Using Web Host Manager (WHM)
As a website owner, it's important to understand how cPanel and WHM work together. WHM is a dashboard that allows you to manage your websites based on cPanel. In order to change your cPanel account plan through WHM, you need to know how the two interact.
How does WHM interact with cPanel?
It is always better to have each domain on its own cPanel account. This way, if one domain is infected with malware, the others will not be affected. However, managing multiple cPanel accounts can get complicated. WHM can help you isolate each domain, create separate cPanel accounts for each one, and allocate the plan's resources among them in the way you consider best.
Who can use WHM?
WHM is a tool that is available to users of VPS hosting, Reseller Hosting, and Dedicated Hosting, but not to those who use shared hosting.
Why using WHM is beneficial?
If you have multiple cPanel accounts, WHM can save you time and money by assigning each cPanel a dedicated IP address. This makes it more cost-effective than buying separate share hosting resources for each cPanel, and also compliance with regulatory standards.
Upgrading the cPanel package through WHM
As the manager of your cPanel accounts, you have the ability to upgrade or downgrade plans as needed. This can be done easily through WHM.
One reason you might need to upgrade or downgrade is if your website's popularity changes. If this happens, you will need different hosting resources to accommodate the change in traffic. With WHM, you can simply change your package from the dashboard. Therefore, it is important to know how to do this.
How WHM simplifies the process
If you want to upgrade your package to one that offers 10 add-on domains, it is best to do so through WHM. This way, all the corresponding changes will be made in an error-free manner.
How to upgrade or downgrade the package from WHM?
If you want to upgrade your package to one that offers 10 add-on domains, it is best to do so through WHM. This way, all the corresponding changes will be made in an error-free manner.
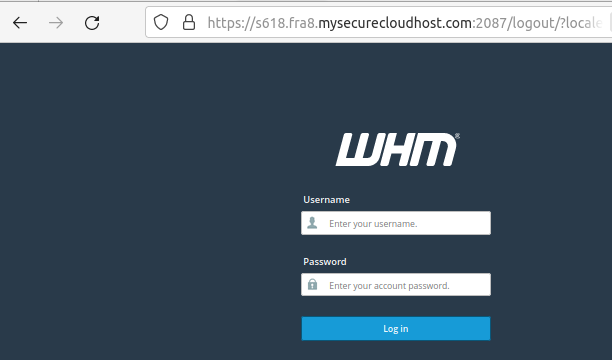
Step 1: Log in to WHM

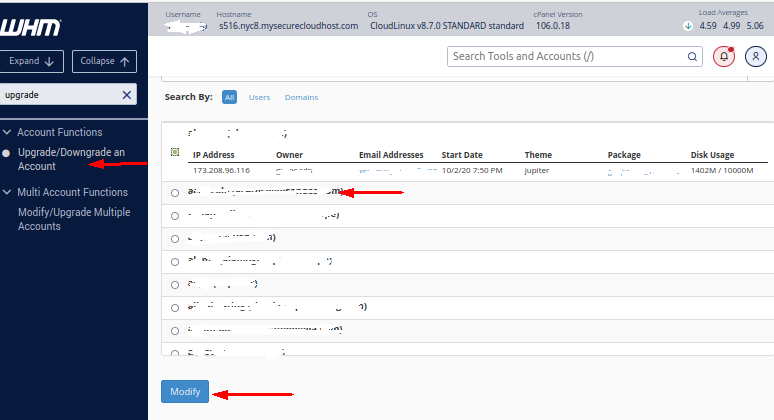
Step 2: Go to Account Functions
Step 3: Select Upgrade/Downgrade Account from the menu on the left
Step 4: Select the cPanel account you want to upgrade or downgrade
Step 5: Click “Modify”

Step 6: Choose whether you need to upgrade or downgrade the package
You can see what upgrading or downgrading your account will do by clicking on the magnifying glass. Your plan will be changed as needed and you will see the details below once it is finished, including what changes were made to your account. Note that this process will only upgrade or downgrade your cPanel account, not change its IP address.
Conclusion
If you're looking for an easy and straightforward way to manage your cPanel accounts, upgrading or downgrading your account plan through WHM is a great idea. However, if you're using shared hosting, you won't have access to WHM, so you'll need to follow a different procedure for upgrading or downgrading your account.
Updated 9 months ago