How to Upload Files in WordPress
Uploading Files in WordPress
There are different ways to upload files to WordPress, depending on the type of file and where you want to upload it. Here are the steps to upload files to WordPress. In case you prefer using an FTP client for that purpose check out our step-by-step guide.
- Log into your WordPress dashboard
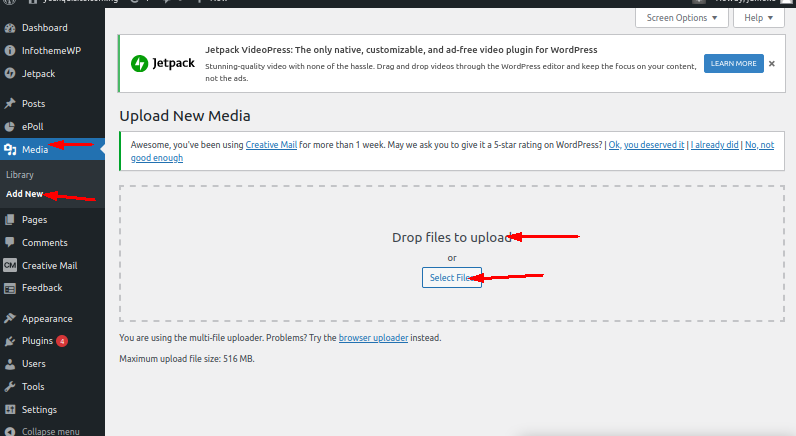
- Go to Media > Add New.
- Click on the "Select Files" button to upload files from your computer. You can also drag and drop files into the upload area.

- Once the files are uploaded, you can edit the file details, such as the title, caption, and description.
- Click "Insert into post" to add the file to a post or page, or click "Save" to save the file to the media library.
These files can be used for later use.
You can also use an FTP client to upload files to your site, you need the FTP credentials to connect to your website and then you can upload files to the desired location.
- In your WordPress Dashboard
- Click Posts >Add New Post
- On the Upload menu, click The Add media files from your computer page will appear.
- Click the Select Files button.

Uploading Files in a Post
There are two possible editing interfaces that you may be working on: the Classic Editor and the Gutenberg Block Editor.
Classic Editor
- While editing a post, click the Add Media button to add a media image
- Select the Upload Files tab
- You can drag files from your computer or click on the Select Files button to open up a file browser

- If you're not ready to use the files now, simply make to uncheck the files. The files will still be there to be used in the future
Gutenberg Block Editor
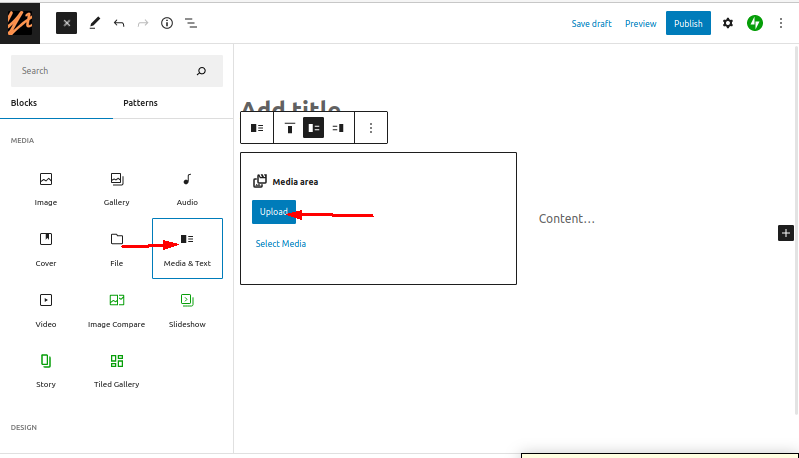
- Open the post editor
- Click one of the plus buttons
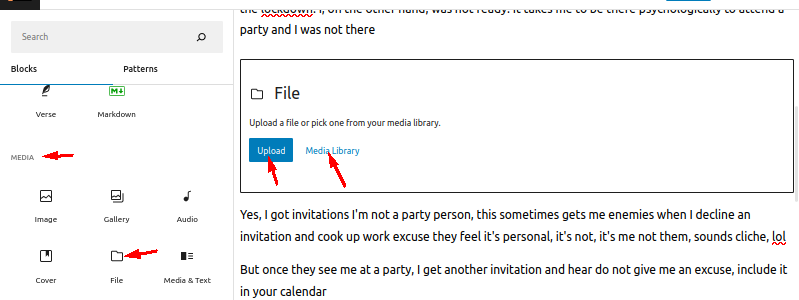
- Find the File block and click it
- You'll see a file block appear in the post body. You can drag files from your computer, or click on Upload or Media Library
Updated 9 months ago