Step 1: Access the Server Console (VNC)
- Log in to https://clients.verpex.com/
- Go to Products and Services -> Hosting and Services
- Click on Manage
- Click the Login button
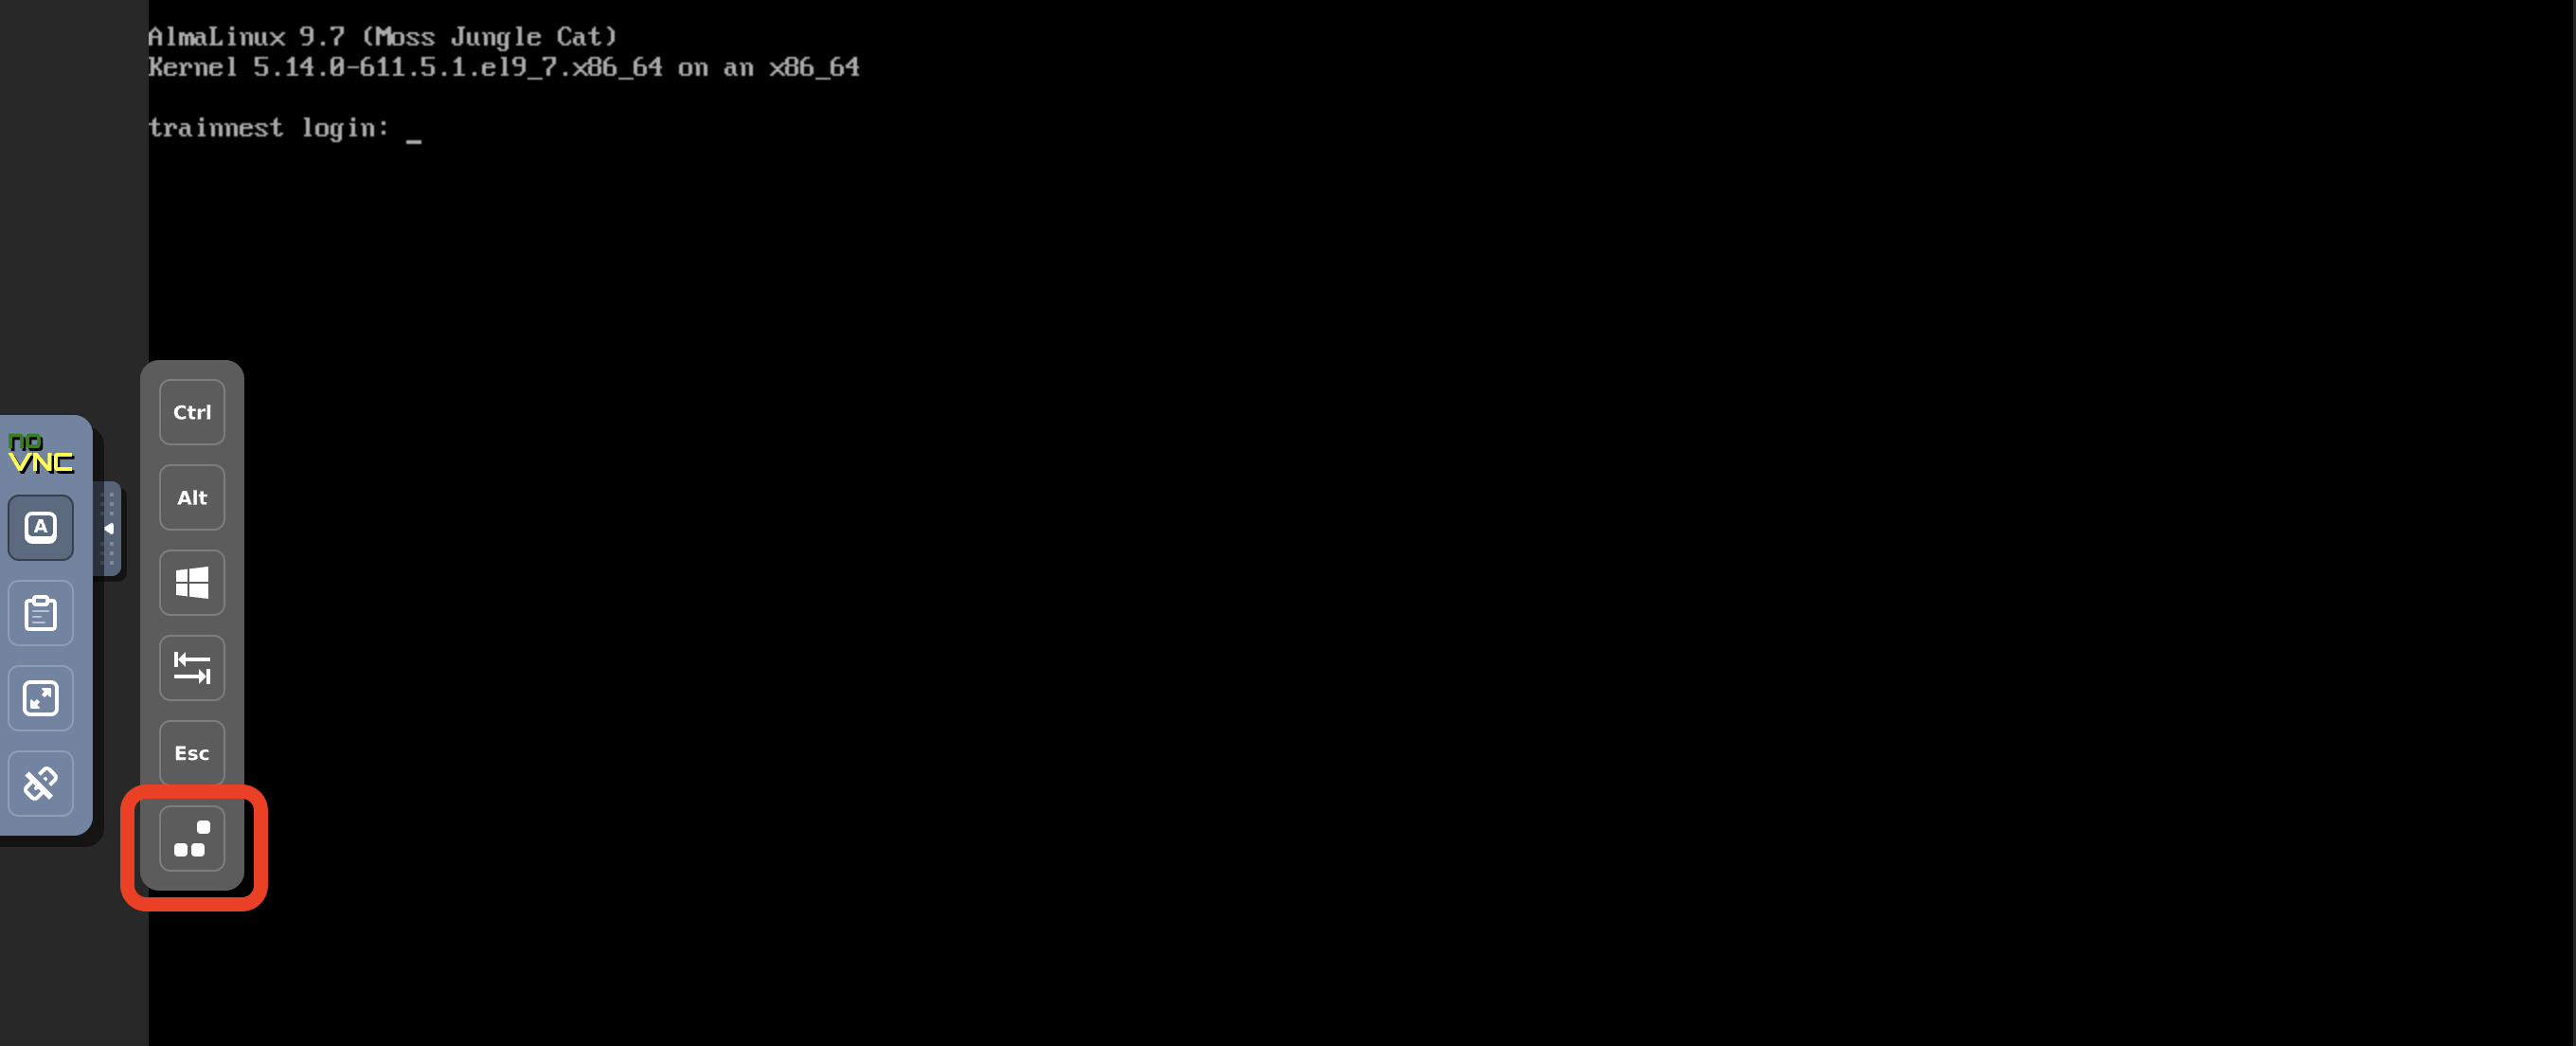
Now you are in your Console
- Reboot the system
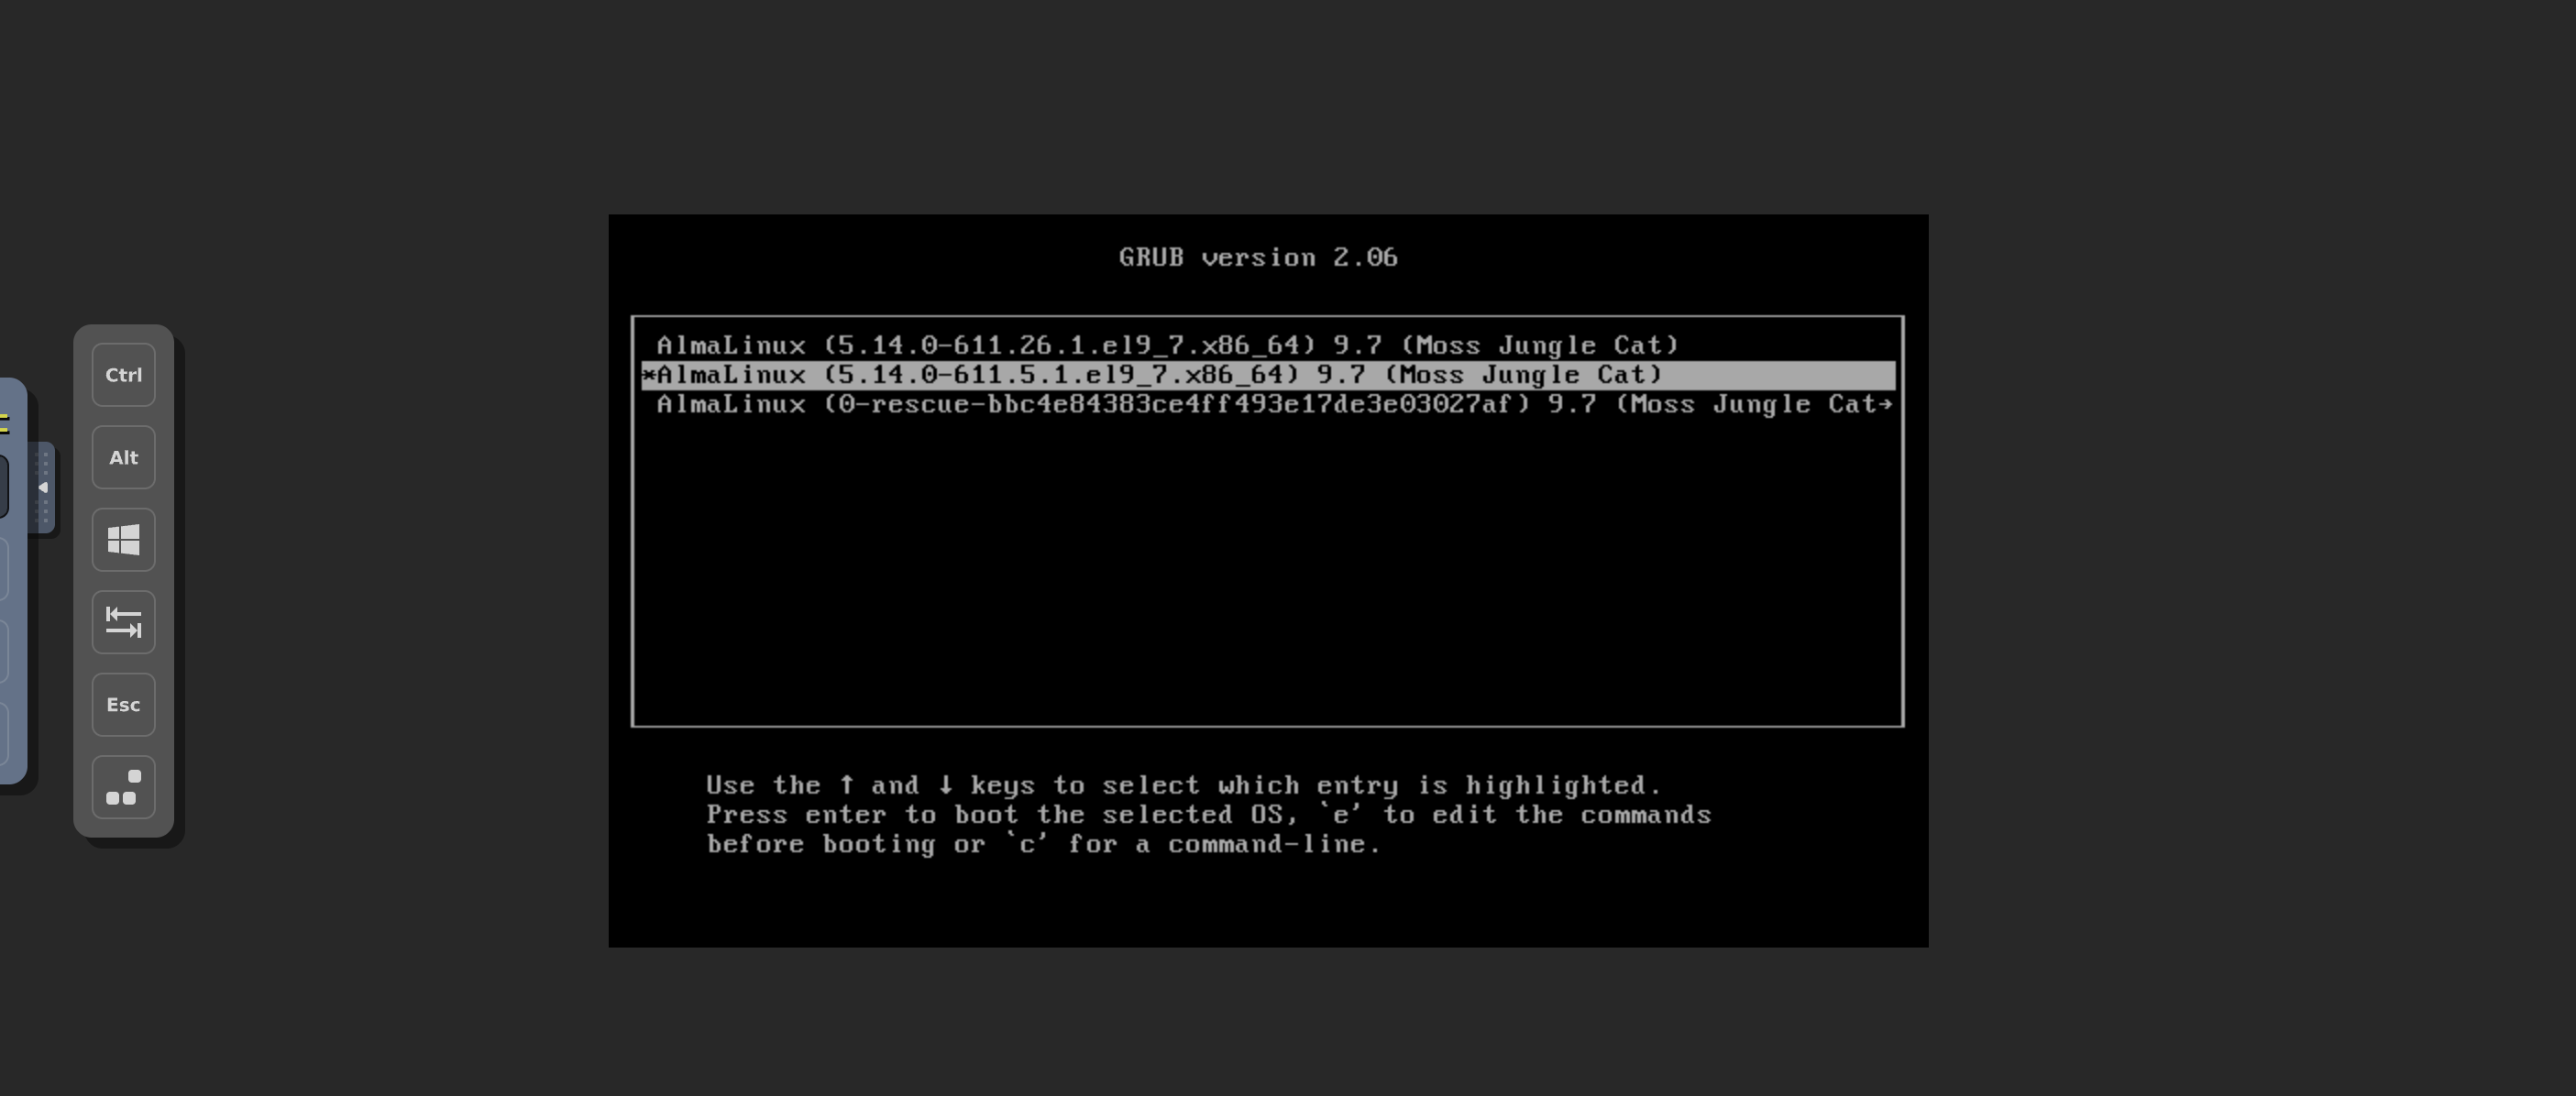
- When the GRUB menu appears, select the default kernel entry. You should navigate with the arrows
- Press
e to edit the boot parameters.
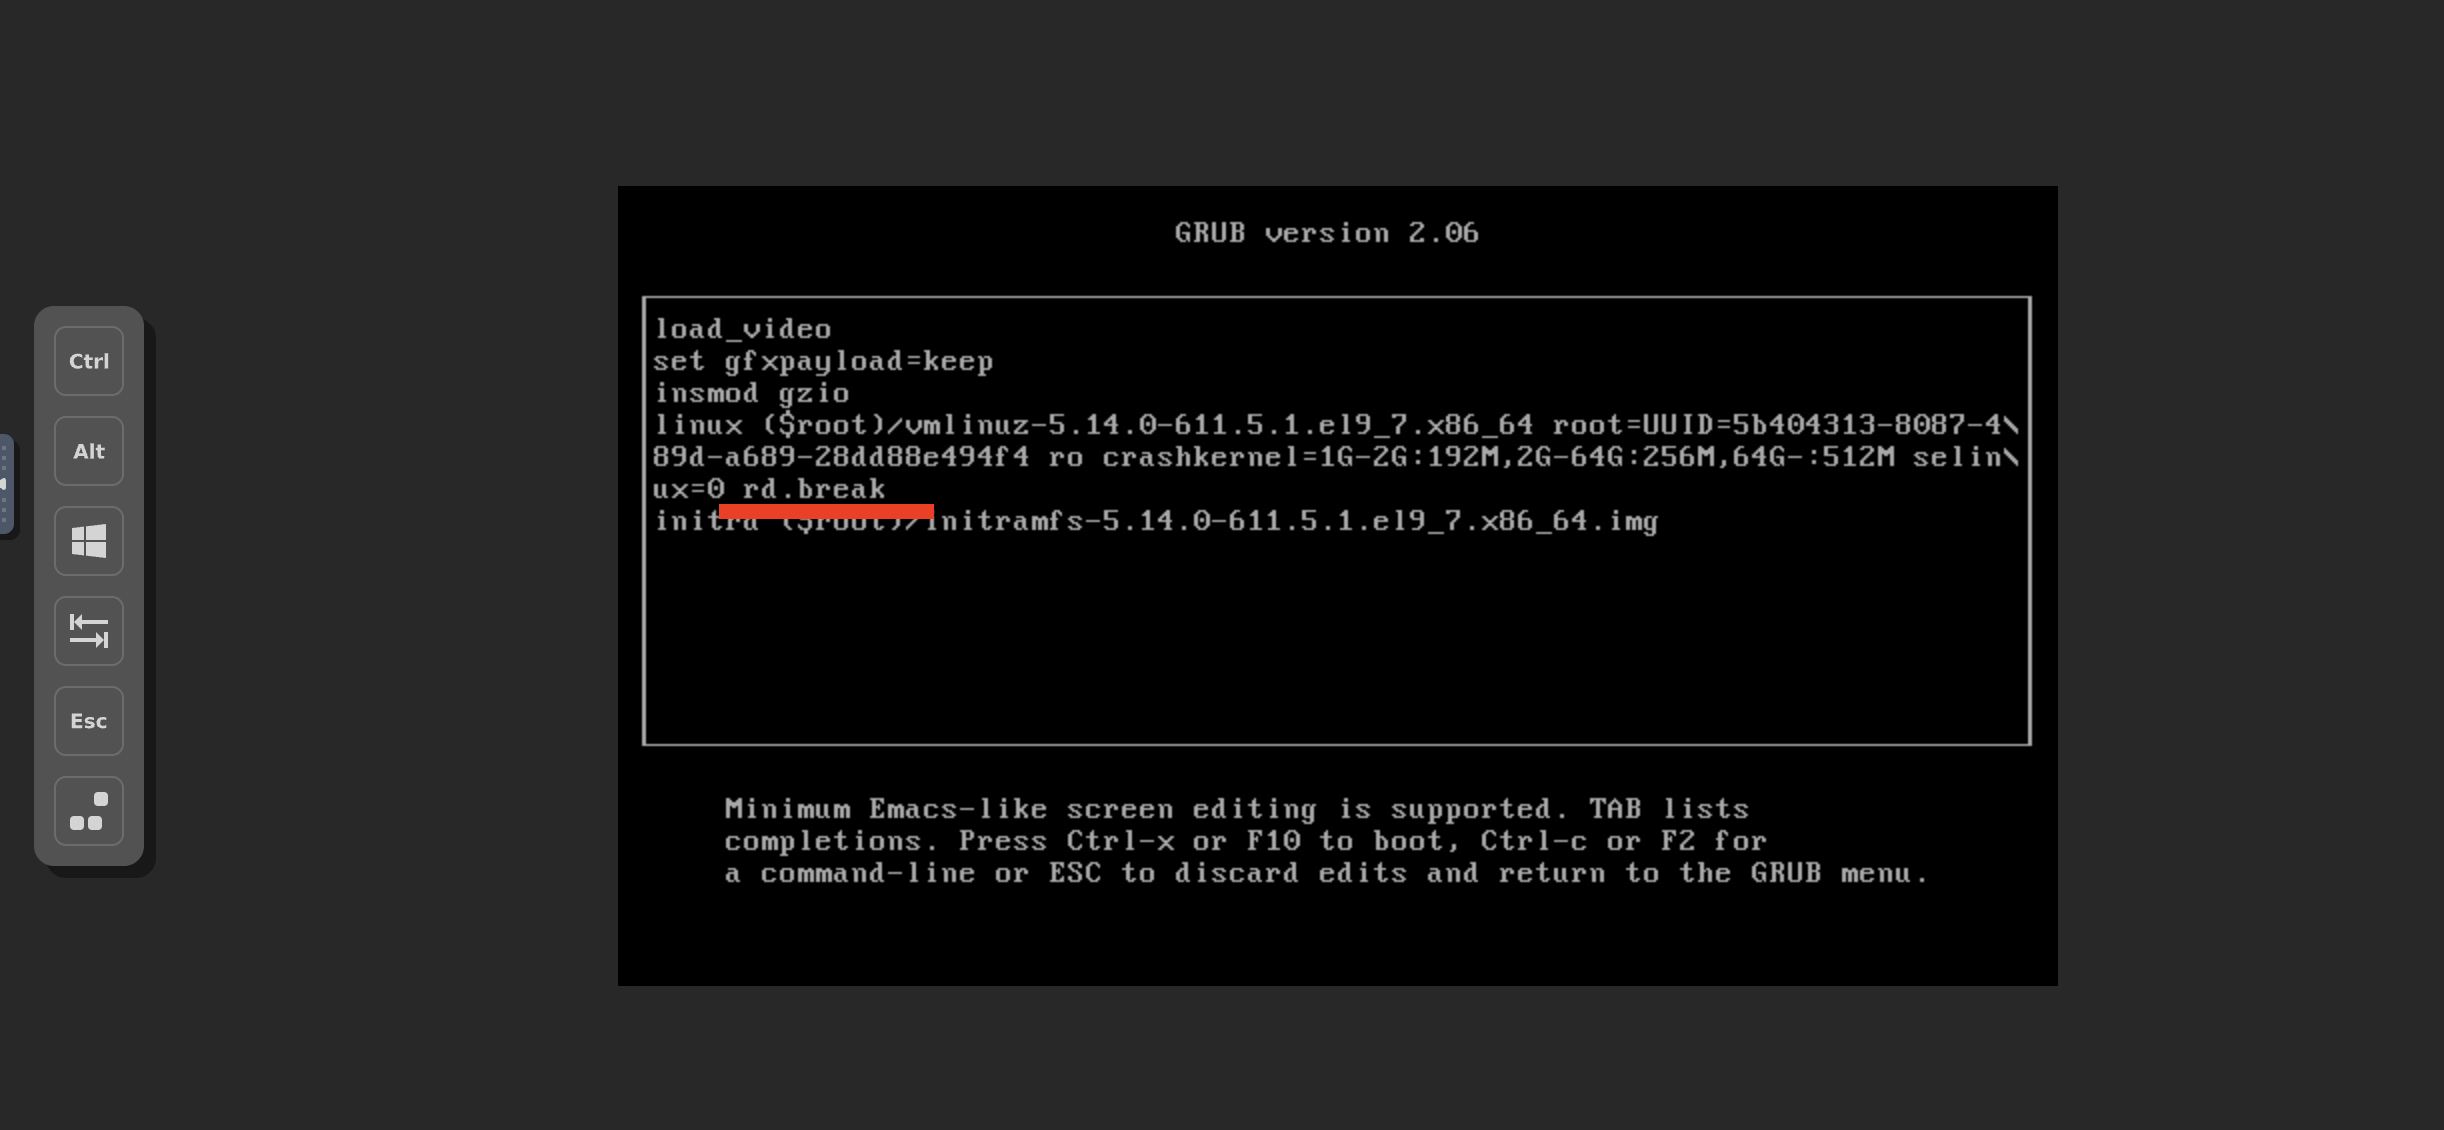
Step 3: Modify Kernel Boot Parameters
- Locate the line starting with linux or linuxefi
- At the end of that line, add:
- Press Ctrl + X (or F10) to boot with the modified parameters.
Step 4: Enter Emergency Mode Shell
After booting, the system will drop into an emergency shell with a prompt similar to:
Step 5: Remount the System as Writable
Step 6: Chroot into the Installed System
Switch into the actual system environment:
Step 7: Reset the Root Password
Run the password utility:
- Enter a new password when prompted.
- Confirm the new password.
Step 8: Enable SELinux Relabeling
This step should be performed only if you are using AlmaLinux
Step 9: Exit and Reboot
Exit the chroot environment and reboot the system: