# Affiliate System
Source: https://kb.verpex.com/billing/affiliate-system
**What is an Affiliate and how does it Work?**\
Affiliate marketing involves referring a product or service. The affiliate earns a commission each time someone makes a purchase through the unique affiliate link associated with their referral.
The Verpex Affiliate program is a marketing program wherein we pay a certain fixed commission to people who drive new customers' sales to Verpex
For many, the best way to start promoting our services would be a simple affiliate link, which leads your referrals to Verpex’s homepage. When someone visits our website through your affiliate link, a cookie with your affiliate ID gets dropped on their computer. It is then used to track the order this user completes and mark it as an affiliate.
**Affiliate links**\
Create and share unlimited affiliate links for targeting different URLs, campaigns and shop configurations. When clicked, a cookie will be set on the visitor's browser and subsequent purchase activity will be attributed to your account.
**Referrals**\
A referral is someone who first visits Verpex via one of your custom affiliate links and goes on to make a purchase. Each referral will show in the referrals table in your client account.
**Commission History**\
This is a history of commissions paid to this affiliate. It also shows pending commissions and those that were cancelled.
To know more about how our affiliate works, please click [here](https://affiliates.verpex.com/affiliates/) to read about our Affiliate Program and [Affiliate Terms and Conditions.](https://verpex.com/affiliates-terms-conditions)
# Automatic vs Manual Domain Renewals
Source: https://kb.verpex.com/billing/automatic-vs-manual-domain-renewals
We provide two options for domain renewal. Most users choose to leave their domain on auto-renew, but also offer a manual renew option.
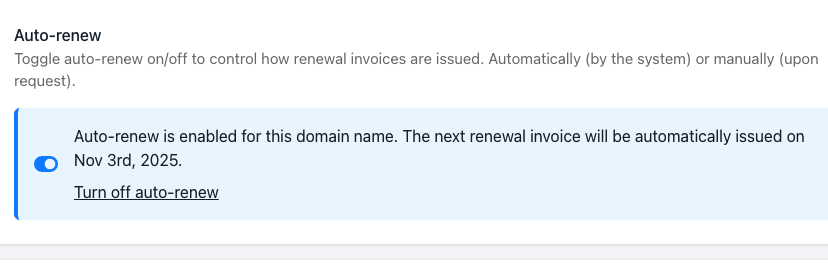
Auto-renew generates invoices 21 days before the domain renewal date, which falls due on the day the domain is due to expire. If you have account credit or an automatic payment method on file, then that will be automatically charged for the renewal and your domain will be renewed with no input from you.
Manual renewal disables this process, if not manually renewed by the expiry date, your domain will expire and eventually drop to general availability.
You can toggle auto-renew on each domain as follows:\
Step 1: Log into your client account with us\
Step 2: Go to Products\&services

Step 3: Choose the product you want to enable this service for
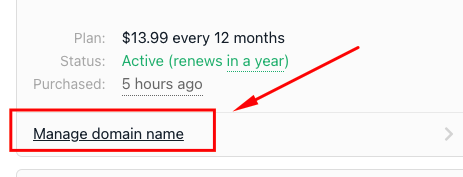
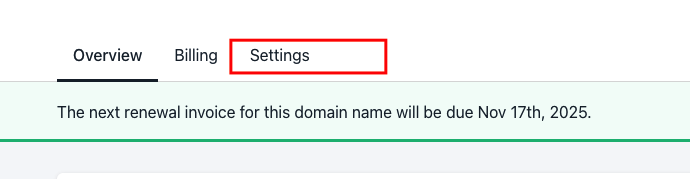
Step 4: Click Settings
Step 5: Toggle auto-renew on
Step 6: Update payment method
To manually renew your domain, you can leave the auto-renew off
Auto-renewal can be enabled when you first register a domain or anytime the domain has been registered.
Please note if manual renewal is chosen, you have to be vigilant about dates and ensure your contact email address is valid to avoid missing renewal reminders. It is advisable to enable the auto-renew feature to avoid stress and eliminate the cost of losing and recovering your domain.
# Cancellation
Source: https://kb.verpex.com/billing/cancellation
If you're having trouble with your cloud hosting package, or have a question in related to your hosting product - please feel free to contact our technical support team, today for any required assistance - we are happy to help you at any given time, 24 hours a day & 7 days a week.
If you still require to cancel your hosting package for any reason, this can be done pretty quickly although we'd be really sad to see you go.
For any reason, please see the steps below to cancel you're account with Verpex.
```
Please ensure to log into https://clients.verpex.com to get started. This will be the email/password you have setup when ordering.
Once you've logged in, please head over to "services" on the left hand side menu.
You'll now be able to see the services you have with us, please click on the product/service you wish to cancel.
Once opened, on the left hand side under "Actions" you'll be able to see "Request Cancellation". Please click on this and you'll be able to get an option which states either to cancel the service right away or once the package comes to an end.
```
Your plan will now be cancelled, if you think you've made a mistake please contact our support team right away so we can reverse any changes for you immediately. We'd be really happy to receive positive or negative feedback, Verpex has been built up around providing a great service backed by great customer care and we'd love to hear what you have to say.
# Cancellation and Refund
Source: https://kb.verpex.com/billing/cancellation-and-refund
We are sad to see you go and would love you to stay back with us. However, if you do not need your hosting package anymore and wish to cancel it, you can place a cancellation request within your client area. All websites for add-on domains, subdomains, as well as email accounts (if any) that are hosted in your cPanel account will be suspended and further terminated along with the main hosting service after a cancellation request has been submitted.
Ensure your hosting account and all its data is backed up before it gets suspended and then cancelled to avoid any unwanted service interruptions.
The money back guarantee is for the following periods:
* All products, except for domains, servers, and certain third-party supplier products: 30 days.
To place a cancellation request, follow these steps:
1. Log into your client account.
2. Go to **quick actions**.
3. Click **Cancellation Options**.
4. Fill in the required fields in the cancellation form with your feedback and submit the request. You will receive an email confirmation once your request is completed.
Leaving your feedback about our services is crucial to our ability to successfully serve our customers. We would truly value any information you can offer.
Cancelling the hosting account does **NOT** cancel your related domain name registration. A domain, once it is registered, cannot be cancelled or refunded.
# Clients Verpex Overview
Source: https://kb.verpex.com/billing/clients-verpex-overview
# Countries with Potential Service Restrictions
Source: https://kb.verpex.com/billing/countries-with-potential-service-restrictions
United States Export restriction laws restrict a few countries.
For instance, our top providers Google, Amazon, Digital Ocean, and Linode, are all based in the United States, and their laws also apply to our servers, no matter the data center location. We can not guarantee that you will be able to view your websites on our servers without a VPN for these countries or another non-sanctioned country.
In addition, we don't issue a free SSL certificate for:
```
SS South Sudan
AF Afghanistan
SD Sudan
North Cyprus
ZW Zimbabwe
LR Liberia
KP Korea, Democratic People's Republic of
CU Cuba
GN Guinea
ER Eritrea
SY Syrian Arab Republic
SL Sierra Leone
IR Iran, Islamic Republic of
```
Make sure that you keep in mind what we mentioned above if you're a resident of these countries. To ensure the best services for your sites, we recommend that you pursue local providers.
The United States export laws and regulations operate to restrict the access and use of controlled information, technology, and goods, for reasons of protection of trade or national security.
Regulations that limit the export of technology and goods out of the country have been around ever since the 1940s. However, attention to the control of export has been heightened in recent years as a result of intensified concerns about leaks of United States technology to foreign competitors, drug trafficking, terrorism, the proliferation of weapons of mass destruction, and homeland security.
In general, the regulations for export control cover four types of activities:
```
Controlled information transfers, such as technical data to entities and persons that are located outside of the United States;
Shipment of physical items that are controlled, including scientific equipment to a foreign country, from the United States;
Visual, electronic, written, or verbal disclosures of controlled technical and scientific information related to export items that are controlled to foreign nationals in the United States. The term for this transfer is a "deemed export" due to the fact that the transfer is "deemed" to be to the country where the person is a citizen or a resident.
Travel to specific embargoed or sanctioned countries for the purposes of performing research or teaching.
```
To determine whether or not a license is required, you must answer the following questions. The first question is what is the item. The second question is where it is going. The third question is who is receiving it. And lastly, the fourth question is how it will be used. If a person has a technology or project that is export controlled and needs a license to proceed, they must restrain the activity until a review to see if an exclusion or exception applies or if a license is required. Also, make sure that you note that "deemed" exports also might be in need of a license as well.
# Discounts and Promo Codes
Source: https://kb.verpex.com/billing/discounts-and-promo-codes
From time to time we offer special discounts and promotions on our services which we share on [our website](https://verpex.com/) as well as across our social media pages
At the moment we are offering 20% off yearly hosting plans and 90% off monthly hosting plans on all our hosting plans. This promotional price applies to first-time orders and customers only. Note that online offers change regularly and are only valid for a limited time, so be sure to grab your Verpex coupon code while it's still available.
How to Apply your Coupon Code
* Place an order on Verpex.com for any hosting of your choice
* During the checkout process, you will be presented with a coupon field.
* Simply enter the coupon code and click the "**Apply**" button and any active coupon will automatically count towards the total.
These are discounts that we offer directly to our customers and are not the same as those we offer to our affiliates. Web Hosting promo codes can be used to save on the following plans: Cloud Web, Managed WordPress and WordPress, Managed Magento, Reseller, and Managed Cloud Server. All Verpex web hosting plans come with 24/7/365 support and a 99.9% uptime guarantee.
# Adding or Removing a Payment Card
Source: https://kb.verpex.com/billing/how-do-i-addremove-a-payment-card-from-my-account
By following the instruction below, you will be able to add and/or remove a payment card from your Verpex account.
1. First, you need to log in your Verpex account

2. Click on Billing on the top sidebar -> Payment Methods
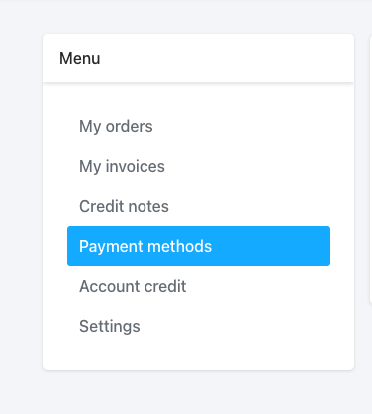
3. Click add a payment method to add a card

Find the card you would like to remove. Click on the settings button, this brings out the edit and the delete button, click the delete button to delete your card.
Your card has just been successfully removed from your account.
# How To Add Credit To my Verpex Account
Source: https://kb.verpex.com/billing/how-to-add-credit-to-my-verpex-account
Account credit is a pre-paid balance which can be used towards invoice payments and [automatic renewals ](/billing/automatic-vs-manual-domain-renewals)(if enabled). Clients can hold credit in multiple currencies if desired. These preferences can be set at a brand level and overridden on a per-client basis.Follow the steps below to add credit to your account.
* Log in to your client account
* Once logged in,go to **Billing -> Account Credit**
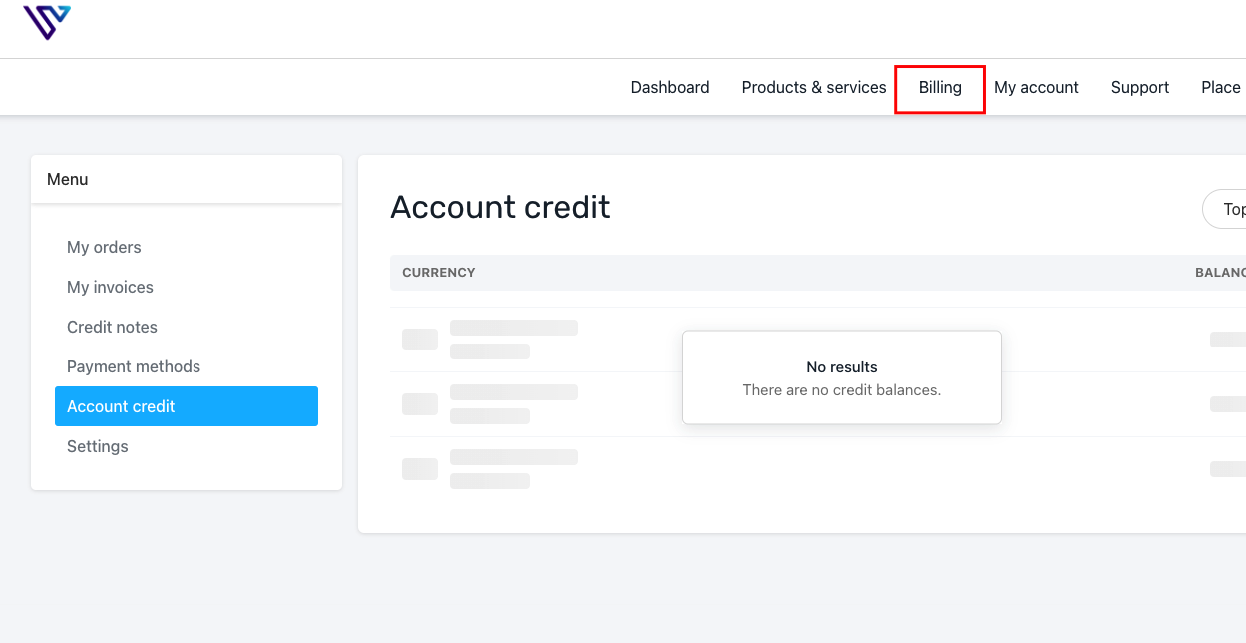
* On the Account Credit page, click **Top Up** in the top right corner
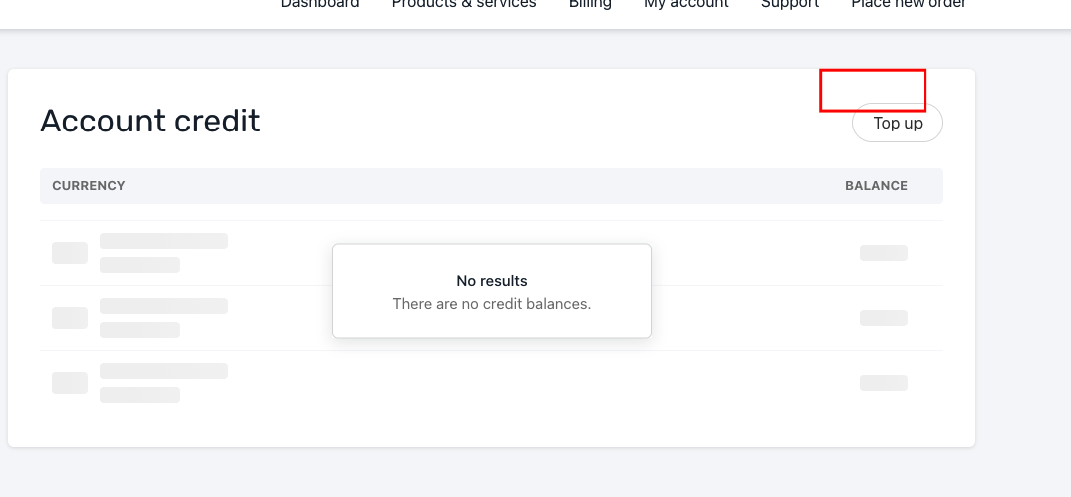
* Choose the payment method, currency, and amount you will like to add as credit
* Be careful when choosing the currency
* Submit Payment
After adding the credit you can proceed to pay for your invoice/s using the funds in your account
# How To Apply my Credit on an Invoice
Source: https://kb.verpex.com/billing/how-to-apply-my-credit-on-an-invoice
You have credit in your wallet and you wish to apply your credit on your unpaid invoice/s. To apply credit on an invoice, follow these steps:
Log into your client area\
On the dashboard, click **Billing**\
Go to **My Invoices -> Unpaid**\
Select the invoice\
Then **Pay now**,\
The Payment Method list box appears, select **Choose Account Credit** from the list of payment options stated
You have just successfully paid for your invoice.
# How to Change Payment Method
Source: https://kb.verpex.com/billing/how-to-change-payment-method
If you wish to change your payment method for whatever reason like choosing the wrong payment method or not choosing a payment method at all, this can be changed using the process below
* Log into your client account
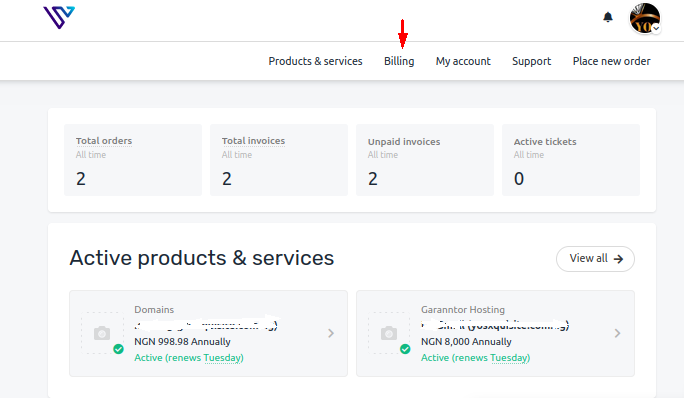
* Click **Billing** at the top of the page
* If you are yet to choose any payment method, click **Add payment method**
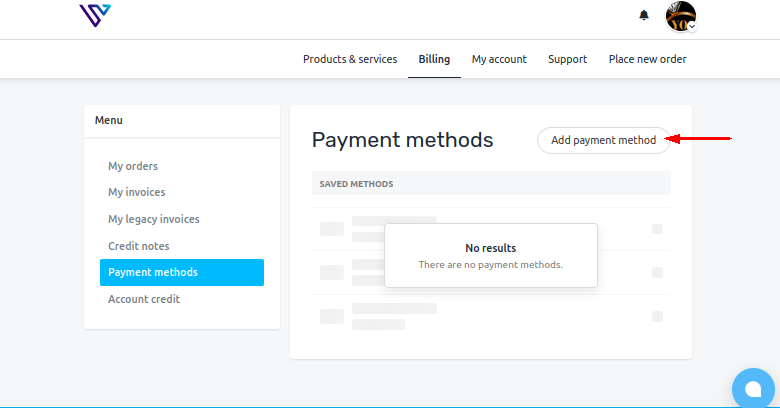
* Depending on the payment method, fill required details and **Save**
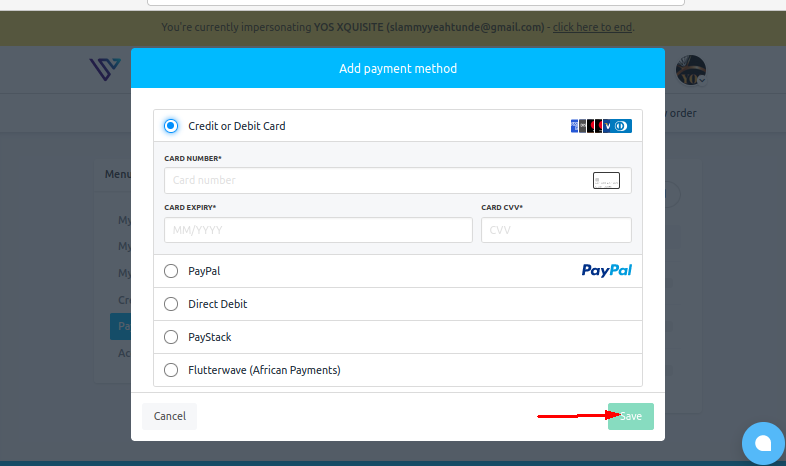
Please note that this payment method covers all unpaid invoices in your account. However, if you wish to temporarily use a payment method on an invoice, you can change the payment method for the specific invoice.
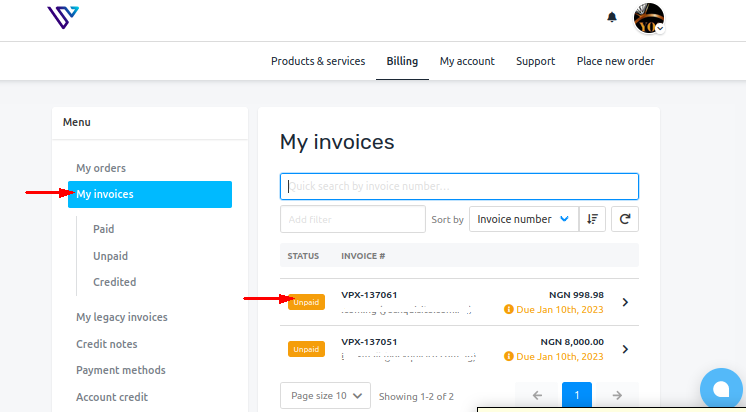
* Navigate to **My invoices** from **Billing**
* Go to the unpaid invoice you wish to change the payment method
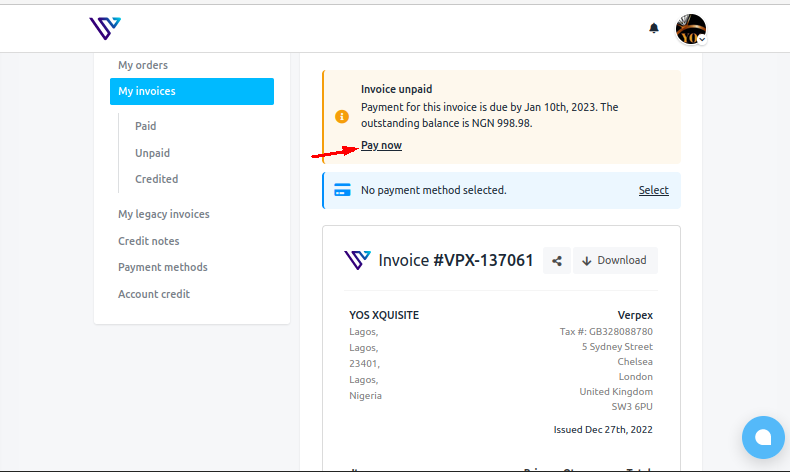
* Click **Pay Now**
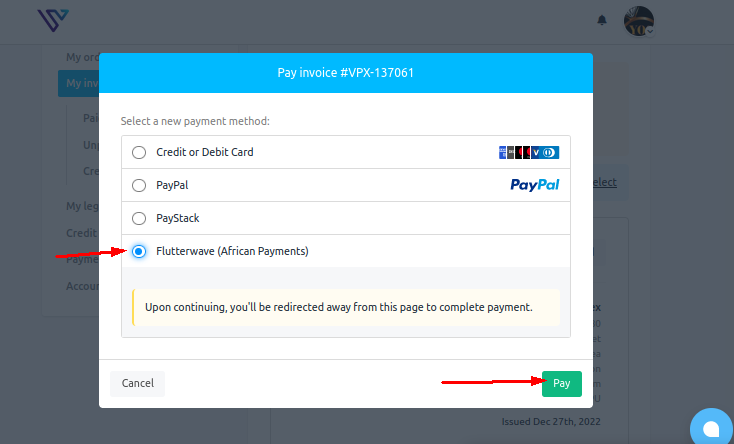
* Choose a payment method(in this scenario I chose Flutterwave) and proceed to make the payment
# Enabling and Disabling Two-Factor Authentication (2FA)
Source: https://kb.verpex.com/billing/how-to-disable-2fa-authentication
Two-factor Authentication (2FA) adds an additional layer of account security to your Verpex account, requiring a time-sensitive code to be entered during login in addition to your username and password. When Two-Factor Authentication is enabled on your account, no unauthorized access can have access to your account even if they have your password.
To enable Two-Factor Authentication on your account, please follow the steps below:
1. Sign in to your Verpex account.
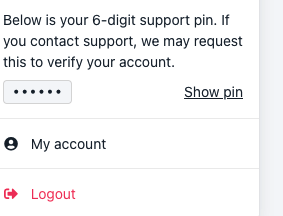
2. Select your account profile from the right top corner, then, click my account

3. After that, choose the Security tab. You will see the 2FA Toggle-button
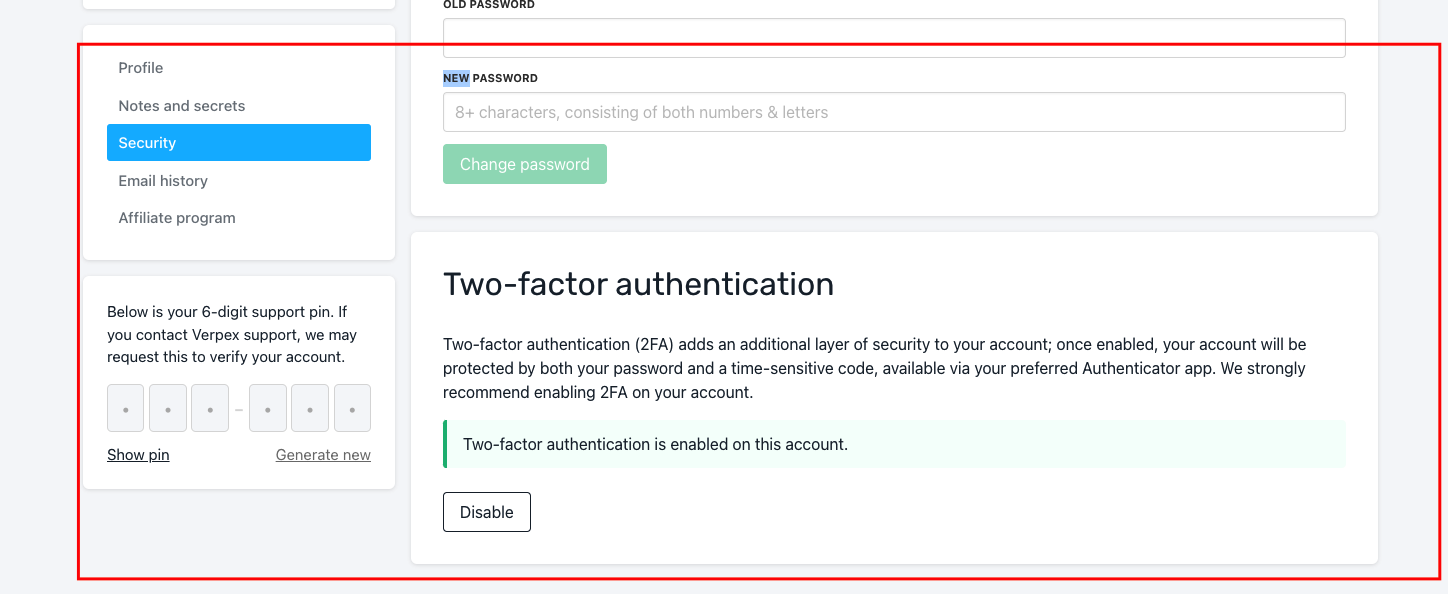
4. Click Two-Factor Authentication and proceed with the feature enabling
2FA adds extra security to your account, disabling it might lead to your account being susceptible to attack. Should you want to disable the feature at all, do follow these steps
Sign in to your Verpex account
1. Select Settings from the left >> choose Security.
2. Click Two-Factor Authentication and proceed with the feature disabling
Two-Factor Authentication is an option we offer to our customers at no extra charge.
# Paying for a Domain When You're Not the Registrant
Source: https://kb.verpex.com/billing/how-to-pay-for-a-domain-name-if-i-am-not-the-registrant
If you do not have access to the Verpex Account where the domain name is located, you can request the domain renewal as a third-party, however, this request can be granted or rejected base on the uniqueness of your case
Please note that the domain name will remain in the original Account, and you will not have access to manage the domain even after you have paid for the renewal. Only the Account owner can manage the domain.
If this is acceptable to you, let’s proceed with the renewal steps for the domain:
1. Contact our support via the ticketing platform stating your request providing us with proof you own the domain name.
2. Provide us with the domain name you would like to renew, and details relating to the domain name.
3. The support team will review and contact the registered client, if no objections are received within 24 hours, you will get a confirmation email as reply to the support ticket you sent requesting the domain renewal providing you with steps on how to make payment.
4. You can proceed to make payment and the domain name will be renewed.
5. A renewal confirmation email will be sent to the email address linked to the Verpex Account where the domain was originally registered.
# How to Use Verpex Affiliate System
Source: https://kb.verpex.com/billing/how-to-use-verpex-affiliate-system
You can earn passive income by joining the Verpex affiliate system, there is no limit to what you can earn. With a simple one-click opt-in, you can be up and running in just minutes. You can create and share unlimited unique referral links.
You create a special affiliate link to a product on the Verpex website. You use that link in your digital marketing. For example, use the link in an email campaign or social media posts.
The steps below show how you can easily create an affiliate link
* Log into your Verpex account
* Click **My account**
* Go to **Affiliate Program** on the dashboard
* Click **Create new link**. A link can be any page on verpex.com or a direct product order page on clients.verpex.com.
The next step is to create a link that connects your account and a Verpex page.
* Open a Verpex webpage (e.g. verpex.com/reseller-hosting) or a Verpex product page.
* Copy the URL.
* Paste it into the Affiliate link '**Redirect UR**L' field
* Give this a name under '**Name**'
* Save
Your affiliate link is now ready to give out. You can see the links you have created on the same page and track referrals.
When a person comes to the Verpex website from your link, we call that a referral. Each time a referral makes a purchase, you earn a commission. The more referral purchases, the more you earn.
**Monitoring your Program**
There is an overview on the left menu that allows you to see a list of referrals, and monitor referrals, earnings, and payouts. Click Commissions and Payouts to check your financial success.
**Who can you Refer?**
This scheme is designed for you to get credit for referring your friends, or other businesses (basically, people you know). You cannot unfortunately refer yourself. If you operate a website and want to add a link there, you can by all means use the affiliate link.
# How to View Invoices
Source: https://kb.verpex.com/billing/how-to-view-invoices
Hosting accounts and domain names are invoiced 14 days prior to the billing date. An invoice notification email is sent out at the time of invoice generation indicating the information of the product/service you are paying for(payment option, amount and due date)
Invoices are due on the billing date and will be cancelled by the system if payment is not made after 30 days. To view your invoices, you need to:
* Log into your client area
* Once logged in, click Billing -> Invoices
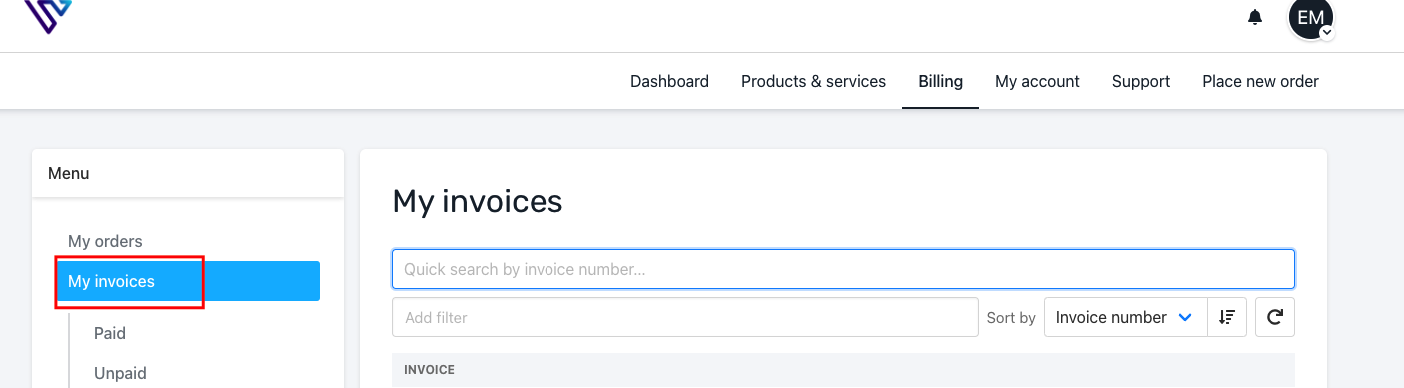
* This page will display a list of all invoices you have generated with us. The list is shown on the page as Paid, Unpaid, Credited(Refunded)
Paid - This is a list of the invoices that have been paid for\
Unpaid - This is a list of invoices that are yet to be paid\
Credited - This is a list of invoices that have been refunded, the status is shown as cancelled
You can download a copy of your invoice on your device. In order to do this, open the invoice you wish to download, click **Download** at the top right of the invoice.
# Invoicing and Suspension
Source: https://kb.verpex.com/billing/invoicing-and-suspension
This article covers invoicing policies for Verpex hosting accounts(invoice dates, renewal dates, and overdue invoices) These policies provide our customers with ample time to settle their invoices to avoid service disruption.
**Grace Periods**
There is a 3-30-day window between invoice generation and the beginning of the next billing cycle for hosting services. Hosting services will be suspended if the invoice is still unpaid on the 3rd day after the due date. Domain names expire on the due date of the invoice. Before the renewal invoice is generated, a notice is sent 45 days before your account is suspended
If we cannot successfully charge your card(s) on file or process your payment, we send out notifications to your primary email address to avoid account suspension and data loss. If the account got suspended and remains suspended after you paid all the invoices, please reach out to our support.
**Automatic Payment Methods**
Automatic billing can be enabled by placing one or more credit/debit cards on file. When it is time for any open invoices to be paid, the card(s) on file will be automatically charged. Verpex will generate invoices and process automatic payments depending on your billing cycle and the product in question
**Invoice Dates**
An invoice notification email is sent out at the time of invoice generation 3 days prior to the billing date indicating the outstanding amount and the due date. Invoices are due on the billing date. If you have an auto-renewal option enabled for the hosting package, the stored credit card on our system will be automatically charged on the 3rd day after invoice generation. If the attempt failed in the first auto-renewal, the system will try to renew the hosting plan 2 and 5 days after the billing date. If the system receives an error related to the invalidity of a card, it sets a pause for three days till the next charge, if not renewed, will get the service suspended. It is recommended to renew the service manually in such cases. Invoices can be settled manually at any time until the service is terminated.
**Renewal Date**
If you purchased a monthly hosting account on the 22nd of the month, your hosting account will renew on the 22nd of the following month, this also applies to the yearly billing cycle. You can manually renew your hosting account before an invoice is generated.
**Suspension**
Unpaid invoices will result in the suspension of your web hosting services. All hosting plans become automatically suspended 3 days after the invoice due date.
**Cancellation**
Invoices are not generated for cancelled web hosting services. Your web hosting service gets automatically terminated after a cancellation request has been submitted. If you wish to cancel your Verpex account, please refer to our article [Cancellation and Refund](/billing/cancellation-and-refund)
**Termination**\
In case the outstanding balance is not paid within 30 days after the billing date your web\
hosting services will be terminated.
You can always log into your customer portal, in the billing section to check your billing account information. If you have any questions regarding your Verpex invoicing or automatic payments, please contact us via our support channels and we will be more than happy to help.
# Money-Back Guarantee
Source: https://kb.verpex.com/billing/money-back-guarantee
We offer a 100% money-back guarantee on our shared products. If you're not satisfied with our service for any reason, just contact our team within the first 30 days and we'll refund your purchase.
VPS services are non-refundable.
The money-back guarantee is a great way to try our shared and reseller hosting packages with no risk.
You can cancel within the first 30 days after service activation and receive a full refund.
This includes any domain registration or transfer that was included with your hosting package. However, the standard price of the domain will be deducted from your refund.
The domain will be entirely yours to use as if you had purchased it standalone.
Our money-back guarantee doesn't mean you can't order from us again in the future. In fact, we encourage it! We just ask that you understand that we can only offer one refund per customer. So if you purchase a hosting plan and then cancel it, you will be refunded but won't be able to receive another refund if you cancel again.
Why do we offer a money-back guarantee?
Our service is incredible and we want you to be able to try it without any commitment. We never tie our customers into long-term contracts, so you can always cancel if you're not happy.
# Support Team
Source: https://kb.verpex.com/billing/support-team
Our support team at Verpex are available 24 hours a day, 7 days a week just as you'd require for any questions or issues which may come by.
We believe providing a fast, robust customer service and provide this via a few different channels:
```text theme={null}
Phone Support UK 02030954271 , USA +15182506389 Live Chat
Support Tickets
```
We try our best to help you as soon as your request is received and will go above and beyond to exceed your expectations at all times.
Our cloud hardware/network uptime can be seen here [https://status.verpex.com](https://status.verpex.com) status page and is monitored 24/7, in case you have any issues please contact our support team for any assistance.
# Why Was My Card Declined?
Source: https://kb.verpex.com/billing/why-was-my-card-declined
You are unable to complete your purchase with us because your card got declined, this might be a bit uncomfortable and frustrating.
Your card may be declined for a number of reasons: the card has expired or got deactivated; you're over your credit limit; the card issuer sees suspicious activity that could be a sign of fraud or incorrect payment information(card number, expiration date, CVC). Please note that in case of a decline, your card is not charged.
**Steps to take in case of a Card Decline**
* First, and foremost, review your card information to confirm that you entered your information accurately. You need to also confirm if your card is not expired.
* Check your credit card limit
* Crosscheck if your card supports international payments. Ask your financial institution if your card can be used for online international transactions
* Use another web browser or computer with another internet connection as this might just be a blocked firewall. Clear the cache and disable any add-ons/extensions/plugins that may block the actions with the card. Details on how to clear the cache can be found [here](/network/how-to-clear-your-browser-cache).
* Remove and re-add your card back to your account. This can be done by following the steps stated in[ this link ](/billing/how-do-i-addremove-a-payment-card-from-my-account)
* If the direct payment fails, fund your Verpex wallet (you may use any Visa, MasterCard, Bank or Wire Transfer, or PayPal). Our Knowledgebase article on [how to add credit](/billing/how-to-add-credit-to-my-verpex-account) may be of help.
If none of the listed methods works, please get in touch with your bank and provide them with screenshots of the error
# Brotli Compression
Source: https://kb.verpex.com/building/brotli-compression
If you are looking for ways to make your website load faster, you need to turn on brotli compression. When a data is compressed, it becomes small and delivers faster. You can speed up page load times for your visitor’s HTTPS traffic by applying Brotli compression.
Brotli is one of the best compression tools primarily used by web servers and content delivery networks to compress HTTP content which makes websites load faster. It is designed to compress streams on the fly, it is faster at both compressing content on the server and decompressing it in the browser. When Brotli is turned on, it tells your web server to compress your data before sending it to a browser
**How do I enable Brotli?**\
To Enable Brotli Compression in cPanel, follow the steps below
* Log into cPanel
* Scroll down to Software
* Click Select PHP Version
* Tick the box in front of Brotli, and it saves automatically
Brotli is a general-purpose lossless compression algorithm that boasts faster compression times and greater compression of webpages. It is open-source, free to use, and compatible with most modern web servers and browsers.
# Building Website with Sitepad
Source: https://kb.verpex.com/building/building-website-with-sitepad
There are a lot of ways you can create a website on the Internet. And the best part is that you don’t need to learn a single line of code. You can use something simple like SitePad Website Builder. It’s an easy system that has everything your website will need and will help you get your website up and running in no time.
SitePad is a popular drag-and-drop website builder with Professional Themes which cover a wide range of categories like Blog, Business, Portfolio, Restaurants, Travel, etc. You can build your professional website using an easy-to-use editor and publish static web pages. It is easily accessed through your cPanel dashboard. In this guide, we will cover the basics of creating a new website using the SitePad Website builder.
**How to Install and Set Up SitePad Website Builder**
Before we install and set up SitePad, let’s get you logged in.
* Log In to your Verpex dashboard,
* Click on the “Log into cPanel” button to access your cPanel.
* Scroll down until you see the SitePad website builder themes section and choose a theme for your website( all the Themes are responsive so your website will work across all device sizes).
* Attach your domain name(even if it’s a subdomain.) and fill in the site details as well
* Click on the “Proceed With Install” button at the bottom of the page.
* Now, you have successfully set up the site, you will be redirected to the "Sitepad Editor" within seconds.
* Click any text to edit it, or use the drag-and-drop widgets in the left-side navigation.
* To change which page you’re editing, or to create a new page, choose from the “Pages” drop-down.
* Save Changes to Your Website
* When you have finished editing, click the “Update” button to save your work. When you are ready to make the page (or the site) live,
* Click the “Publish” button.
The final website will be hosted on your web server and since the files are static your website will load much faster as compared to a PHP website. Remember, if you have multiple domains and you want to make sure that SitePad works on the correct one, then make sure that the domain you want is attached properly in the site details configuration portion of the setup above.
You can have your site running in no time by setting up a website using the SitePad Website Builder. You can publish multiple sites, manage upgrades, and even clone a site, all from cPanel using SitePad. Every website template is responsive, meaning your site will look great on any screen size.
# Clone a SitePad Website Builder Page
Source: https://kb.verpex.com/building/clone-a-sitepad-website-builder-page
To clone a site:
* Login to Control Panel
* Click on the SitePad Website Builder Icon
* Click on the ‘Clone Sites’ Icon.
You will find clone wizard options like:
* Choose protocol (https\:// or https\://)
* Select the site you want to clone the site from.
* Select domain (select the domain on which you want to clone the site)
* If you are creating a subsite, add Sub-directory
* Add a site title (to differentiate added sites across all sites)
* Add an email (not required)
* Click save after adding all the details
* Click the save button, the page will load for a few minutes and then you will see the success message shown on successful cloning.
For more information, you can refer to: [https://sitepad.com/docs/enduser/clone-a-site/#:\~:text=Click%20the%20Sites%20to%20display,shown%20in%20the%20image%20below](https://sitepad.com/docs/enduser/clone-a-site/#:~:text=Click%20the%20Sites%20to%20display,shown%20in%20the%20image%20below)
# Edit a SitePad Website Builder Page
Source: https://kb.verpex.com/building/edit-a-sitepad-website-builder-page
To edit a page you must log in to the cPanel dashboard if you are not yet logged into SitePad.\
Click on SitePad Dashboard Icon.
* Click Pages then click on All Pages.
* When you select All Pages you can see options such as Edit Page, Delete
* Page, View Page, etc.
* Hover your mouse over the page you want to edit.
* Click the pencil icon to edit the page.
* After clicking the edit icon, you will be redirected to the SitePad Editor, where you can edit and update the page.
* Click the Settings Icon to update Page settings as desired.
* You will find options like Add/Update Page Name, Add/Update Page URL, Add/Update Page Status, Add/Update Page Feature Image And you can also edit the page content if needed.
Once done, you can click the Refresh button to update the changes made.
For more information, you can refer to: [https://sitepad.com/docs/web-pages/edit-a-page/](https://sitepad.com/docs/web-pages/edit-a-page/)
# How to Boost Your Hosting Performance
Source: https://kb.verpex.com/building/how-to-boost-your-hosting-performance
**OpCache**
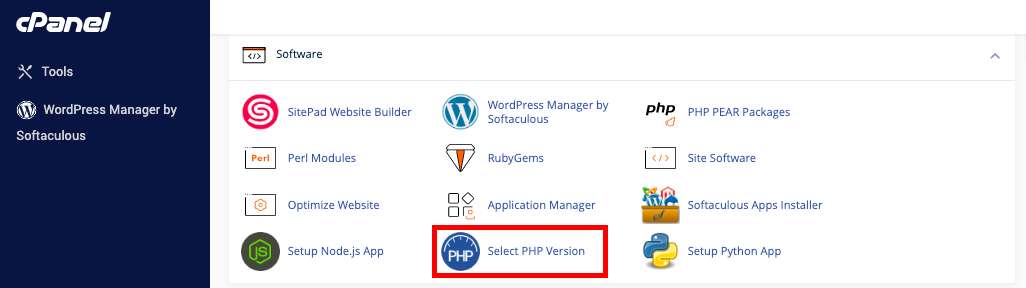
Opcode caching is done by compiling PHP into pre-compiled bytecode so that PHP doesn't have to be re-interpreted per request. It is excellent for boosting the speed of large apps with many includes/require statements. With OpCache, page loading times can be decreased from several seconds to less than 500ms. OpCache can be enabled in the cPanel under the "Select PHP version" option. Then, you click the OpCache icon, and you're done. However, it's recommended to leave OpCache disabled only when debugging or site development.

**Caching With WordPress**
Caching with WordPress is enabled through plugins, and installing them is pretty simple. You go to the wp-admin, press the Plugins icon, and then the Add New icon. After this, you type in the name of the plugin you want to install. There are numerous WP caching plugins that work differently for everyone, depending on the themes and other plugins you have installed. The top three are:
● WP Super Cache ● W3 Total Cache ● WP Fastest Cache
You should only install one of these plugins to avoid causing conflict and actually slowing down your performance.
**Leverage Browser Caching**
Browser caching enables the customer's web browser to download CSS, JS, images, and other static assets into local storage for a limited time, which usually reduces requests for each page, thus reducing the server load. Browser caching is enabled by adding the following lines to your .htaccess file:\
ExpiresActive On ExpiresByType image/jpg "access plus 1 year" ExpiresByType image/jpeg "access plus 1 year" ExpiresByType image/gif "access plus 1 year" ExpiresByType image/png "access plus 1 year" ExpiresByType text/css "access plus 1 month" ExpiresByType application/pdf "access plus 1 month" ExpiresByType application/javascript "access plus 1 month" ExpiresByType application/x-shockwave-flash "access plus 1 month" ExpiresByType image/x-icon "access plus 1 year" ExpiresDefault "access plus 2 days"
**Gzip Compression**
Gzip Compression is used to reduce the size of the data that you send from your server. All of the most popular browsers support Gzip compression, and they look for the specific header when making a HTTP request. Gzip compression enabled fast loading speeds and smooth performance.
**Image Optimization**
To avoid slow loading times and decreasing your SEO, the images you post should be less than 500KB. To ensure your images meet these criteria, you can download WP Smush, one of the many WordPress\
image optimization plugins.
**How to Minify CSS and JavaScript Files**
Minifying Javascript and CSS files implies removing white space, line breaks, etc. It reduces the size of the files to make them easier to download and process. If you're using WordPress, plugins like W3 Total Cache will handle the process for you.
# How to Preview Your Website on Our Servers
Source: https://kb.verpex.com/building/how-to-preview-your-website-on-our-servers
Whether you just want to create a site without making it live instantly as you work on it, or we just migrated your website to ourselves, in this article, you will find some tips on how to preview your site on our servers without it actually being live. In this article, we will go over every famous OS that is currently being used by people.
You can have a quick preview of your site in your browser. There is an online tool you can use to preview your website quickly, and all you need to do is visit [https://sitepreview.org/](https://sitepreview.org/). This online tool will pick up which server your site is on automatically, and all you need to do is enter your domain name. However, if you have your domain added to multiple servers from us or if there is an error that occurs, you can untick the field called "Lookup IP against mysecurecloudhost.com nameservers." In the second field, you will need to manually enter the IP, and you're good to go.\
Ubuntu
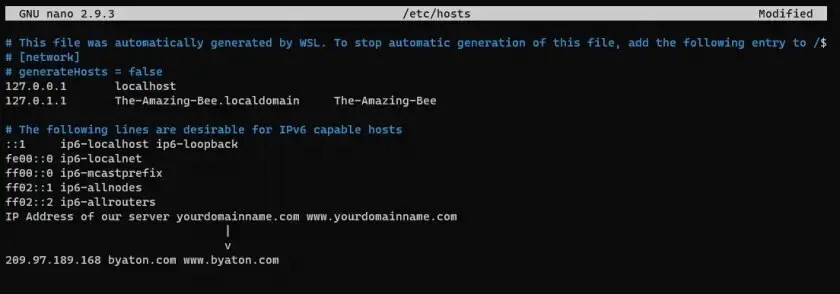
To edit the host's file, you will need to use the Terminal for Ubuntu. Write the following to edit your file once you open up the Terminal: sudo nano /etc/hosts

In the Terminal, the file will open, and you will add the line at the bottom. If you want to keep the file open afterwards you've saved it; you need to press Ctrl and o. To save and close the file, you need to press Ctrl and x. Then, you will be asked if you want to save the changes that you have made. Type n for no or y for yes, and then press Enter.
Mac
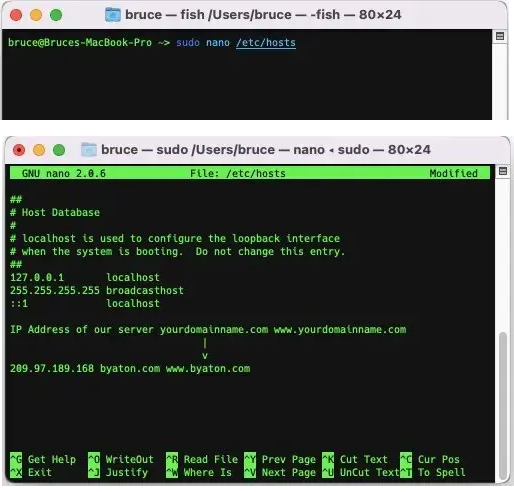
When it comes to Mac, the same directions as Ubuntu need to be used due to the fact that in order to edit the file, both require the Terminal. The commands will be exactly the same as above.
Windows 10
You can use the search function to open Notepad using administrator privileges. All you need to do is type in Notepad, then right-click on the icon, and choose the first option, "Run as administrator." Now, you will have the privileges in Notepad that you need in order to add your text.
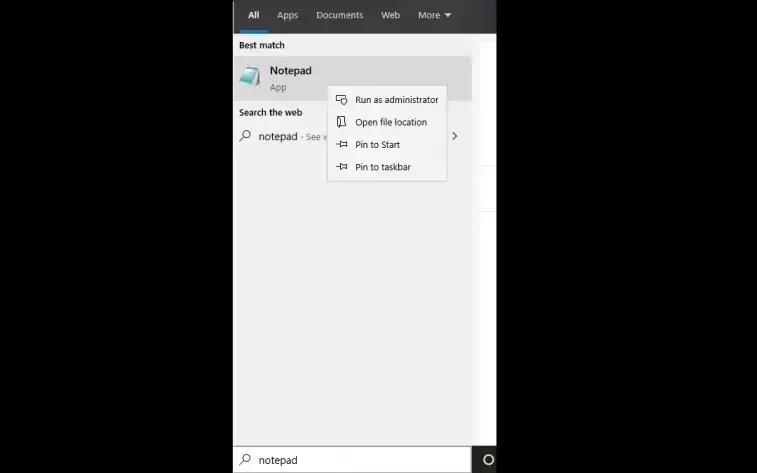
You need to click on file "File" that is located on the top left corner once you open Notepad, and then to open the file, all you need to do is click "Open." You will write the following path in the field, and you will click "Open."
c:\windows\system32\drivers\etc\hosts
You will put the following at the bottom of the file, and then you will click on "Save."
IP Address of our server yourdomainname.com [www.yourdomainname.com](http://www.yourdomainname.com)
Once your file has been saved, you can open your website from any browser you want and see how it looks.
# Fixing a 404 Not Found Error
Source: https://kb.verpex.com/cpanel/404-error-resource-error
A 404 error is a common HTTP response code indicating that the requested resource could not be found on the server. This error occurs when a client (such as a web browser) requests a page or file that doesn't exist on the server.
404 errors can occur for several reasons, including mistyping the URL, a broken link, a deleted page, a corrupt .htaccess file, incorrect file permission or a server error. It is important for website owners to fix any 404 errors they come across, as this can negatively impact user experience and search engine rankings. You can refer to [https://support.cpanel.net/hc/en-us/articles/360048411893-404-Error](https://support.cpanel.net/hc/en-us/articles/360048411893-404-Error), or follow the steps below to resolve this error
**1. Make Sure the Domain Points Correctly to your hosting**
If the domain is still propagating, you can come across a 404 error page. To solve it, you will need to wait until the propagation is complete, this takes 24 hours to get completed.
The 404 error can also be caused by misconfigured DNS settings. You may have pointed the domain to an incorrect nameserver or IP address. Therefore, you need to check if the domain is pointed correctly. To solve this issue, use online tools such as DNS Checker, whatsmydns.net, etc to check which DNS server your domain is pointed to,
**2. Update Your WordPress Site’s Permalinks**
The issue might be with your permalinks or your .htaccess file. The best way to fix this is to update your permalink settings through the WordPress dashboard.
* Log into your WordPress dashboard
* Go to Settings → Permalinks
* Click Save Changes (you don’t need to make any changes before saving changes )
**3. Set Up 301 Redirects For Moved or Renamed Content**
When a user tries to access the content at an old location and sees a 404 page. To fix this error, an automatic redirection has to be done, a redirect that will redirect anyone who visits the old location to the new location, which is also good for SEO purposes. You can lose all the domain authority for a post that was renamed without redirection. You can use a free redirection plugin or use .htaccess to set up redirects, follow the steps in the link below to redirect your site\
[https://kb.verpex.com/docs/how-to-forward-a-domain](/cpanel/how-to-forward-a-domain)
**4. Disable the .htaccess File**
As a crucial part of a website, .htaccess can become corrupt for several reasons, such as incompatible plugins and wrong configuration. A broken .htaccess may disrupt a website’s appearance and cause a 404 error page. To fix this problem, disable and create a new one.
Follow these steps to disable the .htaccess file :
* Log in to cPanel, and click on File Manager.
* Click the public\_html folder
* Right-click on .htaccess and choose Rename.
* Add any character to the file name to disable the file.
* Click Rename to save the changes.
Then proceed to create a new .htaccess:
* In File Manager, click on New File in the upper menu.
* Type .htaccess as the file name.
* Copy and paste the code below:
```text .htaccess code theme={null}
# BEGIN WordPress
RewriteEngine On
RewriteRule .* - [E=HTTP_AUTHORIZATION:%{HTTP:Authorization}]
RewriteBase /
RewriteRule ^index\.php$ - [L]
RewriteCond %{REQUEST_FILENAME} !-f
RewriteCond %{REQUEST_FILENAME} !-d
RewriteRule . /index.php [L]
# END WordPress
```
* Click Create to save your changes.
If you can access the website after disabling and creating a new .htaccess file,\
Then it means the 404 page not found error was caused by a corrupt .htaccess file.
**5. Fix File Permissions**
If error 404 still persists, we recommend fixing file permissions.
File and folder permissions let the server know who can run, read, or edit the data on the hosting account. However, if the values are incorrect, the web page may show a 404 error.
Therefore, you will need to modify the file permissions to solve this issue. The default values for files are 644 and for folders are 755.\
Follow these to fix file permissions on cPanel:
* Log in to your Verpex account.
* Select the hosting plan and click Manage.
* go to the File Manager
* Right-click on the file or folder you want to modify and select Permissions.
* Tick the boxes to modify accesses. The values will automatically update upon choosing the permissions.
* Click Change to apply the changes.\
This should solve the 404 page not found error if the error came from incorrect permission.
**6. Restore Backup**
If all these solutions do not work, you can restore the backup from your cPanel, follow the steps in this[ link ](/cpanel/how-to-restore-your-website) to restore a backup
If the above steps don't resolve the issue, contact support for assistance.
# Fixing a 500 Internal Server Error
Source: https://kb.verpex.com/cpanel/500-internal-server-error-and-how-to-fix-it
The "500 Internal Server Error" is a common HTTP status code indicating a problem with the server. The issue could be due to various reasons, such as a resource limitation, an application error, or an issue with the server-side code. To resolve the issue, the website administrator should check the server logs for errors and troubleshoot the problem.
**Causes and Solution for 5oo Internal Server Error**
**1. Corrupt.htaccess File**
A .htaccess file can get corrupted in different ways, it could happen while working on the server or during plugin installation. The reason for such kind of an error is the incorrect syntax of the .htaccess file or the existence of incorrect directives could be the reason you're seeing the 500 internal error.
To resolve this:
* Locate your .htaccess file through the file manager in cPanel or via FTP/SFTP. The file is located in your public\_html directory. Your server might have hidden this file from view by default and you'll need to click on hidden files to see it.
* Click the rename option to rename the .htaccess file. If this helped and you’ve found out .htaccess is the culprit,
* Check the error\_log file for further troubleshooting if the modification does not work
* And remember to rename the file and uncomment the lines back.
**NOTE**: If you are unfamiliar with the syntax, we recommend that you do not make changes or ask your developer to make the changes for you. And also take a backup of your account before making any changes.
**2. Incorrect Permissions**
Permission error does not allow users to perform the action they are trying to and it will not allow their scripts to run. It could be bugs, user mistakes, or networking problems.
Check to make make sure your permissions are set correctly on your server.
Find below the correct permissions:
**files** - 0644\
**folders** - 0755\
**public\_html** - 0750
**3. Reaching LVE limits**
You are getting the 500 internal server error because your hosting account is exceeding the\
resource limit allotted. You can check using **Resource usage** page in Cpanel
Check the error\_log file to find which script, plugin, etc. causing the issue. Once you know the cause, you should optimize your site performance to ensure it does not hit your account\
resource limits anymore.
**4. PHP Memory Limit Exceeded**
PHP is a server-side scripting language used for managing content, databases, session tracking, etc. Your hosting account has a limit for each process that uses memory. All you need to do is to increase the value set for the PHP Memory to avoid the “Allowed memory size” error. You can set your PHP values by following the steps in this [link](/cpanel/how-to-increase-your-php-memory-limit)
**5. Faulty Plugins/ Themes**
Plugins/themes can also cause 500 Internal Server Errors. In general, the error occurs because of compatibility issues caused by outdated plugins/themes or poorly coded new ones. You might encounter the error after installing a plugin/theme
To find out which of your plugins/themes is causing the error\
Deactivate all plugins/themes and see if the error goes away.\
If it does, reactivate each plugin one by one to determine which one is causing the problem.
You can also re-upload core files if it is a WordPress website.
If you're still unable to resolve the issue, contact your hosting provider for assistance. They should be able to diagnose and resolve the problem.
# Fixing a 503 Service Unavailable Error
Source: https://kb.verpex.com/cpanel/503-error-and-how-to-resolve
503 Error - Service Unavailable
A 503 error, also known as "Service Unavailable", is an HTTP status code that indicates that the web server is temporarily unable to handle the request. This can occur for various reasons, including server overload or errors, maintenance, network issues, or unexpected downtime. In some cases, the server may provide additional information about the cause of the error in the response body.
To resolve a 503 error, you can try the following:
The first thing to do is to check your error log in the cPanel to know what might be causing the error.
**1. Check for Ongoing Maintenance**
If the server is undergoing maintenance, the HTTP error 503 service unavailable might occur during this maintenance.
Contact our support or check our[ status](https://status.mysecurecloudhost.com/) page to check if the 503 error is caused by the ongoing maintenance.
**2. Check Resource Usage**
Checking the resource usage can help you confirm whether the issue is related to limited resources. Users can access the cPanel dashboard and navigate to resource usage to monitor traffic and detect when there is a surge
To resolve this you either need to upgrade your hosting package or optimize your website
**3. Stop Running Processes**
Exceeding the maximum process limit could cause the 503 service unavailable error. Running too many server processes simultaneously can overload the server.
To get your site back online, you will need to stop running processes.\
Please note that this is a temporary fix as you need to investigate further to know what is causing many processes to run simultaneously. You need to examine your plugins and themes to know if they are conflicting with each other.
**4. Check Your DNS**
The 503 error might be caused by a DNS-related issue such as an unresponsive DNS server or an unresolved IP address.
Flush your DNS to fix this issue
The 503 can negatively impact your site performance and user experience if left unattended. The effective ways stated above will solve the problem and return your site to normal.
# Fixing a 504 Gateway Timeout Error
Source: https://kb.verpex.com/cpanel/504-error-server-is-unavailable
504 Error and how to resolve it
The HTTP 504 error is a gateway timeout error, indicating that an intermediary server did not receive a timely response from the upstream server. This typically means that the server is down or not functioning properly, resulting in the inability to load the requested resource. The error message "server is unavailable" suggests that the server is temporarily unavailable and may be due to maintenance, high traffic, or other reasons. Try again later or contact the website owner for more information.
**504 Gateway Timeout Causes**
There are many possible causes for a 504 Gateway Timeout error.
**1. Server Overload:** When too many requests are made to a server at once, it can’t handle all of them and results in a 504 Gateway Timeout. This can be due to high traffic volume, incorrect configuration, or malicious attacks.
**2. DNS Issues:** If the Domain Name Server (DNS) isn’t properly configured or is overloaded, it can cause 504 Gateway Timeout errors.
**3. Incorrect Server Configuration:** A misconfigured firewall or incorrect settings on the server itself can also result in 504 Gateway Timeout errors
**4. Network Congestion:** A congested network which could be due to a malfunctioning router, overloaded switches, or simply too many devices trying to use the network at once can also cause 504 Gateway Timeout errors
**5. Malicious Attacks:** Malicious attacks like DDoS attacks, malware infections, or spam campaigns can also be a cause of 504 Gateway Timeout errors
**6. Invalid URLs:** Mistyping incorrect URLs or using invalid symbols can cause a 504 Gateway Timeout error
**7. Problems With the Browser Cache**: If the cached files on the browser are corrupted or not up to date, it can cause an error. This can be tackled by removing the cache on the browser or by using a different browser.
**8. Corrupted WordPress Database:** A corrupt WordPress database can cause a 504 gateway timeout error. The database could get corrupt for so many reasons including wrong or theme updates, brute force attacks, or even something as simple as a corrupt .htaccess file.
**Here are some steps to resolve a 504 error:**
The error could be temporary and may resolve on its own after some time. Try refreshing the page after a few minutes.
* Make sure your network connection is stable and working. Restarting your router or modem could fix the problem.
* Clearing the browser cache can help resolve the issue. The issue could be specific to the browser you're using. Try accessing the website with a different browser to see if the
* problem persists.\
**\* Flush the DNS Cache:** If you’re using Windows, you can flush the DNS cache by opening the Command Prompt and entering the following directive:
```text theme={null}
ipconfig /flushdns
```
If it worked, you would see a “Successfully flushed the DNS resolver Cache.”
* **Check Your Proxy Settings:** Incorrect proxy server settings can sometimes be the reason. Disable the proxy server and reload the webpage to see whether it’ll fix the error. You can skip this step if you do not use a proxy service.
* **Disable Your Site’s CDN:** The problem could also be with your content delivery network(CDN). Most CDNs will try to serve the full webpage from their cache if a site’s origin server is not reachable.
* **Check Server Issues With Your Host:** The issue can be on your host's end. One of the most common reasons for facing a 504 Gateway Timeout error is
* server issues
A 504 Gateway Timeout error indicates that the web server is waiting too long to respond from another server and is “timing out.” It might be a result of server overload or malfunction
# Fixing a 508 Resource Limit Reached Error
Source: https://kb.verpex.com/cpanel/508-error-resource-limit-is-reached
508 Error and how to fix it.
The "508 Resource Limit is Reached" error is a specific HTTP status code indicating that the server is unable to process the request due to a resource limitation( an account exceeds the resources assigned to it). This typically means that the website has reached its allotted bandwidth, disk space, or CPU usage limit set by the hosting provider. You can check the resource usage of your account by logging into cPanel > Resources Usage menu
**Common causes for this include:**
**Website Traffic Spikes** - If your website experiences high peaks in inbound or outbound traffic whether malicious or not it can exceed allocated resources.
**Outdated Script/App** - If your website is poorly coded or has an outdated script installed (e.g. an old version of WordPress or an outdated Plugin), this can spike the resources associated with your account, leading to the error page. The error will show until the app is terminated or your account's resources have been increased. This is partly why we recommend keeping all apps updated.
**Backend operations** – Backend operations such as imports and exports can increase the load o an account, which in addition to normal traffic can cause resource limits to be exceeded.
Web crawlers also have a way of making a high number of requests per second which can eat up resources
**To resolve this issue, you can try the following steps:**
* Login to cPanel and check the **Resource Usage** for your website.
* Navigate to **Current Usage Overview**
* Look for warning messages that would provide some information on what's going on
* Check that your website software is updated
* Check the document root of your websites for any "error\_log" files and take a look at the recent entries.
* Optimize your database to keep things running smoothly.
* Uninstall any old software programmes/apps/plugins on your website, that could be malfunctioning.
* Optimize the website by compressing images, minifying CSS and JavaScript files, and reducing the number of plugins used.
* Consider upgrading to a higher-tier hosting plan with more resources if necessary.
* Regularly monitor the resource usage of your website to identify and resolve any potential issues early on.
Running error-free, well-coded websites will vastly reduce the resource usage on your account and lead to a much more stable hosting experience.
# HTTP/2: A Broad Outline
Source: https://kb.verpex.com/cpanel/a-broad-outline-of-http-2
HTTP/2 is a significant overhaul to HTTP, the protocol for hypertext-based communication that handles the bulk of data transfer on the World Wide Web. This update has been a decade and half in the making, and soon servers and clients alike will all be able to use it.\
What are the advantages of HTTP/2?
HTTP/2 makes significant improvements to the existing HTTP protocol, especially with page load times, such as:
```
Connections are now parallel and fully multiplexed, so multiple data assets can be transferred faster and more efficiently over the same TCP request.
The protocol is binary, so the commands in the form of 0s and 1s that are transferred over the wire are more efficient, unlike the human-readable commands used up to HTTP 1.1.
The new 'server push' concept allows the server to send resources in anticipation of the needs of the client, while still allowing the client to reject the pushed data.
Compressed HTTP headers that avoid the need to re-send headers.
```
**How compatible is HTTP/2?**
HTTP/2 strives to make HTTP better, but to get there, it has to work well with the existing infrastructure of the internet:
```
It supports all browsers, so if your site uses HTTP/2, there's no scenario where it prevents a visitor from accessing your site. Newer browsers that are compatible with HTTP/2 will work of course, but those aren't compatible will switch to HTTP 1.1 without so much as a hiccup. Of course, the new protocol doesn't affect how the site looks, just how well it performs or how quickly it loads.
It will directly work with your existing TLS certificate, and you don't need to tweak anything. However, do remember that only secured domains work with HTTP/2 right now, though this should change as more and more browsers add HTTP/2 cleartext support.
You can use HTTP/2 with major existing services like Cloudflare that support all the way up to even HTTP/3
Most hosting services enable HTTP/2 by default. The HTTP/2 web server from Verpex, for instance, works from the get go.
```
**Testing**
We can test that the enabled HTTP/2 on your website by using online tools such as KeyCDN's HTTP/2 Test ([https://tools.keycdn.com/http2-test](https://tools.keycdn.com/http2-test)) and ensure that the protocol is indeed working for you.
# Addon Domain
Source: https://kb.verpex.com/cpanel/addon-domain
What is an addon domain? As the name implies, an addon domain is an additional domain name that you can add to your hosting plan. You can create this domain in your control panel, and it is a domain that is completely functional.
Your addon domain can be given forwarders, email addresses, and more, the same way you would to a main (primary) domain on your account.
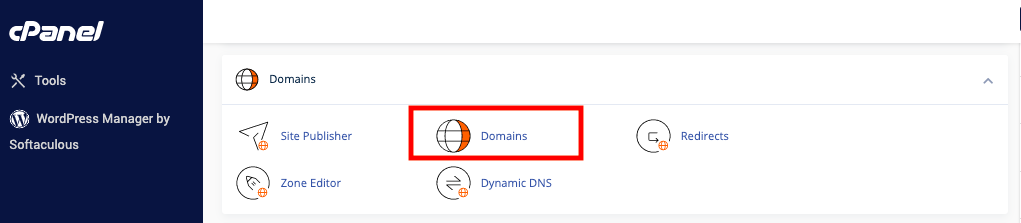
When you create an Addon domain, in the root directory, there will be a folder with the name of the domain name unless you specify another name or path for the folder. For the primary domain, there will be a subdomain that will be created and attached to the new folder. \[addon].maindomain.com will be linked to the primary domain name with every addon domain, which can be used to preview websites as well.
In order to add an addon domain, you will need to click on create domains after you have logged in to cPanel, and they enter your domain at the top. The location of your document root will be in the last field.
Keep in mind that an addon domain name must be registered before users can actually access it.
If you put in a domain that looks like an existing domain that can be found on your account, it will be recommended by the system that you create a subdomain for that domain. This will make sure that the nameservers manage the entries in the file zone of the domain properly. You can access the Subdomains interface by going to cPanel, clicking on Home, Domains, and lastly, on Subdomains.
## What should you do if you want to create multiple addon domains with different extensions?
You will need to enter a unique username in the Subdomain text box manually if you want to create several addon domains with different extensions (for instance, example.net and example.com).
The maximum number of addon domains that you can make can be seen on your cPanel Statistic Sidebar.\
For Resellers, you can modify this number by going to WHM > List Account > Modify Account > Max Addon Domains.
If the zones files of the registered domain are incorrect, you might receive an error, and you will be prevented from adding the domain. You can use the Zone Editor interface in cPanel by going to cPanel, clicking on Home, then Domains, and Zone Editor. The zone editor will help you to correct the zone files of your domain. If you want to make sure that your zone files are right, feel free to reach out to us.
# Aliases vs. Redirects
Source: https://kb.verpex.com/cpanel/aliases-vs-redirects
Both redirects and aliases work in the same way, and their aim is to take your visitors to another website page. However, what differs between them is the end result.
What doesn’t change in a web browser is Alias URLs. What this means is that when the alias URL (example.org) is typed in by visitors, the original content on example.com will be loaded by the browser, but the window of the URL will still say “example.org.”
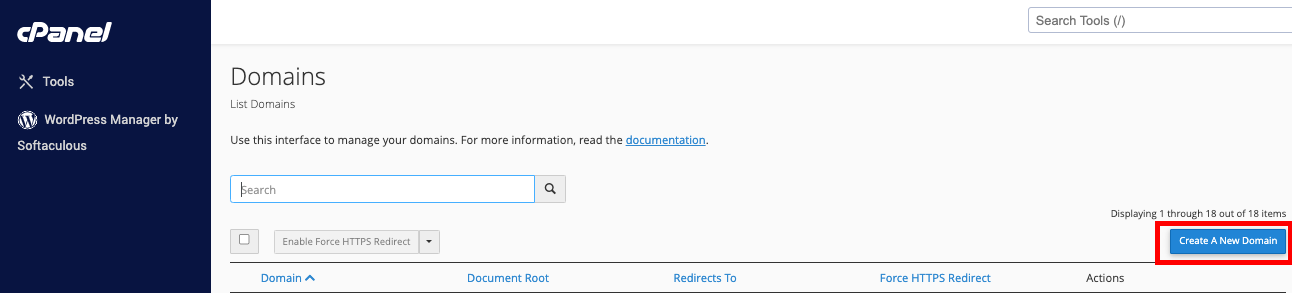
You need to log into cPanel if you want to add a Domain Alias to your account. Once you’ve logged into cPanel, you can click on Domain. On this new screen, you will be able to add new Aliases. To add the Alias, all you need to do is go to the Create a New Domain section and tick the box under Document Root (File System Location). You can manage any new alias that you have added.
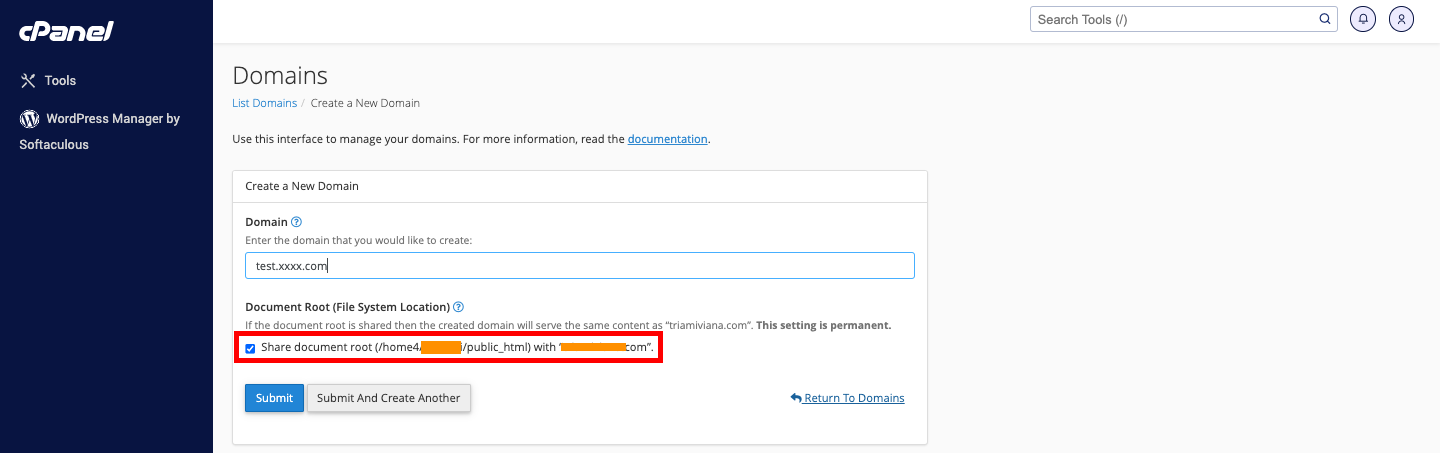
What are the setbacks of aliases? The traffic numbers of your website will be split when you use aliases since some of the visitors will use the original domain URL, and others will use the alias URL. This can have a negative effect on the website stats and SEO. For this reason, we would recommend going with redirects.
Redirects, on the other hand, let you make one domain point to another domain, whether it’s a specific web page or a website. Unlike Alias, redirect URLs change in a web browser. This means that when the redirecting URL is typed in by visitors, for instance, example.org, the original content on example.com will be loaded by their browser, and the window of the URL will say “example.com.”
One thing you should keep in mind is that when a redirect is set up, and you are moving content to a permanent new site, the redirect you have set up could result in some broken links, and this is particularly true for images. These are things that you will need to fix manually.
Redirects can be set up in cPanel. The first thing you need to do is to add the domain as an addon domain by going to the section Domains and clicking on Addon Domains. After you are finished doing this, you need to go to Redirects. Lastly, to select the URL you would like to redirect visitors from, you will just click on the pop-up menu. Once you have entered all of the information that is needed, just click the Add button, and you are good to go.
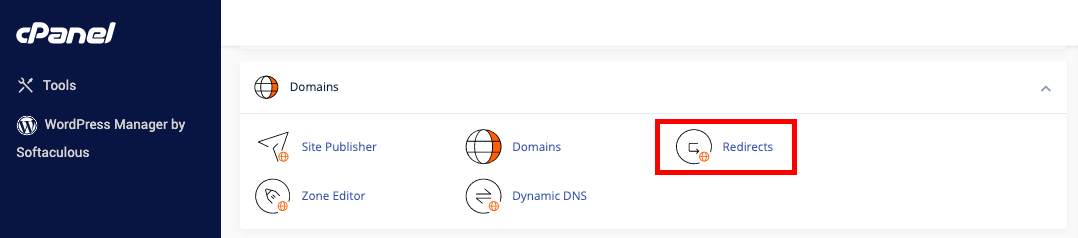
Hopefully, the information we provided for you today will help you in your decision whether you should use a domain redirect or a domain alias.
# Backing up and restoring your data using Backuply
Source: https://kb.verpex.com/cpanel/backing-up-and-restoring-your-data-using-backuply
This article demonstrates how to use Backuply to quickly and easily back up and restore files, email accounts, MySQL databases, and more.
This article demonstrates how to use Backuply to quickly and easily back up and restore files, email accounts, MySQL databases, and more.
You can create local backups on your hosting server, and also remote offsite backups to help protect your data.
Backuply is currently available on VPS and Dedicated servers.
Backuply is integrated with cPanel, which makes it easy to access and use. Follow the procedures below to create and restore backups for your account.
## Configuring backups
The following procedures describe how to configure and schedule backups in Backuply.
### Adding a remote backup server
You can create a local backup without any additional server configuration. Most likely though, you will want to configure offsite backups for extra data protection and redundancy.
To configure a remote backup server, follow these steps:
1. Log in to cPanel.
If you do not know how to log in to your cPanel account, please see [cPanel Hosting Overview](/cpanel/cpanel-hosting-overview).
2. On the **Tools** page, in the **Software** section, click **Backuply**:

3. The Backuply dashboard appears:
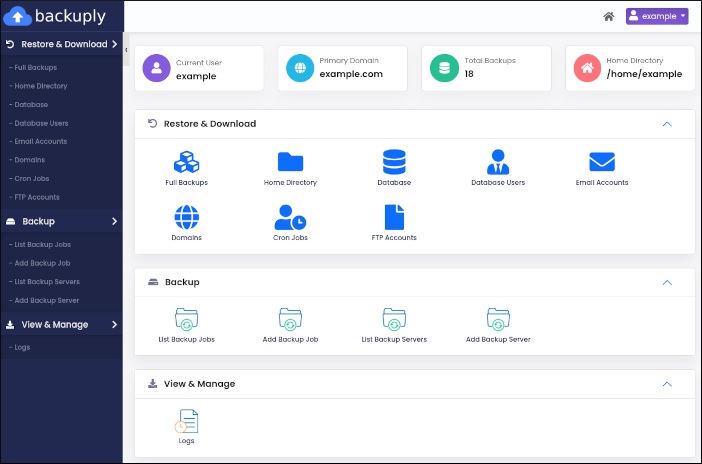
4. In the left sidebar, in the **Backup** section, click **Add Backup Server**:
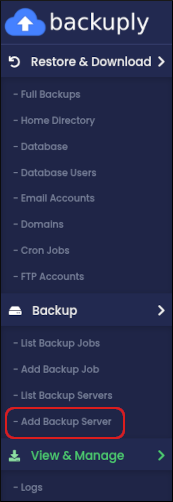
5. The **Add Backup Server** page appears. In the **Type** list box, select the type of backup server you want to configure:
* SSH
* Amazon S3 and S3 compatible
* FTP
* Google Drive
* Microsoft OneDrive
6. The configuration options vary based on the type of backup server you select. Complete the options for the backup server type you selected in step 5.
7. Click **Test Connection**. Backuply checks that the connection settings are valid. If you receive a **Test Connection Failed** message, check the information you provided in step 6, and then try again.
8. After you receive a **Test Connection Successful** message, click **Submit**. Backuply saves the server configuration.
9. To view, edit, or delete the server configuration, in the left sidebar, click **List Backup Servers**:
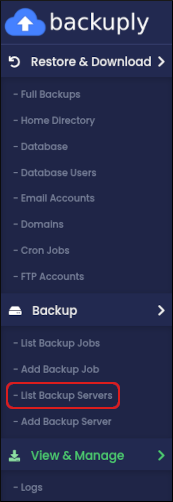
### Scheduling a backup
To schedule an automated backup, follow these steps:
1. Log in to cPanel.
If you do not know how to log in to your cPanel account, please see [cPanel Hosting Overview](/cpanel/cpanel-hosting-overview).
2. On the **Tools** page, in the **Software** section, click **Backuply**:

3. The Backuply dashboard appears:

4. In the left sidebar, in the **Backup** section, click **Add Backup Job**:
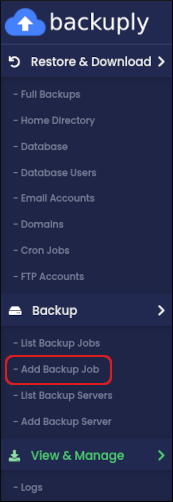
5. The **Backup** page appears. In the **Select Backup Server** list box, click **Local** to create a local backup. Alternatively, click the name of a backup server you configured in the previous procedure.
6. In the **Type** list box, select what you want to include in the backup:
* **Full Backup**: This backup includes all of the next three items.
* **Home Backup**: This backup includes all of the files in your home directory.
* **Database Backup**: This backup includes all of your MySQL databases.
* **Mail Backup**: This backup includes the files for all of your email accounts.
7. In the **Max Retries** text box, type how many times you want to retry creating a backup file in the event of a failure.
8. On the **Backup Scheme** tab, select the schedule you want for backup creation. You can select a daily, weekly, or monthly schedule.
Alternatively, to set up a custom cron job, click the **Backup Cron** tab and select the schedule you want to use.
9. Click **Schedule**. Backuply saves the backup job.
10. To view, edit, or delete the backup job, in the left sidebar, click **List Backup Jobs**:
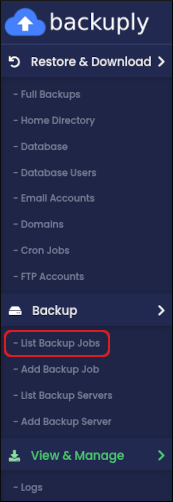
### Creating an instant backup
You can create a backup immediately without scheduling it. To do this, follow these steps:
1. Log in to cPanel.
If you do not know how to log in to your cPanel account, please see [cPanel Hosting Overview](/cpanel/cpanel-hosting-overview).
2. On the **Tools** page, in the **Software** section, click **Backuply**:

3. The Backuply dashboard appears:

4. In the left sidebar, in the **Restore & Download** section, click the item you want to back up. You can create immediate backups of the following items:
* Full backups.
* Home directory files.
* MySQL databases and users.
* Email accounts.
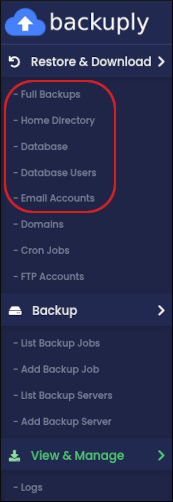
5. Click **Backup Now**:

## Restoring backups
To restore a backup using Backuply, follow these steps:
1. Log in to cPanel.
If you do not know how to log in to your cPanel account, please see [cPanel Hosting Overview](/cpanel/cpanel-hosting-overview).
2. On the **Tools** page, in the **Software** section, click **Backuply**:

3. The Backuply dashboard appears:

4. In the left sidebar, in the **Restore & Download** section, click the item you want to restore. You can restore the following items:
* Full backups.
* Home directory files.
* MySQL databases and users.
* Email accounts.
* Domains.
* Cron jobs.
* FTP accounts.
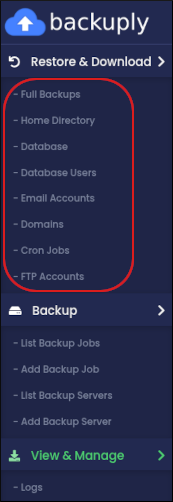
5. In the list of backups for the item you selected, locate the backup you want to restore, and then click the yellow arrow icon:

To delete a backup from the list entirely, click the red trash can icon:

6. To confirm the restore, click **Yes**.
## Viewing backup logs
You can view log information about your backups. To do this, follow these steps:
1. Log in to cPanel.
If you do not know how to log in to your cPanel account, please see [cPanel Hosting Overview](/cpanel/cpanel-hosting-overview).
2. On the **Tools** page, in the **Software** section, click **Backuply**:

3. The Backuply dashboard appears:

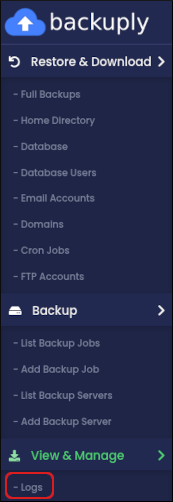
4. In the left sidebar, in the **Backup** section, click **Logs**:
5. On the **Logs** page, information appears about backup jobs that have previously run:
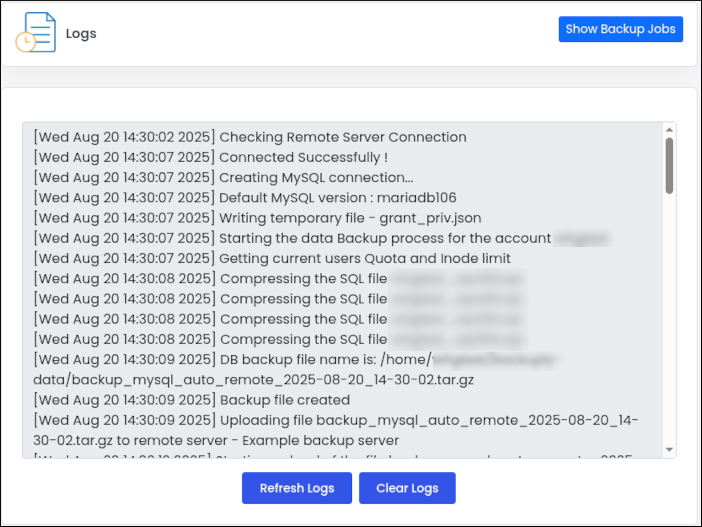
* To refresh the log information, click **Refresh Logs**.
* To clear the log information, click **Clear Logs**.
## More information
To view the official Backuply documentation from Softaculous, please visit [https://backuply.com/docs](https://backuply.com/docs).
# Can I add addon domains without changing DNS?
Source: https://kb.verpex.com/cpanel/can-i-add-addon-domains-without-changing-dns
You need to change the nameservers before an addon domain can be added.
# Can I Switch to Another Hosting Plan?
Source: https://kb.verpex.com/cpanel/can-i-switch-to-another-hosting-plan
Switching to Another Hosting Package at Verpex
Yes, it is possible to switch to another hosting plan, however, it would require a server migration. If you wish to switch to another hosting plan either from Cloud web hosting to WordPress hosting Reseller hosting or managed cloud server then you need to contact support for assistance.
Upgrading between two different [hosting packages](https://verpex.com/) can only be done manually and involves migrating your website content from your current hosting package to the new hosting package. You need to contact support and provide us with the required details like the service you wish to upgrade, to and the plan you are upgrading from and to. Once support has the required information, the migration process starts.
Once the migration is complete, you will be contacted to modify your DNS records to access your migrated site (on the destination server).
Please do **NOT** cancel your current hosting plan until the migration is completed.
# Charity Hosting
Source: https://kb.verpex.com/cpanel/charity-hosting
We strongly believe in supporting people who need help, which is why we will provide any registered charity with completely free web hosting. Every penny counts and you can use the unspent web hosting money on some other charity’s core activities
To get started with your free web hosting, first create an account with Verpex. Then contact our friendly support team and we will help you set it up.
In order to qualify for free charitable hosting, the charity must be a registered charity and have a registered or updated charity number or any document that proves you are a registered charity. The hosting account must be the same as the charity. If you already have a domain name registered with another registrar, you can easily transfer it to us or link your domain to the hosting account once active
For non-profit organisations, again create an account and contact us and we can discuss your options and choose the most suitable web hosting plan for your website.
There is no catch, we won't ask you to link back to our website or even advertise it on social media or necessarily transfer your domain name to us, our services are here to support the fantastic work you do every day.
There is no limit to the number of charity websites we can host. So if you know of a charity that could benefit from free web hosting or would like to transfer your charity site to us, please contact support.
Our charity hosting plan will provide you with everything you need to build a functioning website. Get 24/7 support via chat, email, and phone. We provide free SSL and backups with all of our hosting and have some of the best prices for domain names. Transferring your domain name into our control is free.
# Choosing Between VARCHAR and TEXT in MySQL
Source: https://kb.verpex.com/cpanel/choosing-between-varchar-and-text-in-mysql
While creating a database for web applications, it is crucial to pick the correct data type for text data fields. In MySQL, all text fields use one or the other string data type. As there are various types under String and each has its unique characteristics, it is essential to know which one is best for your requirement.
Apart from suitability, data type also defines the amount of data you can store in the database. Further, the storage location and the level of flexibility also get affected by the data type.
Therefore, knowing the different data types and their applicability is helpful for the smooth performance of everyday database operations.
The two most popular data types you should know about are VARCHAR and TEXT. So, let’s begin the investigation on which data type is best for you.
**A Recent Development**
These two data types can confuse you because, from MySQL 5.0.3 onwards, both VARCHAR and TEXT data types support the maximum length of 65,535 characters. Earlier, VARCHAR supported only 255 characters.
With this development, VARCHAR has become quite similar to TEXT, raising the debate about which is better. This has even made choosing one over another more challenging. So, let us make it simpler for you to choose; take a look into our thorough comparison but if you just need to rush through, below is the short answer:
**VARCHAR is the Go-To option for most, but not for all**
If you want to know which is better at the surface level, then VARCHAR is the way to go most times. It supports variable-length data to a maximum of 65,535 characters. Further, performance-wise it optimizes storage well, offers greater flexibility and, is fully indexable. However, VARCHAR is not always the right choice. What if you want to store data exceeding 65,535 characters? Read on to find out why VARCHAR is not always the go-to choice and when you should choose TEXT.
**A Complete Comparison**
Both VARCHAR and TEXT are a part of MySQL’s BLOB or Binary Large Object. However, they have their own unique characteristics too. Let's understand each in isolation and then compare the two. But to fully understand VARCHAR, we should look at its origin, i.e., CHAR.\
**CHAR and VARCHAR:**\
CHAR is the predecessor to VARCHAR. It has the following features
* It supports the fixed length of 255 characters\
\*There is no need to declare the character count while creating the table
* CHAR pads empty characters with spaces
* Storage consumption is fixed even if you consume less than 255 characters
**VARCHAR, on the other hand, is Variable-CHAR with the following features:**
*It supports a maximum but not fixed length of 65,535 characters\
* You have to declare the maximum character count while creating the table
* There is no padding for unused characters\
\*It only uses the required amount of storage and 1-2 bytes more for the length prefix
The storage optimization and higher character limit make VARCHAR more flexible than CHAR.\
**TEXT and its variants**
Now coming to TEXT, it is very similar to VARCHAR at the basic level, but it has two more variants, which sets it apart.
The three variants are:
|
Variant
|
Maximum Length
|
|
TEXT
|
65,535 bytes
|
|
MEDIUM TEXT
|
16 MB
|
|
LONGTEXT
|
4 GB
|
Although TEXT is very similar to VARCHAR, its variants offer greater flexibility when data storage requirements exceed 65,535 bytes. However, there are some drawbacks too of using TEXT, so let’s compare it with VARCHAR.
**VARCHAR vs. TEXT**
Below is a parameter-wise comparison of the two data types:
Indexing Ability: VARCHAR can be fully indexed, while TEXT columns can be indexed only up to a certain length.
* Sorting Possibility: VARCHAR can be sorted using the entire length of the String, but this is not possible for TEXT
* Storage usage: TEXT occupies 2 + length of string storage space, while VARCHAR occupies 1 + length of string, up to 255 characters, and 2 + length of string greater than 255 characters. So, up to 255 characters, VARCHAR even uses lesser storage than TEXT.
* Performance Optimization: VARCHAR can be stored in MySQL’s memory storage; however, TEXT is not supported by it. So, if a query involves a TEXT column, temporary tables are created on the disk storage. Using disk-based tables takes a toll on the resources, and query run completion takes longer.
**Verdict on which is better VARCHAR or TEXT**
Looking at the above comparison, VARCHAR becomes the go-to choice for most web applications that require sorting text under 65,535 characters.
However, TEXT is still a reasonable choice if its limitations don’t create a problem for you, but there could be undesirable consequences of using TEXT, which gets eliminated in VARCHAR.
However, when more than 65,535 characters need to be used, MEDIUMTEXT and LONGTEXT are the best options.
Even so, VARCHAR is most frequently used because adding multi-gigabyte data into your website database is not advisable. It may have certain unintended consequences, and therefore, the need for using MEDIUMTEXT and LONGTEXT is not very common.\
**How to choose the right data type?**
Although it is pretty clear that VARCHAR is best in most cases, but a blog post or a detailed explanation of a complaint on a website can easily exceed its character limit. With VARCHAR. You need to define the data type while creating the data table, so you might not want it to be restricted by the character limit. Therefore, MEDIUMTEXT and LONGTEXT should be chosen for such fields.
Below is an example of how to optimize the data types:
1. Access the built-in tool of cPanel called phpMyAdmin
2. Select your desired database from the list of databases of your website
3. Check the structure of its tables to find out the data type
![]() The above screenshot shows that the developers have used VARCHAR for shorter fields such as comment type, comment author, URL, etc. However, if you look at the second screenshot below, they use LONGTEXT for longer fields such as posts and comment content.
The above screenshot shows that the developers have used VARCHAR for shorter fields such as comment type, comment author, URL, etc. However, if you look at the second screenshot below, they use LONGTEXT for longer fields such as posts and comment content.
![]() The two possible reasons for doing this are:
```
The VARCHAR fields need to be indexed while LONGTEXT fields don’t need to be
There is little chance of character limit exceeding in The VARCHAR fields, but in posts or comment content fields, the character limit can exceed the VARCHAR limit based on the nature of content that needs to be added.
```
So, to ensure that there is no later requirement of changing the data type, using a mix of VARCHAR and TEXT is advisable.
**Conclusion**
Both VARCHAR and TEXT have their own benefits and drawbacks, so no single data type fits all requirements. However, most of the database requirements can be met with VARCHAR, MEDIUMTEXT, and LONGTEXT should only be used where necessary and with caution.
# Creating a Full cPanel Backup
Source: https://kb.verpex.com/cpanel/cpanel-backup
How to create a full cPanel backup
A full cPanel backup includes all account files, databases, email accounts and settings in your cPanel.\
We recommend creating a full cPanel backup before any major data modification/migration.
**1. Login to cPanel > Files section > Backup menu:**

**2. Click on Download a Full Account Backup:**
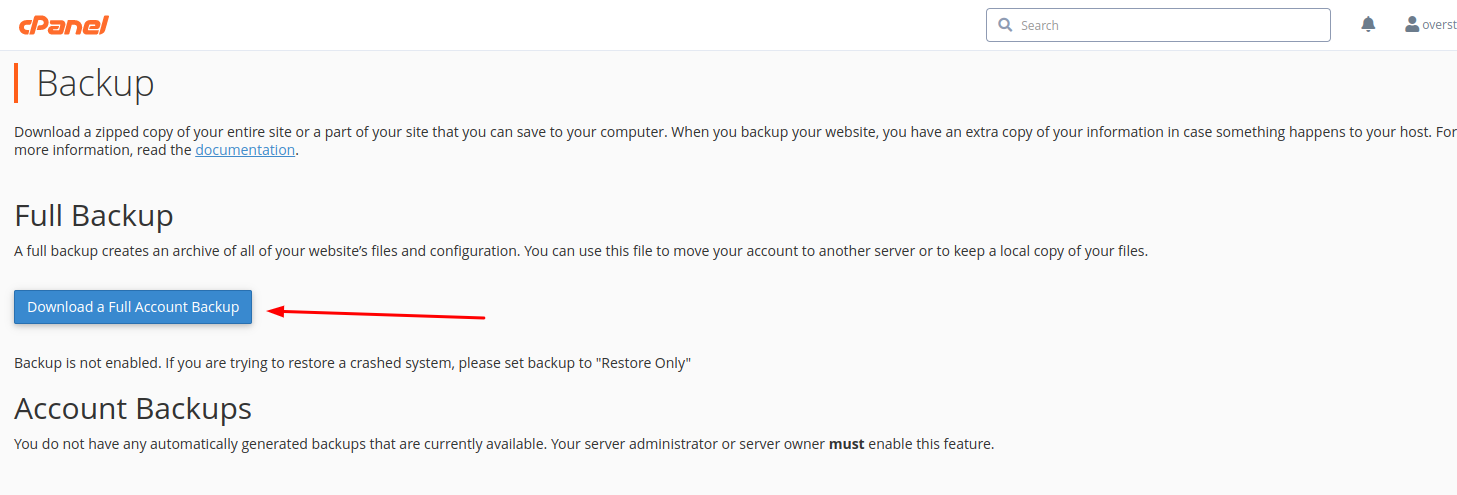
**3. By default, a full cPanel backup will be saved into your account home directory.\
click on Generate Backup**
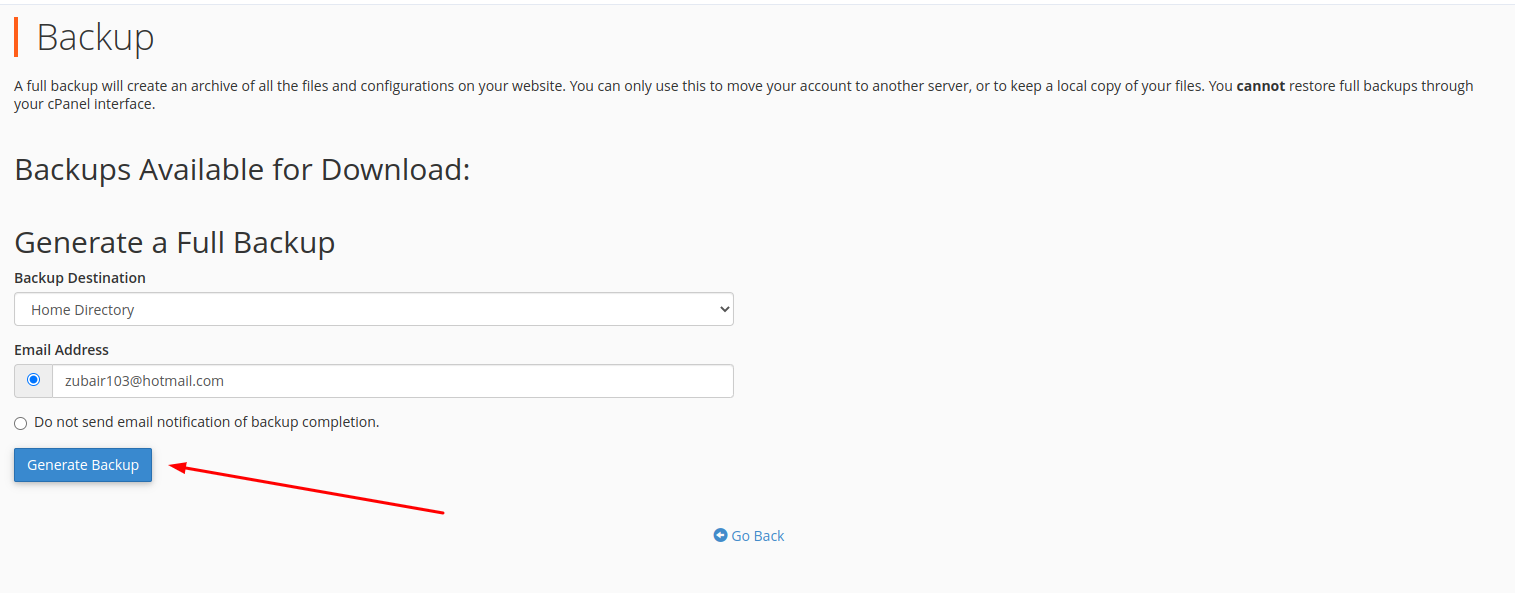
**4. You will see the following message notifying you about the start of the backup generation process**
**5. Click on Go Back to monitor the status of the generation process in real-time.**
**A green checkmark next to the backup name will indicate that the backup has been completed.**
# cPanel Hosting Overview
Source: https://kb.verpex.com/cpanel/cpanel-hosting-overview
## What is cPanel
cPanel is a popular Linux hosting control panel that is used by many hosting providers worldwide. Often, it is included with the web hosting package. However, there are cases where you need to get a separate subscription in order to get cPanel. cPanel uses a graphical interface that simplifies the management of a site greatly. It displays key metrics about the performance of your server, and it allows you to access a range of modules such as Preferences, Files, Databases, Web Applications, Security, Metrics, Domains, Software, Email, and Advanced Modules.
In order to administer your website hosting with us, we provide the cPanel control panel. You can execute the most common hosting tasks with just a few clicks, thanks to this graphical interface.
## Logging in to cPanel
You can log into your cPanel control panel by doing the following two things. First, you can log in directly into cPanel using [https://yourdomain.com/cpanel](). To log into, all you need is your username and password for cPanel. If you’re having trouble and you want to reset your password, reach out to us, and we will immediately assist you.
Second, you can log into your client area, then navigate to Hosting Accounts, click the Account, and then log in to cPanel. Now that we’ve gone through the ways to log into cPanel, we’re going to get you started off with the basics of cPanel.
## Installing Software
You can install the software in the following two ways. You can install your software manually by following their guides for installation, or you can use our auto-installers, which are recommended for most open-source platforms such as Magento, Joomla, and WordPress.
Databases
The data for most applications is stored in databases. For instance, WordPress uses both databases and files. You can create unlimited databases by adding them manually or using auto-install software.
Uploading and Managing Files
The files of your website run out of a folder called public\_html, and there are several ways that you can manage files. Some advanced users use SSH, while others use SFTP or FTP through a file management application like FileZilla or use the inbuilt file manager.
SSL Certificates
At Verpex, with every hosting account, we provide free SSL certificates. In most cases, renewal and provisioning are completely automated, and you don’t need to do anything in regard to the SSL certificates.
Email Accounts
Every Verpex hosting account allows you to create email accounts. The emails can be set up to forward somewhere else, or they can be full mailboxes. Alternatively, MX records can be set up in order to point emails to an external provider such as Office 365 or Google Gsuite.
## Optimization and Performance
Verpex Hosting is set up to minimize potential issues or downtime and to run your website quickly. We set it up by default to run the greatest number of sites in the best manner. However, you can do some optimizations to make sure that a certain site loads quickly from your end as well, such as changing the PHP version.
# Creating a Node.js application with the Node.js Selector
Source: https://kb.verpex.com/cpanel/create-application-with-nodejs-selector
Learn how to create a Node.js application using the Node.js selector in cPanel.
The Node.js selector allows you to easily set up Node.js applications with the cPanel graphical interface or using the command line. Use whichever method you prefer.
Throughout this tutorial we use the following variables:
* **app** represents the application root directory and application uri.
* **example** represents the username.
* **example.com** represents the domain.
* **app.js** represents the application startup file.
* **My app** represents the description.
* **10 or 11** represents the node.js major version number.
You should change these values to match the values required for your account and application.
## Method #1: Setting up a Node.js application with the cPanel interface
To set up a Node.js application using cPanel, use the following procedures.
### Step #1: Create the application
First, you must create an application. To do this, follow these steps:
1. Log in to cPanel.
2. On the **Tools** page, in the **Software** section, click **Setup Node.js App**:

3. On the Node.js selector page, click **CREATE APPLICATION** to start the application setup:

4. Fill in the fields on the application setup form:
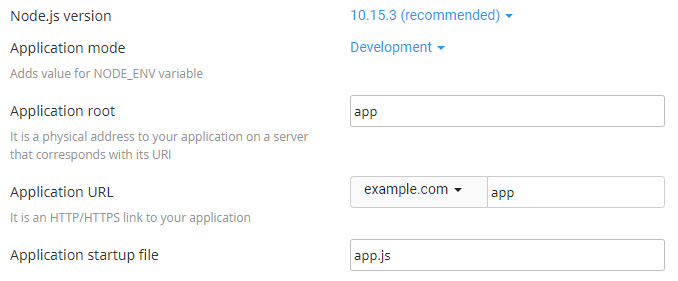
* **Node.js version** - select your preferred version from the drop down list
* **Application mode** - choose **Development** or **Production** from the list. Development may be chosen initially and changed to production later.
* **Application root** - the file system location for application files. The entry will be appended to */home/username* to form the complete path to the application files in the cPanel home directory.
Typical locations for the application root are */home/username/appname* or */home/username/apps/appname*. Do not put the application root inside the domain document root.
* **Application URL** - the address of the application on the Internet.
When you define routes in your application code, you must include the application URL in the route.
* **Application startup file** - the initial file that will be processed when launching the application.
5. When the form is complete, click **CREATE**:

6. The application starts automatically. To view a test page for the application, click **OPEN**:

You should see the **It Works!** message appear.
Now that a working application is installed, you can enhance the environment with the *package.json* settings file and the npm package manager. To do this, follow the next two procedures.
### Step #2: Create the package.json file
To create the *package.json* file, follow these steps:
1. On the **Tools** page, in the **Files** section, click **File Manager**:

2. In the left hand column of File Manager, click the text of the application root folder:
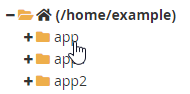
3. Click **+File** to create a new file:

4. In the **New File** dialog box, type the filename **package.json**, and then click **Create New File**:
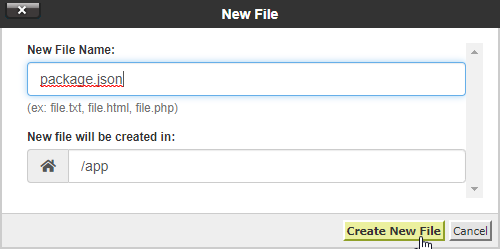
5. Right-click or secondary click on the *package.json* file in the right-hand column of File Manager and then click **Edit**. An edit dialog box appears:
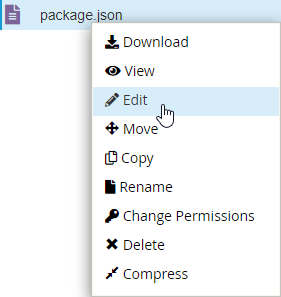
6. In the **Edit** dialog box, click **OK**.
7. Type the following text in the editor screen:
```json theme={null}
{
"name": "app",
"version": "1.0.0",
"description": "My App",
"main": "app.js",
"scripts": {
"test": "echo \"Error: no test specified\" && exit 1"
},
"author": "",
"license": "ISC"
}
```
8. Click **Save Changes** to save the file:

9. Click **Close** to close the editor:

### Step #3: Install npm
To install npm, follow these steps:
1. On the **Tools** page, in the **Software** section, click **Setup Node.js App**:

2. In the **Actions** column of the **Web Applications** list, click the pencil icon to edit the application:
3. Click **Run NPM Install**:

4. The NPM installation runs and displays a success indicator when complete:

5. To install packages with NPM and do other command line tasks related to the application, log in via SSH and enter the virtual environment for the application using the command shown in the information box at the top of the application setup page:

## Method #2: Setting up a Node.js application using the command line
Users familiar with SSH and the bash shell may find the command line process faster and easier than navigating the cPanel interface. To set up a node.js application from the command line, follow these steps:
1. Log in to your account using SSH.
2. Create the application with the following command:
```shell theme={null}
cloudlinux-selector create --json --interpreter nodejs --version 11 --app-root app --domain example.com --app-uri app
```
3. Change to the application directory:
```shell theme={null}
cd ~/app
```
4. Open the vi editor and create the *package.json* file:
```shell theme={null}
vi package.json
```
5. press **i** to change to insert mode and paste the following text into the editor:
```json theme={null}
{
"name": "app",
"version": "1.0.0",
"description": "My App",
"main": "app.js",
"scripts": {
"test": "echo \"Error: no test specified\" && exit 1"
},
"author": "",
"license": "ISC"
}
```
6. Press **escape** followed by **:** to enter command mode.
7. Press **x** followed by **Enter** to save and exit the editor.
8. To install npm, type the following command:
```shell theme={null}
cloudlinux-selector install-modules --json --interpreter nodejs --user example --app-root app
```
To install packages with npm and do other command-line tasks related to the application, log in using SSH, and then type the following command to enter the virtual environment for the application:
```shell theme={null}
source /home/example/nodevenv/app/11/bin/activate && cd /home/example/app
```
9. To control the running state of the application, do the following:
* To stop the application, type the following command:
```shell theme={null}
cloudlinux-selector stop --json --interpreter nodejs --app-root ~/app
```
* To start the application, type the following command:
```shell theme={null}
cloudlinux-selector start --json --interpreter nodejs --app-root ~/app
```
* To restart (stop and start in one step) the application, type the following command:
```shell theme={null}
cloudlinux-selector restart --json --interpreter nodejs --app-root ~/app
```
# Creating MySQL Databases and Users
Source: https://kb.verpex.com/cpanel/creating-mysql-databases-and-users
Databases offer a way of managing large amounts of information over the web easily. They are needed to run many applications that are web-based, such as online retail shops, content management systems, and bulletin boards.
In this article, we will go over the steps that you need to take to create a new database and a new user that will be assigned to the database successfully. When you’re setting up an application or script from scratch, this is something that is typically required. We would suggest using the Softaculous Auto-Installers when possible, which set up applications like Magento, Joomla, and WordPress for you.
You need to log into your account on cPanel to start the whole process. Then, after you’re logged in, go to the tab Databases and search for the MySQL Database Wizard.
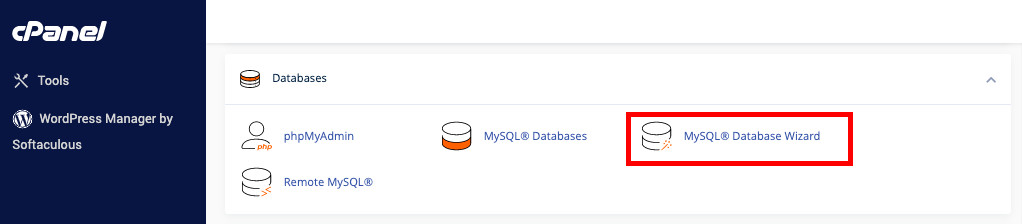
Once you have managed to access this tool, there are some steps you will need to go through, and the first one is the creation of the name of the database. Your cPanel username will prefix the database name, for instance, cpaneluser\_db. In order to avoid any confusion that might arise in the future, it is best that you use something descriptive. So, instead of just using “DB,” use something like “wordpress” or “wp.”
You will be asked what should your database password and username be on the net page. The database user is the easiest to create with the same username as the name of the database. When it comes to the password, you can use the “Password Generator,” which is built-in, or you can just type in a password of your choice. Once you’re satisfied with your username and password, click on the button “Create User,” which will lead you to the next page.
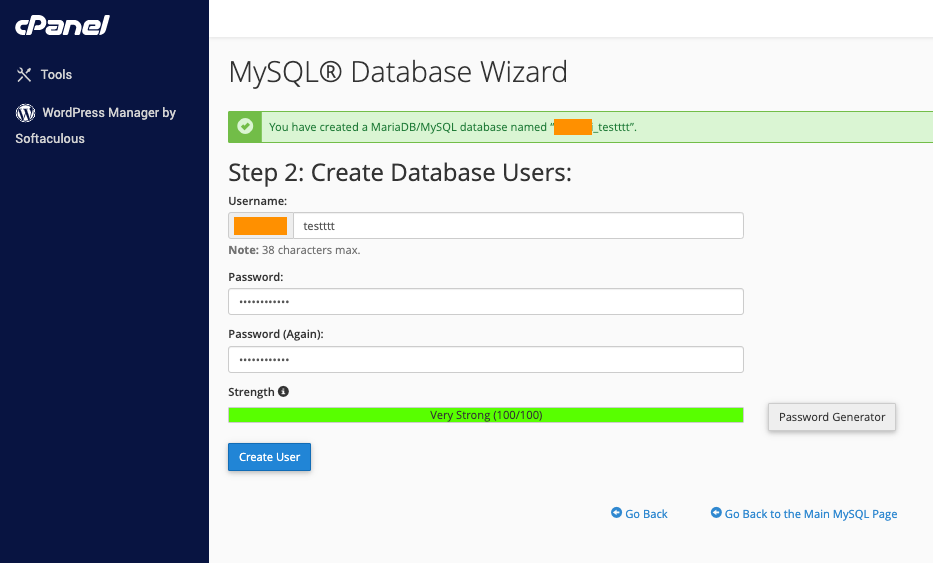
For the database you just created, you will need to assign the user, and most of the time, for the user, you will need all of the privileges. For this, you will need to tick the box next to the phrase “All Privileges.” Click on the button “Next Step” once you’ve done this. This is the last step, which means that you’ve managed to create your database and user for your cPanel account successfully.
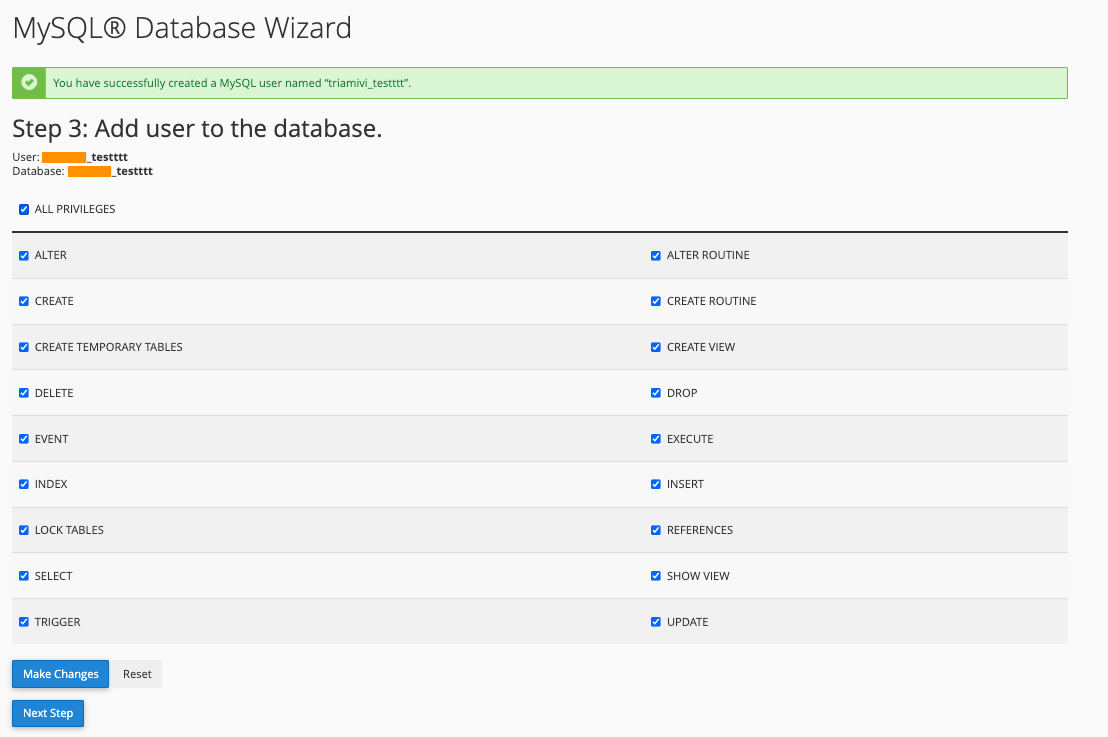
If you want to delete a MySQL database, you need to go to MySQL Databases and go to the section “Current Databases.” In the column “Actions,” click on the delete that is located next to the database you want to delete. In order to remove the database permanently, just confirm your action, and you’re good to go.
If you want to delete a database user, you need to go to MySQL Databases and navigate to the section “Current Users.” Once you’re there, look for the database user that you want to delete, and then click on the delete icon that is net to the database user. In order to confirm the deletion, click the Delete User icon.
# Database Privileges
Source: https://kb.verpex.com/cpanel/database-privileges
A database (MySQL) is an entity for storing information in the form of tables. All data in its databases are stored in the form of logically connected tables, access to which is carried out with the help of query language SQL. MYSQL verify credentials and permissions so that people's databases are not available to every user on the server, there is a system of users for these databases. Access to any database itself can be assigned by an authorised user, and it can be limited or full.
**Privileges for MySQL users**
There are a number of privileges in the MySQL database management system, listed below are the most common MySQL user privileges with a description that can be assigned to a database user.\
CREATE - This privilege creates new databases and tables\
DROP - The privilege deletes databases or tables\
INSERT - The privilege adds rows to a table.\
UPDATE - The privilege changes the content of table rows.\
DELETE - The privilege deletes rows from the table.\
ALTER - The privilege changes the table structure which requires CREATE and INSERT privileges.\
SELECT - The privilege allows reading (outputting rows) from tables using selections by columns and/or by some arithmetic and logical criteria.\
GRANT OPTION - The privilege assigns specific rights to a certain user\
LOCK TABLES - The privilege locks the table for the time it is artificially changed.\
REFERENCES - This privilege creates links between tables using an external key.\
EVENT - This privilege gives the right to create/modify/delete tasks for the scheduler\
TRIGGER - The privilege creates/modifies/deletes triggers (linked to certain tables) that perform additional actions during DELETE, UPDATE or INSERT operations.\
INDEX - the privilege gives the right to add/remove indexes to (from) tables. The indexes themselves are assigned manually and allow you to save time searching for rows.\
CREATE TEMPORARY TABLES - The privilege creates temporary tables for session time.\
CREATE VIEW - The privilege allows you to create some view in the form of a table that does not actually exist as a single one and contains only data from other tables.\
SHOW VIEW - The privilege allows you to check what kind of query (which data consists of) a certain view is created by CREATE VIEW\
CREATE ROUTINE - The privilege creates a procedure that is a set of SQL commands.\
ALTER ROUTINE - The privilege modifies a procedure created by CREATE ROUTINE.\
EXECUTE - The privilege allows you to call prepared procedures.\
FILE - The privilege gives you read access to any file on the server that MySQL itself has access to, and access to create a file in directories that MySQL has write access to.\
SUPER (admin) - The privilege that gives the right for many operations:
**How to Assign Privileges to MySQL Users in the Control Panel**
All operations with MySQL databases, database users and their permissions are done in the MYSQL databases. To initiate a connection to a database, MySQL must authenticate the hostname from which the request was made, the database user and the password. Once the connection is authorised and validated, MySQL checks that privileges have been granted to the specified database. The database user privileges need to be granted before MySQL will allow that user to execute the request on the database.
* Log into cPanel, go to Databases → MySQL Databases
* Go to the “Add User To Database” section under the MySQL Users section or select the desired user you want to grant/deny privileges
* The Current Users section will be updated, a dialog box will open for assigning privileges
* Assign all possible rights to a user
* Click the Make Changes button.
After confirming the changes made, a redirect to the page confirming that the specified rights have been granted and the Current databases section on the MySQL database and user management page will be refreshed.
# Do we Support Wildcard Subdomains
Source: https://kb.verpex.com/cpanel/do-we-support-wildcard-subdomains
Yes, Verpex Hosting supports wildcard DNS for subdomains.
WildCard subdomains (same as WildCard DNS) allow you to point all the existing and non-existing subdomains to a specific file folder in your cPanel account. Wildcard subdomain is useful for multisite web applications (WordPress multisite), speed up propagation and if you want your subdomains to show the same content as your main website.
If a wildcard subdomain is enabled on your account support.testing.com(non-existing), or admin.testing.com(existing) will show the same content. A WildCard subdomain is specified by using an " *" as part of a domain name, for example, If your main domain is testing.com, then the wildcard subdomain will be*.testing.com. It is available only for domains whose DNS is hosted with us (pointed to our NameServers).
Follow these steps to create a WildCard subdomain
* Log in to cPanel.
* In the Domains section of the cPanel click Domains
The two possible reasons for doing this are:
```
The VARCHAR fields need to be indexed while LONGTEXT fields don’t need to be
There is little chance of character limit exceeding in The VARCHAR fields, but in posts or comment content fields, the character limit can exceed the VARCHAR limit based on the nature of content that needs to be added.
```
So, to ensure that there is no later requirement of changing the data type, using a mix of VARCHAR and TEXT is advisable.
**Conclusion**
Both VARCHAR and TEXT have their own benefits and drawbacks, so no single data type fits all requirements. However, most of the database requirements can be met with VARCHAR, MEDIUMTEXT, and LONGTEXT should only be used where necessary and with caution.
# Creating a Full cPanel Backup
Source: https://kb.verpex.com/cpanel/cpanel-backup
How to create a full cPanel backup
A full cPanel backup includes all account files, databases, email accounts and settings in your cPanel.\
We recommend creating a full cPanel backup before any major data modification/migration.
**1. Login to cPanel > Files section > Backup menu:**

**2. Click on Download a Full Account Backup:**

**3. By default, a full cPanel backup will be saved into your account home directory.\
click on Generate Backup**

**4. You will see the following message notifying you about the start of the backup generation process**
**5. Click on Go Back to monitor the status of the generation process in real-time.**
**A green checkmark next to the backup name will indicate that the backup has been completed.**
# cPanel Hosting Overview
Source: https://kb.verpex.com/cpanel/cpanel-hosting-overview
## What is cPanel
cPanel is a popular Linux hosting control panel that is used by many hosting providers worldwide. Often, it is included with the web hosting package. However, there are cases where you need to get a separate subscription in order to get cPanel. cPanel uses a graphical interface that simplifies the management of a site greatly. It displays key metrics about the performance of your server, and it allows you to access a range of modules such as Preferences, Files, Databases, Web Applications, Security, Metrics, Domains, Software, Email, and Advanced Modules.
In order to administer your website hosting with us, we provide the cPanel control panel. You can execute the most common hosting tasks with just a few clicks, thanks to this graphical interface.
## Logging in to cPanel
You can log into your cPanel control panel by doing the following two things. First, you can log in directly into cPanel using [https://yourdomain.com/cpanel](). To log into, all you need is your username and password for cPanel. If you’re having trouble and you want to reset your password, reach out to us, and we will immediately assist you.
Second, you can log into your client area, then navigate to Hosting Accounts, click the Account, and then log in to cPanel. Now that we’ve gone through the ways to log into cPanel, we’re going to get you started off with the basics of cPanel.
## Installing Software
You can install the software in the following two ways. You can install your software manually by following their guides for installation, or you can use our auto-installers, which are recommended for most open-source platforms such as Magento, Joomla, and WordPress.
Databases
The data for most applications is stored in databases. For instance, WordPress uses both databases and files. You can create unlimited databases by adding them manually or using auto-install software.
Uploading and Managing Files
The files of your website run out of a folder called public\_html, and there are several ways that you can manage files. Some advanced users use SSH, while others use SFTP or FTP through a file management application like FileZilla or use the inbuilt file manager.
SSL Certificates
At Verpex, with every hosting account, we provide free SSL certificates. In most cases, renewal and provisioning are completely automated, and you don’t need to do anything in regard to the SSL certificates.
Email Accounts
Every Verpex hosting account allows you to create email accounts. The emails can be set up to forward somewhere else, or they can be full mailboxes. Alternatively, MX records can be set up in order to point emails to an external provider such as Office 365 or Google Gsuite.
## Optimization and Performance
Verpex Hosting is set up to minimize potential issues or downtime and to run your website quickly. We set it up by default to run the greatest number of sites in the best manner. However, you can do some optimizations to make sure that a certain site loads quickly from your end as well, such as changing the PHP version.
# Creating a Node.js application with the Node.js Selector
Source: https://kb.verpex.com/cpanel/create-application-with-nodejs-selector
Learn how to create a Node.js application using the Node.js selector in cPanel.
The Node.js selector allows you to easily set up Node.js applications with the cPanel graphical interface or using the command line. Use whichever method you prefer.
Throughout this tutorial we use the following variables:
* **app** represents the application root directory and application uri.
* **example** represents the username.
* **example.com** represents the domain.
* **app.js** represents the application startup file.
* **My app** represents the description.
* **10 or 11** represents the node.js major version number.
You should change these values to match the values required for your account and application.
## Method #1: Setting up a Node.js application with the cPanel interface
To set up a Node.js application using cPanel, use the following procedures.
### Step #1: Create the application
First, you must create an application. To do this, follow these steps:
1. Log in to cPanel.
2. On the **Tools** page, in the **Software** section, click **Setup Node.js App**:

3. On the Node.js selector page, click **CREATE APPLICATION** to start the application setup:

4. Fill in the fields on the application setup form:

* **Node.js version** - select your preferred version from the drop down list
* **Application mode** - choose **Development** or **Production** from the list. Development may be chosen initially and changed to production later.
* **Application root** - the file system location for application files. The entry will be appended to */home/username* to form the complete path to the application files in the cPanel home directory.
Typical locations for the application root are */home/username/appname* or */home/username/apps/appname*. Do not put the application root inside the domain document root.
* **Application URL** - the address of the application on the Internet.
When you define routes in your application code, you must include the application URL in the route.
* **Application startup file** - the initial file that will be processed when launching the application.
5. When the form is complete, click **CREATE**:

6. The application starts automatically. To view a test page for the application, click **OPEN**:

You should see the **It Works!** message appear.
Now that a working application is installed, you can enhance the environment with the *package.json* settings file and the npm package manager. To do this, follow the next two procedures.
### Step #2: Create the package.json file
To create the *package.json* file, follow these steps:
1. On the **Tools** page, in the **Files** section, click **File Manager**:

2. In the left hand column of File Manager, click the text of the application root folder:

3. Click **+File** to create a new file:

4. In the **New File** dialog box, type the filename **package.json**, and then click **Create New File**:

5. Right-click or secondary click on the *package.json* file in the right-hand column of File Manager and then click **Edit**. An edit dialog box appears:

6. In the **Edit** dialog box, click **OK**.
7. Type the following text in the editor screen:
```json theme={null}
{
"name": "app",
"version": "1.0.0",
"description": "My App",
"main": "app.js",
"scripts": {
"test": "echo \"Error: no test specified\" && exit 1"
},
"author": "",
"license": "ISC"
}
```
8. Click **Save Changes** to save the file:

9. Click **Close** to close the editor:

### Step #3: Install npm
To install npm, follow these steps:
1. On the **Tools** page, in the **Software** section, click **Setup Node.js App**:

2. In the **Actions** column of the **Web Applications** list, click the pencil icon to edit the application:

3. Click **Run NPM Install**:

4. The NPM installation runs and displays a success indicator when complete:

5. To install packages with NPM and do other command line tasks related to the application, log in via SSH and enter the virtual environment for the application using the command shown in the information box at the top of the application setup page:

## Method #2: Setting up a Node.js application using the command line
Users familiar with SSH and the bash shell may find the command line process faster and easier than navigating the cPanel interface. To set up a node.js application from the command line, follow these steps:
1. Log in to your account using SSH.
2. Create the application with the following command:
```shell theme={null}
cloudlinux-selector create --json --interpreter nodejs --version 11 --app-root app --domain example.com --app-uri app
```
3. Change to the application directory:
```shell theme={null}
cd ~/app
```
4. Open the vi editor and create the *package.json* file:
```shell theme={null}
vi package.json
```
5. press **i** to change to insert mode and paste the following text into the editor:
```json theme={null}
{
"name": "app",
"version": "1.0.0",
"description": "My App",
"main": "app.js",
"scripts": {
"test": "echo \"Error: no test specified\" && exit 1"
},
"author": "",
"license": "ISC"
}
```
6. Press **escape** followed by **:** to enter command mode.
7. Press **x** followed by **Enter** to save and exit the editor.
8. To install npm, type the following command:
```shell theme={null}
cloudlinux-selector install-modules --json --interpreter nodejs --user example --app-root app
```
To install packages with npm and do other command-line tasks related to the application, log in using SSH, and then type the following command to enter the virtual environment for the application:
```shell theme={null}
source /home/example/nodevenv/app/11/bin/activate && cd /home/example/app
```
9. To control the running state of the application, do the following:
* To stop the application, type the following command:
```shell theme={null}
cloudlinux-selector stop --json --interpreter nodejs --app-root ~/app
```
* To start the application, type the following command:
```shell theme={null}
cloudlinux-selector start --json --interpreter nodejs --app-root ~/app
```
* To restart (stop and start in one step) the application, type the following command:
```shell theme={null}
cloudlinux-selector restart --json --interpreter nodejs --app-root ~/app
```
# Creating MySQL Databases and Users
Source: https://kb.verpex.com/cpanel/creating-mysql-databases-and-users
Databases offer a way of managing large amounts of information over the web easily. They are needed to run many applications that are web-based, such as online retail shops, content management systems, and bulletin boards.
In this article, we will go over the steps that you need to take to create a new database and a new user that will be assigned to the database successfully. When you’re setting up an application or script from scratch, this is something that is typically required. We would suggest using the Softaculous Auto-Installers when possible, which set up applications like Magento, Joomla, and WordPress for you.
You need to log into your account on cPanel to start the whole process. Then, after you’re logged in, go to the tab Databases and search for the MySQL Database Wizard.

Once you have managed to access this tool, there are some steps you will need to go through, and the first one is the creation of the name of the database. Your cPanel username will prefix the database name, for instance, cpaneluser\_db. In order to avoid any confusion that might arise in the future, it is best that you use something descriptive. So, instead of just using “DB,” use something like “wordpress” or “wp.”
You will be asked what should your database password and username be on the net page. The database user is the easiest to create with the same username as the name of the database. When it comes to the password, you can use the “Password Generator,” which is built-in, or you can just type in a password of your choice. Once you’re satisfied with your username and password, click on the button “Create User,” which will lead you to the next page.

For the database you just created, you will need to assign the user, and most of the time, for the user, you will need all of the privileges. For this, you will need to tick the box next to the phrase “All Privileges.” Click on the button “Next Step” once you’ve done this. This is the last step, which means that you’ve managed to create your database and user for your cPanel account successfully.

If you want to delete a MySQL database, you need to go to MySQL Databases and go to the section “Current Databases.” In the column “Actions,” click on the delete that is located next to the database you want to delete. In order to remove the database permanently, just confirm your action, and you’re good to go.
If you want to delete a database user, you need to go to MySQL Databases and navigate to the section “Current Users.” Once you’re there, look for the database user that you want to delete, and then click on the delete icon that is net to the database user. In order to confirm the deletion, click the Delete User icon.
# Database Privileges
Source: https://kb.verpex.com/cpanel/database-privileges
A database (MySQL) is an entity for storing information in the form of tables. All data in its databases are stored in the form of logically connected tables, access to which is carried out with the help of query language SQL. MYSQL verify credentials and permissions so that people's databases are not available to every user on the server, there is a system of users for these databases. Access to any database itself can be assigned by an authorised user, and it can be limited or full.
**Privileges for MySQL users**
There are a number of privileges in the MySQL database management system, listed below are the most common MySQL user privileges with a description that can be assigned to a database user.\
CREATE - This privilege creates new databases and tables\
DROP - The privilege deletes databases or tables\
INSERT - The privilege adds rows to a table.\
UPDATE - The privilege changes the content of table rows.\
DELETE - The privilege deletes rows from the table.\
ALTER - The privilege changes the table structure which requires CREATE and INSERT privileges.\
SELECT - The privilege allows reading (outputting rows) from tables using selections by columns and/or by some arithmetic and logical criteria.\
GRANT OPTION - The privilege assigns specific rights to a certain user\
LOCK TABLES - The privilege locks the table for the time it is artificially changed.\
REFERENCES - This privilege creates links between tables using an external key.\
EVENT - This privilege gives the right to create/modify/delete tasks for the scheduler\
TRIGGER - The privilege creates/modifies/deletes triggers (linked to certain tables) that perform additional actions during DELETE, UPDATE or INSERT operations.\
INDEX - the privilege gives the right to add/remove indexes to (from) tables. The indexes themselves are assigned manually and allow you to save time searching for rows.\
CREATE TEMPORARY TABLES - The privilege creates temporary tables for session time.\
CREATE VIEW - The privilege allows you to create some view in the form of a table that does not actually exist as a single one and contains only data from other tables.\
SHOW VIEW - The privilege allows you to check what kind of query (which data consists of) a certain view is created by CREATE VIEW\
CREATE ROUTINE - The privilege creates a procedure that is a set of SQL commands.\
ALTER ROUTINE - The privilege modifies a procedure created by CREATE ROUTINE.\
EXECUTE - The privilege allows you to call prepared procedures.\
FILE - The privilege gives you read access to any file on the server that MySQL itself has access to, and access to create a file in directories that MySQL has write access to.\
SUPER (admin) - The privilege that gives the right for many operations:
**How to Assign Privileges to MySQL Users in the Control Panel**
All operations with MySQL databases, database users and their permissions are done in the MYSQL databases. To initiate a connection to a database, MySQL must authenticate the hostname from which the request was made, the database user and the password. Once the connection is authorised and validated, MySQL checks that privileges have been granted to the specified database. The database user privileges need to be granted before MySQL will allow that user to execute the request on the database.
* Log into cPanel, go to Databases → MySQL Databases
* Go to the “Add User To Database” section under the MySQL Users section or select the desired user you want to grant/deny privileges
* The Current Users section will be updated, a dialog box will open for assigning privileges
* Assign all possible rights to a user
* Click the Make Changes button.
After confirming the changes made, a redirect to the page confirming that the specified rights have been granted and the Current databases section on the MySQL database and user management page will be refreshed.
# Do we Support Wildcard Subdomains
Source: https://kb.verpex.com/cpanel/do-we-support-wildcard-subdomains
Yes, Verpex Hosting supports wildcard DNS for subdomains.
WildCard subdomains (same as WildCard DNS) allow you to point all the existing and non-existing subdomains to a specific file folder in your cPanel account. Wildcard subdomain is useful for multisite web applications (WordPress multisite), speed up propagation and if you want your subdomains to show the same content as your main website.
If a wildcard subdomain is enabled on your account support.testing.com(non-existing), or admin.testing.com(existing) will show the same content. A WildCard subdomain is specified by using an " *" as part of a domain name, for example, If your main domain is testing.com, then the wildcard subdomain will be*.testing.com. It is available only for domains whose DNS is hosted with us (pointed to our NameServers).
Follow these steps to create a WildCard subdomain
* Log in to cPanel.
* In the Domains section of the cPanel click Domains
![]() * Click Create A New Domain
* Click Create A New Domain
![]() * In the box created for the subdomain, type an asterisk \* symbol, signifying that you are creating a wildcard subdomain. Other fields will automatically generate a path for your wildcard subdomain. You can change the directory by typing the full path in the Document Root text box.
* Click Submit. You will get a success message to confirm the subdomain was set up.
* In the box created for the subdomain, type an asterisk \* symbol, signifying that you are creating a wildcard subdomain. Other fields will automatically generate a path for your wildcard subdomain. You can change the directory by typing the full path in the Document Root text box.
* Click Submit. You will get a success message to confirm the subdomain was set up.
![]() The record will be automatically added to your domain’s DNS entry after this has been done,
The record will be automatically added to your domain’s DNS entry after this has been done,
![]() You can then look up any properly formed subdomain and have it resolved, which might take a couple of hours to propagate. If the cPanel server does not manage the root domain's DNS, the wildcard subdomains' A record will have to be manually added to the DNS zone on the server that manages the root domain's DNS.
**Kindly Note:\*** We do not sell any Wildcard at the moment, but surely you can purchase it from other SSL Providers and set it up on our cPanel
# FFMPEG Support
Source: https://kb.verpex.com/cpanel/ffmpeg-support
FFMPEG is installed and available to use on all of our hosting systems. The FFMPEG binary version is provided by our Linux package installer, and unfortunately is not possible to change this on our shared hosting systems for standardization purposes, however this can be changed on our dedicated hosting servers.
Creating a video hosting site used to be a difficult and complex endeavour, but the power and flexibility of FFmpeg allow users to easily convert video into formats, including MPEG-4 and Flash, that are suitable for a wide range of mobile and desktop devices. Once converted, video and audio can be streamed using FFmpeg's media player.
FFmpeg is a free and open-source collection of tools and libraries that allows users to record, convert, and stream video and audio in different types of formats. These tools are extremely useful in optimizing files for online sharing and streaming.
FFmpeg offers a cross-platform software capable of streaming, converting and recording video and audio. Asides from conversions to and from any media type, FFmpeg also supports basic editing(so you or your users can resize, resample, or change the aspect ratio of content to fit the requirements of your site).
You can use FFmpeg to play, stream, decode, encode, and manipulate all kinds of multimedia, it is used for processing audio and video data. Verpex supports FFmpeg streaming on our shared servers for your video-sharing applications.
FFmpeg’s popularity stems from its accessibility, you do not have to know much about multimedia formats, all you need to do is simply upload whatever video you have captured from your mobile device or camera, and FFmpeg converts it to a file format which will play in any modern web browser.
FFmpeg allows users to upload the video to your website in all of the most popular video formats, and convert them on the server side into what you can with full High Definition video. YouTube video is an end result of FFmpeg.
**How does FFmpeg work?**
Once your video-sharing application has been installed, you can upload a video to your site.\
FFmpeg will convert the video to a video file(which is similar to the type of file you see when streaming from sites like Vevo, Vimeo, Youtube, etc.) on the server. This automatically embeds the video in your web pages and your users can embed your video on their websites or share it through social networking.
FFmpeg can manage the web hosting resources for websites that host multimedia content. However, if you already have a large video-sharing website or are planning on having a large site, we suggest a Managed cloud server.
# Hosting with Verpex: What to Expect
Source: https://kb.verpex.com/cpanel/hosting-with-verpex-what-you-should-expect
Frequently Asked Questions On Hosting Accounts
**Do you manage the backup for my website and create a backup twice a day?**
Yes, we are managing the backup of your account and the backup is done twice daily
**Are your backups or Partial Backups?**
We have full and partial backups in the cPanel, the steps to generate a full backup is stated in the link below\
[https://kb.verpex.com/docs/how-to-restore-your-website](/cpanel/how-to-restore-your-website)
**Will you be able to fully restore the website if something goes wrong?**
Should anything happen, your website can be restored fully with the help of JetBackup5
**How long do you retain Backups?**
Backups are kept for 30 days
**Can I restore the backup myself or do I need you to create my own?**
The JetBackup 5 allows you to restore your backup yourself anytime you wish to
**What is the difference between the backup that you make twice per day and the backup that I can do via the cPanel?**
The backups are the same, both backups are taken from your cPanel account
**When persons visit the website for the first time, they are getting the message website is not secure, what can I do to ensure that they are visiting a secure and trusted website?**
You need to install an SSL certificate on your website to have a secure website. The steps on how to install SSL on your website is stated below\
[https://kb.verpex.com/docs/ssl-certificates](/cpanel/ssl-certificates)\
**\
Can you explain how you can and will assist when a website crashes?**
When and how it happened is our priority, this will enable us to know the backup to restore and other fixes to be done on the website. If the issue persists, you will need to contact a web developer or fixed.net if it is a WordPress site.
**How is the website maintenance carried out?**
On a daily basis, software, hardware, vulnerability, MYSQL, CloudLinux paths and cPanel updates are carried out on our servers without a reboot. However, if we have to carry out any maintenance that includes some downtime, we schedule in advance and update our [status page](https://status.mysecurecloudhost.com/)
# How can I give Access to my Developer?
Source: https://kb.verpex.com/cpanel/how-can-i-give-access-to-my-developer
Your web developer requests you to give them access to your web hosting account so they can work on your website. You need to be careful about who you give access to and what level of access you give them. Your developer does not need to have access to your Verpex customer account. Give your developer just enough access to strictly do what they need to do. When considering sharing access to your cPanel hosting account with your developer, the level of access depends on the level of control you want to offer. There are several ways to give them access to your website. Different types of websites require different types of access
**Developer Access Levels**
This access provides full access to your hosting plan, billing information, and personal financial data. You should never give a third-party developer access to your customer account. You can easily take care of the activities in your client area and an overview of how to do this is stated [here](https://kb.verpex.com/)
This is important to note because if you want to provide full access for website development purposes to your developer, it would just be a matter of sharing the Cpanel username and password. This allows them full access to the website files for the website via Cpanel or FTP. In addition, they will have access to database utilities for database administration and modification purposes.
File Transfer Protocol (FTP) access allows your developer to access files on your server. It is often used to upload, download or edit files or even install WordPress plugins. FTP access varies from one FTP account to another. You can create an FTP account that gives access to only part of a website or an FTP account that gives access to everything on your site. If you want to grant limited access to your developer, we recommend that you DO NOT grant them access to the Cpanel. You can provide the temporary URL for FTP access so they can manipulate your website files. You can also create FTP accounts in your Cpanel and even set file limits. Please refer to our guide on[ How to Create FTP Accounts.](/cpanel/how-to-create-an-ftp-account)
You can also allow your developer to manipulate the database files remotely (using a database client such as phpMyAdmin or other third-party solutions), but you must configure MySQL access. The main limitation of this type of access is that they could not create databases. With a remote database, they will be able to connect to your database remotely. For this, you will need to provide them with the database username and password. In case they ask you for access to phpMyAdmin, you will need to provide them with access to your cPanel account. You can still create a new database user for the developer.
If your developer just needs to work on a content management system(CMS) site, they can only request the credentials to access the software itself and NOT the user credentials used to access the server/cPanel. These credentials only allow access to commands and tools within the same site, with no direct access to files, databases, or servers. For small changes, like updating a theme or adding an article, that's all your developer will need. In this case, you just need to create a new user in your CMS for the developer. Add a WordPress user for the WordPress Content Movement Service.
If you do not trust your web developer enough, you can ask them to send you the necessary files and instructions and upload the files yourself.
If you granted your developer access to your website through Cpanel, remember to remove access to your site or account when your developer is finished.
If you have created FTP accounts for your developer, change the cPanel password and delete the FTP accounts using Cpanel's FTP Account Manager.\
Changing the Cpanel password is also the main FTP password for the account. This is true even if you have not explicitly granted FTP access to your developer.\
If you created Remote MySQL connections to allow your developer to access remote databases, simply delete the connection you created in remote MySQL in Cpanel.\
Be sure to check the email section in case you have created email accounts that need to be deleted. If you want to keep the email account active, please change your email account password to cPanel. If your developer received your customer account login information, reset your password or you added your developer as the second point of contact, remove the developer information from your account.\
If you created a WordPress user for your developer, change the user's role to one without access to edit the site or delete the user.
That's all! Now you know how to provide secure access to your web developer.
# How to Upgrade Your Hosting Plan
Source: https://kb.verpex.com/cpanel/how-do-i-upgrade-my-hosting-account
Upgrading my hosting account at Verpex
You can upgrade your account at any time. It is free to upgrade, and the only cost you would incur is the difference in price between your current plan and the new plan you wish to upgrade. If you upgrade in the middle of the month, we will charge a prorated amount and the regular monthly fee will be charged the following month.
Follow the steps below to place an upgrade order:
* Log in to your [ Verpex account](https://clients.verpex.com/login)
* Scroll to products\&services and then select the hosting package you want to upgrade
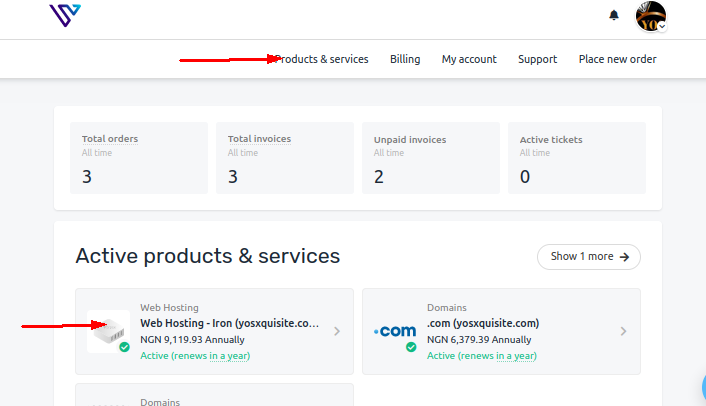
* Click Manage underneath the hosting package
* On the Web Hosting Dashboard page, click billing
* Scroll down to Upgrade/Downgrade
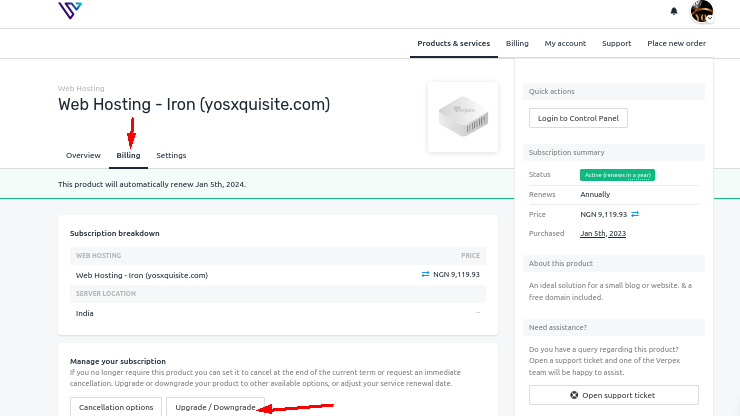
* Follow the checkout instructions and choose the plan, location and review changes where necessary
* An Invoice will be automatically generated and you will be billed for the difference between what you paid for the current plan and the cost of the new plan. At your next renewal, you will pay the full price of the new hosting plan.
Please note that Downgrades can only be done manually by our support team. If you have reached the top-tier hosting plan and wish to upgrade further, you need to contact the support.
# How Long Does DNS Take to Propagate
Source: https://kb.verpex.com/cpanel/how-long-does-dns-take-to-propagate
In order to fully start working, name server changes typically take up from 24 to 48 hours. This period of time, also known as propagation, is the estimated duration of time it takes for cache records and root name servers across the whole web to be updated with the DNS information of your site.
## Is the DNS propagation time affected by any factors?
When the DNS records, or Domain Name System records, are updated in the zone file of your domain name, in order for those updates to propagate through the Internet, they will need up to 48 hours. There are several factors that are out of our control and that determine the propagation time of the DNS, even though we aim to make updates as speedily as possible.
Some of the factors that determine the propagation time of the DNS are the following:
1. The registry of your domain name – If you change the nameservers of your domain name, your change request is communicated to the registry within a couple of minutes, and the registry publishes your authoritative nameserver records to their root zone. The zones are usually promptly updated by most registries. For instance, zones for .com domain names are refreshed by VeriSign every three minutes. However, you need to keep in mind that not all of the registries make updates in such a fast manner. Root nameservers are often protected by registries from overuse in a way that they set up a high TTL (time to live, a sort of expiration date that is put on a DNS record) of up to 48 or more hours for those nameserver records. Additionally, even though the root nameserver records should not be cached by recursive nameservers, some ISPs cache the information anyway, and a longer nameserver propagation time comes as a result of this.
2. Your Internet Service Provider, also known as ISP – DNS records are cached by your ISP, which rather than retrieving fresh data from your DNS server, is stored the data locally. This reduces traffic and speeds up Web browsing, which slows down the propagation time. TTL settings are ignored by some ISPs, and their cached records are only updated every 2 to 3 days.
3. Your TTL Settings – In the zone file of your domain name, you can set up the Time to Live for every DNS record. Like we previously mentioned, TTL is the period of time for which servers cache the information for your DNS records. The propagation speed can be increased by shorter TTL settings. For instance, if a certain record’s TTL is set to two hours, the information for that record is stored locally by servers for two hours before retrieving the updated information from your authoritative nameserver. Although, keep in mind that the number of queries can also be increased by shorter settings, and the processing time of your server can be slowed down by that increased load.
# How many Visitors can your Hosting Support?
Source: https://kb.verpex.com/cpanel/how-many-visitors-can-your-hosting-support
Web servers are very powerful machines, each one capable of handling hundreds, even thousands of websites. While there is no straight answer to the question of how many visitors our hosting can support, you can expect Verpex to ensure a safe environment for at least 3000-4000 visitors daily translating to 100,000 or more on a monthly basis with proper optimisation(cache and maybe a CDN like Cloudflare). And these are just the values, for the entry-level plan, choosing the Gold plan for shared hosting or the Expert plan for managed WordPress plan can raise the bar 2x–4x times.
Verpex does not place a limit on the number of visitors or amount of traffic your site can handle. How many visitors your site can handle depends on how efficient your site is if it's properly optimized, your page size, and the type of site you're running.
Each site is different and the amount of traffic you can handle will depend on the resources each visitor is using. An efficiently coded website that uses few resources per visitor would be able to support a large number of visitors, while a poorly coded website can only support a few simultaneous visitors. The number of visitors your site can support is largely determined by how your site is coded.
A website that relies heavily on PHP / MySQL which isn't optimized may only be able to handle a few thousand visitors per day. This is because a site which serves content dynamically and relies on using PHP to access a database to serve each request will have more overhead and require more resources for each visitor. This can be avoided by properly optimizing the site, including utilizing caching, tweaking your database queries, and following other best practices for the type of site you're running.
You can easily scale up If you are looking for more resources., The best solution for handling a huge number of visitors is undoubtedly the Managed Cloud server because of its enhanced scalability, We at Vepex give you so much resources and support that you may never have to upgrade. Pair that up with some amazingly low price rates with a 99.9% uptime guarantee. Quick-response 24/7 live chat support and assistance whenever you need help. Our ultimate goal is to keep your website fast and functional regardless of the traffic.
# How to Access cPanel
Source: https://kb.verpex.com/cpanel/how-to-access-cpanel
You just purchased a hosting account and you wish to get to the next stage which is to design your site. You need access to your cPanel account.
You can access your cPanel account from within your Verpex client area.
* Log into your Verpex dashboard
* Select Products & services from the bar on the left
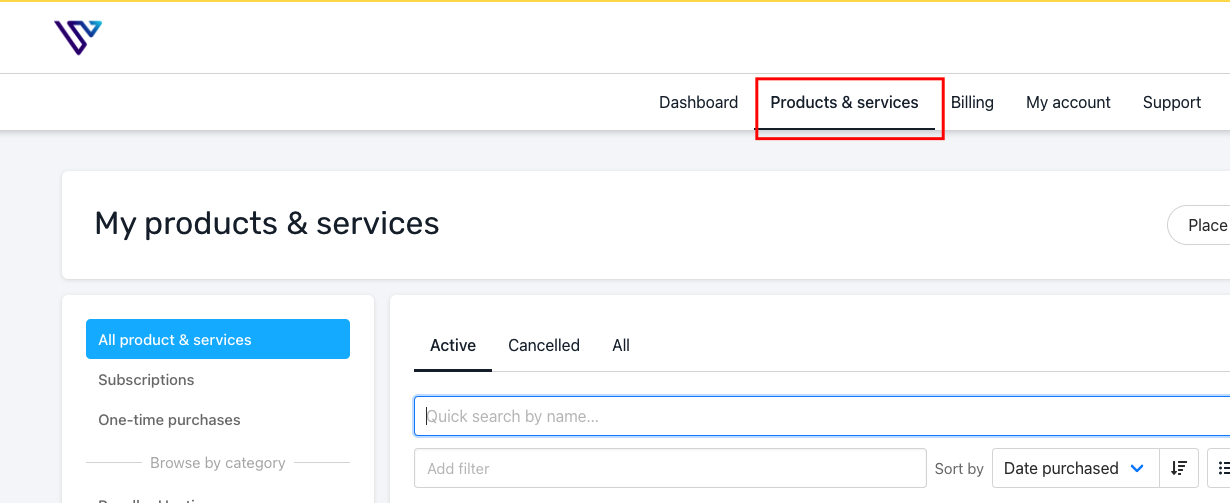
* Click manage product
* 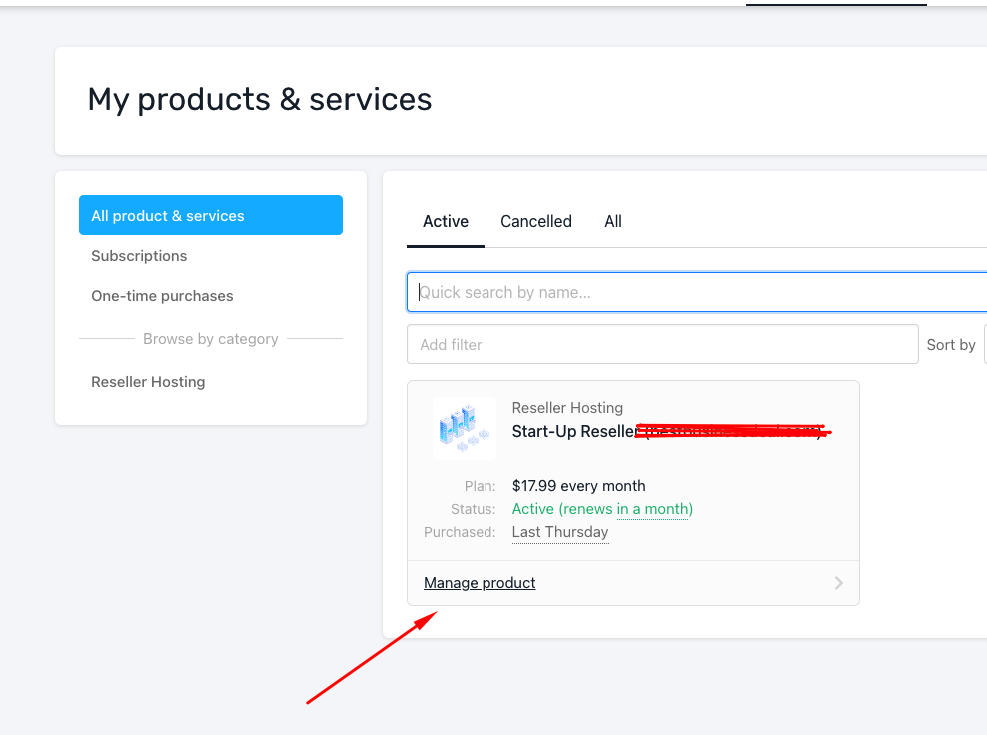
Log into Cpanel
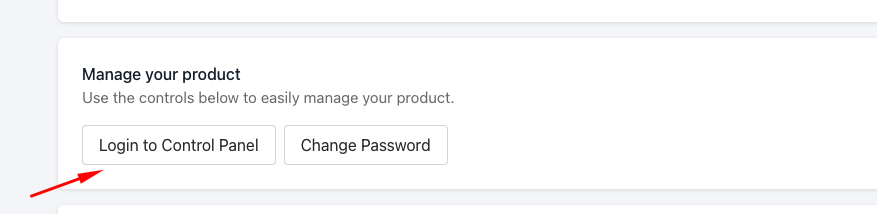
# How to add Google Analytics to your Site
Source: https://kb.verpex.com/cpanel/how-to-add-google-analytics-to-your-site
Google Analytics is a free web analytics service offered by Google that allows website owners to track and analyze websites. It provides detailed information on how users interact with a website, including how they arrive at the site, what pages they visit, how long they stay on each page, and what actions they take.
**Steps on how to add Google Analytics to your site**
To add Google Analytics to your site, follow these steps:
* Go to the Google Analytics website, sign in with your Google account, and sign up for a new account if you don't already have one.
* Once you're signed in to your Google Analytics account, click the "Admin" tab, select the account you want to use, and create a new property for your website.
* Enter your account name, website name, and URL. Accept the Terms and Services in order to get your tracking ID.
* You will be provided with a tracking ID that you need to add to your website. The tracking ID is a piece of JavaScript code that you can add to the header section of your website's HTML code.
* Once you have the tracking ID, you need to install it. There are several ways to install the tracking code on your website, depending on the platform you're using. For example, if you're using WordPress, you can install a Google Analytics plugin or add it to WordPress manually, and if you are using a static website, you can add the tracking code directly to the HTML code.
* Once you've installed the tracking code, you can verify that it's working by going back to the Google Analytics website and checking the status of your property. It may take a few hours or days for data to start appearing in your account.
You can also refer to [https://support.google.com/sites/answer/97459?hl=en](https://support.google.com/sites/answer/97459?hl=en)
Once your tracking code is installed and working, you can explore the various reports and features in your Google Analytics account. This includes data on website traffic, user behaviour, and more, which can help you make data-driven decisions to improve your website's performance.
Google Analytics provides a range of reports and data visualization tools to help users understand their website's performance
# How to Change Your cPanel Language
Source: https://kb.verpex.com/cpanel/how-to-change-your-cpanel-language
cPanel is a leading web hosting control panel based on Linux, and it is widely used to manage a web hosting server’s resources. In order to simplify the process of managing a website that is hosted on a server, it offers various automation tools and a graphical user interface, or GUI, that are integrated together. cPanel is built using a structure with three tears, which provides features and easy functionality for website owners, resellers, and administrators.
English is set as the default language on cPanel. However, if you want to, you can change the language to some of the following languages:
```
Chinese (Traditional)
Finnish
French (France)
Vietnamese
Filipino
Japanese
Spanish (Spain)
Hebrew
Hungarian
Romanian
Portuguese (Brazil)
German (Germany)
Indonesian
Polish
Thai
Arabic
Turkish
Czech
Norwegian
Chinese (Simplified)
Swedish
Dutch (Netherlands)
Ukrainian
Greek
Malay (Malaysia)
Korean
Russian
Danish
Italian (Italy)
```
It is quite easy to change the language of your cPanel if you want to. For instance, you could be working with a client from France, or you could be French yourself and have basic knowledge of the English language. In this situation, you could take advantage greatly of the option to change the language in cPanel. There is a number of different languages that you can change the primary language to that will fit your requirements.
All you need to do is follow the steps we’re going to describe below.
You need to click on user on the top right corner from inside your hosting/cPanel account and then click on Change Language.
After you’ve selected Change Language, you need to select the language you want to change to and press the button Change to submit.
You can then look up any properly formed subdomain and have it resolved, which might take a couple of hours to propagate. If the cPanel server does not manage the root domain's DNS, the wildcard subdomains' A record will have to be manually added to the DNS zone on the server that manages the root domain's DNS.
**Kindly Note:\*** We do not sell any Wildcard at the moment, but surely you can purchase it from other SSL Providers and set it up on our cPanel
# FFMPEG Support
Source: https://kb.verpex.com/cpanel/ffmpeg-support
FFMPEG is installed and available to use on all of our hosting systems. The FFMPEG binary version is provided by our Linux package installer, and unfortunately is not possible to change this on our shared hosting systems for standardization purposes, however this can be changed on our dedicated hosting servers.
Creating a video hosting site used to be a difficult and complex endeavour, but the power and flexibility of FFmpeg allow users to easily convert video into formats, including MPEG-4 and Flash, that are suitable for a wide range of mobile and desktop devices. Once converted, video and audio can be streamed using FFmpeg's media player.
FFmpeg is a free and open-source collection of tools and libraries that allows users to record, convert, and stream video and audio in different types of formats. These tools are extremely useful in optimizing files for online sharing and streaming.
FFmpeg offers a cross-platform software capable of streaming, converting and recording video and audio. Asides from conversions to and from any media type, FFmpeg also supports basic editing(so you or your users can resize, resample, or change the aspect ratio of content to fit the requirements of your site).
You can use FFmpeg to play, stream, decode, encode, and manipulate all kinds of multimedia, it is used for processing audio and video data. Verpex supports FFmpeg streaming on our shared servers for your video-sharing applications.
FFmpeg’s popularity stems from its accessibility, you do not have to know much about multimedia formats, all you need to do is simply upload whatever video you have captured from your mobile device or camera, and FFmpeg converts it to a file format which will play in any modern web browser.
FFmpeg allows users to upload the video to your website in all of the most popular video formats, and convert them on the server side into what you can with full High Definition video. YouTube video is an end result of FFmpeg.
**How does FFmpeg work?**
Once your video-sharing application has been installed, you can upload a video to your site.\
FFmpeg will convert the video to a video file(which is similar to the type of file you see when streaming from sites like Vevo, Vimeo, Youtube, etc.) on the server. This automatically embeds the video in your web pages and your users can embed your video on their websites or share it through social networking.
FFmpeg can manage the web hosting resources for websites that host multimedia content. However, if you already have a large video-sharing website or are planning on having a large site, we suggest a Managed cloud server.
# Hosting with Verpex: What to Expect
Source: https://kb.verpex.com/cpanel/hosting-with-verpex-what-you-should-expect
Frequently Asked Questions On Hosting Accounts
**Do you manage the backup for my website and create a backup twice a day?**
Yes, we are managing the backup of your account and the backup is done twice daily
**Are your backups or Partial Backups?**
We have full and partial backups in the cPanel, the steps to generate a full backup is stated in the link below\
[https://kb.verpex.com/docs/how-to-restore-your-website](/cpanel/how-to-restore-your-website)
**Will you be able to fully restore the website if something goes wrong?**
Should anything happen, your website can be restored fully with the help of JetBackup5
**How long do you retain Backups?**
Backups are kept for 30 days
**Can I restore the backup myself or do I need you to create my own?**
The JetBackup 5 allows you to restore your backup yourself anytime you wish to
**What is the difference between the backup that you make twice per day and the backup that I can do via the cPanel?**
The backups are the same, both backups are taken from your cPanel account
**When persons visit the website for the first time, they are getting the message website is not secure, what can I do to ensure that they are visiting a secure and trusted website?**
You need to install an SSL certificate on your website to have a secure website. The steps on how to install SSL on your website is stated below\
[https://kb.verpex.com/docs/ssl-certificates](/cpanel/ssl-certificates)\
**\
Can you explain how you can and will assist when a website crashes?**
When and how it happened is our priority, this will enable us to know the backup to restore and other fixes to be done on the website. If the issue persists, you will need to contact a web developer or fixed.net if it is a WordPress site.
**How is the website maintenance carried out?**
On a daily basis, software, hardware, vulnerability, MYSQL, CloudLinux paths and cPanel updates are carried out on our servers without a reboot. However, if we have to carry out any maintenance that includes some downtime, we schedule in advance and update our [status page](https://status.mysecurecloudhost.com/)
# How can I give Access to my Developer?
Source: https://kb.verpex.com/cpanel/how-can-i-give-access-to-my-developer
Your web developer requests you to give them access to your web hosting account so they can work on your website. You need to be careful about who you give access to and what level of access you give them. Your developer does not need to have access to your Verpex customer account. Give your developer just enough access to strictly do what they need to do. When considering sharing access to your cPanel hosting account with your developer, the level of access depends on the level of control you want to offer. There are several ways to give them access to your website. Different types of websites require different types of access
**Developer Access Levels**
This access provides full access to your hosting plan, billing information, and personal financial data. You should never give a third-party developer access to your customer account. You can easily take care of the activities in your client area and an overview of how to do this is stated [here](https://kb.verpex.com/)
This is important to note because if you want to provide full access for website development purposes to your developer, it would just be a matter of sharing the Cpanel username and password. This allows them full access to the website files for the website via Cpanel or FTP. In addition, they will have access to database utilities for database administration and modification purposes.
File Transfer Protocol (FTP) access allows your developer to access files on your server. It is often used to upload, download or edit files or even install WordPress plugins. FTP access varies from one FTP account to another. You can create an FTP account that gives access to only part of a website or an FTP account that gives access to everything on your site. If you want to grant limited access to your developer, we recommend that you DO NOT grant them access to the Cpanel. You can provide the temporary URL for FTP access so they can manipulate your website files. You can also create FTP accounts in your Cpanel and even set file limits. Please refer to our guide on[ How to Create FTP Accounts.](/cpanel/how-to-create-an-ftp-account)
You can also allow your developer to manipulate the database files remotely (using a database client such as phpMyAdmin or other third-party solutions), but you must configure MySQL access. The main limitation of this type of access is that they could not create databases. With a remote database, they will be able to connect to your database remotely. For this, you will need to provide them with the database username and password. In case they ask you for access to phpMyAdmin, you will need to provide them with access to your cPanel account. You can still create a new database user for the developer.
If your developer just needs to work on a content management system(CMS) site, they can only request the credentials to access the software itself and NOT the user credentials used to access the server/cPanel. These credentials only allow access to commands and tools within the same site, with no direct access to files, databases, or servers. For small changes, like updating a theme or adding an article, that's all your developer will need. In this case, you just need to create a new user in your CMS for the developer. Add a WordPress user for the WordPress Content Movement Service.
If you do not trust your web developer enough, you can ask them to send you the necessary files and instructions and upload the files yourself.
If you granted your developer access to your website through Cpanel, remember to remove access to your site or account when your developer is finished.
If you have created FTP accounts for your developer, change the cPanel password and delete the FTP accounts using Cpanel's FTP Account Manager.\
Changing the Cpanel password is also the main FTP password for the account. This is true even if you have not explicitly granted FTP access to your developer.\
If you created Remote MySQL connections to allow your developer to access remote databases, simply delete the connection you created in remote MySQL in Cpanel.\
Be sure to check the email section in case you have created email accounts that need to be deleted. If you want to keep the email account active, please change your email account password to cPanel. If your developer received your customer account login information, reset your password or you added your developer as the second point of contact, remove the developer information from your account.\
If you created a WordPress user for your developer, change the user's role to one without access to edit the site or delete the user.
That's all! Now you know how to provide secure access to your web developer.
# How to Upgrade Your Hosting Plan
Source: https://kb.verpex.com/cpanel/how-do-i-upgrade-my-hosting-account
Upgrading my hosting account at Verpex
You can upgrade your account at any time. It is free to upgrade, and the only cost you would incur is the difference in price between your current plan and the new plan you wish to upgrade. If you upgrade in the middle of the month, we will charge a prorated amount and the regular monthly fee will be charged the following month.
Follow the steps below to place an upgrade order:
* Log in to your [ Verpex account](https://clients.verpex.com/login)
* Scroll to products\&services and then select the hosting package you want to upgrade

* Click Manage underneath the hosting package
* On the Web Hosting Dashboard page, click billing
* Scroll down to Upgrade/Downgrade

* Follow the checkout instructions and choose the plan, location and review changes where necessary
* An Invoice will be automatically generated and you will be billed for the difference between what you paid for the current plan and the cost of the new plan. At your next renewal, you will pay the full price of the new hosting plan.
Please note that Downgrades can only be done manually by our support team. If you have reached the top-tier hosting plan and wish to upgrade further, you need to contact the support.
# How Long Does DNS Take to Propagate
Source: https://kb.verpex.com/cpanel/how-long-does-dns-take-to-propagate
In order to fully start working, name server changes typically take up from 24 to 48 hours. This period of time, also known as propagation, is the estimated duration of time it takes for cache records and root name servers across the whole web to be updated with the DNS information of your site.
## Is the DNS propagation time affected by any factors?
When the DNS records, or Domain Name System records, are updated in the zone file of your domain name, in order for those updates to propagate through the Internet, they will need up to 48 hours. There are several factors that are out of our control and that determine the propagation time of the DNS, even though we aim to make updates as speedily as possible.
Some of the factors that determine the propagation time of the DNS are the following:
1. The registry of your domain name – If you change the nameservers of your domain name, your change request is communicated to the registry within a couple of minutes, and the registry publishes your authoritative nameserver records to their root zone. The zones are usually promptly updated by most registries. For instance, zones for .com domain names are refreshed by VeriSign every three minutes. However, you need to keep in mind that not all of the registries make updates in such a fast manner. Root nameservers are often protected by registries from overuse in a way that they set up a high TTL (time to live, a sort of expiration date that is put on a DNS record) of up to 48 or more hours for those nameserver records. Additionally, even though the root nameserver records should not be cached by recursive nameservers, some ISPs cache the information anyway, and a longer nameserver propagation time comes as a result of this.
2. Your Internet Service Provider, also known as ISP – DNS records are cached by your ISP, which rather than retrieving fresh data from your DNS server, is stored the data locally. This reduces traffic and speeds up Web browsing, which slows down the propagation time. TTL settings are ignored by some ISPs, and their cached records are only updated every 2 to 3 days.
3. Your TTL Settings – In the zone file of your domain name, you can set up the Time to Live for every DNS record. Like we previously mentioned, TTL is the period of time for which servers cache the information for your DNS records. The propagation speed can be increased by shorter TTL settings. For instance, if a certain record’s TTL is set to two hours, the information for that record is stored locally by servers for two hours before retrieving the updated information from your authoritative nameserver. Although, keep in mind that the number of queries can also be increased by shorter settings, and the processing time of your server can be slowed down by that increased load.
# How many Visitors can your Hosting Support?
Source: https://kb.verpex.com/cpanel/how-many-visitors-can-your-hosting-support
Web servers are very powerful machines, each one capable of handling hundreds, even thousands of websites. While there is no straight answer to the question of how many visitors our hosting can support, you can expect Verpex to ensure a safe environment for at least 3000-4000 visitors daily translating to 100,000 or more on a monthly basis with proper optimisation(cache and maybe a CDN like Cloudflare). And these are just the values, for the entry-level plan, choosing the Gold plan for shared hosting or the Expert plan for managed WordPress plan can raise the bar 2x–4x times.
Verpex does not place a limit on the number of visitors or amount of traffic your site can handle. How many visitors your site can handle depends on how efficient your site is if it's properly optimized, your page size, and the type of site you're running.
Each site is different and the amount of traffic you can handle will depend on the resources each visitor is using. An efficiently coded website that uses few resources per visitor would be able to support a large number of visitors, while a poorly coded website can only support a few simultaneous visitors. The number of visitors your site can support is largely determined by how your site is coded.
A website that relies heavily on PHP / MySQL which isn't optimized may only be able to handle a few thousand visitors per day. This is because a site which serves content dynamically and relies on using PHP to access a database to serve each request will have more overhead and require more resources for each visitor. This can be avoided by properly optimizing the site, including utilizing caching, tweaking your database queries, and following other best practices for the type of site you're running.
You can easily scale up If you are looking for more resources., The best solution for handling a huge number of visitors is undoubtedly the Managed Cloud server because of its enhanced scalability, We at Vepex give you so much resources and support that you may never have to upgrade. Pair that up with some amazingly low price rates with a 99.9% uptime guarantee. Quick-response 24/7 live chat support and assistance whenever you need help. Our ultimate goal is to keep your website fast and functional regardless of the traffic.
# How to Access cPanel
Source: https://kb.verpex.com/cpanel/how-to-access-cpanel
You just purchased a hosting account and you wish to get to the next stage which is to design your site. You need access to your cPanel account.
You can access your cPanel account from within your Verpex client area.
* Log into your Verpex dashboard
* Select Products & services from the bar on the left

* Click manage product
* 
Log into Cpanel

# How to add Google Analytics to your Site
Source: https://kb.verpex.com/cpanel/how-to-add-google-analytics-to-your-site
Google Analytics is a free web analytics service offered by Google that allows website owners to track and analyze websites. It provides detailed information on how users interact with a website, including how they arrive at the site, what pages they visit, how long they stay on each page, and what actions they take.
**Steps on how to add Google Analytics to your site**
To add Google Analytics to your site, follow these steps:
* Go to the Google Analytics website, sign in with your Google account, and sign up for a new account if you don't already have one.
* Once you're signed in to your Google Analytics account, click the "Admin" tab, select the account you want to use, and create a new property for your website.
* Enter your account name, website name, and URL. Accept the Terms and Services in order to get your tracking ID.
* You will be provided with a tracking ID that you need to add to your website. The tracking ID is a piece of JavaScript code that you can add to the header section of your website's HTML code.
* Once you have the tracking ID, you need to install it. There are several ways to install the tracking code on your website, depending on the platform you're using. For example, if you're using WordPress, you can install a Google Analytics plugin or add it to WordPress manually, and if you are using a static website, you can add the tracking code directly to the HTML code.
* Once you've installed the tracking code, you can verify that it's working by going back to the Google Analytics website and checking the status of your property. It may take a few hours or days for data to start appearing in your account.
You can also refer to [https://support.google.com/sites/answer/97459?hl=en](https://support.google.com/sites/answer/97459?hl=en)
Once your tracking code is installed and working, you can explore the various reports and features in your Google Analytics account. This includes data on website traffic, user behaviour, and more, which can help you make data-driven decisions to improve your website's performance.
Google Analytics provides a range of reports and data visualization tools to help users understand their website's performance
# How to Change Your cPanel Language
Source: https://kb.verpex.com/cpanel/how-to-change-your-cpanel-language
cPanel is a leading web hosting control panel based on Linux, and it is widely used to manage a web hosting server’s resources. In order to simplify the process of managing a website that is hosted on a server, it offers various automation tools and a graphical user interface, or GUI, that are integrated together. cPanel is built using a structure with three tears, which provides features and easy functionality for website owners, resellers, and administrators.
English is set as the default language on cPanel. However, if you want to, you can change the language to some of the following languages:
```
Chinese (Traditional)
Finnish
French (France)
Vietnamese
Filipino
Japanese
Spanish (Spain)
Hebrew
Hungarian
Romanian
Portuguese (Brazil)
German (Germany)
Indonesian
Polish
Thai
Arabic
Turkish
Czech
Norwegian
Chinese (Simplified)
Swedish
Dutch (Netherlands)
Ukrainian
Greek
Malay (Malaysia)
Korean
Russian
Danish
Italian (Italy)
```
It is quite easy to change the language of your cPanel if you want to. For instance, you could be working with a client from France, or you could be French yourself and have basic knowledge of the English language. In this situation, you could take advantage greatly of the option to change the language in cPanel. There is a number of different languages that you can change the primary language to that will fit your requirements.
All you need to do is follow the steps we’re going to describe below.
You need to click on user on the top right corner from inside your hosting/cPanel account and then click on Change Language.
After you’ve selected Change Language, you need to select the language you want to change to and press the button Change to submit.
![]() After the page refreshes, the changes should instantly take effect.
Congratulations, you’ve managed to successfully change the language of cPanel. Keep in mind that not all the languages are supported in cPanel, but you can find the major languages without a problem.
Remember that once you change the language of the interface, there is a cookie in your browser set by the system that will expire after one year. Each time you log in to webmail from a new browser, you must perform this step, whether the cookie expires or you delete cookies. Also, there is an option to change the login interface locale for Webmail, WHM, or cPanel during the process of logging in. This will change the interface’s default language.
In addition, if the Accept-Language header of your browser is set, the locale that corresponds to your browser setting will be displayed by the login interface. The login interface will be displayed in English if the local that the header of the browser requests is not available.
You can leverage cPanel in a specific way with very little effort, and it’s important to learn the basics of cPanel such as this one.
# How to Change Your cPanel Password
Source: https://kb.verpex.com/cpanel/how-to-change-your-cpanel-password
This article will go over how to change your cPanel password. This password enables you to log in to your primary FTP account, SSH, MySQL, and cPanel.
The first thing you need to do is log in to cPanel. On the cPanel home screen, you need to go to the Preferences section and click on Password and Security.
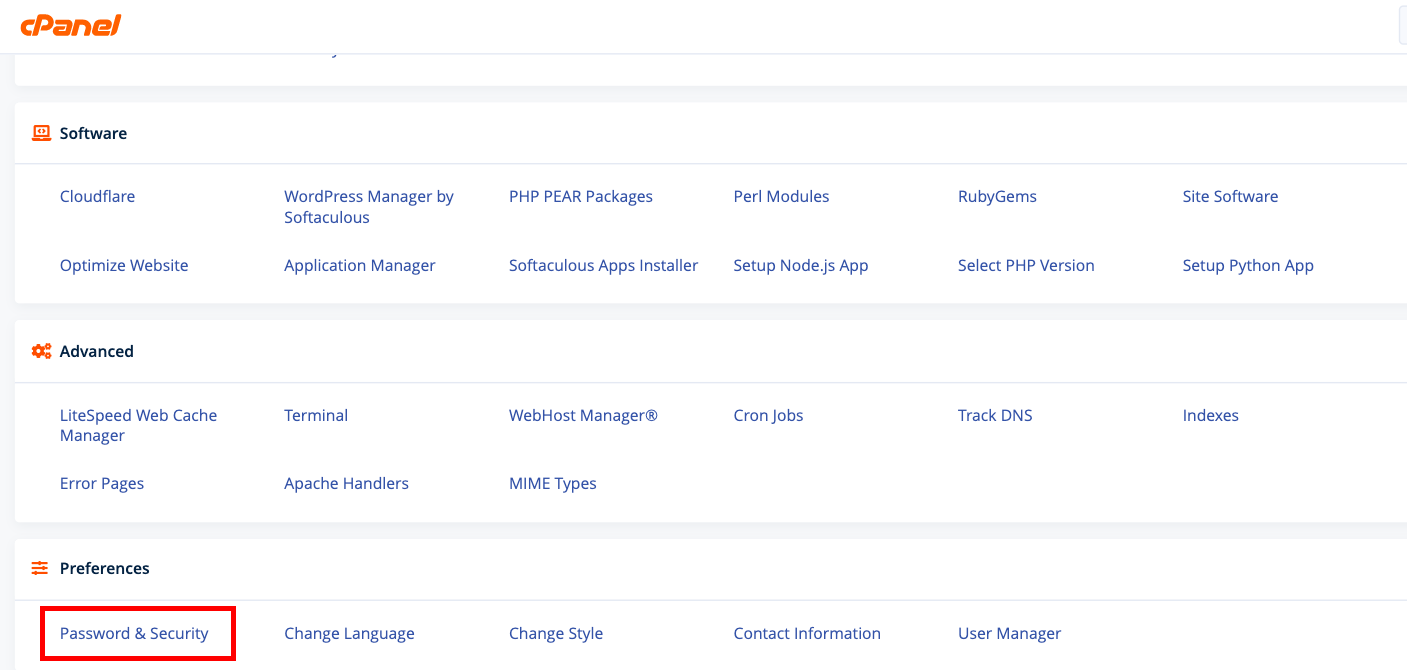
Type your current password in the Old Password text box. Then, type the new password that you want in the New Password text box. Retype the new password in the New password (Again). Lastly, you need to click on Change your password now, and immediately you will have a new password for your cPanel account. If you have forgotten your old password and you can’t access your account for any reason, please contact us for further assistance.
Alternatively you can change your cPanel password from within your client area,
Log into your Verpex dashboard\
Select Products& services from the bar on the left\
Navigate to the product you wish to change the password for\
Click manage product\
Click Manage\
Under Actions, click Change Password
Now you have successfully changed your password, you can log in using the new password.
How to Pick A Strong Password for Your cPanel
One important thing to remember is that you should protect your password. Choose strong passwords and change them regularly to ensure the best security for your account.
Some of the most commonly used passwords are based on hobbies, family names, or just a simple pattern or combination of words. Even though these passwords are easy to remember, they are also not as secure.
To choose a strong password, use a mixture of lowercase and uppercase letters since passwords are case-sensitive. Randomly mix up numbers and symbols with letters. You can substitute the letter A with a @ or the letter O with a zero.
If there is information about you that is easily discoverable, such as the names of your pets and relatives, your high school, city of birth, address, anniversary, or birthday, do not include them in your password. Someone can easily guess your password if you include obvious personal information in it.
Several methods are used by hackers to get into your account, and the most common way is to target you personally and type in symbols, numbers, and letters manually in order to guess your password. This process will take a longer period of time if you have a more complex and long password. Passwords that are shorter will only take a few seconds to crack.
Choosing a long password is a smart move, but what is even a smarter move is choosing a long password that includes random phrases and words. A password will be harder to crack if it is not grammatically correct; it is not a phrase that is in published literature and can’t be found in the dictionary.
If you’re having any trouble creating a new password, you can try using a password generator. Even though the result can be pretty random and it can seem like it’s hard to remember, with a little bit of practice, it can be pretty easy to memorize.
# How to Change your cPanel Password from Client Area
Source: https://kb.verpex.com/cpanel/how-to-change-your-cpanel-password-from-client-area
How to Change your cPanel Password
First of all, keep in mind that you have an opportunity to log in to your Hosting account directly from your Verpex client. Thus, you don’t need to remember your cPanel login details, it’s enough to remember only one set of login details - Verpex account credentials. So, if you forgot your cPanel password or the one provided in the welcome email does not work, you can simply log into cPanel via your Verpex Account Panel.
* To change the Cpanel password of any of your accounts, you have to log into your Verpex [client area](https://clients.verpex.com/login)
* After logging in successfully, click Products& services from the options listed on the left hand side of the page
* From the list, click on the account you would like to modify.
* Click manage product
* Navigate to Manage
* In front of Actions, click Change Password
* Enter your new password and click change password at the bottom of the page
Ensure that you choose a strong password and that this password is only shared with trusted associates or partners.
If you experience any difficulty, send an email to [support@verpex.com](mailto:support@verpex.com).
# How to change your default Index page in .htaccess
Source: https://kb.verpex.com/cpanel/how-to-change-your-default-index-page-in-htaccess
To change the default index page in .htaccess, you can follow these steps:
* Login into cPanel
* Navigate to Files, then click File Manager
* Make sure that the Show Hidden Files checkbox is selected and click Save.
* Search for .htaccess file. If there is no .htaccess file in your root directory, create a new one.
* Right-click the .htaccess file and click Edit
* Add the following line of code to the top of the .htaccess file:
```text .htaccess code theme={null}
DirectoryIndex newindexfile.html
```
* Replace "newindexfile.html" with the name of the file you want to use as your default index page. For example, if you want to use "home.html" as your default index page, the code would be:
```text theme={null}
DirectoryIndex home.html
```
* Save the changes to the .htaccess file and upload it to the root directory of your website.
Test your website to make sure the new index page is working properly.
**Note:** Make sure that the file you have set as the default index page is located in the root directory of your website. If the file is located in a subdirectory, you will need to specify the path to the file in the DirectoryIndex directive. For example:
```text theme={null}
DirectoryIndex subdir/newindexfile.html
```
# How to Change Your PHP Version In cPanel
Source: https://kb.verpex.com/cpanel/how-to-change-your-php-version-in-cpanel
Websites frequently use PHP scripting language for content and applications. PHP is an acronym for Hypertext Preprocessor. PHP is typically embedded in the HTML code and processed on the server. The most common CMSs, or Content Management Systems, such as WordPress, run on this technology.
PHP is frequently offered along with MySQL, which is a database management system, and it is extremely simple and straightforward for new programmers.
Your hosting account has PHP installed by default unless you’re on a Virtual Private Server or VPS plan. You don’t need any manual installation; you can use it directly on your sites.
Usually, the last version of PHP is the best one to use from a security, performance, and features perspective. However, there are some applications that are older and are not compatible with the latest version of PHP. For this reason, you may need to make them run on an older version of PHP.
The prerequisites are you need a cPanel username and password, a web hosting account that supports PHP and cPanel, and a domain name (for instance, [www.example.com](http://www.example.com)).\
Changing Your PHP Version
Firstly, go into your account on cPanel and navigate to the Software Tab, in which you will find the Select PHP Version tool.
Here, you can select the PHP version that your website requires. Once you’ve selected the version you need, you can press Set as current. Below, you will see the modules that are available for this precise PHP version that you’re running at the moment. In order for your website to work without any issues, you can disable or enable them as you need.
At the top, you’ll find the Options tab where the PHP settings can be changed, such as upload\_max\_filesize, max\_execution\_time, memory\_limit, and so on. Below, we will go over the options that you will be tweaking in most cases.
1. upload\_max\_size – To adjust the maximum upload file size that should be supported on your site, you can adjust this value. For example, you might need to tweak this value if you are uploading a large MySQL database.
2. post\_max\_size – This value is the most common in web forms, and it shows the maximum value that can be accepted by GET and POST variables.
3. max\_execution\_time – This value can be set to a higher limit if that is something that you need, and it shows the maximum execution time that a script should run.
4. display\_errors – If you change this value to ‘On’ since it is set on ‘Off’ by default, your browser will show errors on PHP scripts.
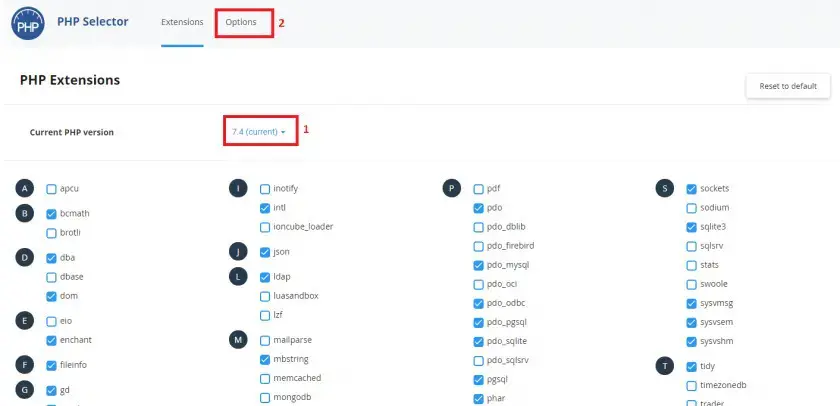
That is all it takes to change the PHP version used on any site you choose. The best thing about cPanel is that PHP customization is made very easy. We hope that our guide will assist you in adjusting the settings according to your needs.
# How to Change Your Time Zone in cPanel
Source: https://kb.verpex.com/cpanel/how-to-change-your-time-zone-in-cpanel
The term time zone is used for an area that observes a uniform standard for social, commercial, and legal purposes. Time zones typically follow boundaries between countries and their subdivisions instead of following longitude strictly because it is convenient for areas that often communicate to keep the same time.
If the incorrect time is in applications, scripts, or services on your server, you can resolve this issue by resetting the time zone. In this article, we will show you how to change your time zone using cPanel.
Most commonly used PHP scripts let you set the time zones as one of their settings. For instance, WordPress has a dropdown list in the General menu found in the Settings. However, this isn’t always the case with all the applications.
By default, applications use the time zone of the host server. You can change this setting if you are in a different time zone. Depending on the application you are using, the exact steps to do this will vary. Today, we will discuss how to do it using cPanel. The interface will display all the timestamps in the new time zone right after you have changed the settings regarding the time zone.
date.timezone is a setting managed via the PHP setting, which sets the script time zone of your PHP. Keep in mind that you cannot change the server time since all servers run on UTC without any exceptions. This helps prevent Daylight Savings Time errors and allows servers that run in different time zones to interact. However, what you can change is the individual cPanel time zone.
You can do this by clicking on the Select PHP version button you will find in cPanel.

When you click on the Switch to PHP Options tab, all of the php.ini values will be shown, including the time zone field.
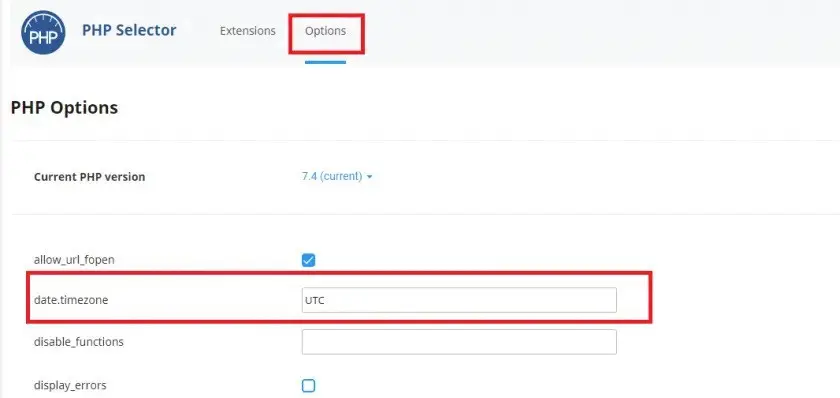
Here, you will find the data.timezone and fill in the value that you require and that suits your needs. If you are not sure what the time zone of your country is, you can find it on the following link: [https://www.php.net/manual/en/timezones.php](https://www.php.net/manual/en/timezones.php).
Once you’ve done this, do a left-side click anywhere outside the text input or dropdown box. You will see a green box with a message that says that the change you’ve done has been applied, and that’s how you know that the change has been successful.
You may synchronize your server to the time server of your network, as your hosting provider determines it. If the time of your server is incorrect, this can be especially useful. To synchronize the time of your server with the network time server, you need to click on Sync Time with Time Server.
cPanel will update PHP in a few moments after you’ve changed it to your preferred time zone. And, that is it! Now you know how to change the time zone in cPanel, and you can instantly use it!
# How to check CPU & RAM usage
Source: https://kb.verpex.com/cpanel/how-to-check-cpu-ram-usage
RAM or Physical Memory Usage is responsible for storing and making available, temporarily, all the data needed to run a website. If this value reaches the limit, you may face 502/503/504 errors. Many reasons may cause this issue: a poorly optimized website, a heavy theme or plugin, the number of visitors, a DDoS attack, etc.
If the CPU/RAM usage reaches 100%, it indicates that your website is using all of the resources allocated. Your website slows down dramatically and, in extreme cases, even time out. It is very important that no one is over-utilizing the CPU, as this can lead to excessive server loads for the other users on the server.
**How to check your websites resource usage in cPanel**
Resource usage is an inbuilt feature in cPanel which shows the statistics of resource usage of your website on the server. It includes CPU usage, Physical memory usage(RAM usage), entry processes, faults, and I/O usage(input/output usage) according to time frames.
The following message will be displayed if you reached/exceeded your CPU, memory, or entry process limits within 24 hours: “Your account has been limited in the past 24 hours”\
Click Details to get an overview of what was limited. Below this, you'll see a number of graphs that visually represent resource usage. We recommend you investigate further and fix any code/caching issues before your site shuts down completely.
**View CPU Usage in cPanel**
To check CPU and RAM usage in cPanel, follow these steps:
* Login to your Cpanel.
* For a quick view, in the right-hand sidebar, scroll until you see CPU Usage.
* For detailed information, scroll down to the Metrics section and click Use of resources
* You will be redirected to the resource usage overview there you want to click on the “Details” link.
* By clicking on Details you will see statistical charts of the detailed resource usage breakdown.
You can view the usage for the current day, week, or month. Switch to the desired period to see a more detailed report. The Usage Report section shows how stable was the usage of CPU/RAM during the specified time frame.\
Once you have checked your website then you can optimize it accordingly or upgrade it as the case may be.
**What to do When you Exceed Your Resources**
If you exceed the resources of your package, you can resolve this by following the steps outlined:\
Review all plugins, modules, or themes and upgrade them to their latest versions.\
Contact your web developer to optimize your website
If after trying these fixes, the resource limit did not drop, you might need to upgrade, do well to contact support
It is important to be aware of the server resources your website is using so you can know when to optimize or upgrade your website. An optimized website will load faster and improve the performance of your website. When you consistently go over CPU and RAM limits, you get a warning email or temporary suspension depending on how severe the usage is.
# How to Configure and Manage WebDAV Web Disks With cPanel
Source: https://kb.verpex.com/cpanel/how-to-configure-and-manage-webdav-web-disks-with-cpanel
Webdav(Web Distributed Authoring and even Versioning) is a protocol that is used for easily accessing your files on the web from your desktop. It allows you to set up a folder on your computer that connects directly to your hosting account, enables collaboration between authors, and manages and edit files on the web using compatible applications as if they were on your local computer.
Web Disk is cPanel & WHM’s implementation of the WebDAV protocol. cPanel automatically creates a Web Disk balance for users to manage files in their home directory remotely. It provides tools for configuring Web Disk accounts and users can create additional accounts as needed to share directories within their home folder. WebDAV has similar capabilities to other network disk and remote file management systems, such as SMB and FTP. However, unlike these technologies, WebDAV is based on an extension of the web’s native HTTP and HTTPS protocols.
WebDAV’s “versioning” abilities are designed for simple collaborative editing, but if you are looking for a modern code version control system, cPanel’s Git™ integration is a better option.WebDAV is also the basic foundation of the CalDAV calendar using CardDAV contact features. CalDAV enables a client to access calendar and scheduling information on a remote server, while CardDAV is an address book protocol that allows users to access and share contact data on a remote server. Microsoft® Windows® and macOS® support WebDAV natively, and there are many compatible apps available for Android™ and iOS®.
If you want to access storage from Microsoft Windows, you must first enable digestion authentication.
**cPanel WebDav Digest Authentication**\
Click Configure Client Access to connect a client to your main Web Disk account
**cPanel WebDav Configure Client**\
The system automatically detects your operating system and provides a direct link to configuration instructions. If identification doesn’t work, you are allowed to choose your configuration options
**cPanel WebDav Connection Instructions**\
Custom Web Disk configuration scripts for macOS Finder, Microsoft Windows Explorer, and Linux file managers Nautilus and Konqueror are readily provided. All you need to do is download and execute the script on your computer, and ensure the script is modified to make it executable.
**cPanel Web Disk Configuration Script**\
This script makes it easy to view and edit files as if they were stored locally.
**cPanel Additional Web Disk**\
cPanel deploys the Web Disk after clicking create thereby making the files accessible
**Importance for WebDAV**
* Manage and edit web server files on a local computer.
* Developers, designers, and content writers can collaborate while working on a site.
* File-sharing within an organization.
* Network-attached storage accessed via local machines or other servers.
**How to Configure Client Access**\
WebDAV client application and the process of accessing WebDisks differs from one operating system to the other. Follow the steps below to download the configuration script for a supported operating system.
* Log into cPanel
* Locate the Web Disk interface (cPanel » Home » Files » Web Disk).
* Click Configure Client Access(This will display the configuration information for the account chosen)
* You can click Enable Digest Authentication if your SSL Certificate is not valid, however, Windows Vista®, Windows® 7, Windows® 8, and Windows® 10 require you to enable Digest Authentication
* Select the connection type
* Choose your Operating System(The system may automatically detect your computer's operating system.)
* Click Download Configuration Script
* Open the file and allow it to run in order to configure the Web Disk.
**Deleting Additional Web Disk Users**\
If you have given a new user access and they have completed their task and no longer need access, you should remove their access. You can remove their access by following these steps:
* Login to your cPanel.
* Locate the Files section for Web Disk.
* Navigate to Manage Additional Web Disk Accounts.
* Click Delete(cPanel will ask you to confirm the action, just click Delete Web Disk Account and the user will be removed)
**Connect with Mac OS X**\
To connect to Apple® operating systems (for example, macOS® X or Sierra), follow these steps:
* Go to Apple’s Finder application.
* Under the Go menu, select Connect to Server.
* Enter the Web Disk server’s URL in the Server Address text box
* Click Connect button
* In the "WebDAV Authentication" window, enter your Web Disk account’s username and password.
* Click Connect.
* Double-click the Web Disk space icon to open it.\
The public\_html folder will appear in your Web Disk space.
**BitKinex**\
Follow these steps to connect Web Disk with BitKinex
* Open BitKinex.
* Click Http/WebDAV.
* Enter your Web Disk account’s login information. The new connection will appear in the BitKinex list.
* Double-click your site’s name to open your Web Disk.
On mobile operating systems, including iOS and Android, you will have to install a third-party application that supports WebDAV( Documents for iOS and WebDAV Navigator)
WebDAV Web Disks are just one of the many ways cPanel & WHM empowers web hosts to offer a feature-rich web hosting experience.
# How to Create a phpinfo
Source: https://kb.verpex.com/cpanel/how-to-create-a-phpinfo
Learn How to Create a phpinfo Page
PHP is a fundamental coding language for WordPress users. Even if you're not a developer, you might need to understand this a bit to keep your site running. PHP has many environment variables that you can update as needed. However, if you don't know where to look, it can be challenging to find even the most basic PHP information for your WordPress installation.
phpinfo() is a PHP function or code snippet that takes one or more parameters and returns a value, providing valuable information for debugging your site. Running phpinfo() allows you to easily display all available information about your site's PHP configuration. This includes versions of your PHP, Apache/IIS, GD etc. A phpinfo page gathers a lot of useful information about your PHP configuration. For example, you can check if your PHP configurations meet the requirements of any software you want to run on your server or if you need to update your PHP memory\_limit to prevent certain scripts from running out of memory.
In this tutorial, we'll show you how to create a phpinfo page to display your hosting account's current PHP settings through your cPanel. Fortunately, the installation takes a few minutes and a line of code to execute.
* Log into your cPanel.
* In the Files section of your cPanel, open the File Manager option.
* Click “public\_html" folder and navigate to the directory you are working with
* In the top menu, click on the +File option to create a new file.
* Enter phpinfo.php
* \*Note the file name can be anything you want, only the extension must be .php (FileName.php).
* Find the phpinfo.php file in your list of files (it should update automatically).
* Right-click on it and click Edit.
* Enter the following code into the phpinfo.php file.
```text PHP Info theme={null}
```
* Then click Save Changes.
How to View your PHP Settings\
Now that you have created the phpinfo page, we’ll show you how to access it and view your PHP settings.
You can now access this page from your browser. If you created the file in your public\_html folder, you should visit [https://testing.com/phpinfo.php](https://testing.com/phpinfo.php).\
Be sure to replace testing.com with your actual domain name.\
To find the specific value for a parameter, search the page for what you are looking for.\
WARNING: Your phpinfo page has many PHP settings that you do not wish to broadcast to the world.\
When you are done using the file, be sure to delete it.\
Another path you can take instead of deleting it however is to name the file something other than phpinfo.php. Since phpinfo.php is such a common name, ‘bots’ on the web will randomly search for files named phpinfo.php. Setting the file name to something like 7845734554.php would never be guessed by a bot (so no one would ever find it) but it might be hard to remember this in the future.
You have now learned how to create a phpinfo.php file and verify PHP information through your hosting control panel or default browser.
# How to Create an FTP Account
Source: https://kb.verpex.com/cpanel/how-to-create-an-ftp-account
FTP is a protocol used to transfer files between your hosting account and your local system.
An essential part of the process of setting up the website is to publish it online, which includes uploading its files to the server where the website is supposed to be located. One of the quickest and easiest ways to do this is to access the server via FTP. . For users to connect to the host server via an FTP client, they must have access rights to this server. These authorization access rights are assigned to users as an FTP account. Each FTP account consists of a unique username and password that allows users to access files in the cPanel account. By default, you already have an FTP account in your cPanel which you can log in with your cPanel username and password.
You can create new FTP accounts to provide access to other users without providing them with cPanel login credentials. For each additional FTP account created, you can also assign each user different levels of access by assigning the user to a specific directory. All our hosting plans allow you to create unlimited FTP accounts for your service.
Follow the instructions below to create FTP accounts
* Login to your accounts cPanel from your client area
* Once logged in, use the search and click the FTP Accounts button
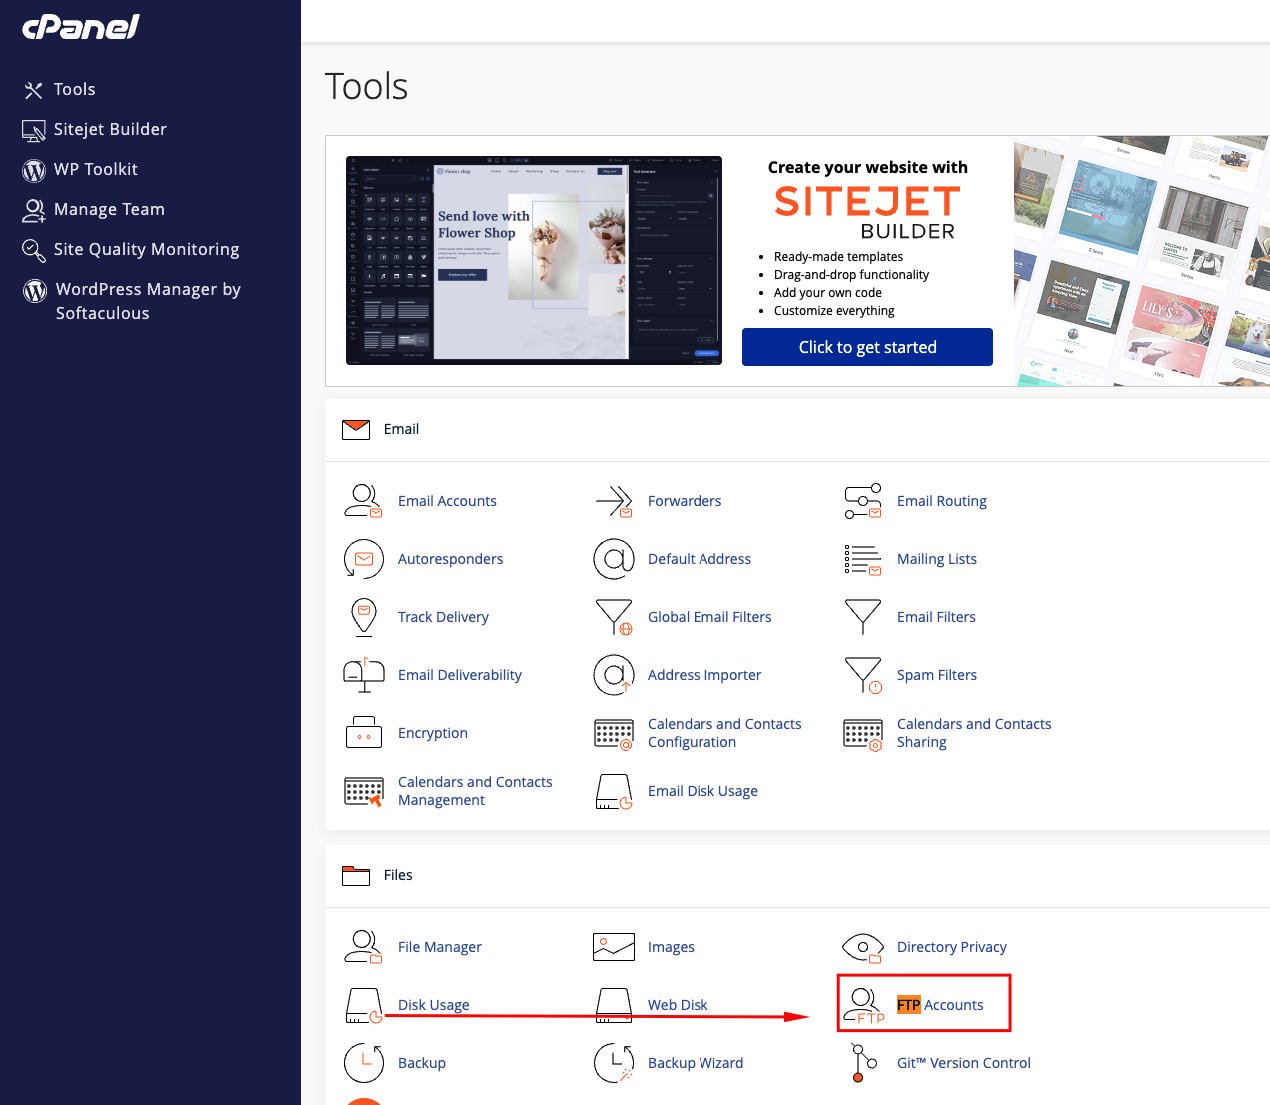
* From the FTP Accounts interface in cPanel fill in the provided fields to create your new FTP user.
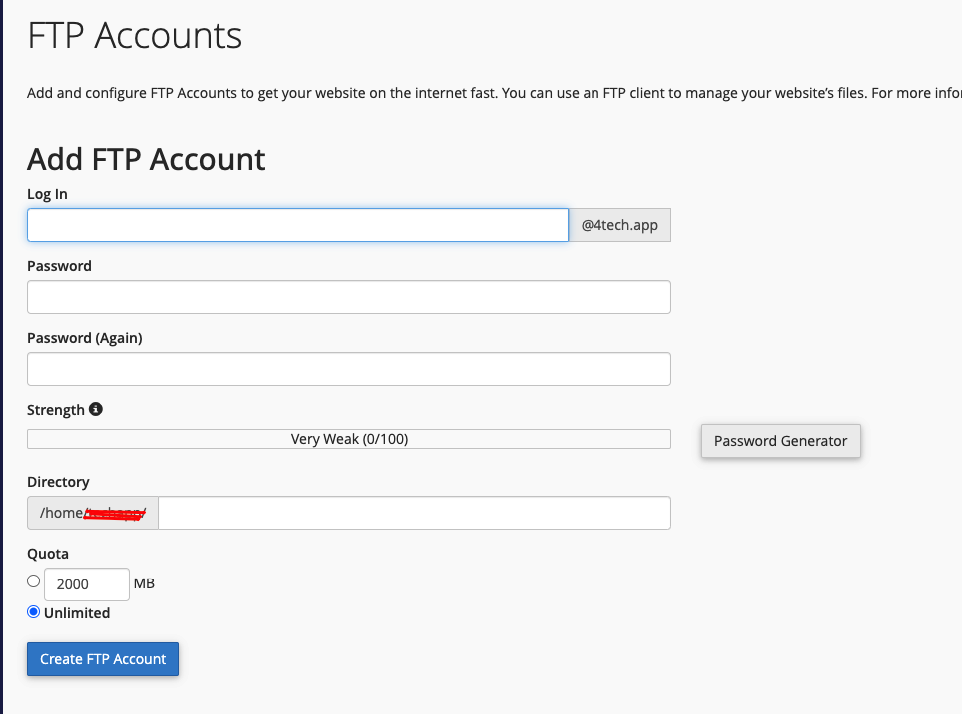
**Log In**: Enter your desired username, this will be your FTP username\
Domain: If you have more than one domain, select the domain this user should be tied to from the drop-down arrow\
**Password**: This will be the password used to authenticate with your FTP user. The password must be a strong password, you can generate the password using a password generator\
**Strength**: This field informs you about the security of your password. The strength level could range from Very Weak to Very Strong.\
**Directory** : This is the default directory on your web hosting account that the FTP user will\
connect to and upload files to when you create an FTP account, it is limited to the directory specified here. cPanel will automatically populate an assumed directory based on your FTP username. You can remove everything after public\_html/ and provide the directory you want the user to go to.\
You can also type a single / and the user will have access to your home directory this is going to be everything outside of the public\_html folder).\
**PLEASE NOTE**: The FTP user will not be able to browse outside of the specified directory. However, he will be able to access all the files and subfolders in this folder. It is possible to determine the access level of a user.\
**Quota**: The maximum size of the total number of files this FTP user can upload and store in their default directory, you can limit the disk space available to an FTP user here or set it to Unlimited
When all the required fields have been completed, click on the **Create an FTP account** button to add the new user. A message will appear indicating "Account created" and your new FTP account will appear in the FTP Accounts section.
# How to Create an Index Page
Source: https://kb.verpex.com/cpanel/how-to-create-an-index-page
The index page, also known as a site's main website, is the URL or local file that is automatically loaded when you start a web browser and click the browser's "Home" button. When creating your index page, you must use one of the following names.
index.html\
index.php
Creating an index page is a useful solution to create a Website coming soon page with your email address, phone number, hours of operation, etc.
Steps to Configure a custom index.html file
* Log into your Hosting cPanel.
* In the Files section, click File Manager
* Locate the current index.html file in the public\_html folder and click the Edit button.
* If the index file does not exist, Click the + File button at the top of the page to create a new file.
* Type index.html in the New File Name field and click the Create new file button
* Select the newly created index.html file and click Edit.
* You can insert text, change fonts, sizes, colors, upload images, insert hyperlinks, etc. for example ‘We are currently performing maintenance’.
* Once you have created the index.html file the way you want, just click Save in the top left corner.
* Return to the browser and reload the page to view the changes you just made.
Go visit your domain name in a browser and you should see your new page. Make sure you have the index page in your public\_html directory, otherwise your site will not display correctly in the browser.
Make sure you have the index page in your public\_html directory, otherwise, your site will not be shown in the browser correctly.
# How to Create an 'Under Construction' Page in cPanel
Source: https://kb.verpex.com/cpanel/how-to-create-an-under-construction-page-in-cpanel
When building a website, you do not want your visitors to see what is going on at the backend. In this case, you may decide to place an under construction page or in the case you want to make changes you can place a maintenance page and this can be done in the cPanel.
**Steps on how to create an "Under Construction" page in CPanel**
To create an "Under Construction/Coming Soon" page in cPanel, you can follow these steps:
* Login to your cPanel account.
* Navigate to the "File Manager" option in the "Files" section.
* Click on the "New File" option in the top menu bar.
* Enter a filename for your page, such as "index.html" or "comingsoon.html".
* Click on the "Create New File" button.
* Right-click on the newly created file and select "Edit" from the drop-down menu, you can use HTML Editor
* Copy and paste one of the following codes:\
**\
This page is under construction\
Under Construction page\
Coming Soon page**
* Save your changes and exit the file editor.
Once you have created your "Under Construction/Coming Soon" page, you will need to make it the default page for your website. To do this, follow the instructions in our[ knowledgebase article.](/cpanel/how-to-change-your-default-index-page-in-htaccess)
# How to Create Separate Database Access
Source: https://kb.verpex.com/cpanel/how-to-create-separate-database-access
This is very useful when you want to provide access to one database only within the Cpanel account.
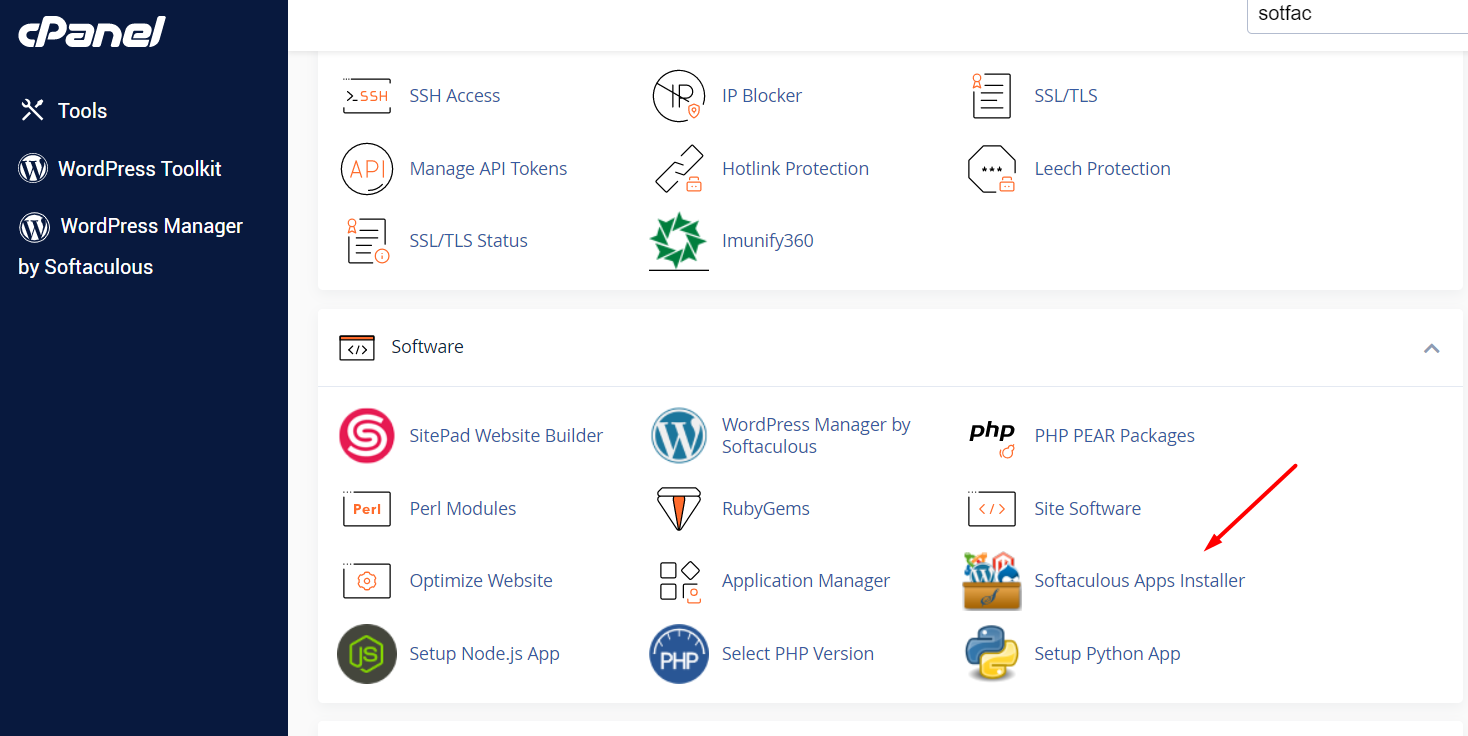
You need to create separate phpMyAdmin access though the Softaculous App Installer.
Then install direct phpmyadmin access under your site ulr (like [https://newdomain.com/phpmyadmin/](https://newdomain.com/phpmyadmin/)), and use it to connect with the database credentials set for your site.
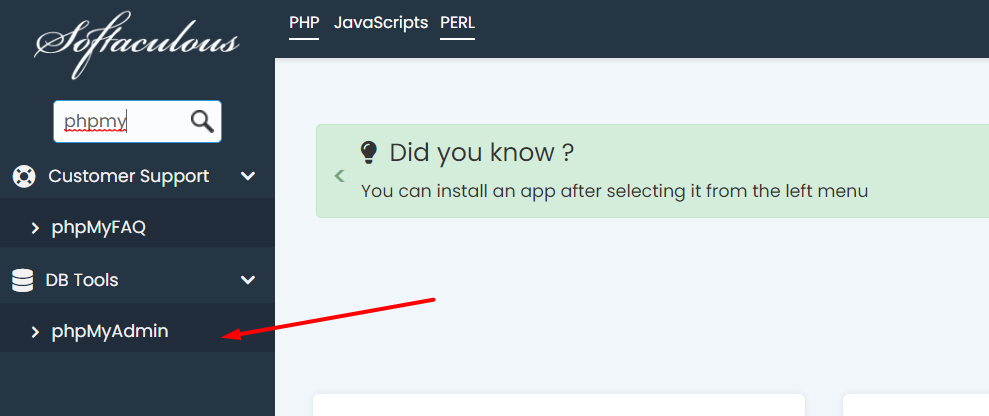
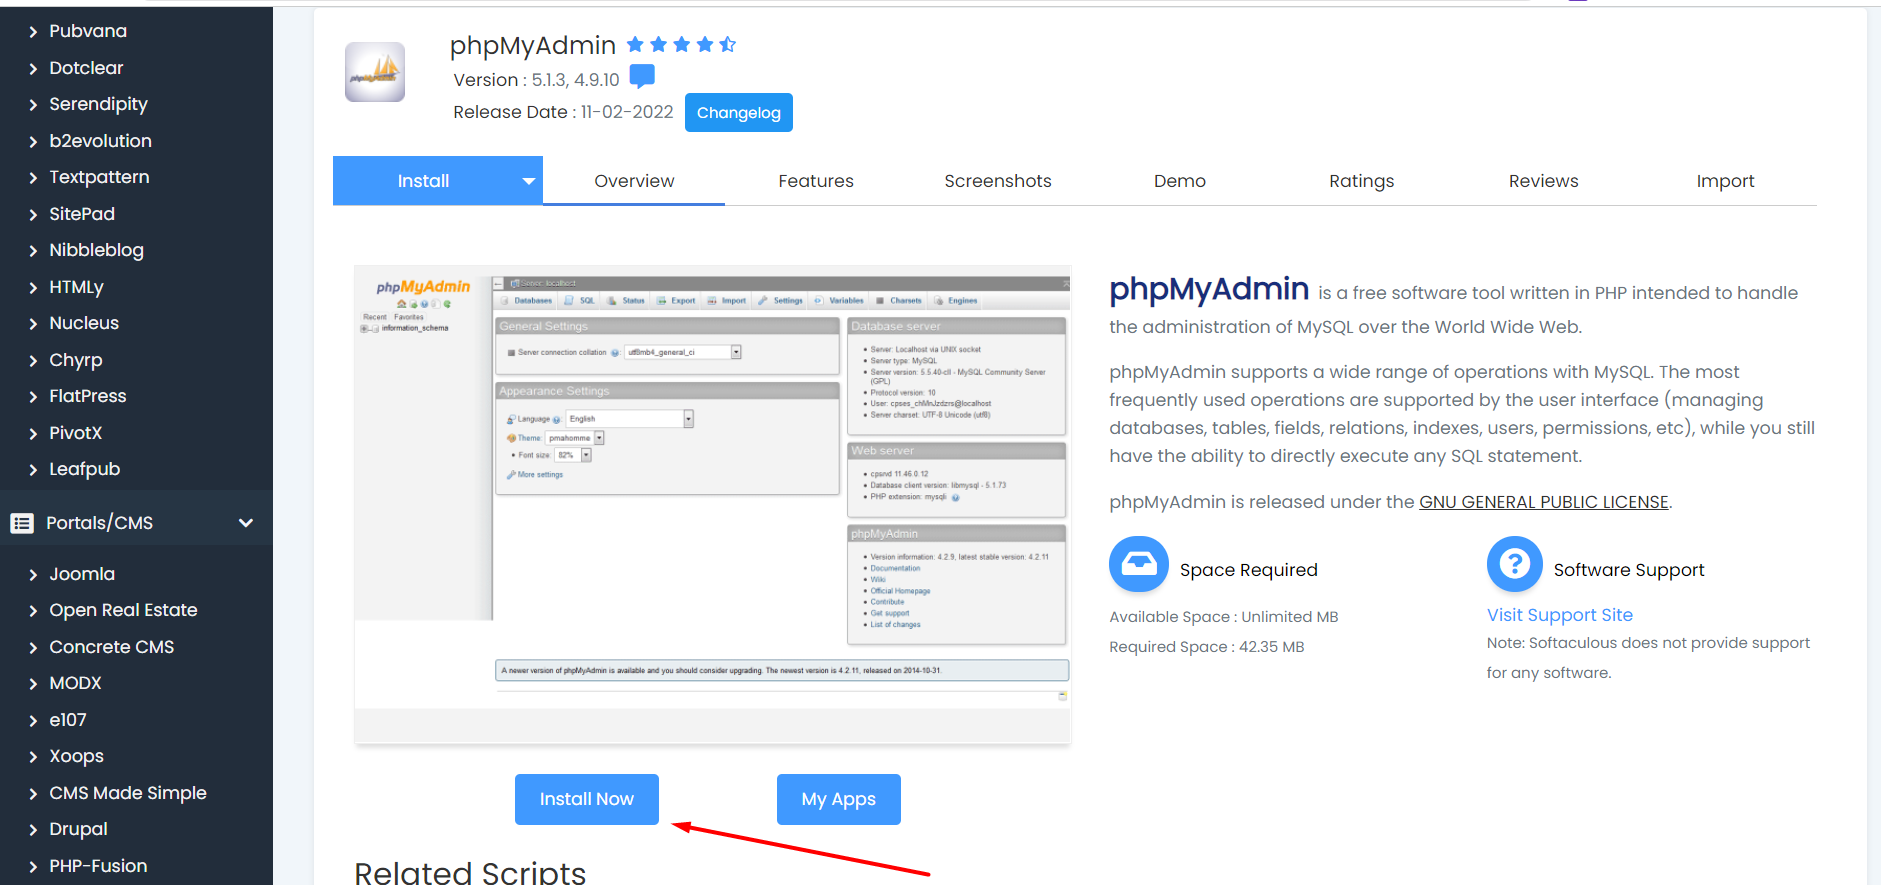
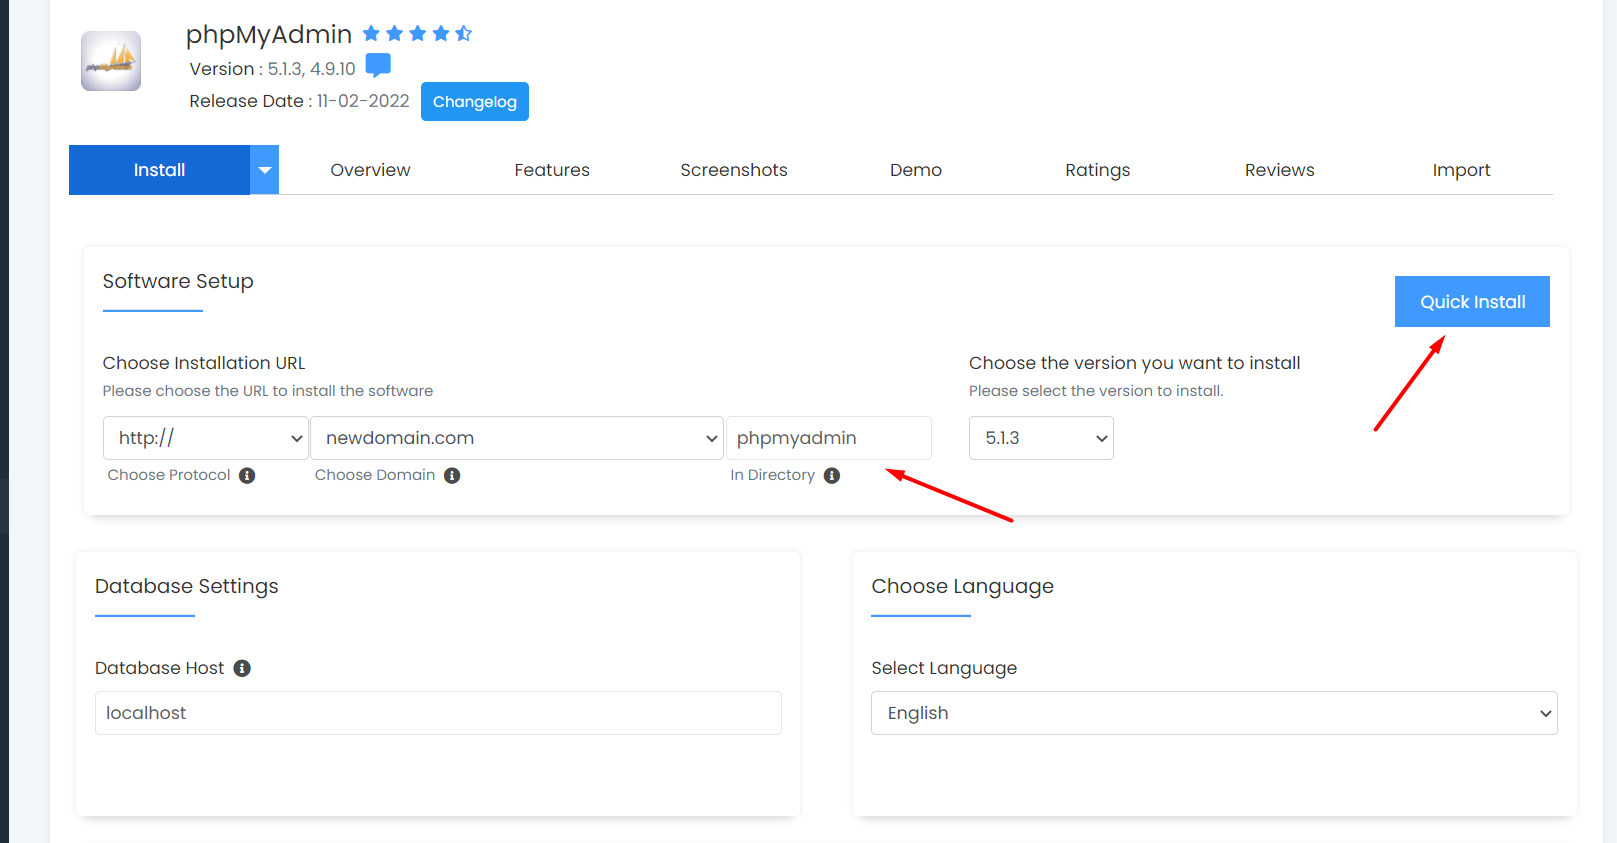
You can check how to create MySQL Databases and Users [here](/cpanel/creating-mysql-databases-and-users)
# How to Edit Your DNS Records with Verpex
Source: https://kb.verpex.com/cpanel/how-to-edit-your-dns-records-with-verpex
DNS stands for Domain Name System. It is a system that allows you to connect to sites by matching domain names that are readable by humans with a unique ID of the server where a site is stored.
A Domain Name System can be viewed as the phonebook of the Internet. The domain names are listed with their matching identifiers, which are called IP addresses, instead of listing names of people with the number of their phone. When a domain name is entered on a device by a user, it looks up the IP address, and it connects them to the location that is physical and where that site is stored.
Each device that is on the Internet has its own IP address that helps other devices identify it. This IP address is a string of numbers with periods between them, and it’s quite lengthy. These strings of numbers won’t tell you anything about the actual website and are pretty hard to remember, which is why domain names were created in order to solve this problem. With domain names, users can now remember the names of their favorite websites more easily, and instead of a bunch of numbers, users can use the alphabet.
A DNS helps in translating the domain names into IP addresses, and your device is pointed in the correct direction. A domain name alongside its corresponding IP address is called a DNS record. The best thing about DNS is that it lets owners of the website move their site without actually having to change their domain names. Registering your domain with your hosting provider would be the best. The reason for this is that using your own hosting provider eliminates changing nameservers or transferring a domain name.
In order to change the DNS settings of your domain name from Verpex, make sure that your nameservers are correctly pointing to us:
```
ns1.mysecurecloudhost.com
ns2.mysecurecloudhost.com
ns3.mysecurecloudhost.com
ns4.mysecurecloudhost.com
```
You can log in to your hosting plan with us once you have your DNS pointing to us. There, in cPanel, you will see a button that says Zone Editor.
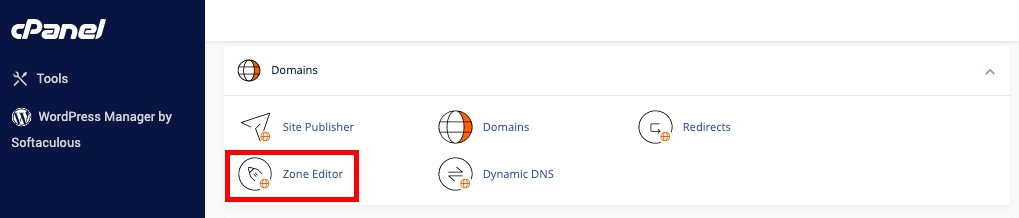
## How to Edit Your DNS Records with Verpex
Your DNS can be managed from the cPanel Zone Editor, by editing or deleting existing records or adding new ones.
As soon as you save your changes, your new DNS settings will begin to propagate. Each Internet Service Provider updates at a different rate, and it usually takes from 24 to 72 hours to complete worldwide. Depending on the visitor’s Internet Service Provider and your web traffic will be directed to either the new or old host.
If you have any questions in regards to adding new DNS records or editing existing ones, or in case you need any assistance with these things, you can contact our customer support any time of the day.
# How to Fix a Contact Form That Isn't Working
Source: https://kb.verpex.com/cpanel/how-to-fix-contact-form-not-working
My form is not sending emails from my clients. How can I fix this?
You must ensure that you have set a valid email address in the widget settings. Check your browser's error console for Javascript errors and fix them. This should fix the issue if one of your servers is not configured to send emails or you need to change your contact form settings.
Let's take a look at what could be causing the problem.
1.**Emails are Sent but end up in Spam**
As spam becomes more common and smarter, email providers are tightening restrictions on emails reaching your inbox. If an email fails these checks, it may be marked as spam or blocked altogether. The first thing to check is to make sure the emails don't end up in your spam or junk folder. If you received an email, it means that WordPress can successfully send emails to your web server. Some email clients may identify WordPress emails as spam because they are automated. If the email is going to spam, you can ask your users to whitelist your emails by adding your email address to their contacts. In Gmail, adding the address to contacts and moving the email to the inbox will avoid it from being sent to spam in the future.

If your domain name has not been properly authenticated for emails, your emails will go to spam. You can verify the correct authentication records(SPF records) in your hosting account and update them appropriately.
If you are not receiving emails yet, it is likely that the contact form plugin is misconfigured or there is an incompatibility with your plugin. You can always contact the plugin developer for help. Let them know that you ran the test above and the email is working on your WordPress installation. Or continue with the steps below.
2.. **The Contact Form Plugin is Sending Spoof Emails**
If you have tested the above and emails can still not be sent out, there is a problem with the plugin sending emails, it will most likely be a contact form plugin. The reason contact form email is sometimes seen as spoof is that they are sent from an address other than the one that’s added to the From field in the email you receive.
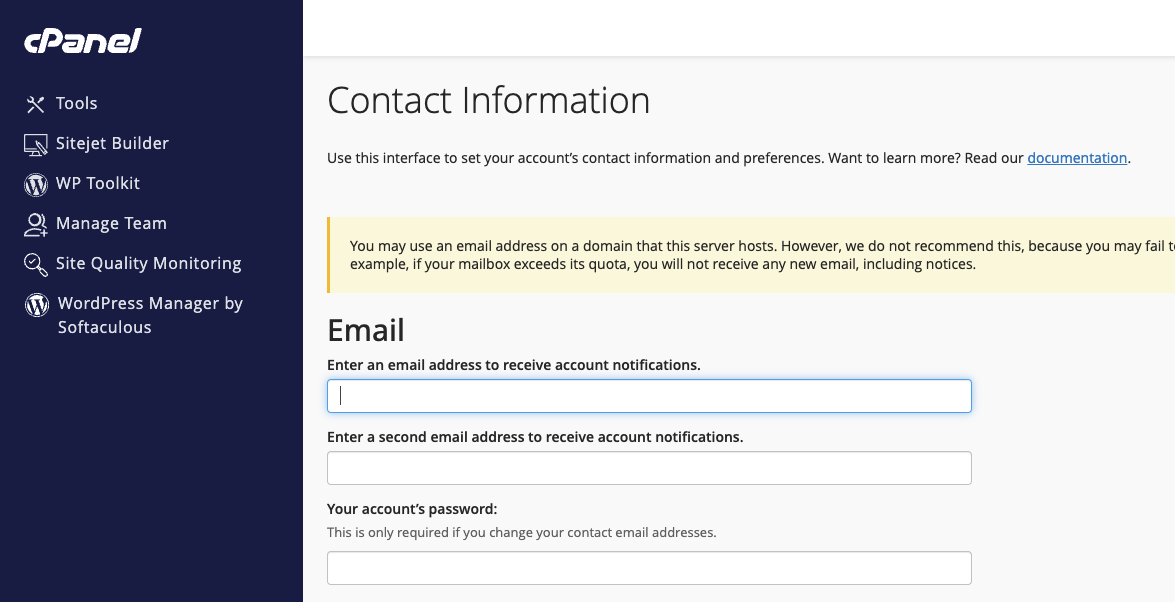
Problems can also arise if emails are sent to and from the same email address. So if the forms plugin sends emails from your admin email address (which will be the default) and you've configured it to send them to that address as well, some email providers may not like it. This is less likely to be a problem than the email spoofing issue. This means you can change the contact form plugin settings to fix this issue and you can easily check if the emails are received.
3.**Incorrect SMTP/Server Configuration**
The contact form failure is not caused by the plugin itself, but rather by incorrect email settings or SMTP configuration. Using an SMTP plugin, you can easily integrate your WordPress site with your preferred mailer.
Another common reason is that your server isn’t configured to send emails. Web servers are not designed to send emails and your server may not be configured to use the PHP mail() function. The good news is that you can easily check if this is the cause of the problem and fix it.
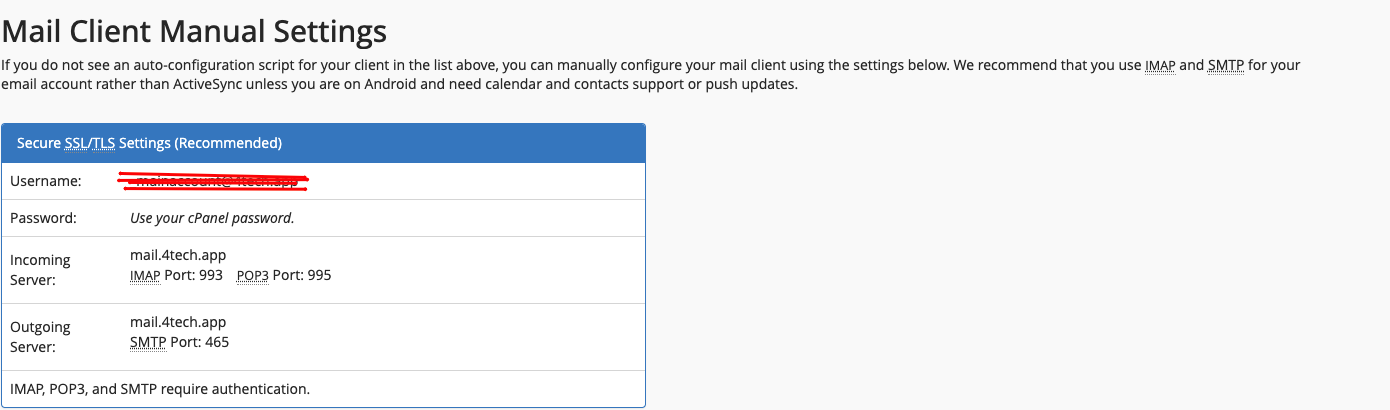
**How to Test if the Server Is Sending Emails**\
Run a test using the free Check Email plugin(this is a basic plugin designed to test if your WordPress installation/ server can send emails) on your WordPress site. Once the plugin is installed, go to Tools > Check Email in your WordPress dashboard. Enter an email address to send a test to, and click Send test email.
It might be some other functionality issue in your hosting server, you can temporarily change your PHP version to test if there is a compatibility issue. This can be done within your cPanel dashboard. If you have connection problems, you may also need to try another port. Your host may be blocking the port.
# How to Force SSL
Source: https://kb.verpex.com/cpanel/how-to-force-ssl
You just installed SSL and you cannot find the secured padlock and HTTPS in front of your domain.\
In fact, your domain still loads with HTTP and the insecure icon is indicating to visitors to beware of your site. Not to worry, this might be due to some insecure links on your website and you need to manually force SSL on your site.
You need to confirm you have the SSL installed on your site. To do this, visit [sslshopper.com](https://www.sslshopper.com/) to confirm SSL has been installed, then proceed to check why it is not secured with a padlock on the browser using [https://www.whynopadlock.com/](https://www.whynopadlock.com/)
Simply type in the full URL into the box below and get a report about your website SSL to know if it is fully installed.\
Click **More Info** in front of **Force HTTPS**, copy and save the code in your notepad as you need to save this code in your .htaccess in your cPanel.
Go to File Manager in your hosting panel.\
Inside the public\_html folder, open .htaccess. If you can’t locate it, make sure to create or unhide it.\
Scroll down to find RewriteEngine On and insert the following lines of code below it (replace verpex.com with your own domain):
```text theme={null}
RewriteEngine On
RewriteCond %{HTTP_HOST} verpex.com [NC]
RewriteCond %{SERVER_PORT} 80
RewriteRule ^(.*)$ https://verpex.com/$1 [R,L]
```
Save the changes.
Go back to your browser, refresh the page to view your site, you can also refresh your information on [https://www.whynopadlock.com/](https://www.whynopadlock.com/)
# How to Forward a Domain
Source: https://kb.verpex.com/cpanel/how-to-forward-a-domain
Domain forwarding, sometimes called redirecting, pointing, or connecting, lets you automatically direct the visitors on your domain to a different location on the web. Forwarding is a World Wide Web technique that makes a website available under more than one URL address. When a visitor from a web browser tries to open a URL that has been redirected, it opens a page with a different URL.
You can forward a domain by using one of our hosting plans and a domain slot that is inside them. Once your hosting plan has a domain added to it, you will need to click on the Redirects button. After you’ve clicked the Redirects button, from the second drop-down, you will need to select the domain name.
If you want to redirect the whole domain, leave the document root empty. If you want to redirect only a specific folder inside it, enter the path. For instance, you could enter http\://public\_html/wp-admin/.
The final step is to enter the target URL you want to redirect to in the last field. It will take about five to ten minutes for the changes to take full effect once you have saved them.
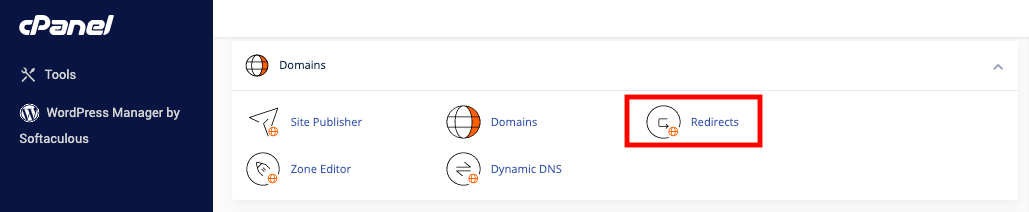
Domain forwarding has two options it offers, and those are forwarding only and forwarding with masking. Visitors will be redirected with both options. However, there are additional features you can use with forwarding with masking.
Forwarding only keeps the destination URL in the browser address bar, and it redirects your visitors to a URL destination that you choose. For instance, you can assign example.com to forward only to example.net. When example.com is typed in a browser address bar by a visitor, they will be redirected to the site for example.net. The bar of the browser will update to display example.net.
When it comes to forwarding with masking or setting up a domain alias, it allows you to enter meta-tags for search engine information, it keeps your domain name in the address bar of the browser, and it redirects visitors to a URL destination that you choose.
For instance, you can assign example.com to forward with masking to example.net. When example.com is typed in the address bar of the browser by a visitor, they will be redirected to the site for example.net. The browser address bar will mask the destination URL efficiently by continuing to show example.com.
You can redirect HTTP any way you want, and it won’t affect email unless you modify the MX records in DNS. Email forwarding is when an entire list of email addresses for a website is set up to forward to a new domain address. For instance, you can have the email for example.com forwarded to example.net. Businesses and individuals that have decided to change the domain name of a certain website can take great advantage of this option for email forwarding.
# How to Increase Your PHP Maximum Execution Time
Source: https://kb.verpex.com/cpanel/how-to-increase-your-php-maximum-execution-time
An important aspect to remember about PHP programs is that the maximum time to execute a script is normally set to thirty seconds, although the time limit varies from one hosting company to another. Programs that involve sending mail to many recipients or some heavy export or import of files can cause the user to get errors of the maximum time limit exceeds.
You might need to increase the limit for certain scripts your website uses. For instance, migration plugins in WordPress, depending on how big your website is, usually require a longer run time.
Thirty seconds is the default setting, and you can increase that value. Keep in mind that the value is in seconds, so 2 minutes would be 120, 3 minutes would be 180, and so on. To find the correct value, you can check your plugin, script, or theme’s documentation. You can use the phpinfo() function to verify the current value of the max\_execution\_time directive and other directives.
If you’re wondering how to set PHP maximum execution time on cPanel, we’re going to do a quick step-by-step guideline for new learners that want to do this. The first thing you need to do once you log in to your cPanel account using your username and password or you can also log in via Verpex Client Area.
The next thing you want to do is find the PHP Selector button. After you’ve selected this button, you will go to the Options section for the php.ini values and scroll down to max\_execution\_time.
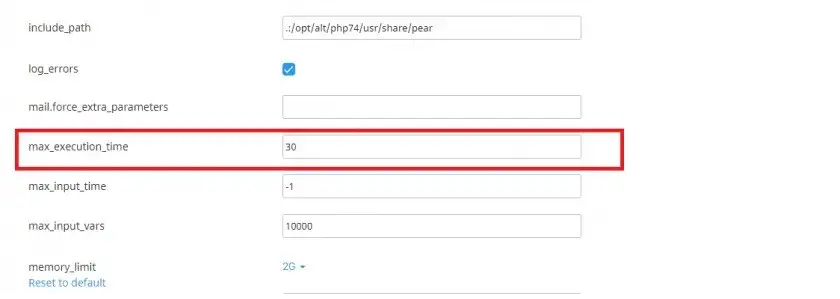
For Unlimited, you set the value to 0. Once you have done the change, make sure that you do a left-click anywhere outside the text input or dropdown box. If you’ve managed to successfully follow the steps we’ve mentioned above, you will be able to see a green box with a message that will confirm that the change you’ve made has been applied.
## Measuring Script Execution Time
The time required to execute the PHP script is the script execution time in PHP. Rather than the CPU execution time, use clock time to calculate script execution time. What will help to know script execution time is knowing the clock time after script execution and before script execution.
Use the microtime() function at the beginning and the end of the script. Then using formula (End\_time – Start\_time). Time returns in seconds with the microtime() function. Execution time depends on the processor, and it is not fixed.
Now you know everything there is to know about increasing the maximum execution time of a script in cPanel. For any further assistance, make sure you contact us so we can help you!
# How to Increase your PHP Memory limit
Source: https://kb.verpex.com/cpanel/how-to-increase-your-php-memory-limit
PHP allocates a certain amount of memory when executing PHP scripts. When the allocated memory is exhausted, the PHP script shows a fatal error
```text Memory_limit error theme={null}
PHP Fatal error: Allowed memory size of xxx bytes exhausted (tried to allocate yyy) in yourscript.php
```
**Please note that the memory\_limit value should be set to at least as big as post\_max\_size.**
Follow these steps to increase memory\_limit in cPanel
* Log into your cPanel from within your Verpex client account
* Locate and **Select the PHP version** menu in the **Software** section
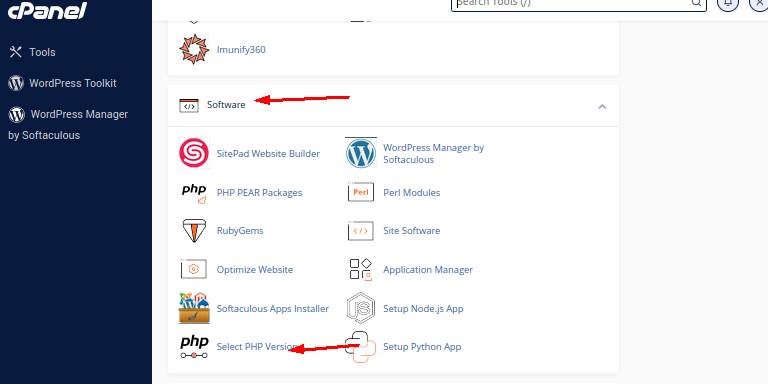
* Click the **Options** section for the php.ini values and scroll down to **memory\_limit**
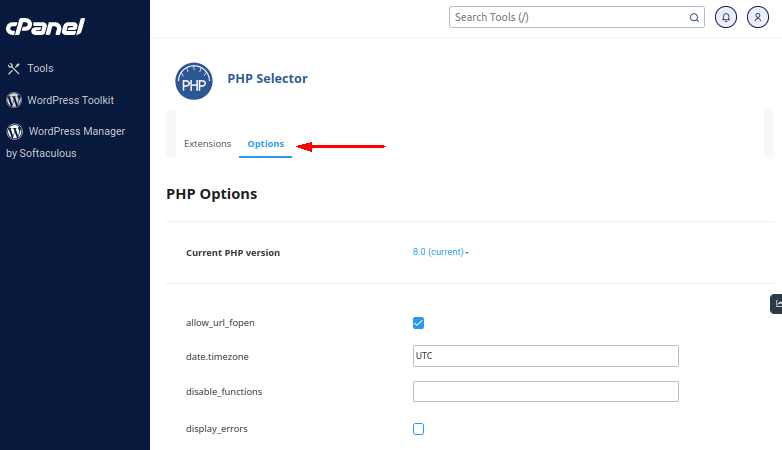
* Set the value to what you want. Once you have done the change make sure that you do a left-click anywhere outside the text input or drop-down box.
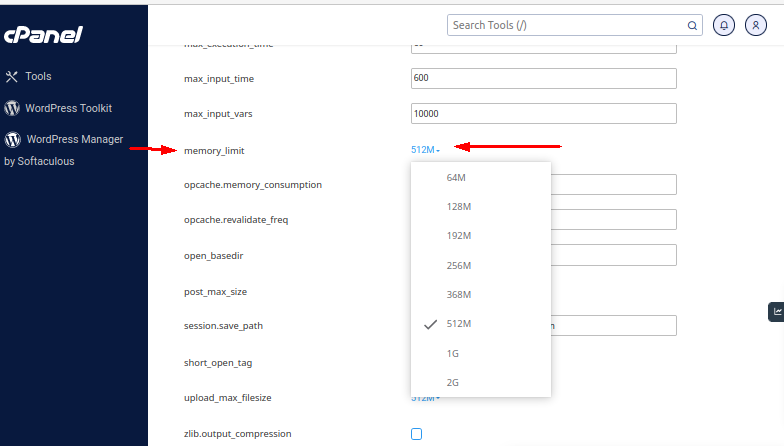
* You will see a green box with a message that will confirm that the change you’ve made has been applied.
You can confirm whether your changes have got into effect by creating a PHP info.php file. To create an info.php file, Follow the steps in this [guide](/cpanel/how-to-create-a-phpinfo).
# How To Install Ruby Gems in cPanel
Source: https://kb.verpex.com/cpanel/how-to-install-ruby-gems-in-cpanel
Ruby Gems are collections of functions that allow you to perform tasks in Ruby, it is a package manager for the Ruby programming language. You will need to install a Gem before you can use it inside a Ruby program. It provides a standard format for the distribution of Ruby programs and libraries.
Without requiring shell access, you can install, view, update, and reinstall Ruby Gems in cpanel.
Follow these steps to install Ruby Gems in cPanel
* Log into your cPanel
* Scroll to Software and Select Ruby Gems
* Type the name of the Ruby Gem in the Install a Ruby Gem field.
* Search for your Gem in the search field
* Click Install Now.\
The Ruby Gem will be added to the Installed Ruby Gem(s) table, where you can update, reinstall, uninstall, or view documentation for each Ruby Gem by clicking the appropriate button.
You can also install a gem by running the command "gem install \[gemname]" via the command line interface provided in cPanel.
**Note:** Gems are installed directly from the RubyForge repository.\
**Warning:** This installer only works for the legacy Ruby installation and does not affect applications that you install with the **Application Manager** interface.
# How to Remove an Addon Domain
Source: https://kb.verpex.com/cpanel/how-to-remove-an-addon-domain
To remove your addon domain from your cpanel, follow these steps:
* Log into cPanel
* Go to **Domains**
* Click the **Manage** icon in front of the domain
* Click **Remove Domain** to remove the domain
# How to Restore Your Website
Source: https://kb.verpex.com/cpanel/how-to-restore-your-website
Almost everyone knows how crucial a website and its content are. Having a full backup of your site in case something goes wrong is not only necessary but indispensable.
Verpex, as one of the best hosting companies there are, offers automatic twice-daily backups to make sure you always have a Plan B. If your website suddenly stops working, you can easily restore it to the time when it last worked properly through the cPanel’s Jetbackup feature.
In this article, we will provide a step by step guide on how to restore your website files and database through Jetbackup 4.
1. First, login to your cPanel dashboard and type in JetBackup 5 on the top right search bar or find the File Backups option within the Jetbackup section.
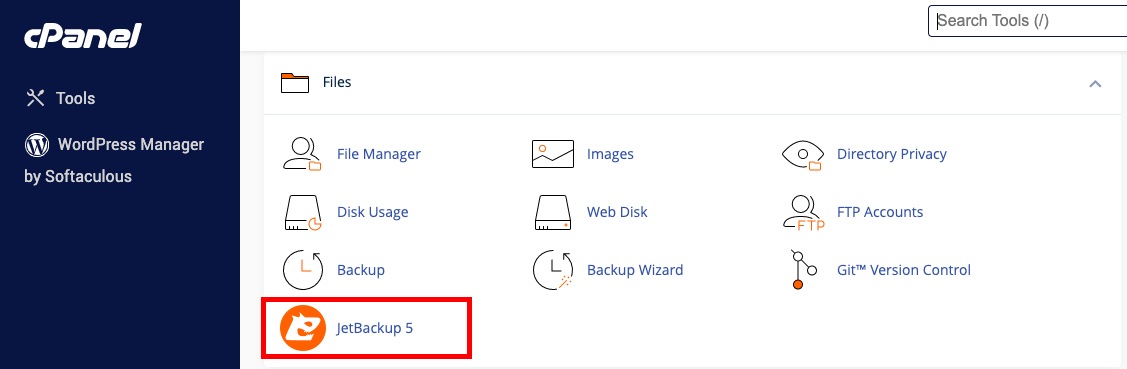
2. You will now be presented by a list of file backups that were taken for your account. Find the version you wish to click restore. In this case, we will pick the most recent backup available.
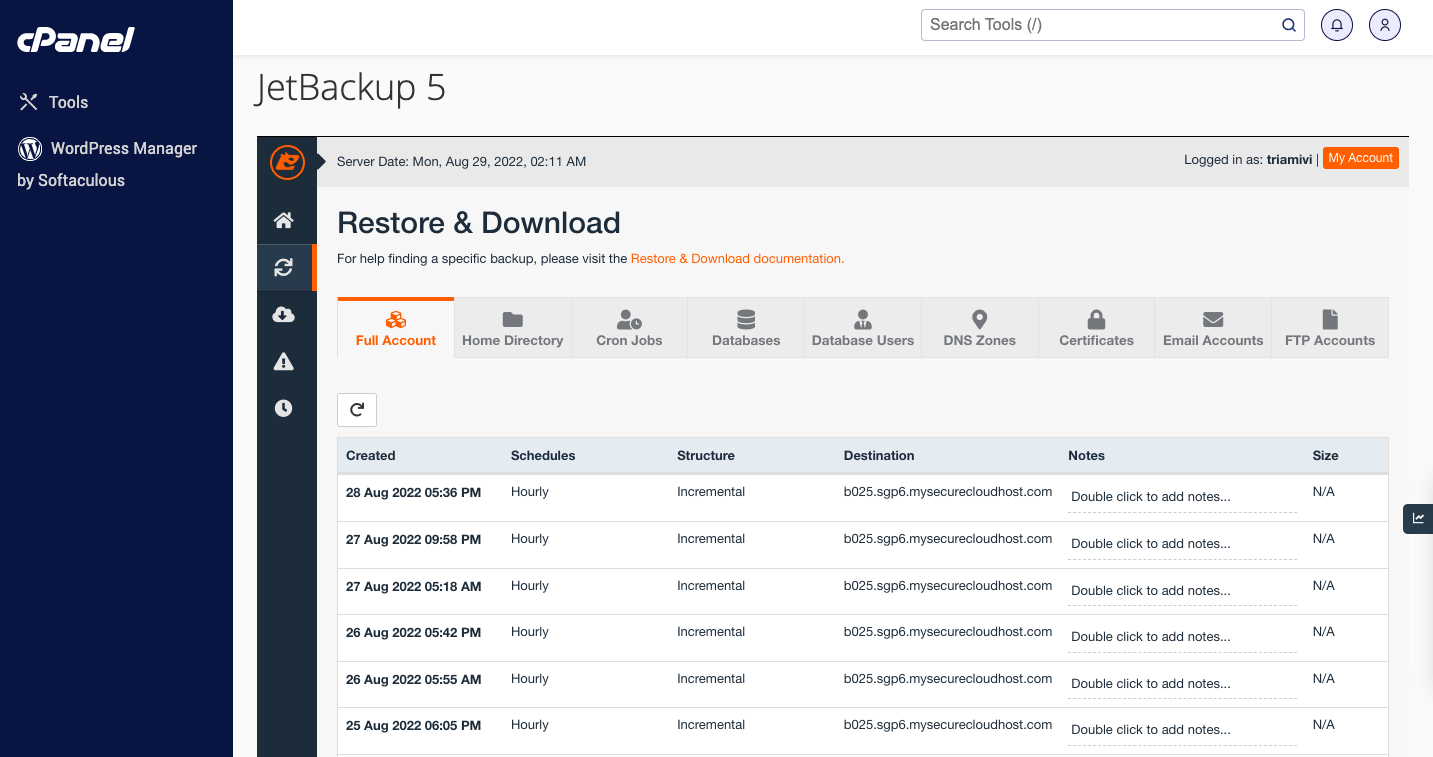
3. Now you will see your account home directory. Normally your website files will be located within a folder called public\_html. So tick on the check box next to its name and click the Restore Selected button. Next there will be another button that appears which you can go ahead and click. Please keep in mind this will overwrite everything within your public\_html folder.
4) Once the restore progress has been initiated, click the Go Back button on this page and the next page so that you will be brought to Jetbackup 5 main page.
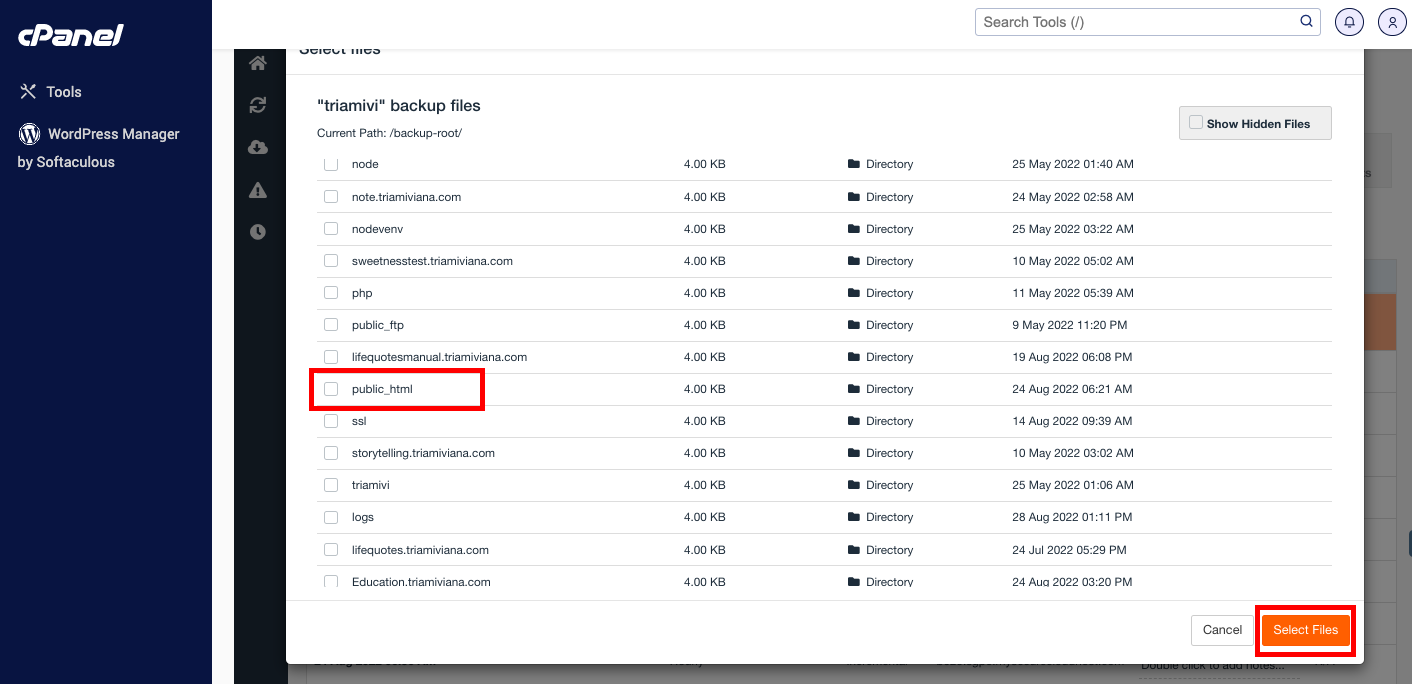
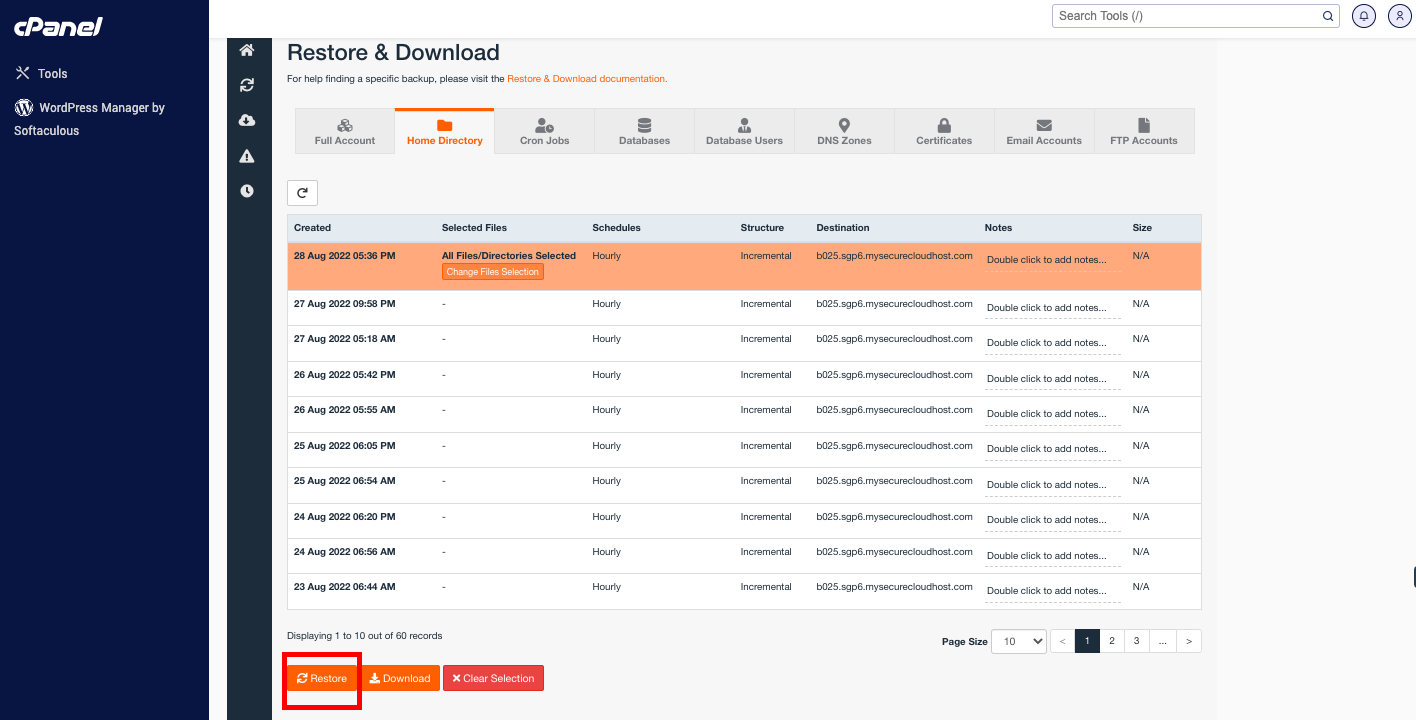
5. On this page, click the Queue option so that you can see the restore progress. Once it’s completed, the status will be updated without you having to refresh the page.
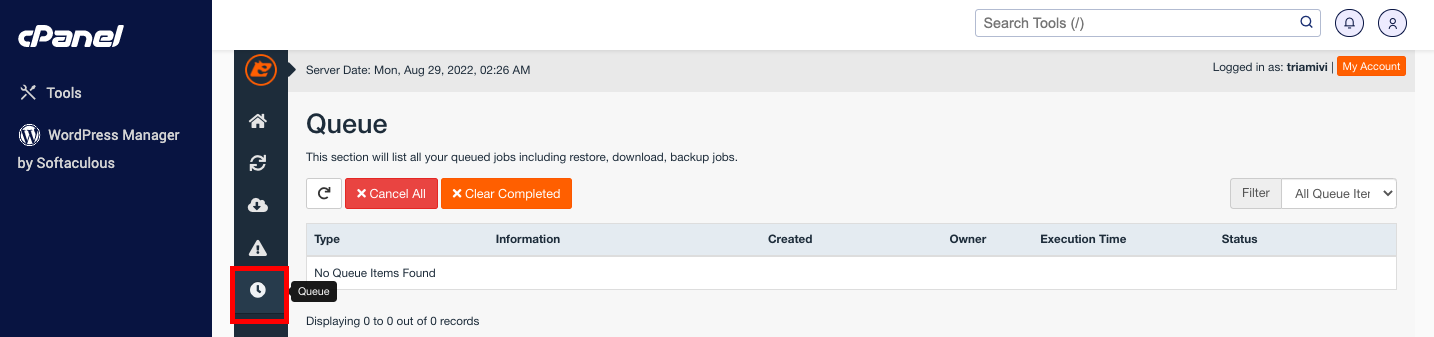
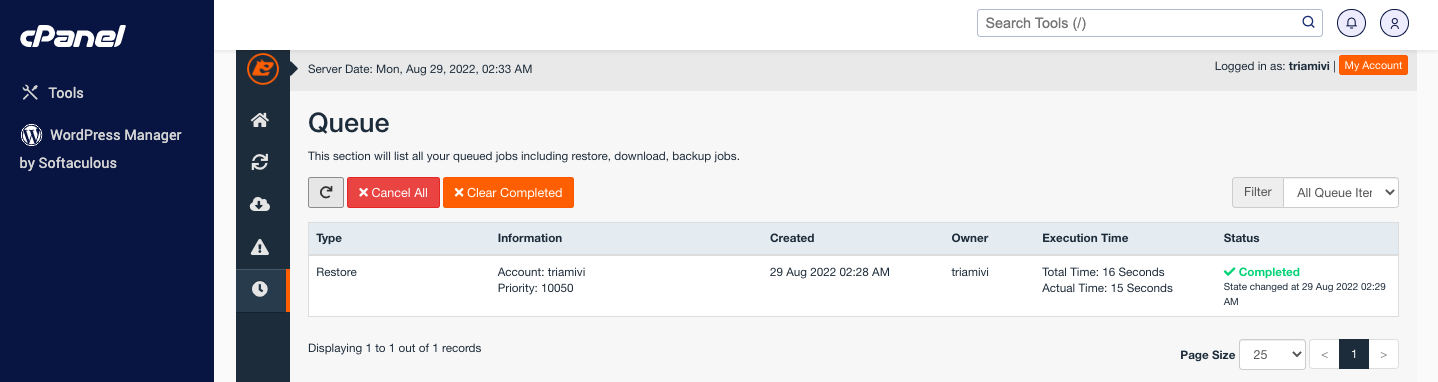
6. Now check your website and see if it loads properly. If you still notice issues, it might be necessary to restore the corresponding database as well. So once again press the Home logo in JetBackup 5 and select Database.
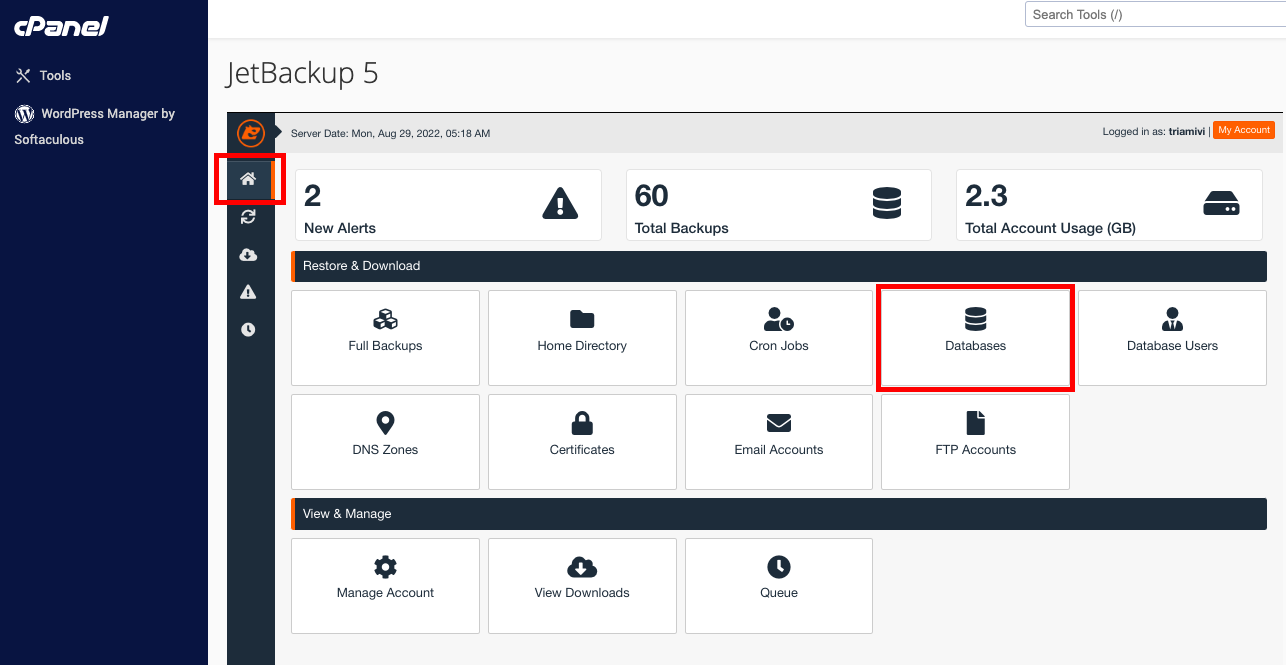
7. You will now see a list of database backups which could be a little overwhelming if you have multiple databases within your account. However, all you have to do is to paste your database name on the search bar. Once you find the appropriate date you’d like the database to be restored to, click Restore.
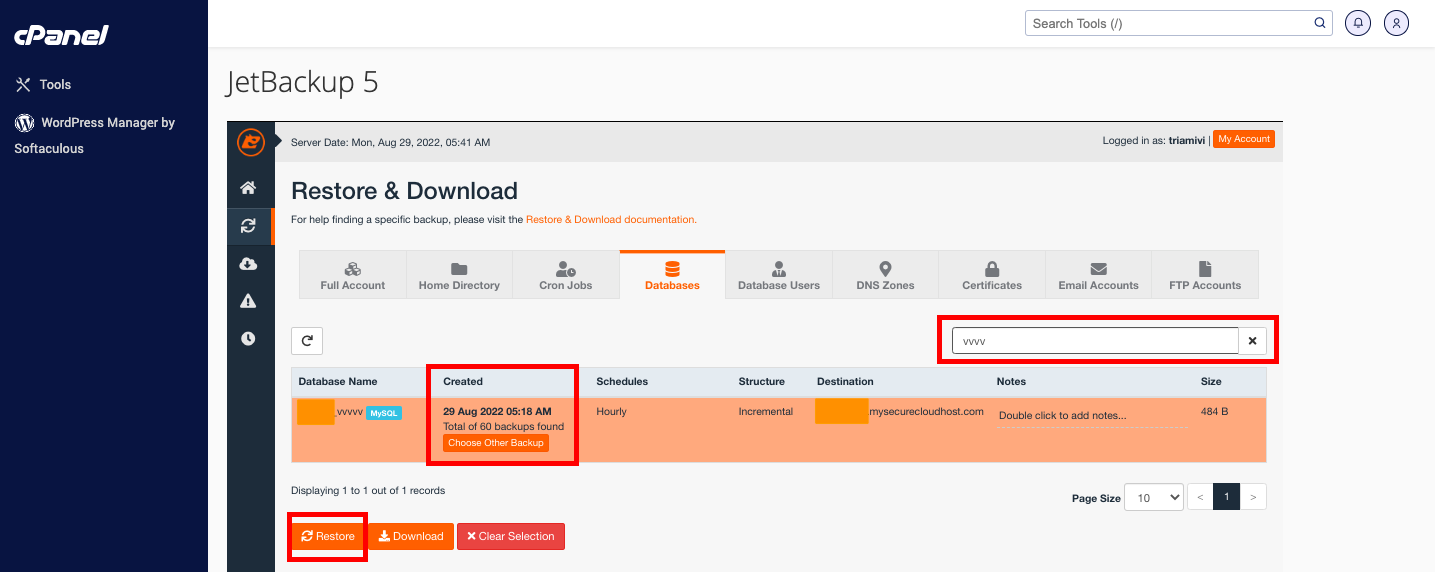
8. You can now go back to the Queue page to view the progress. Once it’s completed, check your website again and it should now display the version of the date you chose to restore from.
Alternatively, you can download a backup of your website on your local machine if you do not wish to restore. The download button is beside the restore button, all you need to do is click the **Download** button and this downloads a copy of your website on your device.
# How to run a Different PHP Version in the Subdomain/Addon Domain
Source: https://kb.verpex.com/cpanel/how-to-run-a-different-php-version-in-the-subdomainaddon-domain
Verpex uses CloudLinux as the operating system on our servers to improve server stability. One of the main features of CloudLinux is that each account can select the PHP version they wish to have for their websites. This is very useful if you have an application that requires a specific version of PHP However, the main drawback of these features is that you cannot set a different PHP version for an Addon Domain or Subdomain in cPanel.
Your website may need to use a different PHP version than the one assigned to your entire cPanel account. Although this is not available using the PHP Selector UI, it is quite simple to do manually. You can configure the server to use different PHP versions on your subdomains and directories by adding the SetHandler code in the .htaccess file of the folder to override the default PHP version.
There are several applications, which can sometimes require specific versions of PHP, the PHP version is important not only for speed and performance With Verpex, all shared hosting clients can set specific PHP versions for different directories.
To set a PHP version other than the one assigned to your domain on your cPanel account, you need to add a special code to your .htaccess file. The .htaccess file is a hidden file which is read by the web server. The web server follows all the instructions contained in the file. We will explain how to run multiple PHP versions simultaneously in any directory on the very same account.
* Log in to your control panel. You can do this by reading [this article.](/cpanel/how-to-access-cpanel)
* Navigate to the section Files -> File Manager. If you wish to edit the .htaccess file for your addon domain, find the .htaccess for the addon domain in question, and go to the public\_html/youraddondomain.com folder.
* Once in the File Manager, You can check if hidden files are enabled in Settings ( upper right corner )
* To set a custom PHP version for your desired directory/addon domain, either select the .htaccess file and click on Edit from the toolbar, or click the file to create a new .htaccess file if it does not exist.
* Once you are inside the .htaccess file, enter the PHP handler for the version you wish to use. If there is already a handler in the file, it should be deleted or replaced with your new handler. Depending on the desired PHP version you want to use for your specific application, modify the SetHandler line in the code. The handler looks like this:
```text PHP 7.4 theme={null}
# php -- BEGIN cPanel-generated handler, do not edit
# Set the “alt-php74” package as the default “PHP” programming language.
AddHandler application/x-httpd-alt-php74___lsphp .php
# php -- END cPanel-generated handler, do not edit
```
Add/replace the following line to your .htaccess file depending on the version you want to use
For PHP 5.6:
```text Php 5.6 theme={null}
AddHandler application/x-httpd-alt-php56___lsphp .php
```
For PHP 7.4:
```text PHP 7.4 theme={null}
AddHandler application/x-httpd-alt-php74___lsphp .php
```
* After adding your configuration rules, save your changes and close the .htaccess file.
Your custom version of PHP has now been set. As a result, an addon domain/directory, for instance, will use the PHP 7.4 version which you’ve set for it, and not the global one set for the account in the cPanel > PHP Selector.
The process is similar if you wish to set a different PHP version for a subdomain. Now you know how you can easily change the PHP version on your Addon domains by using one of the following handlers, according to your desired PHP version.
# How To Setup Node.js App in cPanel
Source: https://kb.verpex.com/cpanel/how-to-setup-nodejs-app-in-cpanel
1. Log into cPanel
2. Choose **Setup Node.js App**under **Software**

3. Click Create Application
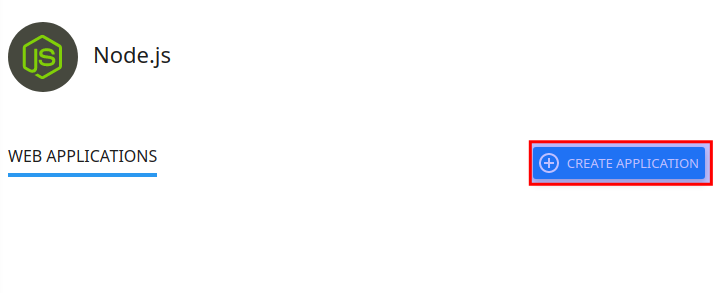
4. Fill in the Application root field (this is the directory in which you will upload for application files)
5. Select your Application URL and startup file (if you do not name a startup file, app.js is used as the default)
6. Fill in the remaining fields with your preferred values
7. Click **Create** when ready
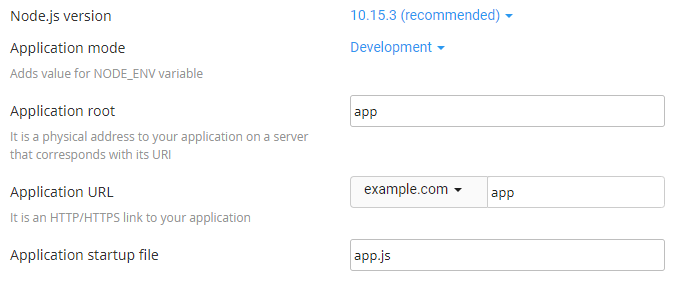
# How to Transfer my Hosting to Verpex
Source: https://kb.verpex.com/cpanel/how-to-transfer-my-hosting-to-verpex
Transferring Your Hosting to Verpex
We are glad to have you on board. Having your website up and running is important for the majority of people transferring their hosting to us, At Verpex, we try as much as possible to avoid little or no downtime. To ease your migration to our servers, we would like to help you migrate your site and emails at no additional cost.
Before you place a transfer order, ensure you have access to the hosting account you wish to transfer to us and your account should abide by our [TOS](https://verpex.com/terms-conditions)
* Go to [https://verpex.com](https://verpex.com) and order one of our hosting packages which suit your requirements. We recommend ordering the package that has equal or higher specifications with the hosting account you wish to transfer.
* Once your package with Verpex is active and you have received your hosting account details via email, submit a support ticket with the old hosting account details and the account you want to migrate to.
A preview link will be given to you to check your website on our server after the migration has been completed. This is to confirm everything works fine before pointing your domain name to our server. Ensure that you have control of your domain to enable you to point your domain to your hosting account with us.
We aim to complete a migration within 72 hours, though we do not guarantee any particular timeframe for the migration.
# How to Remove SSL From cPanel
Source: https://kb.verpex.com/cpanel/how-to-uninstall-ssl
How to Uninstall SSL
All sites/domains hosted by Verpex are automatically enrolled in the Auto SSL system - this is included free of charge with all hosting packages on Verpex. This means that as long as the domain points to us (via the nameservers or A record) the system will request an SSL for the domain and install it automatically if it doesn't already have one. This process is transparent and requires no intervention from you. If you are using a third-party SSL and you do not want to use the SSL that comes pre installed in the cPanel, you can follow the steps below to remove it from your domain/s
1. Login to cPanel
2. Go to the "SSL/TLS Status" section in cPanel.
There you will see the list of all the domains and subdomains in cPanel along with their SSL certificates.
3. You can select the domains in the list and click "Exclude Domains From AutoSSL"
You have just successfully removed the free SSL enabled on your account
# How to use the cPanel Terminal
Source: https://kb.verpex.com/cpanel/how-to-use-the-cpanel-terminal
Terminal access allows you to log in to your hosting account and allows you to run Linux commands, this is very useful for developers when building, configuring and deploying their applications. Having access to the terminal directly from the cPanel interface makes jobs more accessible, faster and more convenient; you can easily search and execute available commands with assigned privileges.
Be careful when using the command line, you should run commands you are familiar with. A wrong command can delete important files or damage your account. If you are unfamiliar with the command line or unsure of a command, we suggest exploring alternatives to using the command line. Also, remember you do not have full access to the server, only limited access to perform basic functions.
How to Launch the cPanel Terminal
* Log in to Verpex and connect to cPanel by clicking the “Login to Control Panel” button in the “**Products & Services**” section.
* In the **“ADVANCED**” section, click the “Terminal” icon.
* Read the warning and click the “**I understand and want to proceed**” button.
* This takes you to the terminal window where you can run your Linux commands.
* NOTE: if you do not see the terminal option in your CPanel, it means SSH access has not been enabled for your account. Kindly send a mail to support\@verpex to request SSH access to your account.
You now have access to the Linux command line and can use basic Linux commands to perform certain tasks. Here are a few commands you can try:
Description Command\
What directory am I in pwd\
List files ls -l\
Change Directory cd name-of-directory\
Change to your home directory cd\~\
Delete a file rm filename\
Read the contents of a file cat filename\
Rename a file mv oldfilename newfilename\
Make a new directory mkdir directory\
Copy a file cp filename newfilename\
how much disk space is left df
You can perform a common terminal operation of installing an application using a single command, instead of navigating through the Software Centre.
# How to Use the Softaculous Autoinstaller
Source: https://kb.verpex.com/cpanel/how-to-use-the-softaculous-autoinstaller
Softaculous is an auto-installer that makes installing web apps simpler and easier. You can install some of the most popular hosting software in the industry on your cPanel server, thanks to the hundreds of scripts that Softaculous provides. To keep the sites secure, Softaculous provides automatic updates through their service, as well as regularly adding new software to their library of scripts.
It can be quite intimidating for some users to install software on a server. Softaculous makes the installation process easier by providing a graphical interface with trusted scripts.
The Softaculous Autoinstaller enables hundreds of apps that cover a wide array of categories like eCommerce, CMS, blogs, forums, ERP, wikis, project management, social networking, and much more. Not only does Softaculous simplify script installation, but it also allows users to manage their applications with backups, updates, restores, and many more features.\
Features of Softaculous
```
Over 100 popular web applications with automated installation
One-click update for newer versions of applications
It is possible to have multiple installations of the same application in different directories
Applications can be installed on addon domains and subdomains, not only in subdirectories of the main domain
You can uninstall applications that you don’t need to use any more only with one click
```
**Using the Softaculous Autoinstaller**
Softaculous is really straightforward to use. With just a few simple steps, you will be able to install hundreds of software titles, and it has multiple layers of settings that you can customize to suit your needs better.
To use the Softaculous Autoinstaller, you need to take the following steps. First, you will need to log into your cPanel. You can find the Softaculous icon at the bottom of the control panel. You can click the main Softaculous icon or various software shortcuts.
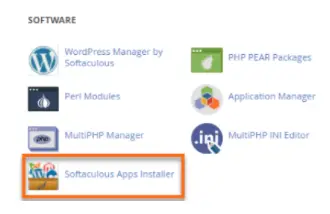
Next, the Softaculous dashboard will appear in front of you. On this dashboard, you will be able to browse software by rating and category. Pick what you would like to install and go to the installation screen. On your display, you will find details regarding that script, which includes an overview, install, demo, screenshot, features, reviews, ratings, import option, and more.
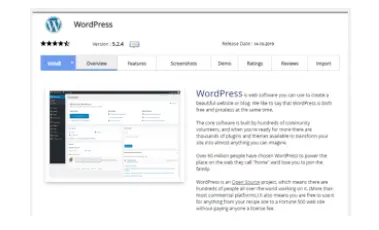
User options in Softaculous allow the default time zone to be redefined, the screen display of side menus to be adjusted, and the language to be changed. Many of the applications are associated with scripts written in standard PHP, although Softaculous also offers some PHP, Perl, and JavaScript functionality.
Lastly, click on the install button. In order to reduce the amount of information that needs to be provided on the installation form, click on Quick Install under the Install dropdown arrow. If you want to configure more information and settings for installing the script, click on the Custom Install button.

Then, you will need to fill in the information that is listed on the form. Depending on which script you are installing, the following information might be included on the form:
```
Admin Account: Configure that Admin Username and Password and Admin Email address. Create a strong password by using the password strength indicator.
Software Setup: Select the domain, protocol and add a directory if needed to configure the installation URL. Always choose https:// when prompted for the site protocol.
Choose Language: You might be able to choose a different language for the script application you’re installing.
Advanced Options: In the custom install, you might get some advanced options for the script that you are installing. These options may vary, but they usually include set auto-upgrade, disable update notification emails, table prefix, database name, and more.
```
There is an option to have the installation information emailed to you if you want to. You can do this by filling out the Email Installation details to: section that can be found at the bottom of the form. Your software should now be installed and entirely usable. The database and files should be automatically uploaded by Softaculous .
After you’re done with the process, Softaculous will display a message about whether the installation process was successful or not. In order to access the admin dashboard of the script, make sure you use the links that are provided on the successful installation page.
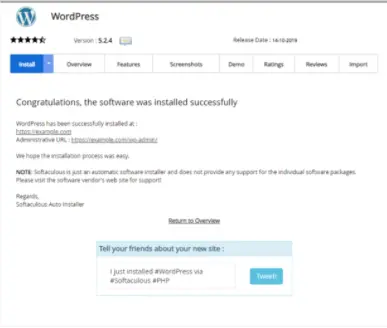
Softaculous can be pretty beneficial. They are well known for providing timely support and quality, as well as keep their products up to date. Server management is made easier with one-click installations and automatic updates thanks to this robust tool and its excellent features.
# How to use User Manager in cPanel
Source: https://kb.verpex.com/cpanel/how-to-use-user-manager-in-cpanel
In cPanel you can manage your FTP, Email, and, Web Disk users using a single interface. You can merge accounts(email, FTP, and Web Disk) into a single Subaccount add new users, edit existing users, link existing users, and delete them using the User Manager in cPanel. This interface does not allow you to create new cPanel accounts, you need a Reseller package or server administrator privilege for this.
**Add Subaccount**
In order to manage Subaccounts in User Manager follow the instructions below:
* Login to cPanel-> Preferences-> User Manager.
* Click on Add User.
* Enter the user information for the new Subaccount(Full Name, Username, Domain, Contact Email Address. )Please note the system sends account notifications and password reset confirmations to this email address.\
You can either let the system set the password for you by choosing **The user will set the account password** or manually setup the password by choosing **Set the user's password**.
* Click on Create to finish, or Create and Add Another User to add another account
* Go to Services and enable what is required.
**Subaccount Services**
You will be prompted by the system to either link or cancel a new account during creation if the Subaccount username tallies with an existing Email/FTP/Web Disk username
To link the account with the Subaccount, follow these steps:
* Click on Link, the existing Email/FTP/Web Disk account will be automatically attached to the Subaccount
* Click on **Dismiss** if you do not wish to link the account with the Subaccount
**Email service** allows you to enable the Subaccount's email address, for example, [username@testing.com](mailto:username@testing.com)
* **The Quota option** defines how much hard drive space the Subaccount may use to store emails.
**FTP service** allows you to manage your website's files, for example, [username@testing.comFTP](mailto:username@testing.comFTP) account.
* **The Quota option** defines how much space the Subaccount user may use in their home directory.
* **The Home Directory** allows you to specify the Subaccount's FTP home directory.
* **The Web Disk utility** allows you to manage and manipulate files on your server using multiple devices
* **The Home Directory** allows you to change the Subaccount's Web Disk home directory.
* **Permissions** allow you to specify the Subaccount's home directory permissions:
* **Read-Write** — This setting allows the Subaccount access to read, download, list and write files inside the directory.
* **Read-Only** — This setting allows the Subaccount access to read, download and list the files inside the directory.
If you use these Windows versions (Windows Vista, Windows 7, Windows 8, or Windows 10), you must enable Digest Authentication in order to access Web Disk over a clear text, unencrypted connection. if the domain uses a signed SSL certificate, then you need not enable Digest Authentication
**How to Login to Subaccount**
You can easily log in to your Subaccount’s email and FTP using the credentials which you have entered while creating a user. The user will set the account password when you created the Subaccount, follow the steps in this [guide](https://docs.cpanel.net/knowledge-base/cpanel-product/subaccount-initial-password-guide/) to set their password.
After you create a Subaccount, you can use several methods(webmail, FTP, web disk) to access it:
**a. Login to webmail:**
* To login to the webmail of the Subaccount, enter the URL as domainname:2096 or s585.lon6.mysecurecloudhost.com:2096, this directs you to your webmail login page.
* Now Enter the Subaccount username and password.
**b. Login to FTP:**
* Download a FTP client like FilezZilla
* Open FileZilla or any other FTP client.
* Go to File and then Site Manager.
* Click New Site and enter the credentials as:\
**Host**: IP Address of your cPanel account/server.\
**Port**: Leave blank or use default port 21.\
**User**: Enter the Subaccount username with the domain name(username\@domainname)\
**Password**: Subaccount password
For more information on how to access your hosting account via FTP, check this [guide ](/cpanel/using-ftp)
**c. Log in to Web Disk:**\
You can connect through a third-party client or your local computer’s operating system\
Check the instruction on how to configure Web Disk on Windows [HERE](/cpanel/how-to-configure-and-manage-webdav-web-disks-with-cpanel)
**How to Edit Subaccount**
Follow these steps to Edit a Subaccount
* Click the Edit option underneath the User you choose
* Manage the following Subaccount properties within this section:\
**Full name** — First and last name of the Subaccount user\
**Contact Email Address** — A different email address for the Subaccount's user\
**Security Information** — Change Password\
**Email, FTP and Web Disk** — The Subaccount's access to email, FTP, and Web Disk services
**How to Delete Subaccount**
Click on Delete and then verify that you wish to delete the account. Deleting a Subaccount removes all of the Subaccount's services.
# Managing Disk Usage
Source: https://kb.verpex.com/cpanel/managing-disk-usage
If you want to see more detail of your disk usage, you should click on the icon that says Disk Space Usage. Otherwise, you can use the cPanel statistics panel to see the total of your disk space usage.
The usage is broken down into several categories by the Disk Space Usage section, and this way, you can efficiently manage your space. You can look into specific folders in the web space.
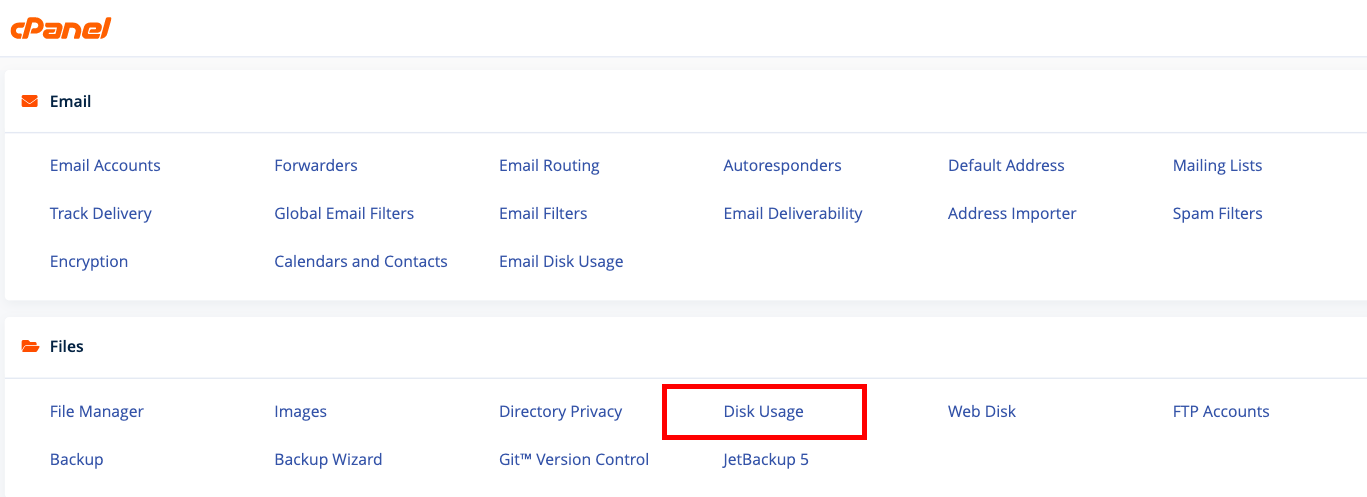
**Reasons for Increased Disk Usage**
When talking about unexpectedly increased usage of disk space, there are reasons that are commonly blamed. These include the following:
```
E-mails – The account usage also includes e-mails. If you receive a large amount of spam, you have a default e-mail address on all of your messages that are kept on a server; this can take up disk space on your account. Also, you should remember that e-mails that can be found in your Trash folder use up disk space. Make sure that you empty the folder Trash if you have a lot of e-mails there, so you can clear up the space that you need.
Website Error Logs – Website error logs are usually files with an error_log name and are created because of a website PHP error, as well as enabled logging details of the reason for the error will be included in the log, or you can go to PHP Selector and disable logging in the PHP options.
Cache Files – Cache files can be created by the software. In theory, these cache files should be removed, but sometimes they are not. Cache files are another thing that should be regularly cleaned since they can unnecessarily take up a lot of space.
Software Website Backups – Software website backups are backups that your software takes, such as WordPress, and they are typically configured in a plugin. Your entire cPanel account is regularly backed up by us, so there is no need to take this. We suggest that you store your backups else if you want to take your own backups.
Log Files – Log files let you monitor the activity of your hosting while you’re away, and they are useful in that way; however, there is no reason for them to remain on the server. Once you have reviewed and downloaded the disk files, you can free up disk space by removing the log files from your server.
Unused Installation – Another reason for increased disk usage can be unused and old installations. Keeping these files on a server doesn’t have a point. These files don’t serve the needs of your website and only eat up the disk space, so make sure that you get rid of them.
```
You can use the cPanel FTP or File Manager once you have found the cause of the increased disk usage and clear the source. If the cause is e-mails, then you should use Mail Client or Webmail to clean it up.
# Managing Files in cPanel
Source: https://kb.verpex.com/cpanel/managing-files-in-cpanel
Verpex manages a folder structure that is similar to the one of a desktop computer file system. A subfolder called public\_html is where the site files are located. If you add additional subdomains and domains to your hosting, they will have their own folders outside the subfolder public\_html. This will be the case if, when you’re adding them to your plan, you don’t specify a different “Document Root.”
When talking about cPanel, there are a few ways to manage your folders and files.
You can find an online File Manager in cPanel. This file manager is quite similar to a file manager on a computer from a graphical interface perspective. On the cPanel dashboard, you can find a File Manager link. The File Manager is pretty straightforward and easy to use. On the left side of the screen, you will find the browser folders, and from there, go to specific files. You can edit these online.
There are several functions that are available to you, including compress to a z, view and edit files, file permission changes, and file uploads. If you want numerous or advanced changes, we recommend that you use a protocol for full file management, even though File Manager is great for quick operations.
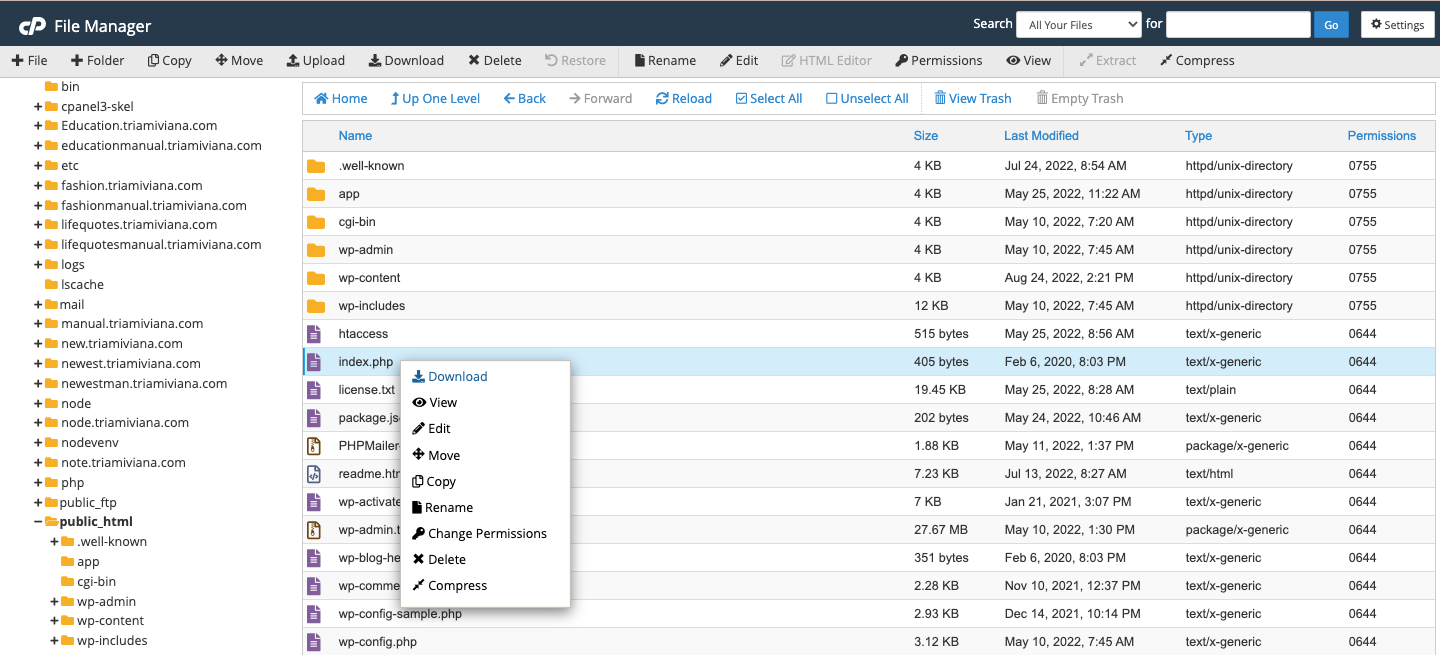
**SFTP and FTP**
SFTP is a more secure form of file transfer protocol that functions through the SSH protocol.
FTP is short for File Transfer Protocol. This is a method for communication you can use to connect from a computer (for instance, your desktop computer) to a web server in order to manipulate files. Filezilla is one of the most popular desktop software applications for FTP.
Both SFTP and FTP are used with your cPanel password and username. Your domain name can be the FTP hostname, and the posts are 22 (SFTP) and 21 (FTP). Under FTP Account in cPanel, you can also set up additional FTP accounts.
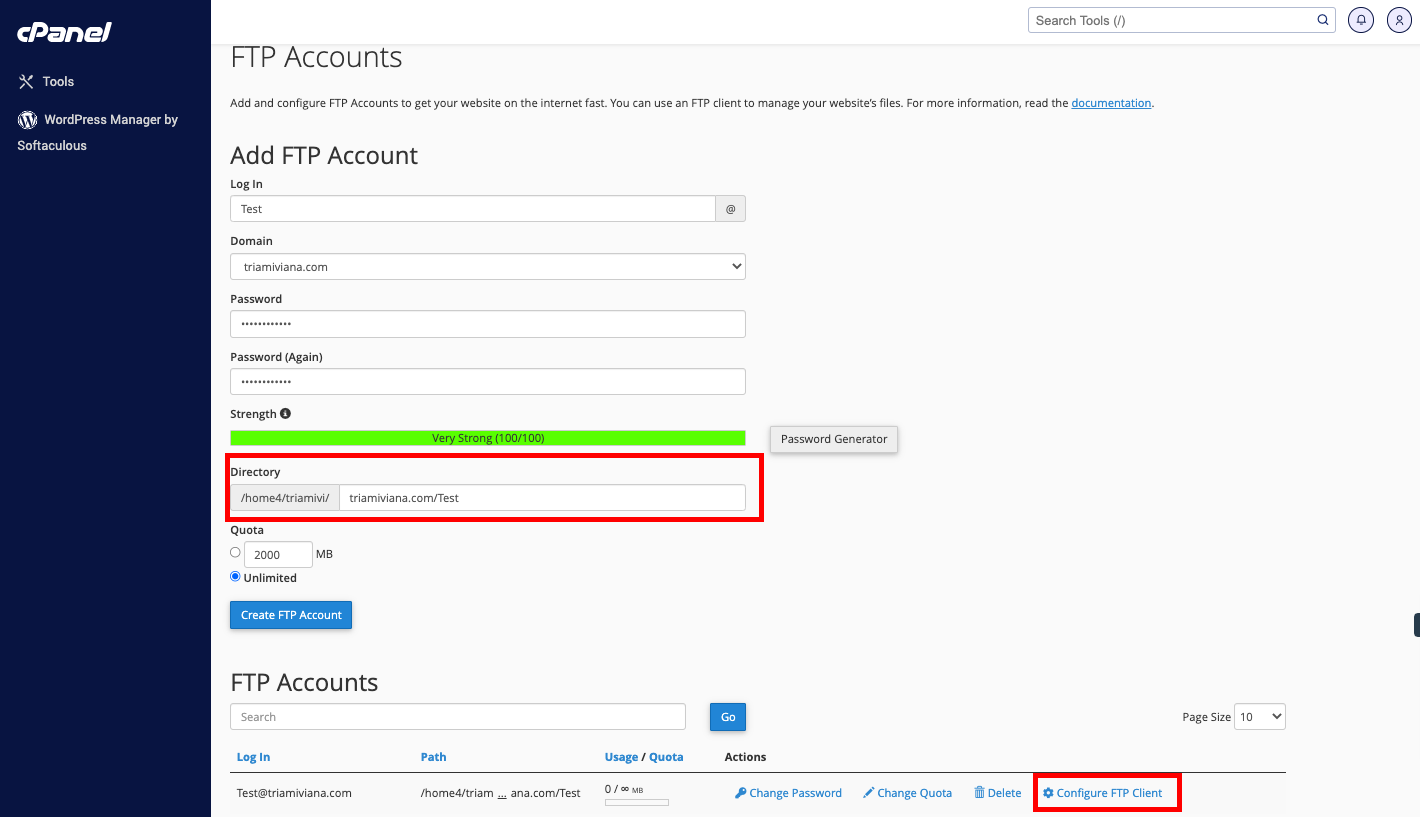
One important thing to remember is that by clicking “Configure FTP Client,” you can check out the settings you need to put in your FTP client. When setting up the places that your FTP Account has access to, make sure that you set the preferred path. Only home/user/ should be present, and everything else should be deleted if you want to have full account access.\
SSH
SSH, or shell access, is enabled by default port 22 with the cPanel password and username if you’re an advanced user. SSH is a way to connect to your webspace by using the command line. For power users, this is such an important feature, and you can run commands and manage files.
You need to use an SSH client to connect to the server if you want to use SSH. Within a terminal application, you can run commands manually once you are connected fully to the server, with the use of an SSH client.
# Managing Domains in cPanel
Source: https://kb.verpex.com/cpanel/managing-websites-in-cpanel
How to Manage domains in cPanel
There’s a newer section in cPanel called the Domains section that combines the Redirects, Subdomains and Addon Domains areas in cPanel allowing you to manage all domains using a single interface. To find this menu, log into the cPanel, navigate to the Domain section and click on Domains. You can do three things in this section:
* Create a new domain/subdomain
* Manage existing domains(Listing and deleting existing domains)
**1. Create a new Domain/Subdomain**
Using this interface, you can create an addon domain or subdomain(assuming the DNS is already pointed to Verpex). Click Create A New Domain option to add another domain or create a subdomain. For a step-by-step tutorial on how to do this, click here:\
[https://kb.verpex.com/docs/sub-domains](/cpanel/sub-domains)\
[https://kb.verpex.com/docs/addon-domain](/cpanel/addon-domain)
**2. Manage Existing Domains**
You can create a new site, create email addresses, change the document root for the domain, manage DNS records, modify any existing redirects and remove the domain from your cPanel using this interface. To access this interface, go to cPanel -> Domains > the Manage button. To access the domain you wish to edit, just click on it. You can update, delete and check the domain/subdomain information by clicking this button.
**The Document Root** shows root folders for each domain. To access the File Manager interface for a domain, click on the Home icon\
**Domain Information** menu shows the information about subdomains, and redirects for the current domain and its document root. To access the root folder for the domain in the File Manager menu, click on the home icon\
**The Redirects To** option manages your domain redirects and checks the domain that redirects to a different domain. To manage your redirects, go to cPanel -> Domains section -> Redirects.\
You can sort the list of the items in the Domain, Document Root, and Redirects To columns alphabetically by clicking on the corresponding column name.\
**The Create Email** option allows you to add email addresses to a domain.\
**The Show Associated Subdomains/Hide Associated Subdomains** options available under the gear icon show/hide the subdomains which the system creates automatically.\
**The Modify the Zones** option allows you to create, edit and delete DNS records for the subdomains and domains in Zone Editor.\
**Update the Domain** allows changing the current root folder for the domain. You can change the root folder by entering a new document root to the corresponding field and then clicking update. Please note you can not move your files to a new root folder or modify the document root for domains that share the document root with the main domain.\
**Remove the Domain** function allows you to delete a domain from your cPanel account.\
Click on the Remove Domain button to remove a domain from your cPanel account. It is recommended to take a full backup before deleting a domain. Removing a domain does not automatically delete the mail folders in the public\_html folder, however, the email accounts will be deleted.
So the Domains section is a great tool for all-in-one management of your domain! It is a one-stop shop for all things domain management.
# Maximum Upload Filesize and how to Increase it
Source: https://kb.verpex.com/cpanel/maximum-upload-filesize-and-how-to-increase-it
What Is “upload\_max\_filesize”?
"upload\_max\_filesize" is a PHP configuration setting that specifies the maximum size of a file that can be uploaded to a server. This setting is used by PHP to limit the size of uploaded files to prevent the server from running out of memory or disk space. The value of the "upload\_max\_filesize" setting is expressed in bytes, but can also be defined in megabytes or gigabytes by appending the letter **M** or **G** respectively.
When updating upload\_max\_filesize, you must put into consideration other directives
* post\_max\_size, which must be larger than upload\_max\_filesize.
* memory\_limit, which should be larger than post\_max\_size.
For example, if the "upload\_max\_filesize" is set to 128M, it means that the maximum size of a file that can be uploaded is 128 megabytes. If you upload a file that is larger than this limit, you will receive an error message indicating that the file is too large.
To increase the upload max filesize on cPanel, you can follow these steps:
* Login to your cPanel account
* Go to the **Software** section and click on **Selecet PHP Version**
* Find the **upload\_max\_filesize** option and increase its value to the desired value (e.g. 64M)
* Click on the **Apply** button to save the changes.
For the new change to be reflected, this value should be at least as big as the post\_max\_size.\
You can also increase the upload max filesize by adding the following code to your .htaccess file:
```text theme={null}
php_value upload_max_filesize 64M
```
It is important to set the "upload\_max\_filesize" value appropriately to ensure that your server can handle the size of uploaded files without running into performance or stability issues.
# My Hosting is Suspended will my Emails work?
Source: https://kb.verpex.com/cpanel/my-hosting-is-suspended-will-my-emails-work
When your hosting account is suspended, not only your website will be down but all related services attached to the hosting will be down as well. You will be unable to send out and receive emails, your cPanel will be inaccessible and your website will go offline. This is why you should not allow your hosting account to get suspended.
We provide timely reminders and do everything we can to help ensure that our clients do not have to face the challenges of an expired hosting account.
Hosting accounts are invoiced 7 days prior to the expiration date. During the time the invoice is generated, a notification email is sent out indicating the outstanding amount and the due date. Shared hosting accounts and Reseller plans will be suspended 3 days after the expiration date in case of non-payment. With these policies in place, customers have ample time to renew before their hosting accounts get suspended.
# My Website has been Compromised
Source: https://kb.verpex.com/cpanel/my-website-has-been-compromised
A compromised website affects your business and your customers. If your website has been breached, make sure to fix it soon to minimize the damage this would have caused to your brand.
* Run a malware scan on your device and in your hosting account using our Imunify360
* Change all passwords across all devices, CMS(WordPress Joomla, etc) and logins(Cpanel, client area, email account, FTP, database, etc) and ensure you use a strong password
* Enable [2-factor authentication](/billing/how-to-disable-2fa-authentication)
* Trace back your actions to know how the compromise came back it might be through a new installation of a plugin/theme or a new upload of a file.
* Reset your .htaccess file
* Install a security plugin like sucuri
* Update outdated plugins, and CMSP, ensure they are all up to date
Ensure this is not a one-time cleanup as you need to always secure your website at all times to prevent any breach.
# My Website Is Down — What Can I Do?
Source: https://kb.verpex.com/cpanel/my-website-is-down-what-can-i-do
Make sure your domain name is not expired and your hosting is not suspended. It could just be your browser or internet connection. Restart your modem/router to resolve this issue or you could just phone a friend and have them test your site. To be doubly sure you can also check if the website is down for everyone or just for you. You can do this by visiting a website like [https://www.isitdownrightnow.com/](https://www.isitdownrightnow.com/) and entering the URL of the website.
Determine the cause to pinpoint why the downtime is occurring. It could be a programming error, DNS problem, expired domain, hardware related, etc. Contact your hosting company or check with your developer if it is not server-related.
Please note that it’s a good practice to always check the status page as this could save you a lot of time. You can visit our status page using [https://status.mysecurecloudhost.com/](https://status.mysecurecloudhost.com/).
**Common Reasons for Website Downtime**
**1. Coding Error**
A misplaced comma can cause issues. Websites function with thousands of lines of code, meaning a misplaced comma can cause issues.
To weed out errors, test every piece of code thoroughly before it goes live to fix potential issues. Keep detailed records of changes and previous outages to identify errors. Ensure your processes and policies are regularly updated and hire professionals where possible to prevent this from happening.
**2. Outdated Hardware Problems**
One reason for the downtime of your website is outdated hardware. Servers are a key part of your website infrastructure and any disruption can lead to downtime.
To prevent hardware failures from causing you downtime, upgrade your server regularly when it’s struggling to keep up.
**3. Poor Hosting Provider**
Not all hosting providers are reliable and offer a website uptime guarantee. With a greater chance of hardware failure, downtime chances increase.
Look for reliable hosting providers with positive reviews. Choose the best complimentary plan for you.
**4. DNS Issues**
Issues with the DNS can prevent a website from loading. DNS) maps a domain name with an IP address, and it’s critical for website uptime.
Check whatsmydns.com or get in touch with your hosting provider for the correct DNS records.
**5. DDOS Attacks**
Distributed Denial of Service, attacks happens when hackers flood a website with huge traffic to make it unavailable. This eats up the server bandwidth and resources, leading to overload.
This can be prevented by running load tests regularly and investing in firewalls.
**6. CMS Issues**
CMS(Content Management Systems) use plugins, extensions, themes, third-party integrations, and other tools to provide extra features and functionalities. Unfortunately, newer versions of these integrations can cause compatibility issues.
To fix this issue avoid nulled or old themes and plugins.
**7. 404 Not Found**
A 404 error occurs when your web server cannot find a page that has been requested.\
In the case where a page no longer exists, it means the page has been removed.
You can be sure to check if it has nothing to do with your hosting account being suspended, contact support to confirm this. Check[ this page](/cpanel/404-error-resource-error) for a detailed description of how to resolve.
**8. 502 Bad Gateway**
Gateway errors do not normally mean the website is down, but some part of the internet is either not working or too busy to deal with your request.
Use a Traceroute command and the domain of your website to further trace the location of the issue or contact your hosting company if the issue persists.
**9. 503 Service Unavailable**
This error tells us that the web server is too busy to deal with your request. If you are on a shared hosting package then it could be that one or more websites that share your server are super-busy and there is no bandwidth left for your website.
If this error does not resolve itself, contact your hosting provider.
**10. Security Warnings**
This is normally caused either by the absence of an SSL certificate on the web server or when an SSL certificate has expired. If there is no valid SSL certificate and the website is trying to deliver content via https, the browser will stop the website from sending data and show a warning.
Add a valid SSL certificate to your website to resolve this issue. There is a free SSL that comes pre-installed in your cPanel.
**12. 500 Internal Server Error**
The most difficult to diagnose, the most common reasons for this error could be over usage of account resources(RAM, CPU), incorrect .htaccess code or file and folder permission, or a mod\_security rule You might have some server issues.
Check the server status and logs for any errors or issues. Update to a later version of the PHP programming language. Contact your hosting provider. To check detailed solutions to each issue, refer to this article.
Back up your website before taking any of the above-mentioned tips. This can be done automatically through a backup tool in cPanel. If your site break, you can restore the copy of your backup to get the website running again,
Understanding the common reasons for these errors means preventative steps can be taken to avoid them happening again. Ensure you regularly back-up data.
Downtime affects the best of us. Staying calm will go a long way in making sure that you and your team can resolve the problem as quickly as possible.
# MySQL Databases
Source: https://kb.verpex.com/cpanel/mysql-databases
# Python Applications
Source: https://kb.verpex.com/cpanel/python-applications
cPanel can run a Python application. This guide will go over the process of how to run Python applications from your cPanel.
Log into your cPanel to get started with your Python app. To load your first configuration screen, click on the Setup Python App, and click on Create Application.
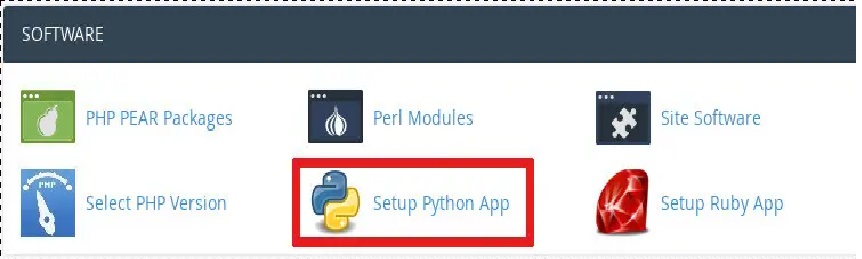
Now, the application form will appear. In the Python Version section, you can select the Python version you want to use and fits your needs. The folder from which all of the Python files will be loaded is the Application root field, so in this text box, type the directory where the application files are located. The URL from which you would like the site to be loaded from is the Application URL. Here, select the domain and then type a URL from the application.
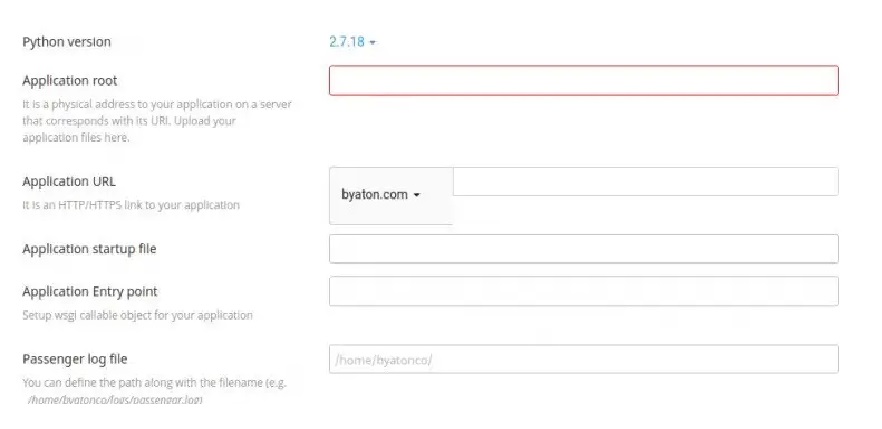
In the Application startup file field, you can specify the startup file for the application; however, this is optional. If you do not do this (specify a startup file), a passenger\_wsgi.py startup file will be created by cPanel for you.
In the Application Entry point text box, you can specify the callable object for the application; however, this is optional as well. cPanel will create an application object that is default for you if you do not specify. You can just enter application in the application entry point field since this is a function call that is going to be executed and load the Django instance.
The file that gets initially executed and proxied via Passenger is the passenger startup file. Within the passenger\_wsgi file, the code is just a simple import.
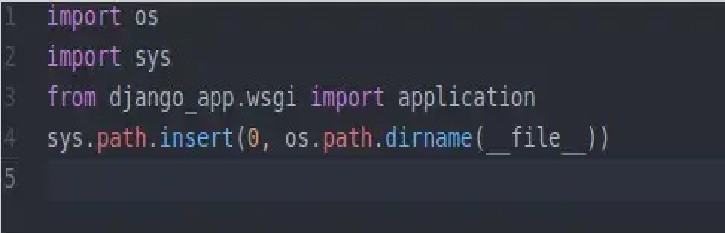
Wsgi is the file that has the application function, while the django\_app is the folder of the Django installation.
In the section Environment variables, the environment variables can be optionally set for the application. You can do this by clicking on Add Variable and then typing the variable value and name. Finally, just click on Done.
Click Create, and then cPanel creates the environment in Python and creates the application.
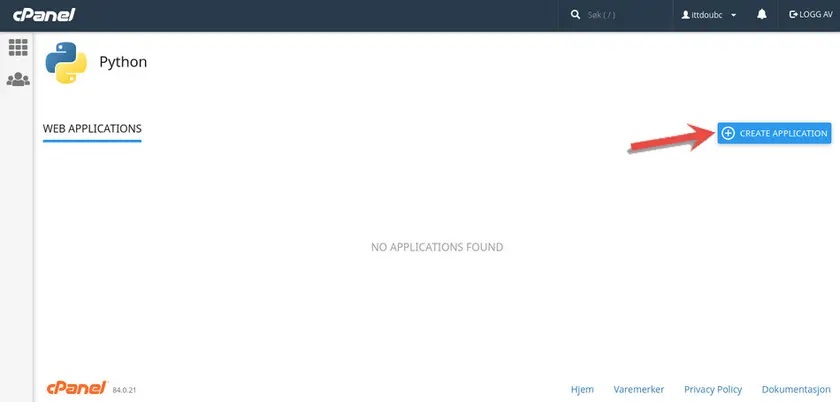
You should connect your account with SSH if you want to work in the environment that was newly created. After you’ve connected your account with SSH, you will need to type the following command. Replace version, application, and username with the actual values that are displayed at the top of the page, next to Enter to the virtual environment. Run the following command if you want to enter the virtual environment:
source /home/username/virtualenv/application/version/bin/activate && cd /home/username/application
You can develop the Python application even further by using other commands and installing modules. In addition, you can control the running state of the application from cPanel. You can click Stop App to stop the application. You can click Restart to restart the application. And lastly, you can click Destroy to entirely eliminate the application from cPanel.
# Remote Database Connections
Source: https://kb.verpex.com/cpanel/remote-database-connections
WordPress lives in its database, your content makes your site special and unique, and that content lives in the database. If you wish to pluck out your WordPress, what you will be taking is your MySQL database.
In order to connect to a MySQL database remotely, you must have your configuration settings ready.
Host name - Your server IP address\
Database name - Your cPanel username database name\
Database username - Your cPanel username database username.\
Database password - The database user password\
Note: You can find your database credentials in your WordPress root folder(File manager-> public\_html folder-> wp-config.php) and open the file\
MySQL Connection Port - 3306\
TCP or UDP, either is fine.
**How to set up a Remote Connection to my Database?**
By default, servers don't allow remote access to their databases except to specific IP addresses. So we need to add our IP address to the whitelist. If your IP changes frequently, please use a hostname or update the connecting IP in Remote MySQL every time it changes. The connecting computer must be enabled as an Access Host before connecting to MySQL from another computer
Perform the following steps to set up a remote connection to your database
* Log into cPanel
* Click the Remote MySQL icon under Databases.
* Fill in the IP address(You can find and add your IP address directly from this address whatismyip.com)
* Click Add Host, and you should get a confirmation message Access Host Added and you should now be able to connect remotely to your database.
**Remove Access for a Remote Server to Access Your Database**\
Follow the steps below to remove a host from accessing databases on your server
* Log into cPanel
* Click the Remote MySQL icon under Databases.
* Click the X icon next to the IP address.
* Click Yes.
Please make sure the credentials match the username created in the "MySQL Database" section of your cPanel to avoid connection issues. After the IP address has been whitelisted to allow remote connection, you should be able to access MySQL remotely using a third-party application like Workbench, phpMyAdmin, etc. Some of these applications are free and some are paid
# Running Multiple Websites
Source: https://kb.verpex.com/cpanel/running-multiple-websites
Managing multiple websites can be expensive and difficult, which is why there are hosting packages that offer multiple domain hosting options. When choosing multiple domain hosting, some of the things you should look out for include:
```
Easy addon domain management from cPanel
Unlimited email accounts
Adding a subdomain to an existing domain name
A beginner-friendly option such as cPanel
Domain alias for having multiple URLs point to a single website
Free or paid SSL certificate
Parked domain management
```
Running several websites with Verpex can be done in two ways. This can either be done through reseller hosting by separating the websites in different cPanel accounts or in a single shared hosting account.
## On Reseller Hosting
You have the Web Hosting Manager, or WHM, on reseller hosting. The Web Hosting manager allows you to create several independent cPanel accounts.
The List Accounts function can be used in order to log in and display each cPanel account. You will need to press the orange CP button in order to log in. In addition, you can modify how many Addon or Parked Domains you have on this account from the plus (+) sign next to the account, as well as other resources.
## On Shared Hosting
cPanel has two options for additional domains: addon domains and parked domains or aliases.
Additional domains are pointed to external folders with addon domains. By default, your main domain runs from the public\_html folder. Addon domains can run from folders such as newdomain or public\_html/newdomain. We recommend that you use a reseller account to manage numerous sites as a substitute to addon domains, in case your sites are functionally independent, you have a large number of sites to run, and you’re able to afford it.
A drawback of cPanel addon domains is that each site runs under the same users on the server, which means that one account is able to access all the website files. As a result, any security vulnerabilities that are found on one site can also affect others as well. Another thing is that all of the sites will be using the resources of one account, while in separate accounts, they will have an abundance of resources to use.
Parked domains allow you to add an additional domain as an alias of your main domain to your control panel. For instance, you might want to add both a .net. and .com domain, but have them both point to the same website. You can easily do this by adding the extra domain as a parked domain (or a domain alias).
Keep in mind that you should redirect one domain to the other domain in order to avoid penalties by search engines such as google for duplicated content. Usually, this is done automatically by most software. However, you can do this by clicking on Manage Redirection after you add the parked domain.
# Secure Shell (SSH) Overview
Source: https://kb.verpex.com/cpanel/secure-shell-ssh-overview
Secure Shell, or SSH, is a way of using the command line to connect to your webspace. For power users, this is a feature that is really important since you can run commands and manage files. You must use an SSH client to connect to the server in order to use SSH. Within a terminal application, you can run commands by hand once you are connected.
To connect to the server, you use a terminal or Shell client with SSH. You can download an SSH client such as PuTTY if you are using Windows. On the other hand, you can use Terminal if you’re on Linux and macOS.
You can type ssh if you have a command prompt, followed by the shell username (cPanel username) you have, an @ sign, and then the name of your server. For instance:
ssh [username@server.verpex.com](mailto:username@server.verpex.com)
You can run PHP commands, move files, edit files, and much more once you have logged in. Key-based authentication is supported by our system, which is a lot more secure than just having a password. In addition, you will save time, and you won’t have to type it every single time. Just create a private key and your computer, and then upload the public key’s contents part of it to a file with the name .ssh/authorized\_keys. Don’t hesitate to contact us if you need any help with this.
After you’ve logged in, there are some basic commands you should know about.\
Navigation
To navigate your hosting space, there are two major commands that you should use. These commands are the following:
```
ls -lah – the files in the folder you currently are in will be listed with this command, along with some extra info about the files such as permissions, time and date it was created/last modified, and size.
Pwd – this is a command which will help you not get lost since it will list he path you’re currently in.
```
Viewing/modifying/creating
In order to create a new file, use touch \[filename.ext]. Keep in mind that the extension should be put at the end, such as .txt, for instance.
In order to create a new directory in the location you’re currently in, use mkdir \[directoryname].
Less experienced users use default nano to modify files. For instance, you can open the file in nano by using nano \[filename].txt, and by pressing Ctrl+G or F1, you can read the full information on how to use it.
vim can be used to edit files; however, users that are more advanced typically use this editor.
For instance, vim \[filename].php
To find text inside of a file, you can use cat in combination with grep. You will be able to find the requested text easier since it will be outlined.
For instance, cat \[filename.txt] | grep “Oct 20 11:02”, which means to display the contents of \[filename.txt] break grab and outline text matching “Oct 20 11:02”.
# Setting Timezones in PHP
Source: https://kb.verpex.com/cpanel/setting-timezones-in-php
How to set the timezone for PHP in the php.ini file
How to set the timezone for PHP in the php.ini file
By default, Verpex servers are configured to use the Coordinated Universal Time (UTC). You can change the time zone that PHP uses for your scripts by setting the date.timezone directive in your php.ini file.
PHP relies on the date.timezone value for some date/time functions executed by PHP-based applications. Sometimes an error message also appears in the web server logs, which clearly indicates this necessity. Fortunately, this can easily be resolved by adding a line of code in your php.ini in the cPanel of your hosting account. After adding the code the time will be displayed according to the time zone entered in the php.ini file.
You can easily set the time zone code in your php.ini file by following the steps below:
* Login to your cPanel.
* Scroll down to the Files section, then click on the File Manager menu.
* On the left side panel, a list of directories of your hosting account is displayed. Here you need to click on the public\_html folder.
* In the public\_html folder, you need to navigate to file public\_html -> php.ini file. If you do not have the php.ini file yet, click the +File button at the top of the page, type php.ini and click Create New File to save.
* Right-click on the php.ini file, then click on the Edit button.
* Now you need to insert the line of code below at the top of your php.ini file:
date.timezone = "Place/Your\_town"\
Note: Change Place/Your\_town with your own time zone as per your requirement.\
date.timezone = "Europe/London"
* After entering the above line, click on the Save Changes button.
Now, you can check your [phpinfo.php page](/cpanel/how-to-create-a-phpinfo) to verify that the change has occurred.
# Software
Source: https://kb.verpex.com/cpanel/software
# SQLite
Source: https://kb.verpex.com/cpanel/sqlite
SQLite is an open-source SQL database that stores data in a text file on a device.\
SQLite is a C-language library that implements a small, fast, self-contained, high-reliability, full-featured, SQL database engine. SQLite is the most used database engine in the world as it is used today by several widespread browsers, operating systems, and embedded systems (such as mobile phones).
The SQLite file format is stable, cross-platform, and backwards compatible\
SQLite is free to use for any purpose commercial or private. It is a self-contained, serverless, zero-configuration and transactional SQL database engine.
SQL databases, SQLite does not have a separate server process. It reads\
and writes directly to ordinary disk files. Also, it is very convenient as it’s less than 600kb in size. Lightweight in terms of setup, database, administration t and resource requirements.
**Features and benefits of using SQLite**\
**Benefits of Using SQLite**\
Self-contained: no external dependencies, it requires no special facilities or tools to build.\
**Serverless** – No server or other system processes are required to run.\
**Configuration Not Required** – No setup or administration is required.\
**SQLite is Transactional** – SQLite implements transactions that are atomic, consistent, isolated, and durable\
**Totally free** – Open source, therefore, no license, setup or administration is required after installation.\
**Storing Data is easy** – Provides an efficient way to store data.\
**Flexible** – Helps you work on multiple databases in the same session simultaneously\
**Single-file Cross-platform Database** – It can run on all platforms\
**Full-Featured SQL**- SQLite has a full-featured SQL implementation
**Features of SQLite**\
Great for use as an application file format. File format can be extended in future versions simply by adding new tables and/or columns while maintaining backward compatibility.\
Supports terabyte-sized databases and gigabyte-sized strings and blobs\
Small code footprint: less than 600KiB fully configured or much less, it is lightweight\
Simple, easy-to-use API.\
Fast: In some cases, SQLite is faster than direct filesystem I/O\
Written in ANSI-C. TCL bindings included. Bindings for dozens of other languages are available separately.\
Well-commented source code with 100% branch test coverage.\
Use for any purpose, Sources are in the public domain\
Comes with a standalone command-line interface (CLI) client that can be used to administer SQLite databases.\
Performance - Rather than reading the entire file and keeping a full scan in memory., it only loads data needed\
Accessibility Content stored in an SQLite database can be recovered decades later
Even with all the benefits, SQLite is not the perfect application file format for every situation.\
It is not suitable for large-scale apps, you will have no access to the network and the database is limited in size
SQLite’s distinctive features make it the most widely deployed SQL database engine used by most developers.
# SSL Certificates
Source: https://kb.verpex.com/cpanel/ssl-certificates
How to Install AutoSSL certificate in cPanel
An SSL certificate on your site gives you the padlock icon in your browser, and this encrypts communications between visitors to your site and the server. Google is now giving sites without SSL certificates a warning in the browser so it is more important than ever to have an SSL certificate on your site.
All sites/domains hosted by Verpex are automatically enrolled in the Auto SSL system - this is included free of charge with all hosting packages on Verpex. This means that as long as the domain points to us (via the nameservers or A record) the system will request an SSL for the domain and install it automatically if it doesn't already have one. This process is transparent and requires no intervention from you. Generally speaking, it takes 4 hours after pointing the nameservers for the SSL to be requested and installed, but, if it takes longer than this or if your SSL certificate is not working, please let us know. or try the following steps below
1. Login to cPanel
2. Go to the "SSL/TLS Status" section in cPanel.

There you will see the list of all the domains and subdomains in cPanel along with their SSL certificates.
3. You can select the domains in the list and click "Run AutoSSL" to force AutoSSL installation for them.
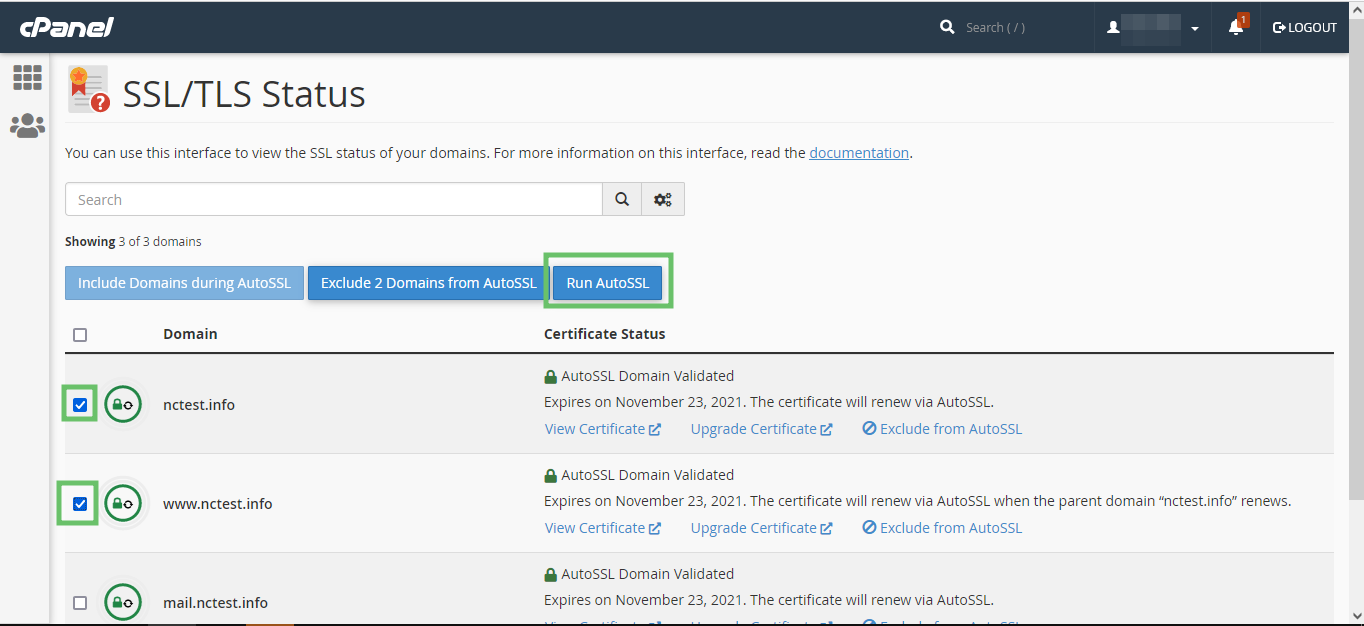
To force your site to work over SSL, generally speaking, you can use a rewrite rule or go to domain and force SSL, e.g.
RewriteEngine On
RewriteCond %\{HTTPS} off
RewriteRule ^(.\*)\$ https\://%\{HTTP\_HOST}%\{REQUEST\_URI} \[L,R=301]
This will redirect all requests for http\:// to https\:// but it is important that you only do this after your SSL is installed and working.
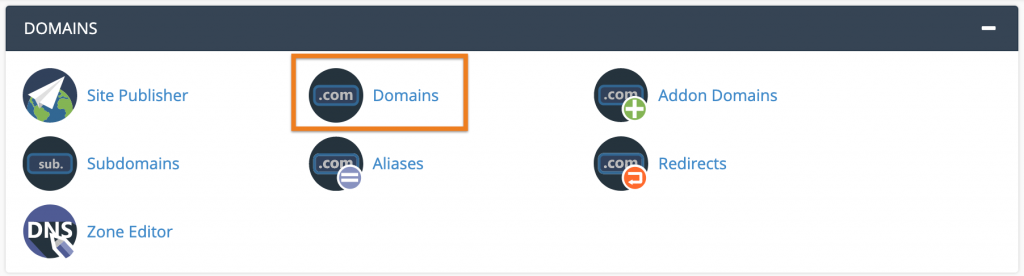
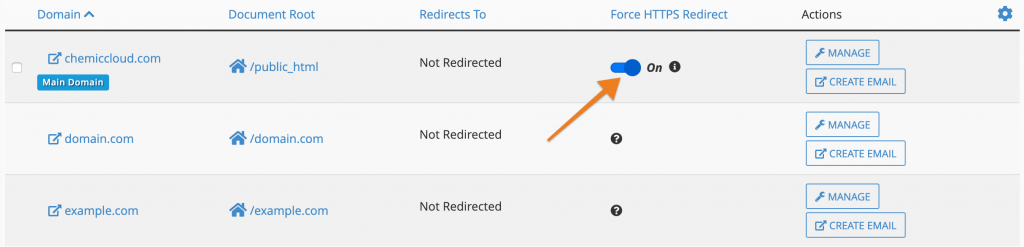
If you're running a CMS like WordPress, it is also important to set the Site URL and Homepage in the wp-admin area to include the https\://. This is important so that images and stylesheets and so on are loaded over https\:// as well. You can also install a plugin such as Really Simple SSL that can help you set these redirections automatically.
# Subdomains
Source: https://kb.verpex.com/cpanel/sub-domains
When you’re visiting a certain website, you might notice that based on your location on the page you’re visiting, the URL in the search bar changes as well. In this article, we will go over the part of the URL that changes, and it’s called a subdomain. A subdomain is an additional part of your main domain name. A subdomain is created to navigate through and organize different sections of your site. On your main domain, you can create several subdomains or child domains. The root domain is the only domain that is not also a subdomain.
Usually, subdomains are used to separate a website into several actions. You can also use subdomains for creating blogs that have different themes. For instance, blogname.com is the blog, while sport.blogname.com and fashion.blogname.com are for specific themes on different subdomains on the blog.
Subdomains are also used if you want a website that has different language versions, such as en.example.com for English, fr.example.com for French, and so on. You can also create a mobile version for your website with a subdomain. For instance, this would be m.example.com. You can also create a network of unrelated sites with a subdomain.
Subdomains can also point to a single page or a section on your website. For instance, if you have a personal portfolio site, the contact form can be hosted on hireme.example.com. You can really get creative when it comes to subdomains For instance, north.example.com and south.example.com are subdomains of the domain example.com, which in turn is a subdomain of the .com top-level domain, also known as TLD. The most commonly used subdomain is www, which stands for World Wide Web. The subdomain contains the most important pages of a website and its homepage. The World Wide Web subdomain is used so much that it is usually included with domain name purchases at domain registrars.
If you plan your website to have more functions, such as a blog, a forum, or a store, adding a subdomain to your domain will be a smart way to separate all of these functions from your primary website.
You need to click on Domains in order to add a subdomain to your cPanel.
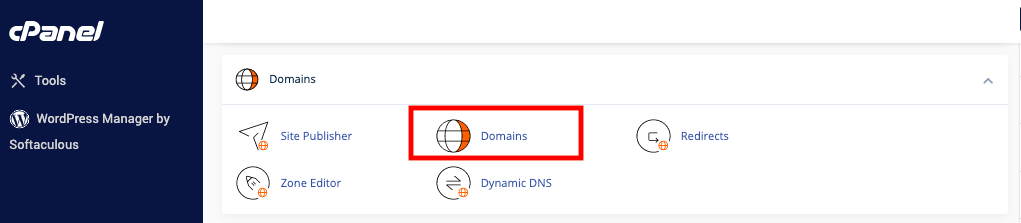
In this section, you will need to click "Create A New Domain".
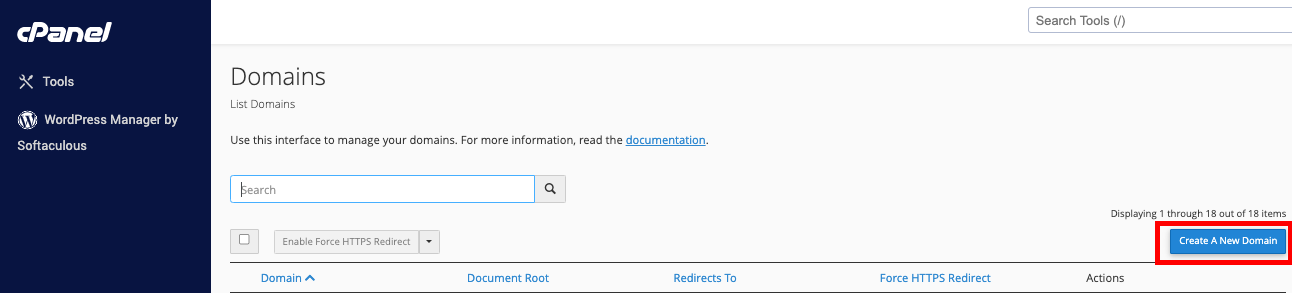
In this section, you will see the first field where you can enter your subdomain only as “north” in “north.example.com.” The second field in this section is called Domain, and this will be the domain name you are setting the subdomains for. The last field is called Document Root, and this is where the files will be located for this subdomain, also known as the document root.
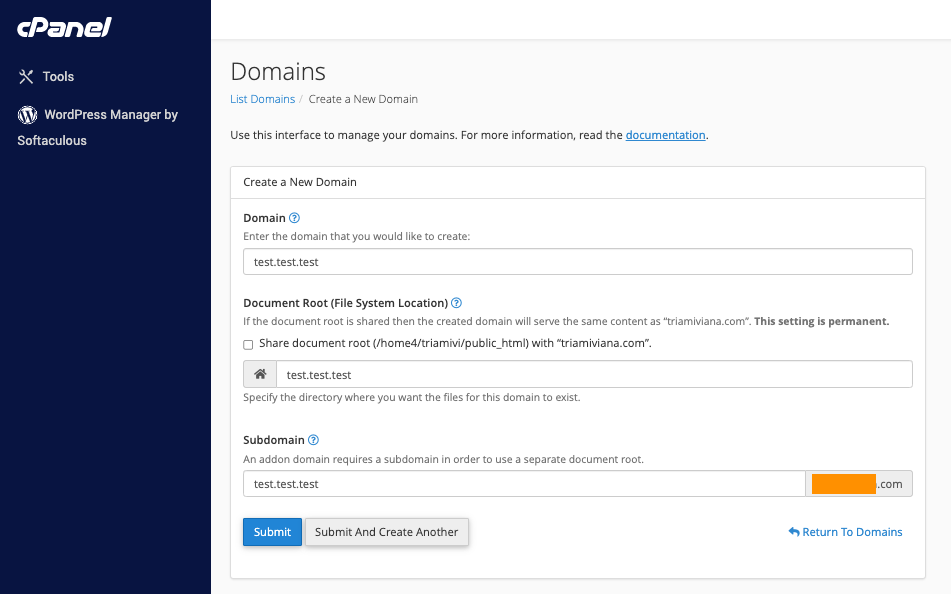
In conclusion, a subdomain is a part of the URL that comes after the domain extension and the main domain name. Subdomains can really be of help if you want to create separate sites on your website or divide your site into several parts.
# Two Easy Ways to Export and Import MySQL Databases
Source: https://kb.verpex.com/cpanel/two-easy-ways-to-export-and-import-mysql-databases
One of the most important components, when you make a website, is a database. Whether you use common CMS platforms like WordPress, Magento, Joomla, or other PHP frameworks such as Laravel, CakePHP, or CodeIgniter, you will probably need to integrate a database that stores the website data.
In this article, we will focus on exporting and importing one of the most popular database management systems, MySQL. This knowledge will come in handy if you wish to transfer your database to another server or simply to create a database backup.
There are two easy ways on how export and import MySQL databases:
```
Use phpMyAdmin
Use SSH command line
```
Now we will explain each method in detail below, so read on!\
How to Export and Import MySQL Through phpMyAdmin
**Exporting**
To export an existing MySQL database using phpMyAdmin, make sure you are logged in to your cPanel area first. Once you’re in, type phpMyAdmin on the top right search bar and click on the option shown:
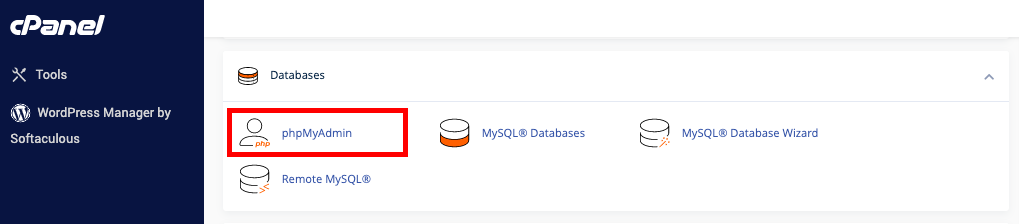
A new browser window will open and the next step is to select the database you would like to export. Make sure you select the correct one, if there are multiple databases. Once the database is selected, click “Export” and on the “Export Method” option, choose Quick. Next, you can choose “SQL” format if you wish to re-import the database again elsewhere. Lastly, click Go.
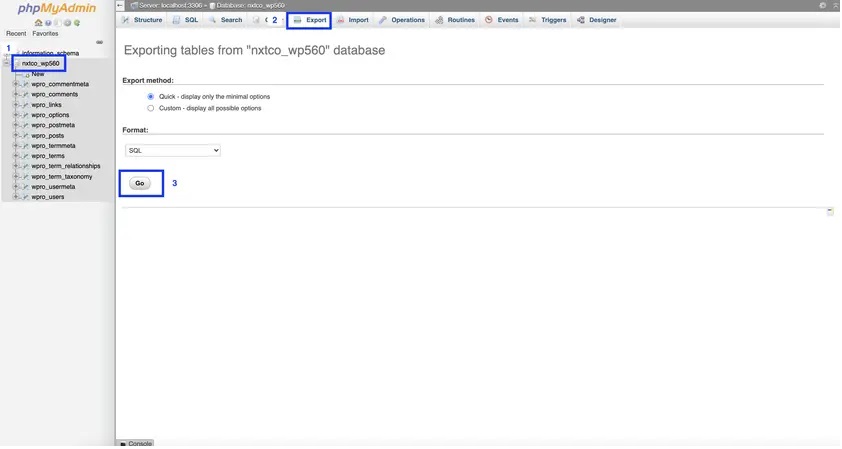
Now all you have to do is to wait for a few minutes (or seconds, if your database is quite small), until the export process is complete. You should now be able to find the .sql file within your Downloads folder.
**Importing**
```
Again, you will need to go to your cPanel and navigate to phpMyAdmin
```
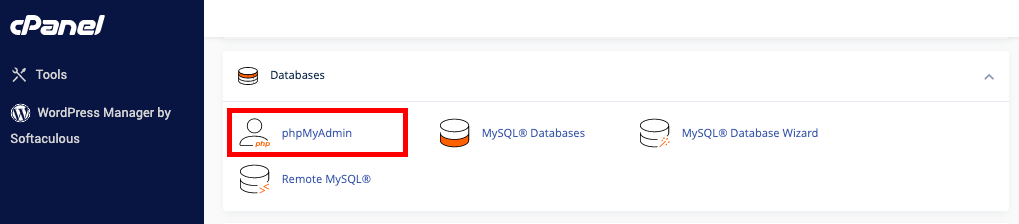
Prepare your SQL database file that you’d like to import
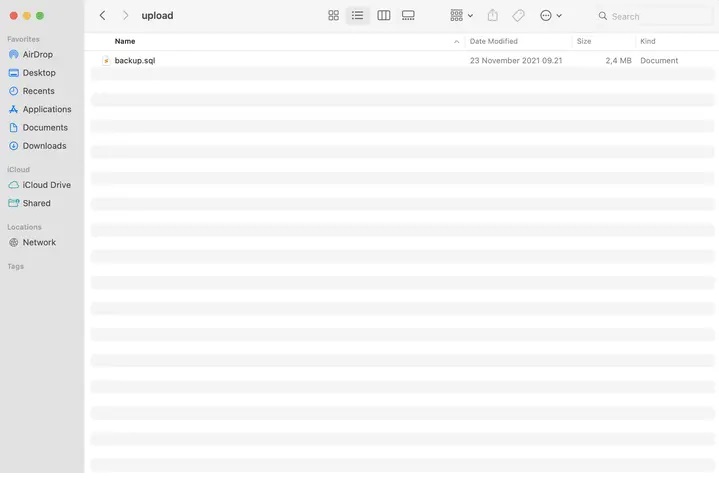
Now that you have the SQL file ready, go back to phpMyAdmin, and select the empty database (If you haven’t created it yet, go back to cPanel > MySQL Database Wizard). After selecting the database, go ahead and click the “Import” button on the top bar. Next, click “Choose File” to select the .sql file. Then scroll down and click Go.
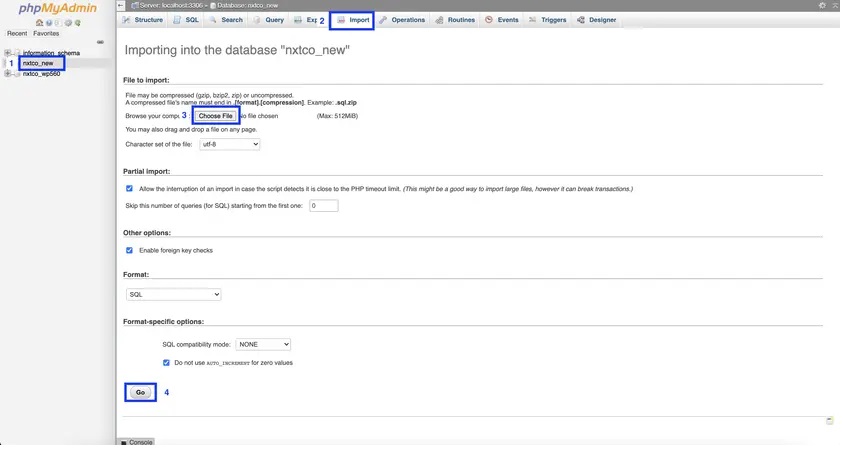
Importing a MySQL database will take a few minutes normally. When it is done, there will be a prompt saying “Import has been successfully finished” and you will be able to see the content of your SQL database within the previously empty one.\
How to Export and Import MySQL Through SSH command line
Note: To export and import MySQL via the command line, the cPanel SSH access must be enabled. Make sure you do know basic SSH commands to login to your server via Terminal or PuTTY. You will also need to have the database credentials such as the database name, user, and password.\
Exporting
First, open your terminal or PuTTY and login to your hosting account. Once logged in, navigate to the directory where you wish the SQL database to be exported and type in this command below:
mysqldump -u DBUSERNAME -p DBNAME > dbbackup.sql
Make sure to replace the DBUSERNAME with the correct database username and DBNAME with the correct database name.
Here’s the breakdown of the command:
mysqldump is the initial command to export the MySql database.
-u clarifies the username of MySQL database
-p specifies the need to use the database password
dbbackup.sql : the result of the export
After typing the command above, you will then be asked to enter the database password. If the password is correct, the export progress will start. Once finished, type in the command ls and the dbbackup.sql should be visible.
Here’s a screenshot taken from Terminal for reference:

**Importing**
Luckily, importing a MySQL database via SSH includes almost the same exact steps as exporting one. Once you are logged in to your server via Terminal or PuTTY, navigate to the directory where you store the SQL file that you wish to import to an existing empty database. Then run this command:
mysql -u DBUSERNAME -p DBNAME \< dbbackup.sql
Don’t forget to replace the DBUSERNAME and DBNAME to the correct database username and name accordingly.
Command Breakdown:
mysql is the initial command to import the MySql database.
-u clarifies the username of MySQL database
-p specifies the need to use the database password
dbbackup.sql : the SQL file that will be imported
You will then be prompted to input the correct password and afterward the import progress will be initiated. Depending on the database size, it can take a few seconds or minutes for the database import to finish.
Here’s another screenshot that can help you:

**Conclusion**
Now that you see how impeccably easy it is to import or export a MySQL database, there’s no need to worry if there comes a day when you need to do either. For the beginners, it’s always recommended to export or import the databases via phpMyAdmin as it’s much easier and GUI based. For the more experienced users out there, feel free to type in those commands above from your terminal and voila! Your SQL database will be exported/imported in no time!
# Types of DNS Records
Source: https://kb.verpex.com/cpanel/types-of-dns-reords
DNS(Domain Name System) is a database that provides important information about a domain/hostname. DNS records which are stored on the server help users connect with the outside world.DNS records provide all the information you need to know about a domain and how to handle requests from a domain.
There are different types of DNS records that can be added to your domain depending on what purpose you want them to serve. The most common record types are A (address), CNAME (canonical name), MX (mail exchange), NS (name server)and TXT (text record). These records can be created on our DNS servers.
Find a brief description of these records below:
**NS(Nameserver)**
A nameserver is a DNS server that stores all DNS records for a domain, including A records, MX records, or CNAME records.
NS records let you know where to go to find out a domain's IP address. This record indicates which DNS server contains the actual DNS records and is authoritative for a domain. NS record ( Name Server Record ) is crucial to correct the functioning of domain names, these records are used to identify DNS server names and the availability of a domain name. You can control your domain name thanks to services provided by domain registrars(DNS management and WHOIS management).
A domain can have multiple NS records to increase reliability. It means that if one nameserver goes down, DNS queries go to the listed secondary DNS server. When NS records are updated, it may take several hours for the changes to be replicated throughout the DNS.
Ns1.verpex.com\
Ns2.verpex.com\
Ns3.verpex.com\
Ns4.verpex.com
Without properly configured NS records, users will be unable to load a website or application. NS records are however limited as they only serve to define the domain nameservers inside a zone, they don't include an IP address that will make sure that the resolution of a domain is successful. DNS records can be customized
[Verpex](/domains/how-can-i-set-nameservers-on-my-domain) allows clients to edit the NS records for their domain, it’s the most basic functionality of domain names.
**A(Address)**
The A record(address-record) is a record in your domain's DNS zone file that makes the connection between the domain and its matching IP address. The A-record determines which IP address belongs to a domain name. For example, you can have the host record for yosxquisite.com.ng pointed to 198.244.229.148
People know websites through their domain names. But computers know websites as IP addresses. The domain name system—DNS—turns those domain names into IP addresses. The IP address that you use does not have to be on your network.
Website owners now have access to control the DNS host for their domains with their hosting companies, they can set an A record to point their domains and hostnames to any IP address of their choice.
To lookup the A record of a domain, you can use the DNS lookup online tool([https://www.whatsmydns.net/](https://www.whatsmydns.net/)) or the “dig” command on a Unix machine.
At Verpex, we offer you the option to modify the A record, along with other DNS records, via a web interface called Zone editor. To set the desired A record, simply follow the steps in this[ link](/cpanel/how-to-edit-your-dns-records-with-verpex).
**MX (Mail)**
MX can be a hostname or the name of a mail server (for example, mail.verpex.com) that tells the sending server(SMTP) where to deliver an email. It specifies a mail server to handle a domain's email, these records are added to the DNS of a domain for incoming and outgoing emails.MX record directs email to a mail server, it indicates how emails should be routed.
Emails are routed through to the IP address which is set in the A-record of the host. MX lookup tool checks the MX records for a domain name, to lookup the MX record of a domain, you can use an online tool([http://mxtoolbox.com/](http://mxtoolbox.com/)) or by using nslookup on a Unix machine.
A typical MX record would look something like this:
Name TTL Type Record\
verpex.com 7200 MX Priority: 0 Destination: verpex.com
All emails sent to [test@verpex.com](mailto:test@verpex.com) will be sent to the mail server mail.verpex.com with the IP address 172.67.73.60
Verpex Hosting gives you the opportunity to control your domains' records through a fully packed [DNS Management interface](/cpanel/how-to-edit-your-dns-records-with-verpex).
**CNAME(Canonical Name Records)**
CNAME is used to associate a hostname with another host or domain. The host that you wish to point to does not have to be on your network.
CNAMEs are important when you have renamed a host, you wish to refer a subdomain to a different server or you just want to point multiple domain names to the same IP addresses.
**\
TXT(Text)**
TXT records are records added to the domain that contains text information for sources outside of a domain. TXT record is a key component of several different email authentication that helps an email server determine if a message is from a trusted source. It provides the ability to associate some text with a host or other name. TXT records can be added to a fully qualified domain name, one domain can have many TXT records.
Usually, TXT record is used for SPF (Sender Policy Framework) email spam prevention, DKIM (DomainKeys Identified E-mail) and DMARC (Domain-based Message Authentication, Reporting and Conformance) domain ownership verification purposes. TXT records were originally developed to contain human-readable information about a domain or server, now it also contains machine-readable information.
**DMARC(Domain-based Message Authentication, Reporting and Conformance)**
DMARC uses DNS to publish information on how an email from a domain should be handled either to quarantine or reject the email. Because it uses DNS, nearly all email systems can decipher how email supposedly sent from your domain should be processed.
DMARC is a must for every domain owner, it is used to protect your domains against abuse in phishing or spoofing attacks. When a domain owner publishes a DMARC record into their DNS record, it helps to gain insight into who is sending emails on behalf of their domain. This information can be used to get detailed information about the email channel and get control over the email sent on his behalf.
**AAAA (quad A Record)**
An AAAA Record is another type of DNS Record that points a domain or subdomain to an IPv6 address, it matches a domain/subdomain with an IPv6 address, similar to A records, which do the same for IPv4 addresses.
**CAA Record**
Certification Authority Authorization (CAA) is a DNS record, which allows a domain name holder to specify the preferred Certification Authorities (CAs) to issue SSL certificates for a domain. It provides additional confirmation for the Certification Authority (CA) when validating an SSL certificate.
Certificate Authority Authorization (CAA) is a way to restrict issuance to the CAs you use so you can reduce your risk from security vulnerabilities. Setting up CAA is an easy way to improve your website's security.
**SRV(Service record)**
SRV is used to specify the location hostname and port number of a specific service and how your domain handles that service in the Domain Name System. It is used to establish a connection between a service and a hostname.
It defines a host of your domain for which a certain service is supported. It is frequently used when configuring some other third-party service.
**ALIAS (ANAME record)**
It is a record type which is used to point one domain name to a hostname instead of an IP address, it can be used in place of CNAME
# Understanding Cron Jobs
Source: https://kb.verpex.com/cpanel/understanding-cron-jobs
When running a complex website, it makes sense to have a way of automating regular tasks, and never have to remind yourself to do them. This is what Cron Jobs is for – Linux commands that schedule things. That means, it is armed with a good knowledge of Linux commands, and you can make the best use of these Cron Jobs.
A Cron Job can be quite handy, as it can be instructed to run in hourly or minutely increments, on a certain day every week or date every month - you can even mix and match these. Be advised, though, that running too many Cron Jobs too often can lead to undue stress on the servers. However, such limits may not be applicable to non-shared resources like a dedicated server.
These Cron Jobs can be used for good old storage housekeeping, or for more advanced task flows that can free up time for more immediate concerns. There are even scripts that depend on Cron Jobs to run. The good thing is that such scripts will clearly detail what needs to be done with regard to the Cron Job.\
How Cron Jobs Work
A Cron Job is made of three parts:
```
A script that is meant to run
A command (specified in cPanel) that runs the script at set intervals or at set times.
An action or result generated by the script, as the nature of the script might be.
```
Adding Cron Jobs via cPanel
1. Once you’re logged in, under ‘Advanced’ in cPanel, select ‘Cron Jobs’ or type in ‘Cron Jobs’ on the top right Search bar.
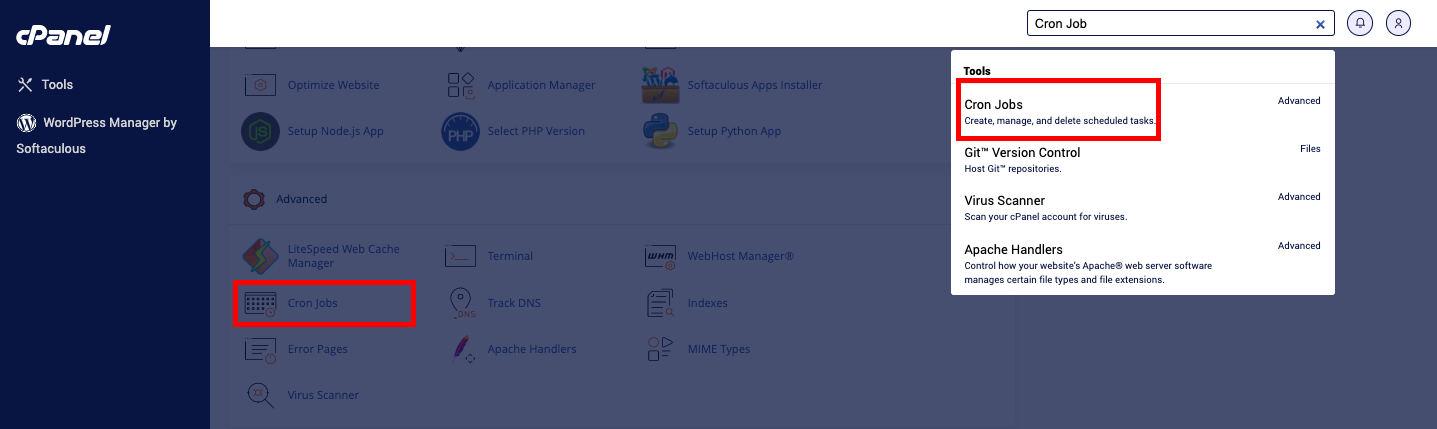
2. For the next section, pick ‘Cron Email’, if you wish to get a report email every time the cron job runs. Then enter or confirm your existing, working email address (by default it uses the cPanel user email address).
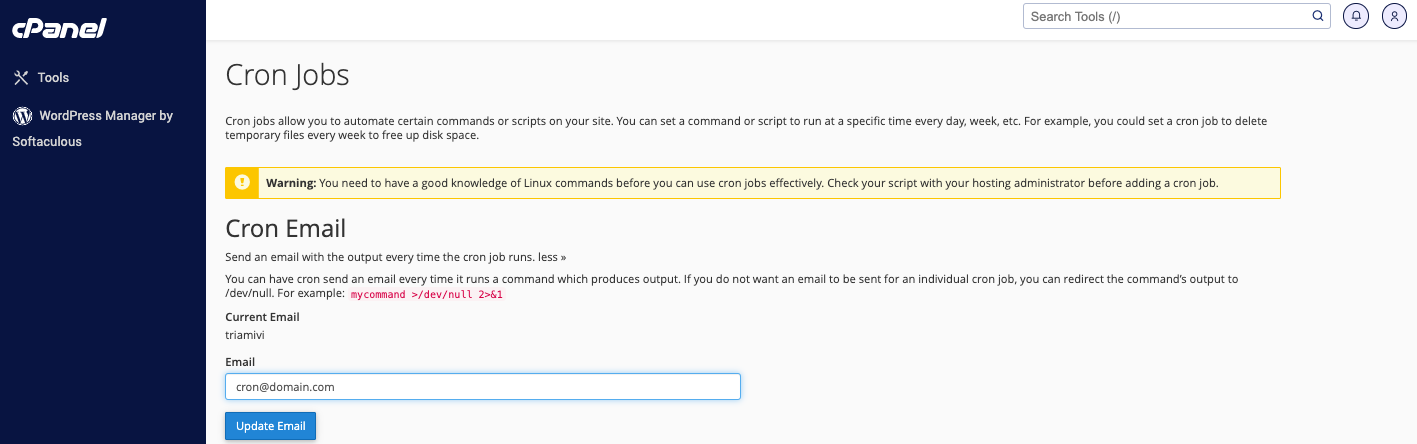
3. In ‘Add New Cron Job’ > ‘Common Settings’, ensure that all settings meet your requirements
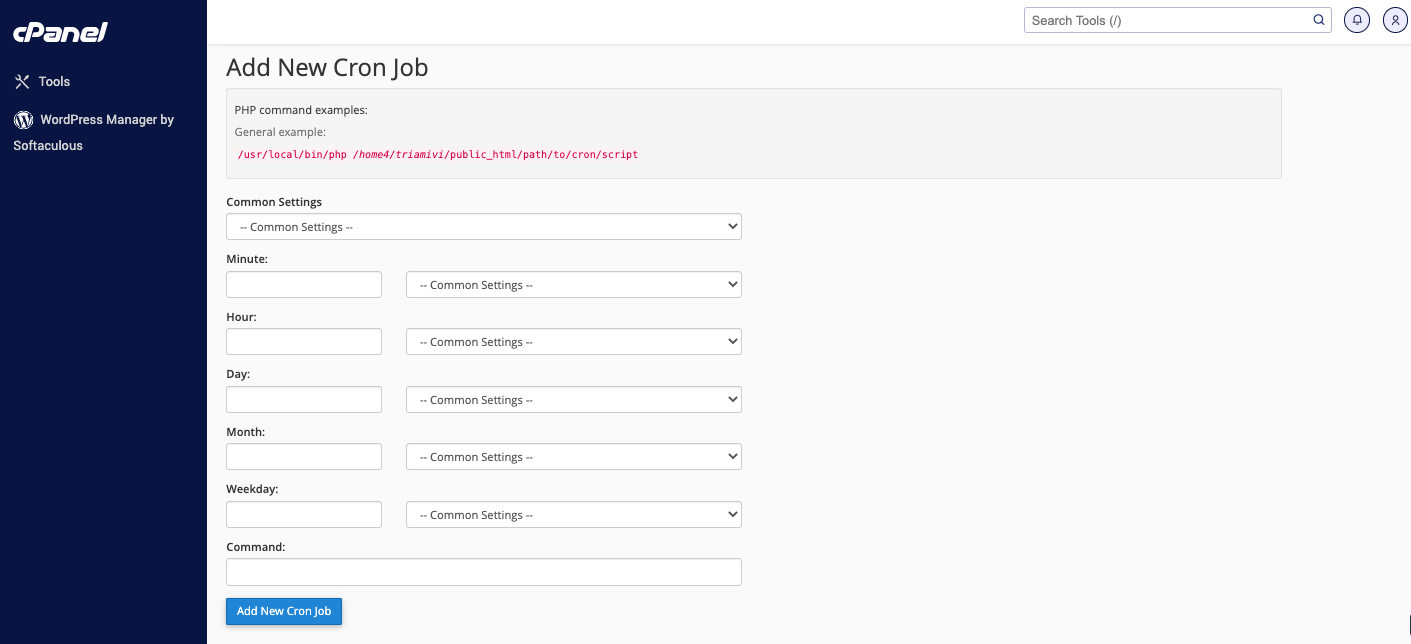
4. You can choose specific time parameters for your Cron to run – from month all the way to minute.
5. n ‘Command’, enter the command that you’d like to run as a Cron Job.
6. That’s it. Just ‘Add New Cron Job’, and it will be added.
Here in cPanel, you can also view all ‘Current Cron Jobs’ where, under the ‘Action’ column, you also get to ‘Edit’ or even ‘Delete’ any existing job.
cURL, GET, and WGET
Here’s some good news when it comes to these request commands. As common as they are in Cron Jobs, there are no additional steps needed to access them; they’re all enabled by default with us.
To Keep in Mind for Running Cron Jobs
1. Any such process will initially use the home directory to run.
2. Since Cron processes do not generate an interactive command line, startup files like bashrc will not be accessed.
3. If we name an executable file without a full path – either absolute or relative - the process will expect it to be in the ’bin’ and ‘usr/bin’ paths alone.
4. For any script, the interpreter’s location can be provided in one of two ways - a full path in a proper #! format or in the shell interface.
5. All file locations must have full paths – absolute or relative, again.
# Using a MySQL Database Remotely with cPanel
Source: https://kb.verpex.com/cpanel/using-a-mysql-database-remotely-with-cpanel
If you have external contributors to your website or your database resides on a different server, it makes sense to use remote database connections from your cPanel. Here’s how you can go about it:
1. Pick up the IP address for the server from which you intend to establish the remote connection. [http://whatismyipaddress.com/](http://whatismyipaddress.com/) should help you find this IP address.
2. Login to your account on cPanel, look for ‘Databases’, and then ‘Remote MySQL’.
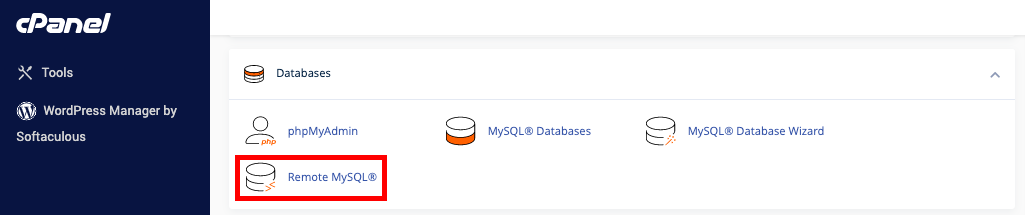
3. Clicking on it will bring you to a new page with a ‘Host’ field where you can enter the IP address (or host name) we identified in the beginning, and add it by selecting ‘Add Host’. If you want to grant database access to, say, all IP addresses starting with 167.45.0, you can use the ‘%’ character, by just entering 167.45.0.%.
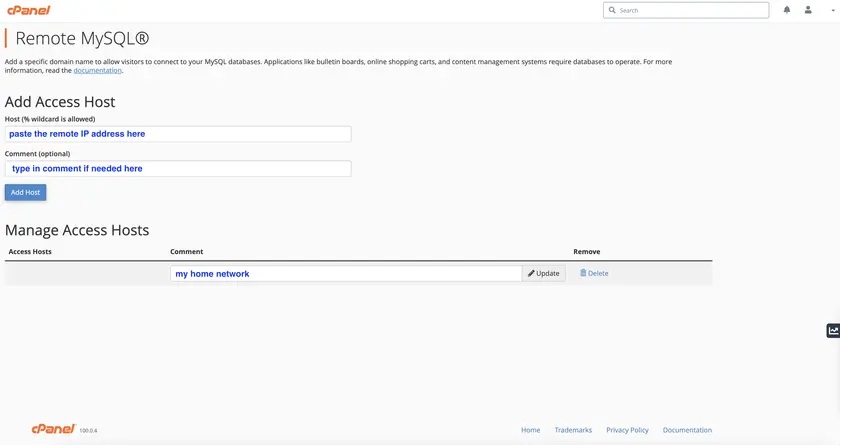
4. Popular software for configuring your remote MySQL include MySQL Workbench ([https://www.mysql.com/products/workbench/](https://www.mysql.com/products/workbench/)) or Navicat ([https://www.navicat.com/en/products/navicat-for-mysql](https://www.navicat.com/en/products/navicat-for-mysql)). For this purpose, you’ll need your hostname, the name of your database, the credentials for the database, the port no. 3306, and if needed, the connection method should be chosen as TCP/IP.
If you’d like to remove database access that is no longer needed, just navigate back to the ‘Remote MySQL’ feature and find the host in question, then click ‘Delete’ next to its name, and confirm it with the ‘Remove Access Host’ button.
# Using FTP
Source: https://kb.verpex.com/cpanel/using-ftp
Files on a web server can be manipulated with FTP accounts over a protocol. A protocol will allow FileZilla or other desktop software to move, download, and upload files on your accounts for hosting. We will go over the things you need to do to connect with FTP to your account.
You can enter the server IP or your domain name for Host. You can go to the main menu of cPanel, and on the right side, you need to click on Shared IP in order the find the IP you need to enter.
The Password and Username are either the password and username you chose for your FTP accounts or the password and username you chose for your cPanel account. Keep in mind that if it is for the FTP Accounts, rather than you’re your cPanel username and the password you set up for it, they will be in the format [username@domain.com](mailto:username@domain.com)
The port is 22 for SFTP and 21 for plain FTP.\
Usage of FTP
FTP, or File Transfer Protocol, is used to transfer files and to communicate between computers on a Transmission Control Protocol/Internet Protocol, or TCP/IP network, also known as the internet. Files can be transferred and received by users who have been granted access to the File Transfer Protocol Server.
In order for the FTP connection to work, it needs two sides to communicate on the network. Users need to provide credentials to the FTP server in order to have permission. However, keep in mind that not all server requires credentials in order to access their files. For instance, some public FTP servers do not require credentials. These are also called anonymous FTP.
When it comes to establishing an FTP connection, there are two different communication channels. One of them is where the distribution of data happens, and it is called a data channel. The second one of them is where the instruction and response are initiated, and this channel is called the command channel. To transfer or to get a file, a user that is authorized will use the protocol to ask about creating changes in the server.
We suggest that you download Filezilla if you have not used FTP before. You can download Filezilla on the following link: [https://filezilla-project.org/](https://filezilla-project.org/)
The commands you need to use are the following:
To enter a folder, you need to double-click on it.
To go back to the previous folder that you were in, you need to find the “..” folder and double-click on it.
In order to download a file, you need to double-click on it.
To upload files to the server, you need to double-click or drag and drop the files on your local computer.
By right-clicking on files or folders, you will open a menu that will offer you a lot more options, such as File Permissions, Move, Delete, Copy, and so on.
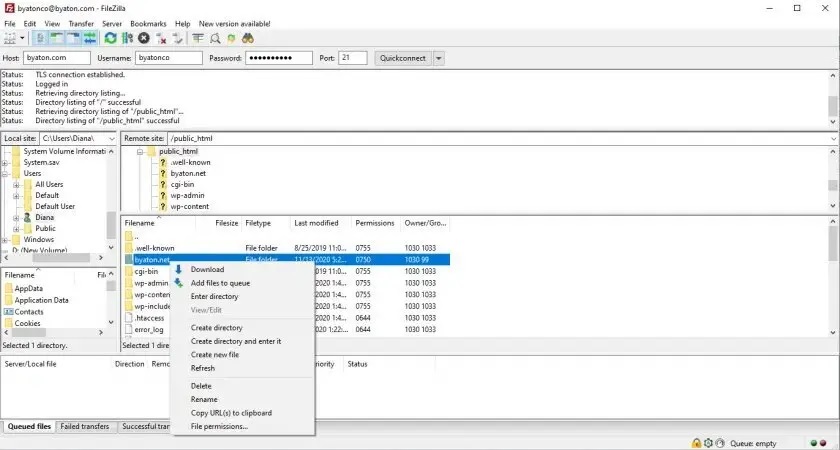
# Using NodeJS Apps
Source: https://kb.verpex.com/cpanel/using-nodejs-apps
cPanel can run NodeJs applications. NodeJs was created with the aim to create real-time sites with push capability, and the creators got their inspiration from applications like Gmail. We finally have web applications with two-way connections, where both the server and the client can initiate communication, allowing them to freely exchange data.
To load your first configuration screen, log into cPanel and then click Setup Node.Js App.
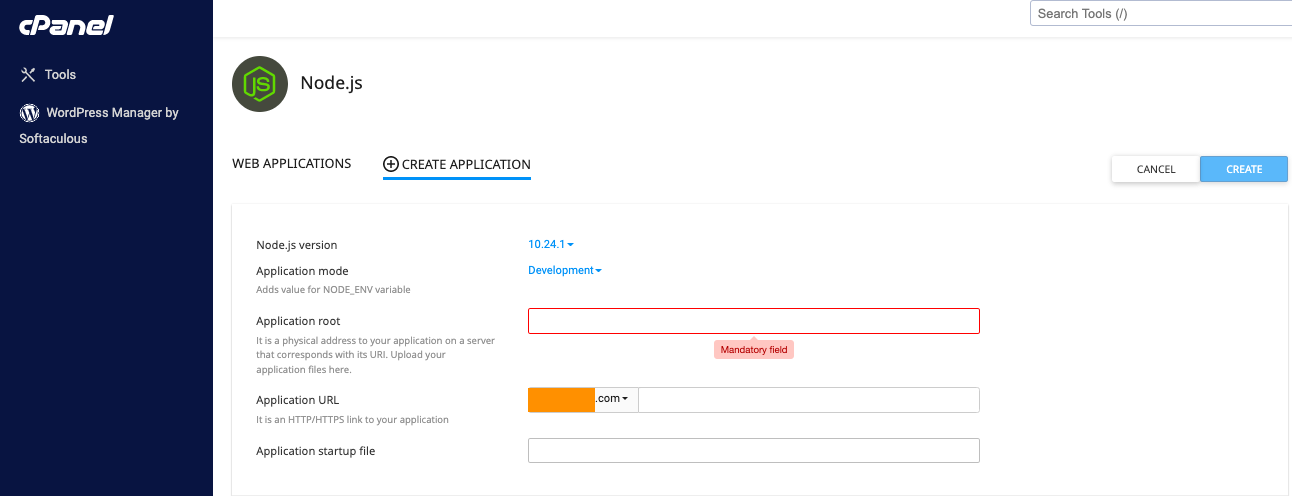
In order to set up a NodeJS application, you will need to fill out three fields. The folder from which all of the NodeJS files will be loaded is the Application root. Any module imports will fail if this field isn’t correct. The URL from which you would like the website to be loaded from is the Application URL.
The main entry point of your NodeJs application is the Application startup file. Typically, this is the file that has a listening HTTP server on a specific port and has all of the data connectivity string, module imports, and so on. The application will be proxied accordingly if you’ve done everything right, and it will be available on ports 443 and 80.
Your error log location should be in the passenger log file field. However, you can set it to whatever you want since this field is less important.
## ExpressJS
ExpressJS is a widely used web API framework for RESTful services. You need to install the ExpressJS package through NPM in order to get a working ExpressJS application. The command below can do this:
```text theme={null}
npm install expressjs
```
You can navigate your application URL, and it will send the ‘Hello World!’ response if you’ve set up everything correctly.
## React / AngularJS / VueJS/ NuxtJS/ NextJS
The front-end frameworks we mentioned above are extensively used. The application should be developed in a local environment and then built through npm scripts provided by each framework in order to use hosting services for the frameworks we mentioned above. The build script of a framework is typically ran through the next command:
```text theme={null}
npm run build
```
The running scripts are different, even though the command does the same for all applications. For instance:
vue-cli-service build --no-clean (VueJS) react-scripts build (ReactJS)
The files of the application will be HTML files that are static with the pre-completed JS to the Common JS format. Once they’ve been built accordingly, they will run without any problems. Since AngularJS, ReactJS, and VueJS are only static websites and don’t have a server that is back-end running, you can transfer the files over to the document root of the website. Our recommendation is to transfer the files through SSH, FTP, or a CI setup that automatically transfers the code on git pushes.
When it comes to NuxtJS and NextJS, these two SSR (Server Side Rendered) servers have both a reactive web application and a listening server running. Even though running them is a possibility, they are very complicated to set up and our support does not provide support for them.
# Using phpMyAdmin
Source: https://kb.verpex.com/cpanel/using-phpmyadmin
PHPMyAdmin is a tool for the management of MySQL databases. This tool lets you manipulate and manage data in the databases of your hosting—for instance, Magento stores user data, pages, and posts in a MySQL Database. You can use phpMyAdmin to delete or add records in a MySQL database.
What are the basic functions of phpMyAdmin?
1. Accessing databases – Through the cPanel’s phpMyAdmin, you can access your databases.
2. Creating databases and users – You can use phpMyAdmin to create databases and users.
3. Selecting databases – To view the database structure, you need to click on the name of the database located in the left column of the home page. The structure of the database will be shown by clicking on the name of the database. The structure will show individual names of tables that your database is made out of.
4. Browsing databases – Once a database has been selected, you can click on the Browse link that is beside the table name while you’re in the Structure view in order to browse each table. The Browse view displays data rows in the database. Based on the current view, there is also a link to Create PHP Code. By clicking > or >>, you can go through the rows of data.
5. Viewing MySQL processes – When you select the tab SQL and run the command showprocesslist, you will be able to see the current MySQL processes. Click on the kill link that is located left of the process ID number if you want to kill a process.
6. Executing SQL queries – Using the Query and Structure tabs lets you run several queries with semicolons that separate different queries.
This article will cover the steps that you need to take to use and access your phpMyAdmin.
You need to login into your account on cPanel in order to access PHPMyAdmin. Once you’re logged into your account, you need to look for the icon that says PHPMyAdmin, or you can just go to the top right-hand corner and use the search bar.
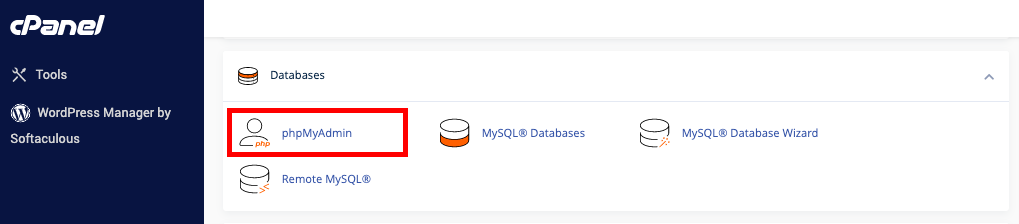
Once you’ve clicked on the icon PHPMyAdmin, a new tab will be Infront of you, and this tab will be the interface of Using phpMyAdmin. You will see a list of your databases under the cPanel account on the left-hand side of the screen. Nothing will be listed here if you do not have any databases.
You can see the database that you are currently in at the top of the bar, as well as the actions that you can take in this database (such as Import database, Export database, Search, SQL query, and so on). You can also see the listed tables. You will see the contents of this tabling by clicking on it to expand it.
An important thing to keep in mind is that unless you don’t have any other choice left, we don’t suggest that you work directly in the database.
# What Databases do we Provide?
Source: https://kb.verpex.com/cpanel/what-databases-do-we-provide
A database allows multiple users to maintain, update, and edit stored information quickly, securely, and efficiently
We provide MySQL (MariaDB) databases which provide improved performance on all of our hosting packages. These can be created in your cPanel account. We do not limit the number of databases\
you can create.
Almost all common website applications (including WordPress and Joomla) use a MySQL database for their data.
Other database formats\
If you require a MongoDB database we recommend using MongoDB Atlas. They have a free tier to which you can connect remotely to.
We do not provide PostgreSQL.
We do not provide MSSQL Databases or MSSQL Express. These are Windows database formats.
# What is Bandwidth?
Source: https://kb.verpex.com/cpanel/what-is-bandwidth
Bandwidth refers to the amount of data that is transferred to and from a website or server. It is measured in bytes (B) and is typically tracked on a monthly basis. It is the traffic your website can handle over the internet. Bandwidth is used each time a visitor accesses a website.
cPanel provides a bandwidth usage tool that allows you to monitor the amount of data that is being transferred to and from your website. This tool displays a graph showing the total amount of data transferred, as well as a breakdown of the data transferred by domain, subdomain, and addon domain.
You can use this tool to monitor your website's bandwidth usage over time and ensure that you are not exceeding your allotted bandwidth.
If you exceed your bandwidth your account will be temporarily suspended and you will be required to upgrade.
**Why you should not exceed your bandwidth limit?**
If you own or manage a website, it is important that you monitor your bandwidth usage to avoid your subscription being put on hold
**What Do Bandwidth Usage Statistics Tell Us?**
* They tell us about excessive traffic, if there is an increase or decrease in traffic, you can know by checking your bandwidth stats
* They tell us about the statistics of a promotional effort
* The bandwidth statistics show the time of an attack if a site falls victim to attack
**How to Check Bandwidth Usage in cPanel**
It is crucial to monitor bandwidth usage to keep your site running constantly. An overview that displays how much bandwidth is being used by your website is displayed in the Bandwidth section in cPanel
**How to see a short summary of bandwidth usage:**
Log into your cPanel\
On the right-hand side of the screen, you will see Bandwidth Usages under the Statics section.
**How to see the full details of bandwidth usage:**
* Log in to cPanel button.
* Navigate to “Metrics”
* Click "Bandwidth"
The Bandwidth interface displays information for the past 24 hours, the past week, the past year, the current month, and the previous months.
**The cPanel bandwidth usage statistics**
**HTTP** – web traffic, requests for pages or resources (images, etc.) on your website\
**POP3 and IMAP** – email that your accounts received\
**FTP** – file transfers\
**SMTP** – emails that your accounts sent
**Monthly Statistics Details**
A monthly breakdown in pie charts is shown here. Simply click on the link from the monthly summary to view the bandwidth usage of that day, you can do the same for the hourly and daily statistics.
It's important to keep an eye on your website's bandwidth usage and make sure that you are not exceeding your allotted bandwidth. This can help you to avoid any unexpected charges or downtime for your website.
Bandwidth is a limited resource when overused can cause performance issues. Therefore, it's important to monitor and manage the bandwidth usage on your website.
# What Nameservers Should I use for an Addon?
Source: https://kb.verpex.com/cpanel/what-nameservers-should-i-use-for-an-addon
Addon domain names should use the same nameservers as your primary domain name. You can find nameservers information in your hosting welcome email.
# Is There Downtime When Changing Hosting Plans?
Source: https://kb.verpex.com/cpanel/when-i-change-between-hosting-plans-is-there-any-downtime
The accessibility of your website is one of the key factors in the success of your business. Downtime is the amount of time your website will be unavailable during the migration process, this could permanently damage your traffic, reputation, and revenue.
Transferring from one host to another has now been simplified and made easy, however, we do not guarantee 100% successful transfer process because at some point, you might still experience downtime during the propagation. Depending on what goes on behind the scenes, the transfer of DNS servers between the old and new web hosts can cause a domain to go dark for between 1 to 4 hours after the request for such a change is submitted to the new registrar.\
**\
There are some techniques to employ to minimise downtime:**
1. Ensure that all features(database, subdomain, software configurations) are working properly before canceling the old hosting plan
2. Refrain from making changes to the site until the process is complete.
3. Download and compress backup files to the new server
4. Update the new domain name servers as soon as the transfer is completed, not in the middle of migration
As soon as the data transfer is complete, our technicians will provide you with all the necessary details via the submitted ticket and promptly resolve any issues that may arise.
# Your Hosting Account has been Compromised
Source: https://kb.verpex.com/cpanel/your-hosting-account-has-been-compromised
If your hosting service has been compromised, it does not necessarily mean your Verpex account has been accessed by a third party.
Your account is compromised when you noticed strange content on your website\
Spam emails are being sent out from any of your email accounts( if you noticed outgoing spam from your mailbox, please contact us to prevent suspension on your account as this is against our terms of service)\
Suspicious login activity to your hosting account.
We recommend the following to resolve the compromise on your account
* Reset your password not only for your cPanel but all login access to your cPanel, your webmail access, your CMS (WordPress, Joomla,etc) access, your verpex account access and the devices used in accessing your cPanel
* Scan using immunify360
* Update outdated plugins and themes
* Enable Two-Factor Authentication.
You can contact our support team if you noticed any unauthorized activity on your account.
# Account Closure
Source: https://kb.verpex.com/docs/account-closure
Closing your Verpex account will permanently delete all associated information.
Account closures can not be reversed. Once we delete your data there's no way to retrieve it. To close your account, please contact support.
Note: You cannot request refunds once you close your account. If you're eligible for a refund, please contact our support to request a refund before you close your account. Once your account is closed, your account data is deleted and you will no longer be eligible for a refund
If you have multiple Verpex accounts, you can simply merge them instead of closing them.
To close a Vepex account, follow these steps:
1. Ensure all conditions are met:
* No credit cards are linked to the account.
* No pending backorders.
* All registered domains are removed, and TLDs are set to XWHOIS.
* No active products or billing lines exist.
* No active workflows should be present.
* If you want your contact details removed as well, you can remove email addresses, phone numbers, and postal addresses from the account.
If you are still requesting closure despite the above conditions being resolved, escalate the request to our support for further assistance
These steps ensure that the account can be closed securely and that all personal data is handled according to the company's policy.
# Banned Countries
Source: https://kb.verpex.com/docs/banned-countries
Verpex hosting is a popular choice for people looking to host their website, however, there are instances where Verpex hosting cannot be used due to geographic boundaries.
More than half of the world's population uses the Internet on a day-to-day basis, but not everyone is granted the same freedom when browsing. What this means is that the web is not really as worldwide as we may want it to be. Each country has its own laws and regulations that govern everything, including the Internet. There is a rapid decline in internet freedom, with only a handful of countries allowing access to truly uncensored cyberspace.
There are some countries internet is found restrictive, find a list of these countries below
China\
Qatar\
Iran\
North Korea\
Sudan\
Syria\
Afghanistan\
Cuba\
Eritrea\
Guinea\
Liberia\
North Cyprus\
Sierra Leone\
South Sudan\
Syrian Arab Republic
Clients from the banned countries listed above will be unable to purchase hosting from us. However, you might try some of these tips and adjustments that may help you get connected
**Change your VPN connection protocol**
Try changing your protocol. We recommend using OpenVPN via UDP or OpenVPN via TCP (available in Windows and Android apps) configuration.
**Use IP addresses instead of our server names**
If the above suggestions do not work, we will recommend placing your website content on a server with a local provider
# Can I Host Adult Content?
Source: https://kb.verpex.com/docs/can-you-host-adult-videoporn
We allow adult sites, you can host adult content on all of our hosting packages. However, please note that you are not permitted to host content that is illegal (libel, copyright infringement, etc.) or that promotes or encourages illegal activities, promotes, encourages or engages in child pornography or exploitation of minors, please see our[ Terms of Service](https://verpex.com/terms-conditions) for more details
Verpex does not restrict the content of hosted sites unless such content is illegal in the United States of America and the United Kingdom.
# Content Restrictions and DMCA Compliance
Source: https://kb.verpex.com/docs/content-restrictions-and-dmca-compliance
The following content is forbidden on our hosting:
* Any bots, including IRC or other social bots e.g. Telegram bots
* Any Warez (i.e. copyrighted content you do not have rights to)
* Phishing Content, especially website that has malicious purposes
* Bulk mailing
* Audio streaming
* Video "tube" websites
* IP Scanners, Brute Force Programs;
* Any financial institution websites (banking, insurance, investment) unless explicitly approved in writing from our team who will ask to see proof of regulatory approval.
* Pharmaceutical websites
* Lottery sites
* File Storage, including movies, applications, computer backups
* File upload websites
* Distribution of confidential and personal information;
* Mobile app downloads
* NextCloud/OpenCloud
Any account found to be hosting the above will be immediately taken offline.
**Do you Allow Adult Sites?**
We allow adult sites which are legal in the United States of America and the United Kingdom.
**Media streaming** - We support HTTP streaming on shared servers; however, live streaming is not supported. As Live streaming will affect our bandwidth that will hamper other customers
**DMCA Compliance**
Most of our infrastructure is in the US, which puts your web presence under the jurisdiction of US law. Laws like the Digital Millennium Copyright Act (DMCA). We may be required by law to send you notices such as DMCA takedown notices, UDRP notices, etc, please note that we will comply with the requests.
# Getting Started with Verpex
Source: https://kb.verpex.com/docs/getting-started
This page will help you get started with Verpex. You'll be up and running in a jiffy!
**Welcome to the Verpex Knowledgebase.**
We've built out a really comprehensive documentation system that will show you how to manage all aspects of your Verpex hosting, as well as give you tips and tricks on how to manage your website and domains.
**Logging in to cPanel**
Once you've ordered your hosting from Verpex, you'll receive a welcome email with details of how to log in to your hosting control panel with us once your hosting is activated (it should be within a few minutes of your order going through). If for some reason you don't receive your welcome email, please get in touch and we can check that everything has gone through OK.
In terms of logging in to your hosting, the first step is to log in to the [https://clients.verpex.com](https://clients.verpex.com) area. Once you have logged in here, click Services and then My Services. Your hosting package(s) will be listed here - click the one you want to log in to and then on the next page click Login to cPanel.
Your login credentials are stored as a secure token in this area (rather than a plaintext username and password) - if the log-in fails for any reason please get in touch and we can reset this to enable you to log in.
**Email**
Once you've logged in to cPanel, you'll be presented with a number of icons that enable you to manage all aspects of your hosting with Verpex. One of the most common things to get set up straight away is Email - click Email Accounts and from here you can start setting up email addresses @yourdomain.com.
To access your email, you can use an email client like Mac Mail, Outlook or Thunderbird, or you can use webmail. Webmail can be accessed by visiting [https://webmail.\[yourdomain.com\]](https://webmail.\[yourdomain.com]). You'll need to log in with the mailbox username and password you created earlier. If you need any help getting set up in your email client, please let us know - we can talk you through the setup.
**Installing Applications** (e.g. WordPress)
In cPanel, scroll down and find the icon that says \`Softaculous Apps Installer. Click the icon of the application you'd like to install, for example - WordPress, Magento, Prestashop, Joomla - and then the system will ask you for some more information. Click 'Install' once you've entered that and then you'll be able to log in to the admin area to get started with your application.
**Nameservers**
If you ordered a domain from Verpex with your hosting, your nameservers will be set automatically to link to your hosting with us. If you have transferred a domain, or if you want to use a domain you have registered elsewhere, you'll need to update the nameservers to:-
ns1.verpex.com
After the page refreshes, the changes should instantly take effect.
Congratulations, you’ve managed to successfully change the language of cPanel. Keep in mind that not all the languages are supported in cPanel, but you can find the major languages without a problem.
Remember that once you change the language of the interface, there is a cookie in your browser set by the system that will expire after one year. Each time you log in to webmail from a new browser, you must perform this step, whether the cookie expires or you delete cookies. Also, there is an option to change the login interface locale for Webmail, WHM, or cPanel during the process of logging in. This will change the interface’s default language.
In addition, if the Accept-Language header of your browser is set, the locale that corresponds to your browser setting will be displayed by the login interface. The login interface will be displayed in English if the local that the header of the browser requests is not available.
You can leverage cPanel in a specific way with very little effort, and it’s important to learn the basics of cPanel such as this one.
# How to Change Your cPanel Password
Source: https://kb.verpex.com/cpanel/how-to-change-your-cpanel-password
This article will go over how to change your cPanel password. This password enables you to log in to your primary FTP account, SSH, MySQL, and cPanel.
The first thing you need to do is log in to cPanel. On the cPanel home screen, you need to go to the Preferences section and click on Password and Security.

Type your current password in the Old Password text box. Then, type the new password that you want in the New Password text box. Retype the new password in the New password (Again). Lastly, you need to click on Change your password now, and immediately you will have a new password for your cPanel account. If you have forgotten your old password and you can’t access your account for any reason, please contact us for further assistance.
Alternatively you can change your cPanel password from within your client area,
Log into your Verpex dashboard\
Select Products& services from the bar on the left\
Navigate to the product you wish to change the password for\
Click manage product\
Click Manage\
Under Actions, click Change Password
Now you have successfully changed your password, you can log in using the new password.
How to Pick A Strong Password for Your cPanel
One important thing to remember is that you should protect your password. Choose strong passwords and change them regularly to ensure the best security for your account.
Some of the most commonly used passwords are based on hobbies, family names, or just a simple pattern or combination of words. Even though these passwords are easy to remember, they are also not as secure.
To choose a strong password, use a mixture of lowercase and uppercase letters since passwords are case-sensitive. Randomly mix up numbers and symbols with letters. You can substitute the letter A with a @ or the letter O with a zero.
If there is information about you that is easily discoverable, such as the names of your pets and relatives, your high school, city of birth, address, anniversary, or birthday, do not include them in your password. Someone can easily guess your password if you include obvious personal information in it.
Several methods are used by hackers to get into your account, and the most common way is to target you personally and type in symbols, numbers, and letters manually in order to guess your password. This process will take a longer period of time if you have a more complex and long password. Passwords that are shorter will only take a few seconds to crack.
Choosing a long password is a smart move, but what is even a smarter move is choosing a long password that includes random phrases and words. A password will be harder to crack if it is not grammatically correct; it is not a phrase that is in published literature and can’t be found in the dictionary.
If you’re having any trouble creating a new password, you can try using a password generator. Even though the result can be pretty random and it can seem like it’s hard to remember, with a little bit of practice, it can be pretty easy to memorize.
# How to Change your cPanel Password from Client Area
Source: https://kb.verpex.com/cpanel/how-to-change-your-cpanel-password-from-client-area
How to Change your cPanel Password
First of all, keep in mind that you have an opportunity to log in to your Hosting account directly from your Verpex client. Thus, you don’t need to remember your cPanel login details, it’s enough to remember only one set of login details - Verpex account credentials. So, if you forgot your cPanel password or the one provided in the welcome email does not work, you can simply log into cPanel via your Verpex Account Panel.
* To change the Cpanel password of any of your accounts, you have to log into your Verpex [client area](https://clients.verpex.com/login)
* After logging in successfully, click Products& services from the options listed on the left hand side of the page
* From the list, click on the account you would like to modify.
* Click manage product
* Navigate to Manage
* In front of Actions, click Change Password
* Enter your new password and click change password at the bottom of the page
Ensure that you choose a strong password and that this password is only shared with trusted associates or partners.
If you experience any difficulty, send an email to [support@verpex.com](mailto:support@verpex.com).
# How to change your default Index page in .htaccess
Source: https://kb.verpex.com/cpanel/how-to-change-your-default-index-page-in-htaccess
To change the default index page in .htaccess, you can follow these steps:
* Login into cPanel
* Navigate to Files, then click File Manager
* Make sure that the Show Hidden Files checkbox is selected and click Save.
* Search for .htaccess file. If there is no .htaccess file in your root directory, create a new one.
* Right-click the .htaccess file and click Edit
* Add the following line of code to the top of the .htaccess file:
```text .htaccess code theme={null}
DirectoryIndex newindexfile.html
```
* Replace "newindexfile.html" with the name of the file you want to use as your default index page. For example, if you want to use "home.html" as your default index page, the code would be:
```text theme={null}
DirectoryIndex home.html
```
* Save the changes to the .htaccess file and upload it to the root directory of your website.
Test your website to make sure the new index page is working properly.
**Note:** Make sure that the file you have set as the default index page is located in the root directory of your website. If the file is located in a subdirectory, you will need to specify the path to the file in the DirectoryIndex directive. For example:
```text theme={null}
DirectoryIndex subdir/newindexfile.html
```
# How to Change Your PHP Version In cPanel
Source: https://kb.verpex.com/cpanel/how-to-change-your-php-version-in-cpanel
Websites frequently use PHP scripting language for content and applications. PHP is an acronym for Hypertext Preprocessor. PHP is typically embedded in the HTML code and processed on the server. The most common CMSs, or Content Management Systems, such as WordPress, run on this technology.
PHP is frequently offered along with MySQL, which is a database management system, and it is extremely simple and straightforward for new programmers.
Your hosting account has PHP installed by default unless you’re on a Virtual Private Server or VPS plan. You don’t need any manual installation; you can use it directly on your sites.
Usually, the last version of PHP is the best one to use from a security, performance, and features perspective. However, there are some applications that are older and are not compatible with the latest version of PHP. For this reason, you may need to make them run on an older version of PHP.
The prerequisites are you need a cPanel username and password, a web hosting account that supports PHP and cPanel, and a domain name (for instance, [www.example.com](http://www.example.com)).\
Changing Your PHP Version
Firstly, go into your account on cPanel and navigate to the Software Tab, in which you will find the Select PHP Version tool.
Here, you can select the PHP version that your website requires. Once you’ve selected the version you need, you can press Set as current. Below, you will see the modules that are available for this precise PHP version that you’re running at the moment. In order for your website to work without any issues, you can disable or enable them as you need.
At the top, you’ll find the Options tab where the PHP settings can be changed, such as upload\_max\_filesize, max\_execution\_time, memory\_limit, and so on. Below, we will go over the options that you will be tweaking in most cases.
1. upload\_max\_size – To adjust the maximum upload file size that should be supported on your site, you can adjust this value. For example, you might need to tweak this value if you are uploading a large MySQL database.
2. post\_max\_size – This value is the most common in web forms, and it shows the maximum value that can be accepted by GET and POST variables.
3. max\_execution\_time – This value can be set to a higher limit if that is something that you need, and it shows the maximum execution time that a script should run.
4. display\_errors – If you change this value to ‘On’ since it is set on ‘Off’ by default, your browser will show errors on PHP scripts.

That is all it takes to change the PHP version used on any site you choose. The best thing about cPanel is that PHP customization is made very easy. We hope that our guide will assist you in adjusting the settings according to your needs.
# How to Change Your Time Zone in cPanel
Source: https://kb.verpex.com/cpanel/how-to-change-your-time-zone-in-cpanel
The term time zone is used for an area that observes a uniform standard for social, commercial, and legal purposes. Time zones typically follow boundaries between countries and their subdivisions instead of following longitude strictly because it is convenient for areas that often communicate to keep the same time.
If the incorrect time is in applications, scripts, or services on your server, you can resolve this issue by resetting the time zone. In this article, we will show you how to change your time zone using cPanel.
Most commonly used PHP scripts let you set the time zones as one of their settings. For instance, WordPress has a dropdown list in the General menu found in the Settings. However, this isn’t always the case with all the applications.
By default, applications use the time zone of the host server. You can change this setting if you are in a different time zone. Depending on the application you are using, the exact steps to do this will vary. Today, we will discuss how to do it using cPanel. The interface will display all the timestamps in the new time zone right after you have changed the settings regarding the time zone.
date.timezone is a setting managed via the PHP setting, which sets the script time zone of your PHP. Keep in mind that you cannot change the server time since all servers run on UTC without any exceptions. This helps prevent Daylight Savings Time errors and allows servers that run in different time zones to interact. However, what you can change is the individual cPanel time zone.
You can do this by clicking on the Select PHP version button you will find in cPanel.

When you click on the Switch to PHP Options tab, all of the php.ini values will be shown, including the time zone field.

Here, you will find the data.timezone and fill in the value that you require and that suits your needs. If you are not sure what the time zone of your country is, you can find it on the following link: [https://www.php.net/manual/en/timezones.php](https://www.php.net/manual/en/timezones.php).
Once you’ve done this, do a left-side click anywhere outside the text input or dropdown box. You will see a green box with a message that says that the change you’ve done has been applied, and that’s how you know that the change has been successful.
You may synchronize your server to the time server of your network, as your hosting provider determines it. If the time of your server is incorrect, this can be especially useful. To synchronize the time of your server with the network time server, you need to click on Sync Time with Time Server.
cPanel will update PHP in a few moments after you’ve changed it to your preferred time zone. And, that is it! Now you know how to change the time zone in cPanel, and you can instantly use it!
# How to check CPU & RAM usage
Source: https://kb.verpex.com/cpanel/how-to-check-cpu-ram-usage
RAM or Physical Memory Usage is responsible for storing and making available, temporarily, all the data needed to run a website. If this value reaches the limit, you may face 502/503/504 errors. Many reasons may cause this issue: a poorly optimized website, a heavy theme or plugin, the number of visitors, a DDoS attack, etc.
If the CPU/RAM usage reaches 100%, it indicates that your website is using all of the resources allocated. Your website slows down dramatically and, in extreme cases, even time out. It is very important that no one is over-utilizing the CPU, as this can lead to excessive server loads for the other users on the server.
**How to check your websites resource usage in cPanel**
Resource usage is an inbuilt feature in cPanel which shows the statistics of resource usage of your website on the server. It includes CPU usage, Physical memory usage(RAM usage), entry processes, faults, and I/O usage(input/output usage) according to time frames.
The following message will be displayed if you reached/exceeded your CPU, memory, or entry process limits within 24 hours: “Your account has been limited in the past 24 hours”\
Click Details to get an overview of what was limited. Below this, you'll see a number of graphs that visually represent resource usage. We recommend you investigate further and fix any code/caching issues before your site shuts down completely.
**View CPU Usage in cPanel**
To check CPU and RAM usage in cPanel, follow these steps:
* Login to your Cpanel.
* For a quick view, in the right-hand sidebar, scroll until you see CPU Usage.
* For detailed information, scroll down to the Metrics section and click Use of resources
* You will be redirected to the resource usage overview there you want to click on the “Details” link.
* By clicking on Details you will see statistical charts of the detailed resource usage breakdown.
You can view the usage for the current day, week, or month. Switch to the desired period to see a more detailed report. The Usage Report section shows how stable was the usage of CPU/RAM during the specified time frame.\
Once you have checked your website then you can optimize it accordingly or upgrade it as the case may be.
**What to do When you Exceed Your Resources**
If you exceed the resources of your package, you can resolve this by following the steps outlined:\
Review all plugins, modules, or themes and upgrade them to their latest versions.\
Contact your web developer to optimize your website
If after trying these fixes, the resource limit did not drop, you might need to upgrade, do well to contact support
It is important to be aware of the server resources your website is using so you can know when to optimize or upgrade your website. An optimized website will load faster and improve the performance of your website. When you consistently go over CPU and RAM limits, you get a warning email or temporary suspension depending on how severe the usage is.
# How to Configure and Manage WebDAV Web Disks With cPanel
Source: https://kb.verpex.com/cpanel/how-to-configure-and-manage-webdav-web-disks-with-cpanel
Webdav(Web Distributed Authoring and even Versioning) is a protocol that is used for easily accessing your files on the web from your desktop. It allows you to set up a folder on your computer that connects directly to your hosting account, enables collaboration between authors, and manages and edit files on the web using compatible applications as if they were on your local computer.
Web Disk is cPanel & WHM’s implementation of the WebDAV protocol. cPanel automatically creates a Web Disk balance for users to manage files in their home directory remotely. It provides tools for configuring Web Disk accounts and users can create additional accounts as needed to share directories within their home folder. WebDAV has similar capabilities to other network disk and remote file management systems, such as SMB and FTP. However, unlike these technologies, WebDAV is based on an extension of the web’s native HTTP and HTTPS protocols.
WebDAV’s “versioning” abilities are designed for simple collaborative editing, but if you are looking for a modern code version control system, cPanel’s Git™ integration is a better option.WebDAV is also the basic foundation of the CalDAV calendar using CardDAV contact features. CalDAV enables a client to access calendar and scheduling information on a remote server, while CardDAV is an address book protocol that allows users to access and share contact data on a remote server. Microsoft® Windows® and macOS® support WebDAV natively, and there are many compatible apps available for Android™ and iOS®.
If you want to access storage from Microsoft Windows, you must first enable digestion authentication.
**cPanel WebDav Digest Authentication**\
Click Configure Client Access to connect a client to your main Web Disk account
**cPanel WebDav Configure Client**\
The system automatically detects your operating system and provides a direct link to configuration instructions. If identification doesn’t work, you are allowed to choose your configuration options
**cPanel WebDav Connection Instructions**\
Custom Web Disk configuration scripts for macOS Finder, Microsoft Windows Explorer, and Linux file managers Nautilus and Konqueror are readily provided. All you need to do is download and execute the script on your computer, and ensure the script is modified to make it executable.
**cPanel Web Disk Configuration Script**\
This script makes it easy to view and edit files as if they were stored locally.
**cPanel Additional Web Disk**\
cPanel deploys the Web Disk after clicking create thereby making the files accessible
**Importance for WebDAV**
* Manage and edit web server files on a local computer.
* Developers, designers, and content writers can collaborate while working on a site.
* File-sharing within an organization.
* Network-attached storage accessed via local machines or other servers.
**How to Configure Client Access**\
WebDAV client application and the process of accessing WebDisks differs from one operating system to the other. Follow the steps below to download the configuration script for a supported operating system.
* Log into cPanel
* Locate the Web Disk interface (cPanel » Home » Files » Web Disk).
* Click Configure Client Access(This will display the configuration information for the account chosen)
* You can click Enable Digest Authentication if your SSL Certificate is not valid, however, Windows Vista®, Windows® 7, Windows® 8, and Windows® 10 require you to enable Digest Authentication
* Select the connection type
* Choose your Operating System(The system may automatically detect your computer's operating system.)
* Click Download Configuration Script
* Open the file and allow it to run in order to configure the Web Disk.
**Deleting Additional Web Disk Users**\
If you have given a new user access and they have completed their task and no longer need access, you should remove their access. You can remove their access by following these steps:
* Login to your cPanel.
* Locate the Files section for Web Disk.
* Navigate to Manage Additional Web Disk Accounts.
* Click Delete(cPanel will ask you to confirm the action, just click Delete Web Disk Account and the user will be removed)
**Connect with Mac OS X**\
To connect to Apple® operating systems (for example, macOS® X or Sierra), follow these steps:
* Go to Apple’s Finder application.
* Under the Go menu, select Connect to Server.
* Enter the Web Disk server’s URL in the Server Address text box
* Click Connect button
* In the "WebDAV Authentication" window, enter your Web Disk account’s username and password.
* Click Connect.
* Double-click the Web Disk space icon to open it.\
The public\_html folder will appear in your Web Disk space.
**BitKinex**\
Follow these steps to connect Web Disk with BitKinex
* Open BitKinex.
* Click Http/WebDAV.
* Enter your Web Disk account’s login information. The new connection will appear in the BitKinex list.
* Double-click your site’s name to open your Web Disk.
On mobile operating systems, including iOS and Android, you will have to install a third-party application that supports WebDAV( Documents for iOS and WebDAV Navigator)
WebDAV Web Disks are just one of the many ways cPanel & WHM empowers web hosts to offer a feature-rich web hosting experience.
# How to Create a phpinfo
Source: https://kb.verpex.com/cpanel/how-to-create-a-phpinfo
Learn How to Create a phpinfo Page
PHP is a fundamental coding language for WordPress users. Even if you're not a developer, you might need to understand this a bit to keep your site running. PHP has many environment variables that you can update as needed. However, if you don't know where to look, it can be challenging to find even the most basic PHP information for your WordPress installation.
phpinfo() is a PHP function or code snippet that takes one or more parameters and returns a value, providing valuable information for debugging your site. Running phpinfo() allows you to easily display all available information about your site's PHP configuration. This includes versions of your PHP, Apache/IIS, GD etc. A phpinfo page gathers a lot of useful information about your PHP configuration. For example, you can check if your PHP configurations meet the requirements of any software you want to run on your server or if you need to update your PHP memory\_limit to prevent certain scripts from running out of memory.
In this tutorial, we'll show you how to create a phpinfo page to display your hosting account's current PHP settings through your cPanel. Fortunately, the installation takes a few minutes and a line of code to execute.
* Log into your cPanel.
* In the Files section of your cPanel, open the File Manager option.
* Click “public\_html" folder and navigate to the directory you are working with
* In the top menu, click on the +File option to create a new file.
* Enter phpinfo.php
* \*Note the file name can be anything you want, only the extension must be .php (FileName.php).
* Find the phpinfo.php file in your list of files (it should update automatically).
* Right-click on it and click Edit.
* Enter the following code into the phpinfo.php file.
```text PHP Info theme={null}
```
* Then click Save Changes.
How to View your PHP Settings\
Now that you have created the phpinfo page, we’ll show you how to access it and view your PHP settings.
You can now access this page from your browser. If you created the file in your public\_html folder, you should visit [https://testing.com/phpinfo.php](https://testing.com/phpinfo.php).\
Be sure to replace testing.com with your actual domain name.\
To find the specific value for a parameter, search the page for what you are looking for.\
WARNING: Your phpinfo page has many PHP settings that you do not wish to broadcast to the world.\
When you are done using the file, be sure to delete it.\
Another path you can take instead of deleting it however is to name the file something other than phpinfo.php. Since phpinfo.php is such a common name, ‘bots’ on the web will randomly search for files named phpinfo.php. Setting the file name to something like 7845734554.php would never be guessed by a bot (so no one would ever find it) but it might be hard to remember this in the future.
You have now learned how to create a phpinfo.php file and verify PHP information through your hosting control panel or default browser.
# How to Create an FTP Account
Source: https://kb.verpex.com/cpanel/how-to-create-an-ftp-account
FTP is a protocol used to transfer files between your hosting account and your local system.
An essential part of the process of setting up the website is to publish it online, which includes uploading its files to the server where the website is supposed to be located. One of the quickest and easiest ways to do this is to access the server via FTP. . For users to connect to the host server via an FTP client, they must have access rights to this server. These authorization access rights are assigned to users as an FTP account. Each FTP account consists of a unique username and password that allows users to access files in the cPanel account. By default, you already have an FTP account in your cPanel which you can log in with your cPanel username and password.
You can create new FTP accounts to provide access to other users without providing them with cPanel login credentials. For each additional FTP account created, you can also assign each user different levels of access by assigning the user to a specific directory. All our hosting plans allow you to create unlimited FTP accounts for your service.
Follow the instructions below to create FTP accounts
* Login to your accounts cPanel from your client area
* Once logged in, use the search and click the FTP Accounts button

* From the FTP Accounts interface in cPanel fill in the provided fields to create your new FTP user.

**Log In**: Enter your desired username, this will be your FTP username\
Domain: If you have more than one domain, select the domain this user should be tied to from the drop-down arrow\
**Password**: This will be the password used to authenticate with your FTP user. The password must be a strong password, you can generate the password using a password generator\
**Strength**: This field informs you about the security of your password. The strength level could range from Very Weak to Very Strong.\
**Directory** : This is the default directory on your web hosting account that the FTP user will\
connect to and upload files to when you create an FTP account, it is limited to the directory specified here. cPanel will automatically populate an assumed directory based on your FTP username. You can remove everything after public\_html/ and provide the directory you want the user to go to.\
You can also type a single / and the user will have access to your home directory this is going to be everything outside of the public\_html folder).\
**PLEASE NOTE**: The FTP user will not be able to browse outside of the specified directory. However, he will be able to access all the files and subfolders in this folder. It is possible to determine the access level of a user.\
**Quota**: The maximum size of the total number of files this FTP user can upload and store in their default directory, you can limit the disk space available to an FTP user here or set it to Unlimited
When all the required fields have been completed, click on the **Create an FTP account** button to add the new user. A message will appear indicating "Account created" and your new FTP account will appear in the FTP Accounts section.
# How to Create an Index Page
Source: https://kb.verpex.com/cpanel/how-to-create-an-index-page
The index page, also known as a site's main website, is the URL or local file that is automatically loaded when you start a web browser and click the browser's "Home" button. When creating your index page, you must use one of the following names.
index.html\
index.php
Creating an index page is a useful solution to create a Website coming soon page with your email address, phone number, hours of operation, etc.
Steps to Configure a custom index.html file
* Log into your Hosting cPanel.
* In the Files section, click File Manager
* Locate the current index.html file in the public\_html folder and click the Edit button.
* If the index file does not exist, Click the + File button at the top of the page to create a new file.
* Type index.html in the New File Name field and click the Create new file button
* Select the newly created index.html file and click Edit.
* You can insert text, change fonts, sizes, colors, upload images, insert hyperlinks, etc. for example ‘We are currently performing maintenance’.
* Once you have created the index.html file the way you want, just click Save in the top left corner.
* Return to the browser and reload the page to view the changes you just made.
Go visit your domain name in a browser and you should see your new page. Make sure you have the index page in your public\_html directory, otherwise your site will not display correctly in the browser.
Make sure you have the index page in your public\_html directory, otherwise, your site will not be shown in the browser correctly.
# How to Create an 'Under Construction' Page in cPanel
Source: https://kb.verpex.com/cpanel/how-to-create-an-under-construction-page-in-cpanel
When building a website, you do not want your visitors to see what is going on at the backend. In this case, you may decide to place an under construction page or in the case you want to make changes you can place a maintenance page and this can be done in the cPanel.
**Steps on how to create an "Under Construction" page in CPanel**
To create an "Under Construction/Coming Soon" page in cPanel, you can follow these steps:
* Login to your cPanel account.
* Navigate to the "File Manager" option in the "Files" section.
* Click on the "New File" option in the top menu bar.
* Enter a filename for your page, such as "index.html" or "comingsoon.html".
* Click on the "Create New File" button.
* Right-click on the newly created file and select "Edit" from the drop-down menu, you can use HTML Editor
* Copy and paste one of the following codes:\
**\
This page is under construction\
Under Construction page\
Coming Soon page**
* Save your changes and exit the file editor.
Once you have created your "Under Construction/Coming Soon" page, you will need to make it the default page for your website. To do this, follow the instructions in our[ knowledgebase article.](/cpanel/how-to-change-your-default-index-page-in-htaccess)
# How to Create Separate Database Access
Source: https://kb.verpex.com/cpanel/how-to-create-separate-database-access
This is very useful when you want to provide access to one database only within the Cpanel account.

You need to create separate phpMyAdmin access though the Softaculous App Installer.
Then install direct phpmyadmin access under your site ulr (like [https://newdomain.com/phpmyadmin/](https://newdomain.com/phpmyadmin/)), and use it to connect with the database credentials set for your site.



You can check how to create MySQL Databases and Users [here](/cpanel/creating-mysql-databases-and-users)
# How to Edit Your DNS Records with Verpex
Source: https://kb.verpex.com/cpanel/how-to-edit-your-dns-records-with-verpex
DNS stands for Domain Name System. It is a system that allows you to connect to sites by matching domain names that are readable by humans with a unique ID of the server where a site is stored.
A Domain Name System can be viewed as the phonebook of the Internet. The domain names are listed with their matching identifiers, which are called IP addresses, instead of listing names of people with the number of their phone. When a domain name is entered on a device by a user, it looks up the IP address, and it connects them to the location that is physical and where that site is stored.
Each device that is on the Internet has its own IP address that helps other devices identify it. This IP address is a string of numbers with periods between them, and it’s quite lengthy. These strings of numbers won’t tell you anything about the actual website and are pretty hard to remember, which is why domain names were created in order to solve this problem. With domain names, users can now remember the names of their favorite websites more easily, and instead of a bunch of numbers, users can use the alphabet.
A DNS helps in translating the domain names into IP addresses, and your device is pointed in the correct direction. A domain name alongside its corresponding IP address is called a DNS record. The best thing about DNS is that it lets owners of the website move their site without actually having to change their domain names. Registering your domain with your hosting provider would be the best. The reason for this is that using your own hosting provider eliminates changing nameservers or transferring a domain name.
In order to change the DNS settings of your domain name from Verpex, make sure that your nameservers are correctly pointing to us:
```
ns1.mysecurecloudhost.com
ns2.mysecurecloudhost.com
ns3.mysecurecloudhost.com
ns4.mysecurecloudhost.com
```
You can log in to your hosting plan with us once you have your DNS pointing to us. There, in cPanel, you will see a button that says Zone Editor.

## How to Edit Your DNS Records with Verpex
Your DNS can be managed from the cPanel Zone Editor, by editing or deleting existing records or adding new ones.
As soon as you save your changes, your new DNS settings will begin to propagate. Each Internet Service Provider updates at a different rate, and it usually takes from 24 to 72 hours to complete worldwide. Depending on the visitor’s Internet Service Provider and your web traffic will be directed to either the new or old host.
If you have any questions in regards to adding new DNS records or editing existing ones, or in case you need any assistance with these things, you can contact our customer support any time of the day.
# How to Fix a Contact Form That Isn't Working
Source: https://kb.verpex.com/cpanel/how-to-fix-contact-form-not-working
My form is not sending emails from my clients. How can I fix this?
You must ensure that you have set a valid email address in the widget settings. Check your browser's error console for Javascript errors and fix them. This should fix the issue if one of your servers is not configured to send emails or you need to change your contact form settings.
Let's take a look at what could be causing the problem.
1.**Emails are Sent but end up in Spam**
As spam becomes more common and smarter, email providers are tightening restrictions on emails reaching your inbox. If an email fails these checks, it may be marked as spam or blocked altogether. The first thing to check is to make sure the emails don't end up in your spam or junk folder. If you received an email, it means that WordPress can successfully send emails to your web server. Some email clients may identify WordPress emails as spam because they are automated. If the email is going to spam, you can ask your users to whitelist your emails by adding your email address to their contacts. In Gmail, adding the address to contacts and moving the email to the inbox will avoid it from being sent to spam in the future.

If your domain name has not been properly authenticated for emails, your emails will go to spam. You can verify the correct authentication records(SPF records) in your hosting account and update them appropriately.
If you are not receiving emails yet, it is likely that the contact form plugin is misconfigured or there is an incompatibility with your plugin. You can always contact the plugin developer for help. Let them know that you ran the test above and the email is working on your WordPress installation. Or continue with the steps below.
2.. **The Contact Form Plugin is Sending Spoof Emails**
If you have tested the above and emails can still not be sent out, there is a problem with the plugin sending emails, it will most likely be a contact form plugin. The reason contact form email is sometimes seen as spoof is that they are sent from an address other than the one that’s added to the From field in the email you receive.

Problems can also arise if emails are sent to and from the same email address. So if the forms plugin sends emails from your admin email address (which will be the default) and you've configured it to send them to that address as well, some email providers may not like it. This is less likely to be a problem than the email spoofing issue. This means you can change the contact form plugin settings to fix this issue and you can easily check if the emails are received.
3.**Incorrect SMTP/Server Configuration**
The contact form failure is not caused by the plugin itself, but rather by incorrect email settings or SMTP configuration. Using an SMTP plugin, you can easily integrate your WordPress site with your preferred mailer.
Another common reason is that your server isn’t configured to send emails. Web servers are not designed to send emails and your server may not be configured to use the PHP mail() function. The good news is that you can easily check if this is the cause of the problem and fix it.

**How to Test if the Server Is Sending Emails**\
Run a test using the free Check Email plugin(this is a basic plugin designed to test if your WordPress installation/ server can send emails) on your WordPress site. Once the plugin is installed, go to Tools > Check Email in your WordPress dashboard. Enter an email address to send a test to, and click Send test email.
It might be some other functionality issue in your hosting server, you can temporarily change your PHP version to test if there is a compatibility issue. This can be done within your cPanel dashboard. If you have connection problems, you may also need to try another port. Your host may be blocking the port.
# How to Force SSL
Source: https://kb.verpex.com/cpanel/how-to-force-ssl
You just installed SSL and you cannot find the secured padlock and HTTPS in front of your domain.\
In fact, your domain still loads with HTTP and the insecure icon is indicating to visitors to beware of your site. Not to worry, this might be due to some insecure links on your website and you need to manually force SSL on your site.
You need to confirm you have the SSL installed on your site. To do this, visit [sslshopper.com](https://www.sslshopper.com/) to confirm SSL has been installed, then proceed to check why it is not secured with a padlock on the browser using [https://www.whynopadlock.com/](https://www.whynopadlock.com/)
Simply type in the full URL into the box below and get a report about your website SSL to know if it is fully installed.\
Click **More Info** in front of **Force HTTPS**, copy and save the code in your notepad as you need to save this code in your .htaccess in your cPanel.
Go to File Manager in your hosting panel.\
Inside the public\_html folder, open .htaccess. If you can’t locate it, make sure to create or unhide it.\
Scroll down to find RewriteEngine On and insert the following lines of code below it (replace verpex.com with your own domain):
```text theme={null}
RewriteEngine On
RewriteCond %{HTTP_HOST} verpex.com [NC]
RewriteCond %{SERVER_PORT} 80
RewriteRule ^(.*)$ https://verpex.com/$1 [R,L]
```
Save the changes.
Go back to your browser, refresh the page to view your site, you can also refresh your information on [https://www.whynopadlock.com/](https://www.whynopadlock.com/)
# How to Forward a Domain
Source: https://kb.verpex.com/cpanel/how-to-forward-a-domain
Domain forwarding, sometimes called redirecting, pointing, or connecting, lets you automatically direct the visitors on your domain to a different location on the web. Forwarding is a World Wide Web technique that makes a website available under more than one URL address. When a visitor from a web browser tries to open a URL that has been redirected, it opens a page with a different URL.
You can forward a domain by using one of our hosting plans and a domain slot that is inside them. Once your hosting plan has a domain added to it, you will need to click on the Redirects button. After you’ve clicked the Redirects button, from the second drop-down, you will need to select the domain name.
If you want to redirect the whole domain, leave the document root empty. If you want to redirect only a specific folder inside it, enter the path. For instance, you could enter http\://public\_html/wp-admin/.
The final step is to enter the target URL you want to redirect to in the last field. It will take about five to ten minutes for the changes to take full effect once you have saved them.

Domain forwarding has two options it offers, and those are forwarding only and forwarding with masking. Visitors will be redirected with both options. However, there are additional features you can use with forwarding with masking.
Forwarding only keeps the destination URL in the browser address bar, and it redirects your visitors to a URL destination that you choose. For instance, you can assign example.com to forward only to example.net. When example.com is typed in a browser address bar by a visitor, they will be redirected to the site for example.net. The bar of the browser will update to display example.net.
When it comes to forwarding with masking or setting up a domain alias, it allows you to enter meta-tags for search engine information, it keeps your domain name in the address bar of the browser, and it redirects visitors to a URL destination that you choose.
For instance, you can assign example.com to forward with masking to example.net. When example.com is typed in the address bar of the browser by a visitor, they will be redirected to the site for example.net. The browser address bar will mask the destination URL efficiently by continuing to show example.com.
You can redirect HTTP any way you want, and it won’t affect email unless you modify the MX records in DNS. Email forwarding is when an entire list of email addresses for a website is set up to forward to a new domain address. For instance, you can have the email for example.com forwarded to example.net. Businesses and individuals that have decided to change the domain name of a certain website can take great advantage of this option for email forwarding.
# How to Increase Your PHP Maximum Execution Time
Source: https://kb.verpex.com/cpanel/how-to-increase-your-php-maximum-execution-time
An important aspect to remember about PHP programs is that the maximum time to execute a script is normally set to thirty seconds, although the time limit varies from one hosting company to another. Programs that involve sending mail to many recipients or some heavy export or import of files can cause the user to get errors of the maximum time limit exceeds.
You might need to increase the limit for certain scripts your website uses. For instance, migration plugins in WordPress, depending on how big your website is, usually require a longer run time.
Thirty seconds is the default setting, and you can increase that value. Keep in mind that the value is in seconds, so 2 minutes would be 120, 3 minutes would be 180, and so on. To find the correct value, you can check your plugin, script, or theme’s documentation. You can use the phpinfo() function to verify the current value of the max\_execution\_time directive and other directives.
If you’re wondering how to set PHP maximum execution time on cPanel, we’re going to do a quick step-by-step guideline for new learners that want to do this. The first thing you need to do once you log in to your cPanel account using your username and password or you can also log in via Verpex Client Area.
The next thing you want to do is find the PHP Selector button. After you’ve selected this button, you will go to the Options section for the php.ini values and scroll down to max\_execution\_time.

For Unlimited, you set the value to 0. Once you have done the change, make sure that you do a left-click anywhere outside the text input or dropdown box. If you’ve managed to successfully follow the steps we’ve mentioned above, you will be able to see a green box with a message that will confirm that the change you’ve made has been applied.
## Measuring Script Execution Time
The time required to execute the PHP script is the script execution time in PHP. Rather than the CPU execution time, use clock time to calculate script execution time. What will help to know script execution time is knowing the clock time after script execution and before script execution.
Use the microtime() function at the beginning and the end of the script. Then using formula (End\_time – Start\_time). Time returns in seconds with the microtime() function. Execution time depends on the processor, and it is not fixed.
Now you know everything there is to know about increasing the maximum execution time of a script in cPanel. For any further assistance, make sure you contact us so we can help you!
# How to Increase your PHP Memory limit
Source: https://kb.verpex.com/cpanel/how-to-increase-your-php-memory-limit
PHP allocates a certain amount of memory when executing PHP scripts. When the allocated memory is exhausted, the PHP script shows a fatal error
```text Memory_limit error theme={null}
PHP Fatal error: Allowed memory size of xxx bytes exhausted (tried to allocate yyy) in yourscript.php
```
**Please note that the memory\_limit value should be set to at least as big as post\_max\_size.**
Follow these steps to increase memory\_limit in cPanel
* Log into your cPanel from within your Verpex client account
* Locate and **Select the PHP version** menu in the **Software** section

* Click the **Options** section for the php.ini values and scroll down to **memory\_limit**

* Set the value to what you want. Once you have done the change make sure that you do a left-click anywhere outside the text input or drop-down box.

* You will see a green box with a message that will confirm that the change you’ve made has been applied.
You can confirm whether your changes have got into effect by creating a PHP info.php file. To create an info.php file, Follow the steps in this [guide](/cpanel/how-to-create-a-phpinfo).
# How To Install Ruby Gems in cPanel
Source: https://kb.verpex.com/cpanel/how-to-install-ruby-gems-in-cpanel
Ruby Gems are collections of functions that allow you to perform tasks in Ruby, it is a package manager for the Ruby programming language. You will need to install a Gem before you can use it inside a Ruby program. It provides a standard format for the distribution of Ruby programs and libraries.
Without requiring shell access, you can install, view, update, and reinstall Ruby Gems in cpanel.
Follow these steps to install Ruby Gems in cPanel
* Log into your cPanel
* Scroll to Software and Select Ruby Gems
* Type the name of the Ruby Gem in the Install a Ruby Gem field.
* Search for your Gem in the search field
* Click Install Now.\
The Ruby Gem will be added to the Installed Ruby Gem(s) table, where you can update, reinstall, uninstall, or view documentation for each Ruby Gem by clicking the appropriate button.
You can also install a gem by running the command "gem install \[gemname]" via the command line interface provided in cPanel.
**Note:** Gems are installed directly from the RubyForge repository.\
**Warning:** This installer only works for the legacy Ruby installation and does not affect applications that you install with the **Application Manager** interface.
# How to Remove an Addon Domain
Source: https://kb.verpex.com/cpanel/how-to-remove-an-addon-domain
To remove your addon domain from your cpanel, follow these steps:
* Log into cPanel
* Go to **Domains**
* Click the **Manage** icon in front of the domain
* Click **Remove Domain** to remove the domain
# How to Restore Your Website
Source: https://kb.verpex.com/cpanel/how-to-restore-your-website
Almost everyone knows how crucial a website and its content are. Having a full backup of your site in case something goes wrong is not only necessary but indispensable.
Verpex, as one of the best hosting companies there are, offers automatic twice-daily backups to make sure you always have a Plan B. If your website suddenly stops working, you can easily restore it to the time when it last worked properly through the cPanel’s Jetbackup feature.
In this article, we will provide a step by step guide on how to restore your website files and database through Jetbackup 4.
1. First, login to your cPanel dashboard and type in JetBackup 5 on the top right search bar or find the File Backups option within the Jetbackup section.

2. You will now be presented by a list of file backups that were taken for your account. Find the version you wish to click restore. In this case, we will pick the most recent backup available.

3. Now you will see your account home directory. Normally your website files will be located within a folder called public\_html. So tick on the check box next to its name and click the Restore Selected button. Next there will be another button that appears which you can go ahead and click. Please keep in mind this will overwrite everything within your public\_html folder.
4) Once the restore progress has been initiated, click the Go Back button on this page and the next page so that you will be brought to Jetbackup 5 main page.


5. On this page, click the Queue option so that you can see the restore progress. Once it’s completed, the status will be updated without you having to refresh the page.


6. Now check your website and see if it loads properly. If you still notice issues, it might be necessary to restore the corresponding database as well. So once again press the Home logo in JetBackup 5 and select Database.

7. You will now see a list of database backups which could be a little overwhelming if you have multiple databases within your account. However, all you have to do is to paste your database name on the search bar. Once you find the appropriate date you’d like the database to be restored to, click Restore.

8. You can now go back to the Queue page to view the progress. Once it’s completed, check your website again and it should now display the version of the date you chose to restore from.
Alternatively, you can download a backup of your website on your local machine if you do not wish to restore. The download button is beside the restore button, all you need to do is click the **Download** button and this downloads a copy of your website on your device.
# How to run a Different PHP Version in the Subdomain/Addon Domain
Source: https://kb.verpex.com/cpanel/how-to-run-a-different-php-version-in-the-subdomainaddon-domain
Verpex uses CloudLinux as the operating system on our servers to improve server stability. One of the main features of CloudLinux is that each account can select the PHP version they wish to have for their websites. This is very useful if you have an application that requires a specific version of PHP However, the main drawback of these features is that you cannot set a different PHP version for an Addon Domain or Subdomain in cPanel.
Your website may need to use a different PHP version than the one assigned to your entire cPanel account. Although this is not available using the PHP Selector UI, it is quite simple to do manually. You can configure the server to use different PHP versions on your subdomains and directories by adding the SetHandler code in the .htaccess file of the folder to override the default PHP version.
There are several applications, which can sometimes require specific versions of PHP, the PHP version is important not only for speed and performance With Verpex, all shared hosting clients can set specific PHP versions for different directories.
To set a PHP version other than the one assigned to your domain on your cPanel account, you need to add a special code to your .htaccess file. The .htaccess file is a hidden file which is read by the web server. The web server follows all the instructions contained in the file. We will explain how to run multiple PHP versions simultaneously in any directory on the very same account.
* Log in to your control panel. You can do this by reading [this article.](/cpanel/how-to-access-cpanel)
* Navigate to the section Files -> File Manager. If you wish to edit the .htaccess file for your addon domain, find the .htaccess for the addon domain in question, and go to the public\_html/youraddondomain.com folder.
* Once in the File Manager, You can check if hidden files are enabled in Settings ( upper right corner )
* To set a custom PHP version for your desired directory/addon domain, either select the .htaccess file and click on Edit from the toolbar, or click the file to create a new .htaccess file if it does not exist.
* Once you are inside the .htaccess file, enter the PHP handler for the version you wish to use. If there is already a handler in the file, it should be deleted or replaced with your new handler. Depending on the desired PHP version you want to use for your specific application, modify the SetHandler line in the code. The handler looks like this:
```text PHP 7.4 theme={null}
# php -- BEGIN cPanel-generated handler, do not edit
# Set the “alt-php74” package as the default “PHP” programming language.
AddHandler application/x-httpd-alt-php74___lsphp .php
# php -- END cPanel-generated handler, do not edit
```
Add/replace the following line to your .htaccess file depending on the version you want to use
For PHP 5.6:
```text Php 5.6 theme={null}
AddHandler application/x-httpd-alt-php56___lsphp .php
```
For PHP 7.4:
```text PHP 7.4 theme={null}
AddHandler application/x-httpd-alt-php74___lsphp .php
```
* After adding your configuration rules, save your changes and close the .htaccess file.
Your custom version of PHP has now been set. As a result, an addon domain/directory, for instance, will use the PHP 7.4 version which you’ve set for it, and not the global one set for the account in the cPanel > PHP Selector.
The process is similar if you wish to set a different PHP version for a subdomain. Now you know how you can easily change the PHP version on your Addon domains by using one of the following handlers, according to your desired PHP version.
# How To Setup Node.js App in cPanel
Source: https://kb.verpex.com/cpanel/how-to-setup-nodejs-app-in-cpanel
1. Log into cPanel
2. Choose **Setup Node.js App**under **Software**

3. Click Create Application

4. Fill in the Application root field (this is the directory in which you will upload for application files)
5. Select your Application URL and startup file (if you do not name a startup file, app.js is used as the default)
6. Fill in the remaining fields with your preferred values
7. Click **Create** when ready

# How to Transfer my Hosting to Verpex
Source: https://kb.verpex.com/cpanel/how-to-transfer-my-hosting-to-verpex
Transferring Your Hosting to Verpex
We are glad to have you on board. Having your website up and running is important for the majority of people transferring their hosting to us, At Verpex, we try as much as possible to avoid little or no downtime. To ease your migration to our servers, we would like to help you migrate your site and emails at no additional cost.
Before you place a transfer order, ensure you have access to the hosting account you wish to transfer to us and your account should abide by our [TOS](https://verpex.com/terms-conditions)
* Go to [https://verpex.com](https://verpex.com) and order one of our hosting packages which suit your requirements. We recommend ordering the package that has equal or higher specifications with the hosting account you wish to transfer.
* Once your package with Verpex is active and you have received your hosting account details via email, submit a support ticket with the old hosting account details and the account you want to migrate to.
A preview link will be given to you to check your website on our server after the migration has been completed. This is to confirm everything works fine before pointing your domain name to our server. Ensure that you have control of your domain to enable you to point your domain to your hosting account with us.
We aim to complete a migration within 72 hours, though we do not guarantee any particular timeframe for the migration.
# How to Remove SSL From cPanel
Source: https://kb.verpex.com/cpanel/how-to-uninstall-ssl
How to Uninstall SSL
All sites/domains hosted by Verpex are automatically enrolled in the Auto SSL system - this is included free of charge with all hosting packages on Verpex. This means that as long as the domain points to us (via the nameservers or A record) the system will request an SSL for the domain and install it automatically if it doesn't already have one. This process is transparent and requires no intervention from you. If you are using a third-party SSL and you do not want to use the SSL that comes pre installed in the cPanel, you can follow the steps below to remove it from your domain/s
1. Login to cPanel
2. Go to the "SSL/TLS Status" section in cPanel.
There you will see the list of all the domains and subdomains in cPanel along with their SSL certificates.
3. You can select the domains in the list and click "Exclude Domains From AutoSSL"
You have just successfully removed the free SSL enabled on your account
# How to use the cPanel Terminal
Source: https://kb.verpex.com/cpanel/how-to-use-the-cpanel-terminal
Terminal access allows you to log in to your hosting account and allows you to run Linux commands, this is very useful for developers when building, configuring and deploying their applications. Having access to the terminal directly from the cPanel interface makes jobs more accessible, faster and more convenient; you can easily search and execute available commands with assigned privileges.
Be careful when using the command line, you should run commands you are familiar with. A wrong command can delete important files or damage your account. If you are unfamiliar with the command line or unsure of a command, we suggest exploring alternatives to using the command line. Also, remember you do not have full access to the server, only limited access to perform basic functions.
How to Launch the cPanel Terminal
* Log in to Verpex and connect to cPanel by clicking the “Login to Control Panel” button in the “**Products & Services**” section.
* In the **“ADVANCED**” section, click the “Terminal” icon.
* Read the warning and click the “**I understand and want to proceed**” button.
* This takes you to the terminal window where you can run your Linux commands.
* NOTE: if you do not see the terminal option in your CPanel, it means SSH access has not been enabled for your account. Kindly send a mail to support\@verpex to request SSH access to your account.
You now have access to the Linux command line and can use basic Linux commands to perform certain tasks. Here are a few commands you can try:
Description Command\
What directory am I in pwd\
List files ls -l\
Change Directory cd name-of-directory\
Change to your home directory cd\~\
Delete a file rm filename\
Read the contents of a file cat filename\
Rename a file mv oldfilename newfilename\
Make a new directory mkdir directory\
Copy a file cp filename newfilename\
how much disk space is left df
You can perform a common terminal operation of installing an application using a single command, instead of navigating through the Software Centre.
# How to Use the Softaculous Autoinstaller
Source: https://kb.verpex.com/cpanel/how-to-use-the-softaculous-autoinstaller
Softaculous is an auto-installer that makes installing web apps simpler and easier. You can install some of the most popular hosting software in the industry on your cPanel server, thanks to the hundreds of scripts that Softaculous provides. To keep the sites secure, Softaculous provides automatic updates through their service, as well as regularly adding new software to their library of scripts.
It can be quite intimidating for some users to install software on a server. Softaculous makes the installation process easier by providing a graphical interface with trusted scripts.
The Softaculous Autoinstaller enables hundreds of apps that cover a wide array of categories like eCommerce, CMS, blogs, forums, ERP, wikis, project management, social networking, and much more. Not only does Softaculous simplify script installation, but it also allows users to manage their applications with backups, updates, restores, and many more features.\
Features of Softaculous
```
Over 100 popular web applications with automated installation
One-click update for newer versions of applications
It is possible to have multiple installations of the same application in different directories
Applications can be installed on addon domains and subdomains, not only in subdirectories of the main domain
You can uninstall applications that you don’t need to use any more only with one click
```
**Using the Softaculous Autoinstaller**
Softaculous is really straightforward to use. With just a few simple steps, you will be able to install hundreds of software titles, and it has multiple layers of settings that you can customize to suit your needs better.
To use the Softaculous Autoinstaller, you need to take the following steps. First, you will need to log into your cPanel. You can find the Softaculous icon at the bottom of the control panel. You can click the main Softaculous icon or various software shortcuts.

Next, the Softaculous dashboard will appear in front of you. On this dashboard, you will be able to browse software by rating and category. Pick what you would like to install and go to the installation screen. On your display, you will find details regarding that script, which includes an overview, install, demo, screenshot, features, reviews, ratings, import option, and more.

User options in Softaculous allow the default time zone to be redefined, the screen display of side menus to be adjusted, and the language to be changed. Many of the applications are associated with scripts written in standard PHP, although Softaculous also offers some PHP, Perl, and JavaScript functionality.
Lastly, click on the install button. In order to reduce the amount of information that needs to be provided on the installation form, click on Quick Install under the Install dropdown arrow. If you want to configure more information and settings for installing the script, click on the Custom Install button.

Then, you will need to fill in the information that is listed on the form. Depending on which script you are installing, the following information might be included on the form:
```
Admin Account: Configure that Admin Username and Password and Admin Email address. Create a strong password by using the password strength indicator.
Software Setup: Select the domain, protocol and add a directory if needed to configure the installation URL. Always choose https:// when prompted for the site protocol.
Choose Language: You might be able to choose a different language for the script application you’re installing.
Advanced Options: In the custom install, you might get some advanced options for the script that you are installing. These options may vary, but they usually include set auto-upgrade, disable update notification emails, table prefix, database name, and more.
```
There is an option to have the installation information emailed to you if you want to. You can do this by filling out the Email Installation details to: section that can be found at the bottom of the form. Your software should now be installed and entirely usable. The database and files should be automatically uploaded by Softaculous .
After you’re done with the process, Softaculous will display a message about whether the installation process was successful or not. In order to access the admin dashboard of the script, make sure you use the links that are provided on the successful installation page.

Softaculous can be pretty beneficial. They are well known for providing timely support and quality, as well as keep their products up to date. Server management is made easier with one-click installations and automatic updates thanks to this robust tool and its excellent features.
# How to use User Manager in cPanel
Source: https://kb.verpex.com/cpanel/how-to-use-user-manager-in-cpanel
In cPanel you can manage your FTP, Email, and, Web Disk users using a single interface. You can merge accounts(email, FTP, and Web Disk) into a single Subaccount add new users, edit existing users, link existing users, and delete them using the User Manager in cPanel. This interface does not allow you to create new cPanel accounts, you need a Reseller package or server administrator privilege for this.
**Add Subaccount**
In order to manage Subaccounts in User Manager follow the instructions below:
* Login to cPanel-> Preferences-> User Manager.
* Click on Add User.
* Enter the user information for the new Subaccount(Full Name, Username, Domain, Contact Email Address. )Please note the system sends account notifications and password reset confirmations to this email address.\
You can either let the system set the password for you by choosing **The user will set the account password** or manually setup the password by choosing **Set the user's password**.
* Click on Create to finish, or Create and Add Another User to add another account
* Go to Services and enable what is required.
**Subaccount Services**
You will be prompted by the system to either link or cancel a new account during creation if the Subaccount username tallies with an existing Email/FTP/Web Disk username
To link the account with the Subaccount, follow these steps:
* Click on Link, the existing Email/FTP/Web Disk account will be automatically attached to the Subaccount
* Click on **Dismiss** if you do not wish to link the account with the Subaccount
**Email service** allows you to enable the Subaccount's email address, for example, [username@testing.com](mailto:username@testing.com)
* **The Quota option** defines how much hard drive space the Subaccount may use to store emails.
**FTP service** allows you to manage your website's files, for example, [username@testing.comFTP](mailto:username@testing.comFTP) account.
* **The Quota option** defines how much space the Subaccount user may use in their home directory.
* **The Home Directory** allows you to specify the Subaccount's FTP home directory.
* **The Web Disk utility** allows you to manage and manipulate files on your server using multiple devices
* **The Home Directory** allows you to change the Subaccount's Web Disk home directory.
* **Permissions** allow you to specify the Subaccount's home directory permissions:
* **Read-Write** — This setting allows the Subaccount access to read, download, list and write files inside the directory.
* **Read-Only** — This setting allows the Subaccount access to read, download and list the files inside the directory.
If you use these Windows versions (Windows Vista, Windows 7, Windows 8, or Windows 10), you must enable Digest Authentication in order to access Web Disk over a clear text, unencrypted connection. if the domain uses a signed SSL certificate, then you need not enable Digest Authentication
**How to Login to Subaccount**
You can easily log in to your Subaccount’s email and FTP using the credentials which you have entered while creating a user. The user will set the account password when you created the Subaccount, follow the steps in this [guide](https://docs.cpanel.net/knowledge-base/cpanel-product/subaccount-initial-password-guide/) to set their password.
After you create a Subaccount, you can use several methods(webmail, FTP, web disk) to access it:
**a. Login to webmail:**
* To login to the webmail of the Subaccount, enter the URL as domainname:2096 or s585.lon6.mysecurecloudhost.com:2096, this directs you to your webmail login page.
* Now Enter the Subaccount username and password.
**b. Login to FTP:**
* Download a FTP client like FilezZilla
* Open FileZilla or any other FTP client.
* Go to File and then Site Manager.
* Click New Site and enter the credentials as:\
**Host**: IP Address of your cPanel account/server.\
**Port**: Leave blank or use default port 21.\
**User**: Enter the Subaccount username with the domain name(username\@domainname)\
**Password**: Subaccount password
For more information on how to access your hosting account via FTP, check this [guide ](/cpanel/using-ftp)
**c. Log in to Web Disk:**\
You can connect through a third-party client or your local computer’s operating system\
Check the instruction on how to configure Web Disk on Windows [HERE](/cpanel/how-to-configure-and-manage-webdav-web-disks-with-cpanel)
**How to Edit Subaccount**
Follow these steps to Edit a Subaccount
* Click the Edit option underneath the User you choose
* Manage the following Subaccount properties within this section:\
**Full name** — First and last name of the Subaccount user\
**Contact Email Address** — A different email address for the Subaccount's user\
**Security Information** — Change Password\
**Email, FTP and Web Disk** — The Subaccount's access to email, FTP, and Web Disk services
**How to Delete Subaccount**
Click on Delete and then verify that you wish to delete the account. Deleting a Subaccount removes all of the Subaccount's services.
# Managing Disk Usage
Source: https://kb.verpex.com/cpanel/managing-disk-usage
If you want to see more detail of your disk usage, you should click on the icon that says Disk Space Usage. Otherwise, you can use the cPanel statistics panel to see the total of your disk space usage.
The usage is broken down into several categories by the Disk Space Usage section, and this way, you can efficiently manage your space. You can look into specific folders in the web space.

**Reasons for Increased Disk Usage**
When talking about unexpectedly increased usage of disk space, there are reasons that are commonly blamed. These include the following:
```
E-mails – The account usage also includes e-mails. If you receive a large amount of spam, you have a default e-mail address on all of your messages that are kept on a server; this can take up disk space on your account. Also, you should remember that e-mails that can be found in your Trash folder use up disk space. Make sure that you empty the folder Trash if you have a lot of e-mails there, so you can clear up the space that you need.
Website Error Logs – Website error logs are usually files with an error_log name and are created because of a website PHP error, as well as enabled logging details of the reason for the error will be included in the log, or you can go to PHP Selector and disable logging in the PHP options.
Cache Files – Cache files can be created by the software. In theory, these cache files should be removed, but sometimes they are not. Cache files are another thing that should be regularly cleaned since they can unnecessarily take up a lot of space.
Software Website Backups – Software website backups are backups that your software takes, such as WordPress, and they are typically configured in a plugin. Your entire cPanel account is regularly backed up by us, so there is no need to take this. We suggest that you store your backups else if you want to take your own backups.
Log Files – Log files let you monitor the activity of your hosting while you’re away, and they are useful in that way; however, there is no reason for them to remain on the server. Once you have reviewed and downloaded the disk files, you can free up disk space by removing the log files from your server.
Unused Installation – Another reason for increased disk usage can be unused and old installations. Keeping these files on a server doesn’t have a point. These files don’t serve the needs of your website and only eat up the disk space, so make sure that you get rid of them.
```
You can use the cPanel FTP or File Manager once you have found the cause of the increased disk usage and clear the source. If the cause is e-mails, then you should use Mail Client or Webmail to clean it up.
# Managing Files in cPanel
Source: https://kb.verpex.com/cpanel/managing-files-in-cpanel
Verpex manages a folder structure that is similar to the one of a desktop computer file system. A subfolder called public\_html is where the site files are located. If you add additional subdomains and domains to your hosting, they will have their own folders outside the subfolder public\_html. This will be the case if, when you’re adding them to your plan, you don’t specify a different “Document Root.”
When talking about cPanel, there are a few ways to manage your folders and files.
You can find an online File Manager in cPanel. This file manager is quite similar to a file manager on a computer from a graphical interface perspective. On the cPanel dashboard, you can find a File Manager link. The File Manager is pretty straightforward and easy to use. On the left side of the screen, you will find the browser folders, and from there, go to specific files. You can edit these online.
There are several functions that are available to you, including compress to a z, view and edit files, file permission changes, and file uploads. If you want numerous or advanced changes, we recommend that you use a protocol for full file management, even though File Manager is great for quick operations.

**SFTP and FTP**
SFTP is a more secure form of file transfer protocol that functions through the SSH protocol.
FTP is short for File Transfer Protocol. This is a method for communication you can use to connect from a computer (for instance, your desktop computer) to a web server in order to manipulate files. Filezilla is one of the most popular desktop software applications for FTP.
Both SFTP and FTP are used with your cPanel password and username. Your domain name can be the FTP hostname, and the posts are 22 (SFTP) and 21 (FTP). Under FTP Account in cPanel, you can also set up additional FTP accounts.

One important thing to remember is that by clicking “Configure FTP Client,” you can check out the settings you need to put in your FTP client. When setting up the places that your FTP Account has access to, make sure that you set the preferred path. Only home/user/ should be present, and everything else should be deleted if you want to have full account access.\
SSH
SSH, or shell access, is enabled by default port 22 with the cPanel password and username if you’re an advanced user. SSH is a way to connect to your webspace by using the command line. For power users, this is such an important feature, and you can run commands and manage files.
You need to use an SSH client to connect to the server if you want to use SSH. Within a terminal application, you can run commands manually once you are connected fully to the server, with the use of an SSH client.
# Managing Domains in cPanel
Source: https://kb.verpex.com/cpanel/managing-websites-in-cpanel
How to Manage domains in cPanel
There’s a newer section in cPanel called the Domains section that combines the Redirects, Subdomains and Addon Domains areas in cPanel allowing you to manage all domains using a single interface. To find this menu, log into the cPanel, navigate to the Domain section and click on Domains. You can do three things in this section:
* Create a new domain/subdomain
* Manage existing domains(Listing and deleting existing domains)
**1. Create a new Domain/Subdomain**
Using this interface, you can create an addon domain or subdomain(assuming the DNS is already pointed to Verpex). Click Create A New Domain option to add another domain or create a subdomain. For a step-by-step tutorial on how to do this, click here:\
[https://kb.verpex.com/docs/sub-domains](/cpanel/sub-domains)\
[https://kb.verpex.com/docs/addon-domain](/cpanel/addon-domain)
**2. Manage Existing Domains**
You can create a new site, create email addresses, change the document root for the domain, manage DNS records, modify any existing redirects and remove the domain from your cPanel using this interface. To access this interface, go to cPanel -> Domains > the Manage button. To access the domain you wish to edit, just click on it. You can update, delete and check the domain/subdomain information by clicking this button.
**The Document Root** shows root folders for each domain. To access the File Manager interface for a domain, click on the Home icon\
**Domain Information** menu shows the information about subdomains, and redirects for the current domain and its document root. To access the root folder for the domain in the File Manager menu, click on the home icon\
**The Redirects To** option manages your domain redirects and checks the domain that redirects to a different domain. To manage your redirects, go to cPanel -> Domains section -> Redirects.\
You can sort the list of the items in the Domain, Document Root, and Redirects To columns alphabetically by clicking on the corresponding column name.\
**The Create Email** option allows you to add email addresses to a domain.\
**The Show Associated Subdomains/Hide Associated Subdomains** options available under the gear icon show/hide the subdomains which the system creates automatically.\
**The Modify the Zones** option allows you to create, edit and delete DNS records for the subdomains and domains in Zone Editor.\
**Update the Domain** allows changing the current root folder for the domain. You can change the root folder by entering a new document root to the corresponding field and then clicking update. Please note you can not move your files to a new root folder or modify the document root for domains that share the document root with the main domain.\
**Remove the Domain** function allows you to delete a domain from your cPanel account.\
Click on the Remove Domain button to remove a domain from your cPanel account. It is recommended to take a full backup before deleting a domain. Removing a domain does not automatically delete the mail folders in the public\_html folder, however, the email accounts will be deleted.
So the Domains section is a great tool for all-in-one management of your domain! It is a one-stop shop for all things domain management.
# Maximum Upload Filesize and how to Increase it
Source: https://kb.verpex.com/cpanel/maximum-upload-filesize-and-how-to-increase-it
What Is “upload\_max\_filesize”?
"upload\_max\_filesize" is a PHP configuration setting that specifies the maximum size of a file that can be uploaded to a server. This setting is used by PHP to limit the size of uploaded files to prevent the server from running out of memory or disk space. The value of the "upload\_max\_filesize" setting is expressed in bytes, but can also be defined in megabytes or gigabytes by appending the letter **M** or **G** respectively.
When updating upload\_max\_filesize, you must put into consideration other directives
* post\_max\_size, which must be larger than upload\_max\_filesize.
* memory\_limit, which should be larger than post\_max\_size.
For example, if the "upload\_max\_filesize" is set to 128M, it means that the maximum size of a file that can be uploaded is 128 megabytes. If you upload a file that is larger than this limit, you will receive an error message indicating that the file is too large.
To increase the upload max filesize on cPanel, you can follow these steps:
* Login to your cPanel account
* Go to the **Software** section and click on **Selecet PHP Version**
* Find the **upload\_max\_filesize** option and increase its value to the desired value (e.g. 64M)
* Click on the **Apply** button to save the changes.
For the new change to be reflected, this value should be at least as big as the post\_max\_size.\
You can also increase the upload max filesize by adding the following code to your .htaccess file:
```text theme={null}
php_value upload_max_filesize 64M
```
It is important to set the "upload\_max\_filesize" value appropriately to ensure that your server can handle the size of uploaded files without running into performance or stability issues.
# My Hosting is Suspended will my Emails work?
Source: https://kb.verpex.com/cpanel/my-hosting-is-suspended-will-my-emails-work
When your hosting account is suspended, not only your website will be down but all related services attached to the hosting will be down as well. You will be unable to send out and receive emails, your cPanel will be inaccessible and your website will go offline. This is why you should not allow your hosting account to get suspended.
We provide timely reminders and do everything we can to help ensure that our clients do not have to face the challenges of an expired hosting account.
Hosting accounts are invoiced 7 days prior to the expiration date. During the time the invoice is generated, a notification email is sent out indicating the outstanding amount and the due date. Shared hosting accounts and Reseller plans will be suspended 3 days after the expiration date in case of non-payment. With these policies in place, customers have ample time to renew before their hosting accounts get suspended.
# My Website has been Compromised
Source: https://kb.verpex.com/cpanel/my-website-has-been-compromised
A compromised website affects your business and your customers. If your website has been breached, make sure to fix it soon to minimize the damage this would have caused to your brand.
* Run a malware scan on your device and in your hosting account using our Imunify360
* Change all passwords across all devices, CMS(WordPress Joomla, etc) and logins(Cpanel, client area, email account, FTP, database, etc) and ensure you use a strong password
* Enable [2-factor authentication](/billing/how-to-disable-2fa-authentication)
* Trace back your actions to know how the compromise came back it might be through a new installation of a plugin/theme or a new upload of a file.
* Reset your .htaccess file
* Install a security plugin like sucuri
* Update outdated plugins, and CMSP, ensure they are all up to date
Ensure this is not a one-time cleanup as you need to always secure your website at all times to prevent any breach.
# My Website Is Down — What Can I Do?
Source: https://kb.verpex.com/cpanel/my-website-is-down-what-can-i-do
Make sure your domain name is not expired and your hosting is not suspended. It could just be your browser or internet connection. Restart your modem/router to resolve this issue or you could just phone a friend and have them test your site. To be doubly sure you can also check if the website is down for everyone or just for you. You can do this by visiting a website like [https://www.isitdownrightnow.com/](https://www.isitdownrightnow.com/) and entering the URL of the website.
Determine the cause to pinpoint why the downtime is occurring. It could be a programming error, DNS problem, expired domain, hardware related, etc. Contact your hosting company or check with your developer if it is not server-related.
Please note that it’s a good practice to always check the status page as this could save you a lot of time. You can visit our status page using [https://status.mysecurecloudhost.com/](https://status.mysecurecloudhost.com/).
**Common Reasons for Website Downtime**
**1. Coding Error**
A misplaced comma can cause issues. Websites function with thousands of lines of code, meaning a misplaced comma can cause issues.
To weed out errors, test every piece of code thoroughly before it goes live to fix potential issues. Keep detailed records of changes and previous outages to identify errors. Ensure your processes and policies are regularly updated and hire professionals where possible to prevent this from happening.
**2. Outdated Hardware Problems**
One reason for the downtime of your website is outdated hardware. Servers are a key part of your website infrastructure and any disruption can lead to downtime.
To prevent hardware failures from causing you downtime, upgrade your server regularly when it’s struggling to keep up.
**3. Poor Hosting Provider**
Not all hosting providers are reliable and offer a website uptime guarantee. With a greater chance of hardware failure, downtime chances increase.
Look for reliable hosting providers with positive reviews. Choose the best complimentary plan for you.
**4. DNS Issues**
Issues with the DNS can prevent a website from loading. DNS) maps a domain name with an IP address, and it’s critical for website uptime.
Check whatsmydns.com or get in touch with your hosting provider for the correct DNS records.
**5. DDOS Attacks**
Distributed Denial of Service, attacks happens when hackers flood a website with huge traffic to make it unavailable. This eats up the server bandwidth and resources, leading to overload.
This can be prevented by running load tests regularly and investing in firewalls.
**6. CMS Issues**
CMS(Content Management Systems) use plugins, extensions, themes, third-party integrations, and other tools to provide extra features and functionalities. Unfortunately, newer versions of these integrations can cause compatibility issues.
To fix this issue avoid nulled or old themes and plugins.
**7. 404 Not Found**
A 404 error occurs when your web server cannot find a page that has been requested.\
In the case where a page no longer exists, it means the page has been removed.
You can be sure to check if it has nothing to do with your hosting account being suspended, contact support to confirm this. Check[ this page](/cpanel/404-error-resource-error) for a detailed description of how to resolve.
**8. 502 Bad Gateway**
Gateway errors do not normally mean the website is down, but some part of the internet is either not working or too busy to deal with your request.
Use a Traceroute command and the domain of your website to further trace the location of the issue or contact your hosting company if the issue persists.
**9. 503 Service Unavailable**
This error tells us that the web server is too busy to deal with your request. If you are on a shared hosting package then it could be that one or more websites that share your server are super-busy and there is no bandwidth left for your website.
If this error does not resolve itself, contact your hosting provider.
**10. Security Warnings**
This is normally caused either by the absence of an SSL certificate on the web server or when an SSL certificate has expired. If there is no valid SSL certificate and the website is trying to deliver content via https, the browser will stop the website from sending data and show a warning.
Add a valid SSL certificate to your website to resolve this issue. There is a free SSL that comes pre-installed in your cPanel.
**12. 500 Internal Server Error**
The most difficult to diagnose, the most common reasons for this error could be over usage of account resources(RAM, CPU), incorrect .htaccess code or file and folder permission, or a mod\_security rule You might have some server issues.
Check the server status and logs for any errors or issues. Update to a later version of the PHP programming language. Contact your hosting provider. To check detailed solutions to each issue, refer to this article.
Back up your website before taking any of the above-mentioned tips. This can be done automatically through a backup tool in cPanel. If your site break, you can restore the copy of your backup to get the website running again,
Understanding the common reasons for these errors means preventative steps can be taken to avoid them happening again. Ensure you regularly back-up data.
Downtime affects the best of us. Staying calm will go a long way in making sure that you and your team can resolve the problem as quickly as possible.
# MySQL Databases
Source: https://kb.verpex.com/cpanel/mysql-databases
# Python Applications
Source: https://kb.verpex.com/cpanel/python-applications
cPanel can run a Python application. This guide will go over the process of how to run Python applications from your cPanel.
Log into your cPanel to get started with your Python app. To load your first configuration screen, click on the Setup Python App, and click on Create Application.

Now, the application form will appear. In the Python Version section, you can select the Python version you want to use and fits your needs. The folder from which all of the Python files will be loaded is the Application root field, so in this text box, type the directory where the application files are located. The URL from which you would like the site to be loaded from is the Application URL. Here, select the domain and then type a URL from the application.

In the Application startup file field, you can specify the startup file for the application; however, this is optional. If you do not do this (specify a startup file), a passenger\_wsgi.py startup file will be created by cPanel for you.
In the Application Entry point text box, you can specify the callable object for the application; however, this is optional as well. cPanel will create an application object that is default for you if you do not specify. You can just enter application in the application entry point field since this is a function call that is going to be executed and load the Django instance.
The file that gets initially executed and proxied via Passenger is the passenger startup file. Within the passenger\_wsgi file, the code is just a simple import.

Wsgi is the file that has the application function, while the django\_app is the folder of the Django installation.
In the section Environment variables, the environment variables can be optionally set for the application. You can do this by clicking on Add Variable and then typing the variable value and name. Finally, just click on Done.
Click Create, and then cPanel creates the environment in Python and creates the application.

You should connect your account with SSH if you want to work in the environment that was newly created. After you’ve connected your account with SSH, you will need to type the following command. Replace version, application, and username with the actual values that are displayed at the top of the page, next to Enter to the virtual environment. Run the following command if you want to enter the virtual environment:
source /home/username/virtualenv/application/version/bin/activate && cd /home/username/application
You can develop the Python application even further by using other commands and installing modules. In addition, you can control the running state of the application from cPanel. You can click Stop App to stop the application. You can click Restart to restart the application. And lastly, you can click Destroy to entirely eliminate the application from cPanel.
# Remote Database Connections
Source: https://kb.verpex.com/cpanel/remote-database-connections
WordPress lives in its database, your content makes your site special and unique, and that content lives in the database. If you wish to pluck out your WordPress, what you will be taking is your MySQL database.
In order to connect to a MySQL database remotely, you must have your configuration settings ready.
Host name - Your server IP address\
Database name - Your cPanel username database name\
Database username - Your cPanel username database username.\
Database password - The database user password\
Note: You can find your database credentials in your WordPress root folder(File manager-> public\_html folder-> wp-config.php) and open the file\
MySQL Connection Port - 3306\
TCP or UDP, either is fine.
**How to set up a Remote Connection to my Database?**
By default, servers don't allow remote access to their databases except to specific IP addresses. So we need to add our IP address to the whitelist. If your IP changes frequently, please use a hostname or update the connecting IP in Remote MySQL every time it changes. The connecting computer must be enabled as an Access Host before connecting to MySQL from another computer
Perform the following steps to set up a remote connection to your database
* Log into cPanel
* Click the Remote MySQL icon under Databases.
* Fill in the IP address(You can find and add your IP address directly from this address whatismyip.com)
* Click Add Host, and you should get a confirmation message Access Host Added and you should now be able to connect remotely to your database.
**Remove Access for a Remote Server to Access Your Database**\
Follow the steps below to remove a host from accessing databases on your server
* Log into cPanel
* Click the Remote MySQL icon under Databases.
* Click the X icon next to the IP address.
* Click Yes.
Please make sure the credentials match the username created in the "MySQL Database" section of your cPanel to avoid connection issues. After the IP address has been whitelisted to allow remote connection, you should be able to access MySQL remotely using a third-party application like Workbench, phpMyAdmin, etc. Some of these applications are free and some are paid
# Running Multiple Websites
Source: https://kb.verpex.com/cpanel/running-multiple-websites
Managing multiple websites can be expensive and difficult, which is why there are hosting packages that offer multiple domain hosting options. When choosing multiple domain hosting, some of the things you should look out for include:
```
Easy addon domain management from cPanel
Unlimited email accounts
Adding a subdomain to an existing domain name
A beginner-friendly option such as cPanel
Domain alias for having multiple URLs point to a single website
Free or paid SSL certificate
Parked domain management
```
Running several websites with Verpex can be done in two ways. This can either be done through reseller hosting by separating the websites in different cPanel accounts or in a single shared hosting account.
## On Reseller Hosting
You have the Web Hosting Manager, or WHM, on reseller hosting. The Web Hosting manager allows you to create several independent cPanel accounts.
The List Accounts function can be used in order to log in and display each cPanel account. You will need to press the orange CP button in order to log in. In addition, you can modify how many Addon or Parked Domains you have on this account from the plus (+) sign next to the account, as well as other resources.
## On Shared Hosting
cPanel has two options for additional domains: addon domains and parked domains or aliases.
Additional domains are pointed to external folders with addon domains. By default, your main domain runs from the public\_html folder. Addon domains can run from folders such as newdomain or public\_html/newdomain. We recommend that you use a reseller account to manage numerous sites as a substitute to addon domains, in case your sites are functionally independent, you have a large number of sites to run, and you’re able to afford it.
A drawback of cPanel addon domains is that each site runs under the same users on the server, which means that one account is able to access all the website files. As a result, any security vulnerabilities that are found on one site can also affect others as well. Another thing is that all of the sites will be using the resources of one account, while in separate accounts, they will have an abundance of resources to use.
Parked domains allow you to add an additional domain as an alias of your main domain to your control panel. For instance, you might want to add both a .net. and .com domain, but have them both point to the same website. You can easily do this by adding the extra domain as a parked domain (or a domain alias).
Keep in mind that you should redirect one domain to the other domain in order to avoid penalties by search engines such as google for duplicated content. Usually, this is done automatically by most software. However, you can do this by clicking on Manage Redirection after you add the parked domain.
# Secure Shell (SSH) Overview
Source: https://kb.verpex.com/cpanel/secure-shell-ssh-overview
Secure Shell, or SSH, is a way of using the command line to connect to your webspace. For power users, this is a feature that is really important since you can run commands and manage files. You must use an SSH client to connect to the server in order to use SSH. Within a terminal application, you can run commands by hand once you are connected.
To connect to the server, you use a terminal or Shell client with SSH. You can download an SSH client such as PuTTY if you are using Windows. On the other hand, you can use Terminal if you’re on Linux and macOS.
You can type ssh if you have a command prompt, followed by the shell username (cPanel username) you have, an @ sign, and then the name of your server. For instance:
ssh [username@server.verpex.com](mailto:username@server.verpex.com)
You can run PHP commands, move files, edit files, and much more once you have logged in. Key-based authentication is supported by our system, which is a lot more secure than just having a password. In addition, you will save time, and you won’t have to type it every single time. Just create a private key and your computer, and then upload the public key’s contents part of it to a file with the name .ssh/authorized\_keys. Don’t hesitate to contact us if you need any help with this.
After you’ve logged in, there are some basic commands you should know about.\
Navigation
To navigate your hosting space, there are two major commands that you should use. These commands are the following:
```
ls -lah – the files in the folder you currently are in will be listed with this command, along with some extra info about the files such as permissions, time and date it was created/last modified, and size.
Pwd – this is a command which will help you not get lost since it will list he path you’re currently in.
```
Viewing/modifying/creating
In order to create a new file, use touch \[filename.ext]. Keep in mind that the extension should be put at the end, such as .txt, for instance.
In order to create a new directory in the location you’re currently in, use mkdir \[directoryname].
Less experienced users use default nano to modify files. For instance, you can open the file in nano by using nano \[filename].txt, and by pressing Ctrl+G or F1, you can read the full information on how to use it.
vim can be used to edit files; however, users that are more advanced typically use this editor.
For instance, vim \[filename].php
To find text inside of a file, you can use cat in combination with grep. You will be able to find the requested text easier since it will be outlined.
For instance, cat \[filename.txt] | grep “Oct 20 11:02”, which means to display the contents of \[filename.txt] break grab and outline text matching “Oct 20 11:02”.
# Setting Timezones in PHP
Source: https://kb.verpex.com/cpanel/setting-timezones-in-php
How to set the timezone for PHP in the php.ini file
How to set the timezone for PHP in the php.ini file
By default, Verpex servers are configured to use the Coordinated Universal Time (UTC). You can change the time zone that PHP uses for your scripts by setting the date.timezone directive in your php.ini file.
PHP relies on the date.timezone value for some date/time functions executed by PHP-based applications. Sometimes an error message also appears in the web server logs, which clearly indicates this necessity. Fortunately, this can easily be resolved by adding a line of code in your php.ini in the cPanel of your hosting account. After adding the code the time will be displayed according to the time zone entered in the php.ini file.
You can easily set the time zone code in your php.ini file by following the steps below:
* Login to your cPanel.
* Scroll down to the Files section, then click on the File Manager menu.
* On the left side panel, a list of directories of your hosting account is displayed. Here you need to click on the public\_html folder.
* In the public\_html folder, you need to navigate to file public\_html -> php.ini file. If you do not have the php.ini file yet, click the +File button at the top of the page, type php.ini and click Create New File to save.
* Right-click on the php.ini file, then click on the Edit button.
* Now you need to insert the line of code below at the top of your php.ini file:
date.timezone = "Place/Your\_town"\
Note: Change Place/Your\_town with your own time zone as per your requirement.\
date.timezone = "Europe/London"
* After entering the above line, click on the Save Changes button.
Now, you can check your [phpinfo.php page](/cpanel/how-to-create-a-phpinfo) to verify that the change has occurred.
# Software
Source: https://kb.verpex.com/cpanel/software
# SQLite
Source: https://kb.verpex.com/cpanel/sqlite
SQLite is an open-source SQL database that stores data in a text file on a device.\
SQLite is a C-language library that implements a small, fast, self-contained, high-reliability, full-featured, SQL database engine. SQLite is the most used database engine in the world as it is used today by several widespread browsers, operating systems, and embedded systems (such as mobile phones).
The SQLite file format is stable, cross-platform, and backwards compatible\
SQLite is free to use for any purpose commercial or private. It is a self-contained, serverless, zero-configuration and transactional SQL database engine.
SQL databases, SQLite does not have a separate server process. It reads\
and writes directly to ordinary disk files. Also, it is very convenient as it’s less than 600kb in size. Lightweight in terms of setup, database, administration t and resource requirements.
**Features and benefits of using SQLite**\
**Benefits of Using SQLite**\
Self-contained: no external dependencies, it requires no special facilities or tools to build.\
**Serverless** – No server or other system processes are required to run.\
**Configuration Not Required** – No setup or administration is required.\
**SQLite is Transactional** – SQLite implements transactions that are atomic, consistent, isolated, and durable\
**Totally free** – Open source, therefore, no license, setup or administration is required after installation.\
**Storing Data is easy** – Provides an efficient way to store data.\
**Flexible** – Helps you work on multiple databases in the same session simultaneously\
**Single-file Cross-platform Database** – It can run on all platforms\
**Full-Featured SQL**- SQLite has a full-featured SQL implementation
**Features of SQLite**\
Great for use as an application file format. File format can be extended in future versions simply by adding new tables and/or columns while maintaining backward compatibility.\
Supports terabyte-sized databases and gigabyte-sized strings and blobs\
Small code footprint: less than 600KiB fully configured or much less, it is lightweight\
Simple, easy-to-use API.\
Fast: In some cases, SQLite is faster than direct filesystem I/O\
Written in ANSI-C. TCL bindings included. Bindings for dozens of other languages are available separately.\
Well-commented source code with 100% branch test coverage.\
Use for any purpose, Sources are in the public domain\
Comes with a standalone command-line interface (CLI) client that can be used to administer SQLite databases.\
Performance - Rather than reading the entire file and keeping a full scan in memory., it only loads data needed\
Accessibility Content stored in an SQLite database can be recovered decades later
Even with all the benefits, SQLite is not the perfect application file format for every situation.\
It is not suitable for large-scale apps, you will have no access to the network and the database is limited in size
SQLite’s distinctive features make it the most widely deployed SQL database engine used by most developers.
# SSL Certificates
Source: https://kb.verpex.com/cpanel/ssl-certificates
How to Install AutoSSL certificate in cPanel
An SSL certificate on your site gives you the padlock icon in your browser, and this encrypts communications between visitors to your site and the server. Google is now giving sites without SSL certificates a warning in the browser so it is more important than ever to have an SSL certificate on your site.
All sites/domains hosted by Verpex are automatically enrolled in the Auto SSL system - this is included free of charge with all hosting packages on Verpex. This means that as long as the domain points to us (via the nameservers or A record) the system will request an SSL for the domain and install it automatically if it doesn't already have one. This process is transparent and requires no intervention from you. Generally speaking, it takes 4 hours after pointing the nameservers for the SSL to be requested and installed, but, if it takes longer than this or if your SSL certificate is not working, please let us know. or try the following steps below
1. Login to cPanel
2. Go to the "SSL/TLS Status" section in cPanel.

There you will see the list of all the domains and subdomains in cPanel along with their SSL certificates.
3. You can select the domains in the list and click "Run AutoSSL" to force AutoSSL installation for them.

To force your site to work over SSL, generally speaking, you can use a rewrite rule or go to domain and force SSL, e.g.
RewriteEngine On
RewriteCond %\{HTTPS} off
RewriteRule ^(.\*)\$ https\://%\{HTTP\_HOST}%\{REQUEST\_URI} \[L,R=301]
This will redirect all requests for http\:// to https\:// but it is important that you only do this after your SSL is installed and working.


If you're running a CMS like WordPress, it is also important to set the Site URL and Homepage in the wp-admin area to include the https\://. This is important so that images and stylesheets and so on are loaded over https\:// as well. You can also install a plugin such as Really Simple SSL that can help you set these redirections automatically.
# Subdomains
Source: https://kb.verpex.com/cpanel/sub-domains
When you’re visiting a certain website, you might notice that based on your location on the page you’re visiting, the URL in the search bar changes as well. In this article, we will go over the part of the URL that changes, and it’s called a subdomain. A subdomain is an additional part of your main domain name. A subdomain is created to navigate through and organize different sections of your site. On your main domain, you can create several subdomains or child domains. The root domain is the only domain that is not also a subdomain.
Usually, subdomains are used to separate a website into several actions. You can also use subdomains for creating blogs that have different themes. For instance, blogname.com is the blog, while sport.blogname.com and fashion.blogname.com are for specific themes on different subdomains on the blog.
Subdomains are also used if you want a website that has different language versions, such as en.example.com for English, fr.example.com for French, and so on. You can also create a mobile version for your website with a subdomain. For instance, this would be m.example.com. You can also create a network of unrelated sites with a subdomain.
Subdomains can also point to a single page or a section on your website. For instance, if you have a personal portfolio site, the contact form can be hosted on hireme.example.com. You can really get creative when it comes to subdomains For instance, north.example.com and south.example.com are subdomains of the domain example.com, which in turn is a subdomain of the .com top-level domain, also known as TLD. The most commonly used subdomain is www, which stands for World Wide Web. The subdomain contains the most important pages of a website and its homepage. The World Wide Web subdomain is used so much that it is usually included with domain name purchases at domain registrars.
If you plan your website to have more functions, such as a blog, a forum, or a store, adding a subdomain to your domain will be a smart way to separate all of these functions from your primary website.
You need to click on Domains in order to add a subdomain to your cPanel.

In this section, you will need to click "Create A New Domain".

In this section, you will see the first field where you can enter your subdomain only as “north” in “north.example.com.” The second field in this section is called Domain, and this will be the domain name you are setting the subdomains for. The last field is called Document Root, and this is where the files will be located for this subdomain, also known as the document root.

In conclusion, a subdomain is a part of the URL that comes after the domain extension and the main domain name. Subdomains can really be of help if you want to create separate sites on your website or divide your site into several parts.
# Two Easy Ways to Export and Import MySQL Databases
Source: https://kb.verpex.com/cpanel/two-easy-ways-to-export-and-import-mysql-databases
One of the most important components, when you make a website, is a database. Whether you use common CMS platforms like WordPress, Magento, Joomla, or other PHP frameworks such as Laravel, CakePHP, or CodeIgniter, you will probably need to integrate a database that stores the website data.
In this article, we will focus on exporting and importing one of the most popular database management systems, MySQL. This knowledge will come in handy if you wish to transfer your database to another server or simply to create a database backup.
There are two easy ways on how export and import MySQL databases:
```
Use phpMyAdmin
Use SSH command line
```
Now we will explain each method in detail below, so read on!\
How to Export and Import MySQL Through phpMyAdmin
**Exporting**
To export an existing MySQL database using phpMyAdmin, make sure you are logged in to your cPanel area first. Once you’re in, type phpMyAdmin on the top right search bar and click on the option shown:

A new browser window will open and the next step is to select the database you would like to export. Make sure you select the correct one, if there are multiple databases. Once the database is selected, click “Export” and on the “Export Method” option, choose Quick. Next, you can choose “SQL” format if you wish to re-import the database again elsewhere. Lastly, click Go.

Now all you have to do is to wait for a few minutes (or seconds, if your database is quite small), until the export process is complete. You should now be able to find the .sql file within your Downloads folder.
**Importing**
```
Again, you will need to go to your cPanel and navigate to phpMyAdmin
```

Prepare your SQL database file that you’d like to import

Now that you have the SQL file ready, go back to phpMyAdmin, and select the empty database (If you haven’t created it yet, go back to cPanel > MySQL Database Wizard). After selecting the database, go ahead and click the “Import” button on the top bar. Next, click “Choose File” to select the .sql file. Then scroll down and click Go.

Importing a MySQL database will take a few minutes normally. When it is done, there will be a prompt saying “Import has been successfully finished” and you will be able to see the content of your SQL database within the previously empty one.\
How to Export and Import MySQL Through SSH command line
Note: To export and import MySQL via the command line, the cPanel SSH access must be enabled. Make sure you do know basic SSH commands to login to your server via Terminal or PuTTY. You will also need to have the database credentials such as the database name, user, and password.\
Exporting
First, open your terminal or PuTTY and login to your hosting account. Once logged in, navigate to the directory where you wish the SQL database to be exported and type in this command below:
mysqldump -u DBUSERNAME -p DBNAME > dbbackup.sql
Make sure to replace the DBUSERNAME with the correct database username and DBNAME with the correct database name.
Here’s the breakdown of the command:
mysqldump is the initial command to export the MySql database.
-u clarifies the username of MySQL database
-p specifies the need to use the database password
dbbackup.sql : the result of the export
After typing the command above, you will then be asked to enter the database password. If the password is correct, the export progress will start. Once finished, type in the command ls and the dbbackup.sql should be visible.
Here’s a screenshot taken from Terminal for reference:

**Importing**
Luckily, importing a MySQL database via SSH includes almost the same exact steps as exporting one. Once you are logged in to your server via Terminal or PuTTY, navigate to the directory where you store the SQL file that you wish to import to an existing empty database. Then run this command:
mysql -u DBUSERNAME -p DBNAME \< dbbackup.sql
Don’t forget to replace the DBUSERNAME and DBNAME to the correct database username and name accordingly.
Command Breakdown:
mysql is the initial command to import the MySql database.
-u clarifies the username of MySQL database
-p specifies the need to use the database password
dbbackup.sql : the SQL file that will be imported
You will then be prompted to input the correct password and afterward the import progress will be initiated. Depending on the database size, it can take a few seconds or minutes for the database import to finish.
Here’s another screenshot that can help you:

**Conclusion**
Now that you see how impeccably easy it is to import or export a MySQL database, there’s no need to worry if there comes a day when you need to do either. For the beginners, it’s always recommended to export or import the databases via phpMyAdmin as it’s much easier and GUI based. For the more experienced users out there, feel free to type in those commands above from your terminal and voila! Your SQL database will be exported/imported in no time!
# Types of DNS Records
Source: https://kb.verpex.com/cpanel/types-of-dns-reords
DNS(Domain Name System) is a database that provides important information about a domain/hostname. DNS records which are stored on the server help users connect with the outside world.DNS records provide all the information you need to know about a domain and how to handle requests from a domain.
There are different types of DNS records that can be added to your domain depending on what purpose you want them to serve. The most common record types are A (address), CNAME (canonical name), MX (mail exchange), NS (name server)and TXT (text record). These records can be created on our DNS servers.
Find a brief description of these records below:
**NS(Nameserver)**
A nameserver is a DNS server that stores all DNS records for a domain, including A records, MX records, or CNAME records.
NS records let you know where to go to find out a domain's IP address. This record indicates which DNS server contains the actual DNS records and is authoritative for a domain. NS record ( Name Server Record ) is crucial to correct the functioning of domain names, these records are used to identify DNS server names and the availability of a domain name. You can control your domain name thanks to services provided by domain registrars(DNS management and WHOIS management).
A domain can have multiple NS records to increase reliability. It means that if one nameserver goes down, DNS queries go to the listed secondary DNS server. When NS records are updated, it may take several hours for the changes to be replicated throughout the DNS.
Ns1.verpex.com\
Ns2.verpex.com\
Ns3.verpex.com\
Ns4.verpex.com
Without properly configured NS records, users will be unable to load a website or application. NS records are however limited as they only serve to define the domain nameservers inside a zone, they don't include an IP address that will make sure that the resolution of a domain is successful. DNS records can be customized
[Verpex](/domains/how-can-i-set-nameservers-on-my-domain) allows clients to edit the NS records for their domain, it’s the most basic functionality of domain names.
**A(Address)**
The A record(address-record) is a record in your domain's DNS zone file that makes the connection between the domain and its matching IP address. The A-record determines which IP address belongs to a domain name. For example, you can have the host record for yosxquisite.com.ng pointed to 198.244.229.148
People know websites through their domain names. But computers know websites as IP addresses. The domain name system—DNS—turns those domain names into IP addresses. The IP address that you use does not have to be on your network.
Website owners now have access to control the DNS host for their domains with their hosting companies, they can set an A record to point their domains and hostnames to any IP address of their choice.
To lookup the A record of a domain, you can use the DNS lookup online tool([https://www.whatsmydns.net/](https://www.whatsmydns.net/)) or the “dig” command on a Unix machine.
At Verpex, we offer you the option to modify the A record, along with other DNS records, via a web interface called Zone editor. To set the desired A record, simply follow the steps in this[ link](/cpanel/how-to-edit-your-dns-records-with-verpex).
**MX (Mail)**
MX can be a hostname or the name of a mail server (for example, mail.verpex.com) that tells the sending server(SMTP) where to deliver an email. It specifies a mail server to handle a domain's email, these records are added to the DNS of a domain for incoming and outgoing emails.MX record directs email to a mail server, it indicates how emails should be routed.
Emails are routed through to the IP address which is set in the A-record of the host. MX lookup tool checks the MX records for a domain name, to lookup the MX record of a domain, you can use an online tool([http://mxtoolbox.com/](http://mxtoolbox.com/)) or by using nslookup on a Unix machine.
A typical MX record would look something like this:
Name TTL Type Record\
verpex.com 7200 MX Priority: 0 Destination: verpex.com
All emails sent to [test@verpex.com](mailto:test@verpex.com) will be sent to the mail server mail.verpex.com with the IP address 172.67.73.60
Verpex Hosting gives you the opportunity to control your domains' records through a fully packed [DNS Management interface](/cpanel/how-to-edit-your-dns-records-with-verpex).
**CNAME(Canonical Name Records)**
CNAME is used to associate a hostname with another host or domain. The host that you wish to point to does not have to be on your network.
CNAMEs are important when you have renamed a host, you wish to refer a subdomain to a different server or you just want to point multiple domain names to the same IP addresses.
**\
TXT(Text)**
TXT records are records added to the domain that contains text information for sources outside of a domain. TXT record is a key component of several different email authentication that helps an email server determine if a message is from a trusted source. It provides the ability to associate some text with a host or other name. TXT records can be added to a fully qualified domain name, one domain can have many TXT records.
Usually, TXT record is used for SPF (Sender Policy Framework) email spam prevention, DKIM (DomainKeys Identified E-mail) and DMARC (Domain-based Message Authentication, Reporting and Conformance) domain ownership verification purposes. TXT records were originally developed to contain human-readable information about a domain or server, now it also contains machine-readable information.
**DMARC(Domain-based Message Authentication, Reporting and Conformance)**
DMARC uses DNS to publish information on how an email from a domain should be handled either to quarantine or reject the email. Because it uses DNS, nearly all email systems can decipher how email supposedly sent from your domain should be processed.
DMARC is a must for every domain owner, it is used to protect your domains against abuse in phishing or spoofing attacks. When a domain owner publishes a DMARC record into their DNS record, it helps to gain insight into who is sending emails on behalf of their domain. This information can be used to get detailed information about the email channel and get control over the email sent on his behalf.
**AAAA (quad A Record)**
An AAAA Record is another type of DNS Record that points a domain or subdomain to an IPv6 address, it matches a domain/subdomain with an IPv6 address, similar to A records, which do the same for IPv4 addresses.
**CAA Record**
Certification Authority Authorization (CAA) is a DNS record, which allows a domain name holder to specify the preferred Certification Authorities (CAs) to issue SSL certificates for a domain. It provides additional confirmation for the Certification Authority (CA) when validating an SSL certificate.
Certificate Authority Authorization (CAA) is a way to restrict issuance to the CAs you use so you can reduce your risk from security vulnerabilities. Setting up CAA is an easy way to improve your website's security.
**SRV(Service record)**
SRV is used to specify the location hostname and port number of a specific service and how your domain handles that service in the Domain Name System. It is used to establish a connection between a service and a hostname.
It defines a host of your domain for which a certain service is supported. It is frequently used when configuring some other third-party service.
**ALIAS (ANAME record)**
It is a record type which is used to point one domain name to a hostname instead of an IP address, it can be used in place of CNAME
# Understanding Cron Jobs
Source: https://kb.verpex.com/cpanel/understanding-cron-jobs
When running a complex website, it makes sense to have a way of automating regular tasks, and never have to remind yourself to do them. This is what Cron Jobs is for – Linux commands that schedule things. That means, it is armed with a good knowledge of Linux commands, and you can make the best use of these Cron Jobs.
A Cron Job can be quite handy, as it can be instructed to run in hourly or minutely increments, on a certain day every week or date every month - you can even mix and match these. Be advised, though, that running too many Cron Jobs too often can lead to undue stress on the servers. However, such limits may not be applicable to non-shared resources like a dedicated server.
These Cron Jobs can be used for good old storage housekeeping, or for more advanced task flows that can free up time for more immediate concerns. There are even scripts that depend on Cron Jobs to run. The good thing is that such scripts will clearly detail what needs to be done with regard to the Cron Job.\
How Cron Jobs Work
A Cron Job is made of three parts:
```
A script that is meant to run
A command (specified in cPanel) that runs the script at set intervals or at set times.
An action or result generated by the script, as the nature of the script might be.
```
Adding Cron Jobs via cPanel
1. Once you’re logged in, under ‘Advanced’ in cPanel, select ‘Cron Jobs’ or type in ‘Cron Jobs’ on the top right Search bar.

2. For the next section, pick ‘Cron Email’, if you wish to get a report email every time the cron job runs. Then enter or confirm your existing, working email address (by default it uses the cPanel user email address).

3. In ‘Add New Cron Job’ > ‘Common Settings’, ensure that all settings meet your requirements

4. You can choose specific time parameters for your Cron to run – from month all the way to minute.
5. n ‘Command’, enter the command that you’d like to run as a Cron Job.
6. That’s it. Just ‘Add New Cron Job’, and it will be added.
Here in cPanel, you can also view all ‘Current Cron Jobs’ where, under the ‘Action’ column, you also get to ‘Edit’ or even ‘Delete’ any existing job.
cURL, GET, and WGET
Here’s some good news when it comes to these request commands. As common as they are in Cron Jobs, there are no additional steps needed to access them; they’re all enabled by default with us.
To Keep in Mind for Running Cron Jobs
1. Any such process will initially use the home directory to run.
2. Since Cron processes do not generate an interactive command line, startup files like bashrc will not be accessed.
3. If we name an executable file without a full path – either absolute or relative - the process will expect it to be in the ’bin’ and ‘usr/bin’ paths alone.
4. For any script, the interpreter’s location can be provided in one of two ways - a full path in a proper #! format or in the shell interface.
5. All file locations must have full paths – absolute or relative, again.
# Using a MySQL Database Remotely with cPanel
Source: https://kb.verpex.com/cpanel/using-a-mysql-database-remotely-with-cpanel
If you have external contributors to your website or your database resides on a different server, it makes sense to use remote database connections from your cPanel. Here’s how you can go about it:
1. Pick up the IP address for the server from which you intend to establish the remote connection. [http://whatismyipaddress.com/](http://whatismyipaddress.com/) should help you find this IP address.
2. Login to your account on cPanel, look for ‘Databases’, and then ‘Remote MySQL’.

3. Clicking on it will bring you to a new page with a ‘Host’ field where you can enter the IP address (or host name) we identified in the beginning, and add it by selecting ‘Add Host’. If you want to grant database access to, say, all IP addresses starting with 167.45.0, you can use the ‘%’ character, by just entering 167.45.0.%.

4. Popular software for configuring your remote MySQL include MySQL Workbench ([https://www.mysql.com/products/workbench/](https://www.mysql.com/products/workbench/)) or Navicat ([https://www.navicat.com/en/products/navicat-for-mysql](https://www.navicat.com/en/products/navicat-for-mysql)). For this purpose, you’ll need your hostname, the name of your database, the credentials for the database, the port no. 3306, and if needed, the connection method should be chosen as TCP/IP.
If you’d like to remove database access that is no longer needed, just navigate back to the ‘Remote MySQL’ feature and find the host in question, then click ‘Delete’ next to its name, and confirm it with the ‘Remove Access Host’ button.
# Using FTP
Source: https://kb.verpex.com/cpanel/using-ftp
Files on a web server can be manipulated with FTP accounts over a protocol. A protocol will allow FileZilla or other desktop software to move, download, and upload files on your accounts for hosting. We will go over the things you need to do to connect with FTP to your account.
You can enter the server IP or your domain name for Host. You can go to the main menu of cPanel, and on the right side, you need to click on Shared IP in order the find the IP you need to enter.
The Password and Username are either the password and username you chose for your FTP accounts or the password and username you chose for your cPanel account. Keep in mind that if it is for the FTP Accounts, rather than you’re your cPanel username and the password you set up for it, they will be in the format [username@domain.com](mailto:username@domain.com)
The port is 22 for SFTP and 21 for plain FTP.\
Usage of FTP
FTP, or File Transfer Protocol, is used to transfer files and to communicate between computers on a Transmission Control Protocol/Internet Protocol, or TCP/IP network, also known as the internet. Files can be transferred and received by users who have been granted access to the File Transfer Protocol Server.
In order for the FTP connection to work, it needs two sides to communicate on the network. Users need to provide credentials to the FTP server in order to have permission. However, keep in mind that not all server requires credentials in order to access their files. For instance, some public FTP servers do not require credentials. These are also called anonymous FTP.
When it comes to establishing an FTP connection, there are two different communication channels. One of them is where the distribution of data happens, and it is called a data channel. The second one of them is where the instruction and response are initiated, and this channel is called the command channel. To transfer or to get a file, a user that is authorized will use the protocol to ask about creating changes in the server.
We suggest that you download Filezilla if you have not used FTP before. You can download Filezilla on the following link: [https://filezilla-project.org/](https://filezilla-project.org/)
The commands you need to use are the following:
To enter a folder, you need to double-click on it.
To go back to the previous folder that you were in, you need to find the “..” folder and double-click on it.
In order to download a file, you need to double-click on it.
To upload files to the server, you need to double-click or drag and drop the files on your local computer.
By right-clicking on files or folders, you will open a menu that will offer you a lot more options, such as File Permissions, Move, Delete, Copy, and so on.

# Using NodeJS Apps
Source: https://kb.verpex.com/cpanel/using-nodejs-apps
cPanel can run NodeJs applications. NodeJs was created with the aim to create real-time sites with push capability, and the creators got their inspiration from applications like Gmail. We finally have web applications with two-way connections, where both the server and the client can initiate communication, allowing them to freely exchange data.
To load your first configuration screen, log into cPanel and then click Setup Node.Js App.

In order to set up a NodeJS application, you will need to fill out three fields. The folder from which all of the NodeJS files will be loaded is the Application root. Any module imports will fail if this field isn’t correct. The URL from which you would like the website to be loaded from is the Application URL.
The main entry point of your NodeJs application is the Application startup file. Typically, this is the file that has a listening HTTP server on a specific port and has all of the data connectivity string, module imports, and so on. The application will be proxied accordingly if you’ve done everything right, and it will be available on ports 443 and 80.
Your error log location should be in the passenger log file field. However, you can set it to whatever you want since this field is less important.
## ExpressJS
ExpressJS is a widely used web API framework for RESTful services. You need to install the ExpressJS package through NPM in order to get a working ExpressJS application. The command below can do this:
```text theme={null}
npm install expressjs
```
You can navigate your application URL, and it will send the ‘Hello World!’ response if you’ve set up everything correctly.
## React / AngularJS / VueJS/ NuxtJS/ NextJS
The front-end frameworks we mentioned above are extensively used. The application should be developed in a local environment and then built through npm scripts provided by each framework in order to use hosting services for the frameworks we mentioned above. The build script of a framework is typically ran through the next command:
```text theme={null}
npm run build
```
The running scripts are different, even though the command does the same for all applications. For instance:
vue-cli-service build --no-clean (VueJS) react-scripts build (ReactJS)
The files of the application will be HTML files that are static with the pre-completed JS to the Common JS format. Once they’ve been built accordingly, they will run without any problems. Since AngularJS, ReactJS, and VueJS are only static websites and don’t have a server that is back-end running, you can transfer the files over to the document root of the website. Our recommendation is to transfer the files through SSH, FTP, or a CI setup that automatically transfers the code on git pushes.
When it comes to NuxtJS and NextJS, these two SSR (Server Side Rendered) servers have both a reactive web application and a listening server running. Even though running them is a possibility, they are very complicated to set up and our support does not provide support for them.
# Using phpMyAdmin
Source: https://kb.verpex.com/cpanel/using-phpmyadmin
PHPMyAdmin is a tool for the management of MySQL databases. This tool lets you manipulate and manage data in the databases of your hosting—for instance, Magento stores user data, pages, and posts in a MySQL Database. You can use phpMyAdmin to delete or add records in a MySQL database.
What are the basic functions of phpMyAdmin?
1. Accessing databases – Through the cPanel’s phpMyAdmin, you can access your databases.
2. Creating databases and users – You can use phpMyAdmin to create databases and users.
3. Selecting databases – To view the database structure, you need to click on the name of the database located in the left column of the home page. The structure of the database will be shown by clicking on the name of the database. The structure will show individual names of tables that your database is made out of.
4. Browsing databases – Once a database has been selected, you can click on the Browse link that is beside the table name while you’re in the Structure view in order to browse each table. The Browse view displays data rows in the database. Based on the current view, there is also a link to Create PHP Code. By clicking > or >>, you can go through the rows of data.
5. Viewing MySQL processes – When you select the tab SQL and run the command showprocesslist, you will be able to see the current MySQL processes. Click on the kill link that is located left of the process ID number if you want to kill a process.
6. Executing SQL queries – Using the Query and Structure tabs lets you run several queries with semicolons that separate different queries.
This article will cover the steps that you need to take to use and access your phpMyAdmin.
You need to login into your account on cPanel in order to access PHPMyAdmin. Once you’re logged into your account, you need to look for the icon that says PHPMyAdmin, or you can just go to the top right-hand corner and use the search bar.

Once you’ve clicked on the icon PHPMyAdmin, a new tab will be Infront of you, and this tab will be the interface of Using phpMyAdmin. You will see a list of your databases under the cPanel account on the left-hand side of the screen. Nothing will be listed here if you do not have any databases.

You can see the database that you are currently in at the top of the bar, as well as the actions that you can take in this database (such as Import database, Export database, Search, SQL query, and so on). You can also see the listed tables. You will see the contents of this tabling by clicking on it to expand it.
An important thing to keep in mind is that unless you don’t have any other choice left, we don’t suggest that you work directly in the database.
# What Databases do we Provide?
Source: https://kb.verpex.com/cpanel/what-databases-do-we-provide
A database allows multiple users to maintain, update, and edit stored information quickly, securely, and efficiently
We provide MySQL (MariaDB) databases which provide improved performance on all of our hosting packages. These can be created in your cPanel account. We do not limit the number of databases\
you can create.
Almost all common website applications (including WordPress and Joomla) use a MySQL database for their data.
Other database formats\
If you require a MongoDB database we recommend using MongoDB Atlas. They have a free tier to which you can connect remotely to.
We do not provide PostgreSQL.
We do not provide MSSQL Databases or MSSQL Express. These are Windows database formats.
# What is Bandwidth?
Source: https://kb.verpex.com/cpanel/what-is-bandwidth
Bandwidth refers to the amount of data that is transferred to and from a website or server. It is measured in bytes (B) and is typically tracked on a monthly basis. It is the traffic your website can handle over the internet. Bandwidth is used each time a visitor accesses a website.
cPanel provides a bandwidth usage tool that allows you to monitor the amount of data that is being transferred to and from your website. This tool displays a graph showing the total amount of data transferred, as well as a breakdown of the data transferred by domain, subdomain, and addon domain.
You can use this tool to monitor your website's bandwidth usage over time and ensure that you are not exceeding your allotted bandwidth.
If you exceed your bandwidth your account will be temporarily suspended and you will be required to upgrade.
**Why you should not exceed your bandwidth limit?**
If you own or manage a website, it is important that you monitor your bandwidth usage to avoid your subscription being put on hold
**What Do Bandwidth Usage Statistics Tell Us?**
* They tell us about excessive traffic, if there is an increase or decrease in traffic, you can know by checking your bandwidth stats
* They tell us about the statistics of a promotional effort
* The bandwidth statistics show the time of an attack if a site falls victim to attack
**How to Check Bandwidth Usage in cPanel**
It is crucial to monitor bandwidth usage to keep your site running constantly. An overview that displays how much bandwidth is being used by your website is displayed in the Bandwidth section in cPanel
**How to see a short summary of bandwidth usage:**
Log into your cPanel\
On the right-hand side of the screen, you will see Bandwidth Usages under the Statics section.
**How to see the full details of bandwidth usage:**
* Log in to cPanel button.
* Navigate to “Metrics”
* Click "Bandwidth"
The Bandwidth interface displays information for the past 24 hours, the past week, the past year, the current month, and the previous months.
**The cPanel bandwidth usage statistics**
**HTTP** – web traffic, requests for pages or resources (images, etc.) on your website\
**POP3 and IMAP** – email that your accounts received\
**FTP** – file transfers\
**SMTP** – emails that your accounts sent
**Monthly Statistics Details**
A monthly breakdown in pie charts is shown here. Simply click on the link from the monthly summary to view the bandwidth usage of that day, you can do the same for the hourly and daily statistics.
It's important to keep an eye on your website's bandwidth usage and make sure that you are not exceeding your allotted bandwidth. This can help you to avoid any unexpected charges or downtime for your website.
Bandwidth is a limited resource when overused can cause performance issues. Therefore, it's important to monitor and manage the bandwidth usage on your website.
# What Nameservers Should I use for an Addon?
Source: https://kb.verpex.com/cpanel/what-nameservers-should-i-use-for-an-addon
Addon domain names should use the same nameservers as your primary domain name. You can find nameservers information in your hosting welcome email.
# Is There Downtime When Changing Hosting Plans?
Source: https://kb.verpex.com/cpanel/when-i-change-between-hosting-plans-is-there-any-downtime
The accessibility of your website is one of the key factors in the success of your business. Downtime is the amount of time your website will be unavailable during the migration process, this could permanently damage your traffic, reputation, and revenue.
Transferring from one host to another has now been simplified and made easy, however, we do not guarantee 100% successful transfer process because at some point, you might still experience downtime during the propagation. Depending on what goes on behind the scenes, the transfer of DNS servers between the old and new web hosts can cause a domain to go dark for between 1 to 4 hours after the request for such a change is submitted to the new registrar.\
**\
There are some techniques to employ to minimise downtime:**
1. Ensure that all features(database, subdomain, software configurations) are working properly before canceling the old hosting plan
2. Refrain from making changes to the site until the process is complete.
3. Download and compress backup files to the new server
4. Update the new domain name servers as soon as the transfer is completed, not in the middle of migration
As soon as the data transfer is complete, our technicians will provide you with all the necessary details via the submitted ticket and promptly resolve any issues that may arise.
# Your Hosting Account has been Compromised
Source: https://kb.verpex.com/cpanel/your-hosting-account-has-been-compromised
If your hosting service has been compromised, it does not necessarily mean your Verpex account has been accessed by a third party.
Your account is compromised when you noticed strange content on your website\
Spam emails are being sent out from any of your email accounts( if you noticed outgoing spam from your mailbox, please contact us to prevent suspension on your account as this is against our terms of service)\
Suspicious login activity to your hosting account.
We recommend the following to resolve the compromise on your account
* Reset your password not only for your cPanel but all login access to your cPanel, your webmail access, your CMS (WordPress, Joomla,etc) access, your verpex account access and the devices used in accessing your cPanel
* Scan using immunify360
* Update outdated plugins and themes
* Enable Two-Factor Authentication.
You can contact our support team if you noticed any unauthorized activity on your account.
# Account Closure
Source: https://kb.verpex.com/docs/account-closure
Closing your Verpex account will permanently delete all associated information.
Account closures can not be reversed. Once we delete your data there's no way to retrieve it. To close your account, please contact support.
Note: You cannot request refunds once you close your account. If you're eligible for a refund, please contact our support to request a refund before you close your account. Once your account is closed, your account data is deleted and you will no longer be eligible for a refund
If you have multiple Verpex accounts, you can simply merge them instead of closing them.
To close a Vepex account, follow these steps:
1. Ensure all conditions are met:
* No credit cards are linked to the account.
* No pending backorders.
* All registered domains are removed, and TLDs are set to XWHOIS.
* No active products or billing lines exist.
* No active workflows should be present.
* If you want your contact details removed as well, you can remove email addresses, phone numbers, and postal addresses from the account.
If you are still requesting closure despite the above conditions being resolved, escalate the request to our support for further assistance
These steps ensure that the account can be closed securely and that all personal data is handled according to the company's policy.
# Banned Countries
Source: https://kb.verpex.com/docs/banned-countries
Verpex hosting is a popular choice for people looking to host their website, however, there are instances where Verpex hosting cannot be used due to geographic boundaries.
More than half of the world's population uses the Internet on a day-to-day basis, but not everyone is granted the same freedom when browsing. What this means is that the web is not really as worldwide as we may want it to be. Each country has its own laws and regulations that govern everything, including the Internet. There is a rapid decline in internet freedom, with only a handful of countries allowing access to truly uncensored cyberspace.
There are some countries internet is found restrictive, find a list of these countries below
China\
Qatar\
Iran\
North Korea\
Sudan\
Syria\
Afghanistan\
Cuba\
Eritrea\
Guinea\
Liberia\
North Cyprus\
Sierra Leone\
South Sudan\
Syrian Arab Republic
Clients from the banned countries listed above will be unable to purchase hosting from us. However, you might try some of these tips and adjustments that may help you get connected
**Change your VPN connection protocol**
Try changing your protocol. We recommend using OpenVPN via UDP or OpenVPN via TCP (available in Windows and Android apps) configuration.
**Use IP addresses instead of our server names**
If the above suggestions do not work, we will recommend placing your website content on a server with a local provider
# Can I Host Adult Content?
Source: https://kb.verpex.com/docs/can-you-host-adult-videoporn
We allow adult sites, you can host adult content on all of our hosting packages. However, please note that you are not permitted to host content that is illegal (libel, copyright infringement, etc.) or that promotes or encourages illegal activities, promotes, encourages or engages in child pornography or exploitation of minors, please see our[ Terms of Service](https://verpex.com/terms-conditions) for more details
Verpex does not restrict the content of hosted sites unless such content is illegal in the United States of America and the United Kingdom.
# Content Restrictions and DMCA Compliance
Source: https://kb.verpex.com/docs/content-restrictions-and-dmca-compliance
The following content is forbidden on our hosting:
* Any bots, including IRC or other social bots e.g. Telegram bots
* Any Warez (i.e. copyrighted content you do not have rights to)
* Phishing Content, especially website that has malicious purposes
* Bulk mailing
* Audio streaming
* Video "tube" websites
* IP Scanners, Brute Force Programs;
* Any financial institution websites (banking, insurance, investment) unless explicitly approved in writing from our team who will ask to see proof of regulatory approval.
* Pharmaceutical websites
* Lottery sites
* File Storage, including movies, applications, computer backups
* File upload websites
* Distribution of confidential and personal information;
* Mobile app downloads
* NextCloud/OpenCloud
Any account found to be hosting the above will be immediately taken offline.
**Do you Allow Adult Sites?**
We allow adult sites which are legal in the United States of America and the United Kingdom.
**Media streaming** - We support HTTP streaming on shared servers; however, live streaming is not supported. As Live streaming will affect our bandwidth that will hamper other customers
**DMCA Compliance**
Most of our infrastructure is in the US, which puts your web presence under the jurisdiction of US law. Laws like the Digital Millennium Copyright Act (DMCA). We may be required by law to send you notices such as DMCA takedown notices, UDRP notices, etc, please note that we will comply with the requests.
# Getting Started with Verpex
Source: https://kb.verpex.com/docs/getting-started
This page will help you get started with Verpex. You'll be up and running in a jiffy!
**Welcome to the Verpex Knowledgebase.**
We've built out a really comprehensive documentation system that will show you how to manage all aspects of your Verpex hosting, as well as give you tips and tricks on how to manage your website and domains.
**Logging in to cPanel**
Once you've ordered your hosting from Verpex, you'll receive a welcome email with details of how to log in to your hosting control panel with us once your hosting is activated (it should be within a few minutes of your order going through). If for some reason you don't receive your welcome email, please get in touch and we can check that everything has gone through OK.
In terms of logging in to your hosting, the first step is to log in to the [https://clients.verpex.com](https://clients.verpex.com) area. Once you have logged in here, click Services and then My Services. Your hosting package(s) will be listed here - click the one you want to log in to and then on the next page click Login to cPanel.
Your login credentials are stored as a secure token in this area (rather than a plaintext username and password) - if the log-in fails for any reason please get in touch and we can reset this to enable you to log in.
**Email**
Once you've logged in to cPanel, you'll be presented with a number of icons that enable you to manage all aspects of your hosting with Verpex. One of the most common things to get set up straight away is Email - click Email Accounts and from here you can start setting up email addresses @yourdomain.com.
To access your email, you can use an email client like Mac Mail, Outlook or Thunderbird, or you can use webmail. Webmail can be accessed by visiting [https://webmail.\[yourdomain.com\]](https://webmail.\[yourdomain.com]). You'll need to log in with the mailbox username and password you created earlier. If you need any help getting set up in your email client, please let us know - we can talk you through the setup.
**Installing Applications** (e.g. WordPress)
In cPanel, scroll down and find the icon that says \`Softaculous Apps Installer. Click the icon of the application you'd like to install, for example - WordPress, Magento, Prestashop, Joomla - and then the system will ask you for some more information. Click 'Install' once you've entered that and then you'll be able to log in to the admin area to get started with your application.
**Nameservers**
If you ordered a domain from Verpex with your hosting, your nameservers will be set automatically to link to your hosting with us. If you have transferred a domain, or if you want to use a domain you have registered elsewhere, you'll need to update the nameservers to:-
ns1.verpex.com
ns2.verpex.com
ns3.verpex.com
ns4.verpex.com
After making the change, it can take up to 24 hours for the change to propagate and to see that in your browser.
# How Long does it take to set up my Account?
Source: https://kb.verpex.com/docs/how-long-does-it-take-to-set-up-my-account
The setup of your hosting account begins immediately after purchase. Upon signing up\
you will receive an email stating that Verpex has received your order. After your order has been paid for and activated you shall receive your welcome email with your account information and be ready to publish your website online with verpex.com.
The hosting setup is an automated process which is done within minutes of purchase. You can place an order [here.](https://verpex.com/wordpress-hosting)
Your domain on the other hand could be up within minutes depending on whether it is a new registration or [domain transfer](https://verpex.com/domain-transfer). All new domains are processed within minutes while domain transfers could take from 24 hours to 5 days depending on the registry.
In rare cases, where you have not received your Web Hosting Account Details within the stated time frame, please do not hesitate to contact support.
# How to Create and View Support Tickets
Source: https://kb.verpex.com/docs/how-to-create-and-view-support-tickets
You can submit your request to support, our Support Team will update you using the email address specified during the ticket submission. We provide 24/7 support via Live chat and the Ticket System. We treat customers' requests with the highest priority and provide equal support for all our customers.
Our response time is usually up to 2-3 hours. Surely, there may be cases that require further escalation to upstream providers or to other departments, and depending on the complexity of the issue, such cases may need more time to be processed. However, we would like to assure you that we prioritise each case.
To view or open a new ticket:
* Log into Verpex Account
* Once logged in, click **Support**
* It takes you to the page where you have **Active Tickets** and **Closed Tickets**, on this page, you can click the **Open new ticket** button to submit a ticket.
Our ticketing platform allows you to open a ticket securely and easily, even without registration; however, we advise creating an account first to manage your support tickets.
\*For urgent needs and requests, you can always **reach us via our live 24/7 chat support or by making a phone call.**
# Order Your Hosting Account
Source: https://kb.verpex.com/docs/order-your-hosting-account
Looking to get started with a hosting account from Verpex? In this article, we'll walk you through the process step-by-step.
1. Log in to your account on the Verpex website.
2. Click on the "Place new order" tab on the top right corner.
3. On the left menu, you'll see the available options: "Web Hosting" or "Reseller Hosting".
4. Click on whichever one you're interested in to learn more about our current offerings.\
We offer unique hosting services for charities and nonprofits. Availability is limited and subject to verification. If you're interested in this option, be sure to get in touch with us as soon as possible to reserve your spot.
Hosting service details are just a click away. Simply click an icon and you'll get all the information you need to make a decision. So why wait?
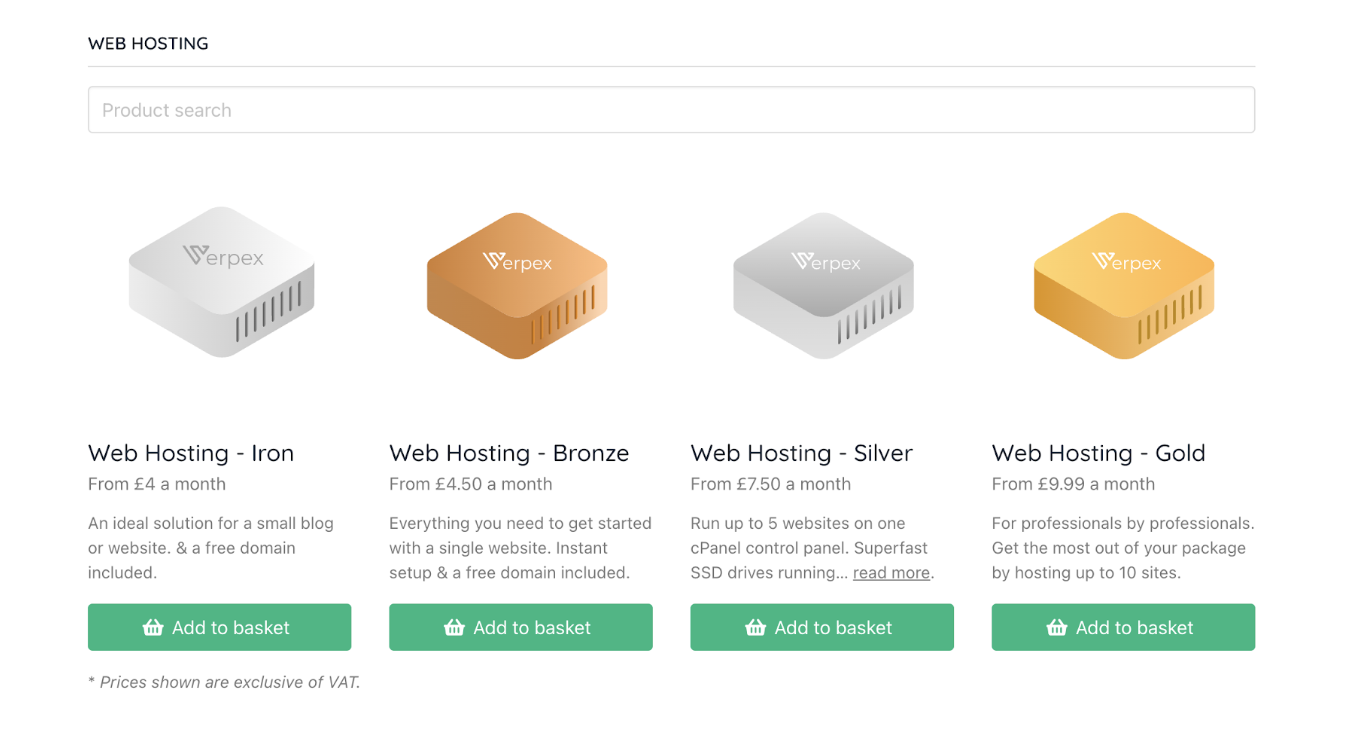
* You can order our service by clicking the "Add to basket" button.
* After reviewing the options, select a billing term.
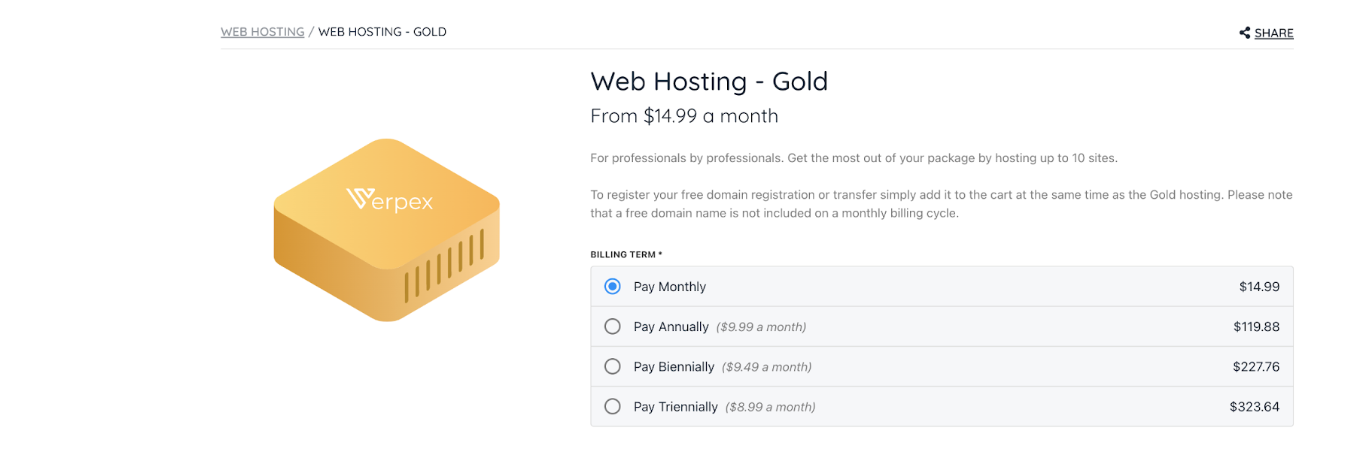
* Your next step is choosing your server location.
* Then, enter your account domain name before clicking "Add to basket" again.
* Review the order details and add a discount code if desired.
* Finally, click "Continue to checkout" on the checkout page.
* Enter your payment information and click "Place order & pay" to complete the transaction. You will see the "Order complete" page, and will also receive a confirmation email message.
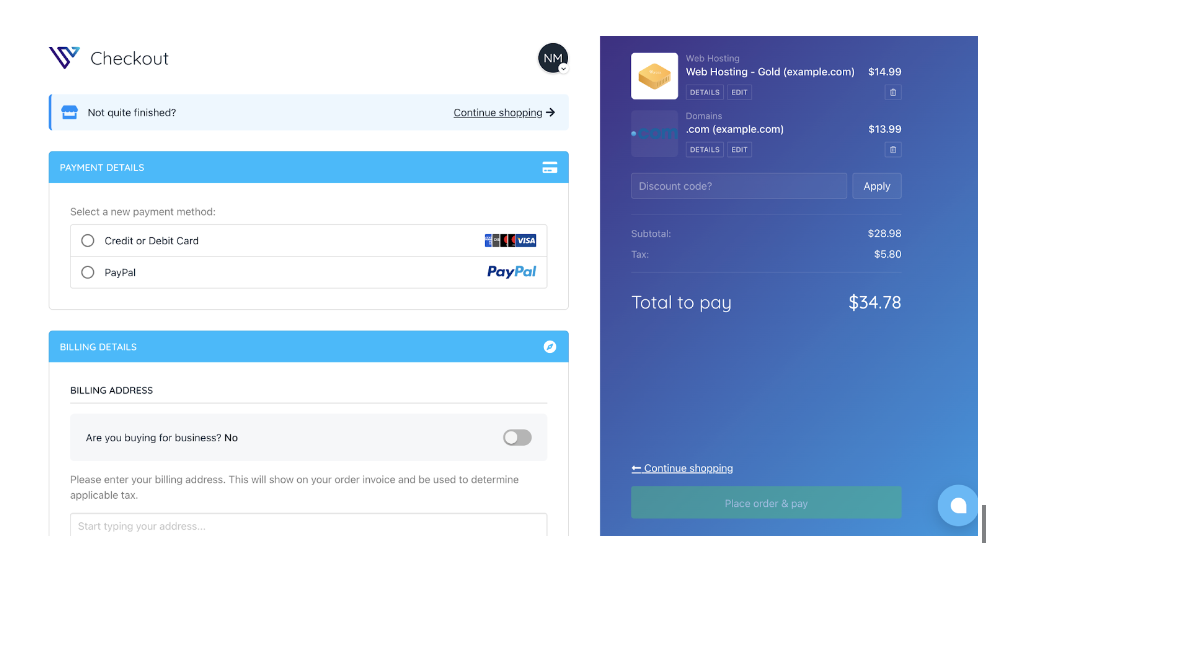
# Web Hosting, Explained
Source: https://kb.verpex.com/docs/web-hosting-explained
Web hosting refers to a service that provides users with space and resources to host their website data. It is important to note that this is a separate service from domain names, which are URLs that connect to the data hosted on the web hosting package. In order to create a website, you will need to purchase both a domain name and a web hosting package.
**cPanel hosting**
We offer a variety of single account plans, each with different specifications. Select the plan that best fits your needs based on those specifications.
You can manage your website/s and email/s with various tools.
These packages are located on a shared server, but your data is safe thanks to Cagefs, which completely separates your account from other users on the same server.
**[Reseller Hosting](https://verpex.com/unlimited-reseller-hosting)**
As a reseller, you will be given a limited number of accounts and a control panel to manage them, as well as reseller tools,. allowing you to reliably and easily host multiple clients.The name of this reseller control panel is "WHM".
You can create packages of resources and sell them to customers at a price you set. These packages are located on a shared server.
**Dedicated Servers**
If you're looking for a dedicated server that can be tailored to your specific needs, then look no further than our managed servers. We take care of all the software-end management, leaving you free to focus on your cPanel accounts and data.
This is an ideal solution if you want the independence of having your own server, without any of the hassles.
If you need help picking the right hosting option for you, please don't hesitate to get in touch!
# What is a Support Pin?
Source: https://kb.verpex.com/docs/what-is-a-support-pin
When you contact Verpex support, we may need to validate your account before we can discuss account-specific details with you or assist you with your support inquiry. In order to validate you as the account holder, we may ask you for your Support PIN.
The Support PIN is a unique 6-digit pin that is assigned to your account for 24 hours after you log in.
In order to get your Support PIN, mouse over the Support button at the top of the page and click on the Support PIN to either copy the support pin or Generate a new pin

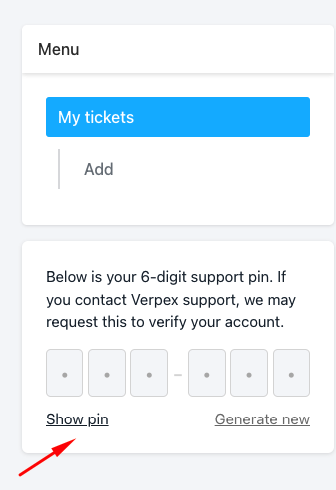
Feel free to contact our Support Team, If you have any questions.
# Why Choose Verpex?
Source: https://kb.verpex.com/docs/why-choose-verpex
Looking to launch a website? You'll need both web hosting and a domain name to make your site accessible online. At [Verpex](https://verpex.com/), we have years of experience in the field and can help you choose the best hosting plan for your needs. Plus, we're giving you a free domain name registration or transfer.
Here are the top reasons why Verpex is the best choice:
* Verpex offers **free domain registration** for those signing up for Cloud hosting, WordPress hosting, Reseller hosting, or a Cloud server package.
* The **cPanel Control Panel** makes it easy for anyone looking to start a website with its many features and options.
* You can have **unlimited email accounts** with Verpex, which is essential for businesses and other professionals.
* At Verpex, we understand the importance of security for eCommerce sites. That's why we include a free SSL certificate with every site we host. With SSL in place, buyers can feel confident that their purchase is safe and secure.
* We also offer a wide range of website-building tools, including over 200 content management scripts, to help you easily create the site you need. WordPress is just one of the many options available with a single click.
* If you're looking to start a WordPress site, Verpex has the perfect solution for you. Our cloud hosting packages are WordPress optimized, so you can get started with just a few clicks. Plus, our technical support team is available 24/7 to help you with any issues you may have.
* As a customer-centric organization, we always aim to provide the best possible experience for our valued clients. [Trustpilot](https://uk.trustpilot.com/review/www.verpex.com) is a trusted provider that helps us measure customer satisfaction and collect feedback. Our reviews show that our clients are happy with our service and we are proud to be able to help them get started today.
* We have over **9 locations around the world** - so you can provision your websites to be closer to your customers, no matter where they are.
* We're an **independent business** - Not a faceless corporate marketing machine, but a small team of technical experts who run websites ourselves.
* If you need help with technical support or billing, we're here for you. We have different ways for you to get in touch with us right away, and our team is ready to answer any questions you may have. So don't hesitate to reach out - we'd be happy to assist. Need help with your purchase, installation, or technical issue? Our team of engineers is here to assist you! Call us now, use our chat option, open a ticket using our ticket system, or check our Knowledge base for more information.
* A managed hosting environment that is managed by a team of expert engineers, leaving you free to focus on your business. We provide the resources you need and take care of all the details, so you can succeed. We take care of all the software-end management, leaving you free to focus on your cPanel accounts and data.
*If you need help hosting your website, our team is happy to chat with you. You can reach us by live chat. We look forward to hearing from you!*
# Accessing your web site before DNS propagation is complete
Source: https://kb.verpex.com/domains/accessing-your-website-before-DNS-propagation
DNS propagation must complete before starting to use your domain name. Read this article to learn methods for viewing your site before it completes.
After you update your domain's name server settings, DNS propagation can take 24 hours to complete. During this time, you cannot use your domain name. However, you can bypass DNS and view your web site by using a shared URL or the *hosts* file.
**Important**
Some content management systems (CMS) and web applications may not display correctly when you use a shared URL. This is because they are configured to use your domain name, which is different from the shared URL. For example, you must update two database settings every time you use a different domain name with WordPress.
## Method #1: Use the hosts file
Another method for bypassing DNS is to use the *hosts* file on your local computer. The *hosts* file contains domain name to IP address mappings. These mappings mimic the function of a DNS server, and allow you to "trick" your computer into associating a domain name with a particular IP address.
To use the *hosts* file to bypass DNS for your domain, follow these steps:
1. Open the *hosts* file in a text editor. The location of the *hosts* file depends on your computer's operating system:
* On Microsoft Windows computers, the *hosts* file is located at *%SystemRoot%\system32\drivers\etc\hosts*.
> 📘 Note
>
> * On Windows Vista, Windows 7, and Windows 8, click **Start**, search for Notepad, right-click the icon, and select **Run as Administrator**.
> * On Windows 10, Windows 11, click **Start**, type `notepad`, right-click **Notepad**, and then click **Run as administrator**.
This starts Notepad with the elevated privileges necessary to open, modify, and save the *hosts* file. Note that in Notepad's **Open** dialog, you must use the **All Files** filter to see the *hosts* file.
* On Apple Macintosh computers, the *hosts* file is located at */etc/hosts*. For example, in a terminal window
type `sudo nano /etc/hosts` to open the file in a text editor with the correct permissions.
* On Linux computers, the *hosts* file is located at */etc/hosts*.
> 🚧 Important
>
> The *hosts* file is a plain text file, so you should use a plain text editor like Notepad or nano to edit it. Do **not** use a word processor like Microsoft Word, which can add additional formatting and cause more problems than it solves!
2. When you open the *hosts* file, you should see an entry that resembles the following line:
```text theme={null}
127.0.0.1 localhost
```
3. To create a new mapping for your domain, add the following line to the file:
```text theme={null}
192.0.43.10 example.com www.example.com
```
Replace the IP address with your Verpex server's IP address, and replace *example.com* with your web site's domain name. You can obtain your account's IP address by logging in to [https://clients.verpex.com/](https://clients.verpex.com/)
4. Save the *hosts* file and exit the text editor. For example, if you are using the nano text editor, press **Ctrl+O**, press **Enter**, and then press **Ctrl+X**.
> 🚧 Important
>
> If you are using macOS, you should also clear the DNS cache.
5. To test the configuration, restart your web browser and go to [*http://example.com*](http://example.com) or [*http://www.example.com*](http://www.example.com), where\_example.com\_ represents your domain name. You should see your web site's main page (assuming you have created some content).
> 🚧 Important
>
> After DNS propagation is complete, make sure you go back and remove the relevant entries from the *hosts* file!
## SSL certificates before propagation
Modern browsers increasingly expect SSL connections and generate error messages when SSL is not used. To get the best preview of your site before DNS updates, use one of the following methods. These methods only work with the *hosts* file method described above.
### Copying an existing SSL certificate
If your site currently has an SSL certificate, you can move it to your new location. To move the SSL certificate, make a copy of the certificate and the private key. It is not necessary to move files; you can simply copy the certificate and key to your computer's clipboard and then paste it in place.
### Using a self-signed certificate
If you do not already have an SSL certificate, you can create one and use it temporarily to view your site with SSL. When your site is ready to go live, you should replace the self-signed certificate with a certificate from a recognized certificate authority (CA).
## More information
For more information about the *hosts* file, please visit [http://en.wikipedia.org/wiki/Hosts\_(file)](https://en.wikipedia.org/wiki/Hosts_\(file\)).
# Changing Your Main Domain
Source: https://kb.verpex.com/domains/changing-your-main-domain
The main domain is the domain associated with your hosting account. It is designed for the account during the hosting account purchase but it could be changed later. A main domain name change might be required when the current main domain is expired or you wish to transfer it to another hosting account or maybe you simply want to attach your hosting package to a different domain name.
Yes, you can change the primary domain name associated with your hosting account, however the domain name itself once registered cannot be altered or changed.
Please pay attention to the following points before changing your domain name:
* The domain name you want to host must be registered
* The domain name must not be a trademark
* The domain name must not be hosted on our servers and must not be added as an addon domain to your hosting account. If it has already been added, delete it.
There are some additional steps to be taken
* All references to URL database, contacts and mailing lists, SSL certificates, Softaculous app installs and associated backups will not be reassigned from your old domain to your new one. They must be updated manually.
* If you have a reseller hosting plan, private nameservers for the current domain name will not\
be transferred to the new one. You will need to register new private nameservers and repoint your resold domain names.
* If you have WHMCS/Upmind installed for the current domain name, after the domain name change, a license reissue will be required
Feel free to contact our Support team by submitting a ticket from your [Verpex client account](https://clients.verpex.com/login) to assist you with the process. When you contact us, you will need to provide your current domain name and the new domain name you wish to change to
Changing your domain name may break your website and we will not be held liable to resolve the errors that may arise after the domain name change
# Cloudflare SSL Configuration and Flexible/Strict Mode (which to use)
Source: https://kb.verpex.com/domains/cloudflare-ssl-configuration-and-flexiblestrict-mode-which-to-use
Cloudflare is a content delivery network used to improve the security and performance of a website. When setting up Cloudflare on an account, there are different options to choose from which is the Flexible and Strict options. A look at both options will give an insight on the best option to use.
**CloudFlare Flexible SSL**
Flexible SSL is a way for non-secure websites (those running over HTTP) to appear secure (HTTPS). Setting the encryption mode to Flexible makes your site partially secure. Cloudflare allows HTTPS connections between your visitor and Cloudflare, but all connections between Cloudflare and your webserver are made through HTTP. As a result, it does not require you to purchase an SSL certificate but the site visitors will still access the site via HTTPS and see the green padlock in the browser without any warnings. You can use the Flexible mode only if you do not have an SSL certificate, do not use this option if you have added an SSL certificate to your domain.
The flexible mode might sound like a good option, but it has serious consequences, visitors can no longer tell if a site is fully secured or it is just encrypted by Cloudflare. It will be quite difficult for anyone to enter their card details on a website that is not loading with HTTPS and since they cannot tell if it has been routed through Cloudflare flexible mode, it poses a severe problem. This setting is NOT recommended if you have sensitive information on your website. Cloudflare also recommend against the use of flexible SSL and should be used only if you are unable to set up SSL on your website.
CloudFlare SSL Strict Mode
SSL Full (Strict) is for Valid SSL Certificate users, it means Cloudflare encrypts the traffic and checks the validity of your certificate.If you use Cloudflare, it is advisable to use the Strict mode which provides a higher level of security. It's the only way to really ensure secure communication over the internet. When you set your encryption mode to strict, Cloudflare runs everything in strict mode, but it also enforces stricter requirements for root certificates. It is a mechanism that declares that a website or web application can only be reached via a secure HTTPS connection. It is another brick in the wall of defence against fraud.
Any other choice that is not a professionally signed or let's encrypt certificate is not fully secure and will not work with Cloudflare's Full SSL(Strict) setup. Without using the strict mode , a malicious party could technically hijack the connection and present their own certificate. It no longer costs anything to obtain an SSL certificate and we offer services like[ Let's Encrypt SSL](/cpanel/ssl-certificates) certificate to secure your website for free.
The connection between the user and Cloudflare and from Cloudflare to Verpex is secure. Your visitors will see HTTPS and a secure padlock in their browser. An application that contains sensitive information should always use Strict mode instead.
For the best security, choose strict mode always.
# Criteria for Registering a .net.ng Domain Name
Source: https://kb.verpex.com/domains/criteria-for-registering-a-netng-domain-name
How to Register a .net.ng domain name
.net.ng is a closed .ng domain extension that is ideal for licensed Nigerian Internet Service Providers (ISPs) and Telecommunications infrastructure providers
Mainly dedicated to activities in connection with the Internet and networks, this extension is\
is a unique identity and second level domain (SLD) for Nigeria on the internet. It is great for businesses and individuals interested in expanding their brand or service in Nigeria.
To register a .net.ng, you would need to send us an email with the following:
* The registrant must provide us with a copy of the Nigerian Communications Commission license for the provision of Internet and Telecoms services before it can be approved.
* A scanned copy of an authorization letter on the letterhead of the company with the company details requesting for the registration of the domain
Once the documents have been submitted and vetted, we will proceed to contact the relevant authorities and register the domain
# Criteria for Registering a .sch.ng Domain Name
Source: https://kb.verpex.com/domains/criteria-for-registering-a-schng-domain-name
How to register .sch.ng with Verpex
. sch.ng domains are intended for Nigerian non-tertiary academic institutions(nursery, primary and secondary educational institutions) in Nigeria, and as such requires certain documents in order for the registration to be completed.
To register a .sch.ng, you need to complete the requirements stated below
* A scanned copy of an authorization letter from the school with the contact details of the institution requesting for the domain, Kindly note that this should be presented on the school’s letterhead.
* A scanned copy of the certificate of accreditation from the government.
These documents should be forwarded to [support@verpex.com](mailto:support@verpex.com), after which, we will send them to NIRA (.NG Domains Registry) for verification and approval. Your domain will be activated once your documents have been vetted. The process takes 1 week or more.
# Criteria for Registering .edu.ng Domain Name
Source: https://kb.verpex.com/domains/criteria-for-registering-edung-domain-name
Registering .edu.ng domain name with Verpex
The .edu.ng is a restricted TLD(top-level domain) and reserved ONLY for Government Approved tertiary education institutions in Nigeria. It is a recommended domain extension for any academic institute like Colleges & Universities.
Before you place an order for a .edu.ng domain name, you need to send us the following documents as these documents are required by NIRA (Nigeria Internet Registration Association) for verification purposes. Once sent, the documents are verified by NIRA, and your domain will be automatically activated.
All registrations on the .edu.ng SLD would be at the third level. Various departments or institutions under the qualifying institution may then be subdomains and NOT full domains.
**To register a .edu.ng domain, send us a mail with the following:**
1. A scanned copy of the certificate of accreditation by relevant authorities like the Nigerian Universities Commission (NUC), National Board for Technical Education(NBTE), NCCE and any other body as recognized by the constitution of the Federal Republic of Nigeria that proves that the tertiary institution has been registered.
2. A scanned copy of a letter on the letterhead of the institution authorizing a member of staff to register the domain on behalf of the institution.This letter should contain the full name, email address, designation, phone number, and contact address of this member of staff. The authorization letter must be signed by the head of the institution or the next officer in the hierarchy.
Contact details that should be stated in the letter
**Technical Contact Details**\
Full name\
Telephone number\
Email Address\
Official Position
**Admin Contact Details**\
Full name\
Telephone number\
Email Address\
Official Position
and should be addressed to
Nigeria Internet Registration Association,\
8 Funsho Williams Avenue,\
Iponri, Surulere,\
Lagos
Once the above documents are completed, you can place an[ order](https://verpex.com/domain-registration) for .edu.ng domain registration. We will then send all the above documents to NIRA the .NG domains Registry for approval. After they have verified your documents, your domain will be activated. Generally, it takes 1 Week or more for the documents to be verified and the domain to be activated.
**Sample Letter for the .edu.ng**
Higher institution Name\
Address.\
Date: 29th November 2022\
Nigeria Internet Registration Association,\
8 Funsho Williams Avenue,\
Iponri, Surulere,\
Lagos
Dear Sir,
**Request to Register testing.edu,ng**
I will like to request to register for the domain testing.edu.ng on behalf of Testing Technical college/Polytechnic/University.
As required, find the authorizing personnel for the domain name
**Technical Contact Details**\
Full name: John Samuel\
Telephone number: 08976351738\
Email Address: [john@tester.com.ng](mailto:john@tester.com.ng)\
Official position: Vice Chancellor/Director for Information and Technology
**Admin Contact Details**\
Full name: Peter Fin\
Telephone number: 09876452340\
Email Address: [fin@tester.com.ng](mailto:fin@tester.com.ng)\
Official position: ICT Officer
Regards,\
\[signature, date and stamp]
**PS: Nigerian academic institutions that do not qualify for .edu.ng can consider .sch.ng**
# Criteria for Registering .gov.ng Domain
Source: https://kb.verpex.com/domains/criteria-for-registering-govng-domain
Registering .gov.ng domain name with Verpex
.gov.ng is a subset of the .ng domain name system and is restricted to the various tiers of government in Nigeria(The Federal government, State government, Federal Ministries, Departments, Parastatals and Institutions,) on request.
Requirements for registering a .gov.ng domain name
Before a .gov.ng domain can be approved, some requirements must be met and some guidelines followed.
State government parastatal must register the official abbreviation of the state to register a third-level domain within .gov.ng(Ikeja.lg.gov.ng)
Cities and townships are encouraged to register for a fourth-level domain under a state's third-level domain (e.g. .kd.gov.ng for Kaduna state). The domain name abbreviation must be derived from the name of the entity, after the city or township name, and separated by a hyphen.
**How to register .gov.ng domain name**
To register a .gov.ng, send us an email with
A scanned letter on the letterhead of the ministry or state government parastatal that plans to register the domain. The letter must contain the domain name to be registered and the name of the person authorized to register the domain. This authorized person must be working at the ministry and the following details should be stated in the letter
Technical Contact Details:\
Name of Authorizing personnel\
Telephone number\
Email Address\
Official Position
Admin Contact Details:\
Name of Authorizing personnel\
Telephone number\
Email Address\
Official Position
And should be addressed to:
Nigeria Internet Registration Association,\
8 Funsho Williams Avenue,\
Iponri, Surulere,\
Lagos
Once the letter has been emailed to [support@verpex.com](mailto:support@verpex.com) as an attachment. The domain application with the entity applying for the domain. will be vetted by NITDA directly. It generally takes a week or more as the request for the domain must be confirmed and verified before it can be registered
**Sample of A Letter of Authorization**
Ministry of Testing\
2 Giwa, Okearo\
Lagos\
2nd December 2022
Nigeria Internet Registration Association,\
8 Funsho Williams Avenue,\
Iponri, Surulere,\
Lagos
Dear Sir,
Application for testing.gov.ng domain name
The Ministry of Testing wishes to apply for the domain name testing.gov.ng for our website.
As required, find the authorizing personnel for the domain name
**Technical Contact Details**\
Full name: Tuni Beverley\
Telephone number: 0802373744444\
Email Address: [director@testing.com](mailto:director@testing.com)\
Official Position: Director for ICT
**Admin Contact Details**\
Full name: Binta Shey\
Telephone number: 091283756858\
Email Address: [it@testing.com](mailto:it@testing.com)\
Official Position: IT Officer
Regards,\
\[signature, date, and stamp]
# Do We Still Need Whois Privacy Protection?
Source: https://kb.verpex.com/domains/do-we-still-need-whois-privacy-protection
Most domain names registered through a domain registrar require essential contact information to be collected, such as the name of the registrant, their phone number, mailing address, email address, and so on. In case a dispute happens regarding the domain name, this information of the registrant can be used. The global Whois system, also known as WHOIS, is where this information is often displayed.
The Whois database is used to identify the owner of a specific IP address or domain name. ICANN, or the Internet Corporation for Assigned Names and Numbers, requires that information about domain ownership to be made publicly available. This information includes the name of the domain owner, their address, email address, and phone number.
You can sign up for the Whois privacy service if you want to keep your contact information private for a domain. The Whois privacy service will replace all of the public information that you have provided with an unnamed proxy identity in the database of Whois. This includes having a proxy email address that will replace your email address and replacing your contact information and address with the information from an entity called "Whois Privacy Protection Service, Inc."
With domain privacy, you will maintain full ownership and control of your domain site, and information that is personal won't be made public. Domain privacy can help you prevent the sale of your personal information, unwanted spam, and identity theft. You don't need to worry that third parties won't be able to contact you because you can still be contacted by them without having to reveal your personal information to the public.
However, from our point of view, the answer to the question if you still need Whois privacy protection is no, you don't need Whois privacy protection. Domains registered in the EU have the privacy protection by Whois added as default ever since the GDPR rules were introduced.
GDPR is the core of the digital privacy legislation in Europe, and it stands for General Data Protection Regulation. GDPR is a set of rules that were created to give citizens from the European Union more control over their personal information. Its aim is to simplify the regulatory environment for businesses so both businesses and citizens in the EU can take advantage of the digital economy.
Under the terms of GDPR, not only do companies have to ensure that the personal data they gather is gathered under strict conditions and completely legally, those who manage and collect the personal data are also obliged to protect it from exploitation and misuse. The data owners' rights need to be respected, and if this isn't done, they can face certain penalties.
Please contact us if you want to have Whois protection enabled or if your domain name is showing details instead of "REDACTED FOR PRIVACY."
# Domain transfer for .NG
Source: https://kb.verpex.com/domains/domain-transfer-for-ng
Transferring your .ng Domain to Verpex
Transferring of domain involve switching a domain from one registrar to another. It takes 24 hours to complete a .NG domain transfer all things being equal, however, the transfer might be hindered due to any reason. To avoid this, ensure you take the steps below before initiating a transfer
Things to put into consideration before transferring your .ng domain name
* A domain that has been newly registered cannot be transferred except it stays with the current registrar for 60 days.
* You need to unlock your domain name and ask that your current registrar removes all restrictions on your account before the transfer.
* Your registrant details must be valid and correct so you can receive the Transfer Authorization Email to authorize the transfer.
* Your EPP code must be handy
* If the domain you wish to transfer is expired, you must renew with the current registrar before the domain expires. Also, a domain that has been newly renewed must stay 45 days with the current registrar to get an additional year added to your expiration date, if the domain is transferred within 45 days of renewing, the domain forfeits the additional year and the expiration date remains the same, this is a registry restriction.
* Ensure you initiate a domain transfer one month before expiration. This will give you ample time to fix any mistakes and re-initiate the transfer in time.
You can now proceed to place a transfer order from your Verpex account.
# Domain Verification Suspension
Source: https://kb.verpex.com/domains/domain-verification-suspension
For some reason your domain got suspended by the registry because you did not verify the registrant details after registering, transferring or changing the registrant details of your domain name. Check if your nameserver is pointing to the nameservers below then it means that your domain name has been suspended directly by the registry because of failing to verify your email address.\
ns1.verification-hold.suspended-domain.com\
ns1.verification-hold.suspended-domain.com
The registry suspended your domain name because you failed to verify your email address within the 15 day period. When a domain is newly registered or transferred or the registrant details of a domain name like the the first name, last name and/or email address of an existing domain name was modified, it requires verification of the of the information within 15 days. Since you failed to verify the Registrant information, this domain name and any other domain name using the same Registrant information no longer resolves. For your domains to operate and resolve normally, you need to complete the verification process by clicking the verification link to verify your email address. However, if the verification link has expired, you need to contact our support to resend the link to have your domain verified
Search for the verification email we sent to you in your inbox. If you cannot find the email in your inbox, there is a chance that it ended up in your spam folder, so make sure that you check your spam folder as well. If you are unable to find the email, contact us to resend the verification email. We need to know that the domain owner email address is valid before we can resend the verification email, so check that you have provided us with the\
right email address. You can check and edit your contact details in your [Verpex Dashboard](/domains/how-can-i-update-the-contact-information-on-my-domain).
Once you find the email, click on the link to start the verification process.You will need to click on the "Verify Information" button to confirm that you the contact information provided is correct and up to date. . The suspension is immediately removed once the verification is\
successful, however, it may take some time for your nameserver information to re-propagate through the entire internet. You need to wait 1-2 hours after verifying the mail for your website to be back online.
As your domain's registrar, we're required to verify the accuracy of the contact information you've provided.This process is meant to ensure that domain name owners are staying accountable and transparent by keeping up-to-date, complete records.
# Failed Domain Registration/Renewal
Source: https://kb.verpex.com/domains/failed-domain-registrationrenewal
Always know the terms of your domain name before registering it, options and fees for renewing domain names vary by registry, so be sure to read about the domain name extension before purchasing. Your domain registration/renewal could fail due to a lot of reasons. If your order fails, the reason for the failure will be stated in your client account.
**You are experiencing troubles in registering/renewing your domain name because:**
* Your payment was not fully processed or did not go through.
* Your domain is past the renewable period and the registry has to be contacted for manual renewal.
* There is a hold on your domain by the registry.
* Your TLD (mostly Country Code TLDs) have special registration/renewal requirements.
Despite a failed order, the domain registration/renewal could be successful, you need to confirm the status and expiration date on [Whois](https://www.whois.com/). If the domain registration or renewal was successful, the details will be updated in your Verpex Account's Domain List.
**Tips to avoid failed orders:**
* Check on [whois.com ](https://www.whois.com/) to find out if the domain is available for registration/renewal, contradicts the registry naming rules or has been reserved by the registry
* Make sure the domain you want to register does not have extended attributes, it it has you need to specify during checkout.
* Keep in mind that some TLDs (mostly Country Code TLDs) have special registration/renewal requirements.
Please note that it is important to keep your contact information up to date so you can receive notices of any changes. All failed orders are refunded to the payment source by our Billing team. You can confirm the refund in your Verpex Account Transaction History.
An expired domain is bad for business, do not allow your domain name to expire before renewing. If you have any further questions, feel free to use Live Chat Support or contact our support.
# Free Domain Offers
Source: https://kb.verpex.com/domains/free-domain
List of some of the free domains you can get when purchasing a web hosting/ Reseller hosting yearly plan
.com / .net / .org / .biz / .uk / .in / info / .com.ng / .ng / .org.ng / .ca / .me.uk / .org.uk / .es / .xyz / .me.uk / .de / .us / .co.za / .nI / .club / .ch / .sch.ng / .edu.ng / .name.ng. you can also get a free domain on a domain purchase of less than \$15 USD. You can contact us if you have any specific domain in mind
Please note that our free domain is only available for yearly web hosting/ Reseller hosting plan purchases, it is not included in a monthly billing cycle
# How can I Manage DNS on my Domain Through cPanel?
Source: https://kb.verpex.com/domains/how-can-i-manage-dns-on-my-domain-through-cpanel
Your domain has to point to our server to make the changes in your zone editor work. Find below our default nameservers
ns1.mysecurecloudhost.com\
ns2.mysecurecloudhost.com\
ns3.mysecurecloudhost.com\
ns4.mysecurecloudhost.com
Once your domain points to us, you can follow the steps below to add your records to your cPanel:
Step 1: Log into your verpex client account\
Step 2: Click products\&services
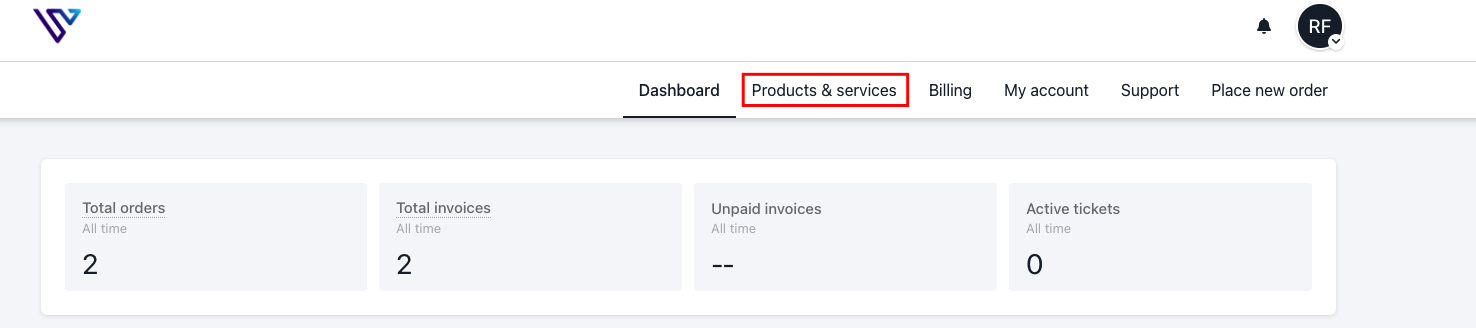
Step 3: Click manage product under the hosting account you wish to manage DNS for
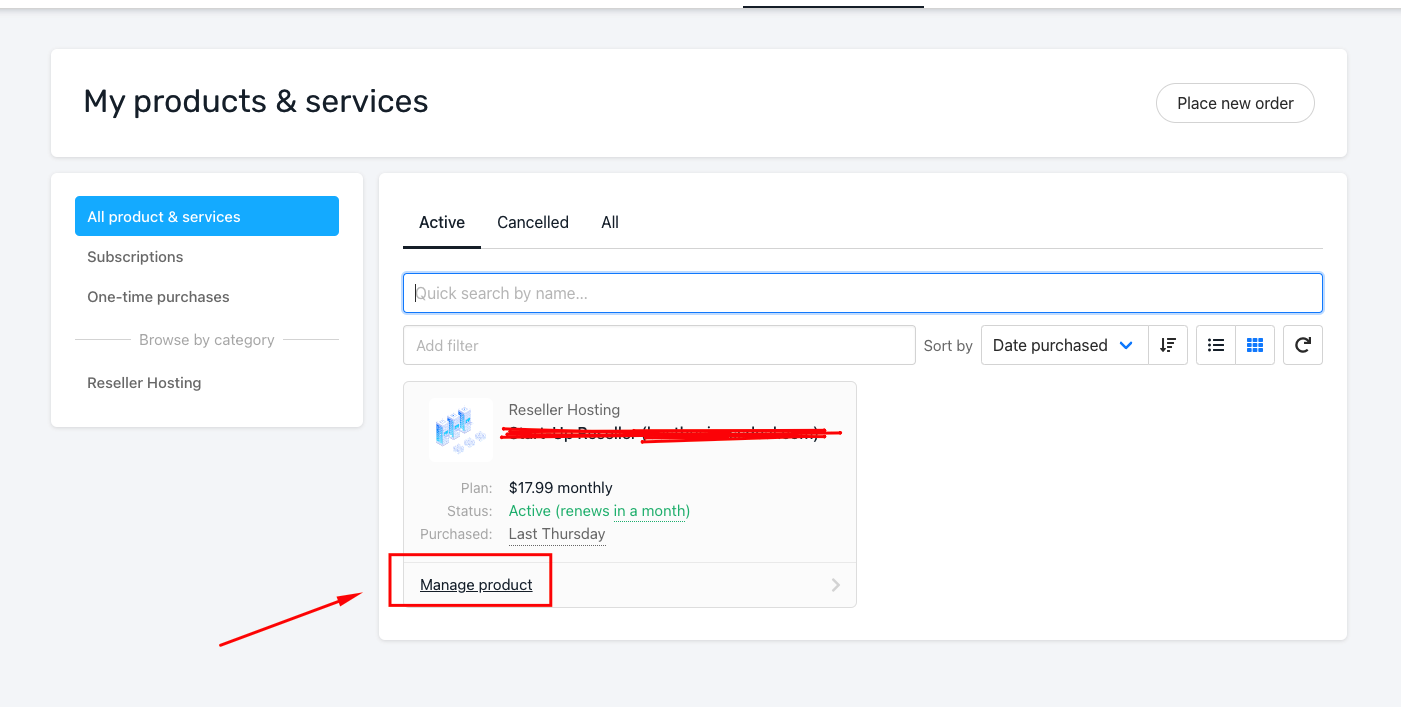
Step 4: Log into Cpanel -> Domain -> Zone editor
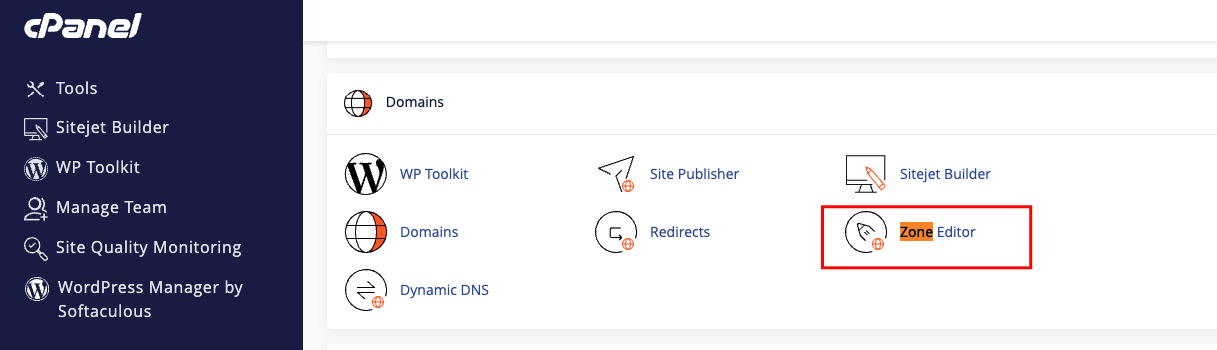
Step 5: Enter the records below in the appropriate fields
Name: Enter the value given or your domain name\
TTL: 7200\
Type: It could be any of these records A, AAA, CNAME, TXT, DMARC, SRV, etc.\
Record: Enter the code provided
The DNS zone allows you to create, edit, and delete records for the domains, addons and subdomains in your cPanel.
If you have more than one domain, click manage in front of the domain you wish to add a record for.
Click the drop-down arrow to choose from any record you wish to add and save\
And if you wish to edit, click the edit button in front of the record and save.\
You will get a pop-up message that the record has been added successfully.
# How can I Move a Domain/Product to Another Verpex Account
Source: https://kb.verpex.com/domains/how-can-i-move-a-domainproduct-to-another-verpex-account
Moving your domain from one Verpex account to another can ONLY be done at our end.
* You do not need an EPP code.
* The recipient must be a client with us. If not, create a client account [here](https://clients.verpex.com/auth/login?redirect=%2Fauth%2Fregister)
* Send an email to [support@verpex.com](mailto:support@verpex.com) from your client account, stating the service you wish to move and the email address of the recipient.\\
Click [here](/domains/how-can-i-transfer-my-domain-to-verpex) if you also want to transfer your domain name to Verpex.
# How can I Renew my Domain with Verpex?
Source: https://kb.verpex.com/domains/how-can-i-renew-my-domain-with-verpex
Renew your domain at Verpex
Domains renew on yearly billing cycles. Domains are typically available for 1 to 10-year periods.
You must renew your domain to keep it. If you do not renew your domain, then it will drop back to general availability and others will be able to register it.
Domain registries offer up to 30 days grace period for late renewal of a domain name. However, it is imperative to renew a domain on or before the renewal date to prevent service disruption.
If set to auto-renew, we generate renewal invoices 21 days in advance of your domain’s expiry date. You can also manually renew your domains in advance. If you renew a domain before the expiry date, the extra period gets added to the end of the expiry date. This means you will not be penalised due to an early renewal.
The steps below will guide you through the renewal process:
Step 1: Log into your [Verpex](https://verpex.com/) client account\
Step 2: Click Products& services\
Step 3: Click manage product under the domain name you wish to renew\
Step 4: Go to Invoices, if there are no available invoices\
Step 5: Scroll down to where you can find QUICK ACTIONS\
Step 6: Click issue next invoice and proceed to make payment\
Step 7: Proceed to generate an invoice and make payment
Depending on the TLD, you can renew for up to 10 years
# How can I set Nameservers on my Domain?
Source: https://kb.verpex.com/domains/how-can-i-set-nameservers-on-my-domain
Nameservers point your domain name to a set of servers that handle your website DNS records. Every domain name has at least two, and up to eight nameservers.
Changing your nameservers is easy and can be done from your Verpex client area. Please note, that if you did not purchase your domain from us, we do not have control over your domain as such you need to contact your domain provider to change your nameservers.
Step 1: Log into your [verpex](https://verpex.com/) client account\
Step 2: Click Products\&services\
Step 3: Click manage product under the domain name you wish to change nameservers to\
Step 4: Click the manage button to update nameservers\
Step 5: Manually enter your preferred nameservers\
Step 6: Click update nameservers and exercise patience for the changes to take effect, it takes 24 hours more or less.
By default, domains registered with us maintain our default nameservers\
ns1.mysecurecloudhost.com\
ns2.mysecurecloudhost.com\
ns3.mysecurecloudhost.com\
ns4.mysecurecloudhost.com
Every hosting package with Verpex uses the above nameservers. You can also interchangeably use our white-label nameservers or your custom DNS for any reseller plans.
# How can I Transfer my Domain to Verpex?
Source: https://kb.verpex.com/domains/how-can-i-transfer-my-domain-to-verpex
Transfer your domain to Verpex without any hassle
Domain transfer varies depending on the domain TLD and the current registrar, some transfers are instant while others take a few days for processing by the registry. When a domain is transferred, the nameservers remain the same, transferring your domain will not affect your hosting.
**Before the Transfer**
For a hassle-free transfer, ensure all restrictions are removed, and contact details are valid and up to date because this is where the verification link for the transfer email will go and, your EPP code is handy. Check the following steps:
1. Has your domain been registered for 60 days and more? A domain can not usually be transferred within 60 days of registration.
2. Was there a recent change to the email address, first and last name or name of the organisation within the last 60 days? As a security feature, there is usually also a 60-day period in which you cannot transfer a domain after changes like this.
3. Is the registrar lock disabled? Some domains have a transfer lock. Make sure your domain is unlocked with your current provider
4. Do you have your EPP code handy? This is sometimes called an EPP code and you need to retrieve it from your old provider’s control panel.
5. Is the registrar lock disabled? Some domains have a transfer lock. Make sure your domain is unlocked with your current provider.
If yes, let's get started with the transfer process:
Step 1: Log in to [verpex.com](https://verpex.com/)
Step 2: Click Domains -> Domain Transfer
Step 3: Enter the domain name, click the transfer button
Step 4: Input the EPP code
Step 5: Click next, this takes you to the payment page, pay and check out
In some cases, an email will be sent to your administrative email address to approve the transfer, click the approve transfer to approve the transfer. This is increasingly rare due to GDPR changes and often you will not an email a all. Now wait for the transfer to be completed, you will get an email notifying you of the successful transfer.
Please note that it takes 5 to 7 days to complete.
**How much do Transfers cost?**
Transfers are free, but some TLDs include a one-year compulsory renewal. We do not charge any extra for the actual transfer. For example, if your .com domain expires in one year and you choose to transfer the domain, after the transfer your domain will expire in two years.
**.uk Domain Transfer**
To transfer a .uk domain to Verpex, the customer needs to follow these steps:
1. Change the IPS tag of the domain to "HOSTINGUK.".
2. There is no charge for transferring a .uk domain, and it does not include a compulsory renewal.
3. After changing the IPS tag, the domain transfer typically happens immediately upon confirmation.
By ensuring that the IPS tag is accurately updated, the transfer process will proceed smoothly. If there are any delays or issues during the transfer, it's advisable to contact Verpex support for assistance.
**.au Domain Transfer**
To transfer a .au domain to Verpex, the customer should follow these steps:
1. Obtain the domain password (EPP/Auth code) from their current registrar.
2. Ensure they have access to the registrant's contact email, as an approval email will be sent there.
3. Log into their Verpex account or create a new account if they are a new customer.
4. Initiate the transfer process:
For existing customers, log in, navigate to "Transfer Domains," and enter the domain name and EPP code.
For new customers, visit the Verpex domain transfer page and enter the required information along with the EPP code.
5. After submitting the transfer request, the registrant will receive an email to approve the transfer. They must click the approval link in that email.
6. Once approved, the transfer typically completes within 48-72 hours.
7. It's important to note that the domain's name servers cannot be modified while it is in pending transfer status.
Additionally, if the domain is expiring within 89 days, they will need to renew it during the transfer.
# How can I Update the Contact Information on my Domain?
Source: https://kb.verpex.com/domains/how-can-i-update-the-contact-information-on-my-domain
Updating your WHOIS records at Verpex
Every domain has contact information which is that of the domain registrant: the legal owner of the domain name.
Each domain with Verpex can have its contact information. To change the contact information of an active domain, follow the instructions stated below:
Step 1: Sign in to your [Verpex ](https://verpex.com/)client account\
Step 2: Select products\&services-> manage product -> manage button

Step 3: Click the Update Registrant, it takes you to the page where you can edit your contact information
Step 4: Edit the contact details with updated information and save changes by clicking Update registrant.
Registrant changes are instant.
# How can I use Cloudflare on my Domain?
Source: https://kb.verpex.com/domains/how-can-i-use-cloudflare-on-my-domain
Using Cloudflare on your Verpex Domain
Cloudflare is a CDN (Content Delivery Network) that makes your websites secure, fast, private and reliable. It is a performance and security service that allows your website to load twice as fast.
Cloudflare also offers excellent DNS management for standalone domains that do not have hosting. Cloudflare has both free and paid plans. The free plans are excellent. You need to sign up for Cloudflare to be able to use it.
To signup:
1. Simply fill out your email and a password, and tick the checkbox to accept CloudFlare's Terms and Conditions.
2. Then click on the Signup button. The system will create your Cloudflare account, and you can link your domain to it
3. Click on the Domains icon and select the domain where you wish to activate Cloudflare.
4. Once selected, click on the "Provision domain with CNAME setup" button.
5. Once the Cloudflare system is active in your domain, you will see the Active status. Also, you will see the cloud icon in orange (which means active) for your domain name entries.
6. If you wish to activate any other subdomain entry to go through the CloudFlare network, simply click on the grey cloud icon for that subdomain.
Since CloudFlare changes the CNAME record of the www subdomain only, you will also need to redirect traffic from mysite.com to [www.mysite.com](http://www.mysite.com)
For more information, you can refer to [https://developers.cloudflare.com/cloudflare-one/tutorials/](https://developers.cloudflare.com/cloudflare-one/tutorials/)
# How do I Cancel my Domain Name Registration?
Source: https://kb.verpex.com/domains/how-do-i-cancel-my-domain-name-registration
Once a domain name has been registered we can't cancel it, however it is possible to cancel services like web hosting . Domain names automatically lapse if they are not renewed. In most cases, your domain name will expire on its own if you do not pay your domain name's renewal fees, it gets deleted and cancels automatically. Remember, once you cancel a domain name registration it will be made available for registration by someone else.
If you are cancelling your domain name, we also recommend that you cancel any attached subscription services, as they won't be automatically cancelled.
To cancel a domain name, you have to turn OFF its auto-renewal feature in the Customer Portal so you will no longer be billed or invoiced in your account. However, if you changed your mind and decide to keep your domain, you need to enable the auto-renewal feature or manually renew your domain within the Customer Portal.
# How to Flush the Cloudflare Cache
Source: https://kb.verpex.com/domains/how-to-flush-the-cloudflare-cache
**What is cache actually and what does it do?**\
A cache is just generated copies of your web content that are created to speed up the process of resolving a particular web page for the end user. Sometimes you may wonder why some updated content is not updating. This means you are viewing an old copy of the file, and the cache has not yet been updated.
Cache purge will immediately remove all cached content on your website, causing Cloudflare to expire all cached static resources before the button is clicked and fetch a fresh version of your website. Purging the cache will only remove cached copies of files, not the files themselves. You may need to clear the cache in Cloudflare when you want to immediately retrieve the latest version of a file on your website.
While caching helps your website load faster, it can also save outdated information, so your latest changes aren't reflected on the site. Because Cloudflare must rebuild the cache after clearing it, site performance may be temporarily degraded.
Follow these steps to clear the Cloudflare cache
* Log in to your Cloudflare account.
* In the left sidebar, click Websites, then click your domain name (testing.com):
* Cloudflare -> Select domain
* In the left sidebar, find the Caching menu, then choose the Configuration option
* Cloudflare - Caching - Configuration
* On the Caching Configuration page, under Purge Cache, find the cache-clearing options.
* Cloudflare -> Caching -> Configuration - > Purge Cache options
* You will be redirected to the caching overview page.\
Here you can purge the cache for individual pages or items or purge everything.\
**Custom Purge** - Specifies which pages you want to be purged\
**Purge Everything** - Clears the cache for the entire website
If you choose the Purge Individual Files option, you will be redirected to the next screen where you will need to enter the exact URLs of the items that should be purged.
To selectively purge the cache;
* Click Custom Purge.
* In the text box, type the full URL (or multiple URLs) you want to clear from the cache,\
and then click Purge.
Purging a single file from the Cloudflare cache immediately removes that resource from the Cloudflare cache, and the next request for that resource will re-add the resource to the cache with the latest version served from the origin. We recommend using this option if you don't want to slow down the site.
To clear all cache at once, click Purge Everything, and then click Purge Everything again to confirm. It may take up to 30 seconds for Cloudflare to clear the cache. Purging the entire cache means all resources in the Cloudflare cache are immediately invalidated, and the next request for each invalidated resource will go back to the origin server to attempt to re-validate the resource. If the resource cannot be revalidated, the resource in Cloudflare's cache will be replaced with the latest version of the resource from your origin. If you have a lot of resources and a lot of traffic, these requests can cause a substantial increase in requests to your origin and slow down your website.\
**NOTE:** Once the cache is purged, the browser and server will need to re-download it, which may take some time. During this period, the loading time for purged pages may take a little longer than before the purging.
Keep in mind that you will end up slowing down your site if you constantly purge resources from your site. When you purge the cache, it means\
we have to fetch all requested resources from your server. It will take up to 3 days to rebuild the cache to an optimal level depending on your site traffic. This means that your site won't perform optimally until the cache is rebuilt.
Cloudflare offers a popular Content Distribution Network (CDN) service and purging of cache is very important when your site goes through changes. Cloudflare strongly recommends using single-file (URL) to maintain optimal site performance instead of completely purging the cache.
For more information, you can refer to [https://developers.cloudflare.com/cache/how-to/purge-cache/](https://developers.cloudflare.com/cache/how-to/purge-cache/)
# How can I Register a Domain with Verpex?
Source: https://kb.verpex.com/domains/how-to-register-a-domain-name-with-verpex
Registering a domain with Verpex is simple and instant
Registering a domain with Verpex is simple and instant
## What is a domain name?
A domain is an identifier, it is what is used to identify your business on the net, more like an address directing people to your business Domain names work in the format\[unique name].\[tld]. You can choose a variety of tld’s (top-level domains).
You can register your domain by following the steps stated below:
1. Visit our website [Verpex.com](https://verpex.com)
2. On the dashboard, click the drop-down arrow beside ‘Domains’ and choose [Domain Registration](https://verpex.com/domain-registration)
3. Enter your domain in the search box, and click the search button you find information about the availability of the domain, and it populates other domain names you might be interested in.
![]() 4. If the domain is available, click `Register domain`. If not try the search again or try one of the alternative suggestions.
5. Once you choose a domain name you will be prompted to enter your domain details such as your name and address.
6. Click Add to Cart. You can either add more products to your basket or check out immediately.
That’s it - as soon as payment is made your domain will be registered. If there are any additional bits of information we need we will be in touch.
## Registration length
By default domains register for one year. However you can choose to register for more than one year (sometimes up to 10 years) depending on the extension. This choice is provided to you after you click `Register domain`
## Domain Transfers
If you have a domain elsewhere you can also [transfer it to Verpex?](/domains/how-can-i-transfer-my-domain-to-verpex).
# How to Register a .NG domain
Source: https://kb.verpex.com/domains/how-to-register-a-ng-domain
To register a .ng domain name,\
Log into your Verpex account\
Go to **Place new order**\
Click Domains\
Enter the domain name you want in the search box to check for its availability, If available save your order and make payment
You have just successfully registered a .NG domain name
# ICANN Registration Data Policy changes
Source: https://kb.verpex.com/domains/icann-registration-data-policy-changes
Learn about recent changes to ICANN's Registration Data Policy and how they might affect you.
[ICANN](https://www.icann.org) (the Internet Corporation for Assigned Names and Numbers) is introducing a new Registration Data Policy that comes into effect on August 21, 2025. This policy helps ensure that domain registration data complies with global data protection laws.
Depending on your domain settings, you may be affected by these changes to the Registration Data Policy.
## Legal ownership
One of the changes in the new Registration Data Policy affects legal ownership of domains. Specifically, the entity in a domain contact's **Organization** field is now considered the legal owner of the domain.
Therefore, if your domain's registrant contact specifies an organization, you should review this information as soon as possible. To do this, follow these steps:
1. Log in to the Hosting Panel at [https://clients.verpex.com](https://clients.verpex.com).
2. On the top menu, click **Products & services**.
3. In the left sidebar, click **Domain Names**.
4. In the list of domains, click the domain you want to configure.
5. On the **Overview** tab, in the **Manage your domain name** section, click **Update Registrant**.
6. Review the information in the **Registrant Organization** field:
* If you want an individual listed as the domain owner, delete the information in the **Registrant Organization** field. Make sure the **Registrant Name** field is correct for the owner's name.
* Alternatively, if you want the organization to remain as the domain's legal owner, confirm that the information in the **Registrant Organization** field is accurate and complete. Make sure you remove any personal information from this field, such as your name.
7. To save your changes, click **Update Registrant**.
## WHOIS information
By default, your contact details (including the organization name, if specified) are **not** published in public WHOIS lookup results.
* If you prefer this information is made public, please open a support ticket at [https://clients.verpex.com](https://clients.verpex.com) and we will assist you.
* If you prefer this information remains private, no action is required on your part.
## More information
To view the official ICANN Registration Data Policy, please see [https://www.icann.org/en/contracted-parties/consensus-policies/registration-data-policy](https://www.icann.org/en/contracted-parties/consensus-policies/registration-data-policy).
# Lifecycle of a .NG Domain
Source: https://kb.verpex.com/domains/lifecycle-of-a-ng-domain
Life cycle varies for country code Top Level Domains (ccTLD). Every domain has a life cycle starting with its initial registration and ending with it being returned to the public to be registered. A domain lifecycle can be extended indefinitely by regularly renewing the domain. Understanding your domain's life cycle will help you know when a domain can be renewed and what is affected when the domain expires.
.NG domain names available can be registered for a period of 1-5 years, once the domain expires, it enters the renewal grace period of 60 days within which it can be renewed, however, it cannot be transferred to another registrar except if it is renewed. All services (e.g., DNS, website, emails, etc.) associated with the domain name is no longer available.
After sixty days of renewal grace, the domain name goes into a redemption period and stays there for 28 days. The domain can still be restored at an additional cost of N1000(\$25).
88 days after expiration, the Redemption Period ends and the domain name will enter into the Pending Delete status at the registry for up to 14 days. During this time, it is not possible for the Registrar to redeem, recover or renew the domain name. After this period the domain name will be available to the general public for fresh registration
# .NG Domain Status
Source: https://kb.verpex.com/domains/ng-domain-status
You just registered a domain and you are unable to manage the domain, you checked the status on whois.com and it is showing restricted, it could be restricted by the registry for any reason.
If you do not know what the status indicates, read on to understand and resolve the status of your domain
**Active**
Your domain is registered and ready to be used
**Pending Create**
The domain name has been restricted by the Registry because further documentation is needed to fulfil the domain registration and you have been unable to meet the registration requirements for the domain registration
Another reason for your domain to be in this state is that your domain violates the domain name registration agreement\
\
To resolve this\
Verpex details each TLD extension with a description of the requirements for its registration, go through the requirements,
* Login into your account and open a ticket
* Forward necessary documents to [support@verpex.com](mailto:support@verpex.com).
**Pending Approval**
The domain name you have requested is submitted to the Registry and is awaiting their approval and activation.
**Expired**
The domain is in an expired state and cannot be used
To resolve this,
Make payment for the domain to get re-activated and back online
**Pending Delete/ Redemption**\
The domain is past the renewable period and has to be manually re-activated.
To resolve this,
* Log into your account and open a ticket
* A member of the support team will generate a new invoice to renew and restore the domain.
* Restoring the domain name will incur an additional fee(restoration fee)
* The registry will be contacted to restore the domain
* After restoration, the domain will be manually renewed at our end.
**Client Transfer Prohibited/Client Delete Prohibited**
The domain is active and cannot be transferred or deleted due to the registrar lock enabled
To resolve this,
If you wish to transfer the domain, you can simply disable the registrar lock and remove other restrictions on the domain.
While most generic top-level domain (gTLD) registries have automated processing, many country code top-level domains(ccTLD) require manual processing. Processing starts after all requirements, documentation, and information has been received. Then, your domain registration order is in line to be processed.
Registrations are often individually submitted, reviewed, and approved by a member of our support team and at the registry. It may take additional time for your registration to be activated and live. Each TLD extension is detailed by Verpex hosting with a description of how long a registration may take to activate.
# .NG Restricted Domains
Source: https://kb.verpex.com/domains/ng-restricted-domains
Some domains are reserved or restricted by the.NG registry (NIRA). This is due to the fact that the registry reserves the right to restrict domain names that may NOT be available for registration or can be withdrawn if registered already. Find below some of the cases this applies to.
**Restricted Names**: These are domains that could pertain to government, military, ministry or other bodies. The application of these domains(\
.gov.ng, .edu.ng, .net.ng, etc) will be rejected if not sent from relevant bodies/entities
**Premium Names**: These domains are high-quality domains that command premium value and could only be made available to registrants at a more expensive rate
**Geonames:** Some domain names are restricted due to geographical locations, industrial\
for business reasons, may require certain documentation in order to establish the legitimacy of the registrant. meaning only certain individuals or groups can register them. Nira determines and rejects the registration of these domains, this list contains names of geographical locations within the local, state and federal government
**Offensive Names:** These are domains that are outrightly offensive to the Nigerian community and then the global community. Nira determines such domains and rejects requests for registration for such domains.
# Overview of .NG Domain
Source: https://kb.verpex.com/domains/overview-of-ng-domain
What is a .ng domain?
The .NG domain extension is a unique identity and country code top-level domain (ccTLD) for the country Nigeria on the internet. It is great and gives credibility to businesses(local and international) looking to expand their brand in Nigeria.
.NG domains include and are not limited to .ng, .com.ng, .org.ng(for Nigerian non-profits),, .edu.ng(for Nigerian tertiary academic institutions), .gov.ng(for various tiers of government in Nigeria), .mobi.ng(for mobile websites) and many more. Each variation is used according\
to specific requirements, and some are open domains, while others are closed domains that can only be acquired with extra documentation
With a .NG domain name you will rank higher in local search results and in the hearts of the locals.
A .NG domain name is short, professional and memorable helping your website stand out in a sea of content online.
# Premium Domain Names
Source: https://kb.verpex.com/domains/premium-domain-names
A premium domain name is a domain that has high quality, and that is bought and sold with the aim of making a profit. Some of the factors that indicate whether or a domain name is premium or not are the following:
```
Brevity – It can be really hard to remember an overly long domain name. In addition, domain names that contain punctuation can be forgotten due to the fact they are complex. For a domain name to be memorable, it needs to be concise. For this reason, premium domain names usually have one or two words in them.
Trustworthy TLD – At the end of the domain, you will find a string of characters that is the top-level domain (TLD). A domain name that is premium will have a good top-level domain that won’t decrease your chances of reaching potential customers.
Generic value – Domain names that have truly generic names have proven to be the most valuable. A name that is generic manages to increase the demand thanks to the appeal it has for the whole industry, as well as it adds value to the whole process.
Contains high domain authority and keywords – Domain names can help in SEO and running a successful website.
```
The price of the domain will be confirmed after the purchase has been initiated, even if the domain you found is available. Wen, it comes to premium domain names, TLDs are charging different rates. If the domain name you have picked is a premium domain and you’re not willing to pay the premium rate, you will be refunded, or you won’t be charged the original purchase price.
The reason for this is that TLD’s now operate this way, and when it comes to premiums, they want as much money as they can get. TLD’s are the ones that determine what the cost will be for a certain domain and what makes a premium name, outside of the fixed prices that you can see on our site.
Premium domain names can be put up for sale either by the Registries or their existing owners. The pricing and the purchase process are what differentiate the two. Existing owners that sell domains usually have a one-time purchase fee, and their maintenance cost isn’t different from the usual cost for other domains with the same extension. When you purchase a domain name from an existing owner, a deal with the current owner is made, and they provide the domain to your account with no extra action needed from your side.
On the other hand, registry premiums are typically new domains that the Registry selects as premiums due to their potential for popularity and high value. In addition, premiums you get from the Registry have special pricing not only to acquire them but also to transfer and renew them. However, the difference between the two types of premiums can often be blurry since Registry premiums are often put for sale by their current owners.
# Types of .NG Domains
Source: https://kb.verpex.com/domains/types-of-ng-domains
**.ng**: This is the most commercially used domain extension and is open to anyone anywhere. Intended for any website associated with Nigeria\
**.com.ng**: This extension is intended for Nigerian businesses for commercial purposes and opened to anyone.\
**.org.n**g: This extension is suitable for non-commercial Nigerian organizations(non-profits) and opened to anyone\
**.name.ng**: This extension is intended for personal websites and is open to anyone anywhere\
**.mobi.ng**: This extension is intended for Nigerian mobile-friendly websites.\
**.net.ng**: This extension is intended for Nigerian network providers(Nigerian Internet Service and Telecoms Providers’ infrastructure only). It is restricted to Nigerian ISP\
**.sch.ng**: This extension is intended for Nigerian non-degree issuing academic institutions. It is restricted to Nigerian preschool institutions and documentation may be required.\
**.edu.ng**: This extension is strictly reserved for Nigerian tertiary academic institutions including Universities, Polytechnics, Colleges of Health, Colleges of Education and Technical Colleges only. \[Find the full requirements here] for Nigerian post-secondary institutions. It is restricted to qualified Nigerian institutions.\
**.gov.ng**: This extension is highly reserved for tiers of Nigerian government(Federal, State, and Local governments and their institutions only). It requires a Letter of Authorization from the head of the Government institution applying for the domain name. \[Read more here]. It is restricted to Nigerian government bodies and institutions
# What is a CDN?
Source: https://kb.verpex.com/domains/what-is-a-cdn
A Content Delivery Network (CDN) is a system of distributed servers that work together to efficiently deliver web content to users based on their geographic location. CDNs are used to\
improve the performance and availability of websites and applications by caching and distributing content such as images, videos, and other static files to servers that are closer to the end users.
When a user requests a web page, the CDN will redirect the request to the nearest server, rather than having it sent all the way back to the origin server. This reduces the distance that the data has to travel, which in turn reduces the amount of time it takes for the page to load.
CDNs also help to reduce the load on the origin server by caching and serving content from a network of edge servers. This can help to improve the scalability and availability of a website, as well as protect it from traffic spikes and DDoS attacks.
Another benefit of CDN is that it can improve the security of a website by using features such as SSL offloading, DDoS protection and Web\
Application Firewall.
**Benefits of a CDN**
**Improved Content Availability and Redundancy** - A CDN can handle high-volume traffic and withstand hardware failure which can cause downtime for your website.
**Increased Website Security** - A CDN can increase security by preventing vulnerability attacks, stopping brute force attempts and mitigating DDoS attacks.
**Improved Website Load Times** - A CDN helps visitors to experience a faster loading page and distribute content closer to website visitors.
**Reduced Bandwidth Costs** - A CDN can reduce bandwidth consumption costs through caching and optimization and increase content availability.
# What you Need to Know Before Registering a .NG Domain
Source: https://kb.verpex.com/domains/what-you-need-to-know-before-registering-a-ng-domain
FAQs for .ng
**What is a .ng domain?**\
.NG is the country-code domain name system (ccTLD) for the country Nigeria.
**How many years can you register .ng domain names?**\
.ng domain names can be registered for up to 5 years.
**How long does it take to register .ng domain name?**\
Depending on the domain extension, it could take minutes or weeks. .edu.ng and .gov.ng domain registration require documentation and vetting. In the case of extra vetting, Verpex will contact the registrant.
**How much does .ng domain name cost?**\
Prices for a .ng domain vary depending on the extension you want, domain name price starts from N999($ 0.99) to N10000($25) per year.
**How can I get a .ng domain name?**\
To get a .ng domain name, you need to search for its availability on our website using the domain name search form. If the domain name is available you will be able to place an order and purchase it instantly.
**How do I host my .ng domain name?**\
Your .ng domain name can be hosted on any hosting platform, whether it be our WordPress hosting or Managed Cloud Server
**Can I hide my .ng registration information (domain privacy)?**\
No, you cannot hide the contact information of your .ng domain on WHOIS, all or partial information will be displayed in WHOIS.
**Are some .ng domain names restricted?**\
Yes, some .ng domain names are restricted
**Which registry manages .ng domain names?**\
Nira manages the registration of .ng domain names, you may visit them at [http://www.nira.org.ng/](http://www.nira.org.ng/)
**What is the grace period for a .ng domain name?**\
After the .ng domain name expires, it stays in the expired state for 60 days\
After which it enters the redemption state immediately. The .ng domain name can be restored with an extra fee of \$25 including the renewal fee in the redemption state. It stays in the redemption state for 28 days and enters the pending delete state, it stays in pending delete for 14 days and gets deleted from the system making it available for anyone who wishes to register.
# Why do Different TLDs have Different Prices?
Source: https://kb.verpex.com/domains/why-do-different-tlds-have-different-prices
Your domain name is your identity on the net, and picking one that aligns with your business is quite important. A TLD (Top-level domain)is what ends your name in a domain and transforms your name into a domain name, it is at the right corner after your name, examples of TLDs are .com, .net, .org, etc.
A TLD determines what your domain is all about before visiting your website. Some TLDs are SEO-friendly, there are over a thousand friendly top-level domains to choose from, you can call them domain extensions or suffix
Top-level domain name price differs from one to the other, and it varies based on the value of the domain, the registry and the registrar. The registrars' reserve domain names through registries. It is the registries that ultimately hold domain extensions and the names associated with them, e.g. VeriSign (.COM/.NET), PIR (.ORG), Nominet (.UK) or Denic (.DE).
The registries charge a fee for a domain, and these prices vary from one top-level domain extension to another. Some domain names have fixed prices negotiated between the registry and a non-profit called ICANN (Internet Corporation for Assigned\
Names and Numbers) who is a regulator for domain names. For older domains like .com, .net, and .biz the prices are affordable to register due to the intervention of ICANN but for newer domains, this is not the case which is why they are a bit expensive.
Some registries apply for some domain extension to be exclusive, they don't just want anyone to register them. The TLD could be restricted to a specific group, profession or company or be used to describe a particular product or service. To register domains with these TLDs to promote exclusivity, you have to meet certain criteria and be willing to pay higher.
# Configuring an Email Client
Source: https://kb.verpex.com/emails/configuring-an-email-client
Many different email clients have different layouts. However, the way they should be set up is the same. The settings that will be shown in this article are suitable for any client and device, regardless of whether it's for a laptop, desktop, or mobile.
You can set up your email using one of two types of settings, with the SSL being the main difference between them. SSL (Secure Sockets Layer) refers to a cryptographic protocol that protects a computer network's communications. SSL is often used to safeguard email, instant messaging, and voice-over IP programs. And, given how widely it's used in email apps, it's no wonder that the two types of email account configuration settings revolve around whether SSL is used or not.
So, here are the two types of email settings:
**Non-SSL Email Settings – Not Recommended Type**
For the non-SSL settings, your email account on the incoming and outgoing server should be in the following format: mail.example.com. Your username should be your full email address, and your password is the one you use for your email account.
The incoming port should be set at POP3 110 or at IMAP 143. The outgoing mail server or SMTP should use port 25. There is no SSL included with these settings, so it is off. Authentication for SMTP is required. The SPA or Secure Authentication has to be disabled.
**SSL Email Settings – Recommended Type**
The income and outgoing server should be in the same format as the non-SSL email settings for the SSL email settings. The same goes for the username and password. The difference in the two types of settings comes in the incoming port. For the SSL email settings, the incoming port should be set at POP3 995 or IMAP 993. The outgoing mail server or SMTP should use port 465.
For these settings, SSL is included, and it is on. Like with non-SSL email settings, SMTP Authentication is required, and the SPA or Secure Authentication has to be disabled.
**The cPanel Way**
Another way to set up your email account and get these settings is by doing so via your cPanel account. The way to do this is by logging in to the account first. After this, you manually search for the "Email Accounts" option or type it on the search bar. After you find it, you will see an option for connecting devices next to your email account, where this information, as well as other similar and valuable information, is shown.
It is essential to know that SNI-based SSL certificates cause problems in some older email clients. This indicates that the incoming and outgoing server hostnames should be mail.\[yourdomain.com] instead of mail.\[yourdomain.com]. If you have any issues with this, customer support will help you figure it out and solve any issues you have.
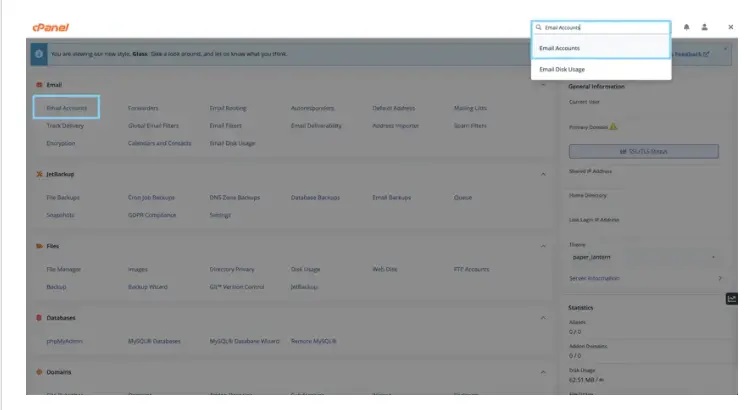
# Configuring Autoresponder for your Email Account
Source: https://kb.verpex.com/emails/configuring-autoresponder-for-your-email-account
Autoresponder is a computer program that answers the emails it receives automatically. There are many Autoresponders out there, and some of them are easy to use, while others are more complex. This article will go over the steps you need to take to set up your Autoresponder through your cPanel.
A cPanel is a control panel that enables you to access a set of different tools so that you can modify your website and its settings. Through the cPanel, you decide what your website will look like to the customers or the "end users," and you have complete control over a myriad of actions. The cPanel dashboard is praised for being extremely user-friendly and for allowing everyone, including non-professionals, for doing as they please with their sites in a simple, straightforward manner.
So, with all of this in mind, let's see what you need to do in order to configure Autoresponder for your email account via your cPanel, and where you can find what you need to complete this process.
First, you need to log in to your cPanel account. After you have done that, look for the "Email" option and select the "Autoresponders" tool. This will redirect you to another page, where the button responsible for adding new Autoresponders is located and also shows all your existing autoresponders.
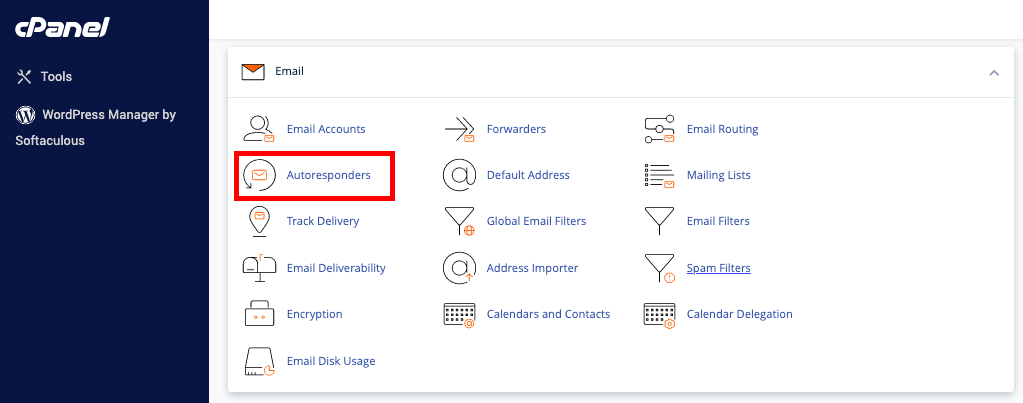
To set up a new autoresponder for your email account, you need to click on the "Add Autoresponder" button.
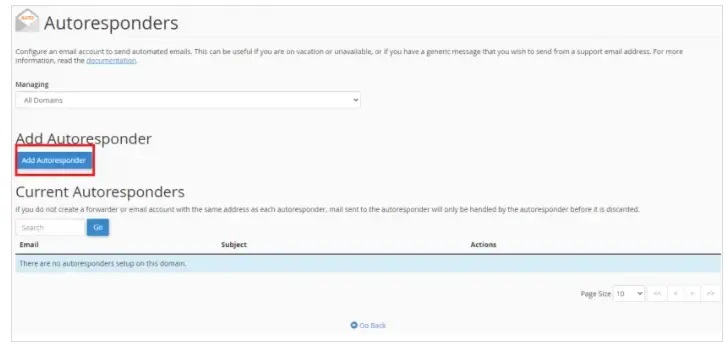
After you click this, many different settings will pop up on the screen for you to configure. Let's break down what they do:
```
The "Interval" setting refers to the amount of time/hours the Autoresponder should let pass between responding to the same email address. Basically, this setting determines how often a message should be sent to the same sender when one person sends you an email several times.
In the "Email" setting, you need to type out your email address. In the "From" setting, you need to put in from whom the message is, so you either put in your name or someone else's, depending on what you want.
In the "Subject" set, you put in the subject of the automated email that the Autoresponder would send out. For instance, "In a meeting."
In the "Body" setting, you should type out the automated message's content. For this, you can make a custom HTML body that can have various links, images, etc., in them. Usually, people put information like when they are back from a holiday in this setting.
The last two settings, the "Stay" and "Stop" boxes, are used to set up the time when the Autoresponder should begin with responding, and it should automatically stop. This means that you will not have to turn it on and off by yourself manually.
```
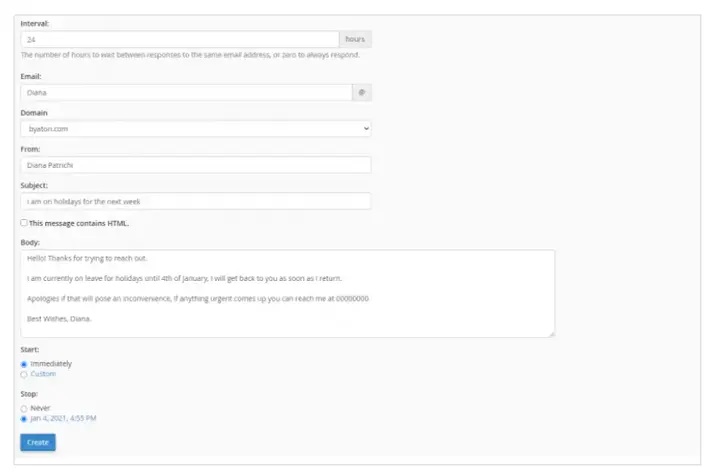
# Creating An Email Account on Your cPanel Hosting
Source: https://kb.verpex.com/emails/creating-an-email-account-on-your-cpanel-hosting
One of the greatest features that most of Verpex hosting packages offer is the unlimited email accounts you can create within your cPanel account. If you are unfamiliar with the process of creating a new email account with your personal domain name, a step-by-step guide and explanation are provided below.
1. Firstly, log in to your cPanel through Verpex Client Area or the direct link [https://domain.com/cpanel](https://domain.com/cpanel) (make sure to replace ‘domain’ part to your own domain name)
2. Once you’re logged in to your cPanel dashboard, go ahead and type in Email Accounts on the top right search bar, or if it’s visible on the dashboard, you can go ahead and click the Email Accounts option under the Email section.
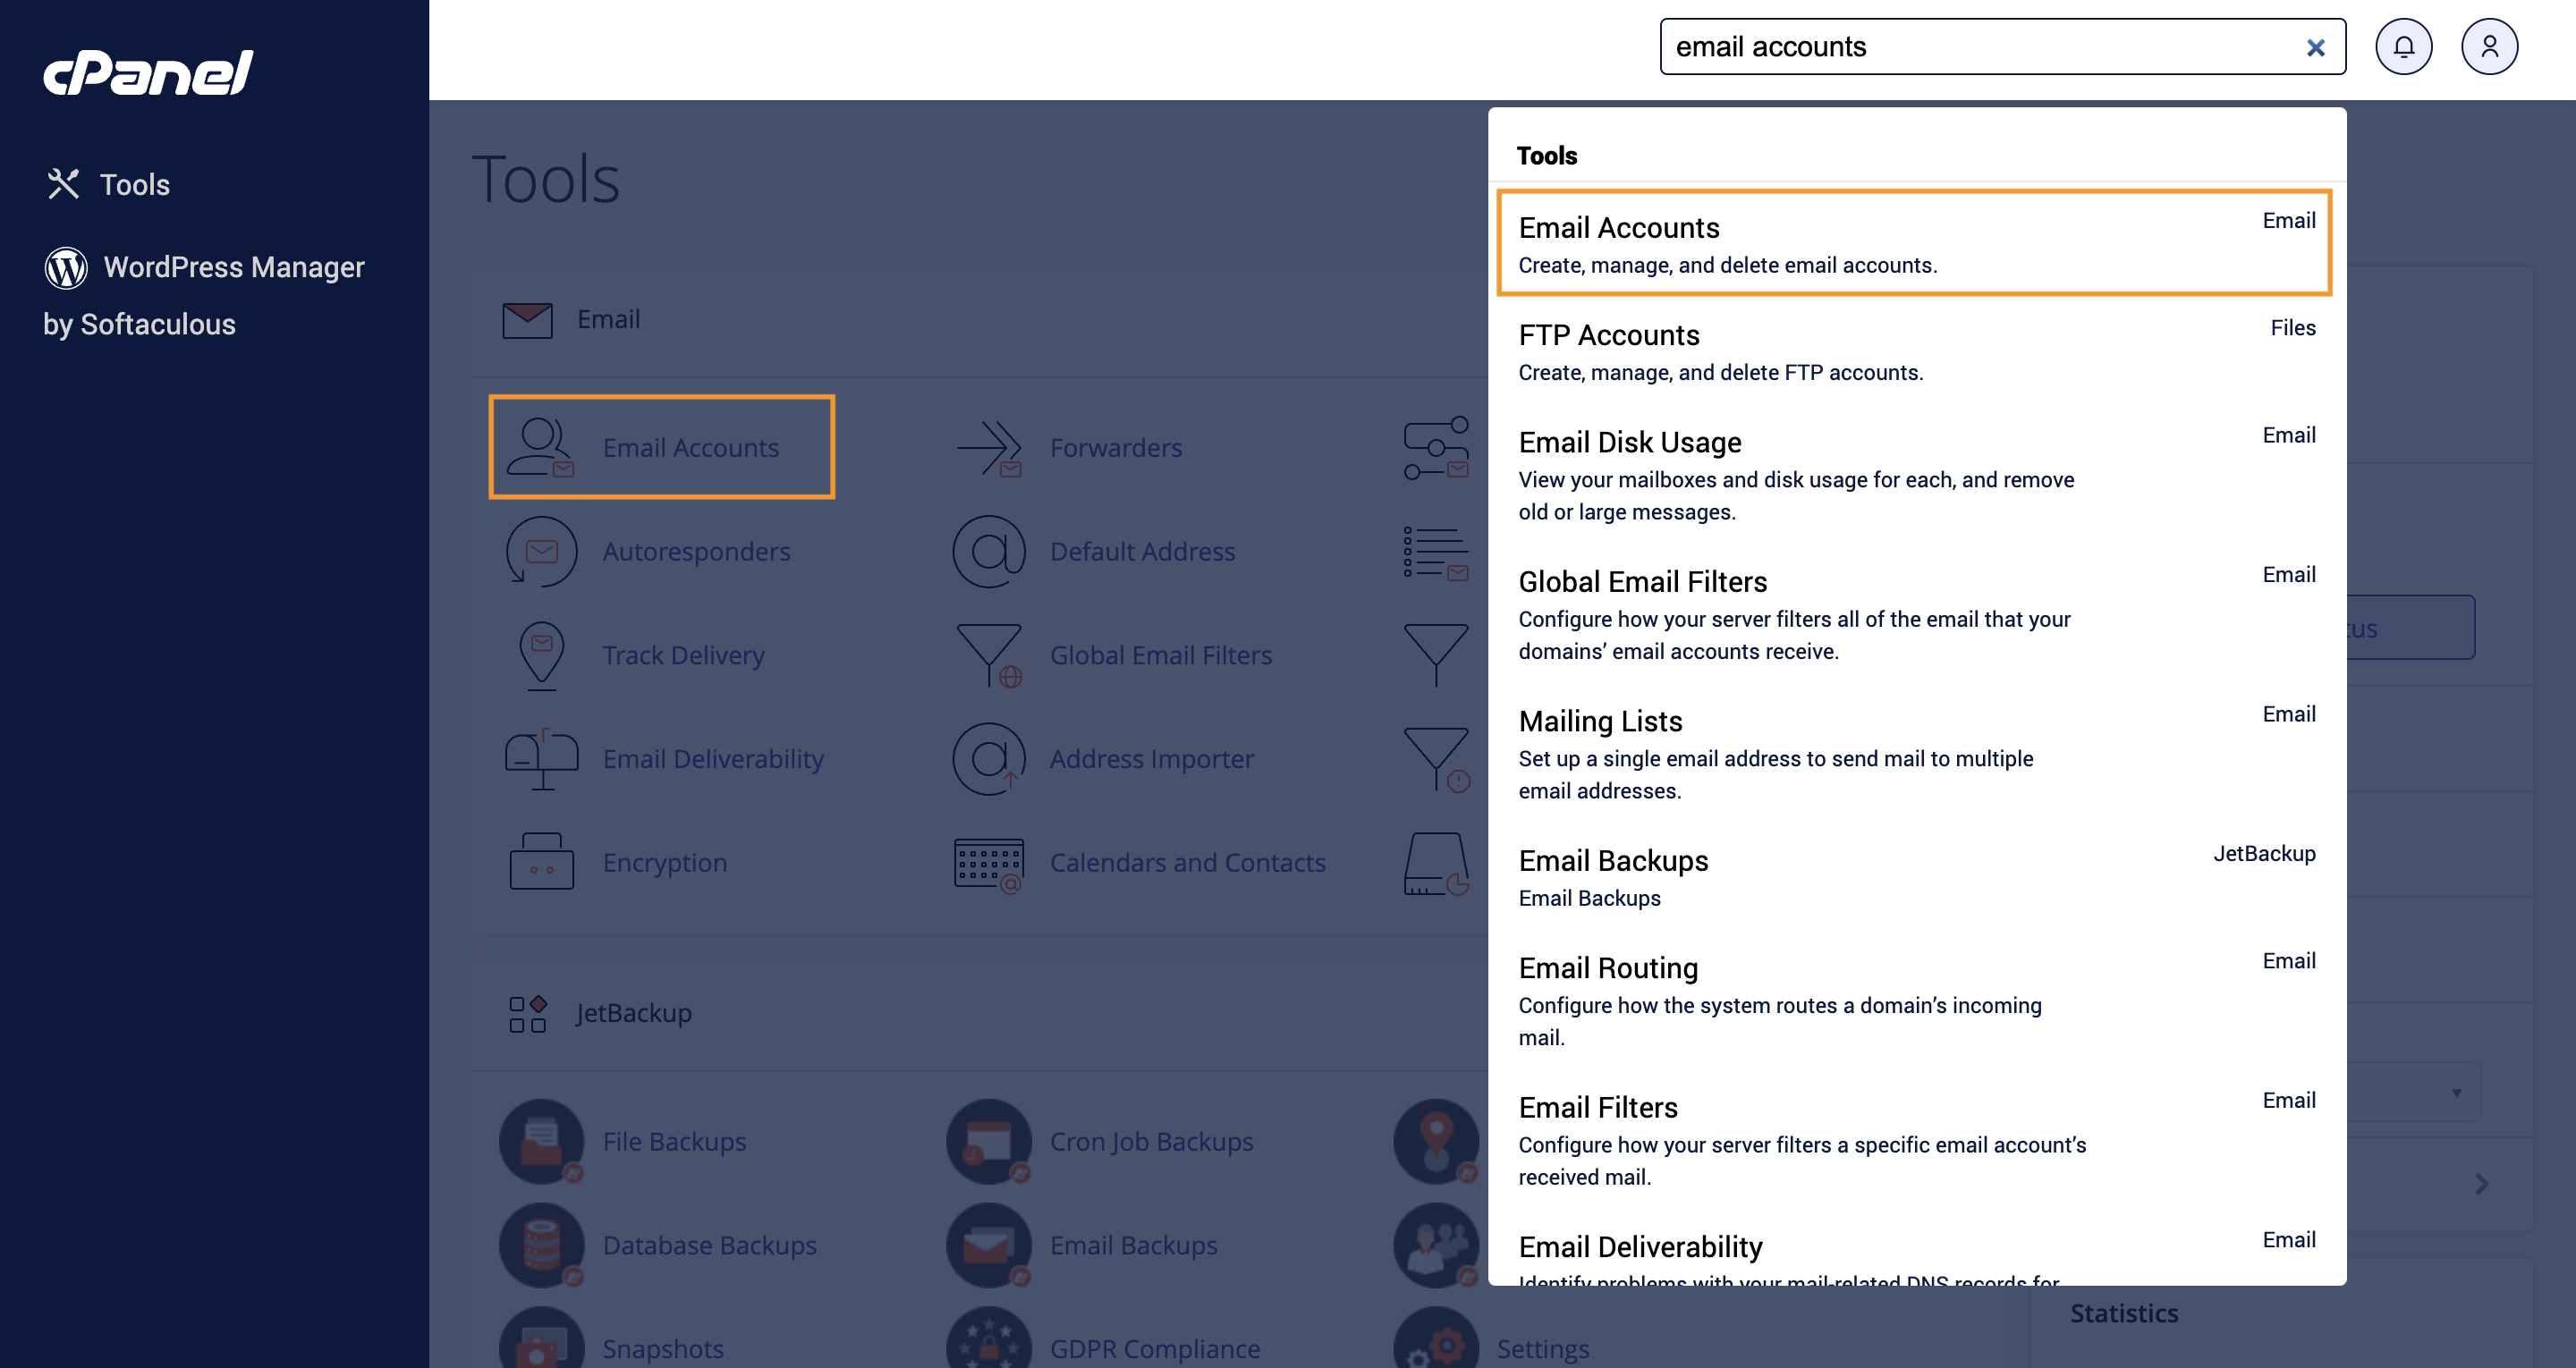
3. After the next page loads, click on the +Create button.
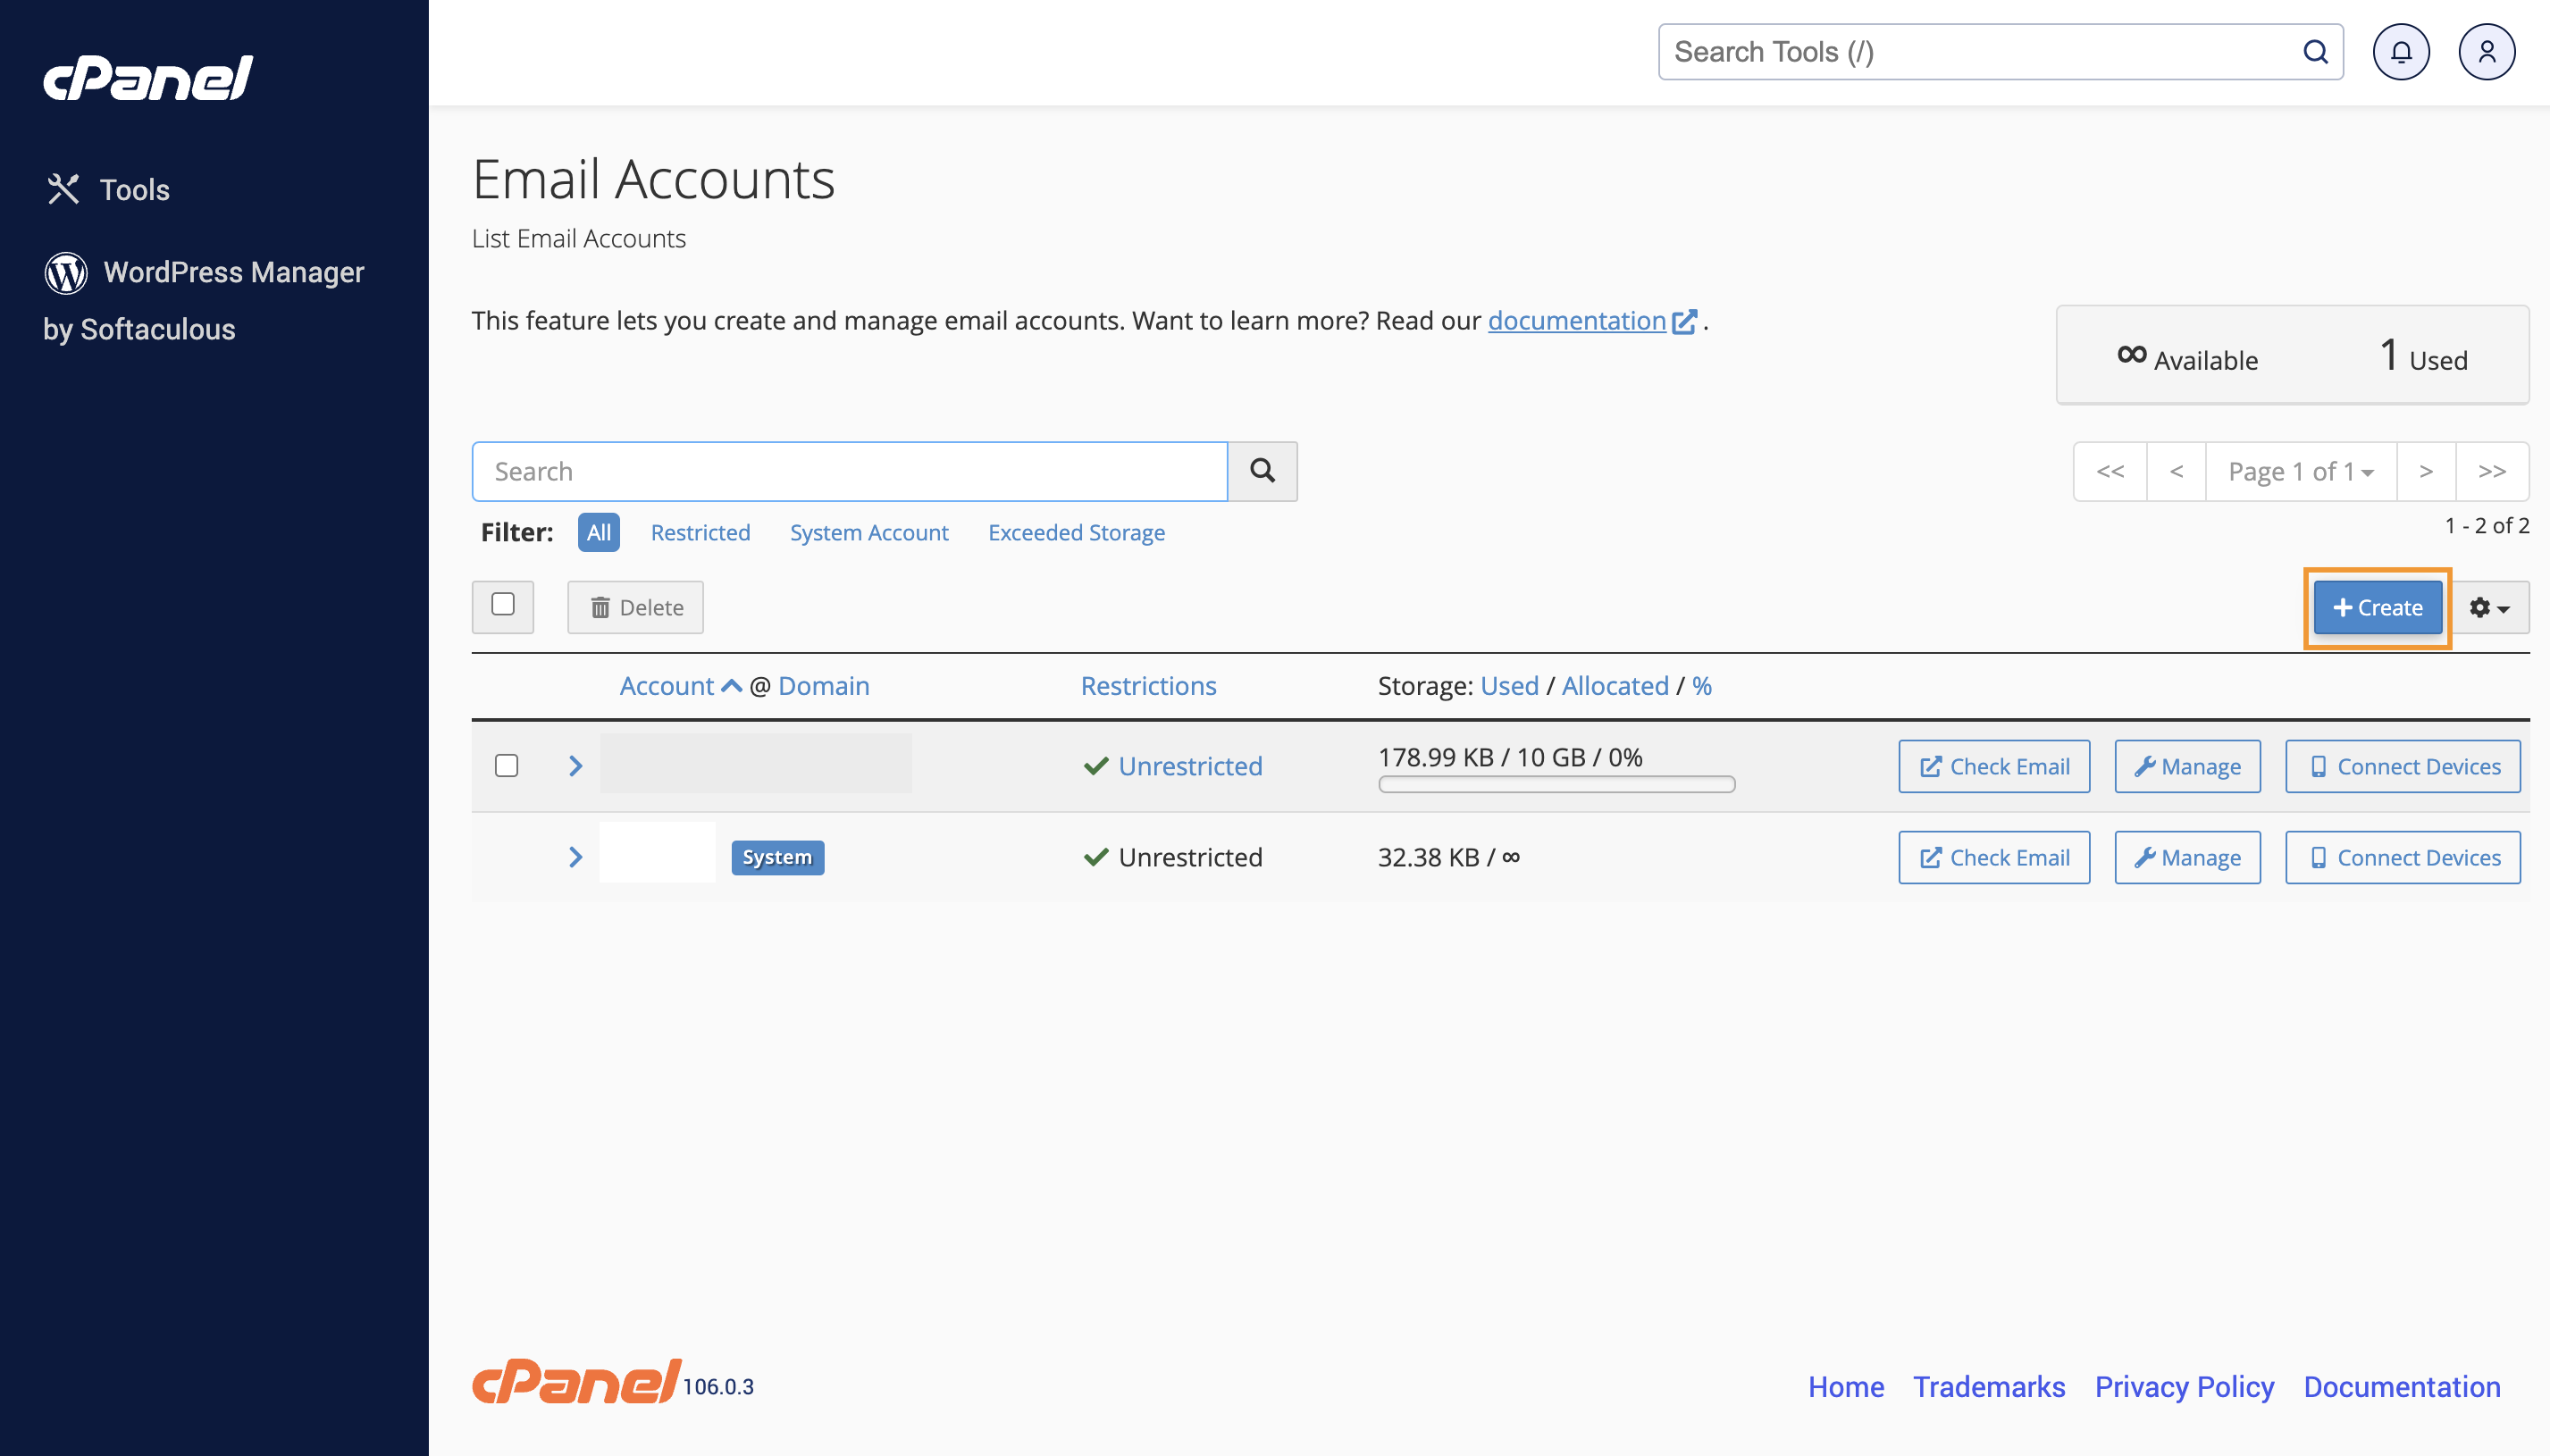
4. Now it’s time to enter the details for your new email account. We have put on little prompts on the screenshot below that should be able to help you. As a side note, it’s always recommended to create a strong password for your email account. You can generate one from sites like [https://www.random.org/passwords/](https://www.random.org/passwords/)
Once all the details are filled, scroll down and click the Create button.
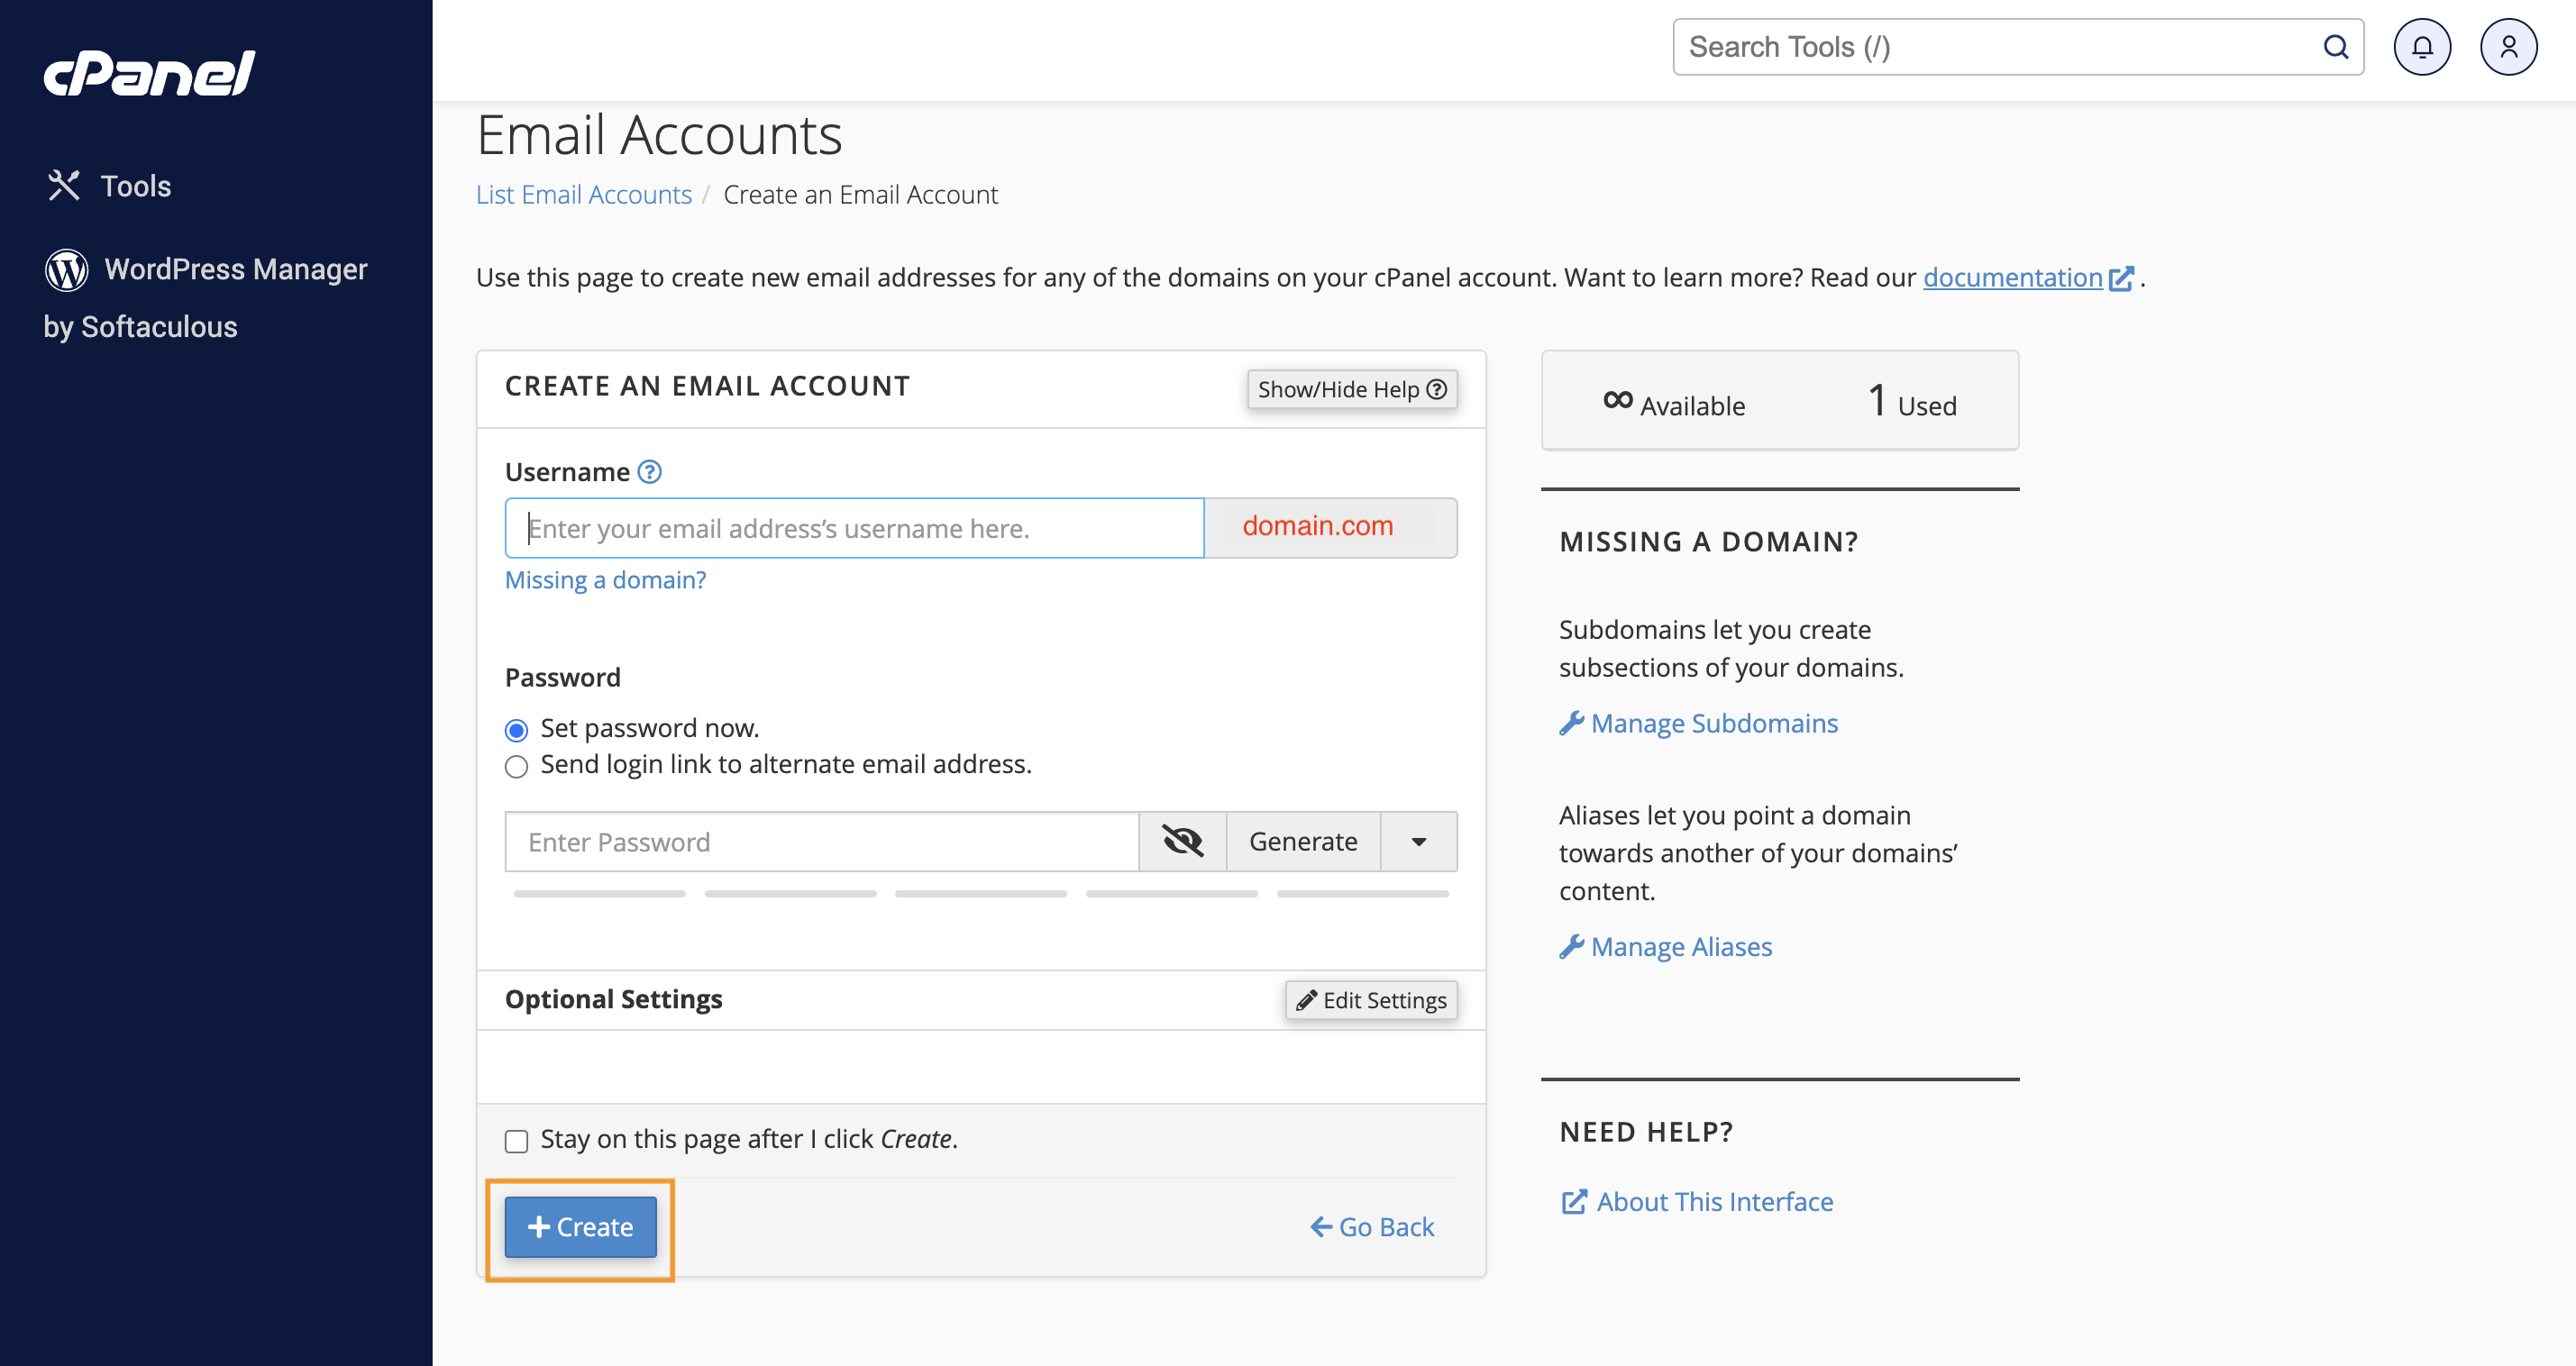
5. You will then be redirected to the previous page where you can see the existing email accounts. To access your inbox, click on the Check Email button.
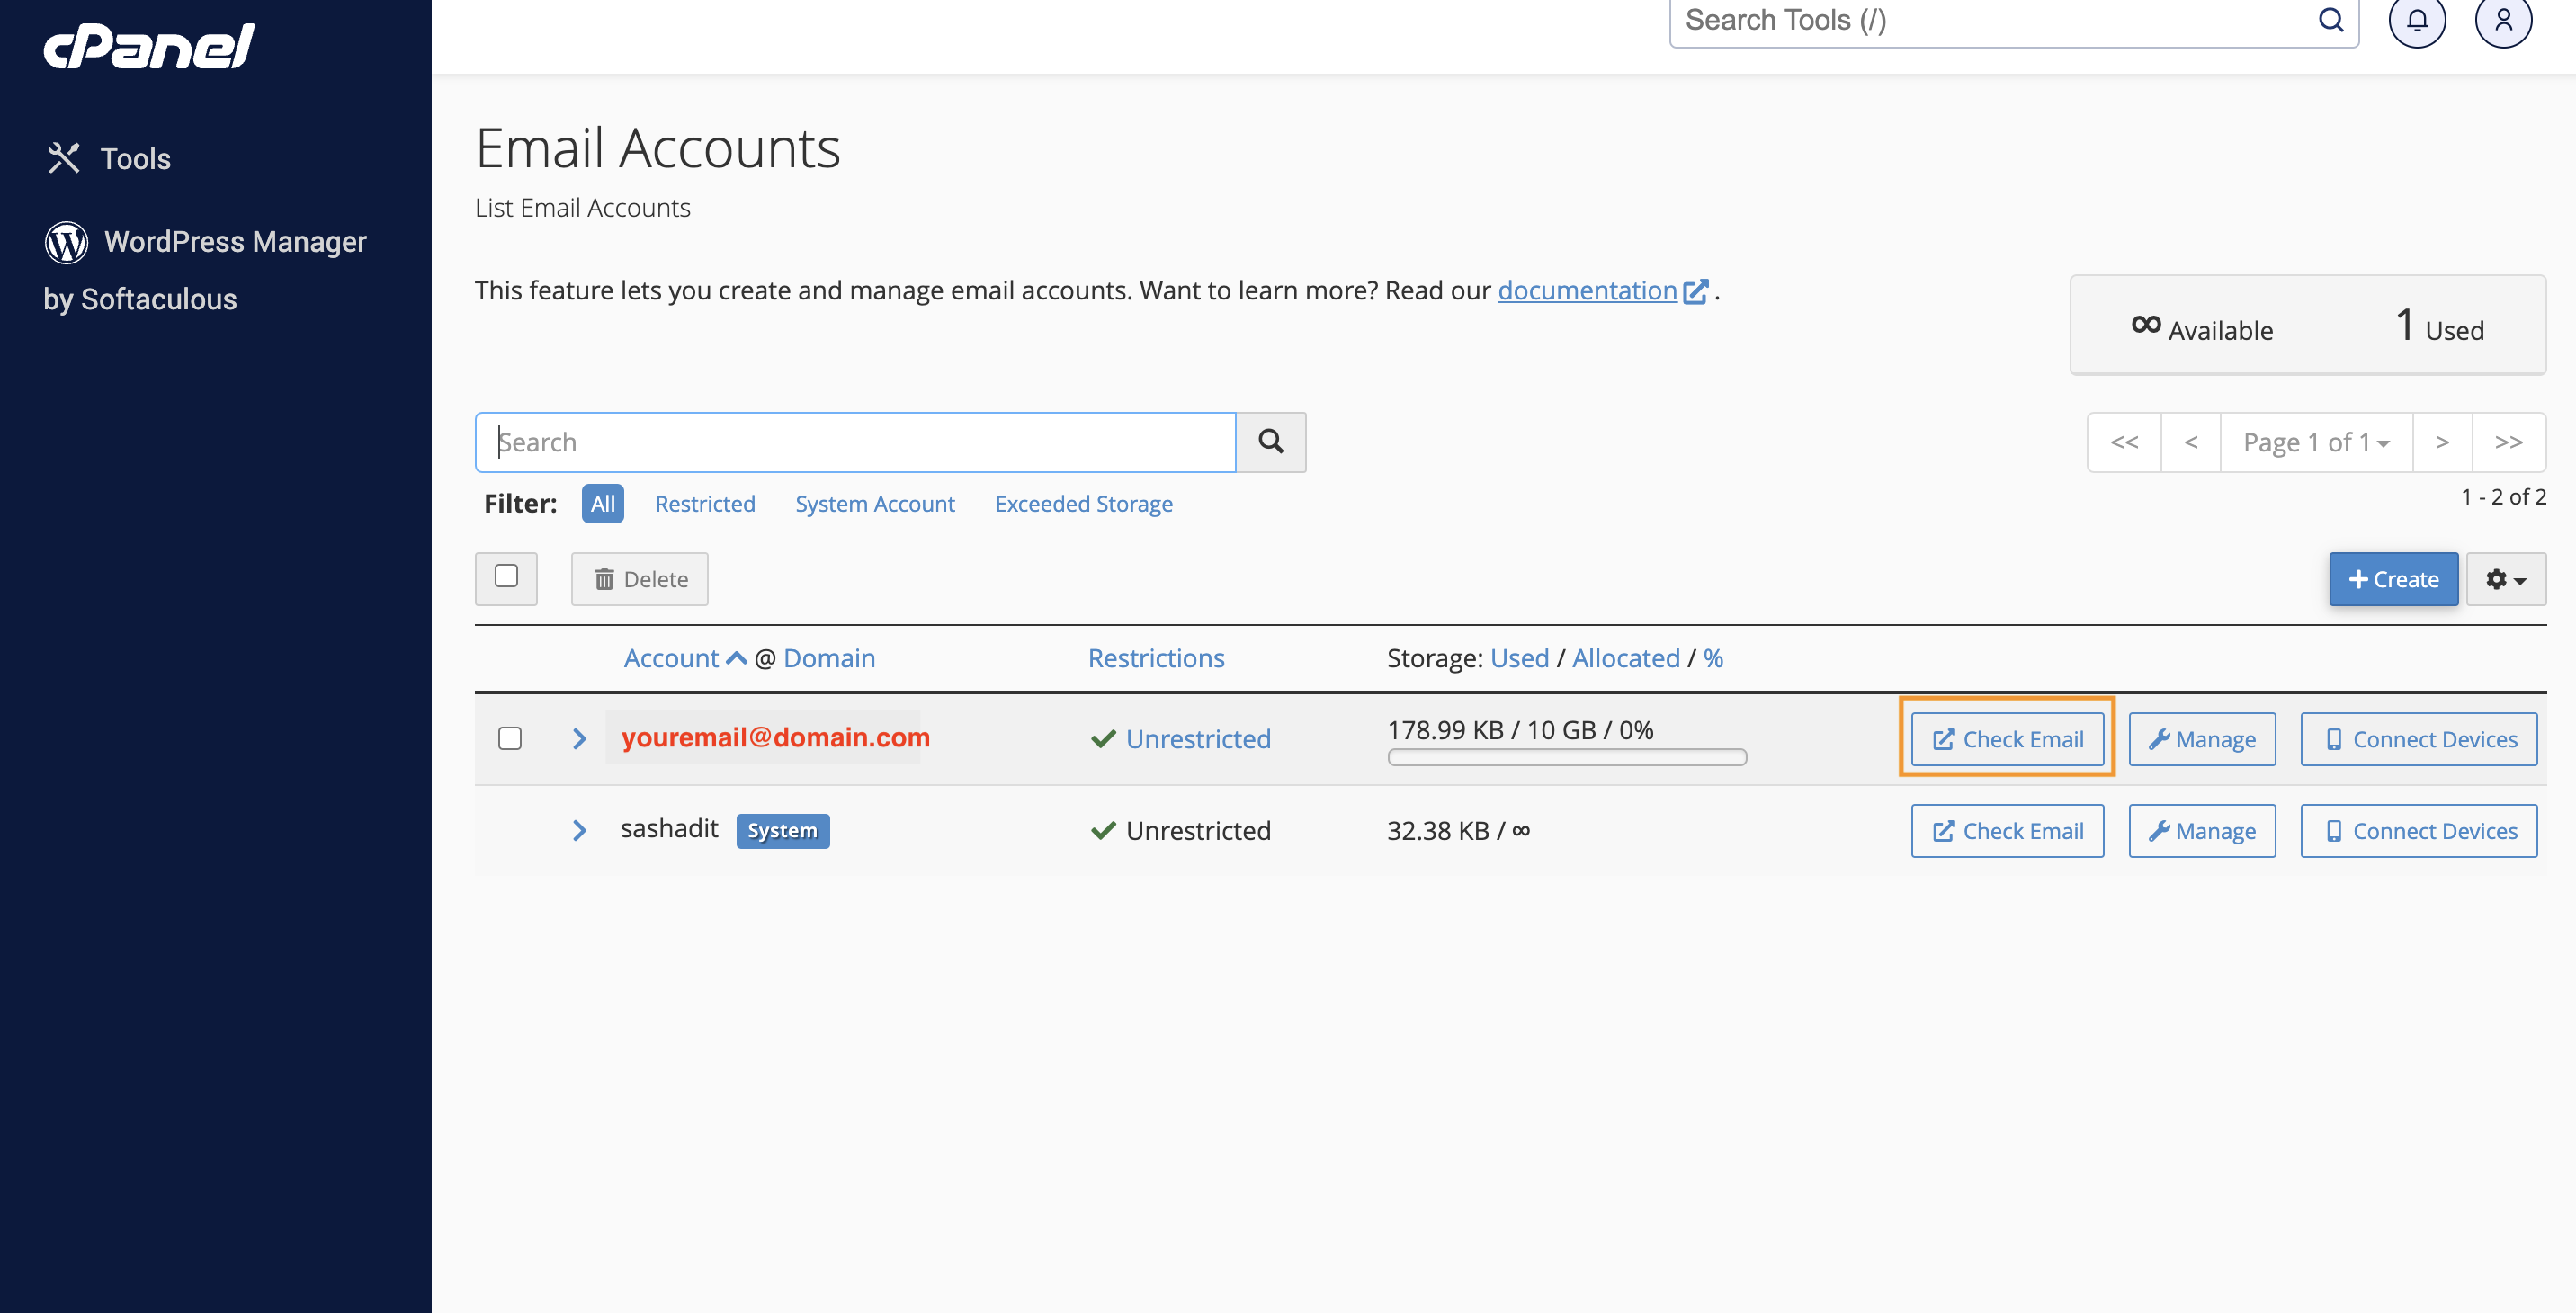
6. You should now be logged in to your Webmail interface. To skip this Welcome Page in the future, you can tick the Open my inbox when I log in option then click the Open button. In this instance, we will choose Roundcube as the Email software.
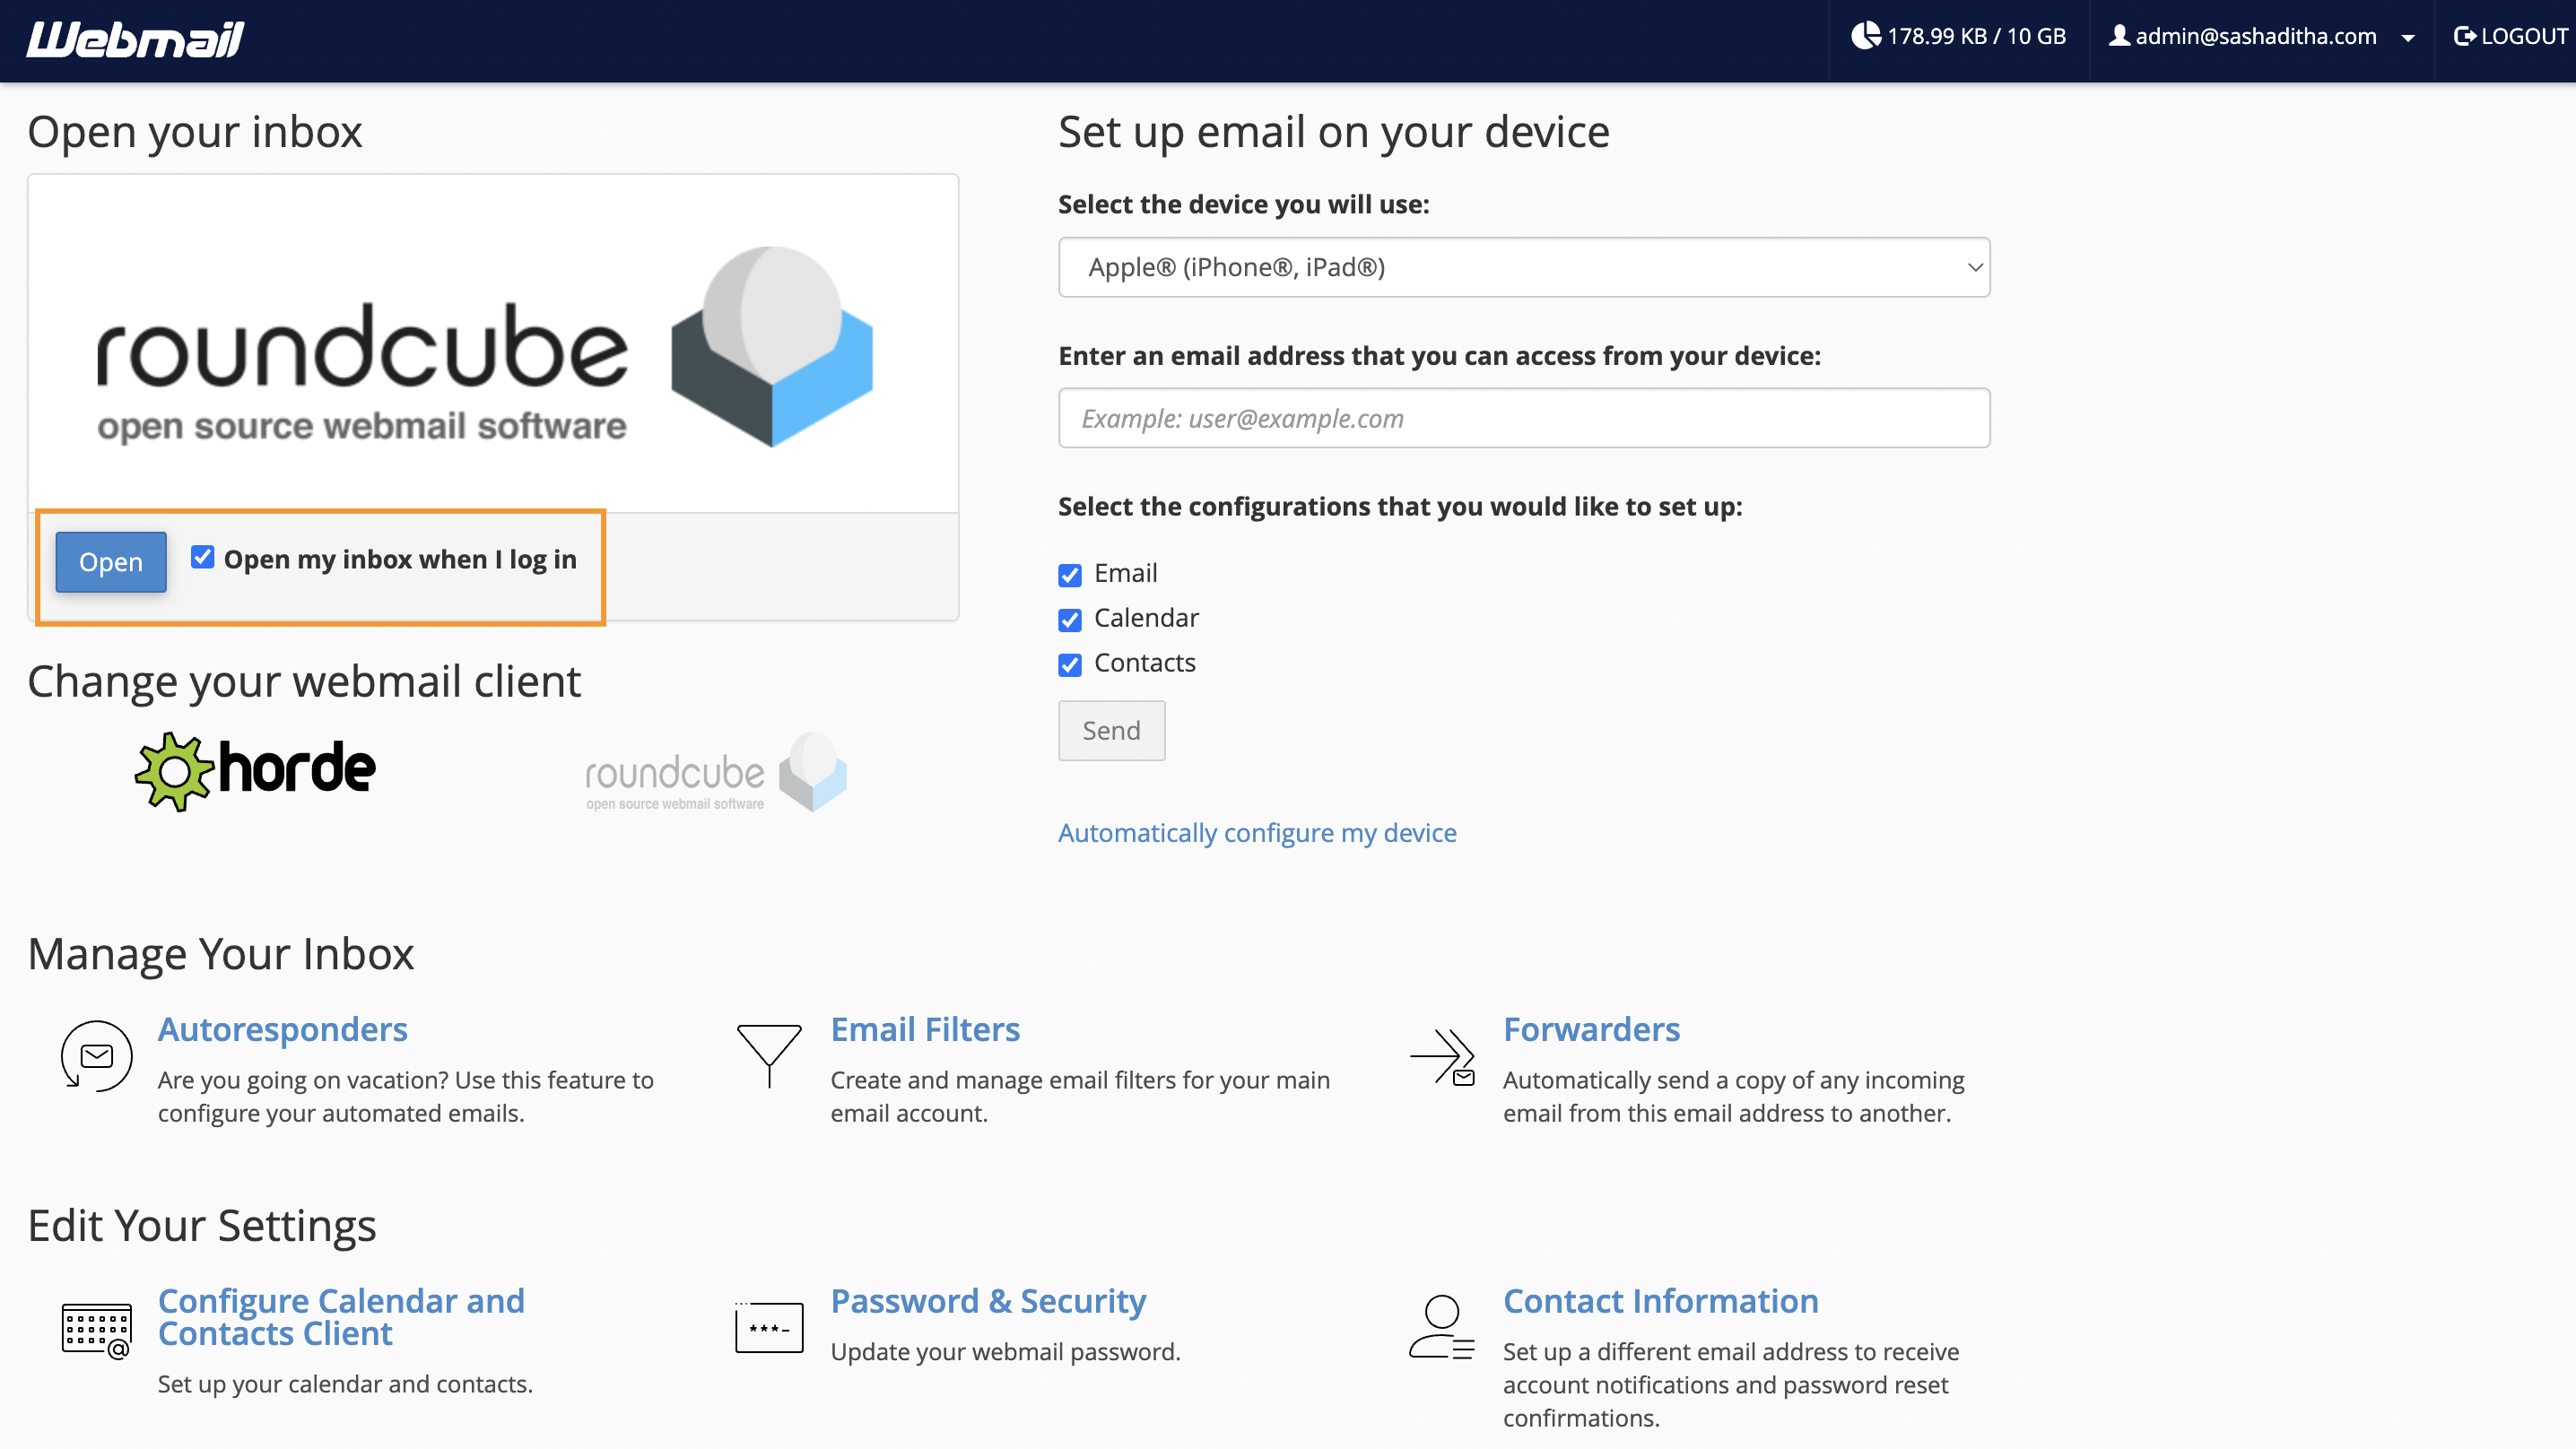
7. The next page will show what the Roundcube interface looks like. This is where you can view new email messages in your inbox or compose a new one. The first email message you received will contain basic information of the newly created email account. If you wish to access this account from a third party email app, for example, such as Outlook, Gmail, or Thunderbird, make sure to enter the details from the “Mail Client Manual Settings” above.
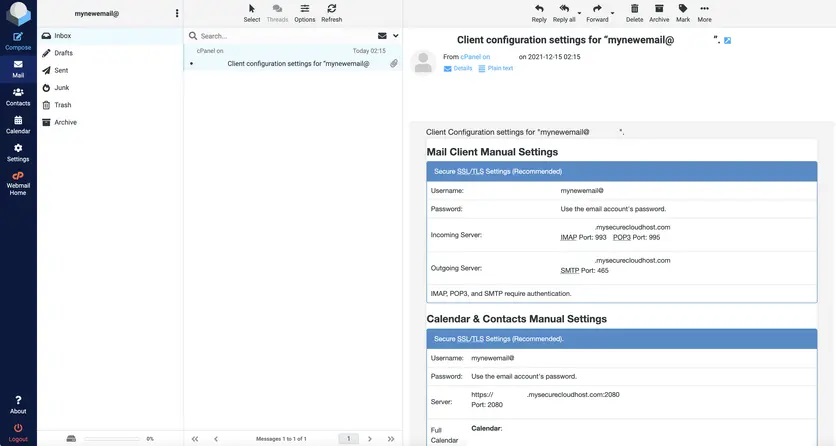
That is all there is to it! Pretty easy, don’t you think? Email account creation should be that simple and hassle-free.
In the unlikely event that you experience any issues creating an email account, feel free to reach out to our support team who are available 24/7 and we will be more than happy to help.
Happy emailing!
# Managing Email Accounts
Source: https://kb.verpex.com/emails/email-accounts
# Email Forwarding in cPanel
Source: https://kb.verpex.com/emails/email-forwarding-in-cpanel
Setting up an email forwarder is quite easy, so see below for the step-by-step guide:
1. First thing first, login to your cPanel area and type in Forwarders on the top right search bar.
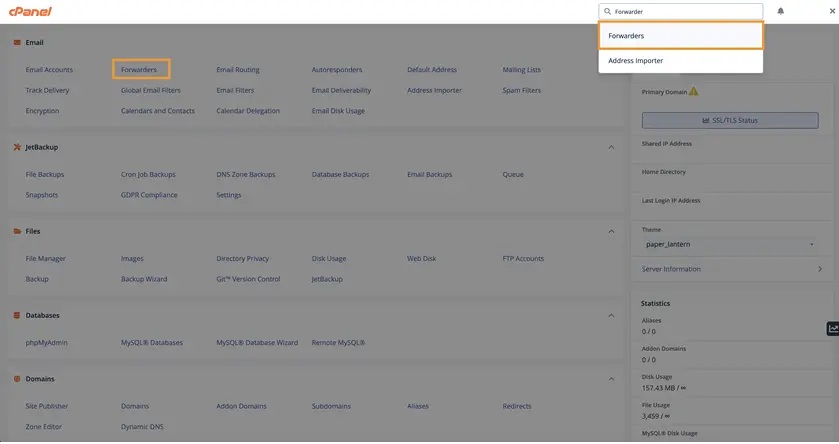
2. Now that you have the Forwarders page open, there are several options that you can choose:
Managing – This is where you can select if you wish to view all forwarders that have been set up for your domains or filter them based on a certain domain.
Add Forwarder – This will be the option to create a specific email account forwarder
Add Domain Forwarder – This option allows you to redirect incoming email for invalid addresses to another domain.
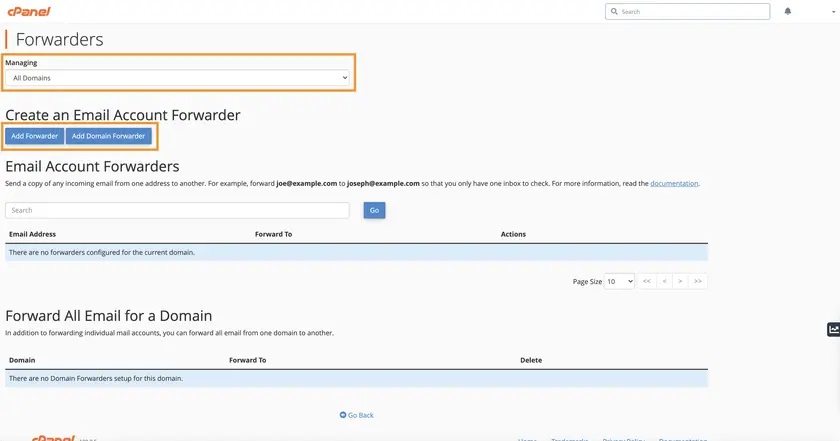
3. Add Forwarder is used if you wish to forward any incoming emails for a certain email account to a specific mailbox. So let’s say you wish to have all incoming emails for [hello@domain.com](mailto:hello@domain.com) to be forwarded to a specific email address, say [hello@gmail.com](mailto:hello@gmail.com), you can fill in the fields as below:
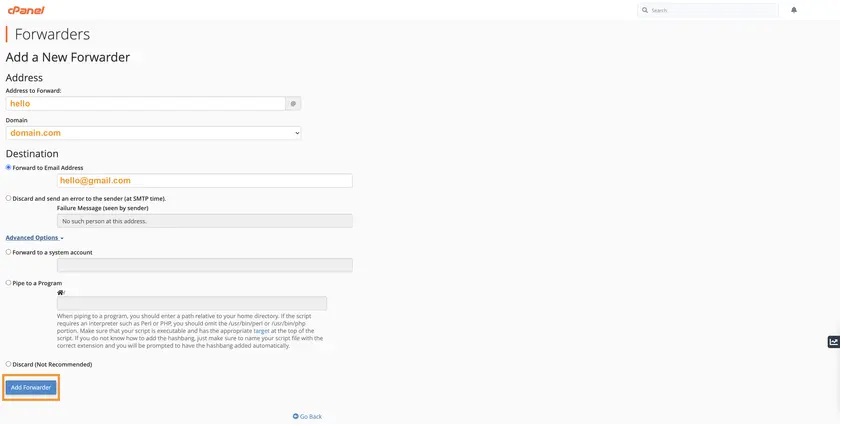
There are also some other options you can set such as discarding the email with a bounce-back error sent to the sender, forwarding to cPanel system account, piping to a specific program or just to discard the emails completely.
4. Once the email forwarder has been set up successfully, you will see a confirmation page.

5. If you wish to set up a domain forwarder, the steps are quite similar. Go back to the Forwarders main page and click “Add Domain Forwarder”.
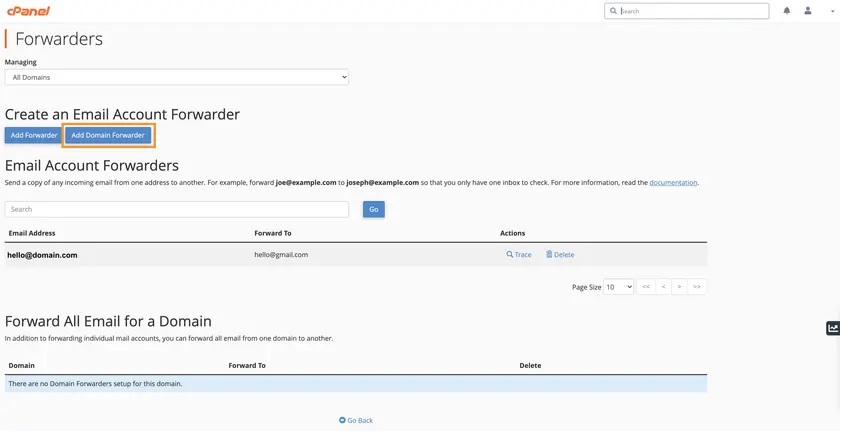
6. You can now select the emails from which domain you wish to forward and the destination domain. In this example, we are setting up a domain forwarder from example.com to example2.com. Click the Add Domain Forwarder once the details are filled in correctly.
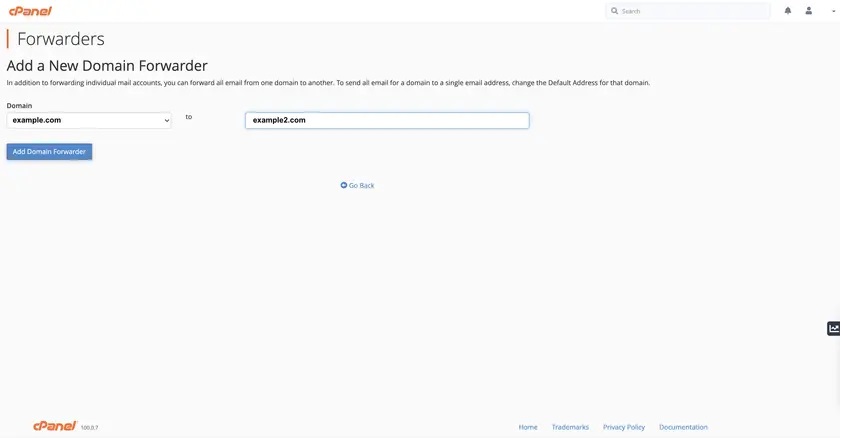
Now please keep in mind, domain forwarders only forward email when the system cannot deliver it to an address or autoresponder. In the setup above, if an email is sent to let’s say [johnny@example.com](mailto:johnny@example.com) address, the following actions will occur:
```
If johnny@example.com address or autoresponder exists, the email will not be forwarded to example2.com
If johnny@example.com address or autoresponder does not exist, the email will be forwarded to johnny@example2.com.
```
7. To delete any existing forwarders, you can once again navigate to the Forwarders main page and click the delete button as pictured on the screenshot below.
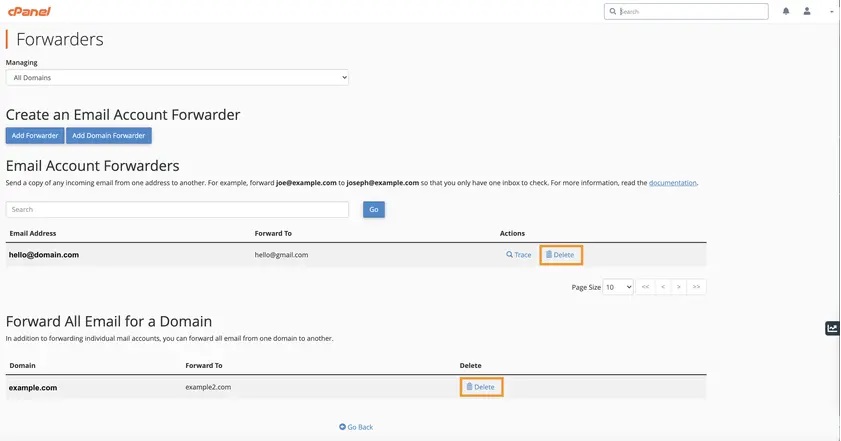
# Email Limits
Source: https://kb.verpex.com/emails/email-limits
## Email Hosting with cPanel
All our shared hosting plans include cPanel email hosting by default. This allows you to:
* Send and receive emails
* Manage accounts via webmail (Roundcube only) or email clients such as Outlook, Thunderbird, and Mail.app
* Connect using SMTP, POP3, or IMAP protocols
## Hourly Email Sending Limits
To keep our servers secure and reliable, shared hosting accounts have a maximum limit of 100 emails per hour. This limit:
* Prevents spammers from sending mass emails
* Protects our server IPs from blacklisting
* Ensures fair CPU and server resource usage for all users
Important:
Unlimited email sending is not allowed on any service.
Managed VPS plans may be eligible for higher email limits, but these are not guaranteed, are reviewed on a case-by-case basis, and may be reverted at any time if abuse, high load, or security risks are detected.
High-volume email sending from compromised accounts or misuse can negatively impact server performance and email delivery.
## Bulk Emailing Policy
We strictly prohibit spam and bulk emailing from our servers.
Any script or account that exceeds allowed limits will be disabled until support is contacted
For legitimate bulk or marketing emails, we recommend using third-party services such as Mailchimp, MadMimi, or similar platforms
## Need a Higher Limit?
If you urgently require a higher email sending limit, you may submit a support ticket from your client area.
Our team will review the request, however approval is not guaranteed, even on Managed VPS, and any granted increase may be reverted at a later time.
# Email Overview
Source: https://kb.verpex.com/emails/email-overview
At Verpex we provide unlimited email accounts with every shared and reseller hosting plan on cPanel.
The emails use the standard IMAP/POP protocol for incoming mail, and SMTP for outgoing mail. That means you can configure your email accounts on all major mail clients and mobile devices. We also provide webmail.
The key connection details are:
4. If the domain is available, click `Register domain`. If not try the search again or try one of the alternative suggestions.
5. Once you choose a domain name you will be prompted to enter your domain details such as your name and address.
6. Click Add to Cart. You can either add more products to your basket or check out immediately.
That’s it - as soon as payment is made your domain will be registered. If there are any additional bits of information we need we will be in touch.
## Registration length
By default domains register for one year. However you can choose to register for more than one year (sometimes up to 10 years) depending on the extension. This choice is provided to you after you click `Register domain`
## Domain Transfers
If you have a domain elsewhere you can also [transfer it to Verpex?](/domains/how-can-i-transfer-my-domain-to-verpex).
# How to Register a .NG domain
Source: https://kb.verpex.com/domains/how-to-register-a-ng-domain
To register a .ng domain name,\
Log into your Verpex account\
Go to **Place new order**\
Click Domains\
Enter the domain name you want in the search box to check for its availability, If available save your order and make payment
You have just successfully registered a .NG domain name
# ICANN Registration Data Policy changes
Source: https://kb.verpex.com/domains/icann-registration-data-policy-changes
Learn about recent changes to ICANN's Registration Data Policy and how they might affect you.
[ICANN](https://www.icann.org) (the Internet Corporation for Assigned Names and Numbers) is introducing a new Registration Data Policy that comes into effect on August 21, 2025. This policy helps ensure that domain registration data complies with global data protection laws.
Depending on your domain settings, you may be affected by these changes to the Registration Data Policy.
## Legal ownership
One of the changes in the new Registration Data Policy affects legal ownership of domains. Specifically, the entity in a domain contact's **Organization** field is now considered the legal owner of the domain.
Therefore, if your domain's registrant contact specifies an organization, you should review this information as soon as possible. To do this, follow these steps:
1. Log in to the Hosting Panel at [https://clients.verpex.com](https://clients.verpex.com).
2. On the top menu, click **Products & services**.
3. In the left sidebar, click **Domain Names**.
4. In the list of domains, click the domain you want to configure.
5. On the **Overview** tab, in the **Manage your domain name** section, click **Update Registrant**.
6. Review the information in the **Registrant Organization** field:
* If you want an individual listed as the domain owner, delete the information in the **Registrant Organization** field. Make sure the **Registrant Name** field is correct for the owner's name.
* Alternatively, if you want the organization to remain as the domain's legal owner, confirm that the information in the **Registrant Organization** field is accurate and complete. Make sure you remove any personal information from this field, such as your name.
7. To save your changes, click **Update Registrant**.
## WHOIS information
By default, your contact details (including the organization name, if specified) are **not** published in public WHOIS lookup results.
* If you prefer this information is made public, please open a support ticket at [https://clients.verpex.com](https://clients.verpex.com) and we will assist you.
* If you prefer this information remains private, no action is required on your part.
## More information
To view the official ICANN Registration Data Policy, please see [https://www.icann.org/en/contracted-parties/consensus-policies/registration-data-policy](https://www.icann.org/en/contracted-parties/consensus-policies/registration-data-policy).
# Lifecycle of a .NG Domain
Source: https://kb.verpex.com/domains/lifecycle-of-a-ng-domain
Life cycle varies for country code Top Level Domains (ccTLD). Every domain has a life cycle starting with its initial registration and ending with it being returned to the public to be registered. A domain lifecycle can be extended indefinitely by regularly renewing the domain. Understanding your domain's life cycle will help you know when a domain can be renewed and what is affected when the domain expires.
.NG domain names available can be registered for a period of 1-5 years, once the domain expires, it enters the renewal grace period of 60 days within which it can be renewed, however, it cannot be transferred to another registrar except if it is renewed. All services (e.g., DNS, website, emails, etc.) associated with the domain name is no longer available.
After sixty days of renewal grace, the domain name goes into a redemption period and stays there for 28 days. The domain can still be restored at an additional cost of N1000(\$25).
88 days after expiration, the Redemption Period ends and the domain name will enter into the Pending Delete status at the registry for up to 14 days. During this time, it is not possible for the Registrar to redeem, recover or renew the domain name. After this period the domain name will be available to the general public for fresh registration
# .NG Domain Status
Source: https://kb.verpex.com/domains/ng-domain-status
You just registered a domain and you are unable to manage the domain, you checked the status on whois.com and it is showing restricted, it could be restricted by the registry for any reason.
If you do not know what the status indicates, read on to understand and resolve the status of your domain
**Active**
Your domain is registered and ready to be used
**Pending Create**
The domain name has been restricted by the Registry because further documentation is needed to fulfil the domain registration and you have been unable to meet the registration requirements for the domain registration
Another reason for your domain to be in this state is that your domain violates the domain name registration agreement\
\
To resolve this\
Verpex details each TLD extension with a description of the requirements for its registration, go through the requirements,
* Login into your account and open a ticket
* Forward necessary documents to [support@verpex.com](mailto:support@verpex.com).
**Pending Approval**
The domain name you have requested is submitted to the Registry and is awaiting their approval and activation.
**Expired**
The domain is in an expired state and cannot be used
To resolve this,
Make payment for the domain to get re-activated and back online
**Pending Delete/ Redemption**\
The domain is past the renewable period and has to be manually re-activated.
To resolve this,
* Log into your account and open a ticket
* A member of the support team will generate a new invoice to renew and restore the domain.
* Restoring the domain name will incur an additional fee(restoration fee)
* The registry will be contacted to restore the domain
* After restoration, the domain will be manually renewed at our end.
**Client Transfer Prohibited/Client Delete Prohibited**
The domain is active and cannot be transferred or deleted due to the registrar lock enabled
To resolve this,
If you wish to transfer the domain, you can simply disable the registrar lock and remove other restrictions on the domain.
While most generic top-level domain (gTLD) registries have automated processing, many country code top-level domains(ccTLD) require manual processing. Processing starts after all requirements, documentation, and information has been received. Then, your domain registration order is in line to be processed.
Registrations are often individually submitted, reviewed, and approved by a member of our support team and at the registry. It may take additional time for your registration to be activated and live. Each TLD extension is detailed by Verpex hosting with a description of how long a registration may take to activate.
# .NG Restricted Domains
Source: https://kb.verpex.com/domains/ng-restricted-domains
Some domains are reserved or restricted by the.NG registry (NIRA). This is due to the fact that the registry reserves the right to restrict domain names that may NOT be available for registration or can be withdrawn if registered already. Find below some of the cases this applies to.
**Restricted Names**: These are domains that could pertain to government, military, ministry or other bodies. The application of these domains(\
.gov.ng, .edu.ng, .net.ng, etc) will be rejected if not sent from relevant bodies/entities
**Premium Names**: These domains are high-quality domains that command premium value and could only be made available to registrants at a more expensive rate
**Geonames:** Some domain names are restricted due to geographical locations, industrial\
for business reasons, may require certain documentation in order to establish the legitimacy of the registrant. meaning only certain individuals or groups can register them. Nira determines and rejects the registration of these domains, this list contains names of geographical locations within the local, state and federal government
**Offensive Names:** These are domains that are outrightly offensive to the Nigerian community and then the global community. Nira determines such domains and rejects requests for registration for such domains.
# Overview of .NG Domain
Source: https://kb.verpex.com/domains/overview-of-ng-domain
What is a .ng domain?
The .NG domain extension is a unique identity and country code top-level domain (ccTLD) for the country Nigeria on the internet. It is great and gives credibility to businesses(local and international) looking to expand their brand in Nigeria.
.NG domains include and are not limited to .ng, .com.ng, .org.ng(for Nigerian non-profits),, .edu.ng(for Nigerian tertiary academic institutions), .gov.ng(for various tiers of government in Nigeria), .mobi.ng(for mobile websites) and many more. Each variation is used according\
to specific requirements, and some are open domains, while others are closed domains that can only be acquired with extra documentation
With a .NG domain name you will rank higher in local search results and in the hearts of the locals.
A .NG domain name is short, professional and memorable helping your website stand out in a sea of content online.
# Premium Domain Names
Source: https://kb.verpex.com/domains/premium-domain-names
A premium domain name is a domain that has high quality, and that is bought and sold with the aim of making a profit. Some of the factors that indicate whether or a domain name is premium or not are the following:
```
Brevity – It can be really hard to remember an overly long domain name. In addition, domain names that contain punctuation can be forgotten due to the fact they are complex. For a domain name to be memorable, it needs to be concise. For this reason, premium domain names usually have one or two words in them.
Trustworthy TLD – At the end of the domain, you will find a string of characters that is the top-level domain (TLD). A domain name that is premium will have a good top-level domain that won’t decrease your chances of reaching potential customers.
Generic value – Domain names that have truly generic names have proven to be the most valuable. A name that is generic manages to increase the demand thanks to the appeal it has for the whole industry, as well as it adds value to the whole process.
Contains high domain authority and keywords – Domain names can help in SEO and running a successful website.
```
The price of the domain will be confirmed after the purchase has been initiated, even if the domain you found is available. Wen, it comes to premium domain names, TLDs are charging different rates. If the domain name you have picked is a premium domain and you’re not willing to pay the premium rate, you will be refunded, or you won’t be charged the original purchase price.
The reason for this is that TLD’s now operate this way, and when it comes to premiums, they want as much money as they can get. TLD’s are the ones that determine what the cost will be for a certain domain and what makes a premium name, outside of the fixed prices that you can see on our site.
Premium domain names can be put up for sale either by the Registries or their existing owners. The pricing and the purchase process are what differentiate the two. Existing owners that sell domains usually have a one-time purchase fee, and their maintenance cost isn’t different from the usual cost for other domains with the same extension. When you purchase a domain name from an existing owner, a deal with the current owner is made, and they provide the domain to your account with no extra action needed from your side.
On the other hand, registry premiums are typically new domains that the Registry selects as premiums due to their potential for popularity and high value. In addition, premiums you get from the Registry have special pricing not only to acquire them but also to transfer and renew them. However, the difference between the two types of premiums can often be blurry since Registry premiums are often put for sale by their current owners.
# Types of .NG Domains
Source: https://kb.verpex.com/domains/types-of-ng-domains
**.ng**: This is the most commercially used domain extension and is open to anyone anywhere. Intended for any website associated with Nigeria\
**.com.ng**: This extension is intended for Nigerian businesses for commercial purposes and opened to anyone.\
**.org.n**g: This extension is suitable for non-commercial Nigerian organizations(non-profits) and opened to anyone\
**.name.ng**: This extension is intended for personal websites and is open to anyone anywhere\
**.mobi.ng**: This extension is intended for Nigerian mobile-friendly websites.\
**.net.ng**: This extension is intended for Nigerian network providers(Nigerian Internet Service and Telecoms Providers’ infrastructure only). It is restricted to Nigerian ISP\
**.sch.ng**: This extension is intended for Nigerian non-degree issuing academic institutions. It is restricted to Nigerian preschool institutions and documentation may be required.\
**.edu.ng**: This extension is strictly reserved for Nigerian tertiary academic institutions including Universities, Polytechnics, Colleges of Health, Colleges of Education and Technical Colleges only. \[Find the full requirements here] for Nigerian post-secondary institutions. It is restricted to qualified Nigerian institutions.\
**.gov.ng**: This extension is highly reserved for tiers of Nigerian government(Federal, State, and Local governments and their institutions only). It requires a Letter of Authorization from the head of the Government institution applying for the domain name. \[Read more here]. It is restricted to Nigerian government bodies and institutions
# What is a CDN?
Source: https://kb.verpex.com/domains/what-is-a-cdn
A Content Delivery Network (CDN) is a system of distributed servers that work together to efficiently deliver web content to users based on their geographic location. CDNs are used to\
improve the performance and availability of websites and applications by caching and distributing content such as images, videos, and other static files to servers that are closer to the end users.
When a user requests a web page, the CDN will redirect the request to the nearest server, rather than having it sent all the way back to the origin server. This reduces the distance that the data has to travel, which in turn reduces the amount of time it takes for the page to load.
CDNs also help to reduce the load on the origin server by caching and serving content from a network of edge servers. This can help to improve the scalability and availability of a website, as well as protect it from traffic spikes and DDoS attacks.
Another benefit of CDN is that it can improve the security of a website by using features such as SSL offloading, DDoS protection and Web\
Application Firewall.
**Benefits of a CDN**
**Improved Content Availability and Redundancy** - A CDN can handle high-volume traffic and withstand hardware failure which can cause downtime for your website.
**Increased Website Security** - A CDN can increase security by preventing vulnerability attacks, stopping brute force attempts and mitigating DDoS attacks.
**Improved Website Load Times** - A CDN helps visitors to experience a faster loading page and distribute content closer to website visitors.
**Reduced Bandwidth Costs** - A CDN can reduce bandwidth consumption costs through caching and optimization and increase content availability.
# What you Need to Know Before Registering a .NG Domain
Source: https://kb.verpex.com/domains/what-you-need-to-know-before-registering-a-ng-domain
FAQs for .ng
**What is a .ng domain?**\
.NG is the country-code domain name system (ccTLD) for the country Nigeria.
**How many years can you register .ng domain names?**\
.ng domain names can be registered for up to 5 years.
**How long does it take to register .ng domain name?**\
Depending on the domain extension, it could take minutes or weeks. .edu.ng and .gov.ng domain registration require documentation and vetting. In the case of extra vetting, Verpex will contact the registrant.
**How much does .ng domain name cost?**\
Prices for a .ng domain vary depending on the extension you want, domain name price starts from N999($ 0.99) to N10000($25) per year.
**How can I get a .ng domain name?**\
To get a .ng domain name, you need to search for its availability on our website using the domain name search form. If the domain name is available you will be able to place an order and purchase it instantly.
**How do I host my .ng domain name?**\
Your .ng domain name can be hosted on any hosting platform, whether it be our WordPress hosting or Managed Cloud Server
**Can I hide my .ng registration information (domain privacy)?**\
No, you cannot hide the contact information of your .ng domain on WHOIS, all or partial information will be displayed in WHOIS.
**Are some .ng domain names restricted?**\
Yes, some .ng domain names are restricted
**Which registry manages .ng domain names?**\
Nira manages the registration of .ng domain names, you may visit them at [http://www.nira.org.ng/](http://www.nira.org.ng/)
**What is the grace period for a .ng domain name?**\
After the .ng domain name expires, it stays in the expired state for 60 days\
After which it enters the redemption state immediately. The .ng domain name can be restored with an extra fee of \$25 including the renewal fee in the redemption state. It stays in the redemption state for 28 days and enters the pending delete state, it stays in pending delete for 14 days and gets deleted from the system making it available for anyone who wishes to register.
# Why do Different TLDs have Different Prices?
Source: https://kb.verpex.com/domains/why-do-different-tlds-have-different-prices
Your domain name is your identity on the net, and picking one that aligns with your business is quite important. A TLD (Top-level domain)is what ends your name in a domain and transforms your name into a domain name, it is at the right corner after your name, examples of TLDs are .com, .net, .org, etc.
A TLD determines what your domain is all about before visiting your website. Some TLDs are SEO-friendly, there are over a thousand friendly top-level domains to choose from, you can call them domain extensions or suffix
Top-level domain name price differs from one to the other, and it varies based on the value of the domain, the registry and the registrar. The registrars' reserve domain names through registries. It is the registries that ultimately hold domain extensions and the names associated with them, e.g. VeriSign (.COM/.NET), PIR (.ORG), Nominet (.UK) or Denic (.DE).
The registries charge a fee for a domain, and these prices vary from one top-level domain extension to another. Some domain names have fixed prices negotiated between the registry and a non-profit called ICANN (Internet Corporation for Assigned\
Names and Numbers) who is a regulator for domain names. For older domains like .com, .net, and .biz the prices are affordable to register due to the intervention of ICANN but for newer domains, this is not the case which is why they are a bit expensive.
Some registries apply for some domain extension to be exclusive, they don't just want anyone to register them. The TLD could be restricted to a specific group, profession or company or be used to describe a particular product or service. To register domains with these TLDs to promote exclusivity, you have to meet certain criteria and be willing to pay higher.
# Configuring an Email Client
Source: https://kb.verpex.com/emails/configuring-an-email-client
Many different email clients have different layouts. However, the way they should be set up is the same. The settings that will be shown in this article are suitable for any client and device, regardless of whether it's for a laptop, desktop, or mobile.
You can set up your email using one of two types of settings, with the SSL being the main difference between them. SSL (Secure Sockets Layer) refers to a cryptographic protocol that protects a computer network's communications. SSL is often used to safeguard email, instant messaging, and voice-over IP programs. And, given how widely it's used in email apps, it's no wonder that the two types of email account configuration settings revolve around whether SSL is used or not.
So, here are the two types of email settings:
**Non-SSL Email Settings – Not Recommended Type**
For the non-SSL settings, your email account on the incoming and outgoing server should be in the following format: mail.example.com. Your username should be your full email address, and your password is the one you use for your email account.
The incoming port should be set at POP3 110 or at IMAP 143. The outgoing mail server or SMTP should use port 25. There is no SSL included with these settings, so it is off. Authentication for SMTP is required. The SPA or Secure Authentication has to be disabled.
**SSL Email Settings – Recommended Type**
The income and outgoing server should be in the same format as the non-SSL email settings for the SSL email settings. The same goes for the username and password. The difference in the two types of settings comes in the incoming port. For the SSL email settings, the incoming port should be set at POP3 995 or IMAP 993. The outgoing mail server or SMTP should use port 465.
For these settings, SSL is included, and it is on. Like with non-SSL email settings, SMTP Authentication is required, and the SPA or Secure Authentication has to be disabled.
**The cPanel Way**
Another way to set up your email account and get these settings is by doing so via your cPanel account. The way to do this is by logging in to the account first. After this, you manually search for the "Email Accounts" option or type it on the search bar. After you find it, you will see an option for connecting devices next to your email account, where this information, as well as other similar and valuable information, is shown.
It is essential to know that SNI-based SSL certificates cause problems in some older email clients. This indicates that the incoming and outgoing server hostnames should be mail.\[yourdomain.com] instead of mail.\[yourdomain.com]. If you have any issues with this, customer support will help you figure it out and solve any issues you have.

# Configuring Autoresponder for your Email Account
Source: https://kb.verpex.com/emails/configuring-autoresponder-for-your-email-account
Autoresponder is a computer program that answers the emails it receives automatically. There are many Autoresponders out there, and some of them are easy to use, while others are more complex. This article will go over the steps you need to take to set up your Autoresponder through your cPanel.
A cPanel is a control panel that enables you to access a set of different tools so that you can modify your website and its settings. Through the cPanel, you decide what your website will look like to the customers or the "end users," and you have complete control over a myriad of actions. The cPanel dashboard is praised for being extremely user-friendly and for allowing everyone, including non-professionals, for doing as they please with their sites in a simple, straightforward manner.
So, with all of this in mind, let's see what you need to do in order to configure Autoresponder for your email account via your cPanel, and where you can find what you need to complete this process.
First, you need to log in to your cPanel account. After you have done that, look for the "Email" option and select the "Autoresponders" tool. This will redirect you to another page, where the button responsible for adding new Autoresponders is located and also shows all your existing autoresponders.

To set up a new autoresponder for your email account, you need to click on the "Add Autoresponder" button.

After you click this, many different settings will pop up on the screen for you to configure. Let's break down what they do:
```
The "Interval" setting refers to the amount of time/hours the Autoresponder should let pass between responding to the same email address. Basically, this setting determines how often a message should be sent to the same sender when one person sends you an email several times.
In the "Email" setting, you need to type out your email address. In the "From" setting, you need to put in from whom the message is, so you either put in your name or someone else's, depending on what you want.
In the "Subject" set, you put in the subject of the automated email that the Autoresponder would send out. For instance, "In a meeting."
In the "Body" setting, you should type out the automated message's content. For this, you can make a custom HTML body that can have various links, images, etc., in them. Usually, people put information like when they are back from a holiday in this setting.
The last two settings, the "Stay" and "Stop" boxes, are used to set up the time when the Autoresponder should begin with responding, and it should automatically stop. This means that you will not have to turn it on and off by yourself manually.
```

# Creating An Email Account on Your cPanel Hosting
Source: https://kb.verpex.com/emails/creating-an-email-account-on-your-cpanel-hosting
One of the greatest features that most of Verpex hosting packages offer is the unlimited email accounts you can create within your cPanel account. If you are unfamiliar with the process of creating a new email account with your personal domain name, a step-by-step guide and explanation are provided below.
1. Firstly, log in to your cPanel through Verpex Client Area or the direct link [https://domain.com/cpanel](https://domain.com/cpanel) (make sure to replace ‘domain’ part to your own domain name)
2. Once you’re logged in to your cPanel dashboard, go ahead and type in Email Accounts on the top right search bar, or if it’s visible on the dashboard, you can go ahead and click the Email Accounts option under the Email section.

3. After the next page loads, click on the +Create button.

4. Now it’s time to enter the details for your new email account. We have put on little prompts on the screenshot below that should be able to help you. As a side note, it’s always recommended to create a strong password for your email account. You can generate one from sites like [https://www.random.org/passwords/](https://www.random.org/passwords/)
Once all the details are filled, scroll down and click the Create button.

5. You will then be redirected to the previous page where you can see the existing email accounts. To access your inbox, click on the Check Email button.

6. You should now be logged in to your Webmail interface. To skip this Welcome Page in the future, you can tick the Open my inbox when I log in option then click the Open button. In this instance, we will choose Roundcube as the Email software.

7. The next page will show what the Roundcube interface looks like. This is where you can view new email messages in your inbox or compose a new one. The first email message you received will contain basic information of the newly created email account. If you wish to access this account from a third party email app, for example, such as Outlook, Gmail, or Thunderbird, make sure to enter the details from the “Mail Client Manual Settings” above.

That is all there is to it! Pretty easy, don’t you think? Email account creation should be that simple and hassle-free.
In the unlikely event that you experience any issues creating an email account, feel free to reach out to our support team who are available 24/7 and we will be more than happy to help.
Happy emailing!
# Managing Email Accounts
Source: https://kb.verpex.com/emails/email-accounts
# Email Forwarding in cPanel
Source: https://kb.verpex.com/emails/email-forwarding-in-cpanel
Setting up an email forwarder is quite easy, so see below for the step-by-step guide:
1. First thing first, login to your cPanel area and type in Forwarders on the top right search bar.

2. Now that you have the Forwarders page open, there are several options that you can choose:
Managing – This is where you can select if you wish to view all forwarders that have been set up for your domains or filter them based on a certain domain.
Add Forwarder – This will be the option to create a specific email account forwarder
Add Domain Forwarder – This option allows you to redirect incoming email for invalid addresses to another domain.

3. Add Forwarder is used if you wish to forward any incoming emails for a certain email account to a specific mailbox. So let’s say you wish to have all incoming emails for [hello@domain.com](mailto:hello@domain.com) to be forwarded to a specific email address, say [hello@gmail.com](mailto:hello@gmail.com), you can fill in the fields as below:

There are also some other options you can set such as discarding the email with a bounce-back error sent to the sender, forwarding to cPanel system account, piping to a specific program or just to discard the emails completely.
4. Once the email forwarder has been set up successfully, you will see a confirmation page.

5. If you wish to set up a domain forwarder, the steps are quite similar. Go back to the Forwarders main page and click “Add Domain Forwarder”.

6. You can now select the emails from which domain you wish to forward and the destination domain. In this example, we are setting up a domain forwarder from example.com to example2.com. Click the Add Domain Forwarder once the details are filled in correctly.

Now please keep in mind, domain forwarders only forward email when the system cannot deliver it to an address or autoresponder. In the setup above, if an email is sent to let’s say [johnny@example.com](mailto:johnny@example.com) address, the following actions will occur:
```
If johnny@example.com address or autoresponder exists, the email will not be forwarded to example2.com
If johnny@example.com address or autoresponder does not exist, the email will be forwarded to johnny@example2.com.
```
7. To delete any existing forwarders, you can once again navigate to the Forwarders main page and click the delete button as pictured on the screenshot below.

# Email Limits
Source: https://kb.verpex.com/emails/email-limits
## Email Hosting with cPanel
All our shared hosting plans include cPanel email hosting by default. This allows you to:
* Send and receive emails
* Manage accounts via webmail (Roundcube only) or email clients such as Outlook, Thunderbird, and Mail.app
* Connect using SMTP, POP3, or IMAP protocols
## Hourly Email Sending Limits
To keep our servers secure and reliable, shared hosting accounts have a maximum limit of 100 emails per hour. This limit:
* Prevents spammers from sending mass emails
* Protects our server IPs from blacklisting
* Ensures fair CPU and server resource usage for all users
Important:
Unlimited email sending is not allowed on any service.
Managed VPS plans may be eligible for higher email limits, but these are not guaranteed, are reviewed on a case-by-case basis, and may be reverted at any time if abuse, high load, or security risks are detected.
High-volume email sending from compromised accounts or misuse can negatively impact server performance and email delivery.
## Bulk Emailing Policy
We strictly prohibit spam and bulk emailing from our servers.
Any script or account that exceeds allowed limits will be disabled until support is contacted
For legitimate bulk or marketing emails, we recommend using third-party services such as Mailchimp, MadMimi, or similar platforms
## Need a Higher Limit?
If you urgently require a higher email sending limit, you may submit a support ticket from your client area.
Our team will review the request, however approval is not guaranteed, even on Managed VPS, and any granted increase may be reverted at a later time.
# Email Overview
Source: https://kb.verpex.com/emails/email-overview
At Verpex we provide unlimited email accounts with every shared and reseller hosting plan on cPanel.
The emails use the standard IMAP/POP protocol for incoming mail, and SMTP for outgoing mail. That means you can configure your email accounts on all major mail clients and mobile devices. We also provide webmail.
The key connection details are:
|
|
|
Webmail Link
|
webmail.\[yourdomain.com] or \[yourdomain.com]/webmail
You can also use the webserver hostname
|
|
Incoming and Outgoing Mailserver Names
|
mail.\[yourdomain.com]
You can also use your web server hostname
|
|
Email account username
|
Your full email address (e.g. you@\[yourdomain.com])
|
|
Email account password
|
As set in cPanel
|
|
Incoming Mailserver settings
|
SSL On, Port 993 (This should be the default!)
|
|
Outgoing Mailserver settings
|
SSL On, Port 465 (This should be the default!)
|
# Email Troubleshooting
Source: https://kb.verpex.com/emails/email-troubleshooting
Email is sort of like the “glue” that holds the Internet together, what do you do if the email is not working? Although very annoying, bounce emails can contain many clues about the problem with the email path and, in many cases, indicate the exact reason why the email could not be delivered. If you have received one yourself from a specific destination then do not overlook it, read through the information to see if you can spot anything useful. Likewise, if someone who emailed you received a bounce back and eliminated the problem at their end, try and get hold of the message so you can have a look. The bounce-back messages can be daunting and garbled at first sight but scan through them for sentences and error messages. If what follows doesn’t make any sense, then try googling for it or raising it with our support
If you are stuck and unable to send out and/or receive webmails or your emails are not even working as they should, then try out these steps to isolate a possible solution.
The first step to troubleshooting email delivery issues is figuring out where the issue is stemming from
* When you get error messages like “ Failed Delivery or Problem Found - Message Not Sent.”Make sure you’re using the correct recipient email address.
* If the error message you are receiving is actually a password prompt and your password does not work. If this happens, please reset your email account’s password within cPanel and test again. A password reset can be done by logging into your cPanel, navigating to the Email Accounts section and clicking the Change Password link next to the email account you wish to work on. Please note after too many sign-in attempts we may block your account for security reasons.
* Make sure your MX records are set up correctly. Mail Exchange (MX) records route email from your domain to the servers that host your domain's user accounts. Your MX records must point to our mail servers before you can send and receive emails in your Verpex hosting account. If you have external MX records, the server may try to deliver your email locally on the server instead of delivering the email to the servers hosting your MX records. Please contact our support department what the correct settings are supposed to be, but if you want to check what the current live setting is for your domain, then go to [www.mxtoolbox.com.](http://www.mxtoolbox.com.)
* If you get an error, it's best to review the basic configuration of your email account in your email client. Please ensure that you are using the correct email client settings. You can check the authentication settings in your cPanel, and send yourself an email from and to your webmail, if it arrives in your webmail account then you need to check your email client configuration. You can reconfigure your mail client again and/or update your mail client to the latest version if it is not updated. If you think the problem is with the email client, the easiest way to test is to try again with another client. For example, if you are using Outlook, try sending/receiving again using Thunderbird or some other email app or service.
* Sometimes, a full inbox can also prevent you from sending and receiving emails as well.
* When people who try to email you receive a bounce-back message saying that “the recipient’s inbox is full”, the undeliverable mail contains a message about why it was returned. It means your mailbox is full and you need to delete emails to free up space or increase the mail quota. To increase the mail quota,, log into your cPanel and click the Email Accounts icon. A list of email accounts will appear, and next to each email account will be listed its quota and the amount of disk space that it is using. If it is over quota, delete the email to free up space or Click the Change Quota link next to the email account and increase the disk quota for that email account.
* Be sure you aren’t blocking addresses you want to get emails from. If you have SpamAssassin enabled on your account, the emails you miss may have been identified as spam by SpamAssassin and have been deleted or moved to a spam folder. If you are receiving some but not all of your emails, this is most likely the culprit. If you have control over the receiving client, adjust the settings by lowering the spam threshold, adding the address to the permanent “allow” list, changing the settings, etc. If you do not have control over the receiving client, the best way to get a message across is to re-send using another email address. You might also want to check your Trash folder. It's always possible that you accidentally deleted the email you're looking for. If you don't receive any emails, we recommend that you continue to the next troubleshooting step.
* One of the most common issues is users accidentally getting blocked by our server’s
* firewall. There is no cause for alarm as this is very easy to fix, just contact our support team to whitelist your IP address. There are strict security measures that we have put in place to keep our clients safe and secure, but sometimes these strict settings report false positives and as a result, real people get blocked. Common signs of this being the case are if your whole office/location seems to be unable to send and receive mail, and possibly not able to view your website.
* Check for account or domain issues, you are getting an error because your account is not active. Your account might have been suspended due to overdue payment or you got an email abuse from our abuse team that your email account was flagged for sending spam or any related abuse issue. If you think you were blocked accidentally, contact our support team to resolve this issue.
* Your email account security may be at risk and malicious emails or viruses have penetrated your network and are sending out masses of spurious emails. You are getting complaints about spam coming from your email address, seeing a display name that's different from the one you set up or receiving emails from your own email address. You may need to add an SPF record to your DNS zone file, clean up your account, change all passwords associated with the email address(ensure you use a strong password) and also contact your network administrator immediately, a full network cleanup and audit is highly recommended.
* If the error got is about being blacklisted, we don’t accept emails from senders who are on known blacklists. If the error is about being blocked, get the bounced back email to us. Then we can help troubleshoot it further. If your email is blocked or flagged as spam, it may be because the address has been added to a spam blacklist. There are many blacklists, you can check if your account is on a blacklist by entering your domain/IP address in the search box for [https://mxtoolbox.com/](https://mxtoolbox.com/). If your IP address or domain is listed, most public blacklists provide a way remove the address.
* Something as simple as an inactive internet connection could be the culprit Make sure you have an active internet connection, disconnect from the internet and reconnect. You might also have to manually reset your internet router, or even try using another device to check your email.
* In some rare cases, our system administration team may migrate your account to another server. If you have received an email from us saying this happened, you will want to be sure you are accessing your webmail from the new server and not the old server. If you connect to webmail using testing.com/webmail, then this should not be a problem. If you connect to webmail using the server name, such as s531.lon8.mysecurecloudhost.com/webmail, we advise you to refer to the email sent to you for the new server name. For example, you may have been migrated from s531 server to the s592 server, in which case you would use s592.lon6.mysecurecloudhost.com/webmail.
Other minute solution is to sign out of your email account and sign back in. The email size is too big, so you need to check the size of the email you are trying to send or there might be server issue which is totally unrelated to you.
Some errors are easy to diagnose while others require a bit of troubleshooting. If you are unable to fix your email issue with the fixes provided above or your specific problem is not addressed, contact support.
# How Folder Subscription Works
Source: https://kb.verpex.com/emails/how-folder-subscription-works
Folder subscriptions allow you to choose which folders appear in your cPanel/email client interface and also allow you to create new folders. Many people do not know about this feature because when they set up their email account all the folders in their account are shown and that is what they want and expect. However, some situations might present themselves where you wish to have some created folders hidden or you just want your pane to look neat.
In WebMail, you can create new folders, move your emails to these folders, or simply create an automated email filter that sends emails. If you do want to see a folder in your listed items, you will need to check the folder, likewise, if you do not wish to see a folder in your listed items, you can uncheck the folder. If a folder( Sent, Trash, Drafts, Junk and other IMAP folders) is missing, please subscribe to them again and they will appear.
Below we will look at the settings in Webmail(Roundcube and Horde), Thunderbird and Outlook; other email programs are similar though.
**To manage your folder subscriptions in Webmail(Roundcube)**
* Click on ‘Settings’ on the left-hand side pane
* Select ‘Folders' from the options available
* On this page, you can create, delete, check or uncheck a folder( please note that the default folders like Inbox, Drafts, Sent, Junk, Trash, and Archive cannot be deleted or altered, they are server folders)
* Upon checking the box you wish to subscribe to, you will get a notification at the bottom of the screen acknowledging the action that has just taken place
Unsubscribing from a folder means the folder has not been checked, so remember to uncheck the box in front of the folder you wish to unsubscribe from. A notification acknowledging the action you just took will appear at the bottom of the page.
**Subscribing to Folders in Webmail(Horde)**
* Log into Webmail using Horde,
* Click the drop-down arrow in front of Folder Actions
* You can create, expand, collapse, show all and rebuild mailboxes depending on the action you wish to take
**Subscribing To Folders in Thunderbird**
* The folders you subscribe to are the ones displayed by Thunderbird. It subscribes to every folder it finds when you first set up the account and any folder you add to it.
* Go to the File menu and click the Subscribe option
* Select desired folders.
* Click Subscribe.
* Click OK.
* New folders can now be accessed from the Folders list on the left side.
To view all folders regardless of subscription status, we recommend that you follow the steps below.
* Click on your account name,
* Go to Settings.
* Choose Server Settings.
* Click Advanced.
* We recommend that you uncheck the option to Show only subscribed folders as this can cause some folders to be hidden in Thunderbird.
* Once you are done, click OK and restart Thunderbird
**Subscribing to Folders in Outlook**
* Click the Tools menu, then on click IMAP Folders
* Click the Query button.
* Select the desired folders.
* Click the Subscribe button. Click OK.
* New folders can now be accessed from the Folders list on the left side.
**Subscribing to Folders on Mac OS X Mail(Mac Mail)**
* Go to Mail > Preferences > Accounts.
* The mail menu with the preferences option.
* Select your email account and click the Advanced tab.
* Make sure the IMAP path prefix is set to INBOX.
* Close the Preferences panel and save.
* Restart the entire mail program.
If you use an email program that does not have a similar system of subscription with Thunderbird or outlook, please contact our support for further assistance.
# Backing Up and Restoring Emails in Webmail (Roundcube & Horde)
Source: https://kb.verpex.com/emails/how-to-back-up-and-restore-emails-in-cpanel-webmailroundcube-and-horde
There is an in-built restore in cPanel that uses Roundcube and Horder to backup and restore emails in cPanel
Here are the steps for backing up and restoring emails in cPanel webmail:
**Roundcube Interface**
How to create backup and restore emails in cPanel webmail via Roundcube interface
**Backup**
* Log in to your webmail account using the Roundcube interface.
* Click on the “Email Accounts” icon.
* Select the email account you want to back up
* Choose the location you want to save the email.
* Select the desired email and click on the More icon to download
You cannot download many emails on Roundcube at once, we recommend using Horde to back up an entire folder or account.
**Restore**
* Using the Roundcube interface, log in to your webmail account
* Click on the “Email Accounts” icon.
* Choose the email account you want to restore.
* Click on More
* Choose Import messages:
* Choose the backup file you want to be imported and click Upload:
* Once successfully imported, you will be notified with a pop-up message
ls to ensure that you don't lose any important data in case of a system failure or other issues. It's also, a good idea to keep multiple copies of your backups in different locations, such as on an external hard drive or in cloud storage, to protect against data loss due to hardware failure or other issues.
# How to Backup Emails in Mail Clients
Source: https://kb.verpex.com/emails/how-to-backup-emails-in-mail-clients
Email backup is one of the most crucial aspects of information management, to make sure important emails can be reinstated in case of accidental data loss.
With the ever-increasing number of cyber attacks, it is no wonder why you might want to backup your emails You may want to back up your emails because of server failures, internet downtime, account closure, migration, etc but whatever reason it is, You need to regularly backup your emails
Backing up emails in mail clients can vary depending on the specific mail client you are using. Here are some general steps for some popular mail clients:
**Backing up Email on Outlook**
Follow these steps to backup your Outlook email folders and mail locally on your computer
* Click File > Open & Export > Import/Export.
* Select **Export to a file**
* Click **Next** and choose the Outlook Data File (.pst, .csv) as the export format.
* Click **Next** and select the mail folder you would like to back up
* Choose the destination folder and backup name
* Select "Finish".
For more information: [https://support.microsoft.com/en-us/office/back-up-your-email-e5845b0b-1aeb-424f-924c-aa1c33b18833](https://support.microsoft.com/en-us/office/back-up-your-email-e5845b0b-1aeb-424f-924c-aa1c33b18833)
**Backing up Email on Gmail**
Follow the steps below to download all emails from Gmail:
* Log in to your Gmail account on your computer.
* Click your **Profile** icon
* Go to your **Google Account**.
* Select **Data & privacy** from the list of options.
* Look for the “Download, delete or make a plan for your data” section and select the “Download your data” option.
* Ensure “Mail” is selected.
* Under “Mail,” select all the labels you want to download.
* Click “Next step” below.
* Now, choose the file type or format you would like to download
* Once done, click “Create archive.” to download all emails on your computer.
**Backing up Email on Thunderbird**
* Open Thunderbird.
* Select your Inbox or any preferred folder you would like to download
* Select the message you want to export. Or press CTRL + A to select all mail on Windows(CMD + A for macOS) within the folder.
* Select Save as -> File.
* Locate the folder where the messages should be saved and click Save.
* By default Thunderbird will export all the selected email messages in .eml format, you can also choose .txt or .html type depending on your needs
**Backing Up Emails on Mac**
Follow these steps to back up emails using the Apple Mail client. if your account is already set up, skip to the fourth step:
* Go to Mail -> **Add Account**.
* Choose the Other Mail Account option. Click **Continue**.
* Enter your email server details and Sign In.
* Click the email folder you want to download and choose **Export Mailbox**.
* Select your destination folder and click "Choose". Mail will export your emails in the form of a .mbox archive.
* You just successfully backed up your email using Apple Mail.
**Backing up Email on Yahoo Emails Using Kernel IMAP Backup**
Follow the steps below to backup your Yahoo emails on your computer:
* Open the app and select.
* Select the **Set Filter and Migrate** options in the email account you wish to download
* Select all the desired filters, click on, “I am Ok”, and Start Migration.
* Select the file format from the list of given options for saving the selected IMAP server data (PDF, PST, DOCX, etc.)
* Provide a file path to save the backed-up IMAP mailbox on your computer.\
You will get a prompt stating “process completed”. A CSV file containing the credentials of all your backup.
We have learned how to back up emails using Outlook, Gmail, Yahoo, Thunderbird, and Apple Mail. It is less expensive and time-consuming, and emails could be restored immediately in case of data loss.
# How to Change your Webmail Password in cPanel
Source: https://kb.verpex.com/emails/how-to-change-cpanel-webmail-password
Everyone of us has many passwords to manage on a daily basis. One study even suggests that we're each juggling a huge 100 passwords across various sites and services.
Now if you ever forgot your email account’s password or need to reset it for security reasons, we’ve got your back!
All you need to do is to just follow the few steps below:
1. First and foremost, log in to your cPanel.
2. Once logged in, type in “Email Accounts” on the top right search bar or click on the Email Accounts option under the Email section.
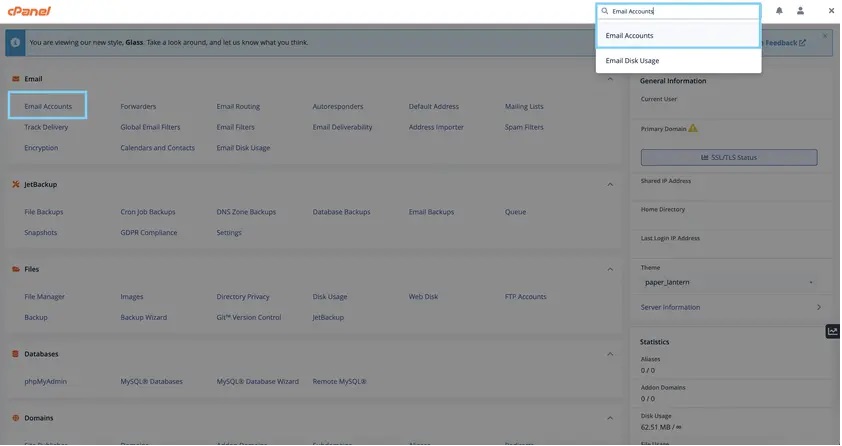
3. Select the email account which password you wish to reset, and then click Manage.
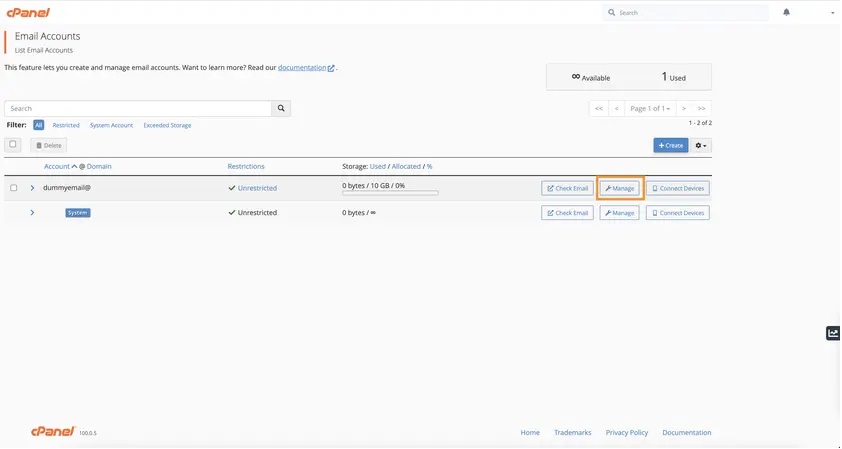
4. On the next page, scroll to the Security section and enter the new password. We would recommend generating a strong, random password (you can use the built-in password generator in cPanel).
Once you note down the password, click the Update Email Settings.
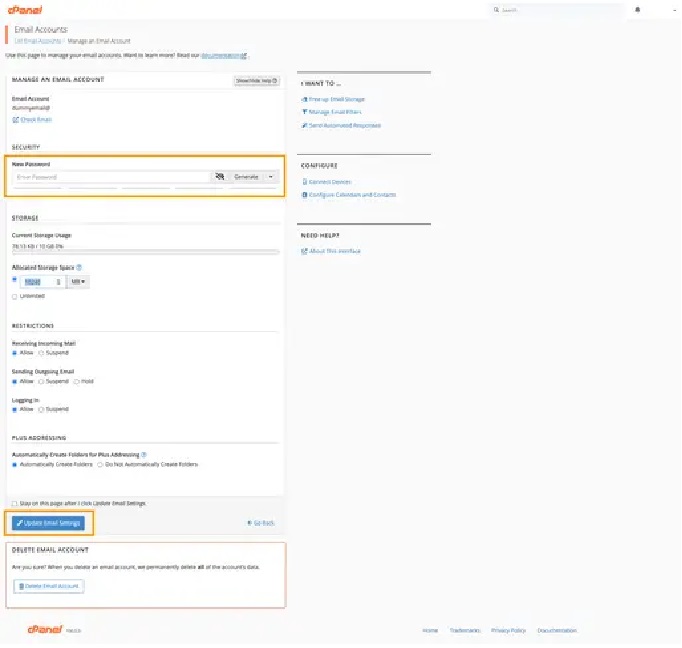
The password for this particular email account will now be updated. Isn’t that too easy?
If for some reason, you are having issues logging in to your cPanel dashboard, you can also reset the email password from your Webmail interface.
The steps are described as below:
1. If you are using Roundcube, you can click cP Webmail Home on the left sidebar. On Horde, the option can be found on the top navigation bar. See screenshots below for reference:
2. This screen will then show up, scroll down and click the “Password & Security” section
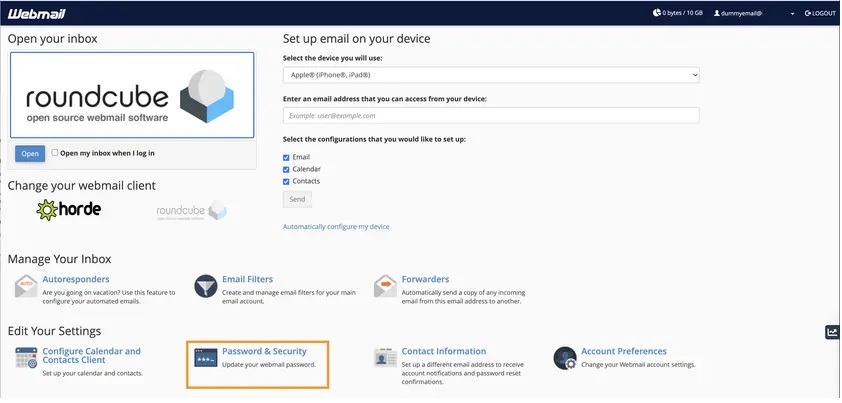
3. Enter the new strong password and click Save once you’re done.
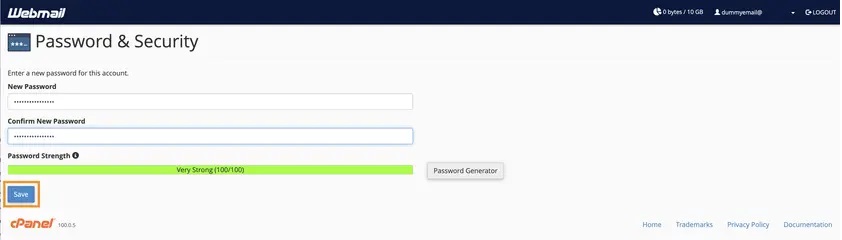
It’s always recommended to double-check if the new password has replaced the old one properly, or if you simply pasted the correct one on your notes. So go ahead and log out from your Webmail, then enter the email username, the password you just updated, and click the Log In button. If you are successfully logged in, that means you’re all set with your new password!
# How to Change the Time Zone in Webmail
Source: https://kb.verpex.com/emails/how-to-change-the-time-zone-in-webmail
Webmail applications use the host server's time zone. If you find that the webmail timezone doesn’t match your location and decide to change the setting. After you change the time zone setting, the interface displays all timestamps in the new time zone right away. Depending on the webmail application, follow the steps below to change your timezone
**Horde:**
Follow these steps To change the time zone in Horde
* Using the horde interface, log in to your webmail account
* Hover over the Tools icon, and go to Preference>Global preference.
* Select Locale and Time.
* Specify your time zone and then click Save.
**Roundcube:**
To change the time zone in Roundcube, follow these steps:
* Login to your email account using the RoundCube interface from your cPanel.
* Click Settings.
* Click Preferences ->User Interface:
* Specify your time zone, and then click Save.
# How to Delete an Email Account in cPanel
Source: https://kb.verpex.com/emails/how-to-delete-an-email-account-in-cpanel
Before you delete an email account, do not forget to backup important emails
Follow these steps to delete an email account
* Log into your cpanel
* Click **Email Accounts** under the **Email** section
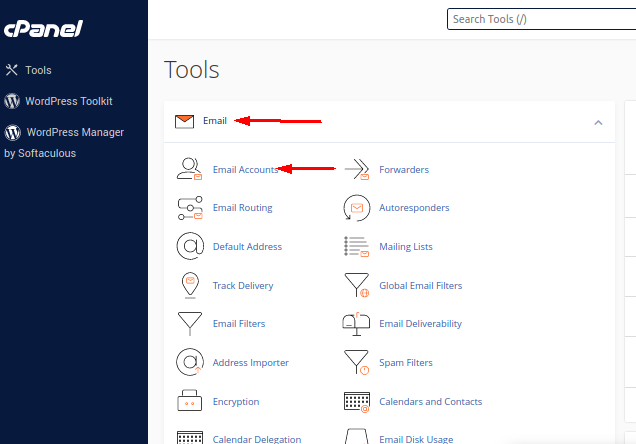
* Click the **Manage** icon in front of the email account you wish to delete
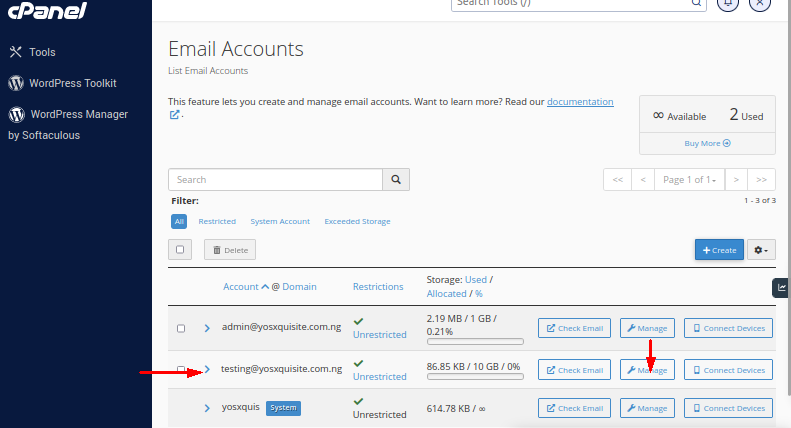
* Click the **Delete Email Account** icon to have the email account deleted
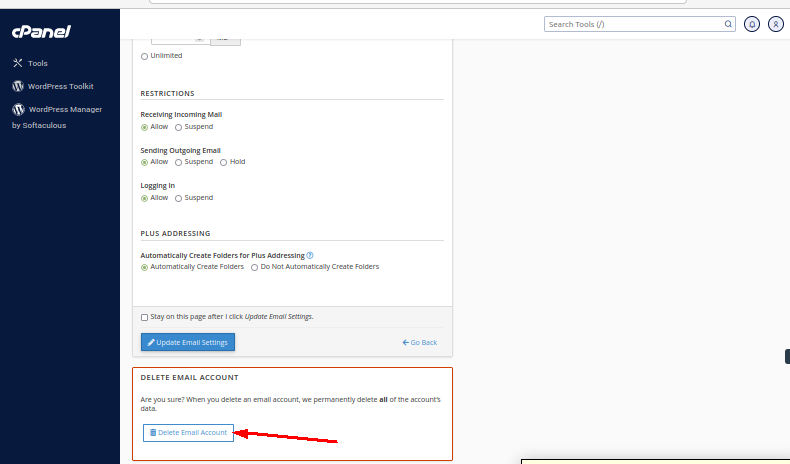
* You will get a prompt asking if you wish to delete
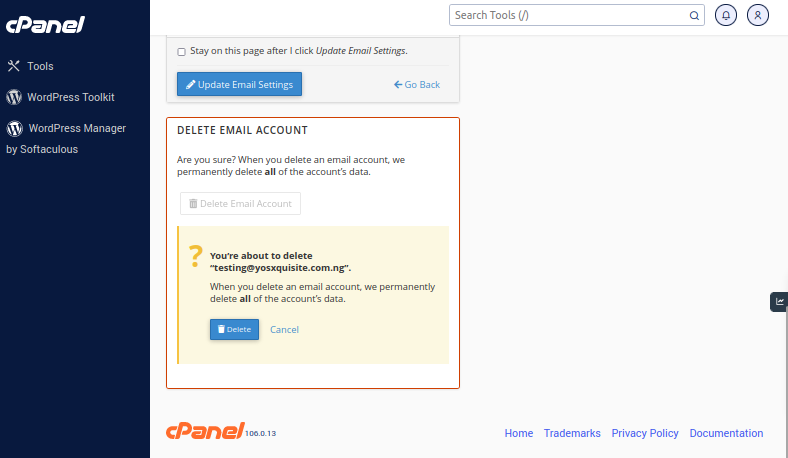
* You will get a successful message notifying you that the email account has been deleted
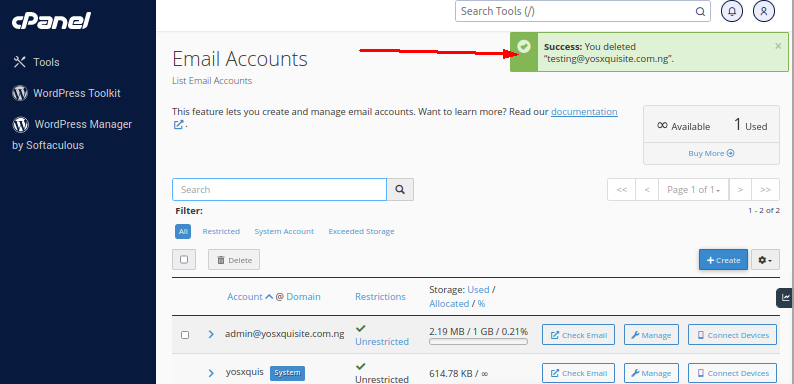
After deleting the email account, you need to go to the etc folder in your file manager to have the corresponding email folder deleted.
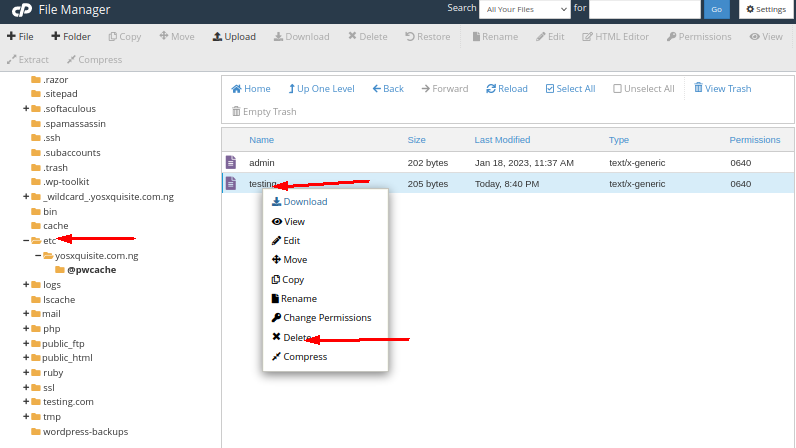
Tick the box, skip the trash and delete permanently
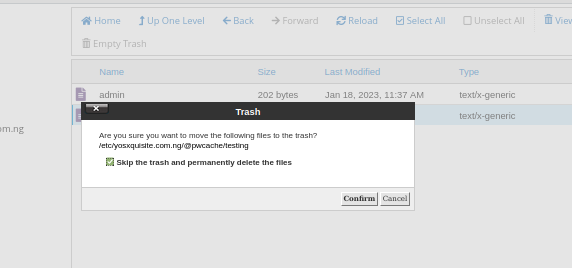
# How to Set Up SMTP in cPanel
Source: https://kb.verpex.com/emails/how-to-set-up-smtp-in-cpanel
Hosting your email on your domain to suit your business and personal brand shows you are in control and ready for business. Your data is stored privately on a server or hosting account only you can access. Using cPanel & WHM allows you to quickly set up and connect to email accounts over SMTP.
**What is SMTP?**
SMTP is the Simple Mail Transfer Protocol, it is a set of communication protocols that\
applications use to send an email over the internet to servers. Most email software is designed to use SMTP for communication purposes when sending outgoing messages.
SMTP settings are Outgoing Mail Server settings, outgoing emails are sent using SMTP. There are two other protocols, POP3 and IMAP, which are incoming settings used to retrieve and store emails. These two settings are often necessary to properly configure any mail client to communicate with your host's mail server.
Let’s take a look at the basics of setting up an SMTP in cPanel
The first thing you want to do is to ensure that your email account is set up. If it is not set up, follow [this guide](/emails/creating-an-email-account-on-your-cpanel-hosting) to set up your email accounts\
Once the email account has been created
* Log in to your email address using your domain name/webmail
* In front of the email account,you want to configure SMTP, Click **Connect Devices**
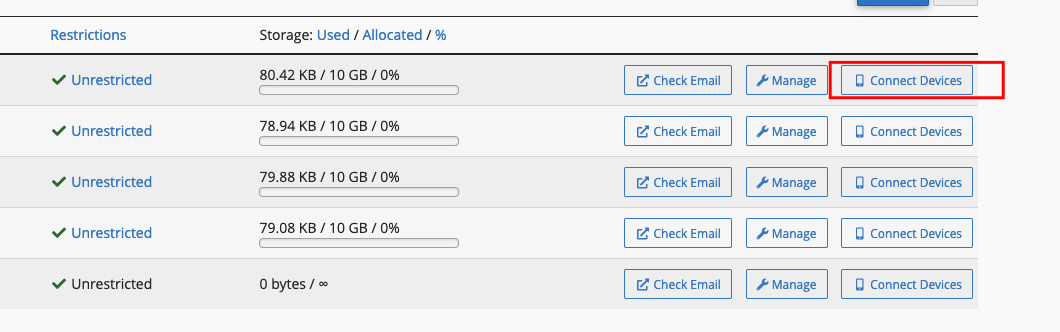
* It takes you to another page where you will find the details you need to give your application(username, SMTP port number of the outgoing server).

Use these details when configuring an email client:\
Full Email Address - Use this as the username in your website or script\
Password for the email account - Use this as the password\
Either your domain or the hostname of the server - Use this as the SMTP host\
Port - This is usually either 465 or 25
The next task is to configure the client so that it knows which server to connect to and how to authenticate.. The required cPanel SMTP settings are available in the **Connect Devices** interface.
On this page, you will find the username, URL and SMTP port number of the outgoing server. These are the details you will need to provide for your application.
If the mail client or device you want to use is not listed, you can use the Mail Client Manual Settings listed at the bottom of the page.
We recommend using SSL/TLS details instead of the non-SSL insecure settings since it provides increased security for your interactions.
There are many email clients out there, but the setup process for sending through your server is usually straightforward.
As always, if you have any issues setting up your SMTP server We are here to help in the best ways we can.
# How to Set Up Webmail in Outlook
Source: https://kb.verpex.com/emails/how-to-setup-webmail-on-outlook
Your domain name must have been registered and your email account created before you can set up an email account on outlook. Please click [here](/domains/how-to-register-a-domain-name-with-verpex) to register a domain name and [here](/emails/creating-an-email-account-on-your-cpanel-hosting) to create an email account
Once this has been done, follow the steps below to set up an email account on Outlook
* Open Outlook and click on **File** in the top left corner.
* Click on **Add Account**
* Select **Automatic setup** and then click **Next**
* Enter your email address and password
* Click **Connect**
If Outlook is able to connect to your email server, it will automatically set up your account and take you to the next screen. If Outlook is not able to connect to your email server, it will prompt you to enter your account information manually.
In the manual setup screen, enter the following information:
Your name: enter the name you want to be displayed on your email\
Email address: enter your full email address\
**Account Type**: Choose IMAP or POP3\
**Incoming mail server**: enter the incoming mail server provided in cPanel\
**Outgoing mail server (SMTP)**: enter the outgoing mail server provided in cPanel\
**User Name**: enter your full email address\
**Password**: enter your email password\
Click on **More settings**
In the Outgoing server tab, check **My outgoing server (SMTP) requires authentication**\
In the Advanced tab, set the incoming and outgoing port numbers provided in cPanel
**Non-SSL Settings:**\
POP3: Incoming server port: 110 Outgoing Server(SMTP): 25 or 26 or 587\
IMAP: Incoming server port: 143 Outgoing Server(SMTP): 25 or 26 or 587
**SSL Settings:**\
POP3: Incoming server port: 995 Outgoing Server(SMTP): 465\
IMAP: Incoming server port: 993 Outgoing Server(SMTP): 465
Click **OK** and then **Next**\
Click on **Finish** to complete the setup process\
Click **Close** and start using your webmail on Outlook.
The steps may vary depending on your version of Outlook and the webmail service you are using. Be sure to refer to the webmail service's documentation for specific instructions.
# How to Transfer in IMAP Emails Using an IMAP Transfer Tool
Source: https://kb.verpex.com/emails/how-to-transfer-in-imap-emails-using-an-imap-transfer-tool
IMAP (Internet Message Access Protocol) is an email access protocol used to configure mail accounts to a local or remote Web server. IMAP is one of the most commonly used Email protocol for receiving emails, it is supported by all modern clients and web servers. IMAP Server is always used while sending and receiving email messages. When you move to a new server or email provider, existing emails will not be available until you migrate them into the new mailbox.
Email Migration or Mailbox Migration is the process of migrating an email message (or messages) from one mail client to another mail client. To copy emails From one Server to another using IMAP, both of your servers/hosting accounts must support the IMAP email protocol, Verpex servers support IMAP.
When you switch to another hosting provider, your emails will likely need to be transferred as well. If you are moving between cPanel-based hosting providers, you should be able to take advantage of the full cPanel backup and migrate all of your settings. This is an easy method of transferring email from one server to another, using matching IMAP email accounts. You can use this IMAP tool [https://imapsync.lamiral.info/X/](https://imapsync.lamiral.info/X/) , it i s free and comes highly recommended.
To Transfer in IMAP Emails using an IMAP Transfer tool you will need:
An IMAP-capable local email client(Thunderbird or Outlook).\
SMTP server(Outgoing Server) - your cPanel account hostname/IP address\
IMAP server(Incoming server) - your cPanel account hostname/IP address\
Username(email\@domain): The full name of your email account\
Password - the password for your email account you set during the creation process in your cPanel(please note the password for both accounts must be the same)\
IMAP Port: 993\
SMTP Port: 465\
TLS/SSL support - Disabled
To Copy IMAP Emails to IMAP Account, follow the steps below:
* Download and install an IMAP-capable email client such as Thunderbird or Outlook.
* Start the IMAP to IMAP Migration Tool.
* Configure your email account(s) ([email@domain.com](mailto:email@domain.com)) to work with the settings of the previous hosting provider(email address, password and configuredusing IMAP)
* Login to your Verpex cPanel to create the same email account under your new hosting account. Use the same spelling, capitalization and password(It is important to change the password after the migration process). If you need help, follow our tutorial on[ How to Change your Webmail Password in cPanel ](/emails/how-to-change-cpanel-webmail-password)
* Enter source IMAP account credentials, and enter the credentials of the destination IMAP account with all the IMAP details – IMAP Server and Port No.
* Choose the folders for migration.
* Click the next button to Migrate IMAP to IMAP account
* Once the process is completed, proceed to the next button to export IMAP emails to IMAP account.
* Use the same settings for the IMAP and SMTP.
* Add the IMAP email account you want to move emails to in your email client
* Repeat the same steps for each folder you want to copy
Using this method your email client will actually copy all messages from your current host to your Verpex cPanel email account. Once completed, your transfer is now successful and your old emails will be in your mailbox on the new server/hosting account.
The time period of extraction depends entirely on the number of emails and your Internet Speed, so give it some time to be completed. When you successfully complete the email transfer, allow some time to ensure the process has worked smoothly, and then you can safely remove the first [mail@domain.com](mailto:mail@domain.com) and continue using your mail accounts with Verpex. To host your domain's email with Verpex, you will also have to update the domain's MX records. You can find more information about the MX configuration [here](/cpanel/how-to-edit-your-dns-records-with-verpex).
To avoid loss of emails when moving your email account from an old hosting account to another, it is a good idea to create a[ forwarder](/emails/email-forwarding-in-cpanel) on the old hosting server so that emails are sent to a third-party email account. This allows you to keep a copy of emails sent to your old email account during the transfer period.
# Local and Remote Mail Exchanger in cPanel
Source: https://kb.verpex.com/emails/local-and-remote-mail-exchanger-in-cpanel
Local and remote mail exchanger are options for the MX Entry for a domain in cPanel. It tells cPanel how you would like the mail services for the domain to be handled
The recommended option is “Automatically Detect Configuration” unless you have a specific setup that needs these explicitly stated.
**Local Mail Exchanger**\
The Local Mail Exchanger setting causes the server to always accept mail for the domain, It manages all mails sent from the server to the domain locally. The system will deliver mail to the local mailbox instead of a remote mail service. Also, choose this option if your hosting provider deleted the domain’s DNS zone. You can use this option if the highest priority MX record points to an IP on the local server. The system will deliver to your local server mailbox.
If your site uses Verpex Hosting name servers and you are experiencing problems with e-mail, you can manually select this setting from Cpanel » Email » Email Routing to help troubleshoot the configuration.
**Remote Mail Exchanger**\
The Remote Mail Exchanger setting causes the server to never accept mail for the domain.\
It manages all mails sent to your domain remotely and delivers them to the mail service determined by the domain’s MX record. (For example, if Google is your mail service, it will deliver the emails to the mailbox on Google's servers rather than your local mailbox.)
The system assigns the lowest priority value to servers with this setting. This option can be used to point your emails to a different email server.
Please note that you must configure the primary MX record to point to the appropriate exchanger for this to work, Use this if there are no MX records that point to an IP on the server. Follow these steps to know how to edit MX . If your site does not use Verpex Hosting name servers, you must select this setting.
You can only choose between Local, Backup, and Remote Mail Exchanger in cPanel, you cannot use both
# MIME Format Emails
Source: https://kb.verpex.com/emails/mime-format-emails
Multipurpose Internet Mail Extensions (MIME) is an Internet standard that is used to support the transfer of single or multiple texts and non-text attachments( graphics, audio, and video files). It uses the Internet protocol to extend the ability of emails to be displayed in more than just plain text.
MIME types tell the browsers how to handle specific file extensions, the type of file and the way the file could be served to the user. When a file is sent to a browser of your website’s visitor, it also sends the MIME type. For example, the application/pdf MIME type tells the browser it is a .pdf file and how to handle files with a .pdf extension as Portable Document Format files accordingly.
MIME type is managed by the Internet Assigned Numbers Authority (IANA), the up-to-date and complete list is on their Media Types list page.
You can modify, add or delete MIME type specifically for your site. MIME types are often used to handle new technologies as they become available. With MIME types, however, you can set up any type or extension for a file by using this option in cPanel and begin serving WAP pages immediately. This feature will provide you with different options for presenting various file extensions in their real format in a web browser.
**How To Add Mime Type In CPanel**
* Login to your cPanel
* Under the ADVANCED section, select the MIME Type option
* On the MIME Type edit box enter the file extension you want to open the file with (for example .php70). For multiple extensions, add them at once and separate with a space.
* Click the option “Add” to save the custom MIME type.
* You will get a successful message that MIME Type has been added\
The added MIME Type is displayed in the user-defined MIME Types
**How to Delete MIME type in the cPanel**
* To remove a MIME type:
* Login to cPanel
* Under the ADVANCED section, select MIME Type option
* Under User Defined MIME Types, choose the extension(s) you want to remove and click the Delete link corresponding to the MIME type you want to delete.
* You will get a successful message of the removal of MIME type
Please note that the built-in system MIME types can not be deleted, you can only delete the MIME Types created by you.
**Structure of a MIME type**\
The MIME type consists of a type and a subtype; these are each string which, when concatenated with a slash (/) between them, comprise a MIME type. No whitespace is allowed in a MIME type\
type/subtype\
The type represents the major general category into which the data type falls(audio or text). While the subtype identifies the accurate data of the specified type the MIME type represents to be served.
# Outlook 365 Auto Archive Setup
Source: https://kb.verpex.com/emails/outlook-365-auto-archive-setup
Auto archiving is a tool that helps you manage the space in your inbox or on the email server you are using. It automatically moves items to an archived location so that your inbox is not cluttered. It can also permanently delete items that have surpassed their respective aging periods.
Different Outlook items have their own aging periods. Unless the item has been expressly set to be excluded, any Outlook item that has exceeded its aging time is included in the next AutoArchive. The following are the default aging periods for automatic removal or archiving for each folder:
```
The "Inbox" folder is archived after six months
The "Drafts" folder is archived after six months
The "Sent Items" folder is archived after two months
The "Deleted Items" is archived after two months
The "Outbox" folder is archived after three months
The "Calendar" folder is archived after six months
The "Tasks" folder is archived after six months
The "Notes" folder is archived after six months
The "Journal" folder is archived after six months
```
This article will go over the steps required to set up auto-archiving for your outlook application. It will use the Outlook 365 version, but the steps should be applicable to older versions as well, like Outlook 2021, Outlook 2019, Outlook 2016, etc.
First up, open the Outlook app. Then, right-click on the specific folder for which you want to set up auto-archive. You need to set auto-archive based on a folder, but your inbox folder is also applicable.
After you right-click the folder, click the Properties option at the bottom of the menu that appears.
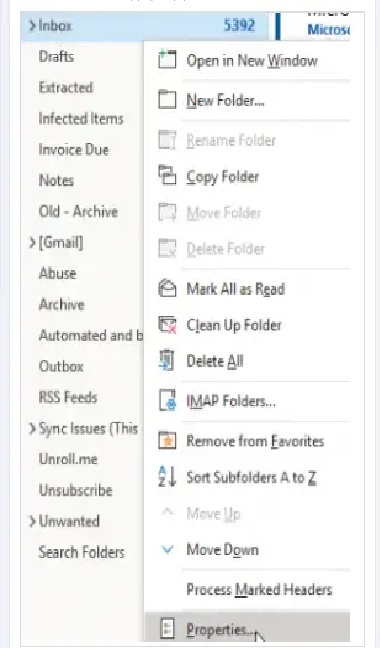
After clicking on properties, click on the AutoArchive option on InboxProperties.
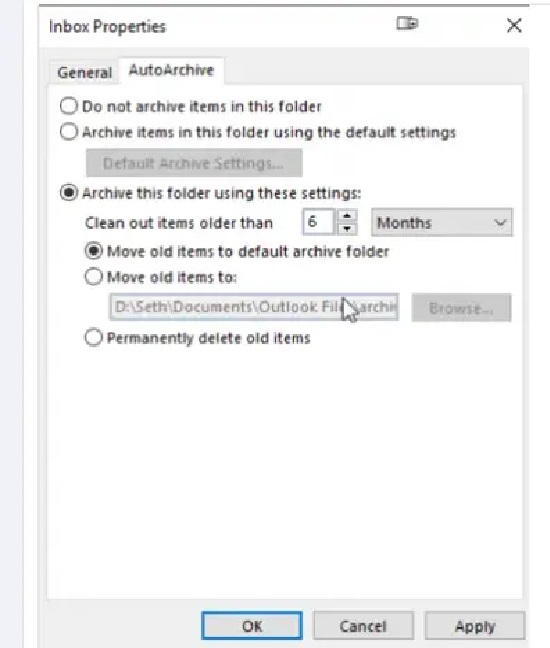
Here, you can decide whether you want to use the default settings for that specific folder or not archive it at all. If you do want to archive it and set the aging period for that folder yourself, you can do so under the "clean out items older than" option. You can select how many months you want to pass before the messages in that folder auto-archive.
You can also permanently delete emails in that folder. You can choose to either move the old items to the default archive folder or set where they are moved. Depending on how many folders you have, you'll have to set this up for each inbox folder. You might have to repeat this whole process quite a few times. The settings can be changed whenever you desire, and you can always go back and set the auto archive to the default settings.
# Setting up Google MX Records from your cPanel
Source: https://kb.verpex.com/emails/setting-up-google-mx-records-from-your-cpanel
MX Record is a type of DNS record which rules where your domain’s email should be pointed. If you are using Google Workspace (or previously known as GSuite) for your emails, this article should help: [https://support.google.com/a/answer/140034?hl=en](https://support.google.com/a/answer/140034?hl=en)
This tutorial below, however, is provided for those that need a step-by-step guide on how to apply Google custom MX records on their cPanel area.
1. Log in to your cPanel dashboard and type in Zone Editor on the top right search bar.
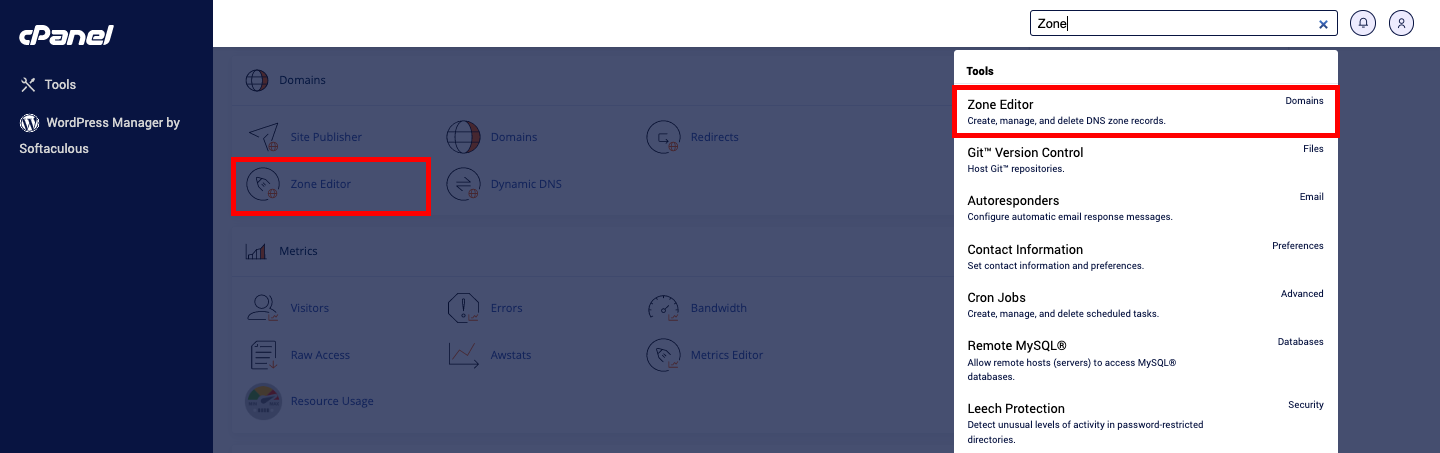
2. Once the Zone Editor opens, find the domain that you wish to install the Google MX record to. Then click on Manage.
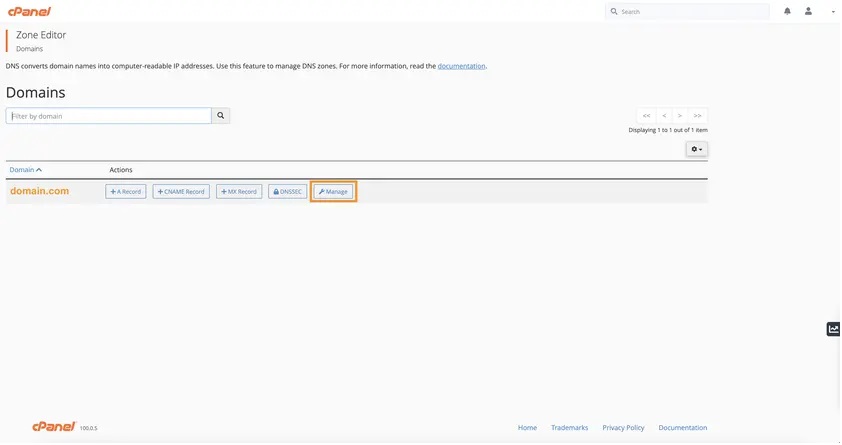
3. You will then see the list of all of your DNS records. In this case, go ahead and filter the records by clicking the MX tab.
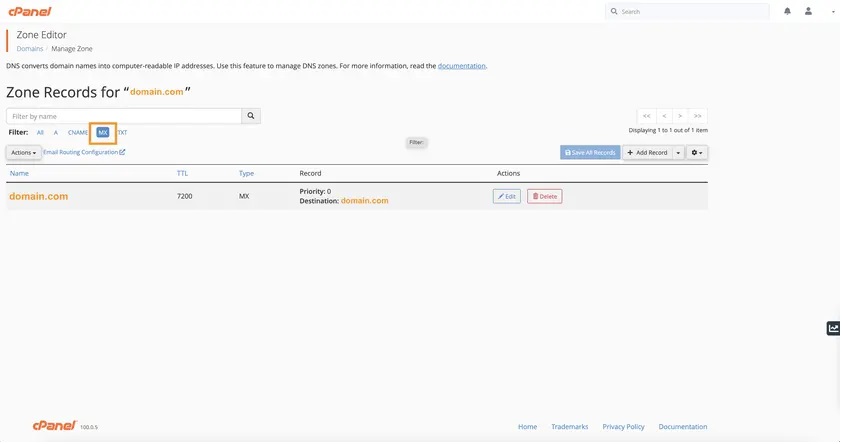
4. You can edit the existing MX record to be the first Google MX record and set the value as ASPMX.L.GOOGLE.COM, as shown on the screenshot below.
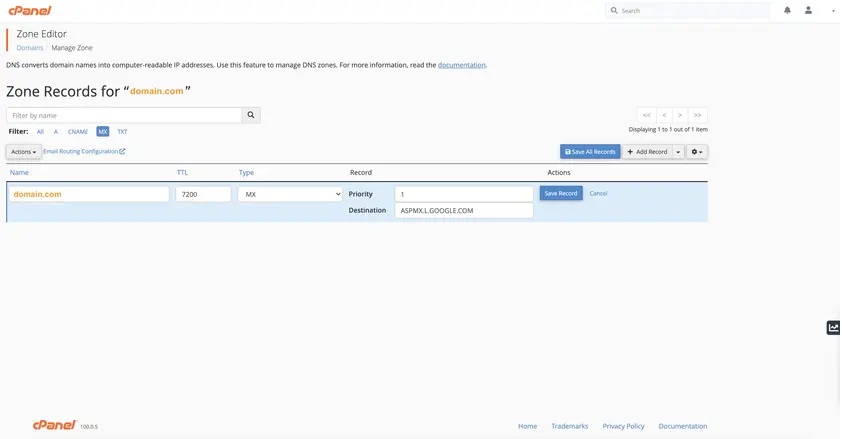
5. Next you can add 4 more MX records and assign each of them to ALT1.ASPMX.L.GOOGLE.COM (priority 5), ALT2.ASPMX.L.GOOGLE.COM (priority 5), ALT3.ASPMX.L.GOOGLE.COM (priority 10), ALT4.ASPMX.L.GOOGLE.COM (priority 10). The name field should remain your domain name.
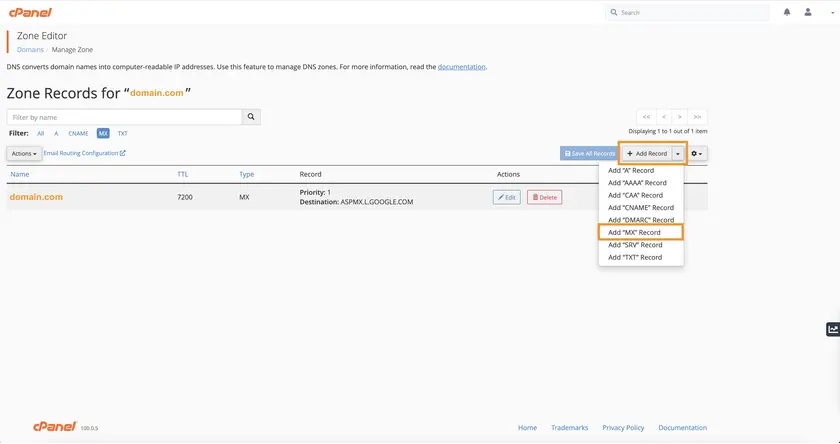
6. This should be the final look of your MX records in your cPanel Zone Editor.
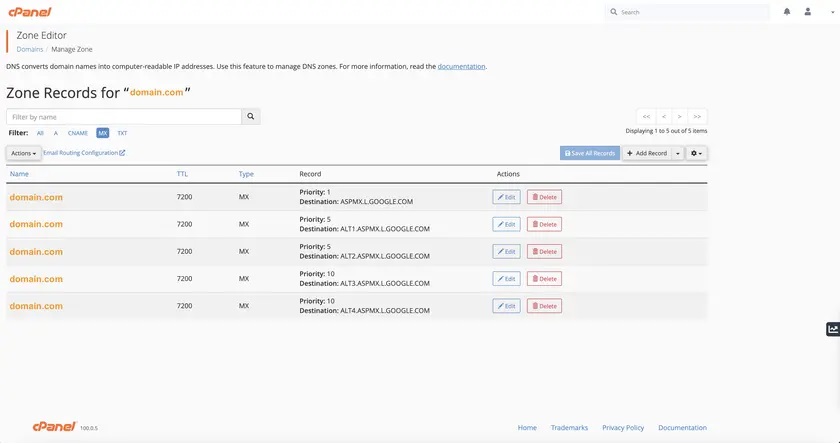
7. Once the MX records are sorted, you now need to make sure that all emails for your domain will be redirected to an external server instead of the local server. So type in “Email Routing” on the top right search bar and click on the option shown.

8. Next select the correct domain on the drop down menu and then make sure to set the Remote Mail Exchanger and click the Change button.
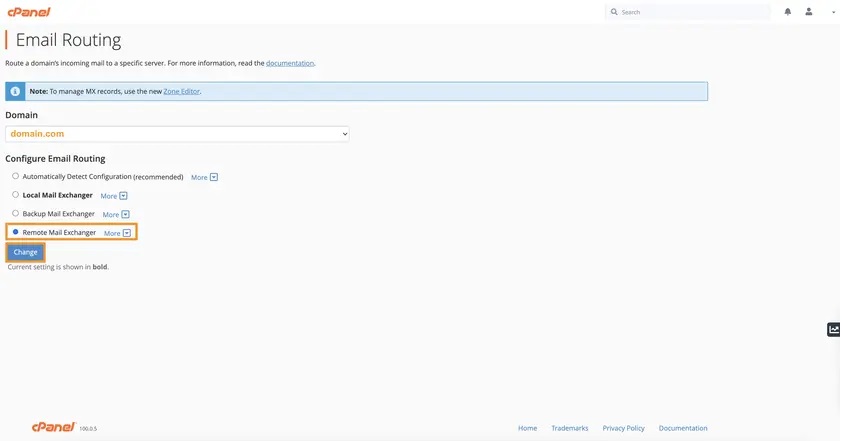
Normally, you will then be able to send and receive emails from your Google Workspace account in the next 6 hours or so. However, on certain occasions, it can take up to 48-72 hours for the DNS change to fully propagate and, unfortunately, you will need to wait just a bit longer.
**Kindly Note:\*** Starting in April 2023, Google made it possible to use one MX record to set up Gmail. This change has no impact on mail delivery or reliability.
Important: Google recommends using these instructions if you’re setting up new MX records or if you need to change your MX records. If your current configuration is working, don't change your MX records. The Legacy version (5 MX records) will continue to work indefinitely.
Name/Host/Alias\* Priority Value/Answer/Destination\
Blank or @ 1 SMTP.GOOGLE.COM
* Domain hosts use different labels for the name and value fields. Some hosts also require a period at the end of smtp.google.com.
# Setup Email Accounts on iPhone
Source: https://kb.verpex.com/emails/setup-email-accounts-on-iphone
It’s great to be able to access your email on the move. This guide will provide a step-by-step guide on how to add your email account with IMAP to the Mail app on your iPhone.
Kindly follow these instructions in order to set up your webmail on your iPhone.
Before you get started, you need to have your email settings and password handy. To get the correct settings for your email account, log in to your Verpex control panel, go to the Email tab, and select Email Configuration from the side menu.
1. Select Settings from the home screen of your iPhone, scroll down and click Passwords and Accounts
2. Select Mail, Contacts, Calendars
3. Click Add Account and click Other from the appeared list
4. Select Add Mail Account. Specify the following records in the New Account menu
**Name**: Your name will appear as the sender's name\
**Address**: Your email address that was created in your cPanel\
**Password** : Password for the email address you are using(the one used in webmail)\
**Description**: We recommend your email address( a name on account of your device, it could be anything)
5. Click Next and choose protocol type (IMAP or POP3). Input the appropriate details stated below in the 'New Account' page for the Incoming and Outgoing servers. We advise you to use IMAP.
**Incoming server:**
**Host Name** : server your account is hosted on(mail.yourdomainname.com)\
**Username** : Your email account\
**Password** : Password for the email address you are using(the one used in webmail)
**Outgoing server:**
**Host Name:** server your account is hosted on(mail.yourdomainname.com)\
**Username**: Email address\
**Password**: Password for the email address you are using(the one used in webmail)\
The settings are the same for IMAP and POP3 at this step.
6. Click Next to enable Notes and Mail, if you use IMAP Click on Save and wait for the verification to be completed
7. Once the verification is completed, choose your newly created account on the page you have been redirected to
8. Choose Advanced at the bottom of the page
9. Check if your inbox behaviours are set up correctly to make sure your emails are saved to the right place. You need to select the following folders on the server:\
Drafts box: Drafts\
Sent box: Sent\
Deleted box: Trash\
Archive box: Archive\
If no folder, or a different folder, is selected, tap the mailbox and select the correct folder on the server.\
Note: If the folder you are looking for is not listed, log in to Webmail and place an email in the missing folder. Then try again, it should now show up in the list. Set the correct mailbox behaviours for folders on the server
If you set an IMAP connection you need to use port 993 (with SSL) or port 143 (without SSL). Set IMAP Path Prefix to INBOX. If you chose POP3 you need to use port 995 (with SSL) or port 110 (without SSL). For the Outgoing Server (SMTP) select port 465 (with SSL) or port 25 (without SSL):
To configure additional settings for the outgoing server, you will need to return to the previous menu and then go to Outgoing Mail Server by clicking on the hostname of the server:
Once you have verified your settings, your account is active and ready to use. You can now send and receive emails from your Mail app on your iPhone.
# Spam Filtering Customisation
Source: https://kb.verpex.com/emails/spam-filtering-customisation
Spam Filtering is a user-friendly email utility which provides advanced smart mail account protection, it examines incoming mail for different spam characteristics, it decides whether mail should be considered spam or not.
Nowadays, with the rising amount of spam and email threats, whether it’s spam, phishing, viruses, malware or spoofing, spam filtration is an essential part of filtering, managing and protecting any business email account from unsolicited bulk email before it reaches your inbox, A vast majority of security attacks begin with email-borne threats. Spam filters recognize, protect and stop messages containing malicious links, spam, phishing, and weaponized attachments.
The Spam Filters tool protects your business from undesired issues and expenses. It uses a robust scoring framework and plug-ins to filter email and block spam. Spam Filters tool is provided by default on our servers, it can be set up through the cPanel, and the guidelines on how to do that is stated below.
* Login to cPanel and navigate to the Email section
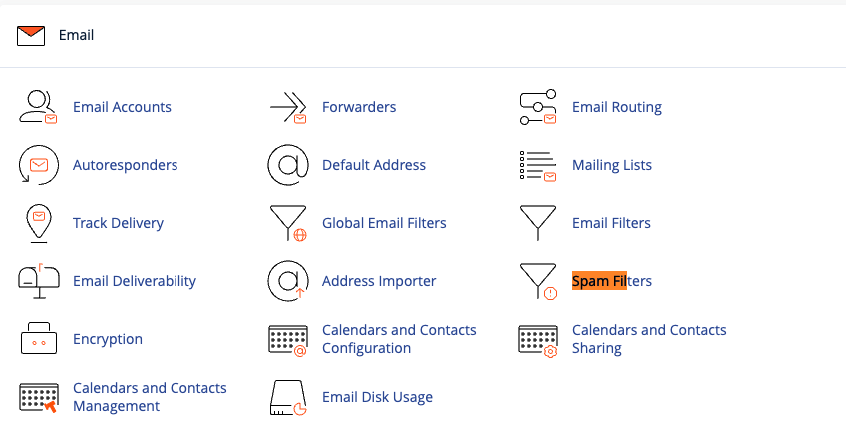
* Click the Spam Filters menu
* Toggle the button near Process New Email and Mark them as Spam to enable/disable
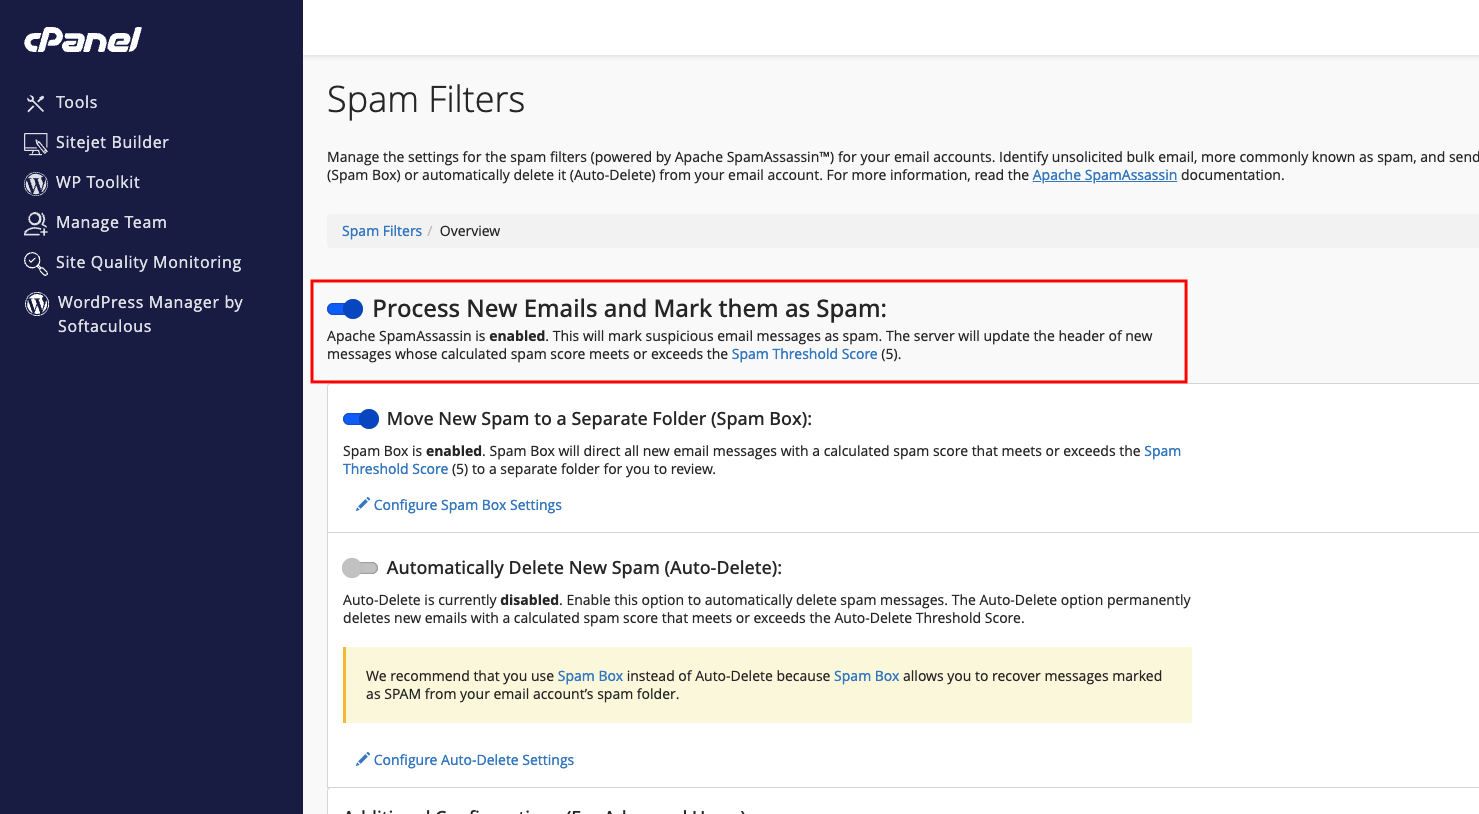
Required Score:\
0 means everything will be marked as Spam\
5 is the default\
10 means nothing will be marked as Spam
Setting up Spam Filters once works for all of the emails on your account. Spam Filters will mark your spam so it is easy to notice. (You can even make spam filters automatically delete those emails.)\
**NOTE**: You can use Spam Box or Email Filtering to move the spam from your Inbox to another folder.
Move New Spam to a Separate Folder (Spam Box):
This feature makes Exim create a separate spam folder in your mailbox, which will collect incoming emails marked as spam.
By default, emails with the score of 5 are considered spam. You can adjust the filter according to your needs. Spam threshold can be configured using the Spam Threshold Score option.
Spam messages have higher calculated spam scores than regular messages. For example, an account that uses a Spam Threshold Score of 10 will only mark messages that are obviously spam.
You can delete messages collected by Spam Box using Configure Spam Box Settings >> Empty the Spam Box folder or Empty all Spam Box\
folders buttons:
**Automatically Delete New Spam (Auto-Delete):**
This feature removes the emails which meet or exceed the spam score set.To configure, go to Automatically Delete New Spam (Auto-Delete) widget and turn it on. The required score can be set using Auto-Delete Threshold Score or Configure Auto-Delete Settings.
The Auto-Delete Threshold Score does not affect the Spam Threshold Score.
To access advanced settings, scroll down to the **Additional Configurations >> Show Additional Configurations:\
**\
**Whitelist/Blacklist**
It is possible to add some email addresses or domains to the whitelist/blacklist using the Whitelist (Emails Always Allowed) and Blacklist (Emails Never Allowed).
If SpamAssassin often blocks some email senders and marks their emails as spam (incorrectly), it is possible to add the sender to the whitelist via Edit Spam Whitelist Settings. To whitelist a specific sender, just enter it into the whitelist\_from field:
Some emails may be mistakenly detected not as spam by Apache SpamAssassin. If these email messages often come from specific email senders, you can blacklist them using Edit Spam Blacklist Settings. SpamAssassin will mark them as spam. To blacklist certain senders, enter it into the blacklist\_from field:
**Calculated Spam Score Settings:**
Each incoming mail is screened by Spam Filters and given a score, based on the spam characteristics. Click Configure Calculated Spam Score to configure individual test scores.
Click Add New "scores" Item, find the score field and configure it as needed:
**NOTE**: the lower your score, the more restrictive filter will be. Once done, Save at the bottom of the page.
# Synchronizing cPanel® Calendar, Contacts, and Email on Android with ActiveSync
Source: https://kb.verpex.com/emails/synchronizing-cpanel-calendar-contacts-and-email-on-android-with-activesync
ActiveSync (Exchange) is a protocol that allows the synchronisation of emails, contacts and calendar appointments from a server to mobile devices.
**Why would I want to use ActiveSync?**
Before the inclusion of ActiveSync support, owners of Android mobile phones and tablets had limited choices for connecting to their cPanel calendars because Android does not natively support CalDAV. The best solution available was to install a third-party application which would serve as\
an intermediary "connector" between the device's local calendar and a CalDAV server. The disadvantage of this approach is that it requires each end-user to install and configure the app.
With ActiveSync, you can configure and synchronize your account on the mobile device directly without the use of any third-party app
This article will show you how to set up ActiveSync (Exchange) account on your Android device.
To get started, a mailbox must have been created before setting up an email account as ActiveSync (Exchange). You can create a mailbox using this[ link](/emails/creating-an-email-account-on-your-cpanel-hosting). Once a mailbox has been created, go to cPanel’s Calendars and Contacts interface or the welcome email that your administrator sent to you after signup to retrieve your calendar and contact configuration details from cPanel.
1. Open your Android device Settings and tap the Accounts and Backup menu (on some devices and versions of Andriod, this menu can be called Accounts or Cloud and Accounts or Accounts and backup)
2. Choose the Accounts tab:
3. Tap the Add Account option at the bottom of the page
4. On the next screen choose the Exchange option or Microsoft Exchange ActiveSync
5. The next screen will prompt you to enter your full email address([test@verpex.com](mailto:test@verpex.com)) Then, tap Set up manually.
6. Tap Next to proceed to the next step. You will enter the correct password for the mailbox:
7. When the password is indicated, press Next. Here you will need to fill in the correct Exchange server settings. We recommend using secure SSL settings where possible, Make sure to use the following settings for your account:
**Username**: Your email address\
**Password**: The password for the mailbox\
**Server URL**: privateemail.com\
**Port**: 2091\
Security Type\*\*: SSL/TLS
8. When all settings are listed correctly, enter the Name of the email account you just added in the email app and tap Next to complete the setup:
Enable push updates (optional):
Return to the list within the Settings app.\
Tap the newly added account.\
Tap Account settings.\
If you are prompted to select the account again, tap the same account.\
Tap Sync frequency, and change the setting to Automatic (Push).
Protip: When creating calendar events, make sure to select the desired calendar from the menu, as the default choice might be another account you already configured previously.
Calendar events from your hosting account will now be visible in your device's Calendar app. Any changes made to your schedule will show up on your device with a refresh.
Your cPanel calendars, contacts, and email has now been synchronised on Andriod with ActiveSync
**Some issues that may occur and how to resolve them**
**Calendar events created on your device do not appear on other devices**
Not all Android devices have a sync frequency or similar settings. If your account seems to be taking an excessive amount of time to sync and If you cannot find this setting, do the following:
Go to the Accounts menu in your device’s Settings. Enable Auto-sync data.
**Duplicate events are displayed on the calendar**
If you see duplicate events in your device's calendar, there are two possible causes:
If you sync your account to two or more email apps, each app will add a copy of the event to your calendar. If you see duplicate events marked by different colours, this is likely the cause. To resolve this issue, unsync or log out of the account in all but one mail app.
Very rarely, if your account's disk exceeds the quota, you may see multiple duplicate events on your calendar. You can only fix this by bringing the account's disk space below the quota.
# Using Gmail with your Verpex Web Hosting
Source: https://kb.verpex.com/emails/using-gmail-with-your-verpex-web-hosting
If you wish to use your personal or business emails with Gmail, there are a couple of ways that you can achieve this. We explain these below, but if you need any further assistance please don't hesitate to get in touch.
1. Setting up an email forwarder from our server to your Gmail address. The first method involves setting up a forwarder in your cPanel with us, to forward to your Gmail.com address. The biggest downside with this is it involves another 'mail hop' and as such there is the possibility that Gmail will mark legitimate forwarded emails as spam. There's not much we can do about this, since the filtering occurs on Gmail's side.
Once you’ve set up the mail forwarder in cPanel under 'Forwarders', you can head over to:
* Settings tab in Gmail
* Click See all settings
* Click on Accounts and Import
* Click on Send mail as: \[Add another email address]
Next, a series of screens to set up your mailbox will show up.
* First, you will need to enter your name, and e-mail address with us, the server hostname, port 465 with SSL and then click on Add Account.
* Then you will be sent a verification code to your mailbox with us at Verpex, check your mailbox and enter the verification code, then click Verify.
2. Checking your mailbox via POP3. Gmail has the ability to check an external mailbox for messages and download them using POP3. The messages will appear in your Gmail account as if they were delivered directly there. The only downside using this method is that emails can come through more slowly than if you were accessing the mailbox directly. Gmail usually checks and downloads messages every 15 minutes. However, there is a much smaller chance of Gmail blocking or missing messages that it thinks might be "spam" with this method.
From the same screen as in the previous method, this time you click on "Check mail from other accounts: \[Add a mail account]”. Then enter your e-mail address with us and enable the option for POP3. POP server is you server hostname, port 995 and SSL always on.
Once that’s done, you will get the option to choose whether you wish to send e-mail as this address or not. If you choose Yes you will be prompted to also do the above step Send mail as: , and if you choose No you will only be able to see incoming e-mails.
# What is the Limit on the Email Attachment Size?
Source: https://kb.verpex.com/emails/what-is-the-limit-on-the-email-attachment-size
We forward email with attachments for up to 50Mb per email(including messages and attached files) . The size limit applies to the combined size of all the message elements, including text, headers, and all attached files. A server can only process so many requests at the same time, these size limits are put in place to avoid a total system collapse. Attaching files larger than 50 MB will result in a bounce-back email notification informing you that the attachment size has been exceeded.
Email size limits are used for performance, database size and security reasons:
**Performance.** Email systems are not designed to transfer large volumes of data.\
**Database/storage size**. Email data have limits because they are stored on a server.\
**Security**. A large number of messages could take a whole system down. Email systems usually use a limited number of ports to retrieve data. This makes them candidates for potential security vulnerabilities( DoS attacks)
An email service provider dictates its limit by performance and security reasons. When preparing your email newsletters, there are things you should keep in mind from the maximum size of file attachments and the HTML part to the email client of the recipient to email deliverability.
# Why Does My Mailbox Get Full?
Source: https://kb.verpex.com/emails/why-does-my-mailbox-get-full
There is usually a storage limit for a mailbox account, if this limit is reached, the server will issue a warning to your mail client that your mailbox is full. The "mailbox full" error message simply means that the recipient's mailbox is full and has exceeded the memory size limit and can no longer hold any messages. It means nothing more can be put in/received/added. You might be able to send emails. But what good is it to send emails, if you can’t receive any?
Your mailbox is full due to the high volume of emails, this might be promotional and marketing email notifications, spam emails or any other service you may have clicked to receive messages about new products or information. It might be to the attachments attached to emails sent and received or your inbox is full.
Your mailbox is full because you have exceeded the size limit/maximum storage limit allotted to your email account.
To resolve the issue with your mailbox full, you need to check your social media accounts, unsubscribe from these promotional emails and block unwanted email lists or newsletters, mass delete junk and spam emails, empty folders that are not in use and clean up your inbox. After these steps have been taken, proceed to increase the mail quota of your mailbox.
To increase your mailbox:
* Login to your cPanel account.
* Under the Mail section, click on **Email Accounts** . This will open the Email Accounts page.
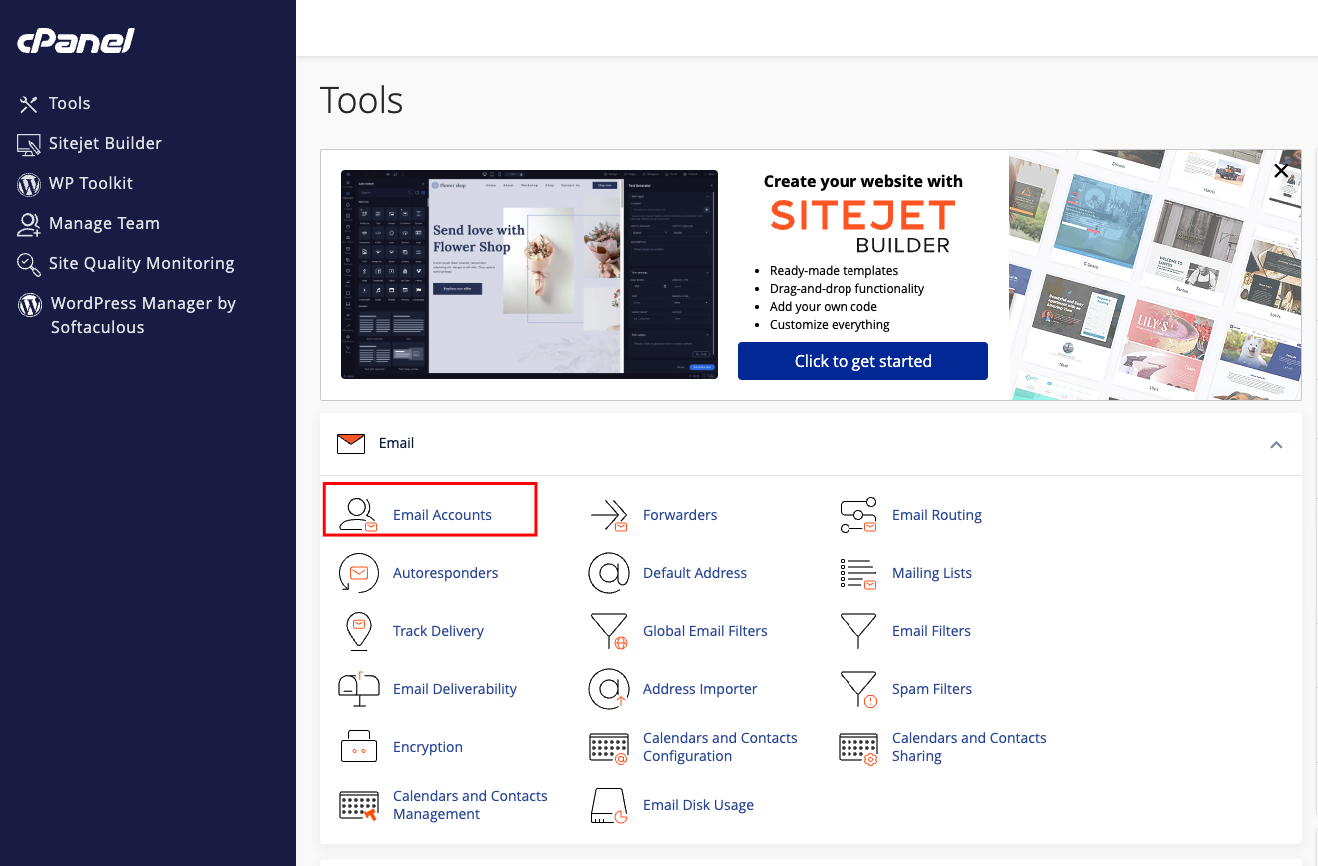
* Locate an email account for which you wish to change the mailbox quota.
* Click **Manage**
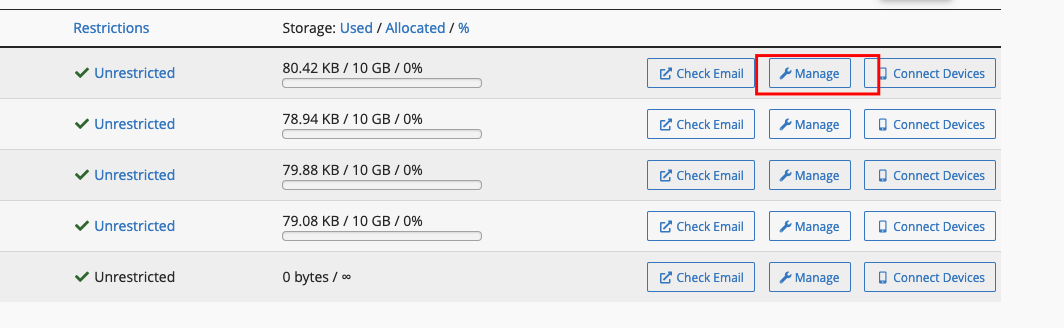
* Scroll down to **STORAGE**
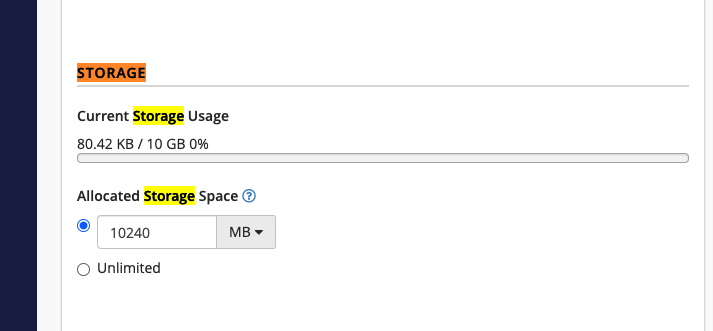
* Enter the new mailbox quota size or check the checkbox in front of Unlimited(this set it to infinite)
* Click **Update Email Settings** to save.
# Adding a New Customer to Your Enhance Reseller Account
Source: https://kb.verpex.com/enhance/adding-a-new-customer-to-your-enhance-resellers-account
Learn how to set up a control panel URL, create a package, and add a new customer to your Enhance reseller account.
First, we need to make sure we have created a universal URL for our customers to log into their own accounts at. This is the URL you will give your customers when they ask you how they can log into their control panels
1. Log into your Enhance control panel, then click on "Settings > Platform and type in “cp.yourdomain.com”, replacing “yourdomain.com” with the name of your primary domain. We use “cp” by default but you can change that to anything you would like
2. Now we need to create a package. Click Settings > Packages > Add a Package
If you have already done this, skip this step and go to step 3. There are tons of features you can enable for your packages. Click ‘Add’ at the bottom of the screen when you’re done customizing this package to your liking.
3. Now go to Customers > Add Customer" on the left hand pane. Fill in the details for your customer. No website data goes here yet
Click Add when done
That’s it! You have now created a customers account and websites can now be added by continuing these steps
4. Now that you have created the customers account, you can “impersonate” him by clicking the Impersonate button which will now take you to that customers dashboard and allow us to add websites:
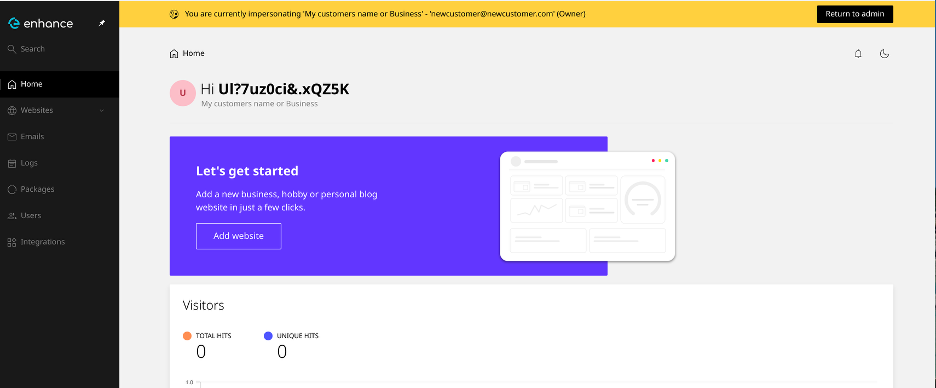
4. To add websites, you can now do this while impersonating the client or logging into his control panel using the URL you specified earlier and the login credentials. Click Add Website
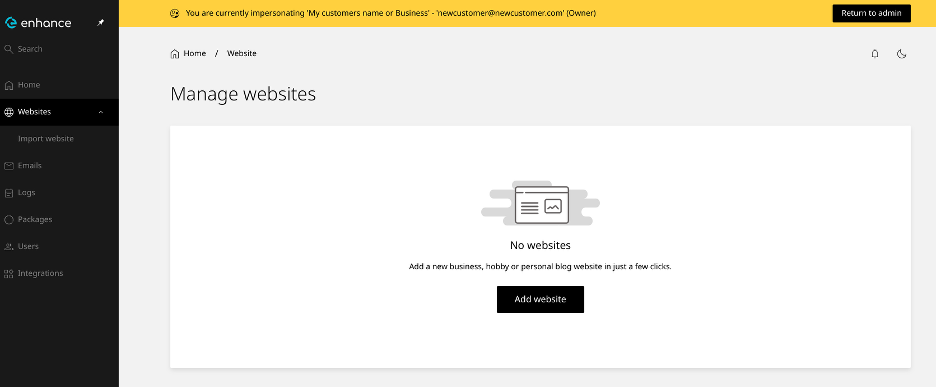
5. You can add an empty website space, or install/manage WordPress using the WordPress toolkit!
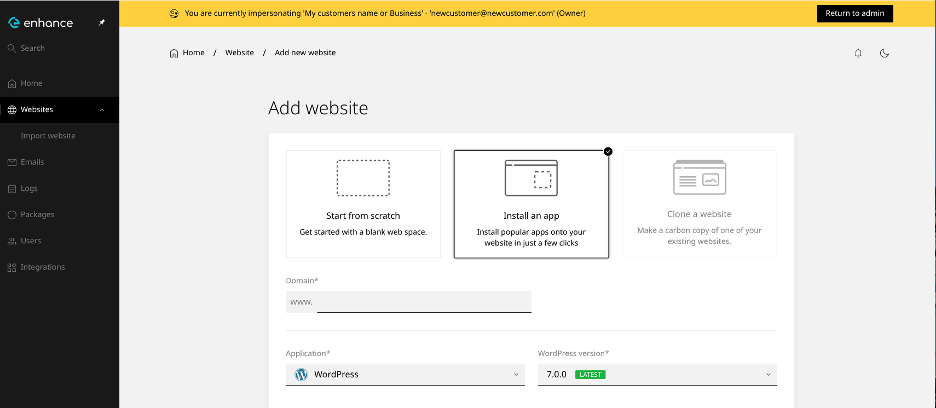
5. If you installed WordPress, you can go into the WordPress Toolkit by clicking “manage” down in the applications section
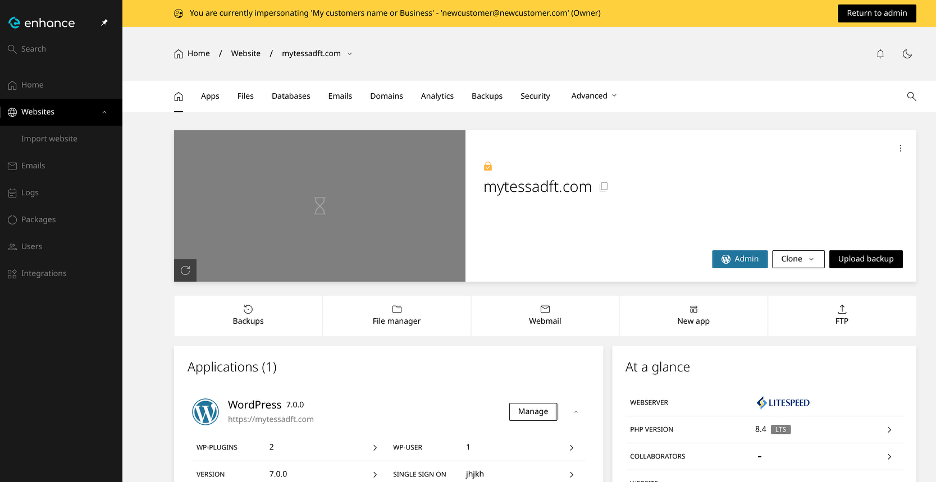
That’s it! You have now added a customer to your resellers account, assigned a package for him, and accessed the WordPress toolkit
# Changing PHP Versions and Settings in Enhance
Source: https://kb.verpex.com/enhance/changing-php-versions-and-settings-in-enhance
Learn how to change the PHP version and customize php.ini settings for your website in the Enhance control panel.
## Changing the PHP version
To change the active PHP version, follow these steps:
1. Log in to your Enhance control panel.
2. In the left sidebar, click **Websites**:
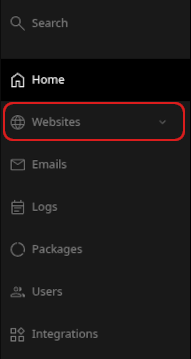
3. On the **Manage websites** page, click the website you want to manage.
4. A list of tabs appears at the top of the page. Click the **Advanced** tab, and then click **Developer tools**:
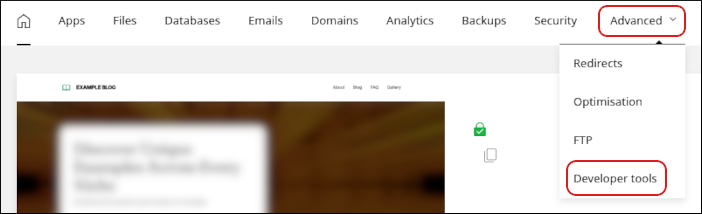
5. In the **PHP** section, in the **Version** list box, select the PHP version you want to use for your site:
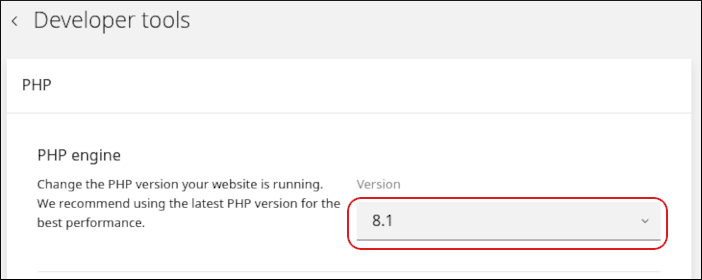
6. Click **Update**.
Make sure the new PHP version is compatible with any applications you are running. Otherwise, your website may not work correctly.
## Changing PHP settings
You can change php.ini directives to customize your PHP environment. To do this, follow these steps:
1. Log in to your Enhance control panel.
2. In the left sidebar, click **Websites**:

3. On the **Manage websites** page, click the website you want to manage.
4. A list of tabs appears at the top of the page. Click the **Advanced** tab, and then click **Developer tools**:

5. In the sidebar, click **php.ini editor**:
6. In the **php.ini editor** section, click **Add directive**:
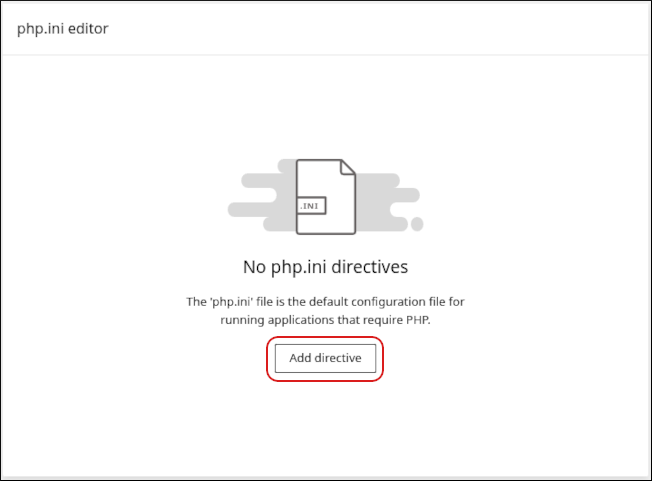
7. In the **Directive** text box, type the name of the directive you want to configure:
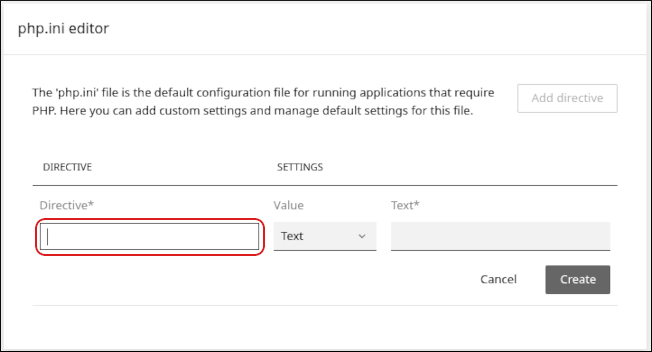
8. In the **Value** list box, select **Text** or **Boolean**:
1. For a text value, type the value in the **Text** text box.
2. For a boolean value, click **Enable** or **Disable**.
9. Click **Create**. The directive appears in the list of configured directives.
10. To make the new *php.ini* settings take effect, follow these steps:
* In the left sidebar, click **PHP**.
* In the **Restart PHP container** section, click **Restart**.
## Related articles
* [Managing your WordPress site in Enhance](/enhance/managing-your-wordpress-site-in-enhance)
* [Installing an SSL certificate in Enhance](/enhance/installing-an-ssl-certificate-in-enhance)
* [Managing your Domains in Enhance](/enhance/managing-your-domains-in-enhance)
* [Managing your Email in Enhance](/enhance/managing-your-email-in-enhance)
* [Using the File Manager in Enhance](/enhance/using-the-file-manager-in-enhance)
* [Managing Backups in Enhance](/enhance/managing-backups-in-enhance)
* [Managing your MySQL databases in Enhance](/enhance/managing-your-mysql-databases-in-enhance)
* [Managing FTP accounts in Enhance](/enhance/managing-ftp-accounts-in-enhance)
* [Configuring SSH access in Enhance](/enhance/configuring-ssh-access-in-enhance)
# Configuring SSH Access in Enhance
Source: https://kb.verpex.com/enhance/configuring-ssh-access-in-enhance
Learn how to configure SSH access to your account using key-based or password-based authentication in the Enhance control panel.
You can configure key-based authentication, password-based authentication, or both. This article shows you how to set up both methods.
## Configuring SSH key authentication
You can enable SSH key access for your account. However, before you follow the procedure below, make sure you generate a key pair (public key and private key) first.
To enable key-based SSH access to your account, follow these steps:
1. Log in to your Enhance control panel.
2. In the left sidebar, click **Websites**:

3. On the **Manage websites** page, click the website you want to manage.
4. A list of tabs appears at the top of the page. Click the **Advanced** tab, and then click **Developer tools**:
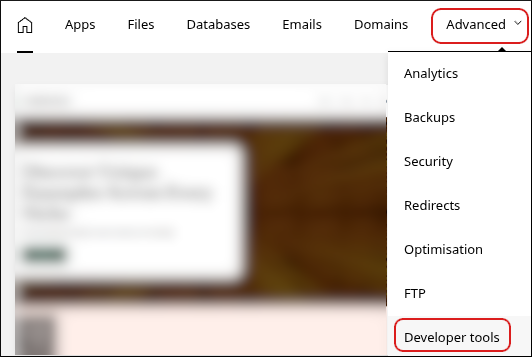
5. The **Developer tools** page appears. In the left sidebar, click **SSH key manager**:
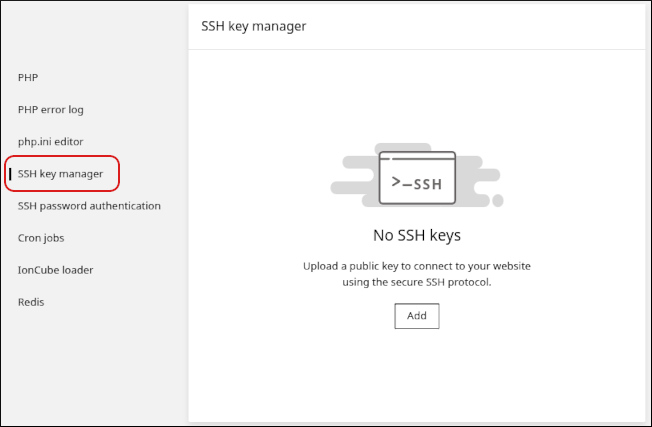
6. Click **Add**.
7. In the **Name** text box, type a descriptive name for the key.
8. In the **Public key** text box, paste the text of the public key. Alternatively, you can upload the public key file directly by clicking **Upload file**.
The public key filename usually ends with a *.pub* extension. Make sure you upload your *public* key, and **not** your *private* key!
9. Click **Upload**. The key and the SSH command to access your account appear:
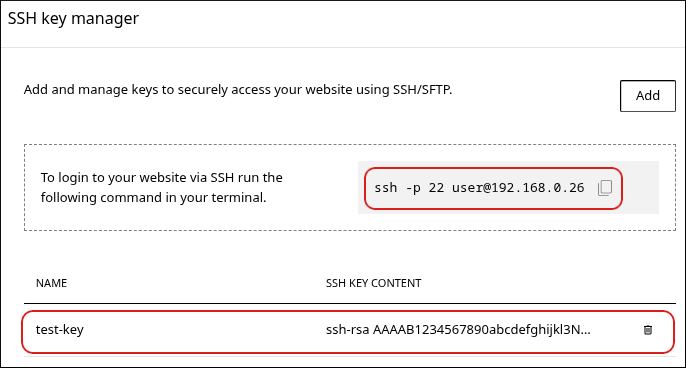
* You can add multiple keys for your account. To do this, click **Add**, and then repeat steps 7 to 9.
* To delete a key, click the trash can icon, and then click **Delete** to confirm.
## Configuring SSH password authentication
To enable SSH access to your account using a password, follow these steps:
1. Log in to your Enhance control panel.
2. In the left sidebar, click **Websites**:

3. On the **Manage websites** page, click the website you want to manage.
4. A list of tabs appears at the top of the page. Click the **Advanced** tab, and then click **Developer tools**:

5. The **Developer tools** page appears. In the left sidebar, click **SSH password authentication**:
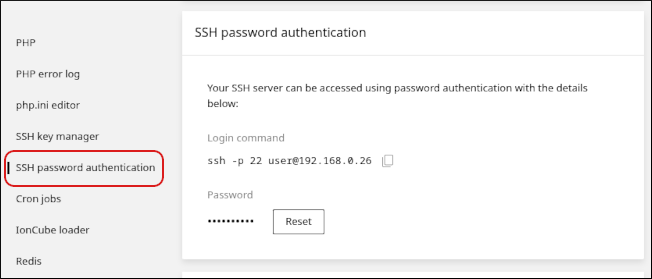
6. To reset the password, click **Reset**.
7. In the **New password** text box, type the password you want to use. Alternatively, click the key icon to automatically generate a strong, random password.
8. Click **Save**. The new password takes effect immediately.
9. Use the command under **Login command** to access your account using SSH.
## Related articles
* [Managing your WordPress site in Enhance](/enhance/managing-your-wordpress-site-in-enhance)
* [Installing an SSL certificate in Enhance](/enhance/installing-an-ssl-certificate-in-enhance)
* [Managing your Domains in Enhance](/enhance/managing-your-domains-in-enhance)
* [Managing your Email in Enhance](/enhance/managing-your-email-in-enhance)
* [Using the File Manager in Enhance](/enhance/using-the-file-manager-in-enhance)
* [Managing Backups in Enhance](/enhance/managing-backups-in-enhance)
* [Managing your MySQL databases in Enhance](/enhance/managing-your-mysql-databases-in-enhance)
* [Managing FTP accounts in Enhance](/enhance/managing-ftp-accounts-in-enhance)
* [Changing PHP versions and settings in Enhance](/enhance/changing-php-versions-and-settings-in-enhance)
# Enhance Reseller Hosting FAQ
Source: https://kb.verpex.com/enhance/enhance-reseller-hosting-frequently-asked-questions
Common questions about Enhance reseller hosting, covering migration, features, customization, pricing, and support.
## Migration
**If I switch to an Enhance Reseller plan, will you migrate my accounts for me?** Yes. Our team will transfer each cPanel account from your current plan to Enhance on your behalf.
**Can I migrate from cPanel to Enhance myself?** Yes. Enhance includes a built-in cPanel importer that transfers websites, emails, and passwords — either through the UI or via SCP. A Plesk importer is also available.
***
## Features & Functionality
**Will I lose any features by switching to Enhance?** No — on the contrary. Enhance plans include Monarx (an industry leader in server security) and a built-in WordPress Toolkit. You also get the ability to set a custom-branded control panel URL for your customers, among other additions.
**Is WordPress management included?** Yes. The WordPress Toolkit is bundled with Enhance at no extra cost. It includes one-click installs, staging, SSO, plugin management, and auto-update scheduling.
**Will my customers get access to their own control panels?** Yes. You will have a primary panel that manages all accounts, and each individual account will also have its own control panel.
**Does Enhance come with the same email settings?** Yes. Roundcube webmail is included. Settings for third-party email apps — including iPhone, Android, Outlook, and Thunderbird — remain the same.
**What about RAM and CPU? Will I get less?** No. Your plan will include the same or more RAM and CPU as the closest equivalent cPanel plan.
**Are backups included?** Yes. Enhance includes a built-in incremental backup system with granular restore options at no extra cost. S3-compatible third-party backup systems can also be configured alongside it.
**Is the Enhance control panel mobile-friendly?** Yes. Enhance is fully responsive and works on desktop, tablet, and mobile without any feature limitations.
**Does Enhance support PostgreSQL?** Yes. Enhance fully supports PostgreSQL
***
## Customization & Integrations
**How customizable is the Enhance control panel?** Enhance supports full white-label customization including logos, colors, fonts, and custom panel domains. You can also create custom hosting packages with specific feature sets and resource quotas.
**What billing platforms does Enhance integrate with?** Enhance integrates with WHMCS, Blesta, HostBill, and Upmind. A RESTful API is also available for custom integrations.
***
## Pricing
**What is the catch? The pricing seems too good to be true.** There is no catch. Because Enhance eliminates per-account cPanel licensing fees, we have significantly more flexibility on pricing — and we pass that savings on to you.
**Is this introductory pricing only?** No. These are the standard prices for our Enhance plans and are not limited to new signups or promotional periods.
***
## Support & Guarantees
**Will I still receive the same level of support on Enhance?** Yes. You will receive the same level of support we provide to all reseller customers, regardless of which control panel you are on.
**What if I don't like it?** All Enhance Reseller plans come with a 30-day money-back guarantee.
# Enhance Reseller: Managing Customers from the Panel
Source: https://kb.verpex.com/enhance/enhance-reseller-managing-customers-from-the-panel
Resellers using **Enhance Reseller Hosting** can now manage their customers directly from the **[Verpex.com](http://Verpex.com)** panel. If you have an active Enhance Reseller product, you’ll see a new **My Clients** section in the left-hand navigation, allowing you to view your customers and access customer management tools without leaving the **[verpex.com](http://verpex.com)** panel.
**Note:** The **My Customers** section is only available if you have an **active Enhance Reseller** product.
## **Accessing My Customers**
1. Log in to your **[Verpex.com](http://Verpex.com)** account at [https://clients.verpex.com/](https://clients.verpex.com/)
2. From the left-hand navigation, click **My Customers**.
![Image]() 3. You’ll see a list of all customers associated with your Enhance Reseller account.
## **[](https://kb.hosting.com/docs/enhance-reseller-managing-customers-from-hostingcom-panel#customer-overview)Customer Overview**
The **My Customers** page displays the following information for each customer:
* **Organisation** – The customer’s organisation or account name.
* **Owner** – The primary account owner and email address.
* **Packages** – The number of hosting packages assigned to the customer.
* **Websites** – The number of websites the customer currently hosts.
You can also use the **Search** bar to quickly locate a customer.
3. You’ll see a list of all customers associated with your Enhance Reseller account.
## **[](https://kb.hosting.com/docs/enhance-reseller-managing-customers-from-hostingcom-panel#customer-overview)Customer Overview**
The **My Customers** page displays the following information for each customer:
* **Organisation** – The customer’s organisation or account name.
* **Owner** – The primary account owner and email address.
* **Packages** – The number of hosting packages assigned to the customer.
* **Websites** – The number of websites the customer currently hosts.
You can also use the **Search** bar to quickly locate a customer.
![Image]() ## **[](https://kb.hosting.com/docs/enhance-reseller-managing-customers-from-hostingcom-panel#managing-a-customer)Managing a Customer**
Each customer has a **Manage** button.
Selecting **Manage** securely logs you into the customer’s Enhance control panel, allowing you to manage their hosting environment without needing their login credentials.
## **Customer Actions**
Click the **three-dot (⋮) Actions** menu next to any customer to access additional management options.
## **[](https://kb.hosting.com/docs/enhance-reseller-managing-customers-from-hostingcom-panel#managing-a-customer)Managing a Customer**
Each customer has a **Manage** button.
Selecting **Manage** securely logs you into the customer’s Enhance control panel, allowing you to manage their hosting environment without needing their login credentials.
## **Customer Actions**
Click the **three-dot (⋮) Actions** menu next to any customer to access additional management options.
![Image]() ### **Impersonate**
Logs you directly into the customer’s Enhance control panel as that customer. This allows you to troubleshoot issues or perform administrative tasks on their behalf without requiring their login credentials.
### **Suspend**
Temporarily suspends the customer’s account. Suspended customers will be unable to use their hosting services until the account is reactivated.
**Note:** Suspending a customer does not permanently remove their data.
### **Delete**
Permanently removes the customer from your reseller account.
## **Creating a New Customer**
To create a new customer:
1. Open **My Customers**.
2. Click **Create customer**.
### **Impersonate**
Logs you directly into the customer’s Enhance control panel as that customer. This allows you to troubleshoot issues or perform administrative tasks on their behalf without requiring their login credentials.
### **Suspend**
Temporarily suspends the customer’s account. Suspended customers will be unable to use their hosting services until the account is reactivated.
**Note:** Suspending a customer does not permanently remove their data.
### **Delete**
Permanently removes the customer from your reseller account.
## **Creating a New Customer**
To create a new customer:
1. Open **My Customers**.
2. Click **Create customer**.
![Image]() 3. Enter the required customer details.
4. Click **Add** to create the customer
The customer will be added to your Enhance Reseller account and will appear in the customer list.
# From cPanel to Enhance: Everything You Need to Know
Source: https://kb.verpex.com/enhance/from-cpanel-to-enhance-everything-you-need-to-know
You've just been moved onto Enhance — our modern control panel platform. Everything you're used to doing in WHM and cPanel, you can still do here. Often faster. Usually cleaner. And with features cPanel simply doesn't have. This is your translation guide.
Common questions about Enhance reseller hosting.
How to add a new customer to your Enhance account.
Managing your WordPress site in the Enhance control panel.
Enhance is built for today's hosting professional. It's quicker, more intuitive, and gives you tools that cPanel doesn't — like self-service site imports, built-in Cloudflare syncing, one-click WordPress during site creation, and real-time Slack notifications for your business.
There's a short familiarization period, as with any new tool. Most resellers are running comfortably within a day. This guide walks you through the key differences so you can hit the ground running.
# Terminology
## The language has changed slightly.
| Old | New |
| :- | :- |
| ~~WHM~~ | *Primary Panel* Your reseller-level control panel |
| ~~cPanel accounts~~ | *Customers* The accounts that sit under your Primary Panel |
| ~~Packages~~ | *Packages* Same name, same concept — no change here |
| ~~"Log in as" a cPanel account~~ | *Impersonate* How you access a customer's control panel |
# Packages
## Create your packages first.
In both panels, you'll want to create your packages before onboarding customers, so you have something to assign when they arrive.
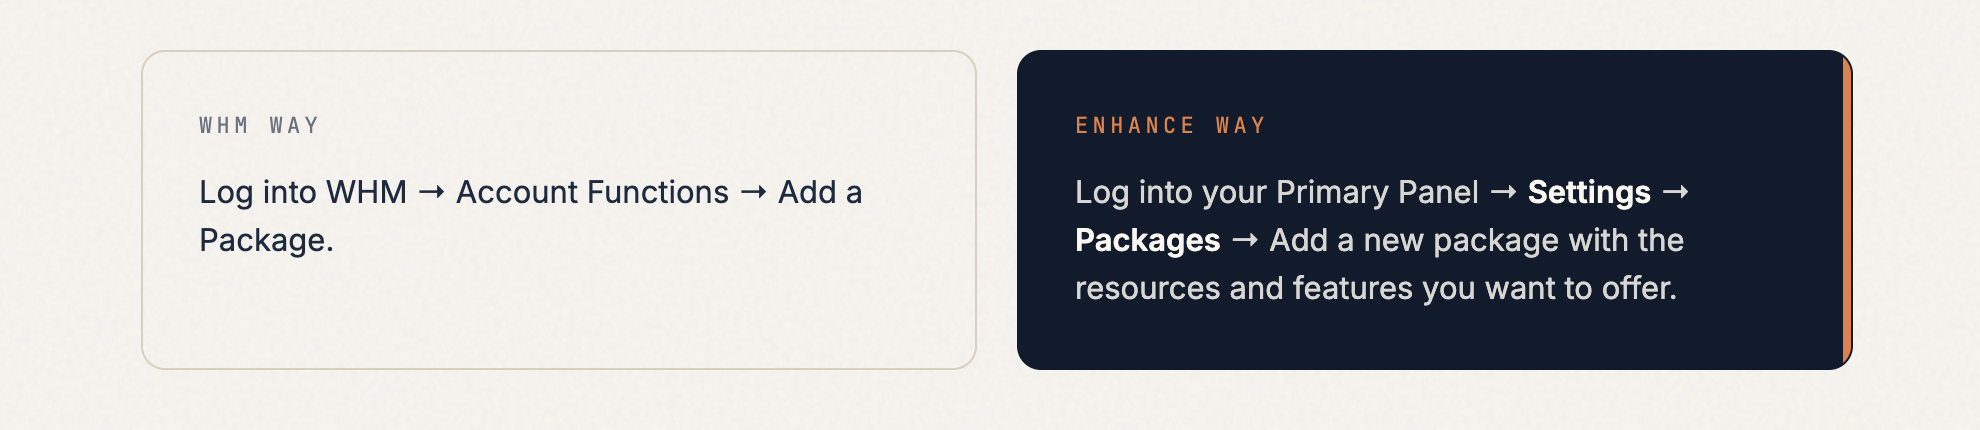
Packages in Enhance let you define disk space, bandwidth, number of websites, email accounts, databases, and a range of feature toggles — all in one cleanly laid-out screen.
# The Big One
## Adding a new customer is three steps, not one.
This is the day-to-day task you'll run most often, and it's the biggest structural difference between cPanel and Enhance — so pay close attention here.
In WHM, creating a new account was a single form: domain, password, package, Create, done. In Enhance, this is broken into three separate steps. It feels like more work at first, but it's actually more flexible — you can onboard a customer before they've picked a domain, change packages independently, and add additional websites under the same customer later without any extra setup.
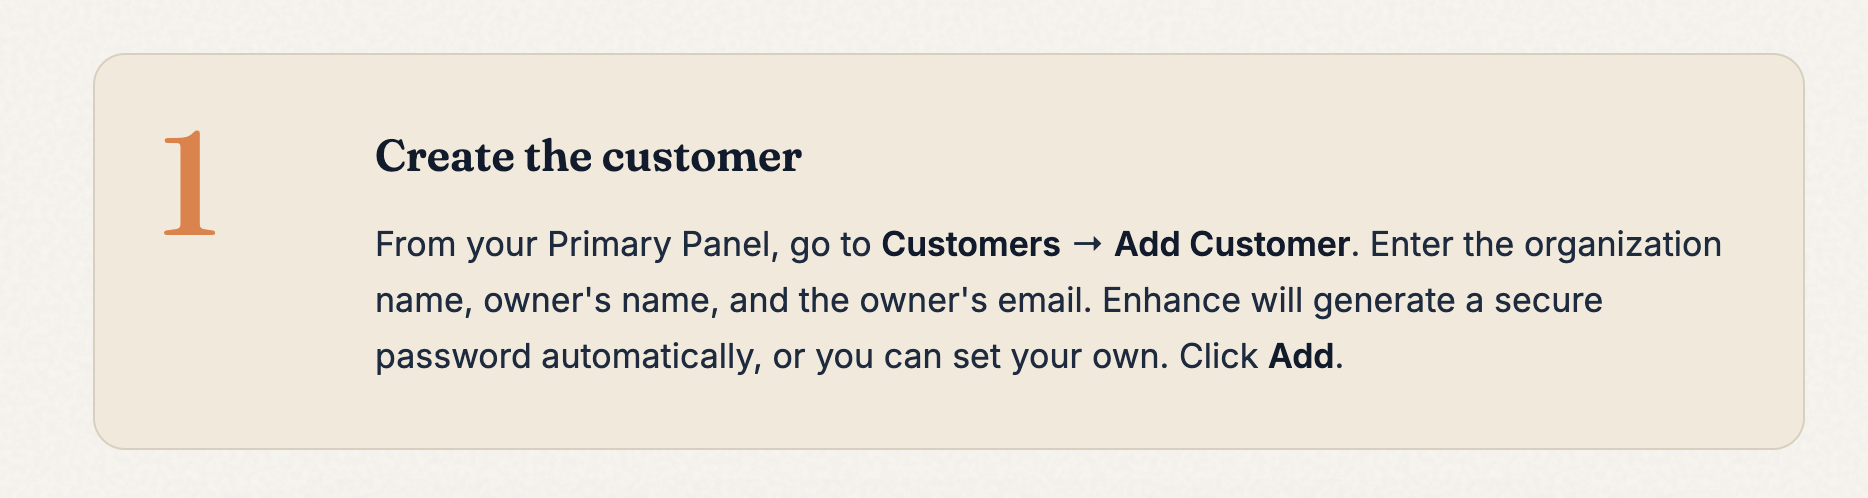
If you're onboarding a client who doesn't have their domain registered yet, you can skip Step 3 entirely for now. The customer and package are ready, and you can come back and add the website whenever the domain is live. Or hand off login details to the client so they can add their own website.
# Impersonation
## Accessing a customer's control panel.
When you need to log into a customer's account to install WordPress, set up email, check files, or troubleshoot — this is the Enhance equivalent of clicking the little orange cPanel logo in WHM.
Once you impersonate, you'll see a yellow banner across the top of the screen confirming you're inside the customer's account. A Return to Admin button in the top-right takes you back to your Primary Panel whenever you're done.
# Client Access *Important*
## Setting up your customers' login URL.
In cPanel, your customers accessed their accounts via port 2083 (e.g. yourdomain.com:2083) or a redirect to /cpanel.
In Enhance, there are no port-based logins or redirects. Instead, you set a branded control panel URL that your customers use to log in — giving your hosting business a more professional appearance from day one.
**To set this up**:
Log into your Enhance Primary Panel → Settings → Platform → Control Panel Domain Here you'll specify the URL your customers will use to access their panel — **for example cp.yourdomain.com**. You'll need to point this domain's DNS to your server before it will work. Once set, your customers visit that URL and log in with the username and password you assigned when creating their customer account.
If you haven't set a control panel domain yet, your customers won't have a URL to log into. Set this up before onboarding your first customer so the experience is seamless from the start.
# Daily Operations
## Files, email, databases & everything else.
Once you're impersonating a customer, the left-hand menu gives you everything the customer themselves would see — and it's where you'll do most of the day-to-day work a cPanel technician does.
1. **Websites** — Add websites, install WordPress, manage SSL, set PHP versions, and access the file manager for each site.
2. **Emails** — Create and manage email accounts, forwarders, and aliases.
3. **Logs** — Access server and website logs for debugging and audit.
4. **Packages** — View package resources and limits.
5. **Users** — Manage additional users with access to this customer's account.
6. **Integrations** — Connect Cloudflare, Slack, and other services.
Everything you used to click through the cPanel icons for is here, just organised into clearer sections.
# Self-Service Imports
## Bring your old sites over yourself.
This is one of the biggest benefits in Enhance and something we want to highlight specifically.
The entire site — files, databases, emails, DNS — is brought over automatically. No ticket, no waiting, no back-and-forth. For larger or more complex migrations, our support team is still here and can handle the full white-glove migration for you if you prefer.
# When You Need Us
## We're here.
If something isn't behaving the way you expect, or you can't find the equivalent of a cPanel feature you rely on — don't struggle with it.
1. Open a support ticket from your client area. Our team is fluent in both panels and can walk you through the cPanel-to-Enhance equivalent of anything.
2. For migration help specifically, open a ticket and our migrations team will take it from there for you.

# How to Deploy a Node.js Application on Enhance
Source: https://kb.verpex.com/enhance/how-to-deploy-a-nodejs-application-on-enhance
This guide walks you through deploying a Node.js application on Enhance, from uploading your files and connecting via SSH to deploying with the Node.js tool and installing dependencies.
# 1. Log in to Enhance Control Panel
1. Navigate to **Websites**.
2. Click on the **desired domain name**.
# 2. Upload Your Application Files
1. Go to **Files**.
2. In your home directory, create a folder called:
```
my-app
```
3. Upload your application files into this folder.
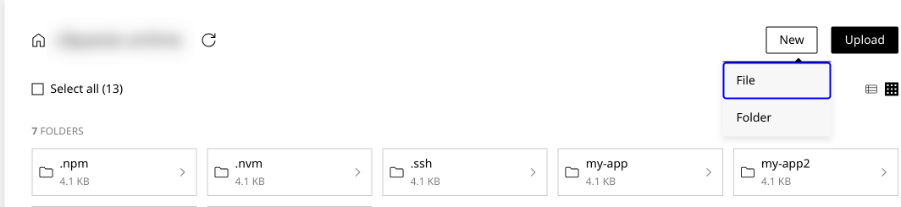
```javascript index.js theme={null}
const express = require('express');
const app = express();
// Use PORT from environment or default to 3000
const PORT = process.env.PORT || 3000;
app.get('/', (req, res) => {
res.send(`
My Node.js App
3. Enter the required customer details.
4. Click **Add** to create the customer
The customer will be added to your Enhance Reseller account and will appear in the customer list.
# From cPanel to Enhance: Everything You Need to Know
Source: https://kb.verpex.com/enhance/from-cpanel-to-enhance-everything-you-need-to-know
You've just been moved onto Enhance — our modern control panel platform. Everything you're used to doing in WHM and cPanel, you can still do here. Often faster. Usually cleaner. And with features cPanel simply doesn't have. This is your translation guide.
Common questions about Enhance reseller hosting.
How to add a new customer to your Enhance account.
Managing your WordPress site in the Enhance control panel.
Enhance is built for today's hosting professional. It's quicker, more intuitive, and gives you tools that cPanel doesn't — like self-service site imports, built-in Cloudflare syncing, one-click WordPress during site creation, and real-time Slack notifications for your business.
There's a short familiarization period, as with any new tool. Most resellers are running comfortably within a day. This guide walks you through the key differences so you can hit the ground running.
# Terminology
## The language has changed slightly.
| Old | New |
| :- | :- |
| ~~WHM~~ | *Primary Panel* Your reseller-level control panel |
| ~~cPanel accounts~~ | *Customers* The accounts that sit under your Primary Panel |
| ~~Packages~~ | *Packages* Same name, same concept — no change here |
| ~~"Log in as" a cPanel account~~ | *Impersonate* How you access a customer's control panel |
# Packages
## Create your packages first.
In both panels, you'll want to create your packages before onboarding customers, so you have something to assign when they arrive.

Packages in Enhance let you define disk space, bandwidth, number of websites, email accounts, databases, and a range of feature toggles — all in one cleanly laid-out screen.
# The Big One
## Adding a new customer is three steps, not one.
This is the day-to-day task you'll run most often, and it's the biggest structural difference between cPanel and Enhance — so pay close attention here.
In WHM, creating a new account was a single form: domain, password, package, Create, done. In Enhance, this is broken into three separate steps. It feels like more work at first, but it's actually more flexible — you can onboard a customer before they've picked a domain, change packages independently, and add additional websites under the same customer later without any extra setup.








If you're onboarding a client who doesn't have their domain registered yet, you can skip Step 3 entirely for now. The customer and package are ready, and you can come back and add the website whenever the domain is live. Or hand off login details to the client so they can add their own website.
# Impersonation
## Accessing a customer's control panel.
When you need to log into a customer's account to install WordPress, set up email, check files, or troubleshoot — this is the Enhance equivalent of clicking the little orange cPanel logo in WHM.


Once you impersonate, you'll see a yellow banner across the top of the screen confirming you're inside the customer's account. A Return to Admin button in the top-right takes you back to your Primary Panel whenever you're done.
# Client Access *Important*
## Setting up your customers' login URL.
In cPanel, your customers accessed their accounts via port 2083 (e.g. yourdomain.com:2083) or a redirect to /cpanel.
In Enhance, there are no port-based logins or redirects. Instead, you set a branded control panel URL that your customers use to log in — giving your hosting business a more professional appearance from day one.
**To set this up**:
Log into your Enhance Primary Panel → Settings → Platform → Control Panel Domain Here you'll specify the URL your customers will use to access their panel — **for example cp.yourdomain.com**. You'll need to point this domain's DNS to your server before it will work. Once set, your customers visit that URL and log in with the username and password you assigned when creating their customer account.
If you haven't set a control panel domain yet, your customers won't have a URL to log into. Set this up before onboarding your first customer so the experience is seamless from the start.
# Daily Operations
## Files, email, databases & everything else.
Once you're impersonating a customer, the left-hand menu gives you everything the customer themselves would see — and it's where you'll do most of the day-to-day work a cPanel technician does.
1. **Websites** — Add websites, install WordPress, manage SSL, set PHP versions, and access the file manager for each site.
2. **Emails** — Create and manage email accounts, forwarders, and aliases.
3. **Logs** — Access server and website logs for debugging and audit.
4. **Packages** — View package resources and limits.
5. **Users** — Manage additional users with access to this customer's account.
6. **Integrations** — Connect Cloudflare, Slack, and other services.
Everything you used to click through the cPanel icons for is here, just organised into clearer sections.
# Self-Service Imports
## Bring your old sites over yourself.
This is one of the biggest benefits in Enhance and something we want to highlight specifically.


The entire site — files, databases, emails, DNS — is brought over automatically. No ticket, no waiting, no back-and-forth. For larger or more complex migrations, our support team is still here and can handle the full white-glove migration for you if you prefer.
# When You Need Us
## We're here.
If something isn't behaving the way you expect, or you can't find the equivalent of a cPanel feature you rely on — don't struggle with it.
1. Open a support ticket from your client area. Our team is fluent in both panels and can walk you through the cPanel-to-Enhance equivalent of anything.
2. For migration help specifically, open a ticket and our migrations team will take it from there for you.

# How to Deploy a Node.js Application on Enhance
Source: https://kb.verpex.com/enhance/how-to-deploy-a-nodejs-application-on-enhance
This guide walks you through deploying a Node.js application on Enhance, from uploading your files and connecting via SSH to deploying with the Node.js tool and installing dependencies.
# 1. Log in to Enhance Control Panel
1. Navigate to **Websites**.
2. Click on the **desired domain name**.
# 2. Upload Your Application Files
1. Go to **Files**.

2. In your home directory, create a folder called:
```
my-app
```
3. Upload your application files into this folder.

```javascript index.js theme={null}
const express = require('express');
const app = express();
// Use PORT from environment or default to 3000
const PORT = process.env.PORT || 3000;
app.get('/', (req, res) => {
res.send(`
My Node.js App
🚀 Node.js App is Running!
Hosted on Enhance
Server time: ${new Date().toLocaleString()}
Node version: ${process.version}
`);
});
app.get('/health', (req, res) => {
res.json({
status: 'ok',
uptime: process.uptime()
});
});
// Listen on all interfaces (required for proxying)
app.listen(PORT, '0.0.0.0', () => {
console.log(`App running on port ${PORT}`);
});
```
```json package.json theme={null}
{
"name": "demo-node-app",
"version": "1.0.0",
"description": "A simple Node.js demo app for Enhance hosting",
"main": "index.js",
"scripts": {
"start": "node index.js"
},
"dependencies": {
"express": "^4.18.2"
}
}
```
# 3. Connect via SSH
If you don't know the SSH password, you can reset it:
1. In Enhance CP, go to:
* **Websites**
* Select your **domain**
* **Advanced**
* **Developer Tools**
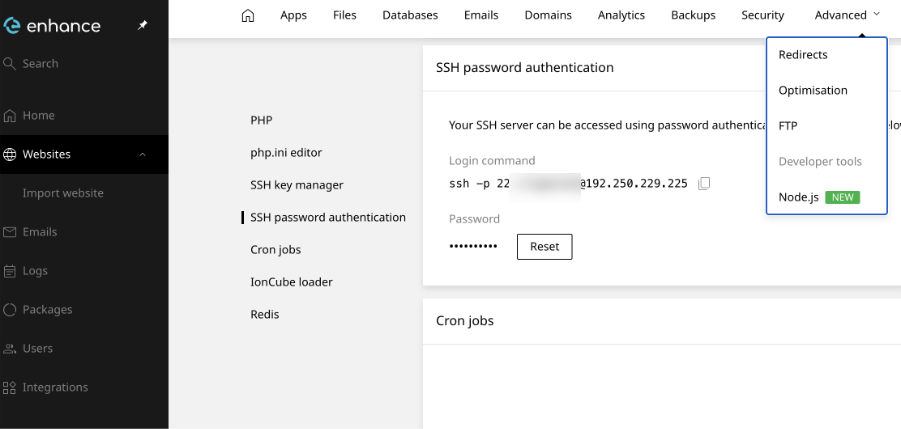
2. Scroll down to SSH Password Authentication.
3. Click Reset and set a new password.
**SSH Example**
```
ssh -p 22 username@192.250.229.225
```
Once connected:
```
username@s4515:~$ ls
my-app public_html
```
Navigate to your application directory:
```
username@s4515:~$ cd my-app
```
# 4. Deploy the Application
Return to the Enhance Control Panel and deploy the application using the Deploy Node.js tool.
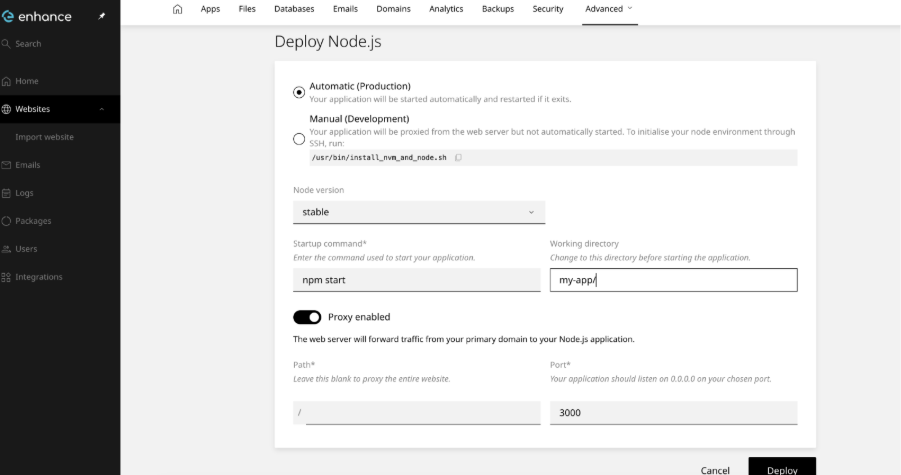
Configure the deployment according to the deployment screen and point it to your `my-app` directory.
# 5. Install Dependencies
After the deployment has been created, return to your SSH session and run:
```
npm install
```
```
run `npm fund` for details
```
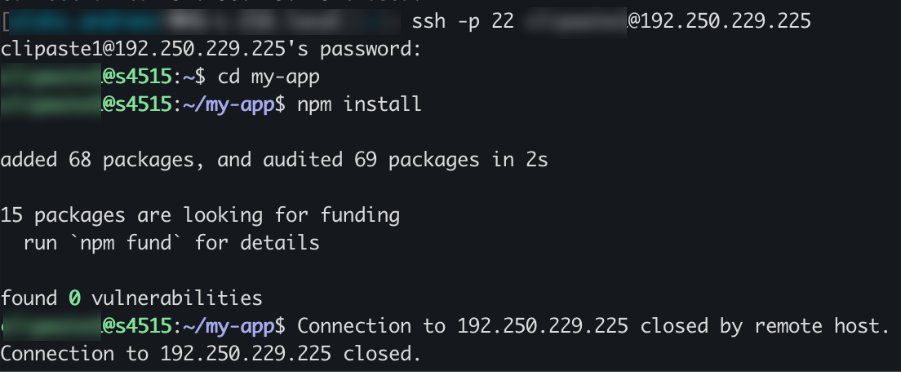
Your Node.js application should now be successfully deployed on Enhance

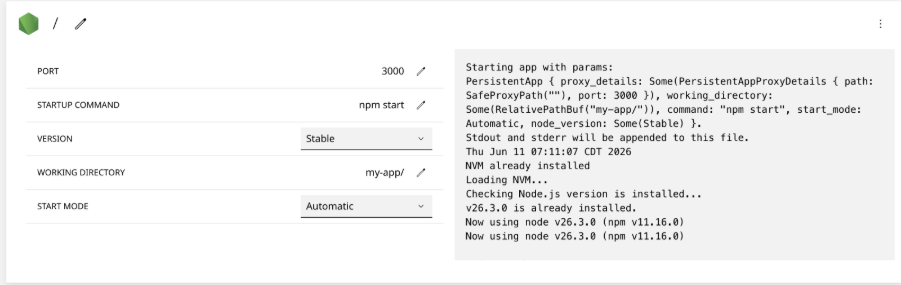
# Installing an SSL Certificate in Enhance
Source: https://kb.verpex.com/enhance/installing-an-ssl-certificate-in-enhance
Learn how to install a custom SSL certificate for a website in the Enhance control panel.
In many cases, you do not need to install an SSL certificate manually. For example, if you are using the free SSL certificate, it is installed automatically. Use this procedure only if you need to install an SSL certificate that you purchased from Verpex or another provider.
## Install an SSL certificate
1. Log in to your Enhance control panel.
2. In the left sidebar, click **Websites**.

3. On the **Manage websites** page, click the website you want to manage.
4. Click the **Security** tab.

5. On the **Security** page, in the **SSL certificates** section, click **Install custom SSL**.
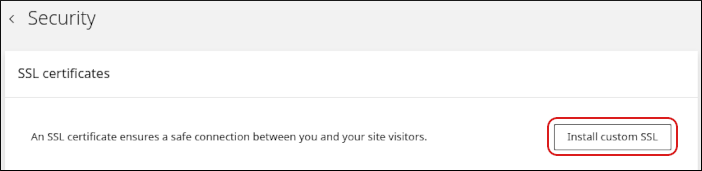
6. In the **Domain** list, select the domain where you want to install the SSL certificate.
7. In the **Certificate (CRT)** field, paste the certificate text. To upload the certificate file instead, click **Upload file**.
8. In the **Private key** field, paste the private key text. To upload the private key file instead, click **Upload file**.
9. Click **Upload**.
The Hosting Panel installs the certificate and private key for the selected domain.
## Related articles
* [Managing your WordPress site in Enhance](/enhance/managing-your-wordpress-site-in-enhance)
* [Managing your Domains in Enhance](/enhance/managing-your-domains-in-enhance)
* [Managing your Email in Enhance](/enhance/managing-your-email-in-enhance)
* [Using the File Manager in Enhance](/enhance/using-the-file-manager-in-enhance)
* [Managing Backups in Enhance](/enhance/managing-backups-in-enhance)
* [Managing your MySQL databases in Enhance](/enhance/managing-your-mysql-databases-in-enhance)
* [Managing FTP accounts in Enhance](/enhance/managing-ftp-accounts-in-enhance)
* [Changing PHP versions and settings in Enhance](/enhance/changing-php-versions-and-settings-in-enhance)
* [Configuring SSH access in Enhance](/enhance/configuring-ssh-access-in-enhance)
# Managing Backups in Enhance
Source: https://kb.verpex.com/enhance/managing-backups-in-enhance
Learn how to manage automatic backups and restore your website, email, and databases in the Enhance control panel.
To manage your backups and restore them if necessary, follow these steps:
1. Log in to your Enhance control panel.
2. In the left sidebar, click **Websites**:

2. On the **Manage websites** page, click the website you want to manage.
3. A list of tabs appears at the top of the page. Click the **Backups** tab:

4. The **Backups** page appears with a list of automatic backups generated for your account:
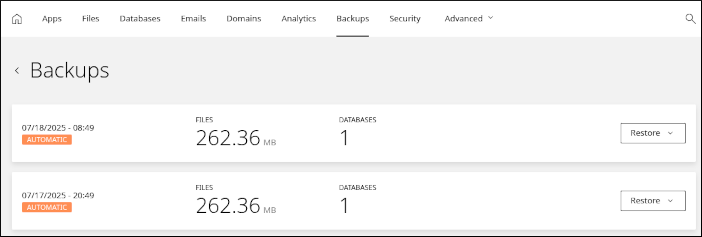
5. To restore a backup, click **Restore** and then select an option:
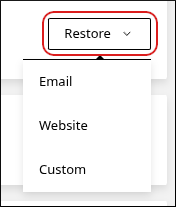
* **Email**: This option restores email messages for any email accounts you have.
Be careful restoring emails. Any email messages newer than the date of the backup may be lost.
* **Website**: This option restores the website files for your account.
* **Custom**: This option enables you to select a custom combination of items to restore. You can restore email, website files, and databases:
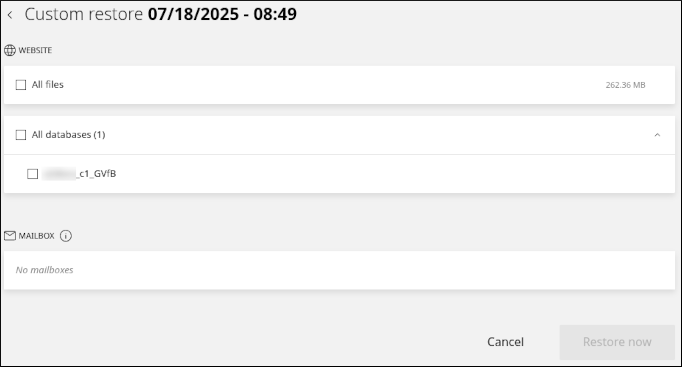
## Related articles
* [Managing your WordPress site in Enhance](/enhance/managing-your-wordpress-site-in-enhance)
* [Installing an SSL certificate in Enhance](/enhance/installing-an-ssl-certificate-in-enhance)
* [Managing your Domains in Enhance](/enhance/managing-your-domains-in-enhance)
* [Managing your Email in Enhance](/enhance/managing-your-email-in-enhance)
* [Using the File Manager in Enhance](/enhance/using-the-file-manager-in-enhance)
* [Managing your MySQL databases in Enhance](/enhance/managing-your-mysql-databases-in-enhance)
* [Managing FTP accounts in Enhance](/enhance/managing-ftp-accounts-in-enhance)
* [Changing PHP versions and settings in Enhance](/enhance/changing-php-versions-and-settings-in-enhance)
* [Configuring SSH access in Enhance](/enhance/configuring-ssh-access-in-enhance)
# Managing FTP Accounts in Enhance
Source: https://kb.verpex.com/enhance/managing-ftp-accounts-in-enhance
Learn how to create, manage, and delete FTP accounts in the Enhance control panel.
## Managing FTP accounts
To manage your FTP accounts, follow these steps:
1. Log in to your Enhance control panel.
2. In the left sidebar, click **Websites**:

2. On the **Manage websites** page, click the website you want to manage.
3. A list of tabs appears at the top of the page. Click the **Advanced** tab, and then click **FTP**:
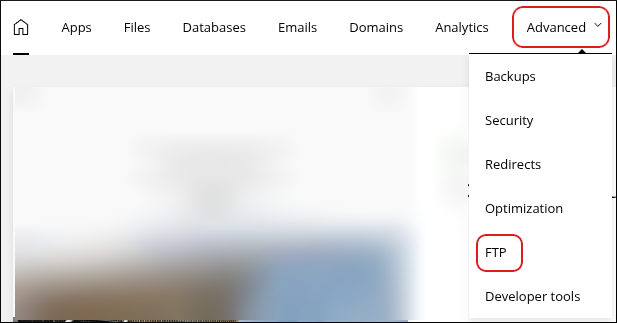
4. The **FTP accounts** page appears:
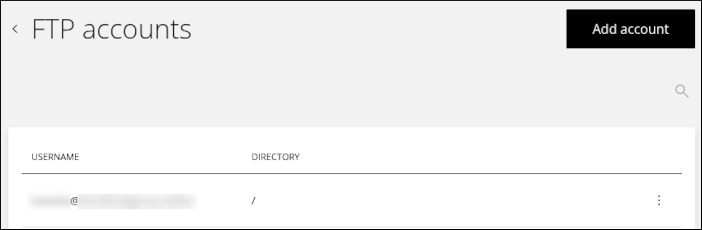
5. To add an account, click **Add account**. The **Add FTP account** dialog appears:
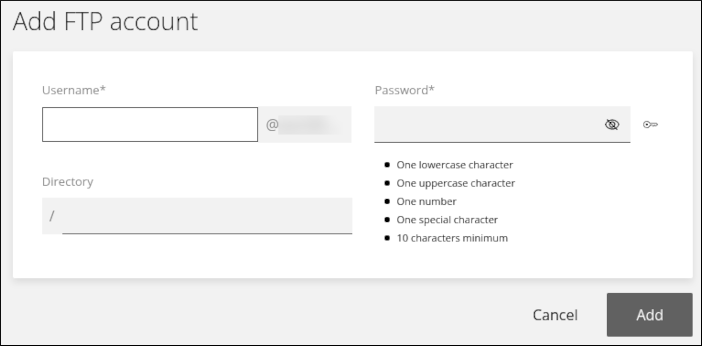
* In the **Username** text box, type the FTP username you want for the account.
* In the **Password** text box, type the FTP password you want for the account.
* In the **Directory** text box, optionally specify a different directory for the account.
* Click **Add**. The account appears in the list of FTP accounts.
6. To modify an existing account, click the three-dot icon in the list of accounts, and then click **Manage**:
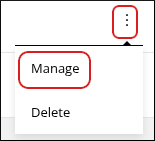
7. To delete an existing account, click the three-dot icon in the list of accounts, and then click **Delete**:
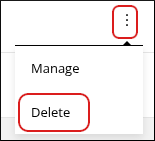
## Related articles
* [Managing your WordPress site in Enhance](/enhance/managing-your-wordpress-site-in-enhance)
* [Installing an SSL certificate in Enhance](/enhance/installing-an-ssl-certificate-in-enhance)
* [Managing your Domains in Enhance](/enhance/managing-your-domains-in-enhance)
* [Managing your Email in Enhance](/enhance/managing-your-email-in-enhance)
* [Using the File Manager in Enhance](/enhance/using-the-file-manager-in-enhance)
* [Managing Backups in Enhance](/enhance/managing-backups-in-enhance)
* [Managing your MySQL databases in Enhance](/enhance/managing-your-mysql-databases-in-enhance)
* [Changing PHP versions and settings in Enhance](/enhance/changing-php-versions-and-settings-in-enhance)
* [Configuring SSH access in Enhance](/enhance/configuring-ssh-access-in-enhance)
# Managing Your Domains in Enhance
Source: https://kb.verpex.com/enhance/managing-your-domains-in-enhance
Learn how to manage and add domains, subdomains, and aliases in the Enhance control panel.
## Managing domains in Enhance
You can manage the following settings for a domain:
* Document root directory.
* Email authentication (DKIM).
* Mail routing.
* DNS records.
To do this, follow these steps:
1. Log in to your Enhance control panel.
2. In the left sidebar, click **Websites**:

3. On the **Manage websites** page, click the website you want to manage.
4. A list of tabs appears at the top of the page. Click the **Domains** tab:

5. The **Domains** page appears:
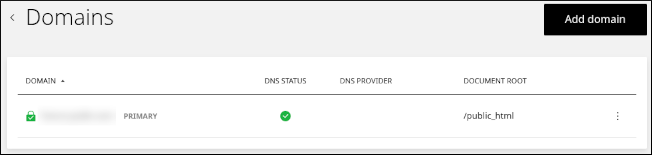
6. Locate the domain you want to manage, click the three-dot menu, and then click **Manage**:
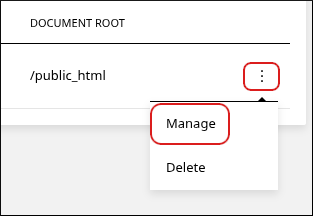
7. To change the document root directory, in the **Document root** section, click the pencil icon:
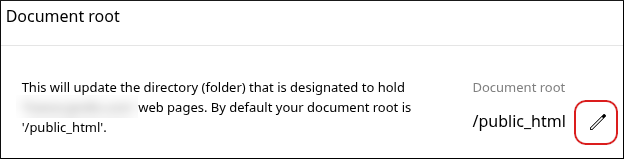
8. To enable DKIM (DomainKeys Identified Mail) for the domain, in the **Email authentication** section, click the **DKIM** slider:
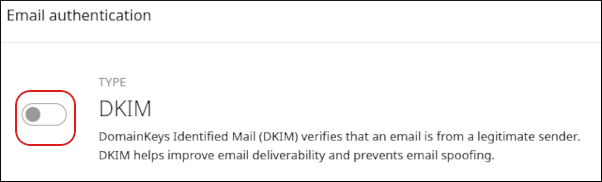
9. To configure mail routing for the domain, in the **Mail routing settings** section, click **Local mail** or **Remote mail**.
You only need to change this setting if you are using a third-party email provider to receive inbound email messages.
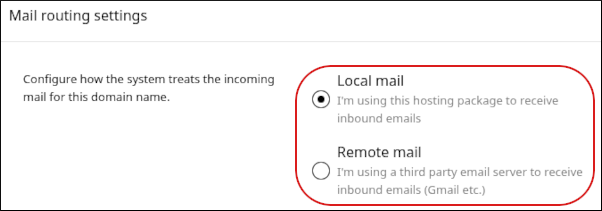
10. To manage DNS records for the domain, scroll down to the **DNS records** section. A list of DNS records for the domain appears:
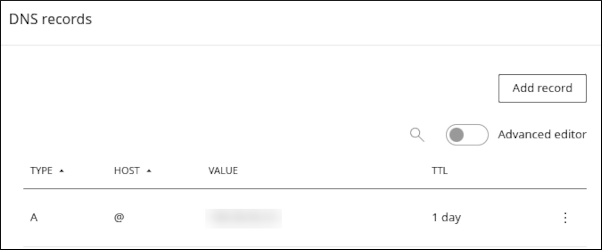
* To modify an existing record, click the three-dot menu, and then click **Edit**.
* To delete an existing record, click the three-dot menu, and then click **Delete**.
* To add a new DNS record for the domain, click **Add record**. The **Add record** dialog appears. Complete the fields for the record, and then click **Create**:
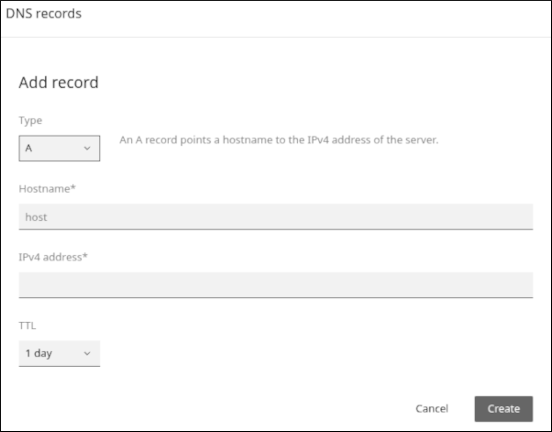
The fields change depending on the type of record you select. For example, an A record requires different settings from an MX record.
## Adding domains
You can add subdomains and aliases.
Aliases (which are sometimes also referred to as "parked domains") are often used to reserve or hold a domain name that does not have an associated web site.
To add a subdomain or alias, follow these steps:
1. In the left sidebar, click **Websites**:

2. On the **Manage websites** page, click the website you want to manage.
3. A list of tabs appears at the top of the page. Click the **Domains** tab:

4. The **Domains** page appears. Click **Add domain**:
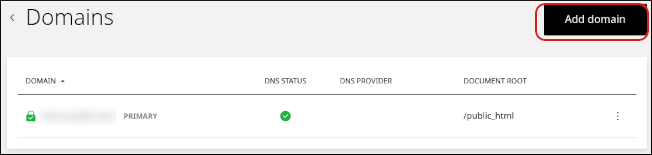
4. The **Add new domain** dialog appears:
* To add a subdomain, specify the name and document root directory, and then click **Add**:
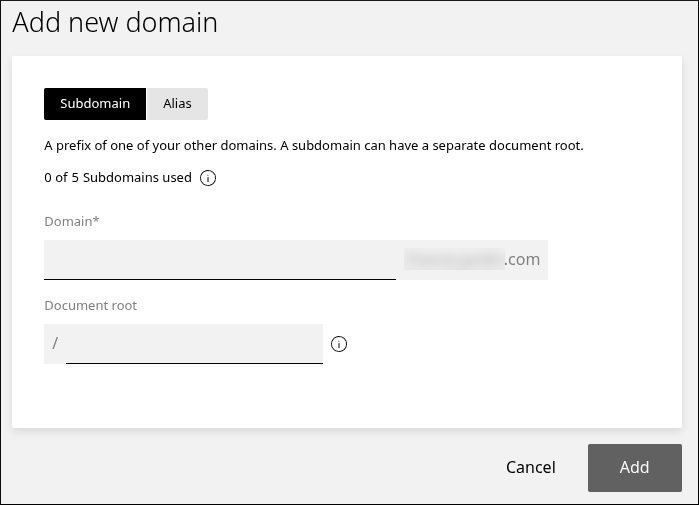
* To add an alias, click **Alias**, specify the name, and then click **Add**. If you want the alias to redirect to the primary domain, select the **Redirect to the primary domain** check box:
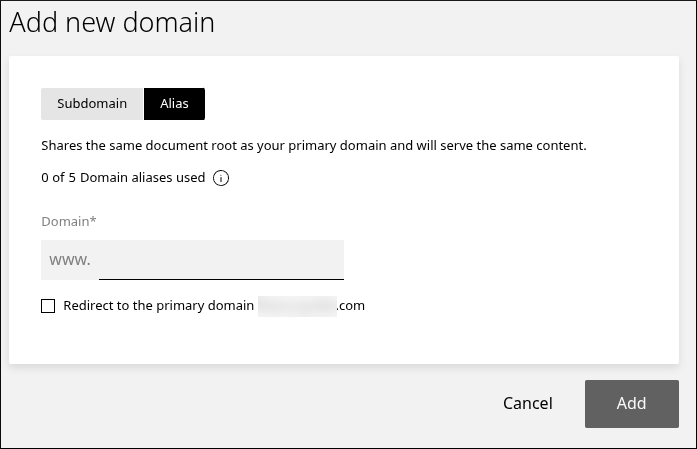
## Related articles
* [Managing your WordPress site in Enhance](/enhance/managing-your-wordpress-site-in-enhance)
* [Installing an SSL certificate in Enhance](/enhance/installing-an-ssl-certificate-in-enhance)
* [Managing your Email in Enhance](/enhance/managing-your-email-in-enhance)
* [Using the File Manager in Enhance](/enhance/using-the-file-manager-in-enhance)
* [Managing Backups in Enhance](/enhance/managing-backups-in-enhance)
* [Managing your MySQL databases in Enhance](/enhance/managing-your-mysql-databases-in-enhance)
* [Managing FTP accounts in Enhance](/enhance/managing-ftp-accounts-in-enhance)
* [Changing PHP versions and settings in Enhance](/enhance/changing-php-versions-and-settings-in-enhance)
* [Configuring SSH access in Enhance](/enhance/configuring-ssh-access-in-enhance)
# Managing Your Email in Enhance
Source: https://kb.verpex.com/enhance/managing-your-email-in-enhance
Learn how to create and manage email accounts, forwarders, spam settings, and autoresponders in the Enhance control panel.
Manage your email accounts, forwarders, spam settings, and autoresponders in Enhance.
## Manage email
1. Log in to your Enhance control panel.
2. In the left sidebar, click **Websites**.

3. On the **Manage websites** page, click the website you want to manage.
4. Click the **Emails** tab.

5. To add an account, click **Add account**.

6. Complete the fields, and then click **Add**.
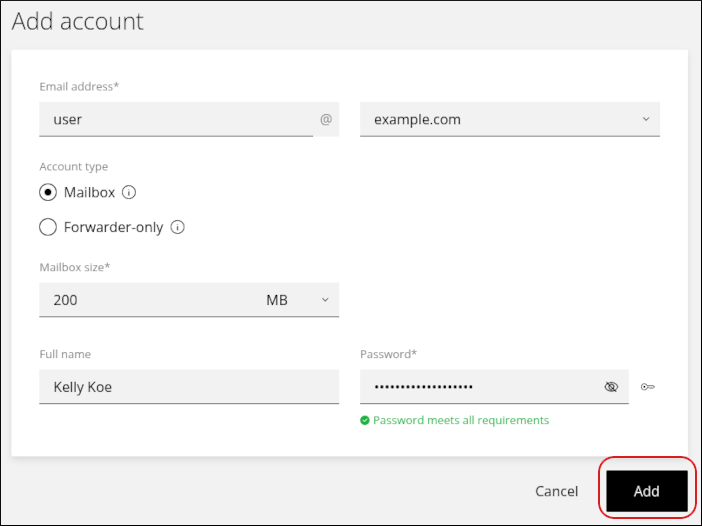
7. To modify an existing account, click the account in the list.
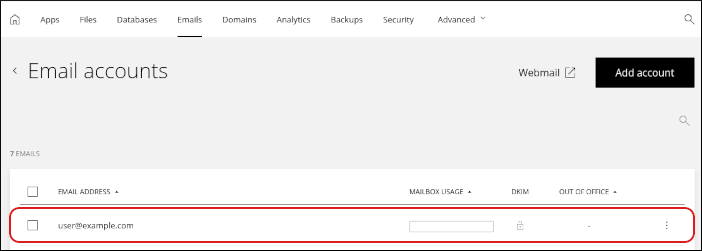
## What you can manage
For each email account, you can change the following settings:
* Display name
* Mailbox size
* Password
* Forwarders
* Spam settings
* Out-of-office notifications (autoresponders)
You can also view email client settings for IMAP, POP, and SMTP.
## Related articles
* [Managing your WordPress site in Enhance](/enhance/managing-your-wordpress-site-in-enhance)
* [Installing an SSL certificate in Enhance](/enhance/installing-an-ssl-certificate-in-enhance)
* [Managing your Domains in Enhance](/enhance/managing-your-domains-in-enhance)
* [Using the File Manager in Enhance](/enhance/using-the-file-manager-in-enhance)
* [Managing Backups in Enhance](/enhance/managing-backups-in-enhance)
* [Managing your MySQL databases in Enhance](/enhance/managing-your-mysql-databases-in-enhance)
* [Managing FTP accounts in Enhance](/enhance/managing-ftp-accounts-in-enhance)
* [Changing PHP versions and settings in Enhance](/enhance/changing-php-versions-and-settings-in-enhance)
* [Configuring SSH access in Enhance](/enhance/configuring-ssh-access-in-enhance)
# Managing Your MySQL Databases in Enhance
Source: https://kb.verpex.com/enhance/managing-your-mysql-databases-in-enhance
Learn how to create and manage MySQL databases and database users in the Enhance control panel.
## Manage database users
Create at least one database user before you create a database so the user can access it.
1. Log in to your Enhance control panel.
2. In the left sidebar, click **Websites**.

3. On the **Manage websites** page, click the website you want to manage.
4. Click the **Databases** tab.

5. On the **MySQL databases** page, click **Add user**.

6. In the **Add database user** section, enter the username and password for the user.
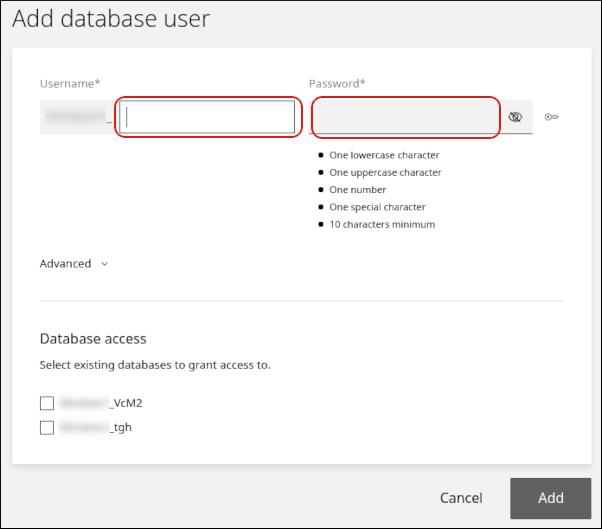
7. If one or more databases already exist, they appear in the **Database access** section. Select the checkbox next to each database you want the user to access.
8. Click **Add**.
9. Click the **Users** tab. The new user appears in the user list.
10. Click the user to modify it. On this page, you can:
* Click **Reset** to reset the user's password.
* Enter an IP address in the **Remote access IP** field to allow remote database access.
* Click **Delete** to delete the user.
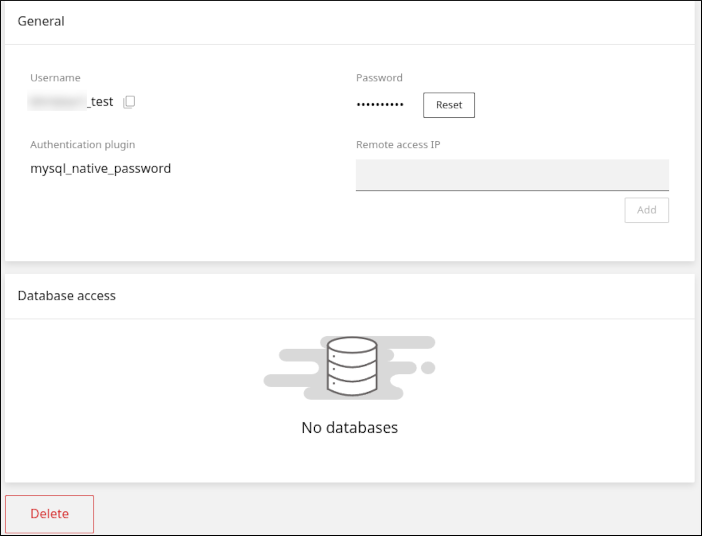
## Manage databases
1. Log in to your Enhance control panel.
2. In the left sidebar, click **Websites**.

3. On the **Manage websites** page, click the website you want to manage.
4. Click the **Databases** tab.

5. On the **MySQL databases** page, click **Add database**.

6. In the **Add database** section, enter the database name.
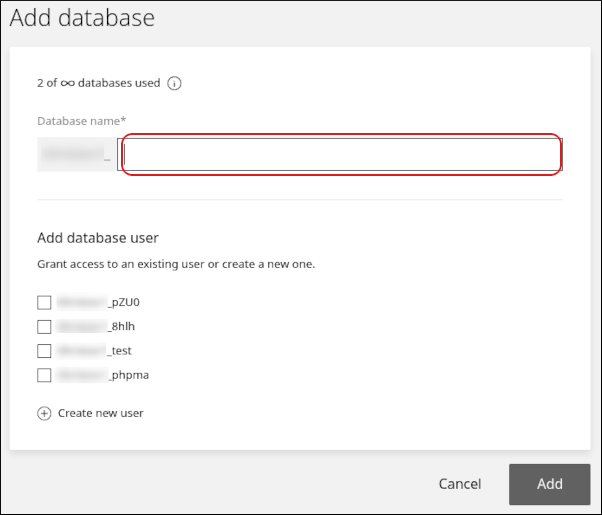
7. In the **Add database user** section, select one or more users that can access the database.
* To grant all access privileges to a user, leave **All database privileges** selected.
* To grant only specific privileges, clear **All database privileges** and select the permissions you want to grant.
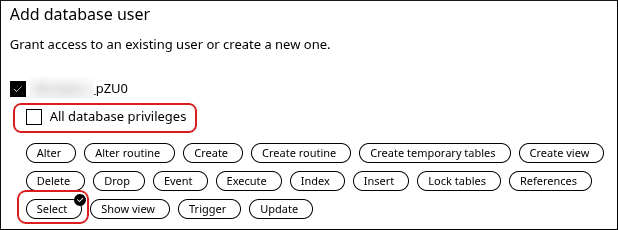
8. Click **Add**. The new database appears on the **Databases** tab.
9. Click the database to modify it and access additional features. On this page, you can:
* Click **PhpMyAdmin** to open phpMyAdmin.

* Add database users to the database or remove them.
* Click **Upload** to import a SQL file and populate the database.

* Click **Download** to export the database as a SQL file.

* Click **Delete** to delete the database.

## Related articles
* [Managing your WordPress site in Enhance](/enhance/managing-your-wordpress-site-in-enhance)
* [Installing an SSL certificate in Enhance](/enhance/installing-an-ssl-certificate-in-enhance)
* [Managing your Domains in Enhance](/enhance/managing-your-domains-in-enhance)
* [Managing your Email in Enhance](/enhance/managing-your-email-in-enhance)
* [Using the File Manager in Enhance](/enhance/using-the-file-manager-in-enhance)
* [Managing Backups in Enhance](/enhance/managing-backups-in-enhance)
* [Managing FTP accounts in Enhance](/enhance/managing-ftp-accounts-in-enhance)
* [Changing PHP versions and settings in Enhance](/enhance/changing-php-versions-and-settings-in-enhance)
* [Configuring SSH access in Enhance](/enhance/configuring-ssh-access-in-enhance)
# Managing Your Website, Databases, and Backups in Enhance
Source: https://kb.verpex.com/enhance/managing-your-website-databases-and-backups-in-enhance
Learn how to manage your website and email from one convenient interface in Enhance Control Panel.
## Manage your website
1. Log in to your Enhance control panel
2. In the left sidebar, click **Websites**.

3. On the **Manage websites** page, click the website you want to manage.
4. Use the tabs at the top of the page to manage different parts of your site.

## What each tab does
### Apps
Use the **Apps** tab to install applications. Click **Install app**, select the settings you want, and then click **Install**.

Only WordPress and Joomla are supported at this time. You can install other applications manually.
### Files
Use the **Files** tab to manage your files. You can download, edit, delete, and perform other file operations.
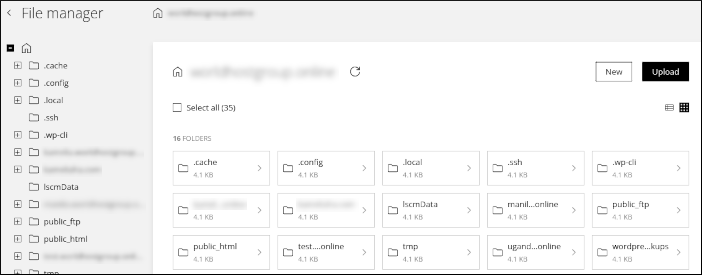
For more information on using file manager, see [Using the File Manager in Enhance.](/enhance/using-the-file-manager-in-enhance)
### Databases
Use the **Databases** tab to manage your MySQL databases. You can add, modify, and delete databases and users. phpMyAdmin is also available here. To get started, click **Add database**.
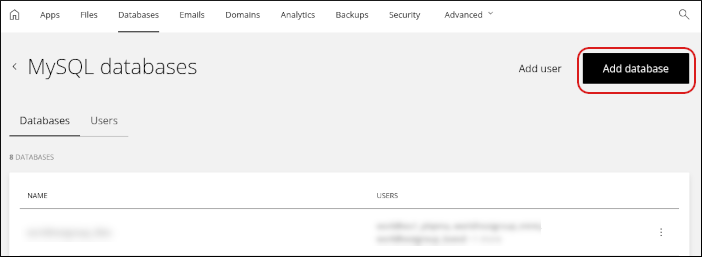
For more information, see [Managing your MySQL databases in Enhance](/enhance/managing-your-mysql-databases-in-enhance).
### Emails
Use the **Emails** tab to configure your email accounts. You can add, modify, and delete email accounts and related settings.
For more information, see [Managing your Email in Enhance](/enhance/managing-your-email-in-enhance).
### Domains
Use the **Domains** tab to manage your domains. You can add subdomains, addon domains, and aliases. You can also configure settings such as the document root directory and DNS.
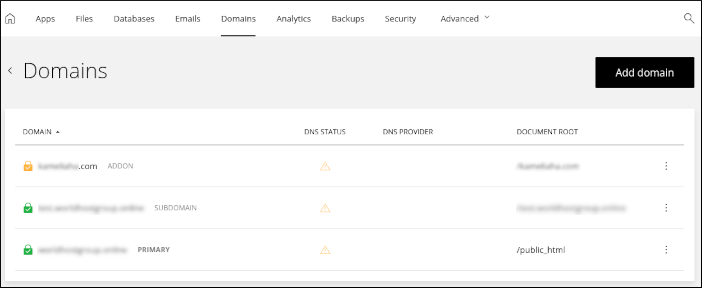
For more information, see [Managing your Domains in Enhance.](/enhance/managing-your-domains-in-enhance)
### Analytics
Use the **Analytics** tab to view bandwidth usage and visitor statistics for your website. You can view statistics for today, last week, or last month.
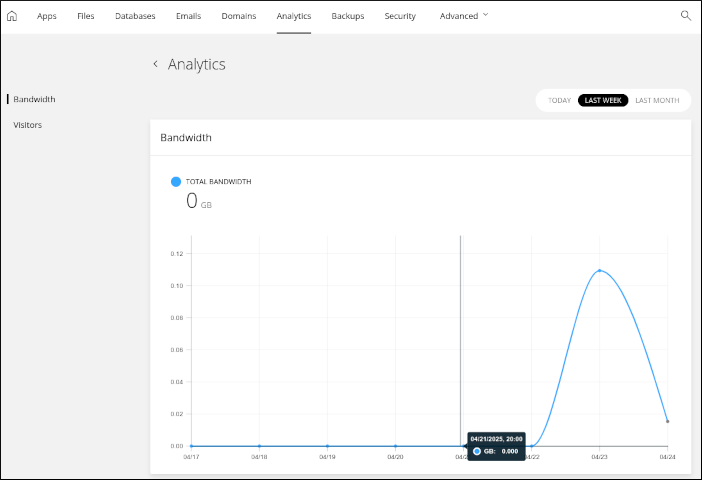
### Backups
Use the **Backups** tab to manage automatic backups and restores. To restore from a backup, click **Restore** and then select what you want to restore.
You can selectively restore:
* Email
* Website files
* A custom collection of items, including email, website files, and databases
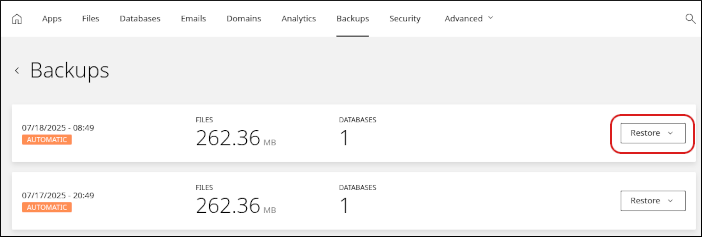
For more information, see [Managing Backups in Enhance](/enhance/managing-backups-in-enhance).
### Security
Use the **Security** tab to manage SSL certificates for your site and allow or block specific IP addresses.
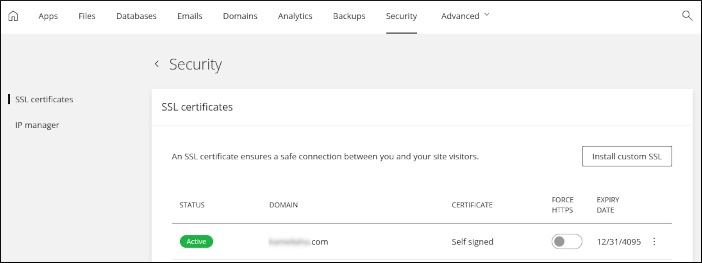
For more information, see [Installing an SSL certificate in Enhance.](/enhance/installing-an-ssl-certificate-in-enhance)
### Advanced
The **Advanced** tab contains several additional tools:
* **Redirects**: Add permanent (301) or temporary (302) redirects to forward visitors to another domain.
* **Optimization**: Enable Opcode caching for your site.
* **FTP**: Add, modify, and delete FTP accounts.
For more information, see [Managing FTP accounts in Enhance](/enhance/managing-ftp-accounts-in-enhance).
* **Developer tools**: Access advanced settings, including PHP settings and cron jobs. You can also view and configure SSH connection details for your account.
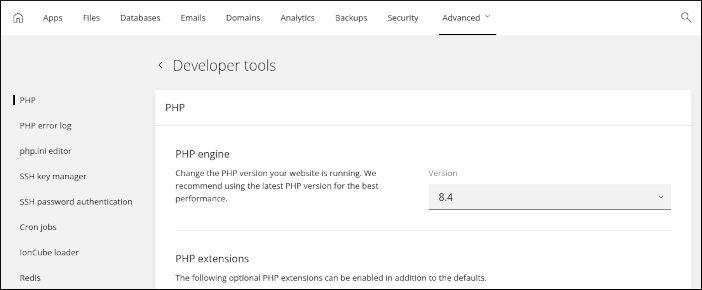
* For PHP settings, see [Changing PHP versions and settings in Enhance](/enhance/changing-php-versions-and-settings-in-enhance).
* For SSH setup, see [Configuring SSH access in Enhance.](/enhance/configuring-ssh-access-in-enhance)
# Managing Your WordPress Site in Enhance
Source: https://kb.verpex.com/enhance/managing-your-wordpress-site-in-enhance
Learn how to manage your WordPress site in the Enhance control panel, including plugins, themes, security, users, single sign on, and debugging.
## Open the WordPress management page
1. Log in to your Enhance control panel.
2. In the left sidebar, click **Websites**.

3. On the **Manage websites** page, click the website you want to manage.
4. In the **Applications installed** section, locate your WordPress site, and then click **Manage**.
## Manage WordPress settings
### General
The **General** section opens first.
* To log in to your WordPress dashboard, click **Login to admin**.
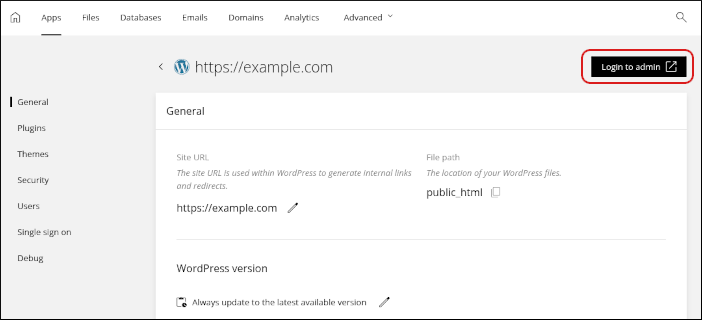
The dashboard opens in a new tab.
* In the **General** section, you can also:
* Change the WordPress site URL.
* Change the location of your WordPress site files.
* Manage versions for your WordPress site.
* Enable or disable maintenance mode.
### Plugins
To manage your WordPress plugins, click **Plugins** in the left sidebar.
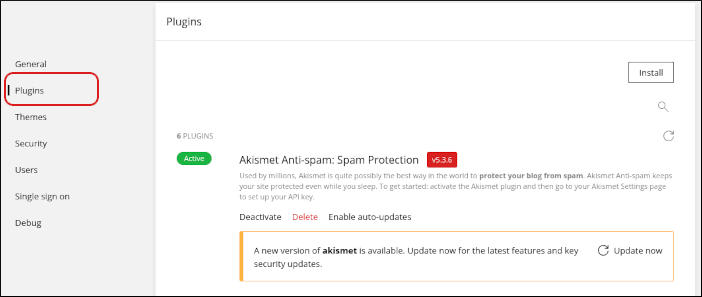
In the **Plugins** section, you can:
* View installed plugins, including version and status information.
* Install, activate, deactivate, update, and delete plugins.
### Themes
To manage your WordPress themes, click **Themes** in the left sidebar.
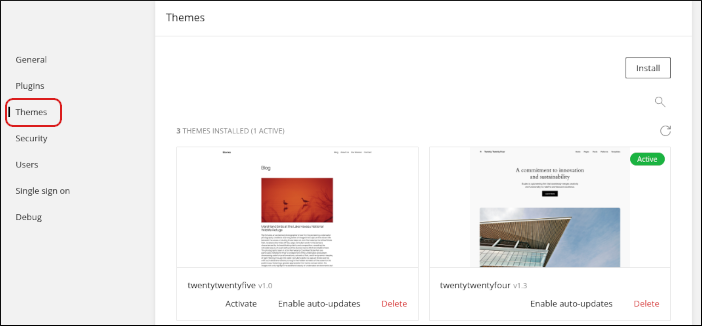
In the **Themes** section, you can:
* View installed themes, including version and status information.
* Install, activate, deactivate, update, and delete themes.
### Security
To manage WordPress security settings, click **Security** in the left sidebar.
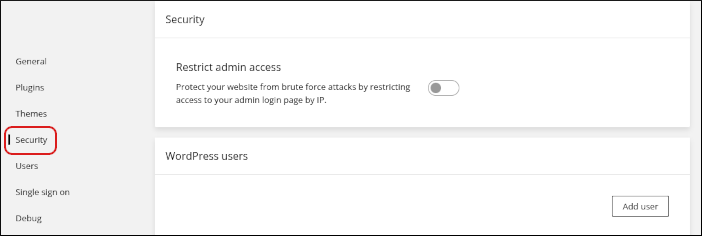
In the **Security** section, you can restrict administrative access to your WordPress site by IP address.
### Users
To manage your WordPress user accounts, click **Users** in the left sidebar.
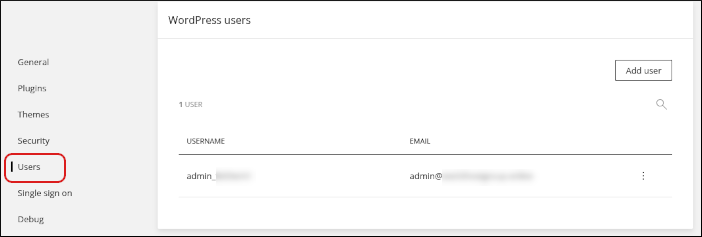
In the **Users** section, you can:
* Add a user account by clicking **Add user**.
* Modify an existing user account. You can change the username, email address, and password for an account.
* Delete a user account.
### Single sign on
To manage single sign on settings for WordPress, click **Single sign on** in the left sidebar.
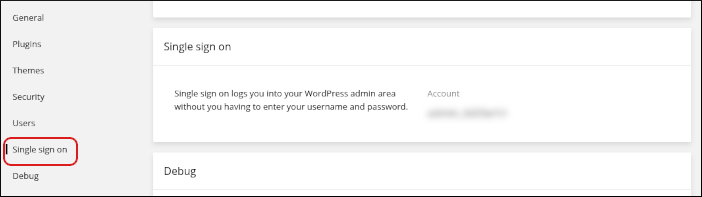
With single sign on, you can log in to your WordPress site without typing a separate username and password.
### Debug
To configure WordPress debugging settings, click **Debug** in the left sidebar.
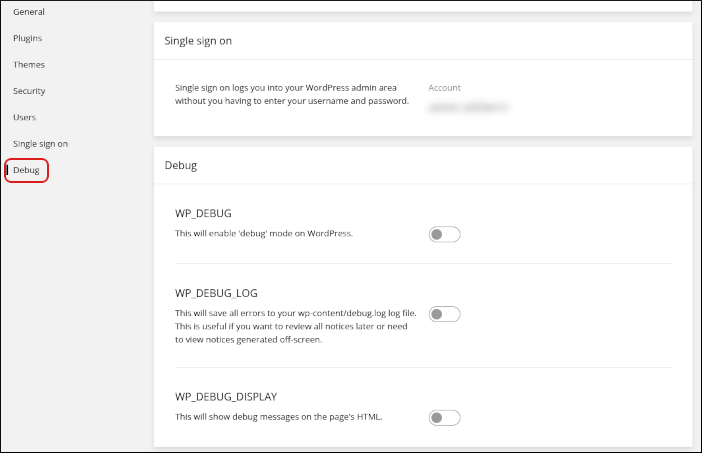
In the **Debug** section, you can enable these WordPress debugging settings:
* **WP\_DEBUG**
* **WP\_DEBUG\_LOG**
* **WP\_DEBUG\_DISPLAY**
For more information about these debugging options, see [Debugging WordPress](/wordpress/how-to-debug-wordpress-with-cpanel-and-wordpress-toolkit).
## Related articles
* [Installing an SSL certificate in Enhance](/enhance/installing-an-ssl-certificate-in-enhance)
* [Managing your Domains in Enhance](/enhance/managing-your-domains-in-enhance)
* [Managing your Email in Enhance](/enhance/managing-your-email-in-enhance)
* [Using the File Manager in Enhance](/enhance/using-the-file-manager-in-enhance)
* [Managing Backups in Enhance](/enhance/managing-backups-in-enhance)
* [Managing your MySQL databases in Enhance](/enhance/managing-your-mysql-databases-in-enhance)
* [Managing FTP accounts in Enhance](/enhance/managing-ftp-accounts-in-enhance)
* [Changing PHP versions and settings in Enhance](/enhance/changing-php-versions-and-settings-in-enhance)
* [Configuring SSH access in Enhance](/enhance/configuring-ssh-access-in-enhance)
# Using the File Manager in Enhance
Source: https://kb.verpex.com/enhance/using-the-file-manager-in-enhance
Learn how to use the File Manager in the Enhance control panel to navigate, create, upload, and manage your website files.
# Managing your website files in the Hosting Panel
## Open the File Manager
1. Log in to your Enhance control panel.
2. In the left sidebar, click **Websites**.

3. On the **Manage websites** page, click the website you want to manage.
4. Click the **Files** tab.

5. The **File manager** appears.

## Navigate your files
Use the folder tree in the left sidebar to move through the file system:
* Click a folder name to view its contents in the right pane.
* Click the plus sign (**+**) icon to show subfolders under the current folder.
## Manage files and folders
In the right pane, you can perform these actions.
### Sort items
To sort the listing by name, size, or last modified date, click a column heading.
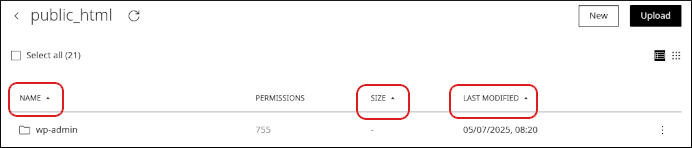
### Create a file or folder
1. Click **New**.
2. Click **File** or **Folder**.
### Upload a file or folder
1. Click **Upload**.
2. Click **File** or **Folder**.
### Modify an existing file or folder
Right-click a file or folder, and then select one of these options:
* **Edit**: Edit a file.
* **Download**: Download a file to your local computer.
* **Get info**: View the path, size, permissions, and other details for a file or folder.
* **Copy**: Copy a file or folder.
* **Rename**: Rename a file or folder.
* **Compress**: Compress a file or folder.
* **Uncompress**: Extract a compressed file or folder.
* **Permissions (CHMOD)**: Change permissions for a file or folder.
* **Delete**: Delete a file or folder.
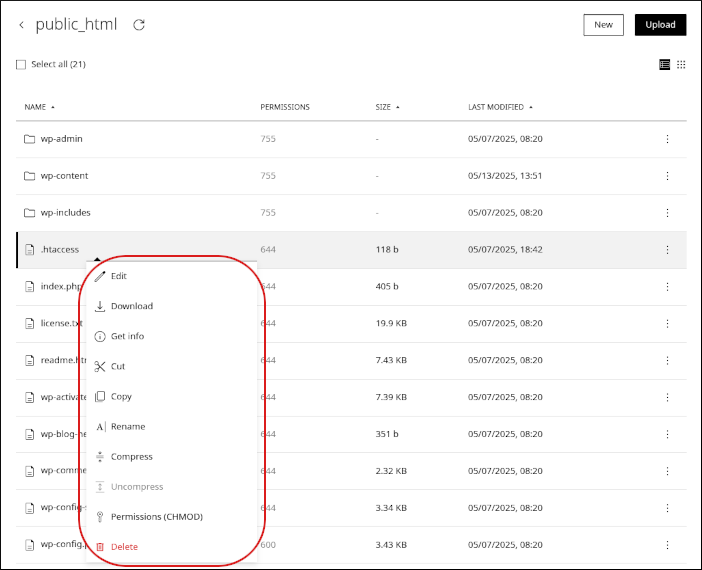
### Process multiple files at once
To perform actions on multiple files at the same time:
1. Select the **Select all** checkbox.
2. Choose one of the options that appears at the bottom of the page.

Be careful when working with multiple files at once, especially when you are deleting items.
## Related articles
* [Managing your WordPress site in Enhance](/enhance/managing-your-wordpress-site-in-enhance)
* [Installing an SSL certificate in Enhance](/enhance/installing-an-ssl-certificate-in-enhance)
* [Managing your Domains in Enhance](/enhance/managing-your-domains-in-enhance)
* [Managing your Email in Enhance](/enhance/managing-your-email-in-enhance)
* [Using the File Manager in Enhance](/enhance/using-the-file-manager-in-enhance)
* [Managing your MySQL databases in Enhance](/enhance/managing-your-mysql-databases-in-enhance)
* [Managing FTP accounts in Enhance](/enhance/managing-ftp-accounts-in-enhance)
* [Changing PHP versions and settings in Enhance](/enhance/changing-php-versions-and-settings-in-enhance)
* [Configuring SSH access in Enhance](/enhance/configuring-ssh-access-in-enhance)
# Importing and Restoring a cPanel Account into Enhance
Source: https://kb.verpex.com/importing-and-restoring-a-cPanel-account-into-enhance
*A step-by-step guide for resellers migrating customer accounts from cPanel to Enhance.*
Importing your cPanel account into Enhance is straightforward and gives you the ability to perform your own account restorations without needing to rely on support staff. This is especially useful for accounts that need to be restored on a tight timeline.
**Important:** Do not create the domain or website account for the account you are importing before starting this process — doing so will cause issues.
# **Step 1: Create the customer account**
Log into your Enhance account and create the customer's account
![Screenshot 2026 09 09 At 8 08 22 1]() # **Step 2: Go to Import Website**
After the customer is created, head over to Websites > Import Website.
# **Step 2: Go to Import Website**
After the customer is created, head over to Websites > Import Website.
![Screenshot 2026 09 09 At 8 09 43 1]() # **Step 3: Select your previous hosting provider**
Select your hosting provider. In this case, we are restoring the cPanel account of a cPanel customer, so select cPanel and click Next step.
# **Step 3: Select your previous hosting provider**
Select your hosting provider. In this case, we are restoring the cPanel account of a cPanel customer, so select cPanel and click Next step.
![Screenshot 2026 09 09 At 8 10 31 1]() # **Step 4: Select the import method**
"Upload website backup" should already be selected — simply click Next step.
# **Step 4: Select the import method**
"Upload website backup" should already be selected — simply click Next step.
![Screenshot 2026 09 09 At 8 11 11 1]() # **Step 5: Choose your backup file**
Click Choose file to upload the cPanel backup file you have. If you need help generating a cPanel backup with your original cPanel provider, the steps are provided on this screen.
# **Step 5: Choose your backup file**
Click Choose file to upload the cPanel backup file you have. If you need help generating a cPanel backup with your original cPanel provider, the steps are provided on this screen.
![Screenshot 2026 09 09 At 8 13 13 1]() # **Step 6: Wait for the upload to complete**
After selecting the backup file, you'll see it uploading. Wait until the upload is complete, then click Next step.
# **Step 6: Wait for the upload to complete**
After selecting the backup file, you'll see it uploading. Wait until the upload is complete, then click Next step.
![Screenshot 2026 09 09 At 8 13 55 1]() # **Step 7: Review and import**
Once you see "Everything looks good. To import your website, click 'Import'," click Import!
# **Step 7: Review and import**
Once you see "Everything looks good. To import your website, click 'Import'," click Import!
![Screenshot 2026 09 09 At 8 14 40 1]() # **Step 8: Wait for the import to finish**
After you click Import, your account will be imported and will show as completed once finished, so you can move on to your next import.
# **Step 8: Wait for the import to finish**
After you click Import, your account will be imported and will show as completed once finished, so you can move on to your next import.
![Screenshot 2026 09 09 At 8 15 26 1]() # **Step 9: Assign the website to the customer**
After importing the website, the last and most important step is assigning the website to the customer. Click Websites to see your list of websites, click the three dots on the far right of the imported site, select Transfer ownership, and then select your new customer as the owner of the account.
# **Step 9: Assign the website to the customer**
After importing the website, the last and most important step is assigning the website to the customer. Click Websites to see your list of websites, click the three dots on the far right of the imported site, select Transfer ownership, and then select your new customer as the owner of the account.
![Screenshot 2026 09 09 At 8 16 05 1]() **That's it!** The cPanel account has now been fully imported and restored into Enhance under the correct customer.
# Domain Transfers
Source: https://kb.verpex.com/moving/domain-transfers
Transferring a domain to Verpex is a very easy process, but, if you need any help or get stuck at any point please remember we are here to help - just get in touch and we can assist at any point in the process. The domain transfer process is slightly different depending on the domain extension (e.g. com, .net, .co.uk) because they are handled by different registry organisations. In the main, there are two main processes:-
.uk domain transfers
.uk domains (.co.uk, .me.uk, org.uk, .uk) are free to transfer in. This means you do not pay when you checkout with a .uk transfer in your cart through Verpex. The expiry date of your domain remains the same when you transfer a domain in and so your renewal becomes due on the same date as before, it's just that you'll pay Verpex to renew the domain instead of your old provider.
To transfer the domain, please order the transfer through here:
[https://clients.verpex.com/cart.php?a=add\&domain=transfer](https://clients.verpex.com/cart.php?a=add\&domain=transfer) - please leave the EPP key/auth code field blank for a .uk domain transfer.
Once you've ordered the domain, you then just need to ask your existing provider to change the IPS tag to
HOSTINGUK
.uk transfers are generally very fast (usually less than an hour). Once the transfer completes, the domain will show as 'active' in your [https://clients.verpex.com](https://clients.verpex.com) area under 'Domains'. From here you can then set the nameservers to point to Verpex. Our nameservers are:-
```
ns1.verpex.com
ns2.verpex.com
ns3.verpex.com
ns4.verpex.com
```
GTLD (.com, .net, .org, and most others) Most other domains are considered 'GTLDs' - this is short for 'Global Top Level Domains', so are not country specific. The transfer process for these domains is slightly different and relies on an authorization code or EPP key. When you order a GTLD transfer, you pay the same as a 1 year registration or renewal because as part of the transfer process, an additional year is added on to the domain expiration date.
The steps to transfer a GTLD domain are:-
* Step 1 - Unlock the domain with your current provider
* Step 2 - Obtain the EPP key (sometimes called an authorization code) from your current provider
* Step 3 - Order the domain transfer from Verpex - [https://clients.verpex.com/cart.php?a=add\&domain=transfer](https://clients.verpex.com/cart.php?a=add\&domain=transfer)
* Step 4 - Once the order is paid for, you'll receive an email to the admin contact on the domain you're transferring. There'll be a link to click and this is where you need to approve the domain transfer to Verpex.
* Step 5 - Once you've approved the transfer, it can take several days for the transfer to go through (depending on the registry it's coming from), but you'll receive an email from Verpex once the transfer is completed.
Once the transfer is completed, you can then manage the domain from clients.verpex.com under 'Domains'.
# Website Migration Process
Source: https://kb.verpex.com/moving/website-migration-process
Verpex offers a free migration service with all of our hosting packages. This means we can move your site with minimal or even zero downtime - all that we need from you are your existing hosting log-in details so that we can get access to your files and database(s).
We do not provide the following types of migrations:
* Windows migrations.
* Migrations to unmanaged VPS plans.
## Starting the migration
To start the process, first open a support ticket and let us know the site you'd like migrated and the details for how we can log in to your old host. Migrations can take a couple of days, depending on the complexity of the site and how quickly we can transfer everything. We will keep you updated on the progress of the migration through the support ticket system. There'll also be an opportunity to test the site prior to changing the nameservers over by updating your hosts file.
### Migration types
Certain migrations are easier than others - if you are with another provider that uses cPanel we can move everything including your site files, databases, emails and everything under the existing account in one move. We generate a full cPanel backup file, and then import that over to your hosting with us - this overwrites anything you've already uploaded with us as part of the process.
To do this, we need your existing hosts' cPanel login details, and it is also important that your host allows you to create your own cPanel account backups (unfortunately some hosts disable this). If you have any questions about this, please let us know beforehand and we can check that the full backup can be created successfully.
If your provider doesn't use cPanel, we manually copy your site files using FTP (or SSH, if it is available) and download a copy of your database(s). Unfortunately, we cannot yet move email accounts from a provider not using cPanel, but, you can recreate these in your cPanel with us once the migration is complete. For more information, you can refer to [this cPanel article](https://docs.cpanel.net/knowledge-base/transfers-and-restores/how-to-migrate-a-wordpress-installation-to-a-cpanel-server/).
## After the migration
After the migration is completed, you need to update the nameservers on the domain to point to:
* ns1.mysecurecloudhost.com
* ns2.mysecurecloudhost.com
* ns3.mysecurecloudhost.com
* ns4.mysecurecloudhost.com
After you update the nameservers, your domain name will point to the newly migrated website at Verpex.
# Domain, Website, and Email Hosting: What's the Difference?
Source: https://kb.verpex.com/moving/whats-the-difference-between-a-domain-website-and-email-hosting
A domain, website, and email hosting are all related but have different functions. For you to be online you need a domain name, website, and email address
**Domain:** A domain such as testing.com is the address or URL that people use to access a website. It's the name of the website. In order to have a website, you need to register and purchase a domain name. A domain name can be registered through a domain registrar live Verpex, a registrant registers a domain. Get your domain name from Verpex today.\
[https://verpex.com/domain-registration](https://verpex.com/domain-registration)
**Website**: A website is a collection of web pages that can be accessed over the internet, it is where the files live. Websites can be built using different technologies such as\
HTML, CSS, and JavaScript. A website is hosted on a web server and can be accessed using a domain name.
When someone enters your domain name in a browser, the domain name is translated into the IP address of your web hosting company’s computer.
Web hosting companies like Verpex specialize in storing and serving websites. At Verpex we offer different types of hosting plans to our customers, please check our [site](https://verpex.com/) to go through each plan.
**Email hosting**: Email hosting is a service that allows you to create, store and manage email accounts using your own domain name.\
This means you can have email addresses like "[support@testing.com](mailto:support@testing.com)" rather than "[info@gmail.com](mailto:info@gmail.com)". Email hosting services usually include webmail (web-based email) access, email forwarding, and email autoresponders.
**In summary:**
A domain is the name of your website\
A website is the content and functionality of the website\
Email hosting is a service to manage your email accounts using your own domain name
Knowing the difference between your domain, web hosting and email is important for keeping track of your online presence and having a functioning website. A domain, website and email hosting are dependent on one another. Your visitors get to your website by typing your domain in their address bar and sending emails to your custom address.
# Can I Livestream Audio or Video?
Source: https://kb.verpex.com/network/can-i-livestream-audio-or-video
No, we do not allow streaming audio/video content and proxy servers to be hosted on shared servers. Audio/video streaming requires a high level of resource usage (bandwidth and lots of I/O loads) to run smoothly on the server. Hosting a streaming content website (even a fairly small one) on the server can lead to unfair distribution of resources and even overload that will create difficulties for other people on the same server.
When you plan to host sites with media content, the [managed cloud server](https://verpex.com/managed-cloud-servers) can be a solution. The managed cloud server has enough resources to carry sites that do not create a very high load but give flexibility. For resource-intensive sites, we recommend ordering the Managed Cloud Server package. And this is why a dedicated server will be a better solution in the case of a popular site with interactive content and multimedia libraries. In any case, we strongly recommend that you roughly estimate the number of resources your site and applications will use by testing them, if possible, and then choosing an appropriate configuration server.
Unfortunately, video/audio streaming is not supported on our shared servers and we do not offer a dedicated hosting service. "Real" streaming requires a special service that transmits audio/video information in real-time. The reader on the visitor's computer interprets this data stream and displays it immediately. For this to work properly, you need a real streaming server.
# Can we Enable Litespeed Crawler?
Source: https://kb.verpex.com/network/can-we-enable-litespeed-crawler
LiteSpeed Crawler is an integration of the LiteSpeed Cache plugin that can help speed up your website. The crawler goes through your website and updates the cached pages to reduce the waiting time for your visitors which saves significant bandwidth!
Additionally, with the crawler refreshing expired pages at regular intervals, the chances that a user will encounter an uncached page is significantly diminished. This makes for a faster site.
Crawler functionality is enabled or disabled at the server level, and its availability is controlled by us to reduce resource usage.
Litespeed Crawler is disabled by default in all shared hosting plans. However, you can install it yourself on our unmanaged VPS options.
# Changing the Document Root Directory
Source: https://kb.verpex.com/network/changing-the-document-root-directory
Learn how to change the document root directory for an account on a shared server, which is set to public_html by default.
This article describes how to change the document root directory for an account on a shared server. By default, your account's document root directory is the /home/username/public\_html directory, where username represents your Verpex account username. However, sometimes you may want to use a different directory as the document root. This is often the case, for example, if you want to try out a new application or test a website configuration before it goes live.
Use either of the following two procedures to change the document root directory. The first method uses symbolic links and requires SSH access. The second method uses .htaccess redirection, and can be configured in cPanel.
If you want to change the document root directory for an addon domain, do not follow the procedures below. Instead, use cPanel to change the addon domain's document root directory. For more information about how to do this, please see this article.
## Method #1: Use symbolic links
You can change the document root directory by moving the contents of the public\_html directory to another directory, and then creating a symbolic link that points public\_html to the new document root directory. To do this, follow these steps:
1. Login to your account with SSH
2. At the command prompt, type the following command:
```
bash
mv ~/public_html ~/public_html_backup
```
3. Type the following command, replacing new\_document\_root with the name of the directory that you want to use as the new document root:
```
Bash
ln -s ~/new_document_root ~/public_html
```
Your site may be inaccessible until the server's cron job sets the correct file permissions and group ownership for the new document root directory. This cron job runs on the server at twelve minutes past the hour on every hour evenly divisible by four (4:12, 8:12, 12:12, etc.). To minimize any possible downtime for your site, you can change the document root directory just before one of these scheduled times. (To determine the current time on the server, access a terminal using SSH or by logging in to cPanel, and then in the Advanced section, click Terminal. At the command prompt, type date and then press Enter.) After the cron job runs, the new document root directory file permissions are set to 750, and the group ownership is set to nobody, as shown in the following sample directory listing:
```
drwxr-x--- 3 username nobody 4096 Mar 10 10:08 new_document_root/
```
4. Use a web browser to test your web site. The browser should display content from the new document root directory.
If your web site does not function correctly:
* Make sure that the new document root directory exists and contains web site files (such as index.html or index.php ).
* Make sure you run the commands in step 2 and 3 in quick succession. To verify that the symbolic link is correct, type the following command:
```
Bash
ls -l ~/public_html
```
You should see output similar to the following, where username represents your account username:
```
/home/username/public_html -> /home/username/new_document_root
```
If you do not see similar output, then the symbolic link is not set up correctly. Type the following command:
```
Bash
rm -rf ~/public_html
```
Then repeat steps 2 and 3.
### Restoring the public\_html directory
You can restore the original configuration and use the public\_html directory as the document root again by reversing the procedure that you followed above. To do this, follow these steps:
1. Log in to your account using SSH.
2. At the command prompt, type the following:
```
Bash
rm ~/public_html
```
Improtant
* This command removes the symbolic link that redirects public\_html to the modified document root directory.
* After you run this command, you must run the next command in step 3 as soon as possible for two reasons. First, your site is inaccessible as long as public\_html is missing. Second, cPanel will automatically recreate the public\_html directory if it detects that it is missing. If you have not run the command in step 3 before this occurs, your site will not function like you expect.
3. Type the following command, replacing source\_directory with the name of the directory that you want to use as public\_html. For example, this directory could be the public\_html\_backup directory that you created in the previous procedure, the new\_document\_root directory that you were using for testing, or an entirely different directory:
```
Bash
mv ~/source_directory ~/public_html
```
4. Use a web browser to test your web site. The browser should display content from the public\_html directory.
## Method #2: Use redirection with .htaccess
This method uses redirection rules in an .htaccess file to change the document root directory. With this method, you configure the web server to redirect incoming requests to a subfolder of your choice. To do this, follow these steps:
1. Log in to cPanel.
2. In the FILES section of the cPanel home screen, click File Manager:
**That's it!** The cPanel account has now been fully imported and restored into Enhance under the correct customer.
# Domain Transfers
Source: https://kb.verpex.com/moving/domain-transfers
Transferring a domain to Verpex is a very easy process, but, if you need any help or get stuck at any point please remember we are here to help - just get in touch and we can assist at any point in the process. The domain transfer process is slightly different depending on the domain extension (e.g. com, .net, .co.uk) because they are handled by different registry organisations. In the main, there are two main processes:-
.uk domain transfers
.uk domains (.co.uk, .me.uk, org.uk, .uk) are free to transfer in. This means you do not pay when you checkout with a .uk transfer in your cart through Verpex. The expiry date of your domain remains the same when you transfer a domain in and so your renewal becomes due on the same date as before, it's just that you'll pay Verpex to renew the domain instead of your old provider.
To transfer the domain, please order the transfer through here:
[https://clients.verpex.com/cart.php?a=add\&domain=transfer](https://clients.verpex.com/cart.php?a=add\&domain=transfer) - please leave the EPP key/auth code field blank for a .uk domain transfer.
Once you've ordered the domain, you then just need to ask your existing provider to change the IPS tag to
HOSTINGUK
.uk transfers are generally very fast (usually less than an hour). Once the transfer completes, the domain will show as 'active' in your [https://clients.verpex.com](https://clients.verpex.com) area under 'Domains'. From here you can then set the nameservers to point to Verpex. Our nameservers are:-
```
ns1.verpex.com
ns2.verpex.com
ns3.verpex.com
ns4.verpex.com
```
GTLD (.com, .net, .org, and most others) Most other domains are considered 'GTLDs' - this is short for 'Global Top Level Domains', so are not country specific. The transfer process for these domains is slightly different and relies on an authorization code or EPP key. When you order a GTLD transfer, you pay the same as a 1 year registration or renewal because as part of the transfer process, an additional year is added on to the domain expiration date.
The steps to transfer a GTLD domain are:-
* Step 1 - Unlock the domain with your current provider
* Step 2 - Obtain the EPP key (sometimes called an authorization code) from your current provider
* Step 3 - Order the domain transfer from Verpex - [https://clients.verpex.com/cart.php?a=add\&domain=transfer](https://clients.verpex.com/cart.php?a=add\&domain=transfer)
* Step 4 - Once the order is paid for, you'll receive an email to the admin contact on the domain you're transferring. There'll be a link to click and this is where you need to approve the domain transfer to Verpex.
* Step 5 - Once you've approved the transfer, it can take several days for the transfer to go through (depending on the registry it's coming from), but you'll receive an email from Verpex once the transfer is completed.
Once the transfer is completed, you can then manage the domain from clients.verpex.com under 'Domains'.
# Website Migration Process
Source: https://kb.verpex.com/moving/website-migration-process
Verpex offers a free migration service with all of our hosting packages. This means we can move your site with minimal or even zero downtime - all that we need from you are your existing hosting log-in details so that we can get access to your files and database(s).
We do not provide the following types of migrations:
* Windows migrations.
* Migrations to unmanaged VPS plans.
## Starting the migration
To start the process, first open a support ticket and let us know the site you'd like migrated and the details for how we can log in to your old host. Migrations can take a couple of days, depending on the complexity of the site and how quickly we can transfer everything. We will keep you updated on the progress of the migration through the support ticket system. There'll also be an opportunity to test the site prior to changing the nameservers over by updating your hosts file.
### Migration types
Certain migrations are easier than others - if you are with another provider that uses cPanel we can move everything including your site files, databases, emails and everything under the existing account in one move. We generate a full cPanel backup file, and then import that over to your hosting with us - this overwrites anything you've already uploaded with us as part of the process.
To do this, we need your existing hosts' cPanel login details, and it is also important that your host allows you to create your own cPanel account backups (unfortunately some hosts disable this). If you have any questions about this, please let us know beforehand and we can check that the full backup can be created successfully.
If your provider doesn't use cPanel, we manually copy your site files using FTP (or SSH, if it is available) and download a copy of your database(s). Unfortunately, we cannot yet move email accounts from a provider not using cPanel, but, you can recreate these in your cPanel with us once the migration is complete. For more information, you can refer to [this cPanel article](https://docs.cpanel.net/knowledge-base/transfers-and-restores/how-to-migrate-a-wordpress-installation-to-a-cpanel-server/).
## After the migration
After the migration is completed, you need to update the nameservers on the domain to point to:
* ns1.mysecurecloudhost.com
* ns2.mysecurecloudhost.com
* ns3.mysecurecloudhost.com
* ns4.mysecurecloudhost.com
After you update the nameservers, your domain name will point to the newly migrated website at Verpex.
# Domain, Website, and Email Hosting: What's the Difference?
Source: https://kb.verpex.com/moving/whats-the-difference-between-a-domain-website-and-email-hosting
A domain, website, and email hosting are all related but have different functions. For you to be online you need a domain name, website, and email address
**Domain:** A domain such as testing.com is the address or URL that people use to access a website. It's the name of the website. In order to have a website, you need to register and purchase a domain name. A domain name can be registered through a domain registrar live Verpex, a registrant registers a domain. Get your domain name from Verpex today.\
[https://verpex.com/domain-registration](https://verpex.com/domain-registration)
**Website**: A website is a collection of web pages that can be accessed over the internet, it is where the files live. Websites can be built using different technologies such as\
HTML, CSS, and JavaScript. A website is hosted on a web server and can be accessed using a domain name.
When someone enters your domain name in a browser, the domain name is translated into the IP address of your web hosting company’s computer.
Web hosting companies like Verpex specialize in storing and serving websites. At Verpex we offer different types of hosting plans to our customers, please check our [site](https://verpex.com/) to go through each plan.
**Email hosting**: Email hosting is a service that allows you to create, store and manage email accounts using your own domain name.\
This means you can have email addresses like "[support@testing.com](mailto:support@testing.com)" rather than "[info@gmail.com](mailto:info@gmail.com)". Email hosting services usually include webmail (web-based email) access, email forwarding, and email autoresponders.
**In summary:**
A domain is the name of your website\
A website is the content and functionality of the website\
Email hosting is a service to manage your email accounts using your own domain name
Knowing the difference between your domain, web hosting and email is important for keeping track of your online presence and having a functioning website. A domain, website and email hosting are dependent on one another. Your visitors get to your website by typing your domain in their address bar and sending emails to your custom address.
# Can I Livestream Audio or Video?
Source: https://kb.verpex.com/network/can-i-livestream-audio-or-video
No, we do not allow streaming audio/video content and proxy servers to be hosted on shared servers. Audio/video streaming requires a high level of resource usage (bandwidth and lots of I/O loads) to run smoothly on the server. Hosting a streaming content website (even a fairly small one) on the server can lead to unfair distribution of resources and even overload that will create difficulties for other people on the same server.
When you plan to host sites with media content, the [managed cloud server](https://verpex.com/managed-cloud-servers) can be a solution. The managed cloud server has enough resources to carry sites that do not create a very high load but give flexibility. For resource-intensive sites, we recommend ordering the Managed Cloud Server package. And this is why a dedicated server will be a better solution in the case of a popular site with interactive content and multimedia libraries. In any case, we strongly recommend that you roughly estimate the number of resources your site and applications will use by testing them, if possible, and then choosing an appropriate configuration server.
Unfortunately, video/audio streaming is not supported on our shared servers and we do not offer a dedicated hosting service. "Real" streaming requires a special service that transmits audio/video information in real-time. The reader on the visitor's computer interprets this data stream and displays it immediately. For this to work properly, you need a real streaming server.
# Can we Enable Litespeed Crawler?
Source: https://kb.verpex.com/network/can-we-enable-litespeed-crawler
LiteSpeed Crawler is an integration of the LiteSpeed Cache plugin that can help speed up your website. The crawler goes through your website and updates the cached pages to reduce the waiting time for your visitors which saves significant bandwidth!
Additionally, with the crawler refreshing expired pages at regular intervals, the chances that a user will encounter an uncached page is significantly diminished. This makes for a faster site.
Crawler functionality is enabled or disabled at the server level, and its availability is controlled by us to reduce resource usage.
Litespeed Crawler is disabled by default in all shared hosting plans. However, you can install it yourself on our unmanaged VPS options.
# Changing the Document Root Directory
Source: https://kb.verpex.com/network/changing-the-document-root-directory
Learn how to change the document root directory for an account on a shared server, which is set to public_html by default.
This article describes how to change the document root directory for an account on a shared server. By default, your account's document root directory is the /home/username/public\_html directory, where username represents your Verpex account username. However, sometimes you may want to use a different directory as the document root. This is often the case, for example, if you want to try out a new application or test a website configuration before it goes live.
Use either of the following two procedures to change the document root directory. The first method uses symbolic links and requires SSH access. The second method uses .htaccess redirection, and can be configured in cPanel.
If you want to change the document root directory for an addon domain, do not follow the procedures below. Instead, use cPanel to change the addon domain's document root directory. For more information about how to do this, please see this article.
## Method #1: Use symbolic links
You can change the document root directory by moving the contents of the public\_html directory to another directory, and then creating a symbolic link that points public\_html to the new document root directory. To do this, follow these steps:
1. Login to your account with SSH
2. At the command prompt, type the following command:
```
bash
mv ~/public_html ~/public_html_backup
```
3. Type the following command, replacing new\_document\_root with the name of the directory that you want to use as the new document root:
```
Bash
ln -s ~/new_document_root ~/public_html
```
Your site may be inaccessible until the server's cron job sets the correct file permissions and group ownership for the new document root directory. This cron job runs on the server at twelve minutes past the hour on every hour evenly divisible by four (4:12, 8:12, 12:12, etc.). To minimize any possible downtime for your site, you can change the document root directory just before one of these scheduled times. (To determine the current time on the server, access a terminal using SSH or by logging in to cPanel, and then in the Advanced section, click Terminal. At the command prompt, type date and then press Enter.) After the cron job runs, the new document root directory file permissions are set to 750, and the group ownership is set to nobody, as shown in the following sample directory listing:
```
drwxr-x--- 3 username nobody 4096 Mar 10 10:08 new_document_root/
```
4. Use a web browser to test your web site. The browser should display content from the new document root directory.
If your web site does not function correctly:
* Make sure that the new document root directory exists and contains web site files (such as index.html or index.php ).
* Make sure you run the commands in step 2 and 3 in quick succession. To verify that the symbolic link is correct, type the following command:
```
Bash
ls -l ~/public_html
```
You should see output similar to the following, where username represents your account username:
```
/home/username/public_html -> /home/username/new_document_root
```
If you do not see similar output, then the symbolic link is not set up correctly. Type the following command:
```
Bash
rm -rf ~/public_html
```
Then repeat steps 2 and 3.
### Restoring the public\_html directory
You can restore the original configuration and use the public\_html directory as the document root again by reversing the procedure that you followed above. To do this, follow these steps:
1. Log in to your account using SSH.
2. At the command prompt, type the following:
```
Bash
rm ~/public_html
```
Improtant
* This command removes the symbolic link that redirects public\_html to the modified document root directory.
* After you run this command, you must run the next command in step 3 as soon as possible for two reasons. First, your site is inaccessible as long as public\_html is missing. Second, cPanel will automatically recreate the public\_html directory if it detects that it is missing. If you have not run the command in step 3 before this occurs, your site will not function like you expect.
3. Type the following command, replacing source\_directory with the name of the directory that you want to use as public\_html. For example, this directory could be the public\_html\_backup directory that you created in the previous procedure, the new\_document\_root directory that you were using for testing, or an entirely different directory:
```
Bash
mv ~/source_directory ~/public_html
```
4. Use a web browser to test your web site. The browser should display content from the public\_html directory.
## Method #2: Use redirection with .htaccess
This method uses redirection rules in an .htaccess file to change the document root directory. With this method, you configure the web server to redirect incoming requests to a subfolder of your choice. To do this, follow these steps:
1. Log in to cPanel.
2. In the FILES section of the cPanel home screen, click File Manager:
![]() 3. In the left sidebar, click the public\_html folder. The folder's contents appear in the right pane.
4. In the list of files, right-click .htaccess, click Edit, and then click Edit again.
If the .htaccess file is not in the list of files, you must create it first. On the top menu bar, click + File . In the New File Name text box, type .htaccess , and then click Create New File .
5. Copy and paste the following text into the .htaccess file. Replace example.com with your own domain name, and replace subfolder with the name of the folder that you want to use as the new document root directory. Additionally, if you want to use a different main file for your site instead of index.html, specify the filename you want to use (for example, index.php ):
```
# .htaccess main domain to subfolder redirect
RewriteEngine on
RewriteCond %{HTTP_HOST} ^(www.)?example.com$
RewriteCond %{REQUEST_URI} !^/subfolder/
RewriteCond %{REQUEST_FILENAME} !-f
RewriteCond %{REQUEST_FILENAME} !-d
RewriteRule ^(.*)$ /subfolder/$1
RewriteCond %{HTTP_HOST} ^(www.)?example.com$
RewriteRule ^(/)?$ subfolder/index.html [L]
```
The subfolder you use must be in the public\_html directory.
6. Click Save Changes, and then click Close.
7. Use a web browser to test your web site. The browser should display content from the new document root directory.
If your web site does not function correctly:
* Make sure that the new document root directory exists and contains web site files (such as index.html or index.php ).
* Make sure the .htaccess file contains the correct domain name and subfolder name.
### Restoring the public\_html directory
You can restore the original configuration and use the public\_html directory as the document root again by reversing the procedure that you followed above. To do this, follow these steps:
1. Log in to cPanel.
2. In the FILES section of the cPanel home screen, click File Manager:
3. In the left sidebar, click the public\_html folder. The folder's contents appear in the right pane.
4. In the list of files, right-click .htaccess, click Edit, and then click Edit again.
If the .htaccess file is not in the list of files, you must create it first. On the top menu bar, click + File . In the New File Name text box, type .htaccess , and then click Create New File .
5. Copy and paste the following text into the .htaccess file. Replace example.com with your own domain name, and replace subfolder with the name of the folder that you want to use as the new document root directory. Additionally, if you want to use a different main file for your site instead of index.html, specify the filename you want to use (for example, index.php ):
```
# .htaccess main domain to subfolder redirect
RewriteEngine on
RewriteCond %{HTTP_HOST} ^(www.)?example.com$
RewriteCond %{REQUEST_URI} !^/subfolder/
RewriteCond %{REQUEST_FILENAME} !-f
RewriteCond %{REQUEST_FILENAME} !-d
RewriteRule ^(.*)$ /subfolder/$1
RewriteCond %{HTTP_HOST} ^(www.)?example.com$
RewriteRule ^(/)?$ subfolder/index.html [L]
```
The subfolder you use must be in the public\_html directory.
6. Click Save Changes, and then click Close.
7. Use a web browser to test your web site. The browser should display content from the new document root directory.
If your web site does not function correctly:
* Make sure that the new document root directory exists and contains web site files (such as index.html or index.php ).
* Make sure the .htaccess file contains the correct domain name and subfolder name.
### Restoring the public\_html directory
You can restore the original configuration and use the public\_html directory as the document root again by reversing the procedure that you followed above. To do this, follow these steps:
1. Log in to cPanel.
2. In the FILES section of the cPanel home screen, click File Manager:
![]() 3. In the left sidebar, click the public\_html folder.
4. In the file listing, right-click the .htaccess file, and then click Rename.
5. In the New file name text box, type an alternate name for the .htaccess file (for example, .htaccess.bak), and then click Rename File.
6. Use a web browser to test your web site. The browser should again display content from the public\_html directory.
Alternatively, you can delete just the relevant redirection rules in the .htaccess file, and leave the rest of the file contents unchanged. You may want to do this, for example, if your .htaccess file has other directives in it that are unrelated to the document root directory.
# CloudLinux Limits
Source: https://kb.verpex.com/network/cloudlinux-limits
CloudLinux is a fork of the linux operating system that lets you limit the resource usage of individual cPanel accounts. On our shared and reseller servers this lets us set how many resources a specific cPanel account can use.
Our limits are set as follows:
Up to 4GB RAM depending on package\
Up to 2 vCPU depending on package\
IO - Between 50MB/S and 250MB/S depending on package\
Iops - Between 1024 and 5200 depending on package.
# Connecting Notepad++ to your hosting account via an FTP connection
Source: https://kb.verpex.com/network/connecting-notepad-to-your-hosting-account-via-an-ftp-connection
Notepad++ is an open-source text editing software that has a great FTP capability that allows you to edit your files directly on the server. You can use this single program to connect to your hosting account via FTP, and make modifications.,It is only compatible with Microsoft Windows users.
The NppFTP plugin allows you to use Notepad++ to connect to your server files via an FTP connection, so you can edit the web files and make changes to your website.
**Steps on How to Connect to your Hosting Server via FTP with Notepad**
Before you get started, get your FTP details from your cPanel.
* Install Notepad++ on your computer if not already installed
* Install the NppFTP plugin and create a new profile.
* Open NotePad++.
* Navigate to Plugins -> NppFTP -> Show NppFTP Window.
* Click the gear icon and select Profile Settings.
* Create profiles, Click Add new to start using the plugin
* In the Adding profile menu, enter a name for this FTP connection
* Click OK.
* Enter your FTP credentials as copied from your cPanel in the Connection tab.
* Set the Connection mode as Active and the Transfer mode as ASCII in the Transfer Tab
* Click close to save your configuration
* Select your new Profile.
* Click the Connect button, and choose your new connection to open it.\
After establishing an FTP connection in Notepad++, it’s time to edit the files within your directory. All you need to do is:
* Connect to your server and access the directory you want to edit
* Opening FTP connection You will then see your files/ folders listed, you can double-click on any files that you want to edit.
* Save your modification by pressing the Save button.
It’s recommended to create a backup before making any changes to prevent any data loss or corrupted files.
Congratulations! You have successfully learned how to connect to your server using Notepad++.
# Disk Space Limits
Source: https://kb.verpex.com/network/disk-space-limits
With Verpex, you receive one of the most generous offers for disk space, including up to 500 GB of NVMe SSD disk space integrated into our plans. This offer is exceptionally generous, and there are truly no hidden catches. However, there are a few conditions.
First, the storage must be utilized for hosting websites online. It cannot be employed for backup storage or file archiving.
Second, we enforce a fair usage limit. While we understand that some individuals may wish to store 100GB of emails in their mailboxes, this practice is not compatible with our disk space limitations and is unfair to other users.
# Firewall IP Block
Source: https://kb.verpex.com/network/firewall-ip-block
A firewall is a security system that allows the server to block dangerous and unauthorised access, it protects and allows legitimate communications to pass. Due to security reasons, we have installed a firewall on our servers with ConfigServer Security & Firewall or 'CSF', which is used for increased server security to block IPs based on suspicious behaviour, like trying to log in with a failing password too many times within a certain timeframe.
Sometimes you find out that your websites are inaccessible. More than that, you are not able to access Mail, Web, FTP or Control Panel services, while others may very well access these services.\
The links to your cPanel(http\://serverIP/cpanel and [http://cpanel.domain.com](http://cpanel.domain.com)) show an error message like server connection timed out, the site cannot be reached, the connection was reset, the site could be temporarily unavailable or too busy. You tried all of the URLs and still got one of these messages, most likely, your external IP address was blocked by our firewall and you need to contact support to unblock your IP.
First, you need to check if your server is up and running. Please visit our [status page](https://status.mysecurecloudhost.com/) to see if there are any known technical issues. If the server is running normally, most likely, your external IP address was blocked by Firewall.
Some events, such as repeated login attempts with incorrect credentials from within the cPanel, webmail, email client, FTP/SSH and PortScan activity could be the reason for the blocks. Let's figure out how these could be avoided and resolved when the issue presents itself
**The number of failed cPanel login attempts has been exceeded**
When you were not able to log into cPanel for the first time, please do not try to log in as many times as possible. Continuous failed attempts can get your IP blocked. To avoid that, use auto-login options in the Verpex account or check your login details in the Welcome Email that was sent to the registered email account linked with the hosting package. Otherwise, feel free to reset your cPanel password
**POP3/IMAP/SMTP or Webmail Connection Failed**
In addition to securing access to cPanel, the firewall also prevents unauthorized access to the mail service
1. Blocked due to failed attempts to access webmail
If you are having difficulty accessing your webmail and therefore cPanel and webmail are no longer available, you have probably activated, most likely you have triggered a similar IP block for email access.
2. Block due to failed POP3/IMAP login attempts
If you start receiving errors of IMAP/POP3 failed authentication in your email client, then it is possible that login credentials for the email account are incorrect. In this case, the email client will not stop trying to access the mail server which may also result in a permanent IP block.
3. Blocked due to failed SMTP connection attempts
This kind of block occurs when SMTP authentication is invalid so you can’t send mail from the email client Make sure that SMTP login is your email address, and the correct password. Once your IP address has been unblocked, consider resetting your password if you are still unable to log in. You can do it in your cPanel account on the Email accounts page >> Manage option.
**FTP/SSH Login Failed**
The web owner has an FTP client set with a very high number of simultaneous connections. Incorrect configuration of email client and FTP client (for example FileZilla) leads the firewall to think it is a brute force attack. If there are many users in your network and they are accessing the Internet from an external IP address, make sure they are not reconnecting frequently using an FTP or email client . Connection requests from an IP address can trigger the firewall to block the IP address. You can change the maximum number of concurrent FileZilla connections for each site you connect to as follows:
```
1. Start the FileZilla FTP program and navigate to Edit -> Settings
2. In the left side menu on the Settings window, you should see the Transfers option. Click on it.
3. Under Concurrent transfers, you have the "Maximum simultaneous transfers:", followed by a text box with a numeric value. Make sure the number is 3 or less. It is recommended to keep this value at 1 if possible, as having multiple connections will slow down your uploads in the long run. If the value is greater than 3, you may get blocked.
```
4. Press the "OK" button and exit FileZilla. Then, restart it again for the changes to take effect.
**Incorrect Email Client Settings**
Mail client settings can also cause IP blocking, so if you're having trouble setting up an email client, it's best to remove the email account from the email client and try again.
Failed web page login\
It occurs when there is an authentication form or a secure directory on the website. Please make sure you use the correct login information. Otherwise, there is a chance for your IP to get blocked.
**WordPress Incorrect Password**
Repeated attempts to login to your website admin area (e.g. WordPress backend) with the wrong username and password combination.
**Unauthorized Country IP**
For security reasons, the firewall blocks IP addresses from certain countries.
**PortScanning**
Attempts to scan server ports are detected as suspicious because they are often used by hackers to detect possible vulnerabilities. Port scanning is an attack that sends client requests to a range of server port addresses on a host with the goal of finding an active port and exploiting a known vulnerability in this service. To avoid this, make sure your clients are configured not to constantly attempt to scan a server's ports.
**Quick Fix for cPanel IP blocking Issues**
If your IP address has been blocked, you can ask our support to unblock it. All you have to do is to open a support ticket and provide us with your IP address using a tool like whatismyip.com.
# How to Clear your Browser Cache
Source: https://kb.verpex.com/network/how-to-clear-your-browser-cache
A cache is a temporary storage for website data, which is used to improve your browsing experience. The 'cache' is a tool used by your internet browser to speed up the page-loading process and helps fix errors like formatting issues. Website owners can also use the caching mechanism to boost their website performance and improve user satisfaction. Clearing the cache and cookies from a web browser is a vital first step for any troubleshooting. Clearing cache is a way one can be sure that any issue you have is actually a development or server error rather than inconsistencies from browser
Many of the websites you visit are made up of thousands of media files, and sometimes it may take a while for a browser application to load all the website’s content. The first time you visit a site, your browser downloads the original data of the website in order to make it load faster the next time you visit it, this process is called caching.
It’s a necessary diagnostic when having website issues. But what does clearing your browser cache mean, and how do you clear the cache for your specific browser? If you are using Internet Explorer, Google Chrome, or Mozilla Firefox you can quickly clear the cache with a keyboard shortcut. While in your browser, press Ctrl + Shift + Delete simultaneously on the keyboard to open the appropriate window (or Option-Command-E for Safari users). Be sure and close the browser and restart it after clearing the cache and cookies.
**Why You Should Clear Cache**
When you use a browser, it saves some website data in your cache. It does this to avoid downloading the same files when you revisit the site. You make a change to your site, but you’re unable to see that change because your browser is still serving up the cached version of that resource. Or, the cache might have become corrupted or misconfigured.
For these reasons, a very good first step whenever you encounter an issue on your site or someone else’s site is to clear your browser cache. It won’t always fix the issue, but it is an essential first diagnostic step to rule out before assuming that it is more complicated.
**How to Clear Your Browser Cache**
Depending on the browser you are using, we have curated a step-by-step guide on how to clear your browser on Google Chrome, Mozilla Firefox, and Safari.
**Clearing the Browser Cache in Chrome**
1. Open Chrome on your computer and click the ellipsis(three dotted lines in the upper-right corner)
2. Go to the More tools menu option and select Clear browsing data
3. Pick a time frame from the drop-down menu
4. Check or uncheck boxes based on your preference. Options include Browsing history, Cookies and other site data, and Cached images and files.
5. Click Clear data.
**Clearing the Cache in Firefox**
1. Open Firefox on your computer and click the three horizontal lines at the upper right corner of the screen.
2. Choose Settings.
3. Click on the Privacy & Security panel.
4. Scroll to the Cookies and Site Data section and click Clear Data
5. Check or uncheck boxes based on your preference (Cookies and Site Data and Cached Web Content)
6. Click the Clear button.
**Clearing the Cache in Safari**
1. Click the Safari menu tab from the bar on top of the screen and select Preferences.
2. Click on Advanced.
3. Check the Show Develop menu in the menu bar box.
4. Click on the Develop tab on the Safari menu bar and select Empty Caches.
With Caching, the browser save some temporary internet files upon a user’s first visit to a specific site. As a result, the page loads faster the next time the user accesses the same website.
Clearing your browser cache can fix loading errors, and it also helps to improve web security as it prevents others fro
# How To Clone A Website In cPanel
Source: https://kb.verpex.com/network/how-to-clone-a-website-in-cpanel
Website cloning means copying or modifying/duplicating an existing website design or script to create a new website. Website cloning allows designers and entrepreneurs to create and start their own website business without the need to develop it from scratch. You might want to clone websites to your cPanel server for many reasons. Since the copies are identical to an existing website, cloning makes it possible to deploy test and staging sites. It's also a quick way to create a new site using the old one as a base.
Site owners use cloned sites to give designers and developers access to a working environment. Cloning can be done from the command line, but it is time-consuming and mistakes are easy to make. cPanel and WHM automate the most error-prone steps so you can quickly clone sites based on content management systems and e-commerce applications.
We'll start with the fastest and most convenient way to clone a WordPress site using WordPress Toolkit, Softaculous and the manual process.
**Clone a WordPress site with WordPress Toolkit**
WordPress Toolkit automatically copies the site, creates a new database and a new database user, configures the site to use the database, and if necessary, creates a new subdomain.
* First, go to the WordPress Toolkit interface in WHM or cPanel
* Open WordPress Toolkit and expand the detailed view of the site you want to clone.
* After clicking Clone, a window will appear asking if you want to clone WordPress to a new subdomain or an existing domain.
* Click the Clone tool on the site dashboard.
* WordPress Toolkit creates the subdomain and location to clone the website if they don’t exist
* Select a subdomain and location to clone the site
* After setting up the subdomain, click Start at the bottom of the page and the cloning process will begin. When the cloning is complete, you will receive a notification that your website has been cloned. When you're done, log in to the cloned site.
**Cloning a Website Manually with cPanel**
Content management systems(WordPress, Joomla, and Drupal) are composed of two main asset types. The first is PHP code files and static files(images, JavaScript files, and CSS). The second is information stored in the site’s database(page content, configuration settings, user information, etc).
To clone a site, both static files and site’s database must be copied. Create a new folder and copy the site’s files into it. Export the original site’s database, create a new database for the clone, and import the data into it. Configure the clone to work with the new database. We’re going to focus on cloning a site into a new directory rather than a subdomain.
Create a Folder and Copy the Site’s Files We can create a folder for the site’s clone and copy the files in File Manager, which you can open from the Files section of cPanel’s main page menu. Select the directory containing the WordPress site you want to clone. Click Copy in the toolbar and enter a name for the new directory. To keep things simple, we’ll clone the site into a directory under public\_html so that you can access it from a URL such as “example.com/testing WordPress.” File Manager copies the directory and all of its contents, giving you an exact duplicate of the original site’s files.
**Clone the Site’s Database**
Cloning the database is straightforward with cPanel’s MySQL tools but a little more complicated than copying files.
* First, create a new database.
* Open MySQL Databases, which you’ll find under Databases the main page menu.
* Enter a name for the new database under Create New Database and click the Create Database button.
* Next, we export the original database. We’ll use phpMyAdmin, which is also under Databases in the cPanel menu.
* Select the original database in the sidebar.
* Select the Export tab and make sure the Quick export method is selected.
* The custom method lets you change database export options, but we’ll stick with the defaults.
* Click Go. This “dumps” the database, downloading an SQL file to your local machine with the information needed to recreate the original site’s database. That’s what we’re going to do next, also using phpMyAdmin.
Select the new database (the one we created in the previous section). Click on the Import tab. In the File to Import section, click Choose File and locate the SQL file you just downloaded. Click the Go button at the bottom of the page.
The last step in this section is to provide the database with a user with a password. You can use an existing database user, but we'll add a new user and provide them with a unique password.
* Log into cPanel,
* Navigate to the MySQL databases page.
* Enter a username and a password under Add New User section.
* Click Create User, then return to the MySQL Databases page.
* Select the new user and the database we created in the previous section.
* Click Add
* Select "All Privileges" on the next page and confirm the changes. The files and database have now been copied, but our cloned WordPress site is still configured to use the original site's database. We will now configure the clone to use its own database.
Edit the cloned site's database and URL configuration. This step is specific to WordPress, but you'll need to do something similar for other content management systems.
* Open the file manager and select the new site directory.
* Select the wp-config.php file.
* Click Edit on the toolbar.
* WordPress has to connect and authenticate with the new database, as such several fields in the MySQL settings section of wp-config.php need to be modified
* Enter the new database name in the DB\_NAME field.
* Enter the user we just created in the DB\_USER field.
* Enter the user's password in DB\_PASSWORD.
* While wpconfig.php is open, we can also notify WordPress of its new URL. By adding the following lines, with the appropriate changes, to the bottom of the file.
3. In the left sidebar, click the public\_html folder.
4. In the file listing, right-click the .htaccess file, and then click Rename.
5. In the New file name text box, type an alternate name for the .htaccess file (for example, .htaccess.bak), and then click Rename File.
6. Use a web browser to test your web site. The browser should again display content from the public\_html directory.
Alternatively, you can delete just the relevant redirection rules in the .htaccess file, and leave the rest of the file contents unchanged. You may want to do this, for example, if your .htaccess file has other directives in it that are unrelated to the document root directory.
# CloudLinux Limits
Source: https://kb.verpex.com/network/cloudlinux-limits
CloudLinux is a fork of the linux operating system that lets you limit the resource usage of individual cPanel accounts. On our shared and reseller servers this lets us set how many resources a specific cPanel account can use.
Our limits are set as follows:
Up to 4GB RAM depending on package\
Up to 2 vCPU depending on package\
IO - Between 50MB/S and 250MB/S depending on package\
Iops - Between 1024 and 5200 depending on package.
# Connecting Notepad++ to your hosting account via an FTP connection
Source: https://kb.verpex.com/network/connecting-notepad-to-your-hosting-account-via-an-ftp-connection
Notepad++ is an open-source text editing software that has a great FTP capability that allows you to edit your files directly on the server. You can use this single program to connect to your hosting account via FTP, and make modifications.,It is only compatible with Microsoft Windows users.
The NppFTP plugin allows you to use Notepad++ to connect to your server files via an FTP connection, so you can edit the web files and make changes to your website.
**Steps on How to Connect to your Hosting Server via FTP with Notepad**
Before you get started, get your FTP details from your cPanel.
* Install Notepad++ on your computer if not already installed
* Install the NppFTP plugin and create a new profile.
* Open NotePad++.
* Navigate to Plugins -> NppFTP -> Show NppFTP Window.
* Click the gear icon and select Profile Settings.
* Create profiles, Click Add new to start using the plugin
* In the Adding profile menu, enter a name for this FTP connection
* Click OK.
* Enter your FTP credentials as copied from your cPanel in the Connection tab.
* Set the Connection mode as Active and the Transfer mode as ASCII in the Transfer Tab
* Click close to save your configuration
* Select your new Profile.
* Click the Connect button, and choose your new connection to open it.\
After establishing an FTP connection in Notepad++, it’s time to edit the files within your directory. All you need to do is:
* Connect to your server and access the directory you want to edit
* Opening FTP connection You will then see your files/ folders listed, you can double-click on any files that you want to edit.
* Save your modification by pressing the Save button.
It’s recommended to create a backup before making any changes to prevent any data loss or corrupted files.
Congratulations! You have successfully learned how to connect to your server using Notepad++.
# Disk Space Limits
Source: https://kb.verpex.com/network/disk-space-limits
With Verpex, you receive one of the most generous offers for disk space, including up to 500 GB of NVMe SSD disk space integrated into our plans. This offer is exceptionally generous, and there are truly no hidden catches. However, there are a few conditions.
First, the storage must be utilized for hosting websites online. It cannot be employed for backup storage or file archiving.
Second, we enforce a fair usage limit. While we understand that some individuals may wish to store 100GB of emails in their mailboxes, this practice is not compatible with our disk space limitations and is unfair to other users.
# Firewall IP Block
Source: https://kb.verpex.com/network/firewall-ip-block
A firewall is a security system that allows the server to block dangerous and unauthorised access, it protects and allows legitimate communications to pass. Due to security reasons, we have installed a firewall on our servers with ConfigServer Security & Firewall or 'CSF', which is used for increased server security to block IPs based on suspicious behaviour, like trying to log in with a failing password too many times within a certain timeframe.
Sometimes you find out that your websites are inaccessible. More than that, you are not able to access Mail, Web, FTP or Control Panel services, while others may very well access these services.\
The links to your cPanel(http\://serverIP/cpanel and [http://cpanel.domain.com](http://cpanel.domain.com)) show an error message like server connection timed out, the site cannot be reached, the connection was reset, the site could be temporarily unavailable or too busy. You tried all of the URLs and still got one of these messages, most likely, your external IP address was blocked by our firewall and you need to contact support to unblock your IP.
First, you need to check if your server is up and running. Please visit our [status page](https://status.mysecurecloudhost.com/) to see if there are any known technical issues. If the server is running normally, most likely, your external IP address was blocked by Firewall.
Some events, such as repeated login attempts with incorrect credentials from within the cPanel, webmail, email client, FTP/SSH and PortScan activity could be the reason for the blocks. Let's figure out how these could be avoided and resolved when the issue presents itself
**The number of failed cPanel login attempts has been exceeded**
When you were not able to log into cPanel for the first time, please do not try to log in as many times as possible. Continuous failed attempts can get your IP blocked. To avoid that, use auto-login options in the Verpex account or check your login details in the Welcome Email that was sent to the registered email account linked with the hosting package. Otherwise, feel free to reset your cPanel password
**POP3/IMAP/SMTP or Webmail Connection Failed**
In addition to securing access to cPanel, the firewall also prevents unauthorized access to the mail service
1. Blocked due to failed attempts to access webmail
If you are having difficulty accessing your webmail and therefore cPanel and webmail are no longer available, you have probably activated, most likely you have triggered a similar IP block for email access.
2. Block due to failed POP3/IMAP login attempts
If you start receiving errors of IMAP/POP3 failed authentication in your email client, then it is possible that login credentials for the email account are incorrect. In this case, the email client will not stop trying to access the mail server which may also result in a permanent IP block.
3. Blocked due to failed SMTP connection attempts
This kind of block occurs when SMTP authentication is invalid so you can’t send mail from the email client Make sure that SMTP login is your email address, and the correct password. Once your IP address has been unblocked, consider resetting your password if you are still unable to log in. You can do it in your cPanel account on the Email accounts page >> Manage option.
**FTP/SSH Login Failed**
The web owner has an FTP client set with a very high number of simultaneous connections. Incorrect configuration of email client and FTP client (for example FileZilla) leads the firewall to think it is a brute force attack. If there are many users in your network and they are accessing the Internet from an external IP address, make sure they are not reconnecting frequently using an FTP or email client . Connection requests from an IP address can trigger the firewall to block the IP address. You can change the maximum number of concurrent FileZilla connections for each site you connect to as follows:
```
1. Start the FileZilla FTP program and navigate to Edit -> Settings
2. In the left side menu on the Settings window, you should see the Transfers option. Click on it.
3. Under Concurrent transfers, you have the "Maximum simultaneous transfers:", followed by a text box with a numeric value. Make sure the number is 3 or less. It is recommended to keep this value at 1 if possible, as having multiple connections will slow down your uploads in the long run. If the value is greater than 3, you may get blocked.
```
4. Press the "OK" button and exit FileZilla. Then, restart it again for the changes to take effect.
**Incorrect Email Client Settings**
Mail client settings can also cause IP blocking, so if you're having trouble setting up an email client, it's best to remove the email account from the email client and try again.
Failed web page login\
It occurs when there is an authentication form or a secure directory on the website. Please make sure you use the correct login information. Otherwise, there is a chance for your IP to get blocked.
**WordPress Incorrect Password**
Repeated attempts to login to your website admin area (e.g. WordPress backend) with the wrong username and password combination.
**Unauthorized Country IP**
For security reasons, the firewall blocks IP addresses from certain countries.
**PortScanning**
Attempts to scan server ports are detected as suspicious because they are often used by hackers to detect possible vulnerabilities. Port scanning is an attack that sends client requests to a range of server port addresses on a host with the goal of finding an active port and exploiting a known vulnerability in this service. To avoid this, make sure your clients are configured not to constantly attempt to scan a server's ports.
**Quick Fix for cPanel IP blocking Issues**
If your IP address has been blocked, you can ask our support to unblock it. All you have to do is to open a support ticket and provide us with your IP address using a tool like whatismyip.com.
# How to Clear your Browser Cache
Source: https://kb.verpex.com/network/how-to-clear-your-browser-cache
A cache is a temporary storage for website data, which is used to improve your browsing experience. The 'cache' is a tool used by your internet browser to speed up the page-loading process and helps fix errors like formatting issues. Website owners can also use the caching mechanism to boost their website performance and improve user satisfaction. Clearing the cache and cookies from a web browser is a vital first step for any troubleshooting. Clearing cache is a way one can be sure that any issue you have is actually a development or server error rather than inconsistencies from browser
Many of the websites you visit are made up of thousands of media files, and sometimes it may take a while for a browser application to load all the website’s content. The first time you visit a site, your browser downloads the original data of the website in order to make it load faster the next time you visit it, this process is called caching.
It’s a necessary diagnostic when having website issues. But what does clearing your browser cache mean, and how do you clear the cache for your specific browser? If you are using Internet Explorer, Google Chrome, or Mozilla Firefox you can quickly clear the cache with a keyboard shortcut. While in your browser, press Ctrl + Shift + Delete simultaneously on the keyboard to open the appropriate window (or Option-Command-E for Safari users). Be sure and close the browser and restart it after clearing the cache and cookies.
**Why You Should Clear Cache**
When you use a browser, it saves some website data in your cache. It does this to avoid downloading the same files when you revisit the site. You make a change to your site, but you’re unable to see that change because your browser is still serving up the cached version of that resource. Or, the cache might have become corrupted or misconfigured.
For these reasons, a very good first step whenever you encounter an issue on your site or someone else’s site is to clear your browser cache. It won’t always fix the issue, but it is an essential first diagnostic step to rule out before assuming that it is more complicated.
**How to Clear Your Browser Cache**
Depending on the browser you are using, we have curated a step-by-step guide on how to clear your browser on Google Chrome, Mozilla Firefox, and Safari.
**Clearing the Browser Cache in Chrome**
1. Open Chrome on your computer and click the ellipsis(three dotted lines in the upper-right corner)
2. Go to the More tools menu option and select Clear browsing data
3. Pick a time frame from the drop-down menu
4. Check or uncheck boxes based on your preference. Options include Browsing history, Cookies and other site data, and Cached images and files.
5. Click Clear data.
**Clearing the Cache in Firefox**
1. Open Firefox on your computer and click the three horizontal lines at the upper right corner of the screen.
2. Choose Settings.
3. Click on the Privacy & Security panel.
4. Scroll to the Cookies and Site Data section and click Clear Data
5. Check or uncheck boxes based on your preference (Cookies and Site Data and Cached Web Content)
6. Click the Clear button.
**Clearing the Cache in Safari**
1. Click the Safari menu tab from the bar on top of the screen and select Preferences.
2. Click on Advanced.
3. Check the Show Develop menu in the menu bar box.
4. Click on the Develop tab on the Safari menu bar and select Empty Caches.
With Caching, the browser save some temporary internet files upon a user’s first visit to a specific site. As a result, the page loads faster the next time the user accesses the same website.
Clearing your browser cache can fix loading errors, and it also helps to improve web security as it prevents others fro
# How To Clone A Website In cPanel
Source: https://kb.verpex.com/network/how-to-clone-a-website-in-cpanel
Website cloning means copying or modifying/duplicating an existing website design or script to create a new website. Website cloning allows designers and entrepreneurs to create and start their own website business without the need to develop it from scratch. You might want to clone websites to your cPanel server for many reasons. Since the copies are identical to an existing website, cloning makes it possible to deploy test and staging sites. It's also a quick way to create a new site using the old one as a base.
Site owners use cloned sites to give designers and developers access to a working environment. Cloning can be done from the command line, but it is time-consuming and mistakes are easy to make. cPanel and WHM automate the most error-prone steps so you can quickly clone sites based on content management systems and e-commerce applications.
We'll start with the fastest and most convenient way to clone a WordPress site using WordPress Toolkit, Softaculous and the manual process.
**Clone a WordPress site with WordPress Toolkit**
WordPress Toolkit automatically copies the site, creates a new database and a new database user, configures the site to use the database, and if necessary, creates a new subdomain.
* First, go to the WordPress Toolkit interface in WHM or cPanel
* Open WordPress Toolkit and expand the detailed view of the site you want to clone.
* After clicking Clone, a window will appear asking if you want to clone WordPress to a new subdomain or an existing domain.
* Click the Clone tool on the site dashboard.
* WordPress Toolkit creates the subdomain and location to clone the website if they don’t exist
* Select a subdomain and location to clone the site
* After setting up the subdomain, click Start at the bottom of the page and the cloning process will begin. When the cloning is complete, you will receive a notification that your website has been cloned. When you're done, log in to the cloned site.
**Cloning a Website Manually with cPanel**
Content management systems(WordPress, Joomla, and Drupal) are composed of two main asset types. The first is PHP code files and static files(images, JavaScript files, and CSS). The second is information stored in the site’s database(page content, configuration settings, user information, etc).
To clone a site, both static files and site’s database must be copied. Create a new folder and copy the site’s files into it. Export the original site’s database, create a new database for the clone, and import the data into it. Configure the clone to work with the new database. We’re going to focus on cloning a site into a new directory rather than a subdomain.
Create a Folder and Copy the Site’s Files We can create a folder for the site’s clone and copy the files in File Manager, which you can open from the Files section of cPanel’s main page menu. Select the directory containing the WordPress site you want to clone. Click Copy in the toolbar and enter a name for the new directory. To keep things simple, we’ll clone the site into a directory under public\_html so that you can access it from a URL such as “example.com/testing WordPress.” File Manager copies the directory and all of its contents, giving you an exact duplicate of the original site’s files.
**Clone the Site’s Database**
Cloning the database is straightforward with cPanel’s MySQL tools but a little more complicated than copying files.
* First, create a new database.
* Open MySQL Databases, which you’ll find under Databases the main page menu.
* Enter a name for the new database under Create New Database and click the Create Database button.
* Next, we export the original database. We’ll use phpMyAdmin, which is also under Databases in the cPanel menu.
* Select the original database in the sidebar.
* Select the Export tab and make sure the Quick export method is selected.
* The custom method lets you change database export options, but we’ll stick with the defaults.
* Click Go. This “dumps” the database, downloading an SQL file to your local machine with the information needed to recreate the original site’s database. That’s what we’re going to do next, also using phpMyAdmin.
Select the new database (the one we created in the previous section). Click on the Import tab. In the File to Import section, click Choose File and locate the SQL file you just downloaded. Click the Go button at the bottom of the page.
The last step in this section is to provide the database with a user with a password. You can use an existing database user, but we'll add a new user and provide them with a unique password.
* Log into cPanel,
* Navigate to the MySQL databases page.
* Enter a username and a password under Add New User section.
* Click Create User, then return to the MySQL Databases page.
* Select the new user and the database we created in the previous section.
* Click Add
* Select "All Privileges" on the next page and confirm the changes. The files and database have now been copied, but our cloned WordPress site is still configured to use the original site's database. We will now configure the clone to use its own database.
Edit the cloned site's database and URL configuration. This step is specific to WordPress, but you'll need to do something similar for other content management systems.
* Open the file manager and select the new site directory.
* Select the wp-config.php file.
* Click Edit on the toolbar.
* WordPress has to connect and authenticate with the new database, as such several fields in the MySQL settings section of wp-config.php need to be modified
* Enter the new database name in the DB\_NAME field.
* Enter the user we just created in the DB\_USER field.
* Enter the user's password in DB\_PASSWORD.
* While wpconfig.php is open, we can also notify WordPress of its new URL. By adding the following lines, with the appropriate changes, to the bottom of the file.
define( 'WP\_HOME', '[http://example.com/testingwordpress](http://example.com/testingwordpress)' );
define( 'WP\_SITEURL', '[http://example.com/testing](http://example.com/testing) wordpress' );
* Save Changes when you’re finished. You should now be able to load your cloned site at http\://your\_domain.com/your\_subdirectory which will be something like [http://example.com/testingwordpress](http://example.com/testingwordpress).
**Cloning a Website Using Softaculous**
Softaculous, however, has a new clone feature that makes cloning much simpler. Since it leaves the original site in place initially, Below is a quick step-by-step guide on how to clone your site with Softaculous.
* Login to your cPanel account.
* Locate and click ‘Softaculous Apps Installer’.
* Click the application in which you want to clone and Click on ‘Clone’.
* Enter the Clone installation details.
* Click on All Installations, this will take you to the Clone Installation page. You can fill the required details of where you want your clone to go. Choose Protocol: Stick with the default https\:// Choose Domain and leave the In Directory blank(if you are moving to a subfolder, enter that here). Database Name: Leave it as default or enter a database name Once the required information for your clone has been filled in, click on the Clone Installation Softaculous will install the clone to the new folder(domain/subdomain) you selected. It also clones the database as well so that each copy has its own. (Be sure that you have enough room on your hosting plan for the databases or your clone will fail).
This is how to clone a website.
# How to do Traceroute from a Windows Machine
Source: https://kb.verpex.com/network/how-to-do-traceroute-from-a-windows-machine
When a website is slow or inaccessible, our first thought is to assume that there is a problem with the web server. While a problem on the web server is certainly possible, it's just as likely that there is a problem somewhere along the way between the server and your computer itself. This is where the traceroute comes in, the traceroute can display where connections are failing or having delays.
Traceroute is one of the most common utilities that is built into operating systems. This utility helps you find where high transfer times are occurring in your internal network and on the Internet. It is useful for diagnosing network connections and the source of many problems. It traces the path a packet takes from your host/computer through each of the individual paths processing the packet and the time it takes to get from one router to another to the final destination(which can be a web server, mail server, or SQL server). Sometimes the tracert command is referred to as the traceroute command.
**How to Run a Traceroute on Windows**
**To run a traceroute on a Windows machine, follow these steps:**
* Open the Windows search box and type CMD in the search bar.
* Then open the Command Prompt app and type tracert followed by a space, then the domain name, server name or IP address(tracert testing.com).
* Press Enter on your keyboard and wait for the traceroute to complete. You will see the words Trace complete when the process is complete.
* You can stop a traceroute at any time by simultaneously pressing the Control + C keys on your keyboard.
* To copy the traceroute results, left-click and drag the mouse to select the traceroute results.
**To Run a traceroute on a Mac, follow these steps:**
* On your local computer, double-click the hard drive icon.
* Open the folder called Applications.
* Click open the Utilities folder.
* Open Network Utility.
* Select the Traceroute tab.
* Enter your website's domain name, server name, or IP address and click on Trace.
**To run a traceroute on an iPhone,**
* To run a traceroute command on iPhone, you need to configure a special app, for example, iNetTools - Ping, DNS, Port Scan.
* Once loaded, go to the Trace Route menu
* Paste your domain name, server name, or IP address in the input box and click Start. The output will be displayed in the result window.
**To run a traceroute on an Android**
* Traceroute can be checked on Android within the Network Utilities app.
* Click on the menu icon to see the list of utilities the application provides.
* Go to the Traceroute menu and paste the domain name, server`s name, or server`s IP address
* Select Trace to get the output, or text file and paste the traceroute results there.
To run a traceroute on a Linux,
* Open a Terminal window and type: traceroute -I domain.com( you can use the server name or IP address)
* The -I option is necessary so that the traceroute uses ICMP.
The test will be completed within a minute or more which will generate a list of the connections and some information about the speed of the steps along the way.\
Select tracert results using your mouse cursor and right-click on it to copy it into the clipboard. You can now paste it into a document and send to Support.\
If you have difficulty copying the traceroute information, or if it runs off the screen, you can type this command instead: tracert hostname > C:\trace1.txt\
This writes the command results to a text file named trace1.txt in the root of your C:\ drive. You can then open this file and paste the contents into your email message to Support.
**How to Read Traceroute Report**
As there are numerous possible causes of a network issue, having the expertise and tools to troubleshoot the error will help save time. The report produced from a traceroute process can be confusing to interpret. If there is an issue within the network, the traceroute results will display error commands such as Request timed out, Destination unreachable, \* in RTT columns, and more.
**Request timed out**: When your website is slow and you get \*\*\* Request timed out, it means that the connection to the server is unstable/ poor or a firewall is blocking your request. You can try connecting to cPanel/website using another ISP(different connection) to resolve this issue.
**Destination Unreachable**: The website you are trying to reach might be down because the data packets have stopped travelling within the network
**\* in RTT columns**: It means there is a packet loss and the router did not respond to the\
request within the allotted time of two seconds. This might also mean that the router in the hop was not configured to provide a response to a traceroute request. You can ping the IP address of the router to verify if there was a packet loss.
Please note that to be effective, the traceroute test MUST run during a time when you are experiencing the problem, from a computer that is experiencing the problem. Therefore, you should try to connect to your site again just before you run it. If the problem is no longer occurring, you will have to wait until the next time the problem occurs (if there is a next time) before running your traceroute test.
# How to Edit Your Hosts File on Windows, Mac, or Linux
Source: https://kb.verpex.com/network/how-to-edit-your-hosts-file-on-windows-mac-or-linux
A hosts file is a plain text file that maps your hostnames to Internet Protocol (IP) addresses. Whenever Windows connects over a network using a hostname, it refers to the hosts file.
**Why do you want to Change your Hosts File?**
Changing your hosts file is a temporary measure to preview your site as it will load from your Verpex server using the preview link ( [https://sitepreview.org/](https://sitepreview.org/)).
You can make changes on a server other than the one loaded by your domain using a hosts file while visitors visit your webpage.
It allows you to test how your website looks on a different server when your DNS has not propagated.
You can also use the hosts file to control access to certain websites or network traffic.
Your host file might have been edited maliciously in an attack, this is known as a hosts file hijack. It is worth checking your hosts file for suspicious entries
**How To Edit Your Hosts File on Windows**
* Find Your IP Address(you can retrieve this information easily using the cPanel dashboard)
* Run Notepad as an Administrator
* To get administrator access, press the Windows key and type Notepad into the search box.
* Right-click on Notepad
* Click Run as Administrator. You will get a prompt whether you want to allow this application to make changes to your device.
* Select Yes(enter an administrative password when prompted).
* Make Your Changes
* Edit the hosts file. In the Notepad, select File > Open.
* Navigate to C:\Windows\System32\drivers\etc . Alternatively, you can copy/paste this file path C:WindowsSystem32driversetchosts into the address bar
* Press Enter.
* Change the file filter from “Text Documents (*.txt)” to “All Files (*.\*)”
* Find the “hosts” file and click open.
* Edit the hosts file.\
You will see some text describing the file’s purpose
# This is a sample HOSTS file used by Microsoft TCP/IP for Windows.
#
# This file contains the mappings of IP addresses to host names. Each
# entry should be kept on an individual line. The IP address should
# be placed in the first column followed by the corresponding host name.
# The IP address and the host name should be separated by at least one
# space.
Enter your custom IP address and hostname at the end of this file.\
Remember to place each entry on a separate line If you are adding multiple entries,\
Save changes and close the hosts file.
**Edit The Hosts File On Ubuntu**
You can edit the hosts file in the Terminal by using your favourite command-line editor\
We will be using Vim which is one of the traditional text editors in Linux. Ubuntu’s hosts file is located in the /etc/ folder. To use, Vim, you will need to launch it prefaced by sudo, however, if Vim is not installed, just run “sudo apt install vim” in a Terminal.
* Run "sudo vim \etc\hosts" in a Terminal.
* Open up a Terminal, then enter:\
sudo vim /etc/hosts
* Enter your password and edit
* You will notice that with Ubuntu there is also a section for IPv6, ignore it, and edit the IPv4 section only.
* Add an entry in the hosts file.
* Save the file\
Note: If your browser has been configured to use DNS Over HTTPS and its own DNS Server, editing the hosts file will probably not block access.
**Editing Hosts File on Mac**
Running Vim as Sudo is the only way to access the hosts file. You'll be prompted for a password.
* To locate the Mac hosts files location: Navigate to the Terminal application.
* Type Terminal on the Spotlight or by going to Applications > Utilities > Terminal.
* Enter this command
```text theme={null}
sudo nano /private/etc/hosts
```
* Use the following command if the permission on the hosts file has been locked
```text theme={null}
sudo chflags nouchg /private/etc/hosts.
```
* Type the password when prompted.
* The hosts file contains some comments starting with the # symbol and some default hostname mappings (e.g., 127.0.0.1 localhost).
* Enter your custom IP and hostname underneath the default ones.\
891.23.45.67 testing.com [www.testing.com](http://www.testing.com)
* Save the file and exit the editor once done
**Editing Hosts File in Unix**
You can find the hosts file at /etc/hosts on Unix-based systems, y. Most distributions of Unix will have terminals located in the same location.
* Open the terminal
* Go to Menu.
* Choose Applications.
* Select Accessories.
* Click Terminal.
* Type the command in the Terminal
```text theme={null}
sudo nano /etc/hosts
```
* When prompted, type your user password\
The hosts file contains some comments lines starting with the # symbol and some default hostname (e.g., 127.0.0.1 localhost).
* Enter your custom IP and hostname underneath the default ones.\
891.23.45.67 testing.com [www.testing.com](http://www.testing.com)
* Save the file and exit the editor once done
To make sure the changes are implemented swiftly, it is recommended to flush the DNS cache.
* Click on the Windows button
* Search for the command prompt and type the following command
```text theme={null}
ipconfig /flushdns
```
* Press the Enter key.\
Windows should be using your new hosts file settings once this process is complete, you could just restart your computer to flush DNS
# How to Fix the “Deceptive Site Ahead” Warning
Source: https://kb.verpex.com/network/how-to-fix-the-deceptive-site-ahead
Google pays a lot of attention to the users' online safety therefore, if there is an issue with your site that puts its users at risk, it will display warning messages and prevent visitors from accessing your site.
If a website is blacklisted by Google, a visitor gets a red colour-blocking page with a “Deceptive Site Ahead" or “The site ahead contains malware” warning upon opening the website. What this means is that your site has been injected with malware or a malicious code was found on your site that a hacker can use to perform malicious activities. All of these activities will affect your user into viewing inappropriate content and ads or stealing their personal data
**Causes for “Deceptive Site Ahead” Warning Message on Your Website**
There are several causes that can result in Google showing a warning message on your website:
* Your website is hosting phishing pages intentionally or unintentionally
* Your website has a virus/malware infection
* Your website contains code within your website linking to questionable links or the website has written some hidden backdoor code or script
* Your website is transmitting personal information to unsecure servers/links
* The SSL certificate installed on your website is compromised
* Your site contains credit card-stealing malware which is used to steal credit card data and send it to hackers.
* Themes and plugins are vulnerable.
**Effects of Deceptive Site Ahead Warning On Your Site**
The consequence of “Deceptive site Ahead” on your website will lead to a loss of traffic and possible business opportunities.\
Your SEO rankings will drop as your site will be penalized by Google for having such malware on your website.\
Not only will your SEO ranking drop, but Google ads will also be suspended\
This warning will lead to your hosting account getting suspended as well until the malware is cleaned.
**Steps on How To Fix The ‘Deceptive Site Ahead’ Warning**
You need to resubmit your site back to Google and request them to unflag the site as deceptive. However, before you do that, make sure the website security issues on your site are resolved.
**Step 1:** Find the Cause, you can check your security issues report via Google search console.\
**Step 2:** Scan your website for malware and remove the malicious infection on your website\
**Step 3:** Obtain an SSL certificate(if you do not have any) and have it installed properly\
**Step 4:** Now that you have your website clean and free of malware, it is time to request a review from Google
Your website must be live for Google to check, Google needs to be able to crawl your site to review it, so make sure you haven’t blocked Googlebot. If you resubmit the site without resolving the issues, it will lead to more delays.
**How to Request a Review From Google**
* Login to your Google Search Console(GSC)
* Select “I have fixed these issues” in the “Open the Security Issues” report section
* Click on Request a review, and state the steps you took in fixing the warning.
* Submit Request
* Repeat the process if there are multiple issues.
* You need to wait as this can take a few hours or days for Google to review your request.
* Google will lift the blacklisting and de-indexation of your pages if all is okay with your website. Re-indexing to regain rankings can take a few days.
**What if Your Website Does not Pass the Review?**
The warning message will continue to show on your website if Google finds out you have not fully resolved the problem. Recheck the security issues report to track any remaining malicious contents/infected URLs, once you are sure everything has been cleared, repeat the re-submitting process.
**Steps on how to Prevent “Deceptive Site Ahead” Warnings**
Do not wait to get this warning before securing your site, a good practice is to do regular security checks on your website to protect yourself against such a situation. Using a firewall and other secure development and maintenance practices will do wonders for your website.
* Use secure hosting with robust security measures
* Make sure you have backups
* Always use trusted themes and plugins at all times
* Keep Your Website Up-To-Date always
* Install Security Plugins
* Monitor emails within your Google Search Console Account
* Use a two-factor authentication feature
* This warning set by Google though alarming is helpful and tells you something is wrong with your website. When Google shows the warning ‘Deceptive site ahead‘ on your website, it is necessary to get down working and repair this error as soon as possible. Your visitors may doubt the professionalism of your website and this is something that can harm you, both in terms of SEO and conversions.
Putting measures in place to secure your website at all times is important because you become vulnerable to outsiders and all forms of attack once your website is open for public access.
For more information, can see this discussion below:
[https://support.google.com/webmasters/thread/181512626/how-to-remove-deceptive-site-ahead-warning?hl=en](https://support.google.com/webmasters/thread/181512626/how-to-remove-deceptive-site-ahead-warning?hl=en)
# How to Host Dynamic DNS Domains with cPanel
Source: https://kb.verpex.com/network/how-to-host-dynamic-dns-domains-with-cpanel
DNS is the system used on the internet to name computers, with one of its major uses being to translate domain names, like verpex.com to IP Addresses(104.26.1.125). This system makes it a lot easier to access services online like Google, Quora, and Verpex Hosting without needing to remember long strings of numbers. But for DNS to work, these IP addresses need to remain consistent; if the IP addresses of any of these services changed, they would be inaccessible until the DNS records were updated. However, that’s usually not a problem, as service providers like DigitalOcean, Google Cloud, and AWS give servers running on their platforms Static IP addresses which don’t change.
Although cPanel is great for managing data-hosted websites, apps, and email accounts hosted on data centre servers, many people prefer to host online services at their homes or business. Many of these ISPs do not provide dedicated IP addresses, what this means is that a domain name cannot be used to connect to services hosted on their networks. Dynamic DNS, which automatically updates domain records when IP addresses change so that the domain remains connected to the corresponding server is the solution.
**What is Dynamic DNS?**
Dynamic DNS is a system for updating DNS (Domain Name System) records automatically. A DNS server is needed to convert the domain name into an IP address(which is a unique number that identifies devices on the internet) when entering a URL into a web browser. The server examines DNS records stored in zone files to determine the IP address associated with a domain,
When an IP address changes Dynamic DNS allows devices such as network routers to inform servers, the device connects to a unique web address, verifies, and transmits the new IP address. The record of an IP address that changes become quickly outdated which leads to connection loss because the server sends the incorrect address. When the zone records of an IP address change ,cPanel updates it so that the next time someone attempts to connect, they are given the correct IP address.
It is incredibly easy to set up dynamic domains in cPanel with the Dynamic DNS tool. We’ll show you how to set up a domain.
* Log in to your cPanel account
* Find the Domain section and navigate to Dynamic DNS
* Click the Create button.
* Fill in the information
* Enter a new subdomain for a domain that is managed through your cPanel account. You can choose a subdomain name according to your requirements. If you want you can enter the IP address too, here you have to enter the IP address where you want to point your domain. The IP address will be updated automatically once the dynamic DNS is working.
* After the subdomain has been created in DDNS cPanel generates a unique URL which is called webcall. A webcall is the address through which a router tells cPanel that its IP address has changed.
* Upon receiving this message, cPanel updates the domain’s zone records. The DDNS entry will be created and a URL that ends with a unique string will be generated. This URL should be treated like a password, visiting the URL will update the DDNS entry with the IP address you are visiting from.
**Configure Dynamic DNS Router**
DDNS client has its own process for configuring custom DDNS domains, you will be required to:
* Go to your device’s DDNS configuration interface.
* Select your Custom DDNS provider.
* Enter the required information( username, password, domain name, and webcall URL).
* Click the View SSL Certificate ( We strongly recommend that you use SSL to avoid sending an unencrypted username and password). You need to provide an SSL certificate to connect the device through an encrypted channel
After this has been set up, your device will use the webcall URL to communicate with cPanel whenever its dynamic IP address changes, ensuring that the service hosted on your network is always accessible at the specified domain name.
Please note the Dynamic DNS feature is available only for the domains pointed to our Verpex nameservers.
**Automatically Updating Your DDNS Record**
While the DDNS record should not change unless you visit your DDNS URL from another IP address, it may be a good idea to set something up to automatically visit your DDNS URL from your IP, so when/if your dynamic IP changes, your DDNS record automatically changes with it. While some routers have DDNS support, the way cPanel handles DDNS is often different from the way other providers handle it; this means the DDNS settings in your router may not be the way to go here.
I’ve found that setting up a cronjob to periodically visit the DDNS URL is a quick way to ensure the DDNS record is kept updated. Depending on what type of router you have and what firmware it’s running, you may be able to set this cronjob up right on your router, otherwise, having it run on a home server (that is running Linux, macOS, or some other UNIX-like OS) would be sufficient. You can get to the cronjob editor on a home server by running: crontab -e. This cron entry below would visit your DDNS URL every hour on the 0th minute; you can use the Crontab Guru to translate crontab schedules
# How to Host Git Repositories with cPanel
Source: https://kb.verpex.com/network/how-to-host-git-repositories-with-cpanel
Git is an open-source version control system(VCS) which tracks the history and versions of content (files and directories) and manages changes to a project without overwriting any part of the project. It allows developers to collaborate and work on a project at the same time.\
The Git Version Control menu allows you to create or import Git repositories and host them in your cPanel account. The cPanel menu allows you to create, clone, view, and deploy repositories without having to log in to your account via SSH. The cPanel Git Version Control tool provides a convenient graphical interface that allows access to Git features without using the command line.
**How to use Git Version control in cPanel to install and update a site**
The steps below allow you to easily deploy and manage your projects.
* To create an empty repository you will need to disable the Clone a Repository option.
* Using your preferred text editor on your local machine, add a .cpanel.yml file to the root folder of your repository.
* Add the following to .cpanel.yml
```text Git theme={null}
deployment:
tasks:
- export DEPLOYPATH=/home/cpanelUser/public_html/
- /bin/cp -R * $DEPLOYPATH
```
Replace the “cpanelUser” with your Cpanel username.\
.Git Add, commit and push these changes to GitHub.
* Head over to your cPanel account
* Under files, select the Git Version Control tool
* Toggle off the Clone a Repository button
* Click Create, where you can start a new repository from scratch. This process will create the /.git folder in the newly created repository. Make sure you do not modify/delete the /.git directory or its contents. Any changes to this folder can break the repository irreversibly and lead to data loss.
* In front of the newly created repository, click on “MANAGE”
* Enter the file path to the new repository
* Name the repository as it will appear in your cPanel interface
* Click Create at the bottom
* Then, it will be transferred to another screen with commands which you can use to push a Git repository from your PC to cPanel.
* In the Repository Path text box, enter the path to the document root of the site, the document root is usually public\_html. However, you can install the site in a public\_html subdirectory if you wish.
* Make sure to set the correct permissions on the directory so that the site is visible. In the Repository Name text box, enter a descriptive name for your repository.
* Click Create.
Please note that Git Version Control will only show Git repositories created using the cPanel menu itself. Therefore, creating or deleting repositories via SSH will cause inaccuracy in the list of repositories displayed here.
**Clone an Existing Repository into your cPanel Account**
Be very careful when creating a repository in a directory that already contains files. If for some reason you delete the repository from cPanel, the entire directory will be deleted. Instead of creating your own Git repository, you can "clone" a repository that already exists on the web.
* Head over to the cPanel
* Under Files, Select Git Version Control
* Copy the clone URL into the Clone URL
* Enter the Repository path (remember the cloned repository provides its own directory)
* Specify the repository name as it will appear in the cPanel interface
* Click Create, and you will be redirected to your list of repositories and the cloning process will begin. This may take some time depending on the size of the repository, and all options for that repository will be disabled during the process, so you will not be able to manage or remove it until the clone is complete.
You have now successfully cloned a repository into your hosting account.
**Managing an Existing Repository**
The Manage option is divided into two tabs: Basic Information and Pull or Deploy. Both tabs share the following elements.\
The repository path indicates the directory where the repository is located and allows you to open it in the file manager.\
The remote URL is only available for repositories cloned from other sources and specifies the location of the source repository.\
Currently, Checked-Out Branch displays the branches that have been checked out for this repository. It also allows you to access it in the Gitweb interface.\
HEAD Commit displays information about the last commit (HEAD) in this Git repository.
In the Basic Information tab, you can also change the Repository name and select a different Checked-Out Branch. Any of these changes must be confirmed by clicking the Update button.
In the Pull or Deploy tab, you can also view information about the last deployment.. This is the information on the commit that is deployed at the moment, and the date of the deployment. There are also two buttons featured here:
Update from Remote, which is only available for cloned repositories and can be used to pull updates from the remote repository to the cPanel repository.
Deploy HEAD commit, which can be used to manually deploy the last commit.
To deploy a repository, you will need to go to the Manage Repository menu and press the Deploy HEAD Commit button in the Pull or Deploy tab.
Please note that cPanel automatically adds a post-receive hook to all new repositories which will trigger the deployment each time you push updates to the repository. Cloned repositories can only be deployed manually.
**Why Create a Git Repository in cPanel**
cPanel makes the process much easier by creating the repository and the necessary executable files to save and launch your project right away.
# How to Perform MTR
Source: https://kb.verpex.com/network/how-to-perform-mtr
MTR is an application that combines traceroute and ping. With MTR, you can send packets from your local machine to a remote server and observe both routing and network performance between machines. MTR is an invaluable network diagnostic tool, especially when trying to isolate the source of problems such as latency or connectivity issues. Sometimes speed and connectivity issues can be related to latency or a "bad hop" in the path of the server you're connecting to or the site you're trying to visit. There are several ways to determine the cause, but a good starting point is an MTR test.
An MTR test is a broad-spectrum diagnostic tool that can help identify where connections are failing. It can also help identify the cause of the connection loss. Note that MTR tests can only be run on Windows, MacOS, or Linux. However, the test is to assess your network, not the device itself. Also, be sure to test using the specific ISP network you're having trouble with at the time.
**Perform an MTR on Linux**
All you have to do is use the terminal to download the package from its repository and install it.
If you’re running an RHEL-based distro, such as CentOS, Fedora, or RHEL, open your terminal and enter
```text theme={null}
yum install mtr
```
* Once installed, enter this command to run the test
```text theme={null}
mtr testing.com -c 1000 -r
```
* Press return.
Note that if your user on the Linux system does not have sufficient permissions, you can use the command below. However, to run it, you will need to enter your root or admin user password
```text theme={null}
sudo yum install mtr
```
If you’re running a Debian-based distro, like Ubuntu, use the following instructions\
Open your terminal and enter
```text theme={null}
apt-get install mtr
```
Note, if your user on the Linux system does not have sufficient permissions, you can use the command below. However, to run it, you will need to enter your root or admin user password
```text theme={null}
sudo apt-get install mtr
```
Once installed, enter this command to run the test.
```text theme={null}
mtr testing.com -c -1000 -r
```
Copy and paste the output and send it to Support for further troubleshooting in case you are asked to run an MTR test.
**Perform an MTR on Windows**
For Windows Operating Systems, you can use WinMTR which is a port of MTR.
* Install MTR on Windows
* Download WinMTR
* Go to the folder where it was saved and unzip the file
* Click “Extract” to extract the files into the same folder where the WinMTR ZIP was saved.
* Double-click WinMTR64.exe to open the application.
* Run the MTR Test.
* To do this, enter a domain name or IP address in the host box, and press Start.MTR.png
* Allow the MTR test run for 15 minutes and then click Stop.
* You can now view MTR Test results.
* Copy and paste the output and send it to Support for further troubleshooting.
**Perform an MTR On MacOS**
The MTR tool does not come pre-installed on Mac OS X devices and is not available in the Apple store. To install MTR, you will need to have the Homebrew package management system installed on your computer. Homebrew makes libraries and utilities available on your Mac that are not included by default with the Mac OS X installation.
To install Homebrew, open a Terminal Window and run the command
```text theme={null}
/usr/bin/ruby -e "$(curl -fsSL https://raw.githubusercontent.com/Homebrew/install/master/install)"
```
To install MTR, run the command
```text theme={null}
brew install mtr
```
Once MTR is installed, run the command
```text theme={null}
cd /usr/local/Cellar/mtr/0.94/sbin
```
Make the MTR command available on your system by running
```text theme={null}
cp mtr /usr/local/bin/
```
If you get a permission error, run
```text theme={null}
sudo cp mtr /usr/local/bin/
```
Running MTR
cp mtr /usr/local/bin/
If you get a permission error, run
```text theme={null}
sudo cp mtr /usr/local/bin/
```
Running MTR\
Once MTR is installed, open Terminal and run this command
```text theme={null}
sudo mtr google.com -r
```
Run the MTR trace for 10-15 minutes.\
Copy and paste the output and send it to Support for further troubleshooting.
**Or you can use MacPorts**
For MacPorts use the syntax below:
```text theme={null}
port install mtr
```
Running an MTR:\
You can use the native GUI that is available and start an MTR through there for Windows based MTR's using WinMTR,
* You can use the syntax for Unix based systems,
```text theme={null}
mtr -rw [destination_host]
```
* Once MTR is installed, open the Terminal application and run this command:
```text theme={null}
sudo mtr google.com -r
```
* Let the MTR trace run for 10-15 minutes.
* Copy and paste the output and send it to Support for further troubleshooting.
# HTTP 2 Overview
Source: https://kb.verpex.com/network/http-2-overview
The HyperText Transfer Protocol (HTTP) enables the retrieval of network-connected resources available across the cyber world and has evolved through the decades to deliver a fast, secure and rich medium for digital communication. It is a set of standards allowing internet users to exchange website information. HTTP/2 is the latest revision of HTTP used by browsers to exchange website communication.
HTTP/2 makes applications faster, simpler, and more robust which optimizes applications and improves performance. The primary goals for HTTP/2 are to reduce latency by allowing full request and response multiplexing, minimise protocol overhead via efficient compression of HTTP header fields, and add support for request prioritisation and server push.
HTTP/2 no longer adjust the utility semantics of HTTP in any way. All the core concepts(HTTP methods, status codes, URIs, and header fields) remain in place which means all existing applications can be delivered without any modification.
**Pros and Cons of HTTP/2**\
**Pros**
* It is binary, not textual
* It enables more efficient use of network resources and a reduced perception of latency by introducing header field compression.
* It is fully multiplexed, what this means is that multiple parallel requests can be made to improve performance within a single TCP connection leading to better utilisation of available network capacity.
* It decreases the load time of applications drastically.
**Cons :**\
There is no alternative available today that’s superior to HTTP/2.
* Encryption is not required.
* There is still an issue with Cookie security
* It is not super modern and not very fast
**Benefits of HTTP/2**\
HTTP/2 brings a number of new features to the table, including:
* A binary protocol, making it more compact to ship over the wire
* Multiplexed and parallel connections allow for faster, more efficient data transfer
* Server push functionality, which enables web developers to build sites that proactively send assets that are needed by a web page and can minimize network overhead.
* Header compression decreases the bandwidth overhead imposed by HTTP/2.
* Prioritization and stream dependency helps developers and website owners optimize their site’s network usage.
HTTP/2 brings about a new and improved Web. It is faster, needs less bandwidth, helps websites stay secure, and makes the overall web user experience smoother and safer.
With HTTP/2, latency is reduced, and there is faster performance and better SEO rankings. HTTP/2 is currently supported added and configured on all hosting
# LVE Limits Explained
Source: https://kb.verpex.com/network/lve-limits-explained
LVE, or Lightweight Virtual Environment, creates isolated, small environments for every user on the server, and each one of them receives a specific portion of security lockdown features and dedicated resources. LVE guarantees users that their web hosting neighbors won’t inter-access their data on their server, nor will they steal SSD speed, RAM, or CPU from them.\
CPU Cores
When processing data, an important piece of hardware that is used in the process is CPU. This piece of hardware has sockets with “cores” that each perform requested tasks. Some tips you should keep in mind if you want optimal CPU usage are:
```
Make sure your site is up to date, optimized, and tidy, and remove any data or content that it doesn’t need.
Enable using a CDN from your cPanel menu. This will help you offload delivering and searching of your website data, and it will take the strain off the server.
There is less strain on CPU cores if there is a more cached content.
```
**Memory (RAM)**
Temporary storing data needed to do tasks is RAM memory. Users accessing various pages of your site and MySQL data queries affect this resource, as well as the activities you take on your site. The data is removed once a task is completed, and the space can be used for another task. For optimal RAM usage, you can follow the following tips:
```
Optimize.
The latest versions of Themes, Plugins, and Core will ensure that your CMS is tidy. Plugins that you don’t need should be removed in order to avoid draining memory usage with tasks that you aren’t in need of.
Automatic cron tasks should be disabled from running by themselves. In addition, they should be set to run at set intervals of time from the Cron Jobs tab in cPanel.
You will decrease the active tasks that use up RAP from repeated visits by serving cached content to users, so make sure that you install a caching plugin.
```
**Entry Processes**
The number of processes that enter your account are the entry processes, for instance, SSH sessions, PHP pages accessed by users, and cron jobs. Depending on the type of request that is being made, they are processed fast by the CPU.
**IO and IOPS**
IO stands for Input/output, and it is measured in MB per second. This influences the size of write/read data blocks served on your site. IOPS stands for Input/Output Operations Per Second, and it affects write/read data blocks number served on your website. If you optimize other limits properly, you shouldn’t be facing issues with these two as well.\
Number of Inodes
Inodes are storage spaces used to hold the data of each folder and file under your hosting space.
**Cage FS Security**
The thing that defines the LVE limits for each account and doesn’t allow them to interfere with other accounts is the CageFS feature that is offered by Cloudlinux. However, keep in mind that this doesn’t apply to MySQL. Even though the resources are maintained and separated per cPanel account, something that is elementary for all accounts to use is MySQL.
# Hardware and Locations
Source: https://kb.verpex.com/network/server-overview
An overview of the hardware we use and which locations our hosting is available in
At Verpex we set every single cPanel/WHM server up identically. That includes:
* Shared hosting
* Reseller hosting
* Managed Dedicated servers
This is true in every location and with every underlying network provider we use. The service you get is identical. We designed this in order to provide the most stable and reliable service.
## Hardware specification
We use high-end NVME hosting. On shared and reseller hosting, this is typically on servers with 128GB+ RAM and AMD EPYC CPUs.
Because we use CloudLinux, each cPanel account is limited in the RAM and CPU usage that it can make use of, but the whole server capacity is huge and the hardware performance is phenomenal.
We have tried various server setups over the past few years in order to provide the most consistent and highest performance hosting we can. This was the optimised setup we settled on.
We do not provide individual server specifications on request and exact underlying hardware can vary from server to server.
All servers run redundant RAID storage
## Locations
As a global hosting provider we offer hosting locations around the globe. We do not run our own datacentres but instead put our managed hosting platform on top of various network providers. We offer the following locations:
* US-West
* US-East
* Canada
* Australia
* London
* Singapore
* India
* Central Europe
* South America
We are adding more locations as we find infrastructure providers that match our high standards and are able to accomodate the advanced features we need such as unlimited bandwidth and inline DDOS protection.
In each of the above locations we may use a number of providers and specific datacentres. We make those decisions based on various factors including network performance, availability of hardware, reliability, government relations.
On dedicated servers we can offer more granular choice about where you want to be located and work with you to find the most suitable setup for your needs.
## Backups
All servers have backups stored offsite using JetBackup.
## AnyCast DNS
We run our own Anycast DNS service
## DDOS Protection
We provide inline DDOS protection on all servers. We do not offer individual site protection against your site getting DDOS attacked -- and we will likely take your website offline should you be under attack. However, this enables us to keep other websites (and the server) online in the event of a DDOS attack.
# Software Stack
Source: https://kb.verpex.com/network/web-hosting-software-stack
An overview of the software stack we run at Verpex
Every server we deploy runs identically and includes the following
|
Software Name
|
Description
|
|
cPanel Control Panel
|
cPanel is the world's most popular hosting control panel.
|
|
WHM (Web Host Manager)
|
WHM is the reseller and server management interface for cPanel. If you have a reseller account or a dedicated server you will have access to WHM.
|
|
CloudLinux 8
|
CloudLinux allows us to limit the resource usage of individual cPanel accounts. This lets us put multiple shared websites on one server and stops one user from affecting others on the server.
|
|
LiteSpeed Web Server
|
LiteSpeed Web Server is a high-performance, secure, and easy-to-use web server that can interchange with Apache. It is part of the "NR Cloud Hosting" platform. The LiteSpeed cluster runs on VMware, with load-balancing performed by an F5 pair. It operates HTTP on the specified IP addresses, while HTTPS traffic is terminated at the F5 and forwarded to the LiteSpeed cluster over HTTP.
In this environment, PHP applications are executed through FastCGI and LSAPI. User data is stored on a Network File System (NFS) volume that is mounted on both nodes of the LiteSpeed cluster
|
|
Imunify360
|
Imunify360 on Verpex is an advanced security solution which provides various features to protect hosting accounts. Imunify360 provides ongoing protection against malware, automated patching, and is integral for maintaining the security of websites hosted on cPanel servers.
|
|
SitePad
|
SitePad is a website builder included with certain hosting plans that enables users to easily create and manage their websites without needing any coding skills. It offers a user-friendly drag-and-drop interface, allowing users to customize their websites fully.
|
|
|
# What is a 403 Forbidden Error (and How Can I Fix It)?
Source: https://kb.verpex.com/network/what-is-a-403-forbidden-error-and-how-can-i-fix-it
Error 403 forbidden message on a website
Running a website, whether it's a blog, an e-commerce store, an information landing site, or anything in between, is critical to your online presence. As with all things technology, hiccups can happen on your site, making the user experience anything but smooth.
Error messages are common problems for anyone running a site. While some of these messages are more prevalent than others and are easy to decipher, others are not. If you recently encountered a message that says "403 Forbidden: You are not authorized to access this server" and you don't know what to do, this article will provide you with easy ways to resolve it.
A 403 Forbidden error occurs when you do not have permission to access a web page or something else on a web server. The issues causing the "403 Forbidden" error are quite different and require different approaches to resolve. Some of the solutions can be implemented by both visitors and website owners, assuming the problem is with their device or local network. However, issues caused by a website configuration can be examined only by the website administrators as they require access to the backend settings.
We will start with the general solutions that anyone can try and narrow down to more specific solutions that require administrator privileges to the Website.
If you are just a visitor, be sure to try these steps:
* Refresh the Page
* Double Check the Address
* Clear your browser’s cache and cookies
* Check if you have Permission to Access the URL
* Try Again Later
* Contact your ISP
* Disconnect from your VPN
If you are the website owner, most likely it's incorrect file permission on your server. This error can be triggered by a faulty plugin or a corrupt .htaccess file. As a website owner, you can check the error logs from your hosting panel as they may indicate the source of the problem. However, you may also need to contact your hosting provider to access or change certain settings on your site In most cases, you should be able to resolve the issue on your own. We recommend backing up your site in case something goes wrong and you need to restore it to an older version.
Below are the steps to fix the 403 forbidden error.
**Faulty WordPress Plugins**
The 403 Forbidden error can also be caused by a faulty plugin, you will have to deactivate your plugins and then reactivate them one by one.
* Log into your cPanel
* Scroll down to the files section and then click on File Manager.
* Click public\_html, go to the wp-content folder and locate the plugins folder.
* Click the plugins folder and select Rename.
* Give the folder a new name, for example, “plugins.bk”. your plugins will be automatically deactivated\
After deactivating the WordPress plugins go back to your website and reload the page if your website opens fine, it means that you have a problem with WordPress plugins.\
Your next step is to figure out which one it is.
* Go back to your cPanel and rename the plugins folder back to “plugins”.
* Go to the Plugins page in the WordPress dashboard and activate the plugins one by one.. Keep doing this until you can reproduce the error.
* Once you have identified the faulty plugin, you can either replace the plugin with an alternative one or contact its developer for support.
**Corrupt .htaccess File**
if the user makes changes to the .htaccess file and for this reason the .htaccess file is corrupted and may affect the website. So to resolve this incorrect .htaccess file to need to edit the .htaccess file in edit mode and replace the corrupted file with the original file.
Steps to edit the .htaccess file:
* First, you need to login to your cPanel
* Go to the files section and then click on File Manager.
* Select the .htaccess file and edit it(If you can't find it, go to the settings and enable the "show hidden files" option.)
* Now you need to replace the content of your htaccess file with the content of the original htaccess and then click on the “Save Changes” button
* You can check the WordPress code here if you do not know the content of the original .htaccess file
* Replace the content of the .htaccess file
**Wrong File Permissions**
If the above two solutions failed to resolve the 403 Forbidden error, then it is very likely that the incorrect file permission is causing the 403 Forbidden error. Also, keep in mind the files and folders stored on your website have different file permissions and these file permission allows those who can access the webpage.
Note: 1. All files stored on your website have 644 file permission.\
2\. All folders stored on your website have 755 file permission.
If the file permissions are incorrect, the web server does not allow the user to access the Webpage then change the file permission that is defined above.\
After changing all file permissions of files and folders then click on the “Ok” button to save the file permission.
**Content Delivery Network (CDN)**
If you continue to receive the 403 Forbidden error after following the steps above, you may have a problem with your Content Delivery Network (CDN).\
It is a network of servers located in different parts of the world, with each server hosting a copy of your website. Many hosting plans come with a CDN to boost your site's performance. To see if your CDN is the cause of the error, you will need to temporarily disable it.
**Verify the A Record**
if your domain name points to the wrong IP address, where you are not authorized to view content, the 403 forbidden error can also occur. If you have recently transferred your site from one host to another and did not change the nameservers, your domain may still be pointing to your old web host. Once the old host deletes your account, it will cause a 403 error status code. Therefore, check that your domain name points to the correct IP address, if not, point your domain’s nameservers or A record to the correct servers.
**Malware Scan**
Another cause of the 403 error is malware. If your WordPress site becomes infected with malware, it may continue to inject unwanted code into the .htaccess file. This way, even if you continue to fix the file using the first method provided, the error will still persist. Scan your website for malware. There are many WordPress security plugins like Sucuri or Wordfence to do this.
**Rolling Back to Recent Updates**
If you recently updated the CMS itself just before the 403 Forbidden Error appeared, you might want to consider rolling back to the previous version you installed when everything was working properly. Likewise, any extensions or modules you've recently updated can also cause server-side issues, so downgrading to older versions of those can also help.
**Unexpected Database Changes**
Uninstalling a CMS extension does not guarantee full recovery of changes. This is especially true for WordPress extensions. These extensions have carte blanche status within an application, which gives them full access rights to the database. With this access, an extension can modify database records that do not "belong" to the extension itself. This means that it can modify records created and managed by other extensions of the same CMS.
In these scenarios, the extension may not know how to undo changes made to database records, so it will ignore those items when uninstalling. Your best course of action, assuming you're reasonably convinced that an extension is the likely culprit of the 403 forbidden error, is to open the database and manually look at the tables and records that have likely been modified by the extension.
**Application Code or Scripts**
If all else fails, manually debug the application by analyzing the application and server logs. Ideally, make a copy of the entire application on a local machine and perform a step-by-step debugging process. This will allow you to recreate the exact scenario where the Forbidden 403 error occurred and visualize the application code at the moment something went wrong.
You will need to contact support if none of the listed steps worked for you. Understanding the problems causing the error is crucial for fixing them in a timely manner – before the website suffers from traffic loss.
# What is the Average Server Specification?
Source: https://kb.verpex.com/network/what-is-the-average-server-specification
Our digital lives depend on servers, and they are everywhere. From small business servers that run networks of printers to network storage used to back up everyday files, servers are all around you. Of course, most servers are designed to allow only a few people to connect at a time, and they're not much more powerful than a desktop computer.
A server is a remote computer usually stored in a server data center. It's always on and connected to the internet via Gigabit Ethernet. It can be used to host a variety of services and applications to achieve business goals. Verpex provides customized, optimized and secure shared and dedicated servers. The server specification indicates the minimum server specification that will be available upon request.
Server load is generally difficult to predict, it is mainly due to visitor peaks, so it is difficult to determine the minimum configuration required. For your website, you will need server resources that can handle hundreds (or thousands) of connections simultaneously and do so without interruption indefinitely. We have different types of hosting and your server hardware specifications will depend on the type of hosting you have. Our specs for shared, reseller, and dedicated servers are listed below.
**We provide these numbers for informational purposes only:**
Our shared servers use AMD Ryzen EPYC processors with 128 - 512GB of RAM and NVME SSDs\
For a Dedicated server, it is an AMD EPYC or an Intel Xeon processor, standard SSDs
Our hosting platform can provide sustained CPU and memory capacity for the application you want to run, especially the intensive startup process. The above values are for the available hardware required to operate. If you need additional physical hardware required by your operating system and any other application running on the server, we recommend that you contact support for assistance in identifying the optimal configuration to meet your needs.
Selecting the right hosting package for the scale of your projects, with the right power and scalability, is key to keeping sites running quickly and consistently. However, each situation is unique and you may need more advice on which monthly plan best suits your needs. If you still have questions about which server to choose or are ready to start setting up your hosting environment, contact the Verpex team today. Our experienced and friendly staff are always ready to help.
# Why Hosting Location Matters
Source: https://kb.verpex.com/network/why-hosting-location-matters
Through leveraging a number of different cloud hosting providers, Verpex is able to offer you the opportunity to host your website in more than 40 locations around the world. By offering cPanel in more locations than any other provider, we can offer an easy managed hosting experience - where we manage the hosting services, backups, and monitoring leaving you to upload your website and go.
The question remains though - why does it matter where your website is hosted?
Firstly, the most important point is website performance. By placing your website geographically as close to the bulk of your site visitors, you'll find their website browsing experience of your site is significantly improved. There are figures out there that suggest that conversion rates are significantly better for faster loading sites, and many visitors will click away (bounce) from your site if your site loads altogether too slowly. If you want to target a mainly UK audience, hosting your site in the UK is, therefore, the best option for you, whereas if you wanted to target users in the East then perhaps Singapore is the best option for your site.
Secondly, the other important benefit of placing your site is an aspect of search engine optimisation (SEO). Google likes to give users somewhat curated results for searches that they make and as such will tend to rank sites that are hosted 'locally' for that user higher than those that are hosted elsewhere. So a site hosted in France will tend to rank higher for Google searchers searching from France than a site in the UK and vice versa.
# Can I oversell on my Reseller Plan?
Source: https://kb.verpex.com/reseller/can-i-oversell-on-my-reseller-plan
We often get questions about offering unlimited reseller hosting with our reseller packages. Yes, we allow overselling on all our reseller hosting packages. What this means is that you can offer your customers up to 500GB disk space and bandwidth.
Overselling means offering more resources than the allocated resources on your account. You are allowed to sell much more than the common amount of disk space and unlimited bandwidth to your customers and you still have great uptime and fast servers at your fingertips.
Overselling to your customers boosts your hosting revenue, you are allowed to sell multiple hosting plans and manage your plans seamlessly.
In order to offer unlimited web hosting, you'll have to create a new package inside your Web Host Manager(WHM). Because of the way Web Host Manager is designed, you will need to enter a number in the bandwidth field even if you wish to offer unlimited there is a [complete guide ](/reseller/how-to-create-packages-and-feature-lists-in-whm) to walk you through the setup.
It's our goal at[ Verpex](https://verpex.com/) to provide you with the best high-speed reseller hosting in the world. Our packages are loaded with features you need to be successful in the web hosting industry.
Our [reseller hosting](https://verpex.com/unlimited-reseller-hosting) is a hosting service that allows businesses and individuals to rent space from us. We then manage the technical aspects of the hosting service, providing technical support and ensuring the software and hardware are up to date.
# Can resellers set their own LVE Limits?
Source: https://kb.verpex.com/reseller/can-resellers-set-their-own-lve-limits
As a reseller, you have the ability to offer different levels of CloudLinux limits to your cPanel accounts. This allows you to better control how many resources each account can use.
|
Start-up Reseller
|
Pro Reseller
|
Ultimate Reseller
|
|
RAM per cPanel
|
2GB
|
2GB
|
4GB
|
|
CPU per cPanel
|
2 vCPU
|
2 vCPU
|
2 vCPU
|
|
Entry Processes
|
30
|
30
|
30
|
|
Inodes
|
Unlimited
|
Unlimited
|
Unlimited
|
|
Iops
|
1024
|
1024
|
5120
|
|
IO
|
50MB/S
|
50MB/S
|
250MB/S
|
|
LVE Manager
|
Disabled
|
Disabled
|
Enabled
|
As a reseller, you have the ability to modify account limits within the LVE Manager.
**LVE Manager**
This is an Ultimate Reseller-only feature that allows you to set limits per cPanel account. Please note that the maximum limit you can set per cPanel is 4GB (your package limit). If you attempt to set the limit higher, it will be automatically reverted back to 4GB.
# Difference Between cPanel and WHM
Source: https://kb.verpex.com/reseller/difference-between-cpanel-and-whm
Web Host Manager, or WHM, is a powerful tool that allows administrative access to the back end of multiple cPanel accounts, Not only does it allow you to manage individual accounts, but you can also set server-side limits and gives full control over multi-site management. WHM functions via 2087 as its secure port number.
WHM (WebHost Manager) is a reseller control panel tailor-made for a reseller to provide administrative control. It gives a hosting provider flexibility to manage and control the back end of multiple cPanel accounts.
In WHM, you can:
* Create, Delete, or Suspend individual cPanel Accounts
* Customize and brand your hosting service
* Set custom hosting packages
* Add domains to the server
* Reset passwords for cPanel accounts/email addresses
* Edit Resource Limits across multiple cPanel accounts
* Modify DNS zone records for each domain and/or subdomain
* Configure private nameservers on the server
* Access and change anything in cPanel accounts without entering login details
* Perform control panel and basic system maintenance
* Configure customers' support requests through cPanel
* Create a default page when you create a new account.
The privileges of the reseller are set by the server administrator, there is a limit to what a reseller can do with WHM as some functions are not available to them compared to when he has [VPS](https://verpex.com/unlimited-reseller-hosting) which has root access privileges.
Reseller accounts get WHM, while VPS accounts get root WHM (which has features that require root access to the server enabled). Resellers can not have root access.
cPanel is a control panel used by end users to manage their own hosting accounts, it only provides access to web hosting accounts on the server to its users. After purchasing a web hosting package of your choice, every user is given a tool to manage their hosting service which is called the cPanel
cPanel is the control panel used by the end users under a reseller of hosting provider, it is designed for managing separate hosting accounts on the server.
cPanel allows account users to perform tasks including:
* Publish a website
* Account file management
* Install web applications using Softaculous
* Upload, Backup, transfer and manage files for their websites
* Manage domains add/remove addon domains and subdomains
* Create email accounts and manage email settings and SPAM protection
* Edit DNS records for their domains
* Monitor website statistics and backups
cPanel functions via 2083 as its secure port number. The password for cPanel can be set by the end user.
cPanel and WHM have characteristics that are quite distinct from one another. They work closely together but have differences which benefit end users and resellers, but at the same time maintain a difference.
# Difference Between Managed Cloud Server and Reseller Hosting
Source: https://kb.verpex.com/reseller/difference-between-managed-cloud-server-and-reseller-hosting
In today’s modern business world, a website is one of the most critical assets an organization can own. If you are thinking of starting your own business website, a lot of things have to be put into consideration including purchasing the right web hosting service well suited to your needs. A good web hosting is a mix of several different things(high page load speed, good customers)
As a good business owner, you are confronted with the dilemma of the type of hosting(Shared, Reseller, Managed cloud server, etc) to choose. Let us understand what Reseller Hosting and Managed cloud servers are.
**What is a Managed Cloud Server?**
A managed cloud server is web hosting option that comes fully with\
Deployment.\
Configuration.\
Maintenance.\
Administration.\
Troubleshooting.\
Monitoring/Reporting.
As a company or an individual, you may choose to go with a managed cloud server to free up time, the time spent on managing a server can now be spent on more crucial and business-critical tasks.
**Why Should You Choose a Managed Cloud Server?**
You should choose a managed cloud server if you need more control over your server. A managed cloud server is for someone who is an expert at server management. If you make a mistake on a managed cloud server, you can cause the server to crash leading to your site/application going offline.
**Advantages of Managed Cloud Server**
* Full control
* Easy to scale and upgrade
* Secure and powerful
* More Customization and Control over server resources
* Easy scalability
**Disadvantages of Managed Cloud Server**
A managed cloud server is not without its drawbacks.
* Cost more money upfront.
* Improper Resource Allocation
While the Managed Cloud Server option gives your business the highest degree of functionality and the most room for growth, the choice ultimately rests upon what do you need.
**Reseller Hosting**
Reseller web hosting packages allow you to become a host without the hassle of setting up servers or investing in hardware and software. What you are simply doing is renting a storage space and bandwidth from your hosting company and selling them as yours to other users. The space rented provides these users with a hosting location for their website. Reseller hosting usually comes with a WHM management tool control panel which controls, secures and manages the cPanel accounts residing in the reseller panel
If you are thinking of starting your own web designing/development firm or a Reseller business then Reseller Hosting is the best choice. With Reseller Hosting you can rent out portions of your web hosting to different customers.
**Why Should You Choose a Reseller Hosting Account?**
You should choose a reseller hosting account if you are a new business owner who does not understand server management. With reseller hosting our team of experts manages the server that your websites are hosted on. Usually, a reseller hosting account is a good place to start because you can upgrade to a managed cloud server at any time. A fresh start-up should always go for reseller hosting.
**Advantages of Reseller Hosting**
* Easy to set up and manage.
* No technical knowledge is required to rent your server resources to their businesses
* Affordable, budget-friendly and easy to upgrade
* Customized control panel
* Easy to manage all customer websites with a single control panel(WHM)
**Disadvantages of Reseller Hosting**
Sharing server resources via reseller hosting come with some challenges:
* The resources could be drained by an account which could slow down the server thereby affecting other accounts
* No access to the server
* You need to go through your hosting service provider to make changes due to limited access
Reseller Hosting is for those who solely want to run a reselling business.. On the other hand, if you’re into web designing or development, or are thinking about migrating your existing website to a new hosting type due to high traffic, then the managed cloud server is recommended.
# Getting Started As a Reseller
Source: https://kb.verpex.com/reseller/getting-started-as-a-reseller
**Is it possible to create separate cPanel accounts for my clients?**\
You can create separate cPanel accounts for your clients
**Is it possible to have ssh access enabled for individual accounts upon request?**\
As a reseller you have the option to enable/disable ssh access for your customers, more information on how to do this is found[ HERE](/reseller/how-to-grant-shellterminal-access-as-a-reseller)
**How can I monitor the bandwidth usage of my accounts?**\
To monitor the bandwidth usage of your resold accounts, go to WHM -> View Bandwidth Usage
**Do you offer control panel customization for resellers?**\
You can customize your control panel in whichever way you want, thanks to the white-label service we provide.
**Am I responsible for my clients' content/behaviour on your servers?**\
Yes, you are responsible for what your customers upload on our servers.
**What restrictions are there to reselling?**\
There are no restrictions to reselling, except for contents that are illegal or against our[ terms of service](https://verpex.com/terms-conditions)
**Are all reseller hosting plans cloud-based?**\
Our servers are in the cloud. So yes, all reseller plans are cloud-based
**Do you include litespeed and lscache?**\
We run on Litespeed servers which allows you to run the LSCache WordPress plugin
**How can I create custom plans for each individual account?**\
You can get the step-by-step procedure to create custom plans for an individual account in [this guide\
](/reseller/how-to-create-packages-and-feature-lists-in-whm)
# How to bill my customers
Source: https://kb.verpex.com/reseller/how-to-bill-my-customers
At Verpex we provide a WHM reseller account which gives you a way to manage cPanel accounts for your customers.
Most resellers also need to use software to manage their clients. This software lets clients place orders and also lets you automatically provision their hosting.
At Verpex we recommend Upmind which is the software we use ourselves.
Here are some software examples you can use
* [Upmind](https://upmind.com/)
* [Blesta](https://blesta.com/)
* [WHMCS](https://www.whmcs.com/)
* [HostBill](https://hostbillapp.com/)
With this software you enter your WHM credentials as a server, and then you can create packages that are then sold to your customers.
# How to Brand Your cPanel Reseller Hosting?
Source: https://kb.verpex.com/reseller/how-to-brand-your-cpanel-reseller-hosting
As a website owner, it's important to have complete control over your site. That's where Web Host Manager comes in. WHM is a powerful tool that allows you to manage your website and create custom packages and feature lists. In this article, we'll show you how to use WHM to get complete control of your website.
**What Exactly is Reseller Branding on cPanel?**
As a website owner, it's important to have full control over your site. That's where Web Host Manager comes in. WHM is a tool that gives users the ability to manage and control every aspect of their website. With WHM, you can create packages and feature lists on cPanel to get complete control over the features of your site.
If you're a reseller, cPanel & WHM give you the ability to create your own branded control panel skins. This way, you can provide your customers with a unique user experience that's all your own. Reseller branding is available in cPanel & WHM version 68 and later.
**What are the Pre-Requisites for Branding Hosting Interface of cPanel Reseller?**
If you want to brand the cPanel reseller hosting interface, here's what you'll need:
* An active cPanel account
* A good understanding of CSS and HTML
* Command line access
* Your brand assets, such as logo, template content, and color scheme.
**Customization of Reseller Brand in WHM**
As a reseller, you have the ability to customize many aspects of the WHM interface to better suit your brand. This includes choosing a logo and name for your company, as well as other interface elements.
To make these customizations, simply log into WHM with your reseller account and go to the "Customization" option under cPanel on the sidebar.
After adding your brand assets to cPanel, you will see the new interface for web hosting. This great tool allows you to easily add your company name, logo, favicon, and set links for documentation and help purposes.
**Hosting cPanel Reseller with a Branded Customized Theme**
If you want to override the existing cPanel theme, you'll need to work in the File Manager. Log into your cPanel account with reseller privileges, then go to File Manager. From there, you can edit the existing theme or create a completely new one from scratch. Keep in mind that creating a brand-new theme can be difficult if you're not a developer. Therefore, overriding an existing theme may be a more practical solution.
In order to create a new directory for our custom themes, we first need to access the var/cpanel/reseller/styled directory. If there is no styled subdirectory already present, we can create one by clicking the +Folder button.
It's easy to create a new directory within your styled folder - simply choose a name that fits your new theme, avoiding any spaces. cPanel will automatically convert any underscores into spaces when it appears in the interface.
To create a file within your theme's directory, select the +File button. Use the file's name for easy reference when composing your theme.
To change the color of your website's navigation bar, you will need to access the CSS file and make some changes. Follow the steps below to get started.
* Open the Edit option on the toolbar and navigate to the style.css file.
* We're going to include the directives of CSS for overwriting the defaults. You should also add the below CSS code to your file styles.css and click on the Save button on the toolbar.
* .navbar-header \{background-color: #3f7cac;}
* We cannot go into more of CSS in this paragraph, but you will easily find plenty of information from the site of Mozilla Network.
Now that you have a new theme running, your navigation bar will begin to display the updated color from CSS. Soon, you'll have a fully functioning and updated website!
**Customizing Reseller Theme Content in cPanel**
As a reseller, you have a lot of control over the appearance of your hosting services. With cPanel, you can easily customize the look and feel of your pages by altering templates and adding or replacing text.
The footer and header templates that work on each page in cPanel are named after the feature they correspond to. For example, the templates for FTP pages are called ftp\_page\_footer.html.tt and ftp\_page\_header.html.tt.
This makes it easy to change the look of any page on your site quickly and easily.
If you want to create content for cPanel pages, you'll need to generate template files within the var/cpanel/reseller/includes/ directory of your reseller hosting account. Note that this directory may not exist by default, so you may need to create it yourself.
**Customization of cPanel Reseller Icons**
The cPanel block icons are designed to help you understand what each cPanel tool does. However, if you have a customized layout, you can replace the default icons with ones that match your logo better. For this, you need an image:
* In PNG format
* At least 48x48 pixels
* With a transparent background
Different icons should be used for different things. For example, in cPanel, there is an app\_key called "file\_manager" which is responsible for icons, templates and other assets. If we want to change the icon for the File Manager, we would rename it to file\_manager.png and save it in a folder called "icons" within a custom theme.
To add an icon image to your newly created directory, use the Upload graphic button in the File Manager.
The last step is to create the cPanel icon sprite, which will ensure icons are displayed correctly. To do this, you'll need to access your cloud hosting account via SSH or the Terminal interface in cPanel.
To install your new customized theme, run the command below, replacing "Reseller\_Hosting\_Theme" with the name of the theme you have selected. For example, if you're using the "paper\_lantern" theme, you would type:
**Set Theme of Reseller Hosting into Default**
cPanel reseller hosting offers many benefits and the final step in the branding process is to set a customized theme as the default. By doing this, resellers can create new cPanel accounts with custom branding. However, before setting the theme as default, it is recommended to generate a preview picture of the interface Change Theme.
To do this, activate the cPanel preview function within your cPanel to get a screenshot of 500 pixels × 500-pixels. Save this file as preview\.png and upload it to the theme's folder through File Manager.\
To change your cPanel account's theme, go to the "Change Style" option in the user menu of the navigation bar. From there, click on the "Set as Default" option to set your new theme as the default.
Conclusion
Looking to spruce up your web hosting interface? This guide will show you how to customize your UI with unique icons, colors and content. cPanel & WHM's flexible theming system makes it easy to create a branded experience for reseller hosting that will really stand out from the crowd.
# How to change a cPanel password in WHM
Source: https://kb.verpex.com/reseller/how-to-change-a-cpanel-password-in-whm
The cPanel is a widely used control panel among hosting providers and web developers. It is typically paired with a web host manager (WHM), which offers administrative control over the server and enables the creation of multiple accounts on a single website. The cPanel dashboard provides various features for data tracking, SEO, statistics, MySQL, and web files. These features are among the many reasons why the cPanel is so popular among hosting providers and web developers.
As a hosting provider, you will likely use a web host manager (WHM) to create cPanel accounts for each customer. While the cPanel dashboard may seem complicated at first glance, this article will explore everything you need to know in order to change passwords. In addition, understanding what web hosting is and how it works will help you to better utilize the cPanel features.
**Introduction to cPanel**
The cPanel is a powerful tool that hosts providers offer to customers. Although it is not free, it is well worth the subscription fee. The cPanel is private to the website owner and can be accessed using your username and password. Keep your login details safe to protect your website from intruders.
**How to Change a cPanel Password?**
For security measures, it is advisable to change your cPanel password from time to time. Your cPanel gives you access to your website. To change your password, you need to log in to your web host manager as the root user. Here is a step-by-step process to change your cPanel password.
**Step 1: Accessing your account**
To change your WHM password, log in as the root user and navigate to "Home" >"Account Functions." Under "Password Modification," enter your new password and click save.
**Step 2 – Selecting an account**
It is important to choose the main account when changing passwords on different websites. Avoid any password errors in the future by selecting the primary account.
**Step 3 – changing password**
If you want to change your password, enter your new password in the "New Password" box. You will need to confirm your new password by entering it again in the "Confirm Password" box. If you would like a randomly generated password, you can click the "Generate" button. Please note that if you use the auto-generated password, it may be difficult for you to remember. However, this option is more secure as it includes a variety of characters and special symbols.
**Step 4 – confirm the change**
If you would like to change your password, please click the "Change Password" button. This will automatically create a new password for you and give you access to your cPanel.
**Understanding the Functionality of the cPanel Interface**
There are many things you can do on your cPanel. It's an interface with a lot of features that can help you build your website. In this section, we'll explore some of the things you can do on your cPanel.
**Install software**
If you're looking to build a website, one key thing you'll need to do is install a content management system. These days, most website owners use WordPress. The cPanel makes this process easy, as it comes with auto-installers that provide a simple way to install different software packages. You can see several of these auto-installers in the image below, located in the Autoinstallers section.
**Add domains and subdomains**
Once you register with a hosting provider, you can configure a domain during the process. It serves as the primary domain that houses your business. Adding a new domain is relatively easy, as you can see from the image below.\
Assuming you have a primary domain, you can add two different types of domain names depending on the host. These include addon domains and subdomains. The Addon domain is a separate domain name different from your main domain. For instance, if your primary domain is "abcd.com," your addon domain can be "mysite.com."\
On the other hand, the subdomain is an addition to your primary domain name. Using our previous primary domain, if you were to add a subdomain, it would be "mysite.abcd.com."
**Upload files**
There are two ways to upload files onto your web server through cPanel - FTP accounts and File manager. The latter option lets you upload files directly into the server via your web browser, which can be more convenient than using a third-party FTP program. However, keep in mind that the File Manager may not be as effective as an FTP program when it comes to uploading large files.
**Security**
If you're looking to increase the security of your website, cPanel is a great resource. It offers tools like an IP Address deny manager and password-protect directories, which can help block traffic from specific IP addresses and protect certain folders on your server with a password, respectively. Using these features can help keep your website safe from potential threats.
**View Error logs**
Most website owners neglect the "view error logs" functionality because they don't know how it works. It allows you to view different errors your website might have encountered. It's an invaluable tool to diagnose what is happening to our website. You can view the error on the server in the visitor stats section, where you will see "Error Log."\
**\
Wrapping up**
As a website owner, it's important to have a server management tool that you can rely on to keep your site running smoothly. cPanel is a great option that offers a lot of functionality to help improve performance. Whether you're using shared or dedicated hosting, cPanel should be a top priority.
For security purposes, it's essential that you change your cPanel password regularly. We've shown you the easiest way to do this so there's no excuse not to stay on top of it. Remember, your username and password are key to keeping your site safe from unwanted visitors.
# How to create and manage cPanel accounts in WHM
Source: https://kb.verpex.com/reseller/how-to-create-and-manage-cpanel-accounts-in-whm
If you're looking to get the most out of your web hosting, then cPanel is an essential tool. cPanel gives you access to a range of features that can help you manage your website more effectively. Whether it's adding new applications or files, or simply keeping track of what's going on behind the scenes, cPanel makes life much easier for webmasters.
Of course, cPanel is only as good as the web hosting company that provides it. So be sure to do your research and choose a reputable provider that will give you all the tools you need to succeed online.
There are many factors to consider when choosing a cPanel host for your business, such as customer support, pricing, performance, features, and reliability. The cPanel is a vital part of a web host as it allows you to manage various aspects of a web server, including email accounts, files, databases, and SSL certificates. With so much at stake, it is important to be careful and select the best possible option for your needs.
**How to create and manage cPanel Account in WHM?**
The first step to creating and managing your cPanel account is accessing your cPanel. However, before you can do this, you must purchase a domain name and hosting plan from a web host. Once you have done this, you can then log in to your cPanel account via the web host manager.
**Step 1: Login to cPanel**\
There are a few different ways that you can log in to your cPanel account. One of the easiest ways is to type in your website address, followed by a colon and 2083. So, for example, if your website is [www.domain123.com](http://www.domain123.com), you would need to type [www.domain123.com:2083](http://www.domain123.com:2083) into your browser's address bar.
This will automatically take you to the login page, where you'll need to enter the username and password that were emailed to you when you set up your account.
**Step 2: Creating an account**
In order to create a new account on your website, start by accessing the website settings. Then, click on the "Account Functions" option. Next, click on the "Create a New Account" button to begin the process.
**Step 3: Fill in the necessary information**
In order to create a new account, you will need to provide some basic information such as a domain name, username, password, and email address. Be sure to fill out all the fields accurately.
The domain name is what will be used primarily for your cPanel account. The username is the name you will use when logging in to cPanel. Every username has a corresponding password which you will need in order to access cPanel. Lastly, the email address is where you will receive notifications from cPanel.
**Step 4: Select Package**
You have the option to select from a variety of different packages. Choose the one that best suits your needs.
**Step 5: Select theme**
In this section, you can choose your language and theme preferences.
**Step 6: Optional setting**
Welcome to the wonderful world of web hosting! Creating a new cPanel account is easy and only takes a few minutes. Simply follow the steps below and you'll be up and running in no time.
1. Enter your desired account name and password in the appropriate fields.
2. Select your preferred DNS and Mail Routing settings. If you're not sure what these are, don't worry - the defaults will work just fine in most cases.
3. Click the "Create Account" button.
**Advantages of cPanel for website Owners**
cPanel provides website owners with a number of powerful features that can be extremely helpful for businesses trying to promote their products and services online. Some benefits of using cPanel include:
-The ability to manage multiple websites from a single account\
-A user-friendly interface that makes it easy to get started
**User-friendly interface**
The cPanel interface is designed for easy navigation, with a dashboard, menus and graphics that make finding what you need a breeze. Installing and uploading files to your web host is simple and straightforward, making cPanel an excellent choice for those looking for a user-friendly platform.
**Highly compatible**
Many people enjoy using WordPress because it is compatible with a variety of web browsers, including Mozilla Firefox, Safari, and Google Chrome. Additionally, it supports many different third-party applications, such as SEO tools and site builders.
**Extensive features**
With the user-friendly dashboard, anyone can easily manage MySQL databases, create FTP accounts and subdomains, and generate website backups - no advanced technical knowledge required.
**Reliable support system**
cPanel blogs and forums offer comprehensive manuals for WHM and cPanel, providing in-depth analysis and solutions for several cPanel products.
**Application installer**
Looking to add some new features to your website? cPanel has you covered, with over 400 applications available for installation. And thanks to the integrated Softaculous apps installer, getting everything set up is a breeze. So why wait?
**Wrapping up**
The cPanel interface provides a wealth of options for web users who want to take control of their website applications and files. With Softaculous, you can install software with ease, create FTP accounts, email accounts, databases and usernames, set up Free AutoSSL, and view web traffic data – all from one convenient platform.
Creating and managing a cPanel account is simple and straightforward. By following our guide on how to create a cPanel account, you too can become an expert in minutes. So why wait? Get started today and see what cPanel can do for you!
# How to create packages and feature lists in WHM
Source: https://kb.verpex.com/reseller/how-to-create-packages-and-feature-lists-in-whm
Different web hosting providers offer different tools to help customers manage their websites. Some of these tools, like Web Host Manager, give users administrative access to cPanel. This control panel, which is based on Linux, allows web owners to perform various tasks, such as creating email accounts, installing software, and creating subdomains and FTP users.
WHM, or Web Host Manager, is a control panel that enables a hosting provider to manage their customers' accounts. It is similar to cPanel in that it provides administrative control over a server, but it also allows the host to manage reseller hosting plans. One important feature of WHM is the ability to create packages and feature lists.
If you're looking to streamline your web hosting experience, creating packages and feature lists in WHM can be a great way to do so.
**How to create Packages in WHM?**
In order to create packages on WHM, simply follow the steps below. You don't need any advanced technical knowledge - all you need is to be able to follow directions.
**Step 1: Log in to WHM**
If you want to create a package, you'll need to login to the administrative section of WHM. Your host provider should have given you the login details. Once you're logged in, you'll be able to access all the features and options available. Or, you can directly login to your WHM from here:
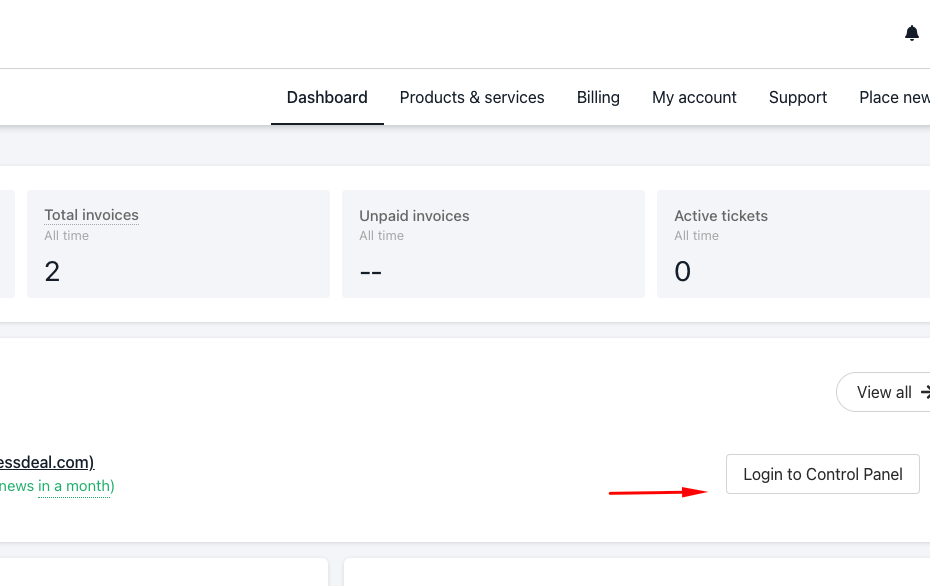
**Step 2: Use the Search box**
If you're looking to add a new package to your project, the best way is to use the search box on the upper left side of the screen. Type "Package" into the search box and select "Add Package" from the results.
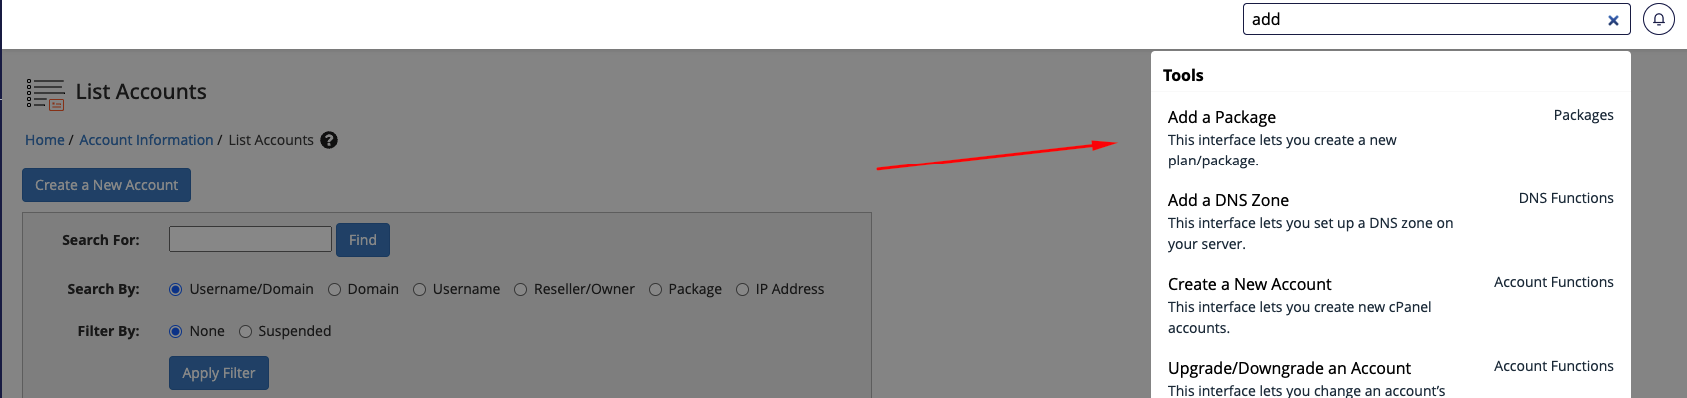
**Step 3: Add a Package**
If you're looking to add a new package to your project, the best way is to use the search box on the upper left side of the screen. Type "Package" into the search box and select "Add Package" from the results.
**Step four 4: Go to Setting**
On the "Setting" tab, scroll down to find the resources you want to enable for the new package. You can also select the cPanel theme using the cPanel theme options.
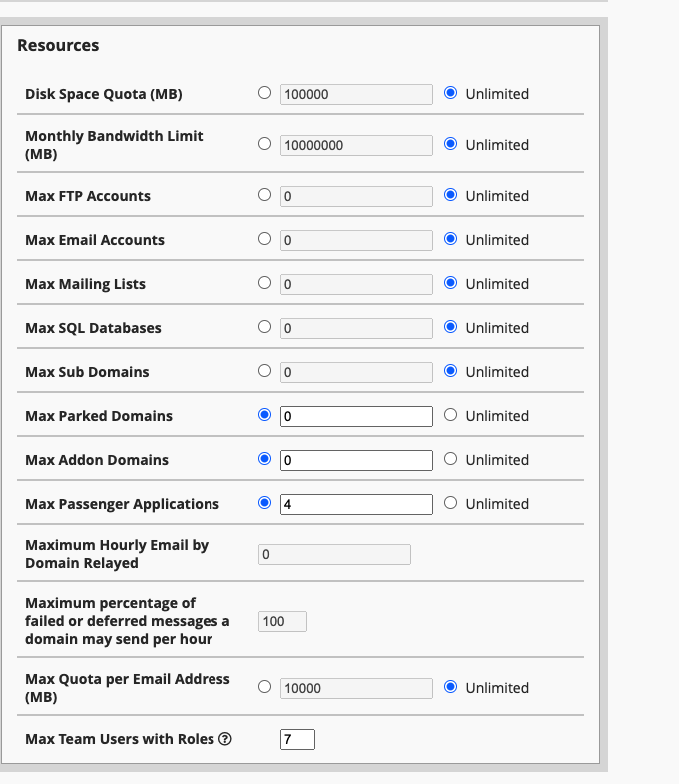
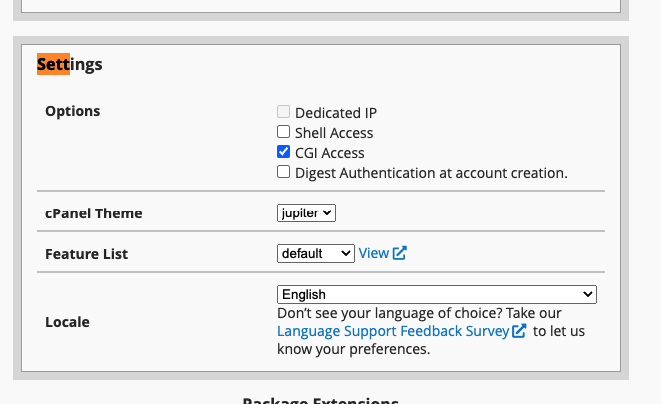
Choose the feature list you want for the package. If you're not sure about a setting, leave it as the default value. The last setting is "Locale," which allows you to select the language of choice. The default is English, but you can change it to something else if you prefer.
**Step five 5: Complete the process**
After you have made all the changes you want, click the "Add" button to create a new package. This completes the process of creating a package in WHM. You can create as many packages as you need.
**How to create feature lists in WHM?**
If you want to give your cPanel users access to certain features on WHM, you can do so by creating a feature list. This is a list of features that each cPanel account has on WHM. For example, you can enable or disable features like IP Deny Manager, Awstats, phpMyAdmin, and File Manager. Let's take a look at how to create a feature list in WHM.
**Step 1**
To access your web hosting account manager, simply log in with your credentials.
**Step 2**
To find the Feature Manager, begin by clicking on the "packages" option in the left-hand menu.
**Step 3**
Assuming you want to add a new feature list:\
Click on the "Feature Manager." You will see a new feature list under "Add a New Feature List." Clicking "Add" will allow you to enter the new list.
**Step four**
The next page will have a list of features. You can choose which ones to enable or disable. Once you're done, click "Save." This creates a new feature list in WHM.
**Functions of WHM**
Before you decide if a product is suitable for your needs, it is necessary to look at what the product does. For example, WHM offers a suite of tools that website owners can use to do various things, such as monitoring and managing websites, creating and suspending cPanel accounts, configuring customers’ support requests, changing domain names, and checking and editing DNS zones.
**Why do you need WHM?**
The Web Host Manager is a powerful tool that gives you flexibility and control when managing multiple websites. With WHM, you can easily sell hosting services and create cPanels for your customers. There are several reasons why you need WHM, especially if you have popular websites that require different cPanels.
For example, if one of your websites is attacked or hacked, the hacker will not be able to access other websites that are on different cPanels. This is because it would be very difficult for someone to know if the different cPanels are connected to the same web host manager account.
Additionally, using a web host manager can save you money and stress if you have several websites that require credit cards. This is because it would be very frustrating to manage different domains in a single cPanel, especially when updating files frequently. With WHM, you can use a shared cPanel account which makes the process much easier.
**Conclusion**
As a website owner, it's important to have full control over your site. That's where Web Host Manager comes in. WHM is a tool that gives users the ability to manage and control every aspect of their website. With WHM, you can create packages and feature lists on cPanel to get complete control over the features of your site.
# How to Delete a cPanel Account in WHM
Source: https://kb.verpex.com/reseller/how-to-delete-a-cpanel-account-in-whm
Follow these steps to delete a cPanel account in your WHM
Log into your WHM\
Go to **List Accounts**\
Click the **+** icon in front of the account you wish to terminate\
Click the **Terminate Account** button
Note that terminating your account is irreversible, you can simply suspend an account if you want it to be temporarily offline.
# How to Grant Shell/Terminal Access as a reseller
Source: https://kb.verpex.com/reseller/how-to-grant-shellterminal-access-as-a-reseller
Secure Shell Access (SSH) is a protocol that uses the command line for connecting to a server, enabling you to transfer files, run remote controls and perform certain actions. Shell access is enabled on all our reseller plans. To have shell access in your WHM, follow the steps stated below:
* Log into your WHM
* Go to list accounts
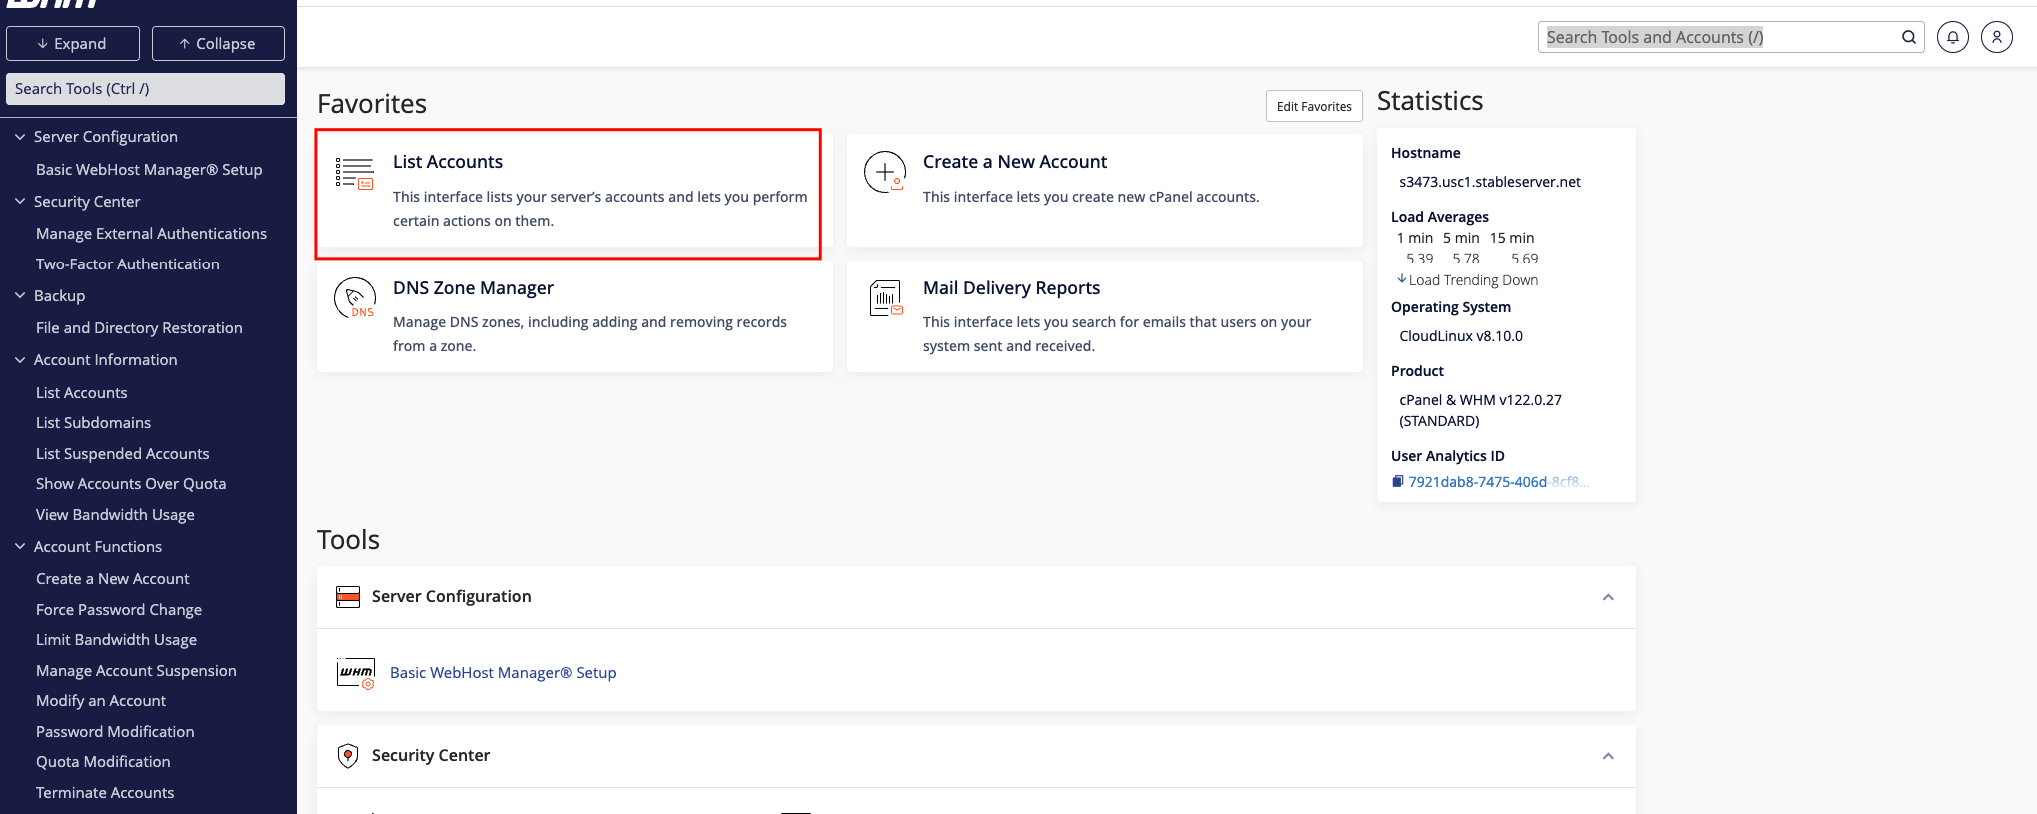
* Click Modify Account for the account you wish to grant shell access
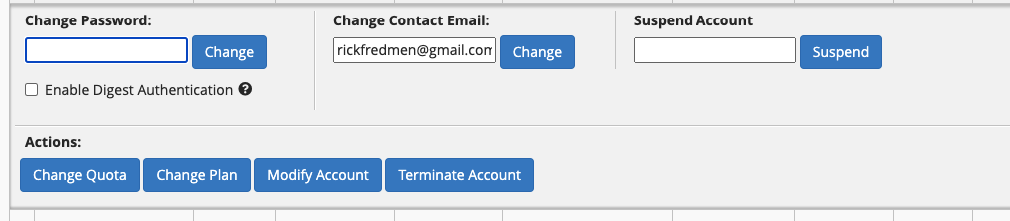
* Navigate to privileges, tick the box in front of shell access and save
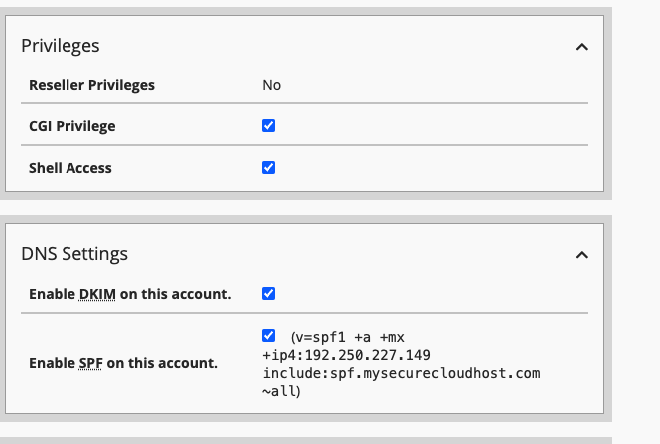
# How to Link WHM Account to WHMCS
Source: https://kb.verpex.com/reseller/how-to-link-whm-account-to-whmcs
WHMCS offers an all-in-one billing and automation platform that automates every aspect of a web hosting business. Connecting WHM to WHMCS is straightforward. This is one of the final steps in getting your reseller business up and running. After ordering and installing WHMCS, the last step is to connect WHM to WHMCS. It will be easy to communicate for easy access from WHMCS, automatic cPanel creation, and synchronising packages, among other options.
In order for you to manage the provisioning of cPanel accounts on your reseller server and for clients to be able to order, pay for and have their accounts provisioned automatically, you will need to connect WHMCS to your WHM hosting account. You will need your welcome email details, including your hosting server name, hosting server IP address, assigned or custom nameservers and IP addresses, and WHM username and password.
**Follow these Steps to Connect WHM to WHMCS**
* Log into WHMCS with your username and password.
* From the drop-down list choose the Products/Services option
* Click on Servers to proceed
* Click the Add New Server button to add a new server to WHMCS
* You will then be on the Servers page, fill out all the necessary fields as needed. The only required fields are Name, Hostname, IP Address, Type, and WHM username/password(everything else is optional).\
**Name** - this can be anything you want, but we suggest naming it to match the server name\
**Hostname** - is the WHM server name in your welcome email\
**Primary & Secondary nameserver names & IP addresses** - You can get this from the welcome email or your custom nameservers if they have been configured.\
**Type** - Choose cPanel from the drop-down list\
**Username** - This should be your WHM username\
**Password** - This should be your WHM password\
**Secure** - This must be ticked
* After entering all the details click the red Test Connection button to verify that the settings are correct.
* Click the Save Changes button.
* You will return to the servers page and see a successful message. Now you know how to connect your WHM to WHMCS!
# How to Set Up Custom Nameservers
Source: https://kb.verpex.com/reseller/how-to-set-up-custom-nameservers
If you want to use your own custom nameservers on our reseller hosting, you can easily do so. You just need to set them up once and they will work across multiple reseller accounts and dedicated servers with Veprex.
Verpex hosting is extremely versatile and can be used for a number of different purposes. In order to make the most of your experience, we recommend utilizing our custom nameservers. This will allow you to 'brand' your nameservers beyond the default settings. You can find more information about this in your welcome email.
1. If you want your domain to resolve to our IP addresses, you will need to set up some glue records with your registrar. If we are also your registrar, then we can take care of this for you.
|
Glue Record
|
Nameserver IP
|
|
ns1
|
13.248.158.180
|
|
ns2
|
75.2.118.134
|
|
ns3
|
76.223.26.245
|
|
ns4
|
99.83.147.209
|
2. In order to complete step 2, you will need to add A records for the given IPs on our end. This can be done by going to cPanel >Zone Editor and adding the necessary information.
* ns1.yourdomainname.com A 13.248.158.180
* ns2.yourdomainname.com A 75.2.118.134
* ns3.yourdomainname.com A 76.223.26.245
* ns4.yourdomainname.com A 99.83.147.209
3. If you want to use custom nameservers for your DNS zone, you can do so by editing the settings in WHM. Just search for "Basic WebHost Manager Setup," then choose "Explicitly Set the Nameservers," and save your changes.
# How to upgrade and downgrade packages in WHM
Source: https://kb.verpex.com/reseller/how-to-upgrade-and-downgrade-packages-in-whm
As a website owner, it's important to understand how cPanel and WHM work together. WHM is a dashboard that allows you to manage your websites based on cPanel. In order to change your cPanel account plan through WHM, you need to know how the two interact.
**How does WHM interact with cPanel?**
It is always better to have each domain on its own cPanel account. This way, if one domain is infected with malware, the others will not be affected. However, managing multiple cPanel accounts can get complicated. WHM can help you isolate each domain, create separate cPanel accounts for each one, and allocate the plan's resources among them in the way you consider best.
**Who can use WHM?**
WHM is a tool that is available to users of VPS hosting, Reseller Hosting, and Dedicated Hosting, but not to those who use shared hosting.
**Why using WHM is beneficial?**
If you have multiple cPanel accounts, WHM can save you time and money by assigning each cPanel a dedicated IP address. This makes it more cost-effective than buying separate share hosting resources for each cPanel, and also compliance with regulatory standards.
**Upgrading the cPanel package through WHM**
As the manager of your cPanel accounts, you have the ability to upgrade or downgrade plans as needed. This can be done easily through WHM.
One reason you might need to upgrade or downgrade is if your website's popularity changes. If this happens, you will need different hosting resources to accommodate the change in traffic. With WHM, you can simply change your package from the dashboard. Therefore, it is important to know how to do this.
**How WHM simplifies the process**
If you want to upgrade your package to one that offers 10 add-on domains, it is best to do so through WHM. This way, all the corresponding changes will be made in an error-free manner.
**How to upgrade or downgrade the package from WHM?**
If you want to upgrade your package to one that offers 10 add-on domains, it is best to do so through WHM. This way, all the corresponding changes will be made in an error-free manner.
**Step 1: Log in to WHM**
Step 2: Go to Account Functions\
Step 3: Select Upgrade/Downgrade Account from the menu on the left
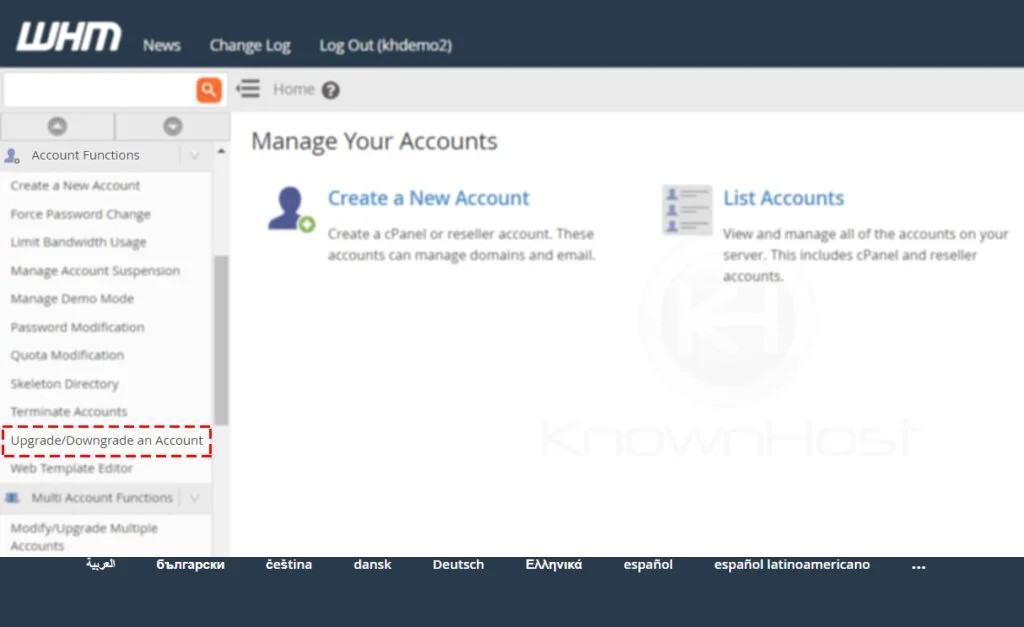
**Step 4: Select the cPanel account you want to upgrade or downgrade**\
**Step 5: Click “Modify”**
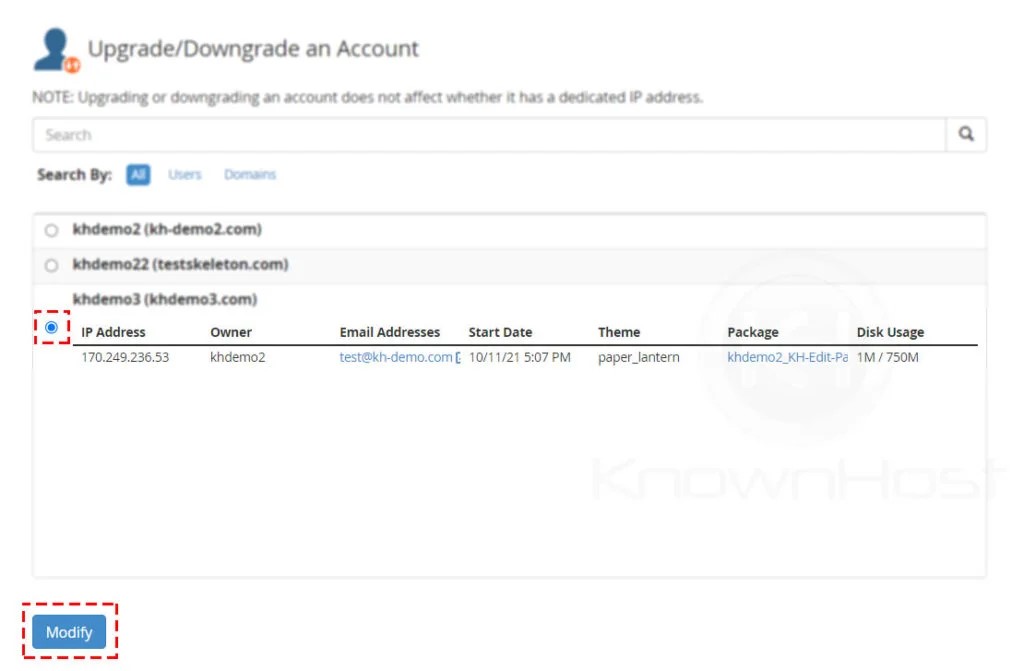
**Step 6: Choose whether you need to upgrade or downgrade the package**
Note: If you want to see what the impact of upgrade and downgrade will be, you can click on the magnifying glass.
Your plan will be upgraded or downgraded as per your need. You will find the below details once it is complete showing the changes made to your account.
Note: The above steps will only upgrade or downgrade your cPanel account and not change its IP address.
**Conclusion**
WHM is a really helpful tool for managing all your cPanel accounts. Therefore, upgrading or downgrading the account plan through it is a good idea if you need a quick and straightforward solution. However, if you use shared hosting, you don't have access to WHM, and in that case, you would need to follow a different upgrade or downgrade procedure.
# Is Reseller Hosting White-Label?
Source: https://kb.verpex.com/reseller/is-reseller-hosting-whitelabel
If you're looking for a hosting provider that offers white-label services, Verpex is a great option. We'll provide you with whitelabel nameservers when you sign up, which you can use for your domain.
For more information about White-Label, you can refer to our article here: [https://verpex.com/blog/reseller-hosting/what-is-white-label-hosting](https://verpex.com/blog/reseller-hosting/what-is-white-label-hosting)
# Linking my WHM account to Upmind
Source: https://kb.verpex.com/reseller/linking-my-whm-account-to-upmind
This article shows resellers how to link a WHM account to an Upmind account. After linking accounts, the next step is to create a hosting package on Upmind. That is where you name the package, configure details, and set billing terms.
You need to have an Upmind account and a WHM reseller account with us.
Add the server to Upmind\
The first step is to configure a new provision configuration. This is how you add web servers and domain providers via APIs.
* Log in to your Upmind account.
* Click Settings.
* On the next page, click Provision configurations.
* Click the Add new configuration button to add a WHM server account. A new panel displays.
* The screenshot below shows two active services (domain hosting and web hosting).
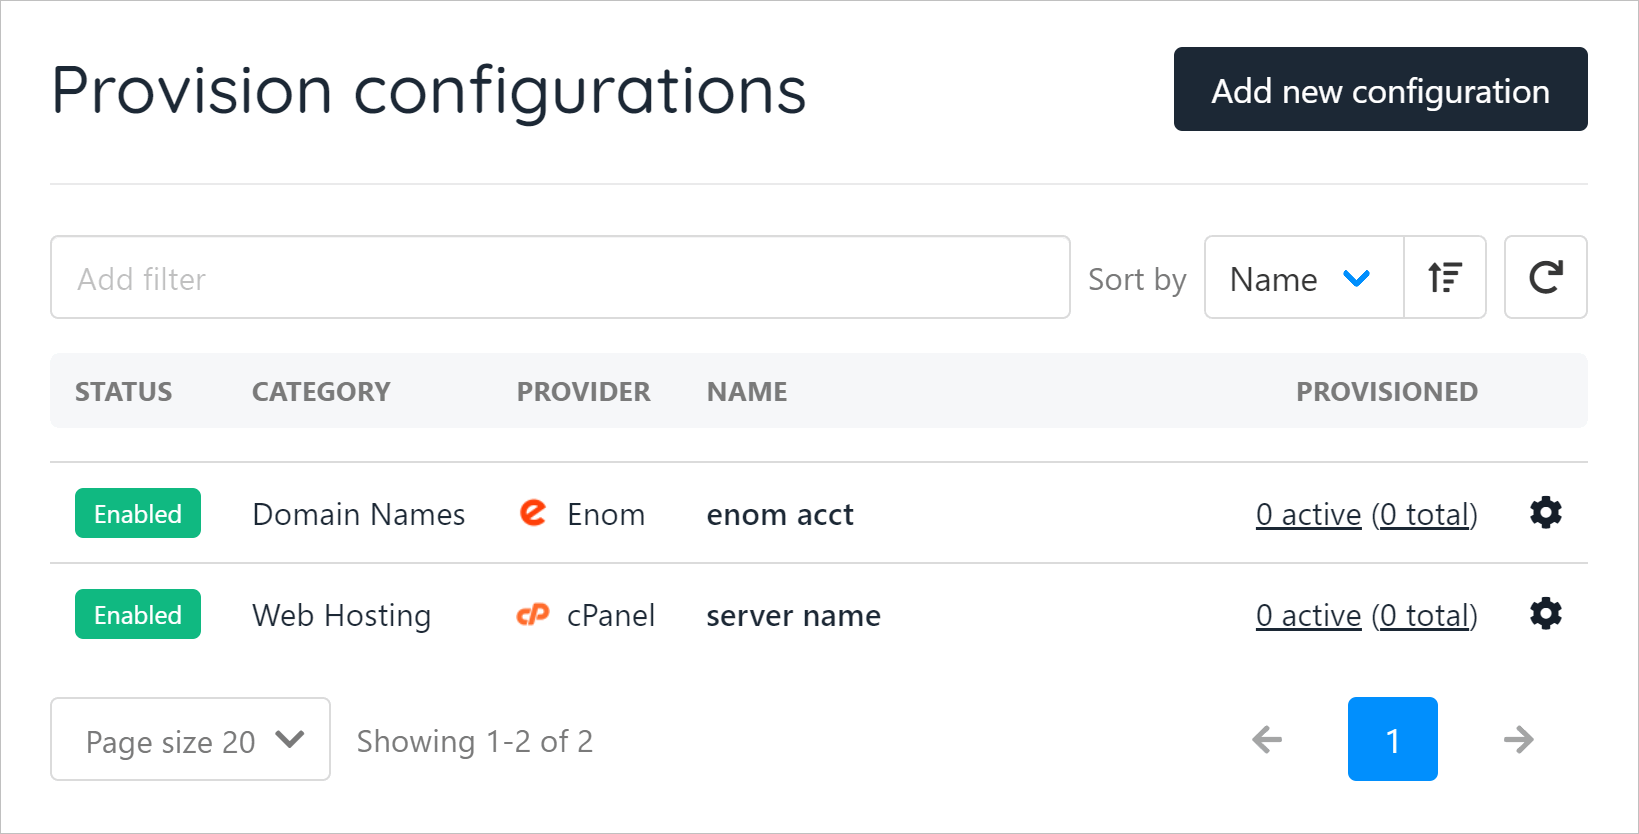
On the new panel:
Enter a unique name for the service.\
Click the PROVISION CATEGORY field and select Web Hosting. A new field displays.
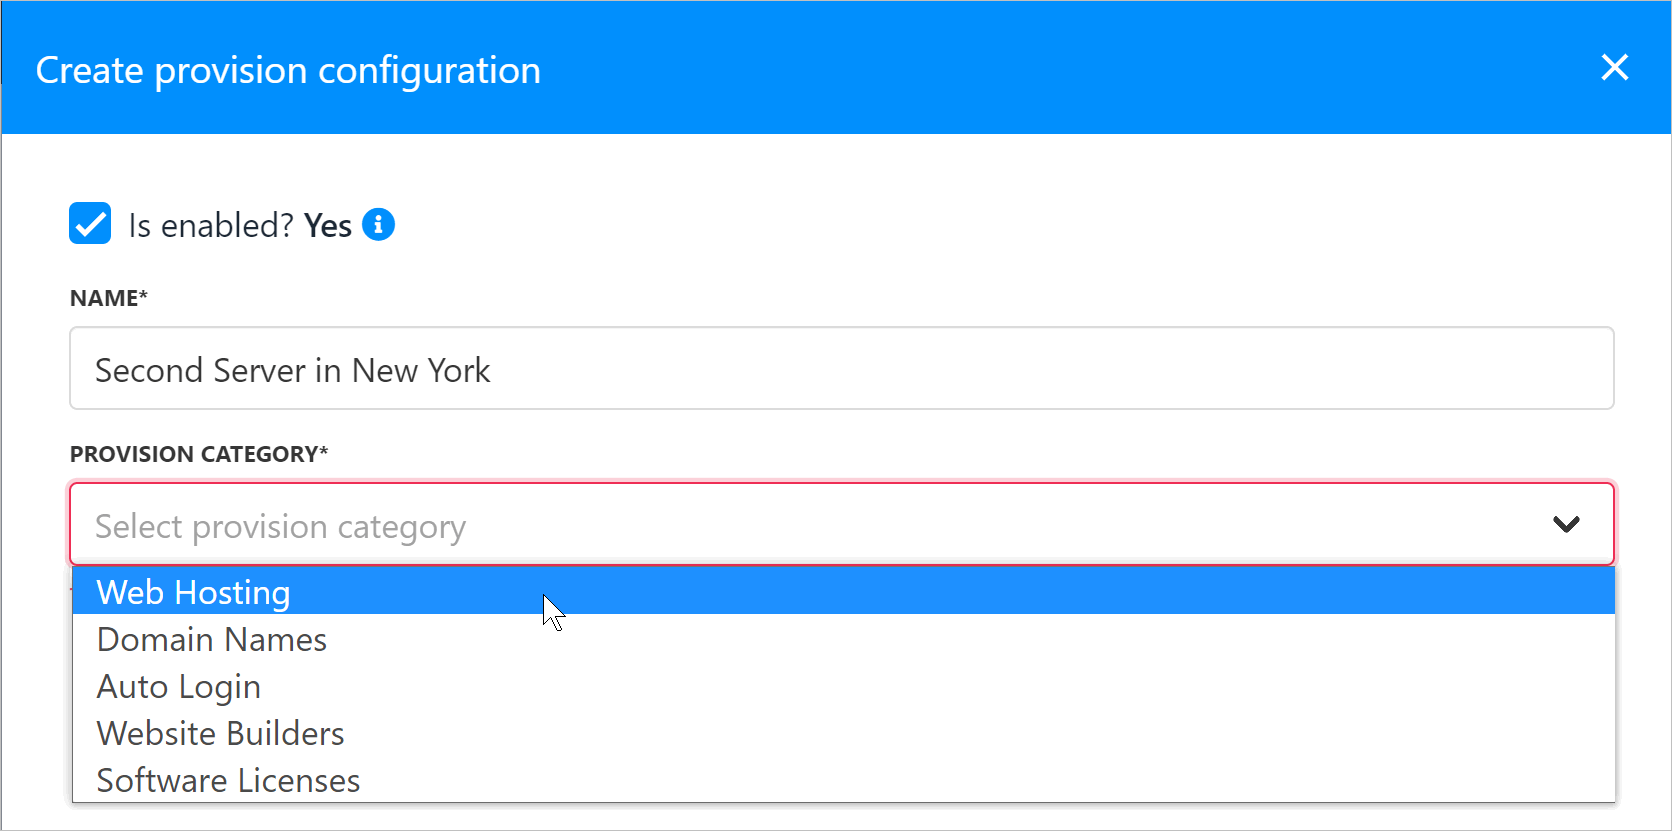
**Select cPanel**
* Set the protocol (e.g. HTTPS).
* Enter the hostname. (see below)
* Enter 2087 for the port.
* Enter the WHM username. (see below)
* Enter the WHM API key. (see below)
* Enter the server location.
* Enter Verpex for hosting provider. Your clients will not see this.
* Check the box to accept new accounts.
* Click Create.
* Copying WHM Information
To complete all the fields in the panel described above, you need to find and copy three pieces of information on your WHM account.
* Hostname
* WHM Username
* API key
**To quickly locate the correct information:**
* Log in to your WHM
* The hostname is the server hostname
* The username is displayed on the top right
* The API key is accessed through WHM -> Manage API Tokens
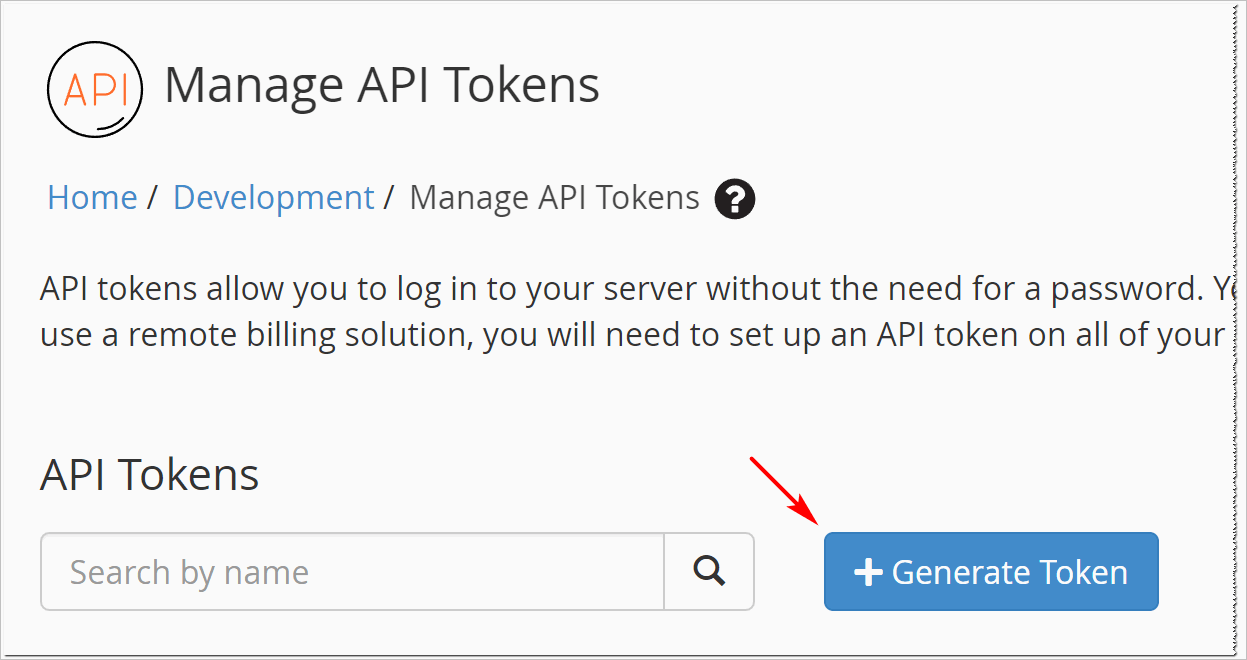
* Next, enter a name for your token.
* Once you have done so, click 'Save'.
* After this, go back to the Upmind page and paste the value you just generated into the API Key field.
**Linking multiple reseller accounts to Upmind**
With Upmind, you can easily add multiple reseller accounts and manage them all from a single platform.
# Managing Clients and Orders
Source: https://kb.verpex.com/reseller/managing-clients-and-orders
# Reseller Hosting Server Specification
Source: https://kb.verpex.com/reseller/reseller-hosting-server-specification
We use [high performance hardware](/network/server-overview) throughout our entire hosting setup. This includes servers with NVME disks, 128GB + RAM, and AMD EPYC CPUs.
Regardless of which of our locations you choose to host your reseller account, we set up servers identically. This is because we manage our deployment centrally. One of our key USPs at Verpex is that we can deploy our hosting stack to essentially any location.
## Whitelabel
All servers with Verpex are whitelabel. We use both hostnames and default nameservers that do not refer to Verpex and you will not find any mentions of Verpex anywhere. Even if you upgrade individual sites to dedicated servers, these will remain whitelabel.
## DNS
We provide the ability free of charge for you to add [custom nameservers](/reseller/how-to-set-up-custom-nameservers) - this allows you to brand the nameservers you use for your and your client websites.
DNS is Anycast - which makes it really resilient and fast. You can use one set of nameservers even if you have multiple reseller accounts (or servers) with Verpex.
## cPanel and WHM
We provide the market leading cPanel control panel, with WHM (Web Host Manager) as a reseller interface for you to manage your client websites. This lets you create accounts, set feature lists, add and remove packages and so on. You can preview WHM at trycpanel.net
## CloudLinux
We run CloudLinux which is a fork of the linux operating system that allows us to essentially isolate each cPanel account. Some other providers call this 'Cloud Hosting'. Each cPanel account is limited in the amount of RAM and CPU usage it can have, but the server as a whole has a huge capacity and phenomenal hardware performance.
On our standard resellers, we limit each cPanel to 2GB RAM and 2 vCPUs. On our Premium Reseller you can use up to 4GB RAM per cPanel account, and you can set lower limits if you wish.
You can read more about our [CloudLinux Limits](/network/cloudlinux-limits).
## LiteSpeed WebServer
We run the LiteSpeed Webserver on all shared and reseller servers. This gives performance advantages and also lets you run the LSCache WordPress plugin
## Softaculous
Softaculous is a software installer that lets you install over 300 types of software, including WordPress.
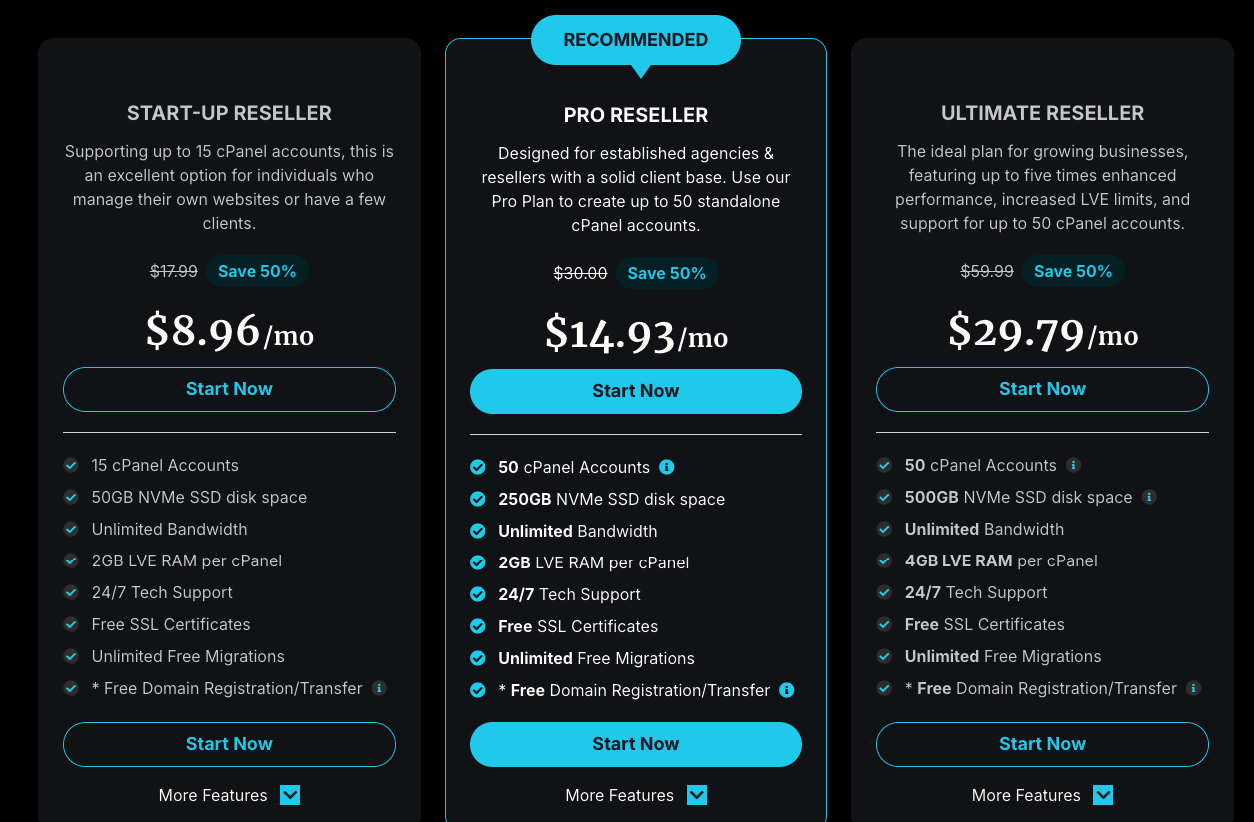
# Using Web Host Manager (WHM)
Source: https://kb.verpex.com/reseller/using-web-host-manager-whm
As a website owner, it's important to understand how cPanel and WHM work together. WHM is a dashboard that allows you to manage your websites based on cPanel. In order to change your cPanel account plan through WHM, you need to know how the two interact.
**How does WHM interact with cPanel?**
It is always better to have each domain on its own cPanel account. This way, if one domain is infected with malware, the others will not be affected. However, managing multiple cPanel accounts can get complicated. WHM can help you isolate each domain, create separate cPanel accounts for each one, and allocate the plan's resources among them in the way you consider best.
**Who can use WHM?**
WHM is a tool that is available to users of VPS hosting, Reseller Hosting, and Dedicated Hosting, but not to those who use shared hosting.
**Why using WHM is beneficial?**
If you have multiple cPanel accounts, WHM can save you time and money by assigning each cPanel a dedicated IP address. This makes it more cost-effective than buying separate share hosting resources for each cPanel, and also compliance with regulatory standards.
**Upgrading the cPanel package through WHM**
As the manager of your cPanel accounts, you have the ability to upgrade or downgrade plans as needed. This can be done easily through WHM.
One reason you might need to upgrade or downgrade is if your website's popularity changes. If this happens, you will need different hosting resources to accommodate the change in traffic. With WHM, you can simply change your package from the dashboard. Therefore, it is important to know how to do this.
**How WHM simplifies the process**
If you want to upgrade your package to one that offers 10 add-on domains, it is best to do so through WHM. This way, all the corresponding changes will be made in an error-free manner.
**How to upgrade or downgrade the package from WHM?**
If you want to upgrade your package to one that offers 10 add-on domains, it is best to do so through WHM. This way, all the corresponding changes will be made in an error-free manner.
**Step 1: Log in to WHM**
**Step 2: Go to Account Functions**
**Step 3: Select Upgrade/Downgrade Account from the menu on the left**
**Step 4: Select the cPanel account you want to upgrade or downgrade**
**Step 5: Click “Modify”**
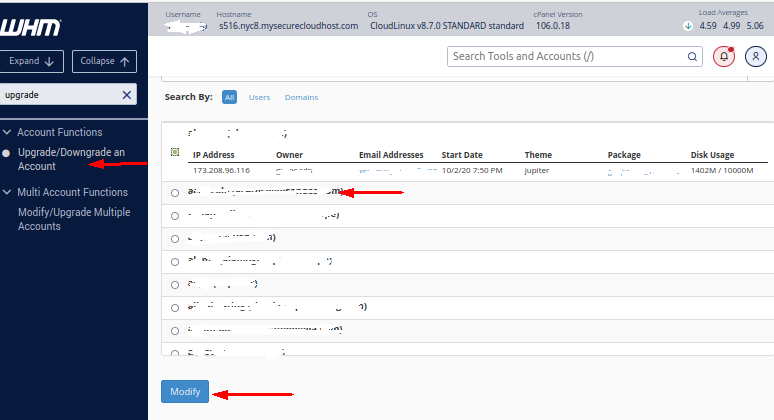
**Step 6: Choose whether you need to upgrade or downgrade the package**
You can see what upgrading or downgrading your account will do by clicking on the magnifying glass. Your plan will be changed as needed and you will see the details below once it is finished, including what changes were made to your account. Note that this process will only upgrade or downgrade your cPanel account, not change its IP address.
**Conclusion**
If you're looking for an easy and straightforward way to manage your cPanel accounts, upgrading or downgrading your account plan through WHM is a great idea. However, if you're using shared hosting, you won't have access to WHM, so you'll need to follow a different procedure for upgrading or downgrading your account.
# Choosing a Strong Password
Source: https://kb.verpex.com/security/choosing-a-strong-password
Using a strong password is vital for your account's security. This article offers some techniques and advice on how to create a strong password, as well as how to safeguard your password.
## Choosing a strong password
Here are some techniques for creating a strong password:
* Choose a password that is at **least** ten characters long, but preferably longer. The longer the password, the less susceptible it is to brute force attacks.
* Use a mixture of lowercase and uppercase characters, numbers, and punctuation marks.
* Place one or more punctuation mark in the middle of a word (for example, *vege#%tarian*).
* Use some unusual way of contracting a word. You do not have to use an apostrophe.
* Think of an uncommon phrase, and then take the first, second or last letter of each word. *You can't always get what you want* could become *ycagwyw*. Throw in a capital letter, a punctuation mark, and a number or two, and you might have *yCag5wyw*.
* You can deliberately misspell one or more words to make the password harder to crack.
* Combine several of the above techniques.
* Use something that no one but you would think of. The best password is one that is totally random to everyone else but you. Since this is highly dependent on the individual, it is difficult to tell you how to come up with these, but use your imagination!
## How not to choose a strong password
Here are some guidelines for what *not* to do when choosing a password. You should **avoid** these techniques when you create a password:
* Using words in a dictionary.
* Using your username or real name.
* Using anyone else's name.
* Using any word in a *cracking dictionary*. A cracking dictionary contains lists of words that attackers use to try to crack passwords (this is also known as a *dictionary attack*). These lists include abbreviations, cartoons, character patterns, machine names, famous names, female names, male names, Bible citations, movies, myths, numeric patterns, short phrases, places, science fiction, Shakespeare, songs, surnames, and just about anything else you can think of.
* Using any of the above techniques with a single character before or after it (for example, *happy1*).
* Using any of the above techniques with capitalization (for example, *Penguin* or *Walrus*).
* Using any of the above reversed (for example, reversing *cat* to *tac*), doubled (*cat* to *catcat*), or mirrored (*cat* to *cattac*).
* Selecting a word and substituting some characters (for example, changing *password* into *p\@ssw0rd*, or *supersecret* into *sup3rs3cr3t*). Attackers are well aware of these substitutions, and can crack them.
* Using keyboard patterns (for example, *qwerty* or *nbvcx*). Cracking programs look for these types of patterns in passwords.
## Safeguarding your password
You should never share your password with anyone else. You should also never write it down. The strongest password in the world doesn't do much good if you write it down and someone else sees it, or if you share it with someone else (who shares it with someone else, and so on).
Lastly, if you receive an e-mail message from someone who claims to be an administrator, security specialist, or some other important-sounding position who asks you to change your password, don't do it. This is a popular scam to trick the unsuspecting.
# Email Spoofing
Source: https://kb.verpex.com/security/email-spoofing
This article provides an overview of email spoofing, including how to identify and avoid email spoofing.
Email spoofing is a technique used by hackers to gain access and plant malware into your system by altering the email header to impersonate a legitimate or trusted organization or person. The trick here is get the recipient to open and respond to the email when they see the sender is apparently someone they know and trust.
## Why is email spoofing dangerous?
Although email spoofing can be easily resolved by simply deleting the emails, many people fall into the trap because the source of the email, as shown in the email headers, appears to be from a legitimate and trustworthy source.
Additionally, the contents of the emails are typically well crafted, making it difficult for users to identify a fraudulent email. Many people follow the instructions in the email, disclosing personal information, banking information, or clicking links in the email. This then allows hackers to gain access into the user's system.
## How to identify email spoofing
Here are some suggestions to help identify email spoofing:
1. **Check the display name and the email address:** In your email client, hover over the display name and verify that the email address matches what you are expecting.
2. **Check the reply path:** When you click **Reply**, the email address should match the sender in the original email.
3. **Check the overall tone of the message content:** Does it sound legitimate?
### What is the difference between email spoofing and email phishing?
Phishing emails typically request personal information such as credit card numbers or PIN numbers, or they collect user information through a pop-up notification requesting the user to click and fill out the details. Spoofing emails use false email headers and IP addresses to entice users to provide requested information or click on a link, allowing hackers to easily obtain user information.
For more information about how to protect yourself from email phishing attempts, please see [this article](/security/protecting-yourself-from-email-phishing-scam-attempts).
## How to avoid or stop email spoofing
Here are some effective ways to help stop email spoofing:
* Enable spam filtering: You can enable an automated spam filtering system in cPanel that filters incoming messages using a variety of techniques. For more information, please see [this article](/emails/spam-filtering-customisation).
* To protect your own email accounts, consider implementing Sender Policy Framework (SPF), Domainkeys Identified Mail (DKIM), and Domain-based Message Authentication, Reporting and Conformance (DMARC):
* **Sender Policy Framework (SPF)** is an authentication protocol that lists IP addresses in a DNS TXT record that are permitted to send email on behalf of domains.
* **Domainkeys identified mail (DKIM)** is a method of assigning a private key to an email message so the receiving server can use the key for verification.
* **Domain-based Message Authentication, Reporting & Conformance (DMARC)** is a protocol that helps determine the authenticity of an email message using both SPF and DKIM.
# How to Generate Google reCAPTCHA Keys for Site Security
Source: https://kb.verpex.com/security/how-to-generate-google-recaptcha-keys-for-site-security
This article guides you through the process of generating reCAPTCHA (site and secret) keys from Google. By adding reCAPTCHA capability, you can help improve your site's security.
## About Google reCAPTCHA
[Google reCAPTCHA](https://cloud.google.com/security/products/recaptcha) is a popular service providing anti-abuse security to help protect your web site. To integrate Google reCAPTCHA in an application, you register the app or web domain with Google’s reCAPTCHA service. After the domain is registered, Google provides reCAPTCHA keys.
There are two keys, the **Site Key** and the **Secret Key**. The Site Key and the Secret Key are also sometimes called the public and private key, respectively.
The Site Key is used to render the reCAPTCHA within a page, and the Secret Key is used for server-side validation. The keys are unique to the domain for which they are registered.
## How to generate Google reCAPTCHA keys
To generate the reCAPTCHA keys, follow these steps:
1. If you are not already signed in to your Google account, do so now.
2. Use your web browser to go to [Google’s reCAPTCHA site](https://cloud.google.com/security/products/recaptcha).
3. Click **Get Started**:

4. On the **Register a new site** page, specify the following information:
1. **Label:** Create a label for the site keys.
2. **reCAPTCHA type:** Choose to verify requests with a score or a challenge.
3. **Domains:** Specify the domain where you will use these keys, such as *example.com*.
5. Click **SUBMIT**. After a few seconds, the Site Key and Secret Key appear:
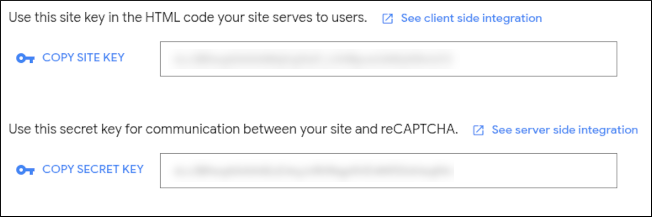
# How to Secure an Unmanaged Server
Source: https://kb.verpex.com/security/how-to-secure-an-unmanaged-server
On unmanaged hosting packages, you are responsible for server administration. One of the most important things to do is secure your server, and this article provides the information you need.
You must have root access to the server to follow the procedures described below.
## Securing an unmanaged server
An unmanaged server provides you with total flexibility. Because you have root access to the server, you can install whatever you want, configure it however you want, and run it however you want.
With this freedom comes additional administration tasks, however, and one of the most important of these is security. If you do not take steps to secure your server, you leave it open to attack by malicious actors. A minor attack could be just an annoyance, while a major attack could result in the loss of your entire server configuration and data.
Therefore, it is very important that you try to secure your server as much as possible. The following recommendations can help you do this.
### Use strong passwords
Weak passwords can undermine the most carefully configured server. Good security practices start with using strong passwords. For information about how to choose strong passwords, please see [this article](/security/choosing-a-strong-password).
### Disable root SSH access
The root account is all-powerful, so one of the first things you should do on a new unmanaged server is create a normal user account and disable root SSH access.
For more information about how to configure an SSH server, please visit [https://man.openbsd.org/sshd\_config](https://man.openbsd.org/sshd_config).
### Update the server regularly
Security vulnerabilities are constantly being discovered and patched. (One well-publicized example is the “Heartbleed” OpenSSL vulnerability that was disclosed in April 2014.) Maintaining an up-to-date server with the latest patches and fixes is crucial to maintaining a more secure server.
For information about how to install updates, check the documentation for the Linux distribution you are running.
### Set up a firewall
A firewall enables you to control incoming and outgoing network packets. For example, you can specify rules that block all incoming packets on port 25, or all outgoing packets to a certain port or host.
Previously, iptables was commonly used to configure server firewalls. Its replacement is [nftables](https://netfilter.org/projects/nftables/).
### Set up fail2ban
The fail2ban program helps secure your server against unauthorized access attempts by monitoring log files for suspicious activity. After a predefined number of failed access attempts from an IP address, fail2ban automatically blocks it.
For more information about fail2ban, please visit [https://github.com/fail2ban/fail2ban](https://github.com/fail2ban/fail2ban).
# Preventing Outgoing Email from Being Marked as Spam
Source: https://kb.verpex.com/security/preventing-outgoing-e-mail-from-being-marked-as-spam
There are several steps you can take to help prevent your outgoing messages from being marked as spam. Also, learn what to do if an organization like Spamhaus blacklists your IP address.
This article is intended for users who have legitimate e-mail messages that are being marked as spam.
## How to help prevent outgoing e-mail from being marked as spam
Mail servers use many different techniques to filter spam. Spammers constantly adapt to these anti-spam measures, so administrators have to continually modify server configurations to help reduce spam. As a result, there is no single thing you can do to ensure that all of your outgoing messages are delivered successfully.
Nevertheless, there are still some things you can do to help improve the odds of successful delivery. Try the following techniques:
* If possible, do not send HTML-only messages (send plain-text messages instead, or multi-part MIME messages with a text/plain component).
* If you do send HTML-only messages, make sure they use valid HTML markup. You can use the [W3C Markup Validation Service](http://validator.w3.org) to test content (you can test a URL, upload a file, or paste HTML into a text box).
* Avoid using lots of exclamation marks (**!**), dollar signs (**\$**), or other common currency symbols in the message subject.
* Create SPF (Sender Policy Framework) records and enable DKIM (DomainKeys Identified Mail).
### Sending e-mail to free e-mail providers
Free e-mail providers such as Yahoo and Hotmail reject messages based on spam reports or a poor IP address reputation. So the more engaged your recipients are with your messages, the better. For example, when your recipients open and read your messages, or pull them out of the spam folder into their inboxes, these are positive indications to the provider that the messages are legitimate.
There are several additional steps you can take to improve the chances that your e-mail messages are delivered successfully to recipients who use free e-mail providers:
Please note that it may take several days for any changes to have an effect.
#### Yahoo
* Create SPF (Sender Policy Framework) records and enable DKIM (DomainKeys Identified Mail).
* Set up reverse DNS (also known as rDNS) for your domain.
#### Gmail
* Create SPF (Sender Policy Framework) records and enable DKIM (DomainKeys Identified Mail).
* Set up reverse DNS (also known as rDNS) for your domain.
* For information about Google's e-mail policies, please visit [https://support.google.com/mail/answer/81126](https://support.google.com/mail/answer/81126).
#### MSN and Hotmail
* Create SPF (Sender Policy Framework) records and enable DKIM (DomainKeys Identified Mail).
* Set up reverse DNS (also known as rDNS) for your domain.
* Sign up for the Junk Email Reporting Partner (JMRP) program. To do this, please visit [https://postmaster.live.com/snds/JMRP.aspx](https://postmaster.live.com/snds/JMRP.aspx).
Make sure you save the verification number. You will need this number for any future correspondence with Microsoft.
* Sign up for Smart Network Data Services (SNDS). To do this, please visit [https://postmaster.live.com/snds/addnetwork.aspx](https://postmaster.live.com/snds/addnetwork.aspx).
#### EarthLink
* Create SPF (Sender Policy Framework) records and enable DKIM (DomainKeys Identified Mail).
* Set up reverse DNS (also known as rDNS) for your domain.
* Send a request to EarthLink asking them to unblock your IP address. To do this, send the request to **[blockedbyearthlink@abuse.earthlink.net](mailto:blockedbyearthlink@abuse.earthlink.net)** with the subject line **Blocked*IP\_ADDRESS***. Replace *IP\_ADDRESS* with your own IP address.
## What to do if your e-mail is blocked by a real-time blacklist
Organizations such as [SpamCop](http://www.spamcop.net/) and [Spamhaus](http://www.spamhaus.org/) may block your outgoing messages.
If you are using a dynamic IP address, this may happen because a previous user of your IP address had a compromised computer that was sending spam. As a result, the IP address has been blacklisted. You can try contacting your ISP and have them issue you a new IP address, or you can just use your ISP's SMTP servers to send e-mail. (You would continue to use Verpex's servers for incoming mail.)
If you have a static IP address, and absolutely must use Verpex servers for outgoing SMTP mail, you must follow the instructions from the blocking organization to remove yourself from their blacklist. Before you do this, you should make sure that none of your computers are infected with a virus or other malware.
We are not affiliated with any blacklist organizations, and we do not have any control over their blacklists or policies.
# Protecting Yourself from Email Phishing Scams
Source: https://kb.verpex.com/security/protecting-yourself-from-email-phishing-scam-attempts
Email phishing attempts aim to obtain your identifying information for nefarious purposes such as identity theft. This article covers the best methods to help protect yourself and your account from phishing attacks.
Phishing emails are sent from criminals in an attempt to obtain your identifying information to commit identity fraud, gather your financial information, and a whole host of other unsavory business. These criminals attempt to fool you by disguising themselves as a trusted source such as Verpex.
Phishing emails often encourage you to take some sort of action on your hosting account, like updating your address or credit card number. The following phishing scam protection tips can help keep your information safe.
## How to tell if an email is legitimate
Phishing emails typically have links to sophisticated pages posing as legitimate site pages. These pages often pose as portals where you would supply sensitive information, such as the official Verpex login page. However, these pages will instead send any and all information you have supplied on the page (such as your username and password) to those perpetrating the scam.
As frustrating as dealing with phishing attempts may be, it’s relatively easy to distinguish legitimate attempts from those made with nefarious intentions. If you’re wondering whether or not you have received a legitimate email from Verpex, consider the following tips:
* Any email requesting that you take action on an account or update user information will be accompanied by a request that you submit a ticket or call us if you have any questions.
* If you receive an email requesting that you log in to your account, do not click any login links included in the email. Instead, visit [verpex.com](https://verpex.com) directly and log in to your account from there. This tip can be used to protect yourself from any online phishing scam, not just those targeting Verpex.
* Never submit confidential information in a form embedded within an email message.
* Before clicking any link within an email, hover your mouse pointer over the link to verify that the destination URL correlates to the destination you are expecting. The page that will open if you click on the link should appear near the mouse pointer or at the bottom of the browser window. The link should match the description provided. If the link does not match, you may very well be dealing with a phishing email.
* Verpex will never ask you to provide your password, credit card number, or any other personal information directly through email.
* Verpex will only ever email the address that you have provided in your customer account. Check at which address you have previously received correspondence.
* If we ever do request information or action from you, we will do so within our support ticket system. The most secure way to reply to us is to go directly to [verpex.com](https://verpex.com) , log in, and submit your reply directly on our website.
## How to keep login information secure
You can double-check that you are logging into the correct Verpex site by ensuring that you see the locked padlock validation icon in your browser bar when visiting [verpex.com](https://verpex.com). You can click **Connection is secure** to see more information about the connection:
If the connection is not secure, do **not** submit your login credentials on the page!
## What should I do if I’m still unsure of an email?
If you’re ever in doubt, contact us! Verpex support is available day or night to answer your questions, and this certainly includes account security questions as well as phishing scam protection. By following the tips above, you can help keep your account safe. However, if you are still unsure about the legitimacy of an email that you have received, please contact us for verification.
# Securing a Hacked Site
Source: https://kb.verpex.com/security/securing-a-hacked-site
If your web site gets hacked despite your best efforts, this guide is here to help you secure your site and help prevent future attacks.
## Determining the cause
The first step to securing your web site and getting back to normal operation is determining how it was hacked. In general, most hacks occur for one of the following reasons:
* Your FTP/SSH password has been compromised.
* File permissions for files or directories in the **public\_html** directory are too permissive.
* There is a software application installed on your web site that contains a vulnerability. The vulnerability is being exploited to run arbitrary code on the server.
Software vulnerability hacks are more common than FTP/SSH password hacks, primarily because of the huge growth in pre-bundled software applications. Users often set up an application and then forget to apply security updates, leaving their sites vulnerable to attack.
Similarly, if a file or directory in the **public\_html** directory has permissions set to 777 (full read-write access), code or data can be exposed and potentially exploited by an attacker.
### Looking for FTP/SSH password compromises
You should first try to determine if someone has compromised your password and logged in to your account. To do this, follow these steps:
1. Log in to your account [using SSH](/cpanel/secure-shell-ssh-overview).
2. At the command prompt, type the following command:
```shell theme={null}
history
```
This command displays the last 1000 commands run on the account, as well as when. Review recent entries in the list for any commands that seem suspicious or that you did not type.
This method is not 100% fool-proof, because the command history can be altered or forged by a malicious actor.
3. At the command prompt, type the following command:
```
cat ~/.lastlogin
```
This command displays the IP address of the last user who logged in to your cPanel account. This information is also available from the cPanel home page.
To see what your own IP address is, visit [http://ipfinder.us](http://ipfinder.us).
If you suspect or determine that an unauthorized user is accessing your account, do the following:
* Change your account password in cPanel immediately. For information about how to do this, please see [this article](/cpanel/how-to-change-your-cpanel-password).
* Stop using FTP. Regular FTP transmits your password over the Internet in unencrypted plaintext and is easily intercepted. Use SFTP or SSH instead.
* Verify that you are running up-to-date virus and malware protection on any computers you have used to access your account.
After you have followed these steps, go to the **Cleaning up after a hack** section below. Otherwise, if you did not find any suspicious behavior, go to the next section.
### Looking for software vulnerabilities
Out-of-date software applications often contain well-known security vulnerabilities that malicious actors can exploit using automated scripts. Software applications include anything you have installed using Softaculous, as well as any packages that you have installed manually. Usually these are applications such as blogs, image galleries, forums, shopping carts, content management systems, etc.
You should review all of the software applications that are installed on your web site. Make sure you have installed the most recent version and all updates. When you update software applications, make sure you check the plugins as well. If you have any non-standard plugins installed with your applications, do a web search for the plugin name and the term "vulnerability" to see if there are any known issues with your version. If you discover any known vulnerabilities, either update the plugin or disable it.
You should also check for recent errors on your web site by using cPanel's Error Log feature. Error messages can help you determine which software applications or files are vulnerable.
After you have updated your software applications and plugins, go to the **Cleaning up after a hack** section below.
## Cleaning up after a hack
After you have secured your web site, the next step is to clean up the mess left behind by the perpetrators and restore normal operation.
### Stopping malicious processes
The first step in the cleanup process is to ensure there are no malicious processes still running on your account. Otherwise, you may go through all of the following cleanup steps, and these processes will wreak havoc in your account all over again.
To view the user processes running on your account, follow these steps:
1. Log into your account [using SSH](/cpanel/secure-shell-ssh-overview).
2. At the command prompt, type the following command:
```
ps faux
```
3. Examine the list of running processes and look for anything suspicious. If you do see a suspicious process, note the process ID (PID) number.
Because you ran the **ps** command in step 2 yourself, it is **not** a malicious process and should not be terminated! For example:
```
USER PID %CPU %MEM VSZ RSS TTY STAT START TIME COMMAND
username 2847697 0.0 0.0 108504 1900 pts/2 Ss 16:37 0:00 -bash
username 2885143 0.0 0.0 109960 1016 pts/2 R+ 16:44 0:00 \_ ps faux
```
These two processes are normal.
4. To kill any suspicious processes that you found, type the following command for each process. Replace *process\_id* with the process ID (PID) that you noted in step 3:
```
kill process_id
```
If you are uncomfortable using the command line to look for suspicious processes, please open a support ticket and our support team can assist you further.
### Removing hacked files
You should go through all of the files in your account and delete anything that you did not put there. If you are using an FTP client, make sure it is set to show hidden files. Similarly, if you are using the command line in SSH, make sure you use the **-a** option with the **ls** command so it shows all files. (Many malicious files try to "hide" from casual observation by making themselves hidden.)
Although we recommend going through all of your files, you can prioritize your search. Look first for file modification timestamps that have changed since you last modified your site, or that occurred around the time the hack took place. If you identify a file that was modified during the hack (such as a defaced index page), you may be able to locate other affected files by searching for similar timestamps.
For example, to find all of the files that have been modified in your **public\_html** directory within the last three days, follow these steps:
1. Log in to your account [using SSH](/cpanel/secure-shell-ssh-overview).
2. At the command prompt, type the following commands:
```
cd ~/public_html
find . -mtime -3
```
You can modify the **-3** option to control how many days in the past the find command searches for modified files. For example, to search back five days instead of three, use **-5**.
### Setting correct file permissions
By default, every directory beneath the **public\_html** directory should have its file permissions set to **755** (full access for the owner, and read and execute access for everyone else). Additionally, every file should have its permissions set to **644** (read and write access for the owner, and read access for everyone else). To set these permissions for your account, follow these steps:
1. Log in to your account [using SSH](/cpanel/secure-shell-ssh-overview).
2. At the command prompt, type the following commands:
```
cd ~/public_html
find . -type d -exec chmod 755 {} \;
find . -type f -exec chmod 644 {} \;
```
After you make these changes, you may need to adjust permissions for a few individual files, depending on the applications you have installed. Nevertheless, it is a good security practice to set secure permissions initially, and then make any individual adjustments as necessary.
### Restoring databases
Some hacks, particularly SQL injection attacks against vulnerable Joomla installations, may alter the database with malicious code. These modifications can grant an attacker access to your account even after you update applications and remove altered files.
Therefore, you should review your databases to see if there are any suspicious changes. You may also want to restore the database from a backup that was completed before the attack occurred.
### Restoring lost and modified files
You can use a backup to restore files in your home directory that have been lost or modified.
### Reconfiguring WordPress
If you use WordPress, there are additional steps you must take to secure your site after an attack. For example, you must reset the WordPress security keys. For more information about WordPress security, please see [this article](/wordpress/how-to-improve-wordpress-website-security-with-these-tips).
### Requesting a site review from Google
A hacked site can lead to online reputation damage and lower search engine rankings. Or visitors may even see "Deceptive site ahead" warnings in web browsers. When you are confident that you have secured your site, you may want to request a review from Google. If Google determines your site is no longer dangerous or deceptive, it will unflag it and no longer penalize it in search engine rankings.
For information about how to request a site review from Google, please visit [https://web.dev/articles/request-a-review](https://web.dev/articles/request-a-review).
### Using Cloudflare to enhance security
To help prevent future attacks, you should consider enabling Cloudflare for your account.
Cloudflare is a content delivery network (CDN) service. Cloudflare's network blocks threats and limits abusive bots before they reach the web server. This increases security and reduces wasted bandwidth.
You can sign up directly on Cloudflare's site at [http://www.cloudflare.com](http://www.cloudflare.com).
# WordPress Security
Source: https://kb.verpex.com/security/wordpress-security
Learn how to enhance the security of your WordPress site. This article covers essential security measures as well as how to defend your site from brute force attacks.
## Essential WordPress security measures
There are several essential steps you should take to enhance the security of a WordPress site:
### Use strong WordPress passwords
Use a strong password for all administrator accounts, and change passwords periodically. Strong passwords are not easily guessed. To break into an account with strong passwords, hackers use brute force attacks. Stopping brute force attacks is covered below.
If your site has been compromised (or you even suspect that it has been compromised), you must also change the security keys in the *wp-config.php* file that are used to encrypt cookies. Simply changing passwords is not enough, because an attacker may still have a valid cookie and be able to access your site.
For more information about how to configure security keys in the *wp-config.php* file, please visit [http://codex.wordpress.org/Editing\_wp-config.php#Security\_Keys](http://codex.wordpress.org/Editing_wp-config.php#Security_Keys).
### Use a unique WordPress username
Do not use the default *admin* username for the administrator. Instead, create a user with a different username, assign the administrative role to it, and then delete the default *admin* administrator.
### Update WordPress plugins and themes
WordPress is updated regularly to address known vulnerabilities. Running old versions of WordPress makes it easy for hackers to gain access to your site. Run updates regularly to make sure WordPress and all related plugins are up to date.
### Delete unused WordPress plugins and themes
Even though unused plugins and themes are disabled, that code is still visible on the Internet and can be a target for hackers. Be sure to delete any unused themes or plugins in order to reduce the opportunity for hackers to gain access to your site.
### Make regular backups
Make regular backups of your WordPress site. Backups will not prevent a site from being compromised, but they do help get a site back online quickly. You can use [Softaculous](/cpanel/how-to-use-the-softaculous-autoinstaller) to back up, restore, and update your WordPress site from one convenient interface.
## Defending against WordPress brute force attacks
A brute force attack is a simplistic type of attack where a user or script tries to gain access to a site by repeatedly guessing different username and password combinations. Unfortunately, many people have username and password combinations that are easily guessed, so brute force attacks are often effective.
If your WordPress site experiences a brute force attack, you may notice that the site responds slowly, or not at all. Additionally, you may be unable to log in. This is because the flood of login attempts during a brute force attack causes numerous PHP and MySQL calls. These calls increase server load and negatively affect website performance.
There are several measures you can take to defend against brute force attacks on your site.
### Method #1: Password-protect the WordPress login page
WordPress uses the *wp-login.php* file for logins. By adding password protection to this file, you add another layer of security to your site. Users must enter a username and password before they can even access the *wp-login.php* file to log in to WordPress.
To set up password protection for the WordPress login page, follow these steps:
1. Use your web browser to go to [http://www.htaccesstools.com/htpasswd-generator](http://www.htaccesstools.com/htpasswd-generator).
2. In the **Username** text box, type a username.
3. In the **Password** text box, type a password for the user.
4. Click **Create .htpasswd file**, and then copy the line of text. The line of text should contain the username you specified, followed by a colon (**:**), and then the encrypted password. For example:
```
username:$apr1$IUQgDA6U$qbXb9wEnjirNCqxezpjoe5
```
5. Create a file named *.wp-password* in your account's home directory. Paste the line of text from the previous step into the file. There are two ways you can create and edit this file:
* Log in to your account [using SSH](/cpanel/secure-shell-ssh-overview), and use a text editor from the command line.
* Log in to your account using cPanel, and use an editor in the [File Manager](/cpanel/managing-files-in-cpanel).
Make sure that the *.wp-password* filename begins with a period (**.**).
6. Save the *.wp-password* file and exit the text editor.
7. Create an *.htaccess* file in the directory where you installed WordPress:
* If you installed WordPress in the domain's document root, then this directory is */home/username/public\_html*, where *username* represents your account username.
* If you installed WordPress in a subdirectory or subdomain, then this directory is */home/username/public\_html/directory*, where *directory* represents the WordPress location.
8. Copy and paste the following text into the *.htaccess* file:
```
# Prevent Apache from serving .ht* files:
Order allow,deny
Deny from all
ErrorDocument 401 "401 Unauthorized"
ErrorDocument 403 "403 Forbidden"
# Protect wp-login.php:
AuthUserFile /home/USERNAME/.wp-password
AuthName "Please log in"
AuthType Basic
require user WP-USERNAME
```
9. In the *.htaccess* file, make the following changes:
* Replace *USERNAME* with your Verpex account (cPanel) username.
* Replace *WP-USERNAME* with the username that you specified in step 2.
If you want to display a login message different from "Please log in", you can change the **AuthName** directive's value to whatever text you want.
10. Save the *.htaccess* file and exit the text editor.
11. Use your web browser to go to the WordPress login page (for example, *[http://www.example.com/wp-admin](http://www.example.com/wp-admin)*, where *example.com* represents your domain name).
12. You should be prompted to type a username and password. Type the username and password combination that you specified in steps 2 and 3. The WordPress login page should appear, and you can now log in to WordPress as you normally do.
### Method #2: Block IP addresses from accessing the WordPress login page
Another way to counter brute force attacks is by blocking IP addresses. With this configuration, you can allow one (or several) IP addresses to access the WordPress login page, and block everything else.
If you enable IP address blocking and also use Cloudflare, make sure you test site logins thoroughly. On some server configurations, the combination of Cloudflare and IP address blocking may prevent *all* logins from working correctly.
To prevent IP addresses from accessing the login page, follow these steps:
1. Create an *.htaccess* file in the directory where you installed WordPress:
* If you installed WordPress in the domain's document root, then this directory is */home/username/public\_html*, where *username* represents your account username.
* If you installed WordPress in a subdirectory or subdomain, then this directory is */home/username/public\_html/directory*, where *directory* represents the WordPress location.
If you already followed the steps to set up password protection for the login page, use the same *.htaccess* file that you created in that procedure.
2. Copy and paste the following text into the *.htaccess* file:
```
order deny,allow
allow from xxx.xxx.xxx.xxx
deny from all
```
3. In the *.htaccess* file, replace *xxx.xxx.xxx.xxx* with the IP address that you want to allow for WordPress logins. All other IP addresses will be blocked from accessing the *wp-login.php* page.
* To grant access to multiple IP addresses, you can add multiple **allow from** lines.
* To determine your current IP address, you can visit [http://ipfinder.us](http://ipfinder.us).
4. Save the *.htaccess* file and exit the text editor.
5. Test your WordPress site to make sure that it still functions correctly, and that you can access the administration login page.
### Method #3: Change the WordPress login URL
The default WordPress login page is *wp-login.php*, and a basic WordPress installation does not allow you to change this location. However, the [WPS Hide Login](https://wordpress.org/plugins/wps-hide-login/) allows you to change the WordPress login URL. Doing so can reduce the impact of brute force attacks, which are usually scripts that are programmed to hit the *wp-login.php* page over and over again with login attempts.
When you change the WordPress login URL, anyone who tries to access the *wp-login.php* page or *wp-admin* directory receives a "404 Not Found" error message.
To change the WordPress login URL using a plugin, follow these steps:
1. Log in to your WordPress site.
2. Click **Plugins**, and then click **Add New Plugin**.
3. In the **Search Plugins** text box, type `wps hide login`, and then click **Search Plugins**.
4. The **WPS Hide Login** plugin appears in the list of search results.
5. Under **WPS Hide Login**, click **Install Now** to start the installation.
6. After the plugin installation finishes, click **Activate**. The **Plugins** page appears.
7. Under **WPS Hide Login**, click **Settings**.
8. In the **Login url** text box, type a URL for the login page, or accept the default value of **login**.
9. Click **Save Changes**.
10. Test your WordPress site to make sure that it still functions correctly, and that you can access the login page using the new URL. Additionally, if you try to access *wp-login.php* or *wp-admin*, you should receive a "Page Not Found" error message.
### Method #4: Enable Cloudflare for your site
Cloudflare is a content delivery network (CDN) that can block malicious requests before they reach your site. For example, Cloudflare-enabled sites were significantly protected during a large-scale WordPress brute force attack that occurred in April 2013.
Cloudflare works by routing traffic to your website through its own network. As a result, Cloudflare is able to block certain types of malicious requests. Cloudflare also increases website performance by leveraging its worldwide server network to deliver content to users more efficiently.
If you enable Cloudflare and also use the IP address blocking method described in this article, make sure you test site logins thoroughly. On some server configurations, the combination of Cloudflare and IP address blocking may prevent logins from working correctly.
# Accessing Your Account on the Hosting Panel
Source: https://kb.verpex.com/servers/accessing-your-account-on-the-hosting-panel
Learn how to register, log in, and log out of the Hosting Panel.
This article describes how to access the Hosting Panel. The Hosting Panel is your gateway to managing verpex.com products and services.
## Signing up for an account
If you do not already have an account in the Hosting Panel, you must create one before you can log in. To do this, follow these steps:
1. Use your web browser to go to clients.verpex.com
2. On the Login page, click Create an account:
![]() 3. Complete the fields, and then click Sign Up:
3. Complete the fields, and then click Sign Up:
![]() 4. You will receive a message at the email address you specified. In the message, click Verify Registration to complete the account creation process.
5. You can now log in to the Hosting Panel using the email address and password you specified in step 3.
## Logging in to the Hosting Panel
To log in to the Hosting Panel, follow these steps:
1. Use your web browser to go to clients.verpex.com
2. On the Login page, in the Username text box, type the email address you specified when you created your account:
4. You will receive a message at the email address you specified. In the message, click Verify Registration to complete the account creation process.
5. You can now log in to the Hosting Panel using the email address and password you specified in step 3.
## Logging in to the Hosting Panel
To log in to the Hosting Panel, follow these steps:
1. Use your web browser to go to clients.verpex.com
2. On the Login page, in the Username text box, type the email address you specified when you created your account:
![]() 3. In the Password text box, type the password you specified when you created your account.
4. Click Login. The Hosting Panel home page appears.
## Resetting your password
If you forget your password, you can reset it. To do this, follow these steps:
1. Use your web browser to go to clients.verpex.com
2. Click Forgot password:
3. In the Password text box, type the password you specified when you created your account.
4. Click Login. The Hosting Panel home page appears.
## Resetting your password
If you forget your password, you can reset it. To do this, follow these steps:
1. Use your web browser to go to clients.verpex.com
2. Click Forgot password:
![]() 3. In the Email text box, type the email address associated with your account, and then click Send reset instructions:
3. In the Email text box, type the email address associated with your account, and then click Send reset instructions:
![]() 4. Follow the instructions in the email to reset your password.
## Logging out of the Hosting Panel
To log out of the Hosting Panel, follow these steps:
1. In the Hosting Panel, click the top-right icon, and then click Logout:
4. Follow the instructions in the email to reset your password.
## Logging out of the Hosting Panel
To log out of the Hosting Panel, follow these steps:
1. In the Hosting Panel, click the top-right icon, and then click Logout:
![]() The letters that appear in the top-right icon vary -- they are your initials.
# How to Reset the Root Password for Your Self-Managed Server
Source: https://kb.verpex.com/servers/how-to-reset-the-root-password-for-your-self-managed-server
This article explains how to reset the root password when access is lost. This method requires booting into emergency mode using the GRUB bootloader and performing the reset from a restricted shell environment.
# Step 1: Access the Server Console (VNC)
1. Log in to [https://clients.verpex.com/](https://clients.verpex.com/)
2. Go to Products and Services -> Hosting and Services
3. Click on **Manage**
4. Click the **Login** button
Now you are in your Console

# Step 2: Boot into GRUB Menu
1. Reboot the system
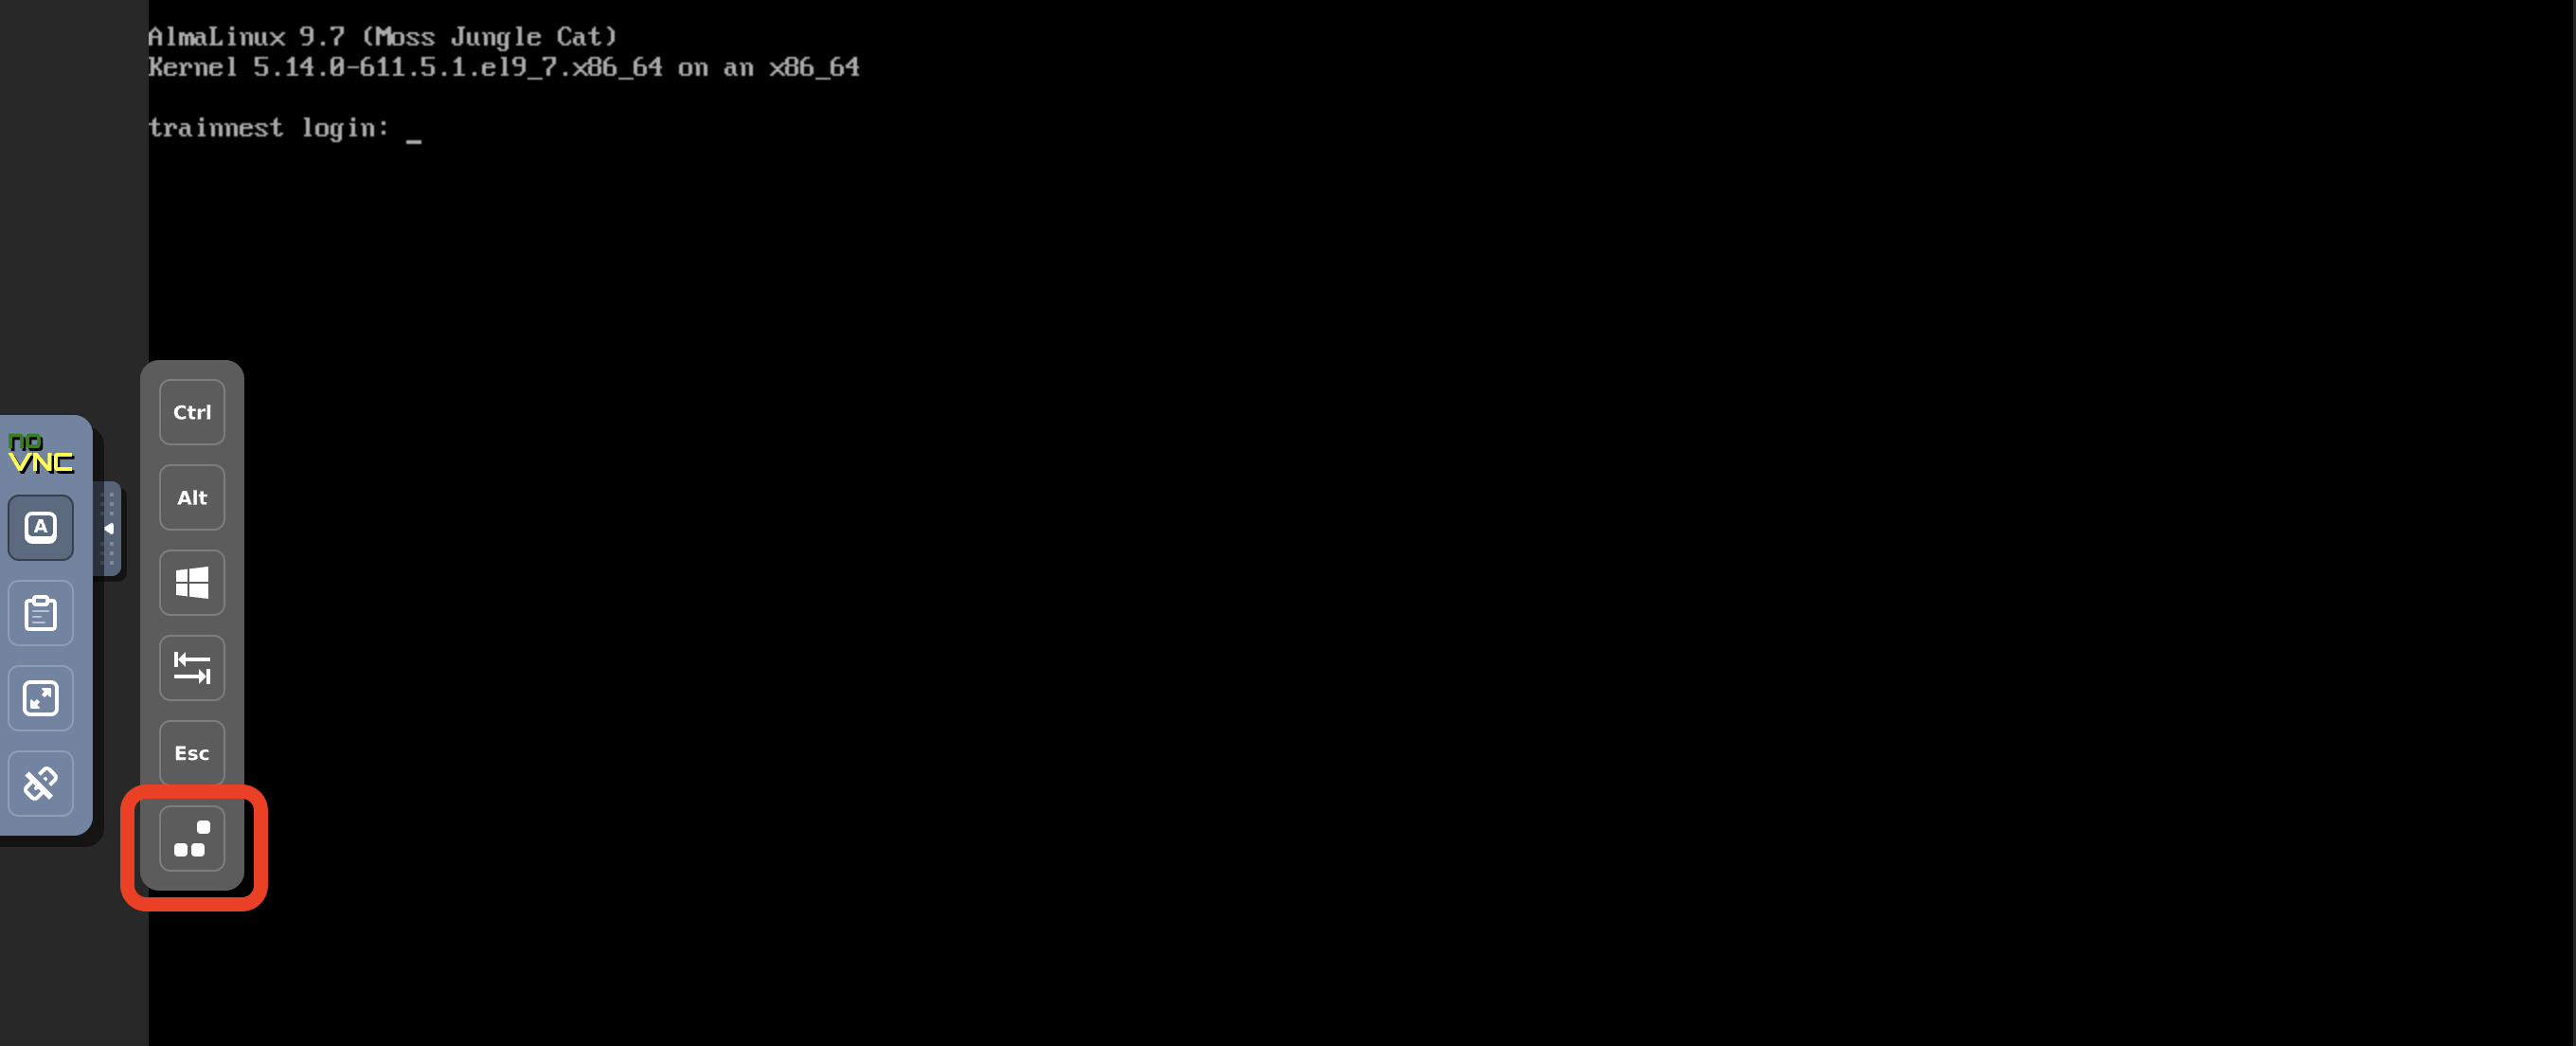
2. When the GRUB menu appears, select the default kernel entry. You should navigate with the arrows
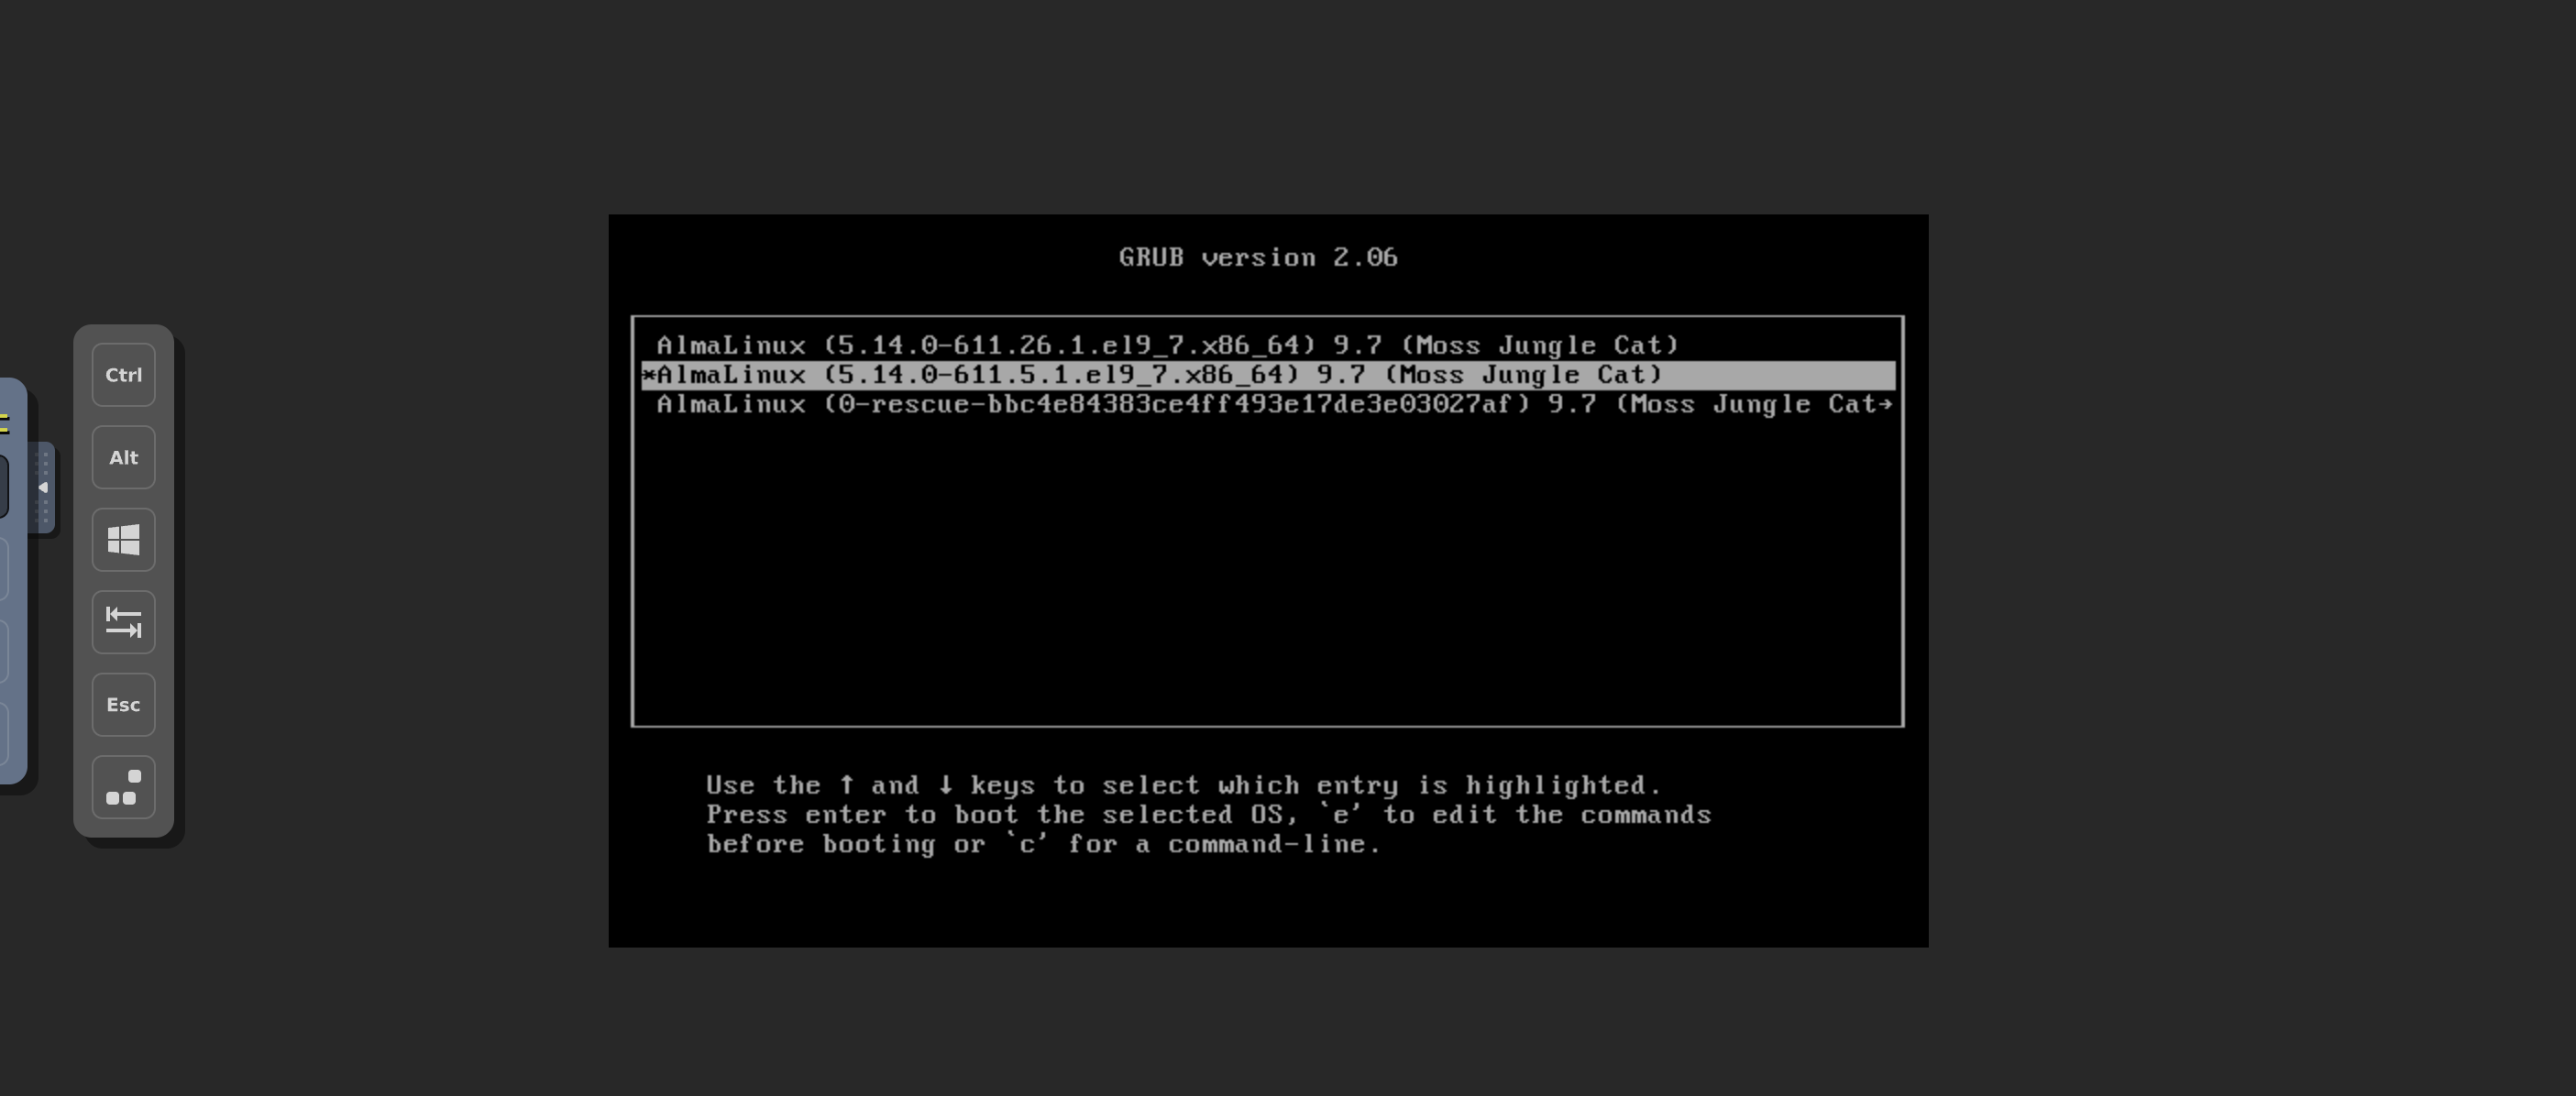
3. Press `e` to edit the boot parameters.
# Step 3: Modify Kernel Boot Parameters
1. Locate the line starting with linux or linuxefi
2. At the end of that line, add:
```
rd.break
```
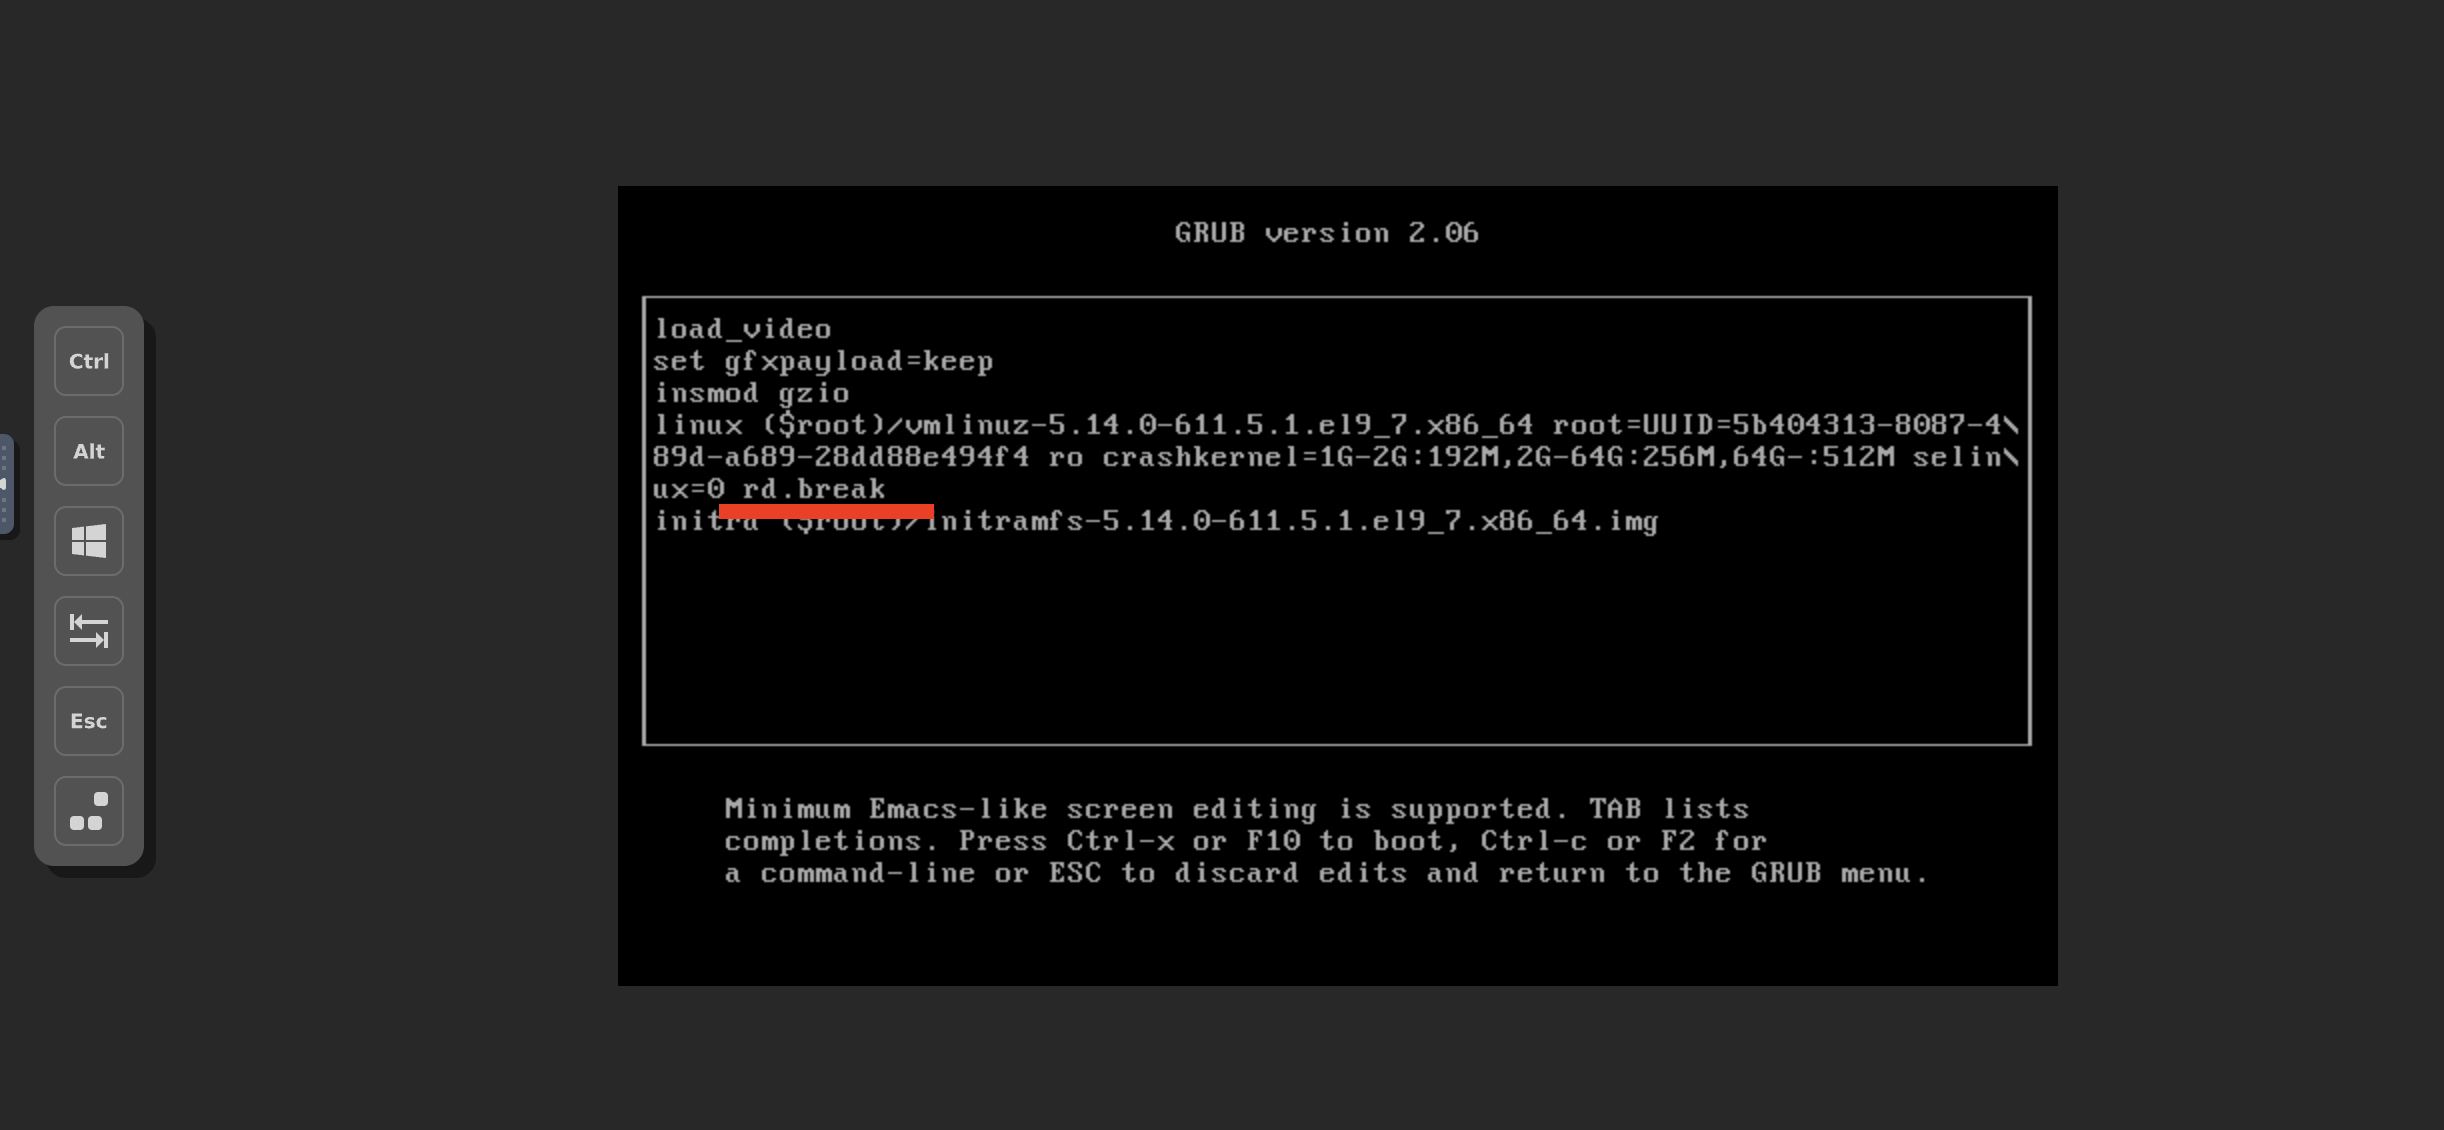
If console=ttyS0,115200 is present as the last parameter, remove it before adding rd.break.
3. Press Ctrl + X (or F10) to boot with the modified parameters.
# Step 4: Enter Emergency Mode Shell
After booting, the system will drop into an emergency shell with a prompt similar to:
```
switch_root:/#
```
# Step 5: Remount the System as Writable
```
mount -o remount,rw /sysroot
```
# Step 6: Chroot into the Installed System
Switch into the actual system environment:
```
chroot /sysroot
```
# Step 7: Reset the Root Password
Run the password utility:
```
passwd root
```
* Enter a new password when prompted.
* Confirm the new password.
# Step 8: Enable SELinux Relabeling
This step should be performed only if you are using AlmaLinux
To ensure proper SELinux context restoration, create the autorelabel file:
```
touch /.autorelabel
```
# Step 9: Exit and Reboot
Exit the chroot environment and reboot the system:
```
exit
exit
```
# Using the Get Connection Button When You Can't Access Your Server
Source: https://kb.verpex.com/servers/how-to-use-the-get-connection-button-when-you-cannot-access-your-server
If you are unable to access your unmanaged VPS using SSH or your usual connection method, the Get Connection feature in the Verpex Client Area allows you to connect directly to your server. This is especially useful if the server is locked, misconfigured, or not responding as expected.
You should use the **Get Connection button** if:
* You cannot connect via SSH
* Your firewall rules are blocking access
* Network settings were misconfigured
* The server appears online but is inaccessible
This tool provides direct console access, allowing you to troubleshoot and restore connectivity.
# How to Connect Using Get Connection
## 1. Log in to the Verpex Client Area
Log in to your Verpex Client Area using your account credentials.
## 2. Go to Product and Services
The letters that appear in the top-right icon vary -- they are your initials.
# How to Reset the Root Password for Your Self-Managed Server
Source: https://kb.verpex.com/servers/how-to-reset-the-root-password-for-your-self-managed-server
This article explains how to reset the root password when access is lost. This method requires booting into emergency mode using the GRUB bootloader and performing the reset from a restricted shell environment.
# Step 1: Access the Server Console (VNC)
1. Log in to [https://clients.verpex.com/](https://clients.verpex.com/)
2. Go to Products and Services -> Hosting and Services
3. Click on **Manage**
4. Click the **Login** button
Now you are in your Console

# Step 2: Boot into GRUB Menu
1. Reboot the system

2. When the GRUB menu appears, select the default kernel entry. You should navigate with the arrows

3. Press `e` to edit the boot parameters.
# Step 3: Modify Kernel Boot Parameters
1. Locate the line starting with linux or linuxefi
2. At the end of that line, add:
```
rd.break
```

If console=ttyS0,115200 is present as the last parameter, remove it before adding rd.break.
3. Press Ctrl + X (or F10) to boot with the modified parameters.
# Step 4: Enter Emergency Mode Shell
After booting, the system will drop into an emergency shell with a prompt similar to:
```
switch_root:/#
```
# Step 5: Remount the System as Writable
```
mount -o remount,rw /sysroot
```
# Step 6: Chroot into the Installed System
Switch into the actual system environment:
```
chroot /sysroot
```
# Step 7: Reset the Root Password
Run the password utility:
```
passwd root
```
* Enter a new password when prompted.
* Confirm the new password.
# Step 8: Enable SELinux Relabeling
This step should be performed only if you are using AlmaLinux
To ensure proper SELinux context restoration, create the autorelabel file:
```
touch /.autorelabel
```
# Step 9: Exit and Reboot
Exit the chroot environment and reboot the system:
```
exit
exit
```
# Using the Get Connection Button When You Can't Access Your Server
Source: https://kb.verpex.com/servers/how-to-use-the-get-connection-button-when-you-cannot-access-your-server
If you are unable to access your unmanaged VPS using SSH or your usual connection method, the Get Connection feature in the Verpex Client Area allows you to connect directly to your server. This is especially useful if the server is locked, misconfigured, or not responding as expected.
You should use the **Get Connection button** if:
* You cannot connect via SSH
* Your firewall rules are blocking access
* Network settings were misconfigured
* The server appears online but is inaccessible
This tool provides direct console access, allowing you to troubleshoot and restore connectivity.
# How to Connect Using Get Connection
## 1. Log in to the Verpex Client Area
Log in to your Verpex Client Area using your account credentials.
## 2. Go to Product and Services
![]() ## 3. Click on Manage Server
## 3. Click on Manage Server
![]() ## 4. Click the Get Connection Button
## 4. Click the Get Connection Button
![]() ## 5. Access Your Server Console
Once the console loads, you will have direct access to your server, even if SSH is unavailable.
From here, you can:
* Fix firewall or network configuration issues
* Reset SSH settings
* Restart services
* Perform recovery tasks
**Important Notes**
The Get Connection feature works even when external access methods are blocked
This tool is intended for unmanaged VPS clients
Any changes made via the console are the client’s responsibility
# Managing Billing in the Hosting Panel
Source: https://kb.verpex.com/servers/managing-billing-in-the-hosting-panel
Learn how to manage billing for your verpex.com account, including paying invoices and managing billing cycles.
Learn how to manage billing for your verpex.com account. This article covers how to pay invoices, manage billing cycles, and more.
## Viewing orders
To view and manage your orders, follow these steps:
1. Log in to the Hosting Panel at [https://clients.verpex.com/](https://clients.verpex.com/)
2. In the left sidebar, click Billing, and then click My Orders:
## 5. Access Your Server Console
Once the console loads, you will have direct access to your server, even if SSH is unavailable.
From here, you can:
* Fix firewall or network configuration issues
* Reset SSH settings
* Restart services
* Perform recovery tasks
**Important Notes**
The Get Connection feature works even when external access methods are blocked
This tool is intended for unmanaged VPS clients
Any changes made via the console are the client’s responsibility
# Managing Billing in the Hosting Panel
Source: https://kb.verpex.com/servers/managing-billing-in-the-hosting-panel
Learn how to manage billing for your verpex.com account, including paying invoices and managing billing cycles.
Learn how to manage billing for your verpex.com account. This article covers how to pay invoices, manage billing cycles, and more.
## Viewing orders
To view and manage your orders, follow these steps:
1. Log in to the Hosting Panel at [https://clients.verpex.com/](https://clients.verpex.com/)
2. In the left sidebar, click Billing, and then click My Orders:
![]() 3. On the Billing page, the My Orders tab appears:
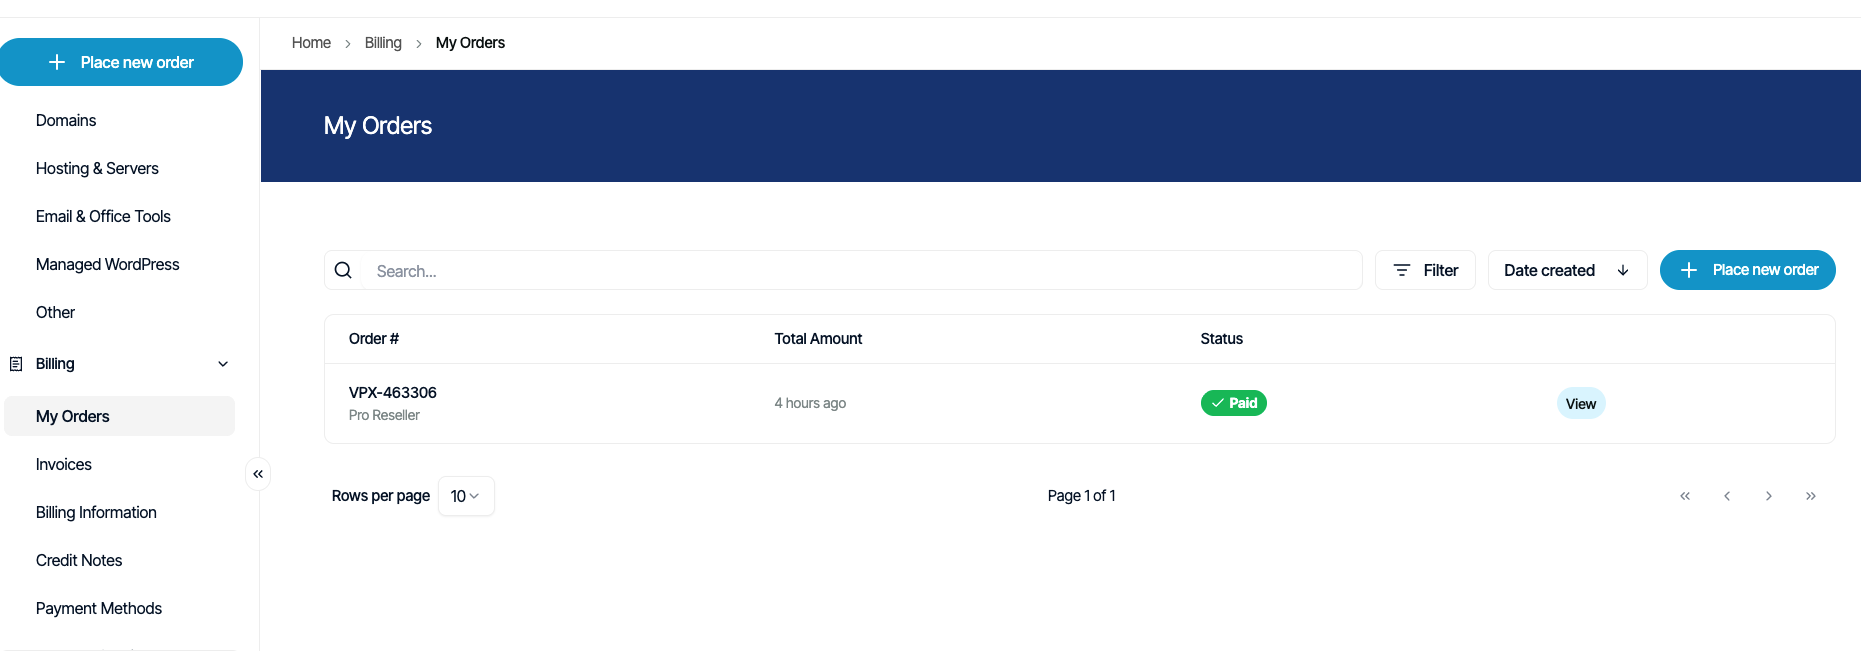
4. On the My Orders tab, you can:
* Search for a specific order in the Search text box.
* Click Filter, and then filter the orders that appear in the list by selecting from a list of criteria.
* Click Sort, and then sort orders by date, status, and other criteria.
* Place a new order for additional products and services.
5. To view an order in detail, click View.
## Managing invoices
To view and manage your invoices, follow these steps:
1. Log in to the Hosting Panel at [https://clients.verpex.com/](https://clients.verpex.com/)
2. In the left sidebar, click Billing, and then click Invoices:
3. On the Billing page, the My Orders tab appears:

4. On the My Orders tab, you can:
* Search for a specific order in the Search text box.
* Click Filter, and then filter the orders that appear in the list by selecting from a list of criteria.
* Click Sort, and then sort orders by date, status, and other criteria.
* Place a new order for additional products and services.
5. To view an order in detail, click View.
## Managing invoices
To view and manage your invoices, follow these steps:
1. Log in to the Hosting Panel at [https://clients.verpex.com/](https://clients.verpex.com/)
2. In the left sidebar, click Billing, and then click Invoices:
![]() 3. The Invoices tab appears:
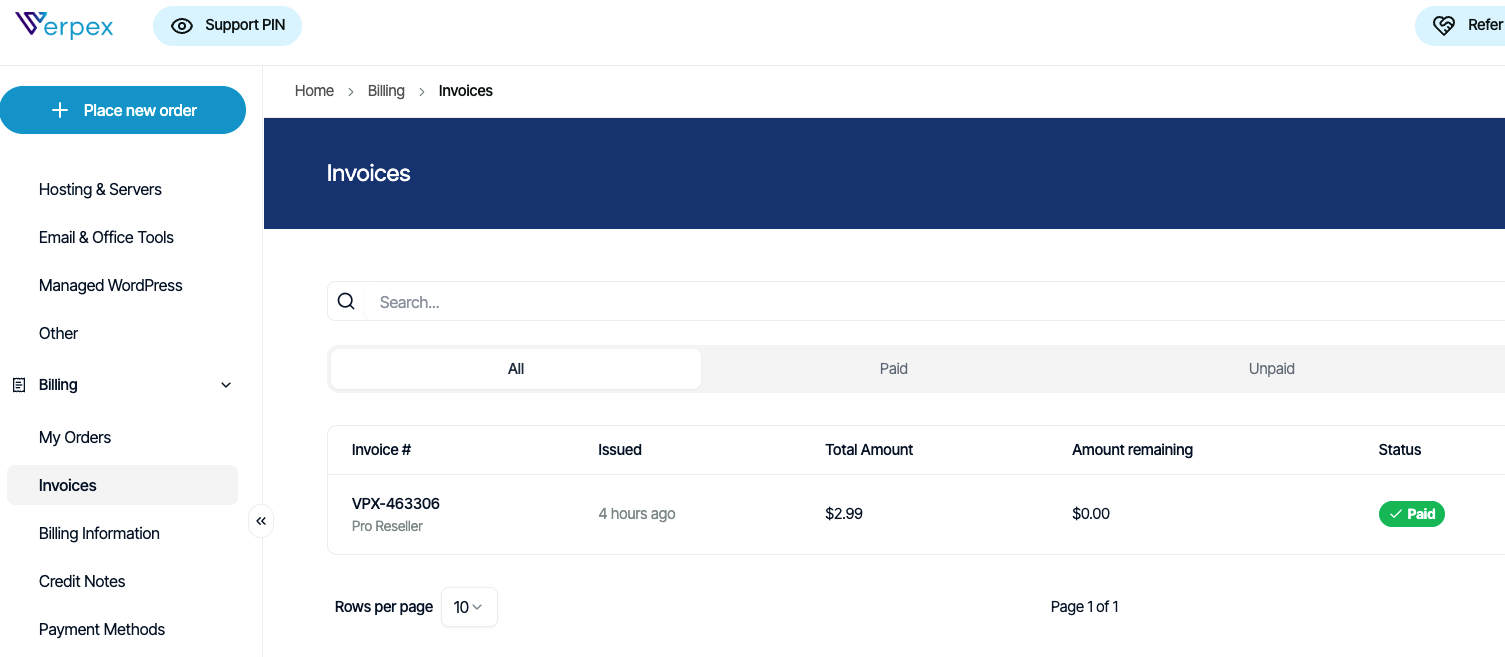
4. On the Invoices tab, you can:
* Search for a specific invoice in the Search text box.
* Click Filter, and then filter the invoices that appear in the list by selecting from a list of criteria.
* Click Sort, and then sort invoices by date, status, and other criteria.
* To view an invoice in detail, click View.
* To download an invoice, click the three-dot menu, and then click Download.
* To pay an invoice, click the three-dot menu, and then click Pay invoice.
## Setting billing information
You can specify your preferred currency and invoice consolidation options. To do this, follow these steps:
1. Log in to the Hosting Panel at [https://clients.verpex.com/](https://clients.verpex.com/)
2. In the left sidebar, click Billing, and then click Billing Information:
3. The Invoices tab appears:

4. On the Invoices tab, you can:
* Search for a specific invoice in the Search text box.
* Click Filter, and then filter the invoices that appear in the list by selecting from a list of criteria.
* Click Sort, and then sort invoices by date, status, and other criteria.
* To view an invoice in detail, click View.
* To download an invoice, click the three-dot menu, and then click Download.
* To pay an invoice, click the three-dot menu, and then click Pay invoice.
## Setting billing information
You can specify your preferred currency and invoice consolidation options. To do this, follow these steps:
1. Log in to the Hosting Panel at [https://clients.verpex.com/](https://clients.verpex.com/)
2. In the left sidebar, click Billing, and then click Billing Information:
![]() 3. The Billing Information tab appears:
4. Specify the preferences you want, and then click Save.
## Managing credit notes
To view credit notes for your account, follow these steps:
1. Log in to the Hosting Panel at [https://clients.verpex.com/](https://clients.verpex.com/)
2. In the left sidebar, click Billing, and then click Credit Notes:
3. The Billing Information tab appears:

4. Specify the preferences you want, and then click Save.
## Managing credit notes
To view credit notes for your account, follow these steps:
1. Log in to the Hosting Panel at [https://clients.verpex.com/](https://clients.verpex.com/)
2. In the left sidebar, click Billing, and then click Credit Notes:
![]() 3. The Credit Notes tab appears:
4. On the Credit Notes tab, you can:
* Search for a specific credit note in the Search text box.
* Click Filter, and then filter the credit notes that appear in the list by selecting from a list of criteria.
* Click Sort, and then sort credit notes by date and other criteria.
* To view a credit note in detail, click View.
* To download a credit note, click the three-dot menu, and then click Download Credit Note.
# Managing Your Domain
Source: https://kb.verpex.com/servers/managing-your-domain
Learn how to use the Verpex Hosting Panel to manage your domains.
This article describes how to use the Verpex Hosting Panel to do domain management tasks, such as changing the domain's name servers and setting the registrar lock.
The information in this article only applies to domains purchased directly from Verpex. If you purchased a domain from a third-party registrar, check their documentation instead for information about how to manage your domain.
## Viewing domain information
To view basic information about your domain, such as payment and registration dates, follow these steps:
1. Log in to the Hosting Panel at [https://clients.verpex.com/](https://clients.verpex.com/)
2. In the left sidebar, under Products & Services, click Domains:
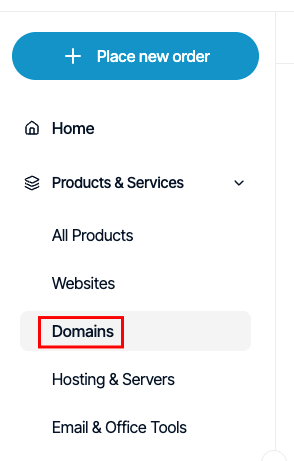
3. On the Domains page, click the domain you want to configure.
You can filter the list of domains to only display active, canceled, or all domains. To do this, click the Active, Cancelled, or All tab.
4. Information about your domain appears.
## Viewing and changing the name servers for a domain
To change the name servers for a domain, or to just see the current name servers set for a domain, follow these steps:
1. Log in to the Hosting Panel at [https://clients.verpex.com/](https://clients.verpex.com/)
2. In the left sidebar, under Products & Services, click Domains:

3. On the Domains page, click the domain you want to configure.
You can filter the list of domains to only display active, canceled, or all domains. To do this, click the Active, Cancelled, or All tab.
4. Click Update Nameservers:

5. In the Update Nameservers dialog box, type the nameservers you want to use. You must specify at least two (a primary and a secondary) nameservers:
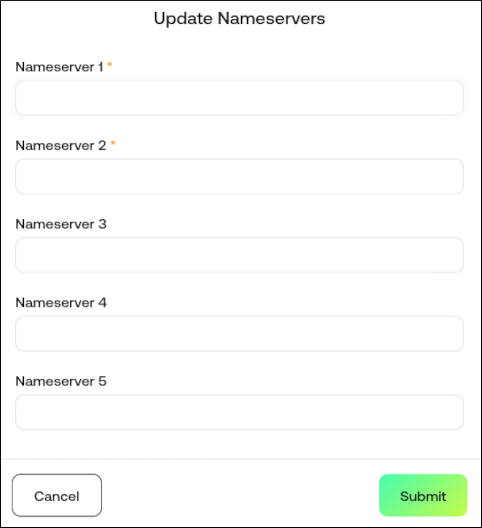
6. Click Submit. DNS changes can take up to 24 hours to fully propagate.
## Setting the registrar lock for a domain
For security reasons, you should keep your domain locked to prevent unauthorized transfers. To do this, follow these steps:
1. Log in to the Hosting Panel at [https://clients.verpex.com/](https://clients.verpex.com/)
2. In the left sidebar, under Products & Services, click Domains:

3. On the Domains page, click the domain you want to configure.
You can filter the list of domains to only display active, canceled, or all domains. To do this, click the Active, Cancelled, or All tab.
4. Click Lock/Unlock:

5. In the Lock/Unlock dialog box, the lock options for the domain appear:
* To lock the domain, make sure the Locked check box is selected:
* To unlock the domain, make sure the Locked check box is not selected:
6. Click Submit.
## Changing registrant contact information
To change the registrant contact information for a domain, follow these steps:
1. Log in to the Hosting Panel at [https://clients.verpex.com/](https://clients.verpex.com/)
2. In the left sidebar, under Products & Services, click Domains:
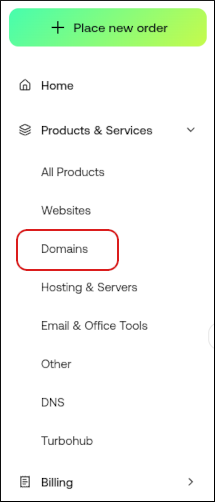
3. On the Domains page, click the domain you want to configure.
You can filter the list of domains to only display active, canceled, or all domains. To do this, click the Active, Cancelled, or All tab.
4. Click Update Registrant:

5. In the Update Registrant dialog box, update the domain registrant contact information:
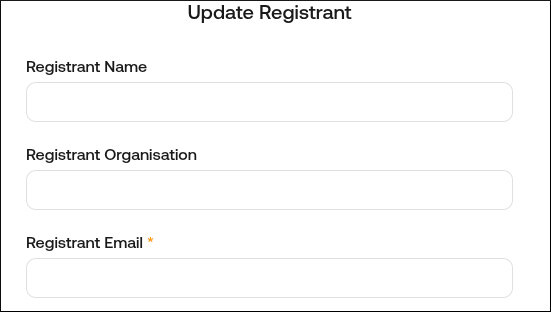
6. Click Submit.
## Obtaining an EPP code
If you want to transfer your domain to another registrar, you must obtain an EPP (Extensible Provisioning Protocol) code first. The EPP code is an additional security measure that helps prevent unauthorized domain transfers.
Domain registrars may also refer to the EPP code as the EPP key, an AuthInfo code, a transfer secret, or something similar.
To obtain an EPP code, follow these steps:
1. Log in to the Hosting Panel at [https://clients.verpex.com/](https://clients.verpex.com/)
2. In the left sidebar, under Products & Services, click Domains:

3. On the Domains page, click the domain you want to configure.
You can filter the list of domains to only display active, canceled, or all domains. To do this, click the Active, Cancelled, or All tab.
4. Click Get EPP Code (Non-UK Domains):

5. The Hosting Panel notifies you that the EPP code has been generated.
The EPP code is sent to the registrant e-mail address for the domain.
## Updating the IPS tag (UK domains)
For UK domains, if you want to transfer your domain to another registrar, you must update the IPS (Internet Provider Security) tag for the domain. The IPS tag is an additional security measure that helps prevent unauthorized domain transfers.
To update the IPS tag for your domain, follow these steps:
1. Log in to the Hosting Panel at [https://clients.verpex.com/](https://clients.verpex.com/)
2. In the left sidebar, under Products & Services, click Domains:

3. On the Domains page, click the domain you want to configure.
You can filter the list of domains to only display active, canceled, or all domains. To do this, click the Active, Cancelled, or All tab.
4. Click Update IPS Tag (UK Domain Release):

5. In the New IPS Tag text box, type the IPS tag provided by the gaining registrar:
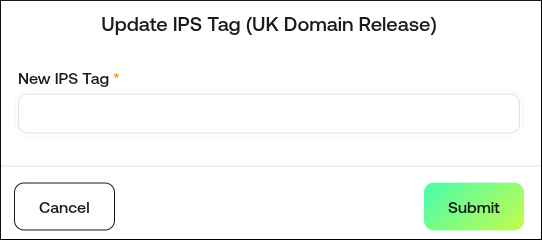
6. Click Submit
# Managing Your Profile in the Hosting Panel
Source: https://kb.verpex.com/servers/managing-your-profile-in-the-hosting-panel
Learn how to manage your profile in the verpex.com Hosting Panel.
This article describes how to manage your profile and account details for your verpex.com account. This article covers how to manage notifications, security, email history, account delegates, and more.
## Managing your personal information
To manage your personal information, follow these steps:
1. Log in to the Hosting Panel at [https://clients.verpex.com/](https://clients.verpex.com/)
2. Click your initials in the top-right corner, and then click Profile:
3. The Credit Notes tab appears:

4. On the Credit Notes tab, you can:
* Search for a specific credit note in the Search text box.
* Click Filter, and then filter the credit notes that appear in the list by selecting from a list of criteria.
* Click Sort, and then sort credit notes by date and other criteria.
* To view a credit note in detail, click View.
* To download a credit note, click the three-dot menu, and then click Download Credit Note.
# Managing Your Domain
Source: https://kb.verpex.com/servers/managing-your-domain
Learn how to use the Verpex Hosting Panel to manage your domains.
This article describes how to use the Verpex Hosting Panel to do domain management tasks, such as changing the domain's name servers and setting the registrar lock.
The information in this article only applies to domains purchased directly from Verpex. If you purchased a domain from a third-party registrar, check their documentation instead for information about how to manage your domain.
## Viewing domain information
To view basic information about your domain, such as payment and registration dates, follow these steps:
1. Log in to the Hosting Panel at [https://clients.verpex.com/](https://clients.verpex.com/)
2. In the left sidebar, under Products & Services, click Domains:

3. On the Domains page, click the domain you want to configure.
You can filter the list of domains to only display active, canceled, or all domains. To do this, click the Active, Cancelled, or All tab.
4. Information about your domain appears.
## Viewing and changing the name servers for a domain
To change the name servers for a domain, or to just see the current name servers set for a domain, follow these steps:
1. Log in to the Hosting Panel at [https://clients.verpex.com/](https://clients.verpex.com/)
2. In the left sidebar, under Products & Services, click Domains:

3. On the Domains page, click the domain you want to configure.
You can filter the list of domains to only display active, canceled, or all domains. To do this, click the Active, Cancelled, or All tab.
4. Click Update Nameservers:

5. In the Update Nameservers dialog box, type the nameservers you want to use. You must specify at least two (a primary and a secondary) nameservers:

6. Click Submit. DNS changes can take up to 24 hours to fully propagate.
## Setting the registrar lock for a domain
For security reasons, you should keep your domain locked to prevent unauthorized transfers. To do this, follow these steps:
1. Log in to the Hosting Panel at [https://clients.verpex.com/](https://clients.verpex.com/)
2. In the left sidebar, under Products & Services, click Domains:

3. On the Domains page, click the domain you want to configure.
You can filter the list of domains to only display active, canceled, or all domains. To do this, click the Active, Cancelled, or All tab.
4. Click Lock/Unlock:

5. In the Lock/Unlock dialog box, the lock options for the domain appear:
* To lock the domain, make sure the Locked check box is selected:

* To unlock the domain, make sure the Locked check box is not selected:

6. Click Submit.
## Changing registrant contact information
To change the registrant contact information for a domain, follow these steps:
1. Log in to the Hosting Panel at [https://clients.verpex.com/](https://clients.verpex.com/)
2. In the left sidebar, under Products & Services, click Domains:

3. On the Domains page, click the domain you want to configure.
You can filter the list of domains to only display active, canceled, or all domains. To do this, click the Active, Cancelled, or All tab.
4. Click Update Registrant:

5. In the Update Registrant dialog box, update the domain registrant contact information:

6. Click Submit.
## Obtaining an EPP code
If you want to transfer your domain to another registrar, you must obtain an EPP (Extensible Provisioning Protocol) code first. The EPP code is an additional security measure that helps prevent unauthorized domain transfers.
Domain registrars may also refer to the EPP code as the EPP key, an AuthInfo code, a transfer secret, or something similar.
To obtain an EPP code, follow these steps:
1. Log in to the Hosting Panel at [https://clients.verpex.com/](https://clients.verpex.com/)
2. In the left sidebar, under Products & Services, click Domains:

3. On the Domains page, click the domain you want to configure.
You can filter the list of domains to only display active, canceled, or all domains. To do this, click the Active, Cancelled, or All tab.
4. Click Get EPP Code (Non-UK Domains):

5. The Hosting Panel notifies you that the EPP code has been generated.
The EPP code is sent to the registrant e-mail address for the domain.
## Updating the IPS tag (UK domains)
For UK domains, if you want to transfer your domain to another registrar, you must update the IPS (Internet Provider Security) tag for the domain. The IPS tag is an additional security measure that helps prevent unauthorized domain transfers.
To update the IPS tag for your domain, follow these steps:
1. Log in to the Hosting Panel at [https://clients.verpex.com/](https://clients.verpex.com/)
2. In the left sidebar, under Products & Services, click Domains:

3. On the Domains page, click the domain you want to configure.
You can filter the list of domains to only display active, canceled, or all domains. To do this, click the Active, Cancelled, or All tab.
4. Click Update IPS Tag (UK Domain Release):

5. In the New IPS Tag text box, type the IPS tag provided by the gaining registrar:

6. Click Submit
# Managing Your Profile in the Hosting Panel
Source: https://kb.verpex.com/servers/managing-your-profile-in-the-hosting-panel
Learn how to manage your profile in the verpex.com Hosting Panel.
This article describes how to manage your profile and account details for your verpex.com account. This article covers how to manage notifications, security, email history, account delegates, and more.
## Managing your personal information
To manage your personal information, follow these steps:
1. Log in to the Hosting Panel at [https://clients.verpex.com/](https://clients.verpex.com/)
2. Click your initials in the top-right corner, and then click Profile:
![]() 3. The Personal section appears. In this section, you can add and modify the following items:
* Name and preferred language: Update the fields, and then click Save.
* Email addresses: Click Add new, complete the fields, and then click Add email.
* Phone numbers: Click Add new, complete the fields, and then click Add phone.
* Addresses: Click Add new, complete the fields, and then click Add personal address.
* Companies: Click Add new, complete the fields, and then click Add business address
* You must add a phone number and address before you can add a company.
* You can add a VAT number and registration number for your company.
## Managing account notes
To manage account notes for your account, follow these steps:
1. Log in to the Hosting Panel at [https://clients.verpex.com/](https://clients.verpex.com/)
2. Click your initials in the top-right corner, and then click Profile:
3. The Personal section appears. In this section, you can add and modify the following items:
* Name and preferred language: Update the fields, and then click Save.
* Email addresses: Click Add new, complete the fields, and then click Add email.
* Phone numbers: Click Add new, complete the fields, and then click Add phone.
* Addresses: Click Add new, complete the fields, and then click Add personal address.
* Companies: Click Add new, complete the fields, and then click Add business address
* You must add a phone number and address before you can add a company.
* You can add a VAT number and registration number for your company.
## Managing account notes
To manage account notes for your account, follow these steps:
1. Log in to the Hosting Panel at [https://clients.verpex.com/](https://clients.verpex.com/)
2. Click your initials in the top-right corner, and then click Profile:
![]() 3. In the left sidebar, click Notes.
4. To add a new note, click Add new, type the note, and then click Add note.
## Managing account security
To manage security settings for your account, follow these steps:
1. Log in to the Hosting Panel at [https://clients.verpex.com/](https://clients.verpex.com/)
2. Click your initials in the top-right corner, and then click Profile.
3. In the left sidebar, click Security.
4. In the Login section, you can change your Hosting Panel username.
5. In the Change password section, you can change your Hosting Panel password.
6. In the Two-factor authentication section, you can enable two-factor authentication (also known as "2FA"). To do this, click the slider:
3. In the left sidebar, click Notes.
4. To add a new note, click Add new, type the note, and then click Add note.
## Managing account security
To manage security settings for your account, follow these steps:
1. Log in to the Hosting Panel at [https://clients.verpex.com/](https://clients.verpex.com/)
2. Click your initials in the top-right corner, and then click Profile.
3. In the left sidebar, click Security.
4. In the Login section, you can change your Hosting Panel username.
5. In the Change password section, you can change your Hosting Panel password.
6. In the Two-factor authentication section, you can enable two-factor authentication (also known as "2FA"). To do this, click the slider:
![]() * Scan the QR code with an authenticator app on your mobile device:
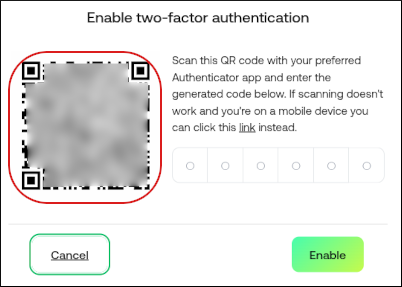
* In the Enable two-factor authentication dialog box, type the six-digit code that appears on your device's authenticator app.
* Two-factor authentication is now enabled. In addition to your username and password, you must provide a six-digit code generated by your device's authenticator app to log in to the Hosting Panel.
7. In the Account Secrets section, you can view your account secrets. Click Add new to add a secret.
8. To view your support PIN, in the right sidebar click Support PIN, and then click Show PIN. Support may ask you to provide this PIN to verify your identity when you contact them.
You can generate a new support PIN at any time. To do this, click Support PIN, and then click Generate new PIN.
## Managing notifications
To manage notifications for your account, follow these steps:
1. Log in to the Hosting Panel at [https://clients.verpex.com/](https://clients.verpex.com/)
2. Click your initials in the top-right corner, and then click Profile:
* Scan the QR code with an authenticator app on your mobile device:

* In the Enable two-factor authentication dialog box, type the six-digit code that appears on your device's authenticator app.
* Two-factor authentication is now enabled. In addition to your username and password, you must provide a six-digit code generated by your device's authenticator app to log in to the Hosting Panel.
7. In the Account Secrets section, you can view your account secrets. Click Add new to add a secret.
8. To view your support PIN, in the right sidebar click Support PIN, and then click Show PIN. Support may ask you to provide this PIN to verify your identity when you contact them.
You can generate a new support PIN at any time. To do this, click Support PIN, and then click Generate new PIN.
## Managing notifications
To manage notifications for your account, follow these steps:
1. Log in to the Hosting Panel at [https://clients.verpex.com/](https://clients.verpex.com/)
2. Click your initials in the top-right corner, and then click Profile:
![]() 3. In the left sidebar, click Notifications. You can change notification preferences for:
* Billing
* Marketing
* Support
* Service Updates
You cannot disable System notifications. These are essential for the security and operation of your account.
4. To change notification preferences, select or clear the Email or In-App options, and then click Save.
## Managing email history
To view and manage your email history, follow these steps:
1. Log in to the Hosting Panel at [https://clients.verpex.com/](https://clients.verpex.com/)
2. Click your initials in the top-right corner, and then click Profile:
3. In the left sidebar, click Email History. In this section, you can:
* Click the > icon to view a message in detail.
* Click Filter, and then filter the messages that appear in the list by selecting from a list of criteria.
* Click Sort, and then sort messages by date or subject.
## Managing delegates
You can designate delegates to act on your behalf in managing your account. You can grant delegates access to all of your products and services, or only a select number.
Delegates must have an existing account on the Hosting Panel to accept invitations.
To view and manage delegates for your account, follow these steps:
1. Log in to the Hosting Panel at [https://clients.verpex.com/](https://clients.verpex.com/)
2. Click your initials in the top-right corner, and then click Profile:
3. In the left sidebar, click Delegates. In this section, you can:
* Click the > icon to view a delegate in detail.
* Click Filter, and then filter the delegates that appear in the list by selecting from a list of criteria.
* Click Sort, and then sort delegates by their access type or date invited.
4. To add a delegate, click Invite delegate. In the Invite delegate dialog box, type the email address of the person you want to invite, select what type of access you want to grant, and then click Send invitation:
3. In the left sidebar, click Notifications. You can change notification preferences for:
* Billing
* Marketing
* Support
* Service Updates
You cannot disable System notifications. These are essential for the security and operation of your account.
4. To change notification preferences, select or clear the Email or In-App options, and then click Save.
## Managing email history
To view and manage your email history, follow these steps:
1. Log in to the Hosting Panel at [https://clients.verpex.com/](https://clients.verpex.com/)
2. Click your initials in the top-right corner, and then click Profile:
3. In the left sidebar, click Email History. In this section, you can:
* Click the > icon to view a message in detail.
* Click Filter, and then filter the messages that appear in the list by selecting from a list of criteria.
* Click Sort, and then sort messages by date or subject.
## Managing delegates
You can designate delegates to act on your behalf in managing your account. You can grant delegates access to all of your products and services, or only a select number.
Delegates must have an existing account on the Hosting Panel to accept invitations.
To view and manage delegates for your account, follow these steps:
1. Log in to the Hosting Panel at [https://clients.verpex.com/](https://clients.verpex.com/)
2. Click your initials in the top-right corner, and then click Profile:
3. In the left sidebar, click Delegates. In this section, you can:
* Click the > icon to view a delegate in detail.
* Click Filter, and then filter the delegates that appear in the list by selecting from a list of criteria.
* Click Sort, and then sort delegates by their access type or date invited.
4. To add a delegate, click Invite delegate. In the Invite delegate dialog box, type the email address of the person you want to invite, select what type of access you want to grant, and then click Send invitation:
![]() After the invitee accepts the invitation, they can then access the product or service you specified in step 5
Alternatively, if you want to quickly add a new delegate to one of your products or services, go to the product or service, click the Settings tab, and in the Delegate Access section, click Invite:
# OpenClaw Guide
Source: https://kb.verpex.com/servers/openclaw-guide
This guide walks you through installing and configuring OpenClaw on a self-managed VPS, from the initial setup and AI model onboarding to exposing the ControlUI securely with Nginx and SSL. It also covers post-installation configuration, troubleshooting tips, and optional customization to help you get your AI agent up and running quickly.
# Installing and Configuring OpenClaw
Installing OpenClaw requires initial preparation on the Self-Managed VPS:
* NodeJS
* Homebrew
* Separate use for OpenClaw
* OpenClaw
Optionally, if you intend to expose the AI Agent to the public, you would also require a Web Service installed, such as:
* Nginx
* Caddy
* Traefik
Once your Self Managed VPS has been provisioned, you will be provided with root credentials in the Product notes. This is located on the Product listing in the Client Area, Products -> VPS in question -> Product notes.
Connecting to the server can be done via Putty for Windows or directly in your terminal if on Linux/mac.
Once connected, in order to setup OpenClaw, it is advisable to start with Homebrew, as some setup steps with Openclaw will require it.
To install homebrew simply run:
```text theme={null}
/bin/bash -c "$(curl -fsSL https://raw.githubusercontent.com/Homebrew/install/HEAD/install.sh)"
```
After installing Homebrew, it is advisable to create a separate user for OpenClaw to use, instead of root. Simply run the following 2 lines:
```text theme={null}
adduser openclaw
usermod -aG sudo openclaw
```
Once Homebrew and the additional user are ready, you can start with the OpenClaw download and then directly run it with:
```text theme={null}
su - openclaw
curl -fsSL https://openclaw.ai/install.sh | bash
```
The installation script will check for minimum requirements and then proceed with installing NodeJS, unless you have installed it prior to starting the install script.
Please note that, if the AI agent is installed via root user, it can have access to its own environment and even core files of the server.
Doing a bad prompt can trick the bot into doing unsafe things on the server.
Once the installation of OpenClaw is complete, you can use the arrow keys to navigate the various options the onboarding process will ask and show.
After agreeing to the security notice, you will be presented with 2 initial setup options:
* QuickStart (recommended) (Recommended local setup. Change details later with openclaw configure.)
* Manual setup (Choose Gateway port, network exposure, Tailscale, and auth.)

When choosing Quick start, the installation will list Gateway information such as Port, bind and what type of token its going to be used.
You will be presented with the most common AI model providers. For this guide, we will be using Google/Gemini:
* OpenAI (ChatGPT/Codex sign-in or API key)
* Anthropic (Claude CLI + API key)
* xAI (Grok) (API key or browser OAuth)
* Google (Gemini API key + OAuth)
* OpenRouter (OAuth or API key)
Alternatively, if the model you intend to use is not listed, you can use "More...", which will lest every AI model.
Once you have chosen your model, the onboarding with ask either for OAUTH or API token to be provided.
Choosing API key will prompt for the API created here:
[https://aistudio.google.com/app/api-keys](https://aistudio.google.com/app/api-keys)
When the Token is provided, the onboarding will show a default model that can be used, alternatively you can enter a model name manually or enter the model name manually.
Please note that even after onboarding is complete and there are issues with connecting with the desired model, you can use the following CLI command to list the available models and the subsequent command to set the model, without the need to go through the onboarding process again:
`openclaw models list --provider [PROVIDER]`
Example:
`openclaw models list --provider google openclaw models set [MODEL NAME]`
Example:
`openclaw models set google/gemini-2.5-flash`
Next, you will have to choose how you would like to communicate with your AI Agent.
This is personal preference. You can always set this later via "openclaw channels add". This is shown if you choose "Skip for now".
When skipped, you can still communicate with the AI Agent via SSH commands when typing "openclaw" and then "talk to agent" to switch from "crestodian" mode to the AI Agent.
Next, you will have to set up which web search engine the AI agent should use.
This is again personal preference, which can be setup later if "Skip for now" is chosen with:
```text theme={null}
openclaw configure --section web
```
In the case of our example of using Gemini, the API key had to be verified after choosing the Web Search engine Google.
Next, you will have to configure additional skills. This is where Homebrew will be used by the onboarding to install any missing skills.
Skills essentially allow you to customize how memory, speed, and searchability work for your AI agent. It does grow over time on its own.
You can proceed with "Yes" on the configuring skills, and this will list additional skills that can be enabled for the AI Agent.
Please note that the screenshot above lists available skills for Gemini, so depending on the AI Model you are using, it will list different compatible skills.
You can use SPACE to mark the skills you want to add. On the next prompt, depending on the requirements of the desired skills, additional API keys will be requested from the relevant providers.
In the next step in the onboarding process, you will be presented with various hooks you can use. These can still be dependent on the AI model, but it helps solidify how the AI agent acts with memory or in case the server has been rebooted.
At this stage, the installation and onboarding are being finalized, with which you will be presented with various information such as:
**ControlUI**
This is a localhost only. If you want to expose the ControlUI to the public, you will have to install a web service and a domain name ( See below for Nginx installation steps and setting up your domain)
You can change how the agent introduces itself
This can be changed either manually via editing the BOOTSTRAP.md file or interacting with the AI Agent.
Main installation and onboarding are complete.
You can interact right away with the agent by either using "openclaw" or the onboarding will leave you with the initial message.
The AI agent will provide a response and also a status bellow to show current status such as tokens used and which model is being used.
# Opening the ControlUI to the public
To open the ControlUI to the public, which is currently set up for localhost only, you will have to start by installing Nginx Reverse Proxy with SSL for OpenClaw.
The following steps are for Ubuntu 24.04:
## 1. Install Nginx, Certbot
```text theme={null}
sudo apt install -y nginx certbot python3-certbot-nginx
```
## Create Nginx config
```text theme={null}
nano /etc/nginx/sites-available/openclaw
```
Paste the following block:
```text theme={null}
server {
listen 80;
server_name your-domain.com;
location / {
proxy_pass http://127.0.0.1:18789;
proxy_http_version 1.1;
proxy_set_header Upgrade $http_upgrade;
proxy_set_header Connection "upgrade";
proxy_set_header Host $host;
proxy_set_header X-Real-IP $remote_addr;
proxy_set_header X-Forwarded-For $proxy_add_x_forwarded_for;
proxy_set_header X-Forwarded-Proto $scheme; proxy_read_timeout 86400;
}
}
```
Make sure the proxy\_pass matches the one provided during the OpenClaw onboarding if the port is different.
Save and exit the text editor (CTRL + C -> Y -> hit Enter)
Follow the next prompts one after the other:
```text theme={null}
ln -s /etc/nginx/sites-available/openclaw /etc/nginx/sites-enabled/
nginx -t
systemctl reload nginx
```
## 3. Open Firewall ports
```text theme={null}
ufw allow 80/tcp
ufw allow 443/tcp
ufw allow 22/tcp
ufw allow from [YOUR IP]
ufw enable
```
Make sure to allow both 22 port and to allow your own IP, to ensure access is allowed from your side once the firewall is enabled.
## 4. Setting up SSL
```text theme={null}
certbot --nginx -d your-domain.com
```
Certbot will auto-update Nginx config and will setup auto-renewal with Let's Encrypt Free SSL. Make sure to replace "your-domain.com" with your actual domain.
## 5. Configurate OpenClaw
You will have to locate the openclaw config file. This can easily be done by doing:
`openclaw config file`
In our case the path is:
`~/.openclaw/openclaw.json`
`nano ~/.openclaw/openclaw.json`
Under "Gateway" section, locate "mode" section and add the following:
`"trustedProxies": ["127.0.0.1"],`
And then under "ControlUi" section:
```text theme={null}
"controlUi": {
"allowInsecureAuth": true,
"allowedOrigins": [
"https://your-domain.com"
]
}
```
Make sure to save the file when exiting.
## 6. Restart the gateway
```text theme={null}
openclaw gateway stop
openclaw gateway start
```
## 7. Open the ControlUI
Open:
```text theme={null}
https://your-domain.com/#token=[YOUR_TOKEN_FROM_CONFIG]
```
The token in question can be located from the same OpenCLAW config file
`(~/.openclaw/openclaw.json)` in the "Gateway" section.
You can easily grep for it with the following pattern:
```text theme={null}
grep -o '"token": "[^"]*"' ~/.openclaw/openclaw.json
```
## 8. Allowing your device
On first-time opening the ControlUI page, you will be prompted to pair your device with the agent.
On the server, you get the current pending devices with:
```text theme={null}
openclaw devices list
```
Copy the request ID and use the following to approve:
```text theme={null}
openclaw devices approve [request-id]
```
In case you want to skip the device approval, simply run this:
```text theme={null}
openclaw config set gateway.controlUi.dangerouslyDisableDeviceAuth true
```
Please note that this can cause anyone who finds your domain or AI agent page to use it without authentication. Use at your own risk.
For more information on OpenClaw and how you can customize it, you can check out OpenClaw's documentation here:
[https://docs.openclaw.ai/](https://docs.openclaw.ai/)
# Renewing a Domain
Source: https://kb.verpex.com/servers/renewing-a-domain
Learn how to use the Hosting Panel to renew domains you have purchased from Verpex.
This article describes how to use the Hosting Panel to manage renewals for domains you have purchased from Verpex
## Configuring automatic renewal for a domain
For greater convenience, you can configure your domains for automatic renewal. When automatic renewal is enabled, Verpex automatically sends you a renewal invoice 14 days before the domain expires. This provides you with enough time to complete the renewal process before the domain expiration.
To configure automatic renewal for a domain, follow these steps:
1. Log in to the Hosting Panel at [https://clients.verpex.com/](https://clients.verpex.com/)
2. In the left sidebar, under Products & Services, click Domains:
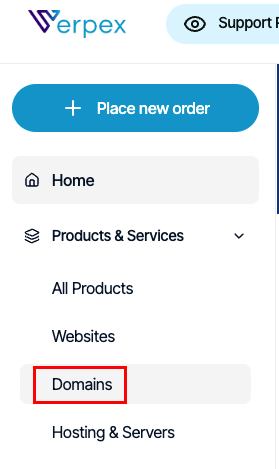
3. On the Domains page, click the domain you want to configure for automatic renewal.
4. In the left sidebar, click Billing.
5. Scroll down the page to the Renewal & Subscription Settings section, and then click the Auto-renew slider to enable or disable automatic renewal:
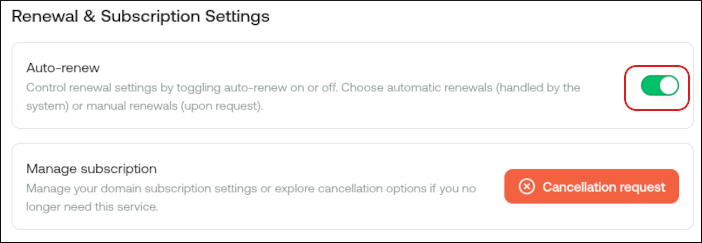
## Renewing a domain
To renew a domain that you previously purchased from Verpex, follow these steps:
1. Log in to the Hosting Panel at [https://clients.verpex.com/](https://clients.verpex.com/)
2. In the left sidebar, under Products & Services, click Domains:

3. On the Domains page, click the domain you want to renew.
You can filter the list of domains to only display active, canceled, or all domains. To do this, click the Active, Cancelled, Pending Cancellation, or All tab.
4. In the left sidebar, click Billing, and then pay the invoice for the domain renewal.
# Requesting a Site Migration to Verpex
Source: https://kb.verpex.com/servers/requesting-site-migration-from-another-host-to-verpex
Learn how to request and initiate a site transfer from another hosting provider to Verpex.
Whether you want to upgrade your hosting package, or you’re bringing your site over from another hosting provider, Verpex offers seamless site migrations.
## Requesting a migration
To request a migration, follow these steps:
1. Log in to the Hosting Panel at [https://clients.verpex.com/](https://clients.verpex.com/)
2. On the home page, click Manage support tickets:
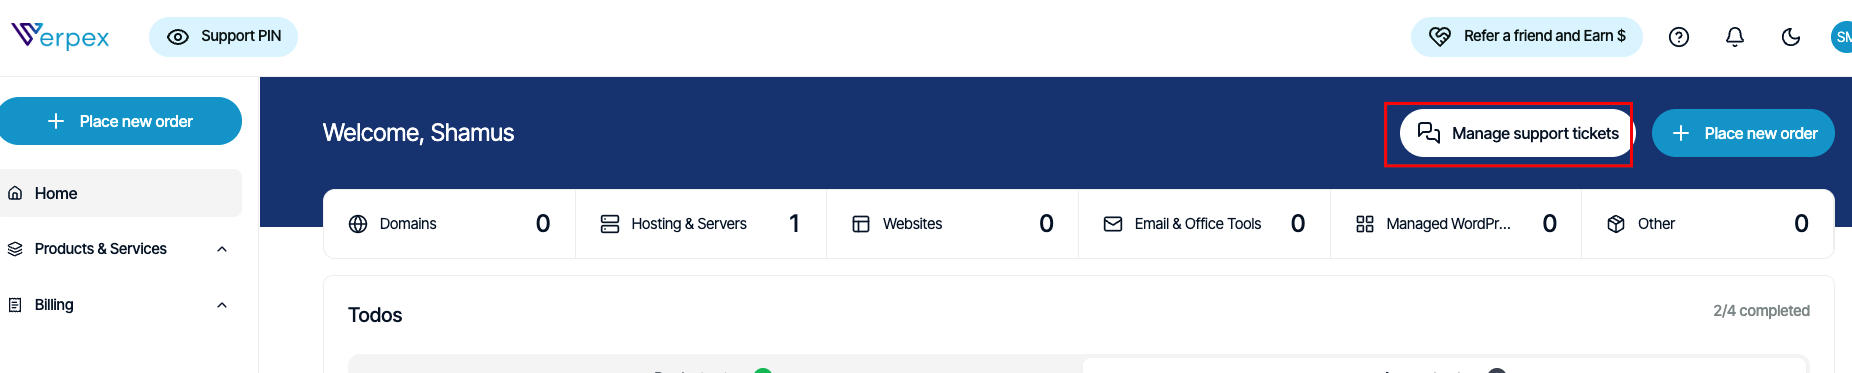
3. The Support page appears:
4. Click Open support ticket, and then in the Submit a support ticket section, complete the following information:
* In the Subject text box, type Site migration request.
* In the Department list box, select Migrations.
* In the Message text box, please specify the following:
a. Destination product or service for the migration.
b. The domain(s) for the migration.
c. Any SSL certificates you may have.
d. Access methods for your account, including any cPanel, FTP, or SSH connection details.
e. Any other special directions or information you want us to know about your account.
5. Click Submit ticket. We will respond to your ticket as soon as possible.
## Fast migrations
We take great pride in providing fast migrations. However, several factors, such as the current host's network speed, the number of sites being migrated, and migration complexity can all influence the migration speed. Our Migrations team will keep you informed of your migration's progress.
A method you can use to expedite your migration is to obtain a cPanel-based backup of your hosting account from your old host, and use FTP or the cPanel File Manager to upload the backup to your account at Verpex. If you would like to take advantage of this, please open a support ticket and provide the backup filename with the full path to the directory where you have uploaded it. Our migration team will begin the migration as soon as possible.
# Updating Your Account's Default Email Address
Source: https://kb.verpex.com/servers/updating-the-default-email-address-for-your-account
Learn how to change the primary email address for your account in the Hosting Panel.
You can change the default email address for your verpex.com account at any time in the Hosting Panel. To do this, follow these steps:
1. Log in to the Hosting Panel at [https://clients.verpex.com/](https://clients.verpex.com/)
2. Click your initials in the top-right corner, and then click Profile.
3. The Personal section appears. In the Emails section, locate the email address you want to set as the default, click the three-dot menu icon, and then click Set as default:
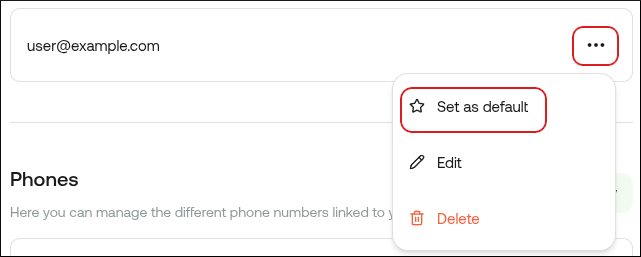
If the Set as default option does not appear, then you only have one email address linked to your account. Click Add new, specify a new address, and then click Add email. After you verify the new email address, the Set as default option appears.
# Using Your Verpex Panel
Source: https://kb.verpex.com/servers/using-your-verpex-panel
The Verpex Hosting Panel is the place to go to manage your products and services, open a support ticket, and more. These articles show you how to use the Hosting Panel.
# Viewing and Changing Shared Hosting Account Settings
Source: https://kb.verpex.com/servers/viewing-and-changing-settings-for-shared-hosting-accounts
You can use the verpex.com Hosting Panel to view and change login settings for a shared hosting account.
This article describes how to use the verpex.com Hosting Panel to view and change settings for a cPanel hosting account.
## Viewing and changing account login settings
You can use the verpex.com Hosting Panel to view the username and change your password for your cPanel hosting account.
Your cPanel hosting username and password is different from the e-mail address and password that you use to log in to the verpex.com Hosting Panel. You use your cPanel hosting username and password to access cPanel, SSH, FTP, and more.
To view or change your cPanel account login settings:
1. Log in to the Hosting Panel at [https://clients.verpex.com/](https://clients.verpex.com/)
2. In the left sidebar, under Products & Services, click Hosting & Servers:
3. On the Hosting & Servers page, locate your hosting account, and then click Manage.
4. In the General section, details appear for your account, including:
* Your username.
* Nameserver information.
* Server name for your account.
* Account IP address.
* Account domain name.
5. To log in to your control panel, click Login to Control Panel:

In a separate window, the Hosting Panel automatically logs you in to your cPanel account.
6. To change your password, click Change Password:
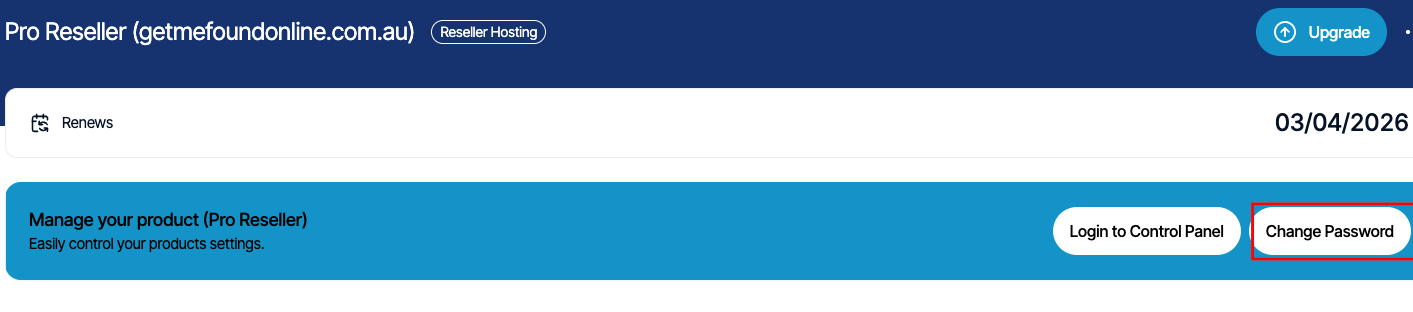
In the New password text box, type your new password, and then click Change password.
Make sure you choose a strong password. A strong password helps protect your account.
# Viewing Your Support PIN
Source: https://kb.verpex.com/servers/viewing-your-support-pin
Learn how to view and change your support PIN in the verpex.com Hosting Panel.
This article describes how to view and change the support PIN for your account. The support PIN is a code that verpex.com uses to help verify account ownership.
We may use the support PIN in phone calls, online chats, tickets, or any time we need to confirm your identity.
To view or change the support PIN for your account, follow these steps:
1. Log in to the Hosting Panel at [https://clients.verpex.com/](https://clients.verpex.com/)
2. At the top of the page, click Support PIN:
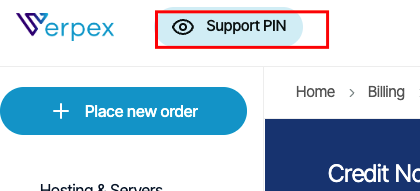
**Note** If you are using a mobile device, tap the settings icon
3. To view your support PIN, click the eye icon:
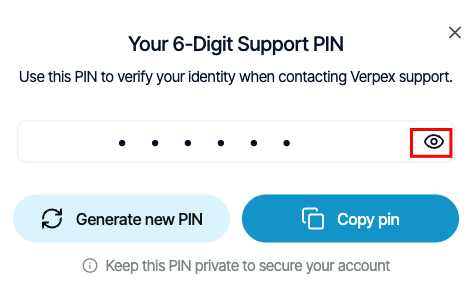
4. To copy your support PIN to the clipboard so you can quickly paste it into a chat with us, click Copy pin:
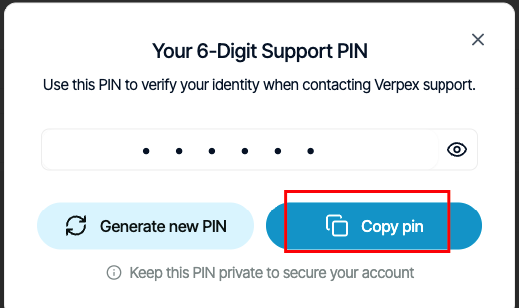
5. To generate a new support PIN, click Generate new PIN:
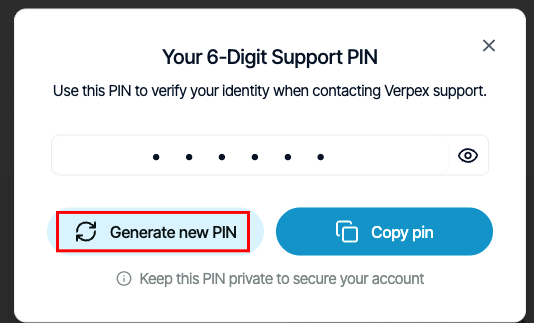
# Working with Tickets in the Hosting Panel
Source: https://kb.verpex.com/servers/working-with-tickets-in-the-hosting-panel
Learn how to work with tickets in the verpex.com Hosting Panel.
This article describes how to use the Hosting Panel to open a ticket and view your ticket history. It also includes some useful guidelines to assist you in writing a descriptive, helpful ticket.
## Opening a ticket
Opening a ticket with us on the Hosting Panel is easy. To do this, follow these steps:
1. Log in to the Hosting Panel at [https://clients.verpex.com/](https://clients.verpex.com/)
2. On the home page, click Manage support tickets:

3. The Support page appears:
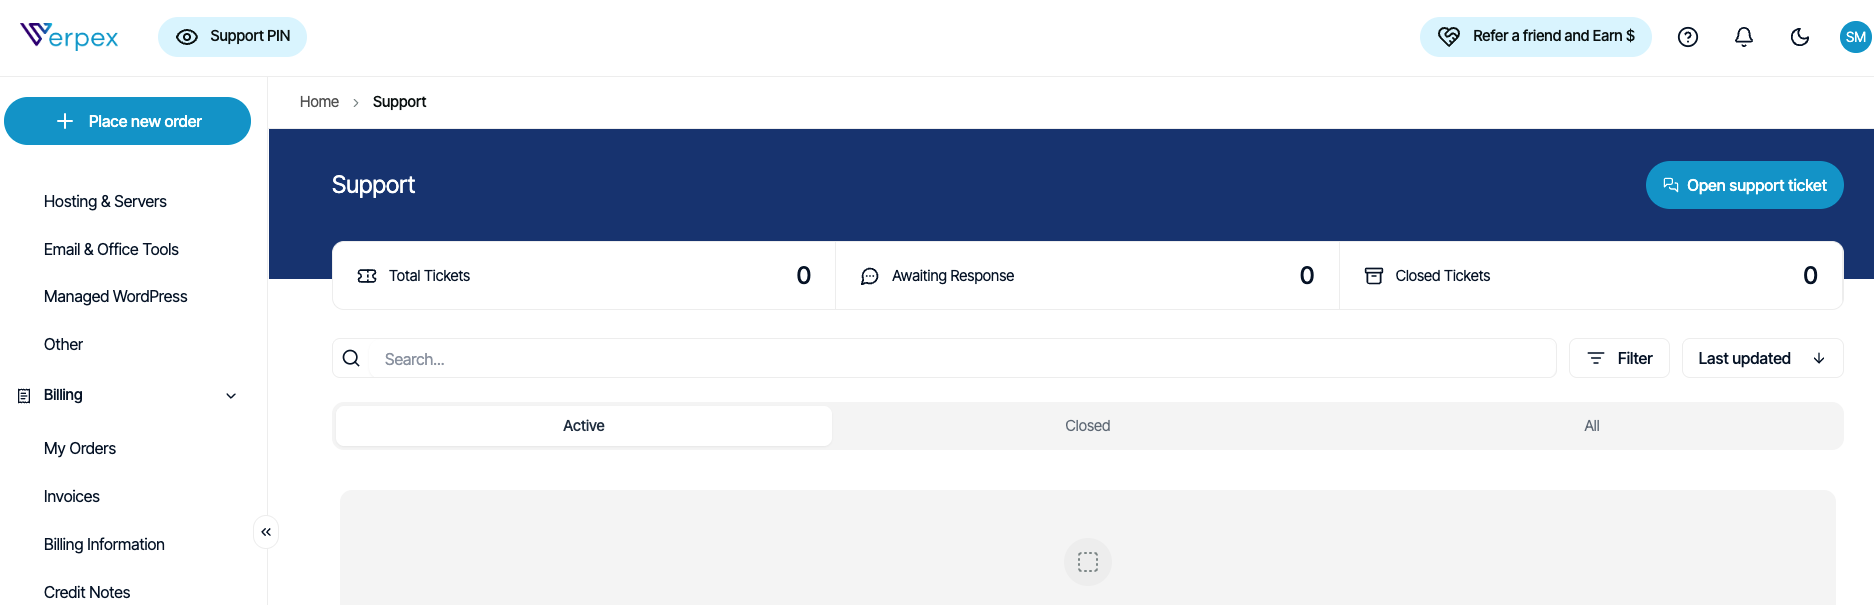
4. Click Open Support Ticket, and then in the Submit a support ticket section, complete the following information:
* Ticket subject.
* The department you want to send the ticket to.
* Ticket message: Please follow the suggestions in the section below to write a descriptive, helpful ticket.
* File attachments (optional): You can attach files to the ticket. The currently supported file formats are PDF, JPG, PNG, and DOCX.
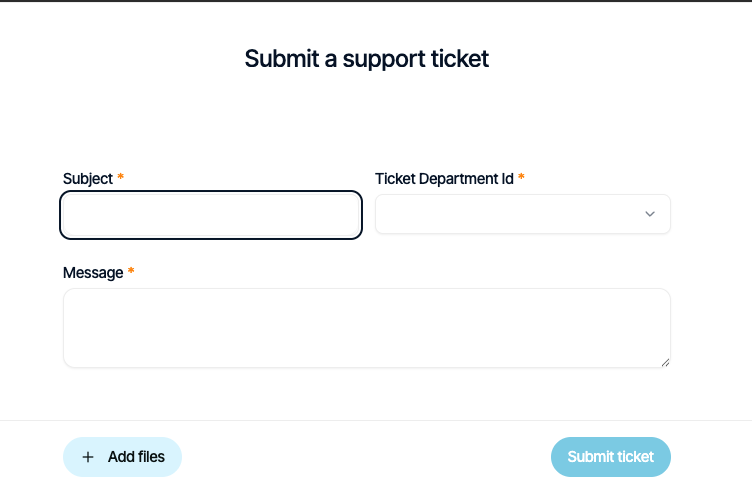
5. Click Submit ticket. We will respond to your ticket as soon as possible.
## Writing a helpful ticket
Writing a helpful ticket is the first step to getting a prompt and correct response. Use the list below as a guide for helpful items to include in your ticket.
This list is not exhaustive, and not every item applies to every situation.
1. Try self-help:
Our Knowledge Base has solutions to many common problems. Some issues have multiple possible solutions. Any possible solution you try reduces the number of things support needs to investigate, and you might just solve the problem yourself!
2. Include all details:
When resolving a ticket, nothing saves time as much as including all of the details. Useful details include:
* What you have already tried to fix the issue, and what the results were.
* If an error message is shown, please provide the exact error message received.
Tell us about the environment:
* What operating system are you using on your computer?
* What browser and version is installed?
* What CMS (Content Management System) is installed and what version
Describe any recent changes:
* Was there a manual or automatic update to the software?
* Was a lot of new data uploaded?
* Was the site recently migrated?
Can the problem be repeated? If so:
* When did the problem start?
* Does it happen from multiple locations?
* Does it happen across multiple browsers?
* Does it happen at all times of day?
* If mail delivery is an issue, we may need the complete headers of the e-mail message. For information about how to view e-mail message headers, please see this article.
3. Screenshots:
Include any screenshots that help describe the issue.
## Viewing your ticket history
You can use the Hosting Panel to view a list of all tickets you have opened previously. To do this, follow these steps:
1. Log in to the Hosting Panel at [https://clients.verpex.com/](https://clients.verpex.com/)
2. On the home page, click Manage support tickets:

3. The Support page appears, with a list of all tickets you have submitted:

* You can search for a specific ticket in the Search text box.
* You can click Filter, and then filter the tickets that appear in the list by selecting from a list of criteria.
* You can click Sort, and then sort tickets by date, subject, and other criteria.
* To view a specific ticket, click the ticket in the list. You can post a reply or close the ticket.
# How to Create a Cookie-Free Domain for WordPress
Source: https://kb.verpex.com/wordpress/3-how-to-create-a-cookie-free-domain-for-wordpress
A browser stores cookies for every website visit which provides a personalized browsing experience based on previous visits, it is how websites are remembered. While cookies do not make a browser forget a page, it increases latency and generates unnecessary network traffic. A website that loads fast has a great impact on user experience, traffic, and SEO.
With the use of cookies, an e-commerce website is able to track and store purchase history and shopping cart items, when next you visit the e-commerce store, the site recommends products according to your previous activity. Tools like Gtmetrix, Pingdom or Page Speed check your website speed and give recommendations on how to use the cookieless domain for serving static content.
**What Is a Cookie-Free Domain?**
Cookie-free domains allows you to separate content that needs a cookie from content that does not, ensuring that your site only serves cookies when it needs to. It does not send the browser a request to store the site’s cookies which will reduce the number of requests sent to the server. Consequently, this will improve your website’s performance eliminating unnecessary traffic.
Find below steps to create and use a cookie-free domain in your WordPress website.
**How to Setup a Cookie-Free Domain in WordPress**\
There are different methods you can use to set up a cookie-free domain. Simply follow these steps to use a cookie-free domain on your WordPress website.
**Create a Subdomain**
A cookie-free subdomain has to be created to deliver the static content. That’s because using the main domain will make the cookies be set in all your subdomains
* Log into the cPanel and select Subdomains.
* Create a new subdomain(website.testingsite.com)
* Point the subdomain to the WordPress wp-content directory in the document’s root field
* Navigate to the File Manager in cPanel and add the code below to the wp-config.php file.
```php theme={null}
define("WP_CONTENT_URL", "http://website.testingsite.com");
define("COOKIE_DOMAIN", "www.testingsite.com");
```
(Replace the links to reflect your webpage’s URLs).
* Find your WordPress database in your wp-config.php file
* Once you have it handy, go to phpMyAdmin -> SQL
* Redirect all posts to the new domain by running the command below in the SQL database.
```sql theme={null}
UPDATE wp_posts SET post_content =
REPLACE(post_content,'www.testingsite.com/wp-content/','website.testingsite.com/');
```
The subdomain website.testingsite.com will deliver all static content without cookies.
**Set up a Content Delivery Network (KeyCDN and Cloudflare).**
Enabling the KeyCDN cache cookies settings allows users to ignore all cookies which make the website load faster and the cookie-free error will be gone.
* Create an account on KeyCDN website. You can try out a free trial for a new account or upgrade to a premium account
* Navigate to the WordPress repository and install the CDN enabler plugin
* Inside the KeyCDN dashboard, create a new Pull-Zone and save.
* Copy and paste the CDN URL inside your WordPress plugin.
* Once your setup is completed, clear your website cache and wait for it to take effect.
* Check the test results on GTmetrix again, you will notice an improvement.
**Use WordPress Plugin(WP2static)**
You can also use a WP plugin called WP2static.
* Log into your WordPress dashboard
* Go to plugins
* Install the plugin and then activate
* Select wp2static from the left bar within the WP dashboard
* Set up the settings inside the “Deploy static website” tab.
* Once the export process is done, visit the URL that you have set during the configuration. ([https://testingsite.com/website](https://testingsite.com/website)). The warning to use cookie-free domains will not display in the GTmetrix report again.
**Advantages of Using Cookie-Free Domains**
Using cookie-free domains can bring several benefits to your website, including:\
Using a different domain to serve static content reduces unnecessary cookie traffic on the server.\
Cookie-free domains do not require users’ browsers to store cookies for them which improves website performance and increases loading speed, especially for static content.
Cookie-free domains are an essential part of website optimization efforts, We hope you have learnt how to set up a cookie-free domain on WordPress to improve your traffic, SEO, and user experience.
# Changing WordPress Site URL using WP-CLI
Source: https://kb.verpex.com/wordpress/changing-wordpress-site-url-using-wp-cli
How to Change WordPress URL via WP-CLI
**How to Change WordPress URL via WP-CLI**
Changing WordPress home and site URLs through the admin dashboard is made possible\
using the wp option update command.
To change the home address, run this command:
```text theme={null}
wp option update home ‘http://testing.com’
```
To change the site URL use this command:
```text theme={null}
wp option update siteurl ‘http://testing.com’
```
**How to Update WordPress via WP-CLI**\
To update WordPress files and the database use these commands
Update the WordPress files first:
```text theme={null}
wp core update
```
To confirm if it is necessary to update the database to the required version:
```text theme={null}
wp core update-db
```
Check your WordPress version using this command:
```text theme={null}
wp core version
```
# How do I Upload a Project to cPanel using WP Toolkit
Source: https://kb.verpex.com/wordpress/how-do-i-upload-a-project-to-cpanel-using-wp-toolkit
WordPress has become an effective platform for bloggers, entrepreneurs, businesses, and storytellers. The credit for this goes to its user-friendly interface alongside valuable tools that allow the admin to manage the website. Likewise, the introduction of cPanel has made it easier to use the web hosting account. The users can control the WordPress sites, domain names, email accounts, and database connections through the cPanel in WordPress.
**Get to Know the cPanel**
cPanel is software for web hosting and control panel. Basically, it delivers a graphic-driven interface with tools for automation. It helps simplify and manage the procedure of hosting websites either to the end-user or the site owner/admin. cPanel facilitates seamless administration using a typical web browser integrated with a 3-tier structure. It aids the user in publishing websites, organizing web files, managing domains, creating email accounts, and many more.
There are two types of interfaces in the cPanel. One is the user-oriented interface, and another is the WHM or Web Host Manager for the management of servers. The amalgamation of these interfaces helps users to streamline the websites. Besides that, cPanel also supplies the hosting service providers with innovative tools for flawless server management.
**The Revolution of the WordPress Toolkit**
WordPress toolkit is a user-oriented interface with an array of striking features. In particular, it facilitates the installation, configuration, and management of WordPress sites. Moreover, one can access tools such as Smart Updates alongside Cloning in the WP toolkit deluxe under the cPanel.
**Server Requirements**
Make sure your server is well-equipped with the following configurations for smoothly running WordPress.
*MySQL- Version 5.7 or later\
* PHP: Version 7.4\
*Web Server: Easy Apache 4\
* Memory Limit for PHP: A minimum of 128MB or more\
*cPanel/WHM Versions: 90 and latest ones alongside root accessibility\
* PHP Extensions: dom, file info, JSON, MySQL, OpenSSL, Imagick, zip, gd, mcrypt, xmlreader, curl, Exif, hash, mbstring, sodium, pcre, XML, filter, iconv, SimpleXML, and Zlib
**Uploading a Project to cPanel using WP Toolkit**
In general, there are two ways to upload a project to cPanel. One is the manual process, and the other is through a WP toolkit. If you want to proceed with the latter one, installing and enabling the WP toolkit in the cPanel is necessary. By going through the below-mentioned information, you will learn the process of logging into cPanel, setting up the toolkit, and uploading the project.
**Installing and Enabling the WordPress Toolkit in cPanel**
The first thing to do is install and enable the WordPress toolkit in the cPanel to get started. Here is all you need to do for installing the WP toolkit deluxe in the cPanel.
* As a root user, log in to WHM
* Navigate towards the WHM homepage and select WHM marketplace
* Click on the “add extensions” option
* Click on the "install" option
After installing the WP toolkit, the next step is to enable the features of the WP toolkit deluxe in cPanel. The following are the ways through which you can execute this step.
* Login as a root user to WHM and navigate to the homepage
* Select the “packages” option and then click on feature manager
* Choose the feature list as per your editing requirements in the "manage features list."
* Select the blue-colored “edit” option
* Type “WordPress” in the search box
* Ensure that the plugin for WP toolkit deluxe and WP toolkit have blue checkmarks
* Click on the "save" option.
* Repeat the same process for every feature list that you need to use
**Logging Into the cPanel**
Before proceeding forwards, you must know how to log in to the cPanel through your browser's address bar. Type the website address along with a colon, followed by 2083. Once you are done, cPanel accessibility would display [https://nameofyoursite.com:2083](https://nameofyoursite.com:2083).
Alternatively, type /cPanel next to the website address. This is another method of logging to the cPanel. If you opt for this method, the cPanel accessibility would be [https://nameofyoursite.com/cPanel](https://nameofyoursite.com/cPanel).
For instance, if your website is newly formed and the DNS records are not broadcasted yet on the server, utilize the IP address to log in to cPanel. The accessibility through IP address would seem like [https://10.10.10:2083](https://10.10.10:2083).
If you want to browse the cPanel interface in another language, navigate towards the bottommost part of the login screen. Select the language as per your preference from the given list. However, it is recommendable to bookmark the cPanel page before logging in as it will help you return to the page later with ease.
After reaching the login screen of the cPanel, enter the credentials such as username as well as password. Click on the “log in” option. You will be redirected towards the control panel of the website to access all the available settings.
**Further Process**
Once you have logged in to cPanel, the next task is uploading a project to cPanel using the WP toolkit. Here are the steps that you need to follow:
* Go to the applications and select "WordPress Toolkit."
* The next step is to click on the "Install WordPress" option in the toolkit
* You will be redirected to the installation page
* Enter the necessary details for the WordPress project/website
* Choose the path for installation in the files/directories option in the WordPress
* Enter the title of the WordPress website
* Determine the set of themes or plugins you want to set up for the WordPress project
* Select the language and advanced stable version for the website
* Enter the username, password, and email address of the WordPress Admin account
* The subsequent step is adding the details of the MySQL database
* Consider enabling the auto-update feature and themes or plugin in WordPress and select the "install" option
* Once you are done with the steps mentioned above, it is time for plugin installation
* Click on the "install plugin" option and set up the plugins as per the need
* Contrarily, if you do not want to install plugins, simply click on the "no thanks" button
* The WordPress project set-up is done
* You can access and manage the WordPress database, themes, plugins, and several other features from the below screen of the project.
**Conclusion**
Utilizing the cPanel and WordPress toolkit has become easier and hassle-less due to technological advancement. You can swiftly upload the WordPress site or project to cPanel through the toolkit by sticking to the abovementioned process. After all, WordPress is the pathway for modern-day achievers!
# How to Change cPanel Domain Through Your WHM
Source: https://kb.verpex.com/wordpress/how-to-change-cpanel-domain-through-your-whm
With WHM, it is possible to change the primary domain name of any cPanel account.
When you change your domain within WHM, the changes do not reflect within the files especially if you are using a content management system(CMS) like WordPress. You need to also change the configurations depending on the CMS you are using. For WordPress, here is our [guide](/wordpress/how-to-change-wordpress-site-address-url) on changing the site URL and home settings.
When you change your primary domain name, email, website files, subdomains, search engine rank are affected by the changes made,. As such, when you make a change to your primary domain name, you need to also change :
* The DNS records, the DNS records for the new domain have to be set after the DNS of the old domain has been deleted. Please refer to this [article ](/domains/how-can-i-manage-dns-on-my-domain-through-cpanel) to learn to use the DNS Zone Editor in cPanel.
* Reissue the SSL certificate for the changed domain
* Change the email address and username to correspond/tally with the new domain name
* Incase come of the website content does not load, update the permalinks for the website
**Steps on how to Change the cPanel domain through your WHM**\
Changing your domain name could leave your website broken as such you need to take a backup before changing your primary domain
* Register the new domain name
* Log into your WHM account
* Click the List Accounts option
After the invitee accepts the invitation, they can then access the product or service you specified in step 5
Alternatively, if you want to quickly add a new delegate to one of your products or services, go to the product or service, click the Settings tab, and in the Delegate Access section, click Invite:
# OpenClaw Guide
Source: https://kb.verpex.com/servers/openclaw-guide
This guide walks you through installing and configuring OpenClaw on a self-managed VPS, from the initial setup and AI model onboarding to exposing the ControlUI securely with Nginx and SSL. It also covers post-installation configuration, troubleshooting tips, and optional customization to help you get your AI agent up and running quickly.
# Installing and Configuring OpenClaw
Installing OpenClaw requires initial preparation on the Self-Managed VPS:
* NodeJS
* Homebrew
* Separate use for OpenClaw
* OpenClaw
Optionally, if you intend to expose the AI Agent to the public, you would also require a Web Service installed, such as:
* Nginx
* Caddy
* Traefik
Once your Self Managed VPS has been provisioned, you will be provided with root credentials in the Product notes. This is located on the Product listing in the Client Area, Products -> VPS in question -> Product notes.
Connecting to the server can be done via Putty for Windows or directly in your terminal if on Linux/mac.
Once connected, in order to setup OpenClaw, it is advisable to start with Homebrew, as some setup steps with Openclaw will require it.
To install homebrew simply run:
```text theme={null}
/bin/bash -c "$(curl -fsSL https://raw.githubusercontent.com/Homebrew/install/HEAD/install.sh)"
```
After installing Homebrew, it is advisable to create a separate user for OpenClaw to use, instead of root. Simply run the following 2 lines:
```text theme={null}
adduser openclaw
usermod -aG sudo openclaw
```
Once Homebrew and the additional user are ready, you can start with the OpenClaw download and then directly run it with:
```text theme={null}
su - openclaw
curl -fsSL https://openclaw.ai/install.sh | bash
```
The installation script will check for minimum requirements and then proceed with installing NodeJS, unless you have installed it prior to starting the install script.
Please note that, if the AI agent is installed via root user, it can have access to its own environment and even core files of the server.
Doing a bad prompt can trick the bot into doing unsafe things on the server.
Once the installation of OpenClaw is complete, you can use the arrow keys to navigate the various options the onboarding process will ask and show.
After agreeing to the security notice, you will be presented with 2 initial setup options:
* QuickStart (recommended) (Recommended local setup. Change details later with openclaw configure.)
* Manual setup (Choose Gateway port, network exposure, Tailscale, and auth.)

When choosing Quick start, the installation will list Gateway information such as Port, bind and what type of token its going to be used.

You will be presented with the most common AI model providers. For this guide, we will be using Google/Gemini:
* OpenAI (ChatGPT/Codex sign-in or API key)
* Anthropic (Claude CLI + API key)
* xAI (Grok) (API key or browser OAuth)
* Google (Gemini API key + OAuth)
* OpenRouter (OAuth or API key)

Alternatively, if the model you intend to use is not listed, you can use "More...", which will lest every AI model.

Once you have chosen your model, the onboarding with ask either for OAUTH or API token to be provided.

Choosing API key will prompt for the API created here:
[https://aistudio.google.com/app/api-keys](https://aistudio.google.com/app/api-keys)
When the Token is provided, the onboarding will show a default model that can be used, alternatively you can enter a model name manually or enter the model name manually.

Please note that even after onboarding is complete and there are issues with connecting with the desired model, you can use the following CLI command to list the available models and the subsequent command to set the model, without the need to go through the onboarding process again:
`openclaw models list --provider [PROVIDER]`
Example:
`openclaw models list --provider google openclaw models set [MODEL NAME]`
Example:
`openclaw models set google/gemini-2.5-flash`
Next, you will have to choose how you would like to communicate with your AI Agent.

This is personal preference. You can always set this later via "openclaw channels add". This is shown if you choose "Skip for now".
When skipped, you can still communicate with the AI Agent via SSH commands when typing "openclaw" and then "talk to agent" to switch from "crestodian" mode to the AI Agent.
Next, you will have to set up which web search engine the AI agent should use.

This is again personal preference, which can be setup later if "Skip for now" is chosen with:
```text theme={null}
openclaw configure --section web
```
In the case of our example of using Gemini, the API key had to be verified after choosing the Web Search engine Google.
Next, you will have to configure additional skills. This is where Homebrew will be used by the onboarding to install any missing skills.
Skills essentially allow you to customize how memory, speed, and searchability work for your AI agent. It does grow over time on its own.
You can proceed with "Yes" on the configuring skills, and this will list additional skills that can be enabled for the AI Agent.

Please note that the screenshot above lists available skills for Gemini, so depending on the AI Model you are using, it will list different compatible skills.
You can use SPACE to mark the skills you want to add. On the next prompt, depending on the requirements of the desired skills, additional API keys will be requested from the relevant providers.

In the next step in the onboarding process, you will be presented with various hooks you can use. These can still be dependent on the AI model, but it helps solidify how the AI agent acts with memory or in case the server has been rebooted.

At this stage, the installation and onboarding are being finalized, with which you will be presented with various information such as:
**ControlUI**
This is a localhost only. If you want to expose the ControlUI to the public, you will have to install a web service and a domain name ( See below for Nginx installation steps and setting up your domain)

You can change how the agent introduces itself
This can be changed either manually via editing the BOOTSTRAP.md file or interacting with the AI Agent.

Main installation and onboarding are complete.
You can interact right away with the agent by either using "openclaw" or the onboarding will leave you with the initial message.

The AI agent will provide a response and also a status bellow to show current status such as tokens used and which model is being used.
# Opening the ControlUI to the public
To open the ControlUI to the public, which is currently set up for localhost only, you will have to start by installing Nginx Reverse Proxy with SSL for OpenClaw.
The following steps are for Ubuntu 24.04:
## 1. Install Nginx, Certbot
```text theme={null}
sudo apt install -y nginx certbot python3-certbot-nginx
```
## Create Nginx config
```text theme={null}
nano /etc/nginx/sites-available/openclaw
```
Paste the following block:
```text theme={null}
server {
listen 80;
server_name your-domain.com;
location / {
proxy_pass http://127.0.0.1:18789;
proxy_http_version 1.1;
proxy_set_header Upgrade $http_upgrade;
proxy_set_header Connection "upgrade";
proxy_set_header Host $host;
proxy_set_header X-Real-IP $remote_addr;
proxy_set_header X-Forwarded-For $proxy_add_x_forwarded_for;
proxy_set_header X-Forwarded-Proto $scheme; proxy_read_timeout 86400;
}
}
```
Make sure the proxy\_pass matches the one provided during the OpenClaw onboarding if the port is different.
Save and exit the text editor (CTRL + C -> Y -> hit Enter)
Follow the next prompts one after the other:
```text theme={null}
ln -s /etc/nginx/sites-available/openclaw /etc/nginx/sites-enabled/
nginx -t
systemctl reload nginx
```
## 3. Open Firewall ports
```text theme={null}
ufw allow 80/tcp
ufw allow 443/tcp
ufw allow 22/tcp
ufw allow from [YOUR IP]
ufw enable
```
Make sure to allow both 22 port and to allow your own IP, to ensure access is allowed from your side once the firewall is enabled.
## 4. Setting up SSL
```text theme={null}
certbot --nginx -d your-domain.com
```
Certbot will auto-update Nginx config and will setup auto-renewal with Let's Encrypt Free SSL. Make sure to replace "your-domain.com" with your actual domain.
## 5. Configurate OpenClaw
You will have to locate the openclaw config file. This can easily be done by doing:
`openclaw config file`
In our case the path is:
`~/.openclaw/openclaw.json`
`nano ~/.openclaw/openclaw.json`
Under "Gateway" section, locate "mode" section and add the following:
`"trustedProxies": ["127.0.0.1"],`
And then under "ControlUi" section:
```text theme={null}
"controlUi": {
"allowInsecureAuth": true,
"allowedOrigins": [
"https://your-domain.com"
]
}
```
Make sure to save the file when exiting.
## 6. Restart the gateway
```text theme={null}
openclaw gateway stop
openclaw gateway start
```
## 7. Open the ControlUI
Open:
```text theme={null}
https://your-domain.com/#token=[YOUR_TOKEN_FROM_CONFIG]
```
The token in question can be located from the same OpenCLAW config file
`(~/.openclaw/openclaw.json)` in the "Gateway" section.
You can easily grep for it with the following pattern:
```text theme={null}
grep -o '"token": "[^"]*"' ~/.openclaw/openclaw.json
```
## 8. Allowing your device
On first-time opening the ControlUI page, you will be prompted to pair your device with the agent.
On the server, you get the current pending devices with:
```text theme={null}
openclaw devices list
```
Copy the request ID and use the following to approve:
```text theme={null}
openclaw devices approve [request-id]
```
In case you want to skip the device approval, simply run this:
```text theme={null}
openclaw config set gateway.controlUi.dangerouslyDisableDeviceAuth true
```
Please note that this can cause anyone who finds your domain or AI agent page to use it without authentication. Use at your own risk.
For more information on OpenClaw and how you can customize it, you can check out OpenClaw's documentation here:
[https://docs.openclaw.ai/](https://docs.openclaw.ai/)
# Renewing a Domain
Source: https://kb.verpex.com/servers/renewing-a-domain
Learn how to use the Hosting Panel to renew domains you have purchased from Verpex.
This article describes how to use the Hosting Panel to manage renewals for domains you have purchased from Verpex
## Configuring automatic renewal for a domain
For greater convenience, you can configure your domains for automatic renewal. When automatic renewal is enabled, Verpex automatically sends you a renewal invoice 14 days before the domain expires. This provides you with enough time to complete the renewal process before the domain expiration.
To configure automatic renewal for a domain, follow these steps:
1. Log in to the Hosting Panel at [https://clients.verpex.com/](https://clients.verpex.com/)
2. In the left sidebar, under Products & Services, click Domains:

3. On the Domains page, click the domain you want to configure for automatic renewal.
4. In the left sidebar, click Billing.
5. Scroll down the page to the Renewal & Subscription Settings section, and then click the Auto-renew slider to enable or disable automatic renewal:

## Renewing a domain
To renew a domain that you previously purchased from Verpex, follow these steps:
1. Log in to the Hosting Panel at [https://clients.verpex.com/](https://clients.verpex.com/)
2. In the left sidebar, under Products & Services, click Domains:

3. On the Domains page, click the domain you want to renew.
You can filter the list of domains to only display active, canceled, or all domains. To do this, click the Active, Cancelled, Pending Cancellation, or All tab.
4. In the left sidebar, click Billing, and then pay the invoice for the domain renewal.
# Requesting a Site Migration to Verpex
Source: https://kb.verpex.com/servers/requesting-site-migration-from-another-host-to-verpex
Learn how to request and initiate a site transfer from another hosting provider to Verpex.
Whether you want to upgrade your hosting package, or you’re bringing your site over from another hosting provider, Verpex offers seamless site migrations.
## Requesting a migration
To request a migration, follow these steps:
1. Log in to the Hosting Panel at [https://clients.verpex.com/](https://clients.verpex.com/)
2. On the home page, click Manage support tickets:

3. The Support page appears:

4. Click Open support ticket, and then in the Submit a support ticket section, complete the following information:
* In the Subject text box, type Site migration request.
* In the Department list box, select Migrations.
* In the Message text box, please specify the following:
a. Destination product or service for the migration.
b. The domain(s) for the migration.
c. Any SSL certificates you may have.
d. Access methods for your account, including any cPanel, FTP, or SSH connection details.
e. Any other special directions or information you want us to know about your account.
5. Click Submit ticket. We will respond to your ticket as soon as possible.
## Fast migrations
We take great pride in providing fast migrations. However, several factors, such as the current host's network speed, the number of sites being migrated, and migration complexity can all influence the migration speed. Our Migrations team will keep you informed of your migration's progress.
A method you can use to expedite your migration is to obtain a cPanel-based backup of your hosting account from your old host, and use FTP or the cPanel File Manager to upload the backup to your account at Verpex. If you would like to take advantage of this, please open a support ticket and provide the backup filename with the full path to the directory where you have uploaded it. Our migration team will begin the migration as soon as possible.
# Updating Your Account's Default Email Address
Source: https://kb.verpex.com/servers/updating-the-default-email-address-for-your-account
Learn how to change the primary email address for your account in the Hosting Panel.
You can change the default email address for your verpex.com account at any time in the Hosting Panel. To do this, follow these steps:
1. Log in to the Hosting Panel at [https://clients.verpex.com/](https://clients.verpex.com/)
2. Click your initials in the top-right corner, and then click Profile.
3. The Personal section appears. In the Emails section, locate the email address you want to set as the default, click the three-dot menu icon, and then click Set as default:

If the Set as default option does not appear, then you only have one email address linked to your account. Click Add new, specify a new address, and then click Add email. After you verify the new email address, the Set as default option appears.
# Using Your Verpex Panel
Source: https://kb.verpex.com/servers/using-your-verpex-panel
The Verpex Hosting Panel is the place to go to manage your products and services, open a support ticket, and more. These articles show you how to use the Hosting Panel.
# Viewing and Changing Shared Hosting Account Settings
Source: https://kb.verpex.com/servers/viewing-and-changing-settings-for-shared-hosting-accounts
You can use the verpex.com Hosting Panel to view and change login settings for a shared hosting account.
This article describes how to use the verpex.com Hosting Panel to view and change settings for a cPanel hosting account.
## Viewing and changing account login settings
You can use the verpex.com Hosting Panel to view the username and change your password for your cPanel hosting account.
Your cPanel hosting username and password is different from the e-mail address and password that you use to log in to the verpex.com Hosting Panel. You use your cPanel hosting username and password to access cPanel, SSH, FTP, and more.
To view or change your cPanel account login settings:
1. Log in to the Hosting Panel at [https://clients.verpex.com/](https://clients.verpex.com/)
2. In the left sidebar, under Products & Services, click Hosting & Servers:

3. On the Hosting & Servers page, locate your hosting account, and then click Manage.
4. In the General section, details appear for your account, including:
* Your username.
* Nameserver information.
* Server name for your account.
* Account IP address.
* Account domain name.
5. To log in to your control panel, click Login to Control Panel:

In a separate window, the Hosting Panel automatically logs you in to your cPanel account.
6. To change your password, click Change Password:

In the New password text box, type your new password, and then click Change password.
Make sure you choose a strong password. A strong password helps protect your account.
# Viewing Your Support PIN
Source: https://kb.verpex.com/servers/viewing-your-support-pin
Learn how to view and change your support PIN in the verpex.com Hosting Panel.
This article describes how to view and change the support PIN for your account. The support PIN is a code that verpex.com uses to help verify account ownership.
We may use the support PIN in phone calls, online chats, tickets, or any time we need to confirm your identity.
To view or change the support PIN for your account, follow these steps:
1. Log in to the Hosting Panel at [https://clients.verpex.com/](https://clients.verpex.com/)
2. At the top of the page, click Support PIN:

**Note** If you are using a mobile device, tap the settings icon
3. To view your support PIN, click the eye icon:

4. To copy your support PIN to the clipboard so you can quickly paste it into a chat with us, click Copy pin:

5. To generate a new support PIN, click Generate new PIN:

# Working with Tickets in the Hosting Panel
Source: https://kb.verpex.com/servers/working-with-tickets-in-the-hosting-panel
Learn how to work with tickets in the verpex.com Hosting Panel.
This article describes how to use the Hosting Panel to open a ticket and view your ticket history. It also includes some useful guidelines to assist you in writing a descriptive, helpful ticket.
## Opening a ticket
Opening a ticket with us on the Hosting Panel is easy. To do this, follow these steps:
1. Log in to the Hosting Panel at [https://clients.verpex.com/](https://clients.verpex.com/)
2. On the home page, click Manage support tickets:

3. The Support page appears:

4. Click Open Support Ticket, and then in the Submit a support ticket section, complete the following information:
* Ticket subject.
* The department you want to send the ticket to.
* Ticket message: Please follow the suggestions in the section below to write a descriptive, helpful ticket.
* File attachments (optional): You can attach files to the ticket. The currently supported file formats are PDF, JPG, PNG, and DOCX.

5. Click Submit ticket. We will respond to your ticket as soon as possible.
## Writing a helpful ticket
Writing a helpful ticket is the first step to getting a prompt and correct response. Use the list below as a guide for helpful items to include in your ticket.
This list is not exhaustive, and not every item applies to every situation.
1. Try self-help:
Our Knowledge Base has solutions to many common problems. Some issues have multiple possible solutions. Any possible solution you try reduces the number of things support needs to investigate, and you might just solve the problem yourself!
2. Include all details:
When resolving a ticket, nothing saves time as much as including all of the details. Useful details include:
* What you have already tried to fix the issue, and what the results were.
* If an error message is shown, please provide the exact error message received.
Tell us about the environment:
* What operating system are you using on your computer?
* What browser and version is installed?
* What CMS (Content Management System) is installed and what version
Describe any recent changes:
* Was there a manual or automatic update to the software?
* Was a lot of new data uploaded?
* Was the site recently migrated?
Can the problem be repeated? If so:
* When did the problem start?
* Does it happen from multiple locations?
* Does it happen across multiple browsers?
* Does it happen at all times of day?
* If mail delivery is an issue, we may need the complete headers of the e-mail message. For information about how to view e-mail message headers, please see this article.
3. Screenshots:
Include any screenshots that help describe the issue.
## Viewing your ticket history
You can use the Hosting Panel to view a list of all tickets you have opened previously. To do this, follow these steps:
1. Log in to the Hosting Panel at [https://clients.verpex.com/](https://clients.verpex.com/)
2. On the home page, click Manage support tickets:

3. The Support page appears, with a list of all tickets you have submitted:

* You can search for a specific ticket in the Search text box.
* You can click Filter, and then filter the tickets that appear in the list by selecting from a list of criteria.
* You can click Sort, and then sort tickets by date, subject, and other criteria.
* To view a specific ticket, click the ticket in the list. You can post a reply or close the ticket.
# How to Create a Cookie-Free Domain for WordPress
Source: https://kb.verpex.com/wordpress/3-how-to-create-a-cookie-free-domain-for-wordpress
A browser stores cookies for every website visit which provides a personalized browsing experience based on previous visits, it is how websites are remembered. While cookies do not make a browser forget a page, it increases latency and generates unnecessary network traffic. A website that loads fast has a great impact on user experience, traffic, and SEO.
With the use of cookies, an e-commerce website is able to track and store purchase history and shopping cart items, when next you visit the e-commerce store, the site recommends products according to your previous activity. Tools like Gtmetrix, Pingdom or Page Speed check your website speed and give recommendations on how to use the cookieless domain for serving static content.
**What Is a Cookie-Free Domain?**
Cookie-free domains allows you to separate content that needs a cookie from content that does not, ensuring that your site only serves cookies when it needs to. It does not send the browser a request to store the site’s cookies which will reduce the number of requests sent to the server. Consequently, this will improve your website’s performance eliminating unnecessary traffic.
Find below steps to create and use a cookie-free domain in your WordPress website.
**How to Setup a Cookie-Free Domain in WordPress**\
There are different methods you can use to set up a cookie-free domain. Simply follow these steps to use a cookie-free domain on your WordPress website.
**Create a Subdomain**
A cookie-free subdomain has to be created to deliver the static content. That’s because using the main domain will make the cookies be set in all your subdomains
* Log into the cPanel and select Subdomains.
* Create a new subdomain(website.testingsite.com)
* Point the subdomain to the WordPress wp-content directory in the document’s root field
* Navigate to the File Manager in cPanel and add the code below to the wp-config.php file.
```php theme={null}
define("WP_CONTENT_URL", "http://website.testingsite.com");
define("COOKIE_DOMAIN", "www.testingsite.com");
```
(Replace the links to reflect your webpage’s URLs).
* Find your WordPress database in your wp-config.php file
* Once you have it handy, go to phpMyAdmin -> SQL
* Redirect all posts to the new domain by running the command below in the SQL database.
```sql theme={null}
UPDATE wp_posts SET post_content =
REPLACE(post_content,'www.testingsite.com/wp-content/','website.testingsite.com/');
```
The subdomain website.testingsite.com will deliver all static content without cookies.
**Set up a Content Delivery Network (KeyCDN and Cloudflare).**
Enabling the KeyCDN cache cookies settings allows users to ignore all cookies which make the website load faster and the cookie-free error will be gone.
* Create an account on KeyCDN website. You can try out a free trial for a new account or upgrade to a premium account
* Navigate to the WordPress repository and install the CDN enabler plugin
* Inside the KeyCDN dashboard, create a new Pull-Zone and save.
* Copy and paste the CDN URL inside your WordPress plugin.
* Once your setup is completed, clear your website cache and wait for it to take effect.
* Check the test results on GTmetrix again, you will notice an improvement.
**Use WordPress Plugin(WP2static)**
You can also use a WP plugin called WP2static.
* Log into your WordPress dashboard
* Go to plugins
* Install the plugin and then activate
* Select wp2static from the left bar within the WP dashboard
* Set up the settings inside the “Deploy static website” tab.
* Once the export process is done, visit the URL that you have set during the configuration. ([https://testingsite.com/website](https://testingsite.com/website)). The warning to use cookie-free domains will not display in the GTmetrix report again.
**Advantages of Using Cookie-Free Domains**
Using cookie-free domains can bring several benefits to your website, including:\
Using a different domain to serve static content reduces unnecessary cookie traffic on the server.\
Cookie-free domains do not require users’ browsers to store cookies for them which improves website performance and increases loading speed, especially for static content.
Cookie-free domains are an essential part of website optimization efforts, We hope you have learnt how to set up a cookie-free domain on WordPress to improve your traffic, SEO, and user experience.
# Changing WordPress Site URL using WP-CLI
Source: https://kb.verpex.com/wordpress/changing-wordpress-site-url-using-wp-cli
How to Change WordPress URL via WP-CLI
**How to Change WordPress URL via WP-CLI**
Changing WordPress home and site URLs through the admin dashboard is made possible\
using the wp option update command.
To change the home address, run this command:
```text theme={null}
wp option update home ‘http://testing.com’
```
To change the site URL use this command:
```text theme={null}
wp option update siteurl ‘http://testing.com’
```
**How to Update WordPress via WP-CLI**\
To update WordPress files and the database use these commands
Update the WordPress files first:
```text theme={null}
wp core update
```
To confirm if it is necessary to update the database to the required version:
```text theme={null}
wp core update-db
```
Check your WordPress version using this command:
```text theme={null}
wp core version
```
# How do I Upload a Project to cPanel using WP Toolkit
Source: https://kb.verpex.com/wordpress/how-do-i-upload-a-project-to-cpanel-using-wp-toolkit
WordPress has become an effective platform for bloggers, entrepreneurs, businesses, and storytellers. The credit for this goes to its user-friendly interface alongside valuable tools that allow the admin to manage the website. Likewise, the introduction of cPanel has made it easier to use the web hosting account. The users can control the WordPress sites, domain names, email accounts, and database connections through the cPanel in WordPress.
**Get to Know the cPanel**
cPanel is software for web hosting and control panel. Basically, it delivers a graphic-driven interface with tools for automation. It helps simplify and manage the procedure of hosting websites either to the end-user or the site owner/admin. cPanel facilitates seamless administration using a typical web browser integrated with a 3-tier structure. It aids the user in publishing websites, organizing web files, managing domains, creating email accounts, and many more.
There are two types of interfaces in the cPanel. One is the user-oriented interface, and another is the WHM or Web Host Manager for the management of servers. The amalgamation of these interfaces helps users to streamline the websites. Besides that, cPanel also supplies the hosting service providers with innovative tools for flawless server management.
**The Revolution of the WordPress Toolkit**
WordPress toolkit is a user-oriented interface with an array of striking features. In particular, it facilitates the installation, configuration, and management of WordPress sites. Moreover, one can access tools such as Smart Updates alongside Cloning in the WP toolkit deluxe under the cPanel.
**Server Requirements**
Make sure your server is well-equipped with the following configurations for smoothly running WordPress.
*MySQL- Version 5.7 or later\
* PHP: Version 7.4\
*Web Server: Easy Apache 4\
* Memory Limit for PHP: A minimum of 128MB or more\
*cPanel/WHM Versions: 90 and latest ones alongside root accessibility\
* PHP Extensions: dom, file info, JSON, MySQL, OpenSSL, Imagick, zip, gd, mcrypt, xmlreader, curl, Exif, hash, mbstring, sodium, pcre, XML, filter, iconv, SimpleXML, and Zlib
**Uploading a Project to cPanel using WP Toolkit**
In general, there are two ways to upload a project to cPanel. One is the manual process, and the other is through a WP toolkit. If you want to proceed with the latter one, installing and enabling the WP toolkit in the cPanel is necessary. By going through the below-mentioned information, you will learn the process of logging into cPanel, setting up the toolkit, and uploading the project.
**Installing and Enabling the WordPress Toolkit in cPanel**
The first thing to do is install and enable the WordPress toolkit in the cPanel to get started. Here is all you need to do for installing the WP toolkit deluxe in the cPanel.
* As a root user, log in to WHM
* Navigate towards the WHM homepage and select WHM marketplace
* Click on the “add extensions” option
* Click on the "install" option
After installing the WP toolkit, the next step is to enable the features of the WP toolkit deluxe in cPanel. The following are the ways through which you can execute this step.
* Login as a root user to WHM and navigate to the homepage
* Select the “packages” option and then click on feature manager
* Choose the feature list as per your editing requirements in the "manage features list."
* Select the blue-colored “edit” option
* Type “WordPress” in the search box
* Ensure that the plugin for WP toolkit deluxe and WP toolkit have blue checkmarks
* Click on the "save" option.
* Repeat the same process for every feature list that you need to use
**Logging Into the cPanel**
Before proceeding forwards, you must know how to log in to the cPanel through your browser's address bar. Type the website address along with a colon, followed by 2083. Once you are done, cPanel accessibility would display [https://nameofyoursite.com:2083](https://nameofyoursite.com:2083).
Alternatively, type /cPanel next to the website address. This is another method of logging to the cPanel. If you opt for this method, the cPanel accessibility would be [https://nameofyoursite.com/cPanel](https://nameofyoursite.com/cPanel).
For instance, if your website is newly formed and the DNS records are not broadcasted yet on the server, utilize the IP address to log in to cPanel. The accessibility through IP address would seem like [https://10.10.10:2083](https://10.10.10:2083).
If you want to browse the cPanel interface in another language, navigate towards the bottommost part of the login screen. Select the language as per your preference from the given list. However, it is recommendable to bookmark the cPanel page before logging in as it will help you return to the page later with ease.
After reaching the login screen of the cPanel, enter the credentials such as username as well as password. Click on the “log in” option. You will be redirected towards the control panel of the website to access all the available settings.
**Further Process**
Once you have logged in to cPanel, the next task is uploading a project to cPanel using the WP toolkit. Here are the steps that you need to follow:
* Go to the applications and select "WordPress Toolkit."
* The next step is to click on the "Install WordPress" option in the toolkit
* You will be redirected to the installation page
* Enter the necessary details for the WordPress project/website
* Choose the path for installation in the files/directories option in the WordPress
* Enter the title of the WordPress website
* Determine the set of themes or plugins you want to set up for the WordPress project
* Select the language and advanced stable version for the website
* Enter the username, password, and email address of the WordPress Admin account
* The subsequent step is adding the details of the MySQL database
* Consider enabling the auto-update feature and themes or plugin in WordPress and select the "install" option
* Once you are done with the steps mentioned above, it is time for plugin installation
* Click on the "install plugin" option and set up the plugins as per the need
* Contrarily, if you do not want to install plugins, simply click on the "no thanks" button
* The WordPress project set-up is done
* You can access and manage the WordPress database, themes, plugins, and several other features from the below screen of the project.
**Conclusion**
Utilizing the cPanel and WordPress toolkit has become easier and hassle-less due to technological advancement. You can swiftly upload the WordPress site or project to cPanel through the toolkit by sticking to the abovementioned process. After all, WordPress is the pathway for modern-day achievers!
# How to Change cPanel Domain Through Your WHM
Source: https://kb.verpex.com/wordpress/how-to-change-cpanel-domain-through-your-whm
With WHM, it is possible to change the primary domain name of any cPanel account.
When you change your domain within WHM, the changes do not reflect within the files especially if you are using a content management system(CMS) like WordPress. You need to also change the configurations depending on the CMS you are using. For WordPress, here is our [guide](/wordpress/how-to-change-wordpress-site-address-url) on changing the site URL and home settings.
When you change your primary domain name, email, website files, subdomains, search engine rank are affected by the changes made,. As such, when you make a change to your primary domain name, you need to also change :
* The DNS records, the DNS records for the new domain have to be set after the DNS of the old domain has been deleted. Please refer to this [article ](/domains/how-can-i-manage-dns-on-my-domain-through-cpanel) to learn to use the DNS Zone Editor in cPanel.
* Reissue the SSL certificate for the changed domain
* Change the email address and username to correspond/tally with the new domain name
* Incase come of the website content does not load, update the permalinks for the website
**Steps on how to Change the cPanel domain through your WHM**\
Changing your domain name could leave your website broken as such you need to take a backup before changing your primary domain
* Register the new domain name
* Log into your WHM account
* Click the List Accounts option
![]() * Click the + sign in front of the account you want to make changes for
* Click **Modify Account**
* Click the + sign in front of the account you want to make changes for
* Click **Modify Account**
![]() * Type the new domain name in the **Primary Domain** field(We recommend you not make any changes in the Username field. Changing the username will cause errors in your database connection)
* Type the new domain name in the **Primary Domain** field(We recommend you not make any changes in the Username field. Changing the username will cause errors in your database connection)
![]() * Click on the Save button
You have just successfully changed your domain name.
# How to Change WordPress Admin URL
Source: https://kb.verpex.com/wordpress/how-to-change-wordpress-admin-url
To keep your WordPress login page safe and prevent attackers from accessing your admin login, you need to change the login URL to a new unique URL. This could really help when it comes to fighting attacks, hacks, and brute-force attacks.
To change the WordPress Admin URL, you can use a plugin such as "WPS Hide Login" or you can manually edit the functions.php file in your WordPress theme. You can use plugins like iThemes Security, WPS Hide Login plugins, etc.
**NOTE**: Make sure that you generate a full backup of your website before proceeding with any changes,
**Change Your WordPress Login Page Using the WPS Hide Login plugin**
The easiest way to change your WordPress login URL page is by using a free plugin like WPS Hide Login, The plugin is very lightweight, and it doesn’t change any files in the core or add rewrite rules.
* Log into the WordPress dashboard
* Go to plugins
* Add new
* Search for the WPS Hide Login plugin
* click Install Now.
* Proceed to activate the plugin
* After activation, Go to Settings > WPS Hide Login
* Enter a new URL for the login page and save the changes
* The link to the WordPress Dashboard will be changed from testing.com/wp-admin to testingname.com/login.
* Your new login page will become effective and your old login URL will no longer work!
**Change Your WordPress Login Page Using The functions.php File**\
**Manual Method :**
* Access the functions.php file in your WordPress theme
* Add the following code:
```text theme={null}
function custom_admin_url() {
return '/my-secret-login';
}
add_filter('login_url', 'custom_admin_url');
Replace '/my-secret-login' with your desired login URL
Save the functions.php file
```
You may need to log out and log back in for the changes to take effect\
Please note that changing the URL of the login page does not provide full security for your website, it is just an extra layer of protection to make it harder for hackers to find the login page.
Another way to change your WordPress login page is to edit your .htaccess file by using a password-protect to protect your login page with a .htpasswd. This will restrict those without passwords to access the login page.
# How to Change WordPress Site Address (URL)
Source: https://kb.verpex.com/wordpress/how-to-change-wordpress-site-address-url
You need to know how to change your WordPress site URL whether you are updating your site to use HTTPS, changing your domain name, migrating from a local server to a live site, or transferring to a subdomain.
We will provide you with a step-by-step procedure on how to change your WordPress site. Make sure to generate a full backup of your website before making any changes.
**Steps on How to change your WordPress site URLs**
**Change the WordPress URL in your WordPress Admin Dashboard**
Adjusting your WordPress URL in the admin dashboard may be all you need to change a domain name, however, some sites may have the URL hardcoded in the wp-config.php file in these cases, you will have to use method 2 below.
* Log into your WordPress admin dashboard
* Click on Settings → General.
* Update WordPress Address (URL) line and Site Address (URL) lines with your new domain name. Both of these fields(Site Address and WordPress Address URL) should be the same.
* Save changes
* Visit your website to make sure everything is working as it should.
**Using wp-config.php File**
You need to access the wp-config.php file first, this file is located in the root folder of your\
website.\
To change this file you need to connect to your website using an FTP client.
* Locate the wp-config.php file, which can be found in the root folder for your domain.
* You need to add the code below just above the line that says ‘That’s all, stop editing! Happy publishing’.
define( 'WP\_HOME', '[https://examplesite.com'](https://examplesite.com') );\
define( 'WP\_SITEURL', '[https://examplesite.com'](https://examplesite.com') );
* You will need to replace ‘[https://examplesite.com’](https://examplesite.com’) with your new domain name.
* Save changes and upload the file back to your server.\
Visit your website to make sure that everything is working fine.
**Using functions.php File**
For some reason, you are unable to access your WordPress admin panel, then you will need to use this method.
* Using an FTP client, you can connect to your WordPress site
* Locate your WordPress theme folder. For most users, this will be something like /wp-content/themes/your-theme-folder/.
* Locate functions.php file via FTP
* using your preferred text editor like Notepad, open your functions.php file and edit it
* Add the code below to the bottom of the file.
update\_option( 'siteurl', '[https://examplesite.com'](https://examplesite.com') );\
update\_option( 'home', '[https://examplesite.com'](https://examplesite.com') );\
Replace ‘[https://examplesite.com’](https://examplesite.com’) with your own site URLs.
* Save changes and upload the file back to your server using FTP.\
Visit your website to make sure everything is working as it should.
This method updates the site URLs in the database. You need to remove the two lines of code from your WordPress functions.php file once your website is working properly.
**Using SSH**
* Enable SSH access in your cPanel using this guide.
* Log into your cPanel > Advanced > Terminal:
* Find your website directory using the command below:
cd rootdirectory
* Where the root directory is the main folder of your installation (e.g., public\_html for the main domain).
* Run the command below:
wp search-replace '[http://oldsite.com'](http://oldsite.com') '[http://newsite.com'](http://newsite.com')
The links in your database will be changed to the new domain name.
**Using phpMyAdmin**
In case you do not have access to the WordPress admin dashboard or Terminal, follow these steps to change the URLs via the database.
You can update WordPress site URLs by changing them directly in your WordPress database. This can be done from within your hosting account dashboard using phpMYAdmin. Your site could break if the changes made to your database are not done properly. So, it is recommended to take a WordPress database backup or check with a developer. This is really important and will help you undo any WordPress database changes if anything goes wrong.
* Log into your cPanel
* Locate the database associated with your website in wp-config.php file
* Click phpMyAdmin in the ‘Databases’ section.
* Click on the database in the left-side column and wp-options(by default wp\_ is the database prefix but it can be different for your installation)
* You will see rows inside the options table. You need to locate the ‘option\_name’ column where ‘siteurl’ and ‘home’ will be listed.
* Click on the pencil ‘Edit’ icon to the left of each row and change the ‘option\_value’ field to your new site URL.
* Click the ‘Go’ button in the bottom right corner to save your database changes.
Visit your website to make sure everything is working as it should.
Some references in the database may not be reassigned to the new domain, in this case, you have to update all links following the steps below.
* Locate the database associated with your website in wp-config.php file
* Right-click on wp-config.php > View or Edit option:
* Download the backup of the database. You can take a backup from within your cPanel > Files section > Backup menu
* Open .sql file with some text editor and update all URL references
* Using Ctrl + F and select Replace option.
* Fill in the corresponding fields
* Replace your old domain with your new domain and click Replace All:
* Save changes.
**Create a new database in your cPanel account**
* Upload the updated database using the phpMyAdmin menu in the Databases section
* Select the newly created database from the list on the left and use the switch to Import tab. Import the database .sql file from your local device
* Once done, you will need to update the wp-config.php file in your installation root folder:
These are the fields to be changed\
define 'DB\_NAME' line – the name of the new database you've created in MySQL Databases menu.\
define 'DB\_USER' line – the name of the new user you you've created in MySQL Databases menu.\
define 'DB\_PASSWORD' line – the new password you've set for database user in MySQL Databases menu.
* Save changes.
* Delete the old database once you confirm that everything is working fine
* Proceed to your WordPress admin page to re-generate the permalinks to make sure they have the new URL.
* Log into your WordPress dashboard in the Settings menu > Permalinks.
* If you had a Post name, switch it to Plain
* Save changes and then revert everything back
**Using WP-CLI**
This option uses the WordPress Command Line Interface (WP-CLI) to access and edit your site. The process involves using command lines to run specific tasks as such you need the help of a developer.
The commands to edit your URL are as follows:\
wp option update home '[http://examplesite.com'](http://examplesite.com')\
wp option update siteurl '[http://examplesite.com'](http://examplesite.com')\
Replace “examplesite” text with your existing domain to get this done!
You have a number of methods to choose from to change your WordPress URL
You can change the settings in the WordPress admin, hardcode them in your wp-config.php file, edit the database, use WP-CLI or use a plugin\
. Work through the methods above to find the one that suits your site, and you’ll have your new WordPress URL working in no time.
# How to create a WordPress staging site with cPanel
Source: https://kb.verpex.com/wordpress/how-to-create-a-wordpress-staging-site-with-cpanel
**What Is a WordPress Staging Site ?**
A staging site is a cloned copy of a production site that is used to test changes before making them live. In simpler terms, it is a copy of your website where you can make changes that do not alter your live website until you deploy them. Staging sites help you catch errors, so you do not damage your website. Moreover, it also helps to avoid downtime and bad user experience. It contains the same data and files, but it is not publicly accessible and usually hosted on a different subdomain. In this article, we will explain what you need to know about WordPress staging sites.
**Why do you Need a Staging Site ?**
If a business depends on its WordPress site or WooCommerce store, editing the live production installation is risky. WordPress staging sites also called development sites or testing sites, are safe alternatives. Ideally, any edit more complicated than publishing a post is thoroughly tested before it goes live.
**Cases for staging sites are:**\
Testing new landing pages to ensure each component works as expected before potential customers visit.\
Checking updates for compatibility issues\
Creating a new theme or modifying the current theme.\
Modifying the site’s code to add new features.\
Staging sites are also useful when you want to allow developers and designers to work on your site but don’t want to give them access to the production\
installation.
Now that you know the benefits of staging a website before production, let’s look at how this task can be accomplished.
WordPress is one of the most popular content management systems (CMS). However, it requires regular updates to ensure full functionality and optimal performance. When performing updates, it is always recommended to have a separate clone of the site in a staging environment to test the compatibility of patches and updates with the site and plugins.
Here are the steps for staging the cPanel site.
**Step 1: Create a Subdomain in cPanel**
* To create a subdomain in cPanel, login to Verpex cPanel.
* Click Subdomains in the Domains section.
* Give your subdomain a name (e.g. test), then click the Create button to add your subdomain, which you can use to import your live WordPress site. Note the location of the staging folder in your directory. The subdomain is where you will access your new staging environment.
Using File Manager\
Manually create a staging site using File Manager:\
Login to your cPanel, and click Advanced\
files. In the public\_html folder\
Navigate to File Manager, under the public\_html folder, download the entire root folder of the website for which you want to create a staging site.
**Step 2: Copy the Database Using phpMyAdmin**
Your WordPress site will have at least one associated database. The database name can be found in the wp-config.php file in your public\_html folder. Once you know the database name, access phpMyAdmin in the Databases section of cPanel.
* Go to phpMyAdmin
* Click on your database name(the database name copied from wp-config.php).
* Choose the Quick export and SQL format options.
* Click Go, this option downloads a copy of the site’s database on your computer.
**Step 3: Create a Database User and Assign it to a Database in cPanel**
* A new database that will act as a clone of the live one has to be created.
* To create a new database, click MySQL Databases in the Databases section of cPanel.
* Scroll down to the MySQL Users section, and click Create a database user
* Enter the username, and password.
* Once the user has been created, you need to add the User to the database
* Scroll down to the Add User To Database section, select the newly created database and click Add.
* Check the box next to All Privileges and click Make Changes.\
You now have two databases listed on the left side menu in your phpMyAdmin
* Click the new database, then click Import.
* Click Choose File to upload the .sql file which is the backup of the live website’s database into the new database.
* After completing all necessary selections, click Go to finish the database import.\
Depending on the size of the uploaded file, it might take from a few minutes to a few hours. After the import is complete, you have two databases with the same database tables.
* After cloning the database, you need to modify the cPanel staging site’s URLs.\
Do so in phpMyAdmin, click on the wp\_options table, and edit the home and site URL options. Click Edit for each individual option to update the URLs.
**Step 4: Copy Website Files in File Manager**
The next step is to copy the files now that the database and user have been set up.. You can do this through file transfer protocol (FTP) or through cPanel's File Manager.
* Log into cPanel, click File Manager
* Locate and open the public\_html folder
* Click Select All
* Click Copy.
* The interface prompts you to set a destination for the cloned files. Enter the directory where your new subdomain is hosted. If you do not know which directory it is, go to the home screen and click Subdomains in the Domains section.
Once the files have been copied, you will need to type in the new database information: database name, database user, and password.
* Go to the File Manager window.
* Right-click on the wp-config.php file, and select Edit.
* In the Database settings section, modify the wp-config.php file with the correct database credentials. .
// **Database settings - You can get this info from your web host** //\
/\* *The name of the database for WordPress*/\
define( 'DB\_NAME', 'budd\_testing' );
/\* *Database username*/\
define( 'DB\_USER', 'budd\_testing' );
/\* *Database password*/\
define( 'DB\_PASSWORD', '\' );
/\* *Database hostname*/\
define( 'DB\_HOST', 'localhost' );
/\* *Database charset to use in creating database tables.*/\
define( 'DB\_CHARSET', 'utf8mb4' );
/\* *The database collate type. Don't change this if in doubt.*/\
define( 'DB\_COLLATE', '' );
* After adding the correct credentials, click Save Changes.
**Step 5: Create A Record for the Subdomain**
An A record needs to be added to your domain name system(DNS) provider to enable you to use the cPanel staging site. The A record has to be pointed to the IP address listed in the General Information section in cPanel as a Shared IP Address. Once the DNS propagation is complete, your new cPanel staging site will be accessible using your chosen subdomain. However, to avoid potential problems with links in the database, replace them to match the subdomain of the staging website.
Instead of manually checking the directories (which can take hours), the easiest way to replace them is with a plugin, such as Better Search Replace. With the plugin installed, you can search and replace all instances of the old domain with the new one.
A WordPress staging site has its advantages and disadvantages:
**Advantages**\
**Risk-free environment:** A safer environment to tweak your site or try out major updates without risking the live website functionality.\
**Early error prevention**: Helps debug WordPress to discover critical issues and system crashes before the site goes live.\
**Flexible configuration:** It can be configured locally or online, depending on your preferences.\
**The best possible output**: It allows you to create a better site since you can test everything thoroughly before launching it.
**Disadvantages**
For beginners who have yet to learn WordPress, setting up a staging site can seem like a challenge at first. Creating a WordPress staging site online may include additional plugin or hosting costs. You will need to take some time to test the changes on the WordPress staging site and repeat the same changes on the live version of the site.
**Conclusion**
Due to frequent security threats and updates to WordPress themes, plugins and core files, staging sites are necessary. Knowing how to create a staging site in a cPanel is straightforward and easier than undoing changes that might break a production site. Additionally, our support team is available around the clock to assist you with cPanel functionality.
Expert Tip\
Go through all the possible use cases with the changes you made. Only after you find no issues with them, then push the changes to safe production.
# How to Debug WordPress® with cPanel and WordPress Toolkit?
Source: https://kb.verpex.com/wordpress/how-to-debug-wordpress-with-cpanel-and-wordpress-toolkit
This article provides a step-by-step explanation on how to quickly and easily debug your WordPress site using the WordPress Toolkit in cPanel. The WordPress Toolkit provides a convenient, easy-to-use interface in cPanel that you can use to set up and manage WordPress websites.
WordPress’s greatest asset is that it simply works, the average user has little or nothing to worry about. As with any complex software, there are bugs in WordPress’s code, plugins, themes and features that could cause unexpected errors. Although WordPress has debugging tools to troubleshoot these issues but using them can be cumbersome and time-consuming.
When facing issues on a WordPress site, enabling and configuring debug mode may be helpful. WordPress toolkit allows you to check your site’s security and fix issues from one interface. CPanel's WordPress toolkit makes debugging easier and faster by providing an intuitive interface for identifying errors.
WordPress debug mode instructs the software to log error messages and warnings generated by the underlying PHP code. Error logs help developers determine the cause of unexpected behaviour. Logs reveal information about the internal state of WordPress that should be kept private. Debug mode, by default, prints errors on WordPress HTML pages, but you can change this behaviour in the configuration settings.
**What do these options do?**
**WP DEBUG**: It enables and disables debugging. Debugging is usually disabled because it consumes server resources and poses a security threat\
**WP\_DEBUG\_LOG**: When enabled, WordPress writes error messages to a file called debug.log, located in the wp-content directory of the site\
**WP DEBUG DISPLAY**: Checks whether error messages are displayed on WordPress pages or not.\
When debugging a staging or development site, it is useful to show an error message where they are generated; however, when debugging a production site, disable this option and use the debug log instead\
**SCRIPT DEBUG**: This option instructs WordPress to use unminified CSS and JavaScript files to find bugs in front-end code.\
**SAVEQUERIES**: This option saves database queries to a PHP array, which can be viewed on a page or accessed in code. Do not forget to turn off this option after debugging because enabling it can severely degrade your site’s performance.
Follow these steps to debug WordPress with WordPress Toolkit
* Log in to cPanel. Please see[ this article](/cpanel/how-to-access-cpanel) if you do not know how to log into your cPanel
* cPanel ->> Domains - WordPress Toolkit icon
* Open WordPress Toolkit: This page opens with a list of installed WordPress sites.
* From the WordPress Toolkit page, Select a site in the WordPress Toolkit interface and click on the Debug option in the Tools section to enable debug mode.
* Under a site listing header, under Status, click Check Security.
* After choosing debugging options, click the OK button
* The scanning of your website begins, and WordPress will start logging errors. If you have WP DEBUG LOG enabled, you can view errors logged in the file manager by navigating to your WordPress site's wp-content directory and opening debug.log.The toolkit displays a list of issues and suggests improvements once the scan is complete
* Check the box next to the issue, and then click Secure.
These issues can be fixed manually and resolved automatically if you have WordPress Toolkit Deluxe. To check for the integrity of WordPress application files and confirm it has not been tampered with click Verify Checksums.
The steps below provide you with a list of debugging options using the WordPress Toolkit
**Identifying Bad WordPress Plugins**
Non-developers can have a hard time reading PHP error logs, and there are easier options if you just want to identify and disable a badly behaving plugin. Faulty plugins can be identified through a process of elimination, which involves disabling plugins one by one until the problem is resolved, deciding the plugins that are faulty and uninstalling them.
* In the WordPress Toolkit interface, select a site
* Click on the Plugins tab.
* The plugins table contains an option that activates and deactivates individual plugins.
* Deactivate the plugins one by one and check if the issue is resolved.
* Once the culprit is found, check the box next to the plugin and click the remove button to uninstall
**Enable Maintenance Mode with WordPress Toolkit**
Debugging mode is not recommended on a production website, it should only be used on staging and testing sites. If you find a bug on a live site that affects user experience, you can combine debug and maintenance modes. Maintenance mode displays a static page to notify users that a site is unavailable. When you update plugins and themes, WordPress automatically places the site in maintenance mode, but you can disable it using the WordPress Toolkit.
* Open WordPress Toolkit
* Navigate to the site you want to debug.
* Click the switch in the lower right corner of the interface to enable maintenance mode.
* Click the adjacent configuration icon to configure the maintenance mode page
* Make your changes, and then click the preview button to make sure everything is in order.
**Restoring WordPress Backups with WordPress Toolkit**
The fastest way to fix a damaged WordPress site is to restore from a backup made before the bug appeared. WordPress Toolkit's backup and restore interface makes it easy to restore your site to an earlier point.
* Launch the backup/restore tool for the site you want to repair.
* Select a recent backup from the list
* Click the restore button.
Restoring reverses changes made to the site after the backup was created, so it's best to create a new backup before making any changes. As you can see, the backup/restore tool makes backup and restore easy.
WordPress Toolkit in cPanel makes it easy to install, manage, and debug any number of WordPress sites, allowing WordPress hosts to provide a better user experience while keeping support costs under control.
# How to Delete a WordPress site
Source: https://kb.verpex.com/wordpress/how-to-delete-a-wordpress-site
Deleting a WordPress Site
Deleting a site will completely get rid of it and you will be unable to view the website. It is important to note that this step is irreversible and you will lose all the content on your site so make sure to back up your website's files and database before proceeding
* Log into your hosting account from your client area
* Go to Softaculous App Installer
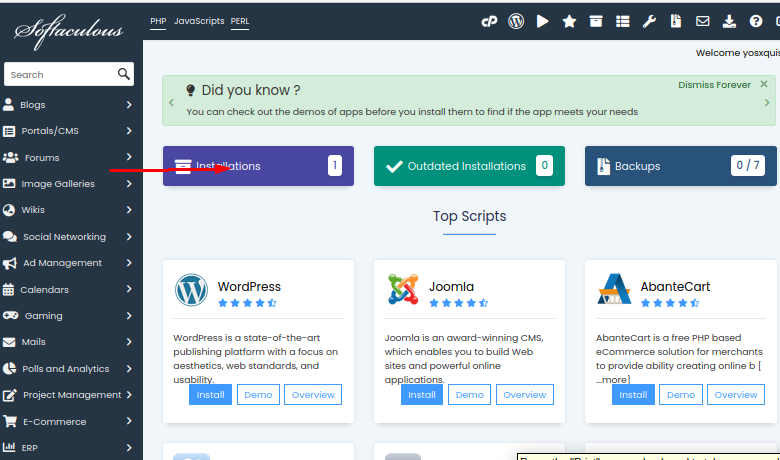
* Select the WordPress website you wish to delete from your current installation
* Click the dustbin icon in front of the WordPress installation you wish to delete and delete
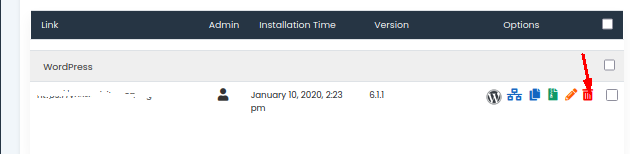
* You will see a pop-up window confirming that you would like to delete your WordPress site, click yes to proceed
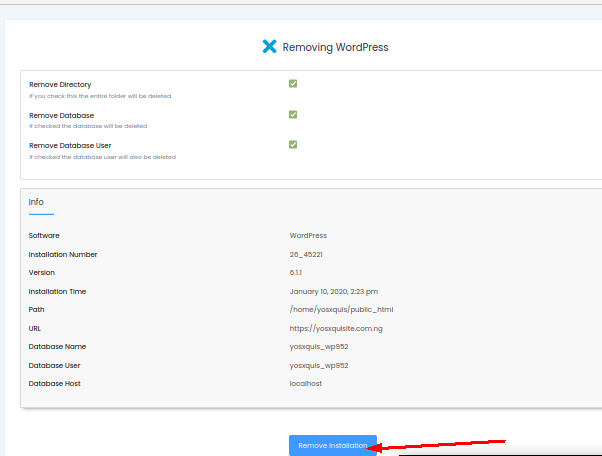
* You just successfully deleted your WordPress
Now proceed to delete the database as well\
From within your cPanel click on MySQL Databases\
This displays a list of databases, select the database of the site that you have already deleted WordPress installation\
Delete the database and the user associated with it.
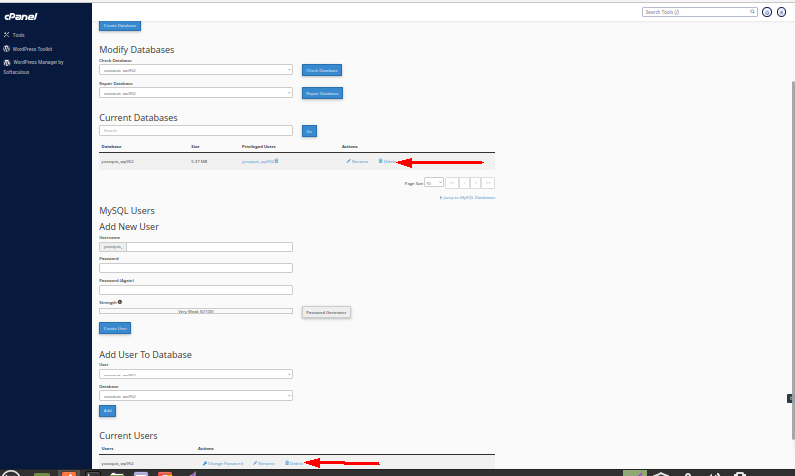
***
You can permanently and completely delete your WordPress.com site by following the steps below. WordPress.com provides support for site deletions that have been accidentally deleted or changed of mind. It's possible to revert the site deletion within 30 days of deleting it. Your site will disappear forever if you don't.
* Click **Tools** on your WordPress.com website's dashboard.
* Select to delete a site
* You will be offered the option of backing up your content.
* Enter the name of the WordPress website you wish to delete.
* Click to Delete This Site.
* Now login to your WordPress.com Dashboard
* And click **My Websites** > **Settings.**
* Scroll down and click to permanently delete your site.
Another way to delete the WordPress, can be deleted from WordPress Manager by Softaculus inside your cPanel.
* Go to WordPress Manager by Softaculus
* Click 'Scan'
* Then, click delete button on the website that you want to delete
# How to Edit My WordPress Website in cPanel Using WP Toolkit
Source: https://kb.verpex.com/wordpress/how-to-edit-my-wordpress-website-in-cpanel-using-wp-toolkit
WordPress Toolkit is the most popular option to manage WordPress websites, and it is embedded with an easy-to-use interface and various features. With these features, you can easily edit your website. So, today we plan to talk about how to edit WordPress using the WP toolkit.
Before we dive deeper, we need to clear some sub-topics. So, first, we will talk about WordPress Installation using the WP toolkit and then the features, and remember there are two different versions of the WordPress toolkit; the Lite version and the Deluxe version.
**WordPress Installation Via WP Toolkit**
This section will shed light on installing WordPress Using the WP toolkit; This is an easy process. If you follow the mentioned steps correctly, there won't be a problem.
**Step 01** - First, log in to your cPanel account.
**Step 02** – Then click on the WordPress Toolkit button near the WordPress Manager icon.
**Step 03** – Now click the Install WordPress button. A window will pop up. In that window, you can see four different tabs: General, WordPress Administrator, Database, Automatic Update Settings. Fill in the necessary data to each tab and start the installation process.
**Step 04** – Finally, install the recommended plugins and themes.
**How to Manage and Edit Your Website Using WP Toolkit?**
After the installation, you will be able to see the WP toolkit. You can see four options; Dashboard, Plugins, Themes, and Database. So, in this section, we will talk about these four options. You can manage and edit your WordPress website. So, let's get started.\
Dashboard
**Log in**: You can log in to the WP site from here.
**Setup**: Using this button, you can easily change your WordPress website's password.
**File Manager**: If you need to review the files on your WP website, you can use the File Manager button; it will show all the files associated with the WP website.
**Copy Data**: With Copy Data, you can copy data from one site to another easily.
**Clone**: This button enables you to clone the original website. You can test new features without disturbing the original site with a clone site. Also, it allows you to select the files and database tables that need to be copied into the original site.
**Backup/Restore**: This option allows you to backup and restore your website. If something goes wrong while running your site, this feature will help you greatly.
**Plugins**
In this tab, you can see all the plugins that you have to install to your WP website. Also, it will allow you to install new plugins, and you don't have to go to the WordPress Dashboard; you can complete it by using the WP toolkit.
**Themes**
Like in the WordPress Dashboard, you can access all the themes you own from here. Moreover, this is an easy and quick way to apply and test new themes, and you can delete and install themes from the WP toolkit without much effort.
**Database**
In the Database tab, you will be able to change the database's user name. But don't change that unless you have to. Also, you can open the database within PHPMyAdmin.\
How to Activate Maintenance mode in WordPress?
WordPress Maintenance mode allows its developers to display a notice to website visitors regarding the unavailability of the website. It is handy while you are developing or updating the WP website. You can easily enable and disable the Maintenance mode using the WP toolkit. So, let's check that out.
**Step 01**- Log in to your cPanel account.
**Step 02** – Then, go to the Application section. Select WordPress Toolkit.
**Step 03** – Once you have completed the process, select the correct website to turn on the Maintenance mode. So, select the correct website from the dropdown list.
**Step 04** – Finally, enable the Maintenance mode by switching the toggle button; now, your WP website will display a notice saying that the site is currently unavailable whenever someone tries to visit your site. You can change the display message picture and count downtime according to your needs.
**Tools**
On the WordPress Toolkit window, go to the dashboard; the right side column shows five different tools. These tools can be used to manage and edit your WP website. So, in this section, we will talk about them one by one.
**Search Engine Indexing**: This tool is very valuable. With this, you can turn on or off the indexing and index. So, you can hide your site from Google search results.
**Debugging**: Whenever the WP site is developed, multiple bugs can be created; So to fix these issues, you can use debugging mode. Simply turn on the debugging before your site goes live, and it will identify all the errors that need to be fixed.
**Password Protection**: This feature allows you to change or set new password access to your website. It is a good feature if your site is still in development stats. In that kind of situation, you can set a password to your site; So when password protection is on, visitors cannot view your site unless they provided the correct password.
**WP-Cron**: With the WP-Cron feature, you can schedule tasks various takes to run on your website. Using this feature will save lots of time for you, and it allows the WP toolkit to change the necessary steps.
***Hotlink Protection***: This is one of the best features in the WP toolkit. It blocks other sites from using your images. Most of the time, the user will copy your images from one site to another. This is done by gathering the image location or image URL. But when Hotlink Protection is on, an outsider cannot copy your images to their websites.
**Wrap Up**
We hope that, with this article, you were able to get a good idea about how to edit and manage your WP website using WordPress Toolkit. There is plenty of tools and features available in the WP toolkit. So, you need to learn how to use these tools properly.
# How to improve WordPress Website Security with these Tips?
Source: https://kb.verpex.com/wordpress/how-to-improve-wordpress-website-security-with-these-tips
Improving WordPress SEcurity
WordPress is one of the most popular and powerful blogging content management systems which faces a lot of security issues and makes it vulnerable to all sorts of attacks. This throws the question– is WordPress secure?
Of course, WordPress is secure regardless of its vulnerable state. Lack of security awareness is one of the major reasons for security breaches which is why it is best to apply precautionary security measures before your website gets hacked.
**Why Do You Need to secure your WordPress Website?**
You risk losing important data, assets, and credibility if your WordPress website is hacked. The cost of damages cannot be measured and you sure do not want to go through the heartache of a hacked website
**How do you Secure your WordPress website?**
There are quite a few simple WP security tips that can help you secure your WordPress site
* Keep your WordPress and all plugins and themes up to date and remove unused plugins and themes.
* Use a strong and unique username and password for your WordPress account, and avoid using "admin" as your username.
* Limit the number of users with administrative access to your website and use strong passwords for each account.
* Change WordPress Admin URL
* Use a security plugin, such as Wordfence or iThemes Security, to help protect your website from common security threats.
* Limit the number of login attempts to your website, so that hackers can’t try multiple passwords in rapid succession.
* Use a web application firewall (WAF) to help protect your website from common web attacks.
* Keep regular backups of your website so that you can restore it in case of an emergency.
* Install an SSL certificate to encrypt data transfer between the browser and the server.
* Use two-factor authentication as an additional layer of security.
* Set up a safelist and blocklist for the admin page.
* Migrate to a more secure web host.
* Disable file editing.
* Disable the XML-RPC feature.
* Hide your WordPress version.
* Regularly monitor your website for any security breaches or suspicious activity and scan for malware
By following these steps, you can greatly reduce the risk of your website being hacked or compromised, and help ensure that your website remains secure.
Applying these security measures is a continuous process that can help reduce the risks of cyberattacks.
# How to Increase WordPress Memory Limit
Source: https://kb.verpex.com/wordpress/how-to-increase-wordpress-memory-limit
Follow these steps to increase WordPress memory limit:
* Log into your cPanel from within your Verpex client account
* Locate and click the **File manager** menu in the **Files** section
* Click **Public\_html**
* Search and select **wp-config.php** file and right- click Edit
* Add the following code right before the / *That's all, stop editing! Happy blogging.*/' line:
```text memory_limit code theme={null}
define( 'WP_MEMORY_LIMIT', '512M' );
```
You can enter any value where 512M was stated. 512M is the memory limit you want to set:
You can also change the WP\_MEMORY\_LIMIT via the wp-includes folder and edit the default-constants.php file.
To confirm whether your changes have got into effect, create a PHP info.php file. To create an info.php file, follow the steps in this [guide](/cpanel/how-to-create-a-phpinfo).
# How to Install a WordPress Theme
Source: https://kb.verpex.com/wordpress/how-to-install-a-theme
Installing a WordPress Theme
To create a website that matches your brand and looks professional, you need to install and activate a WordPress theme.
You can install a WordPress theme using the WordPress directory, download it manually, or use an FTP client.
**1. Install Using the WordPress Theme Directory**
Follow these steps if you are going to use a free theme:
* Log into your WordPress dashboard,
* Locate Appearance and click Themes.
* Next, click the Add New button at the top of the page.
* Hover above your theme of choice to start the installation process
* You can get a preview of your website using the theme by clicking the Live Preview button.
* Click Activate to use the theme
* Visit the site to see how everything looks.
**2. Install Through Downloading WordPress Themes**
If you purchased a theme from a developer, you need to upload before installing. Follow the steps below to upload and install a theme.
* Download the theme’s .zip file to your local computer.
* Log into your WordPress dashboard,
* Locate Appearance and click Themes.
* Click the Upload Theme button at the top of the page to upload a theme you have previously downloaded.
* Click Choose File.
* Select your theme’s .zip file on your computer
* Click Install Now and wait for the uploading process to complete.
* Click Activate to use the theme straight away
**3. Installing a WordPress Theme via FTP**
A File Transfer Protocol (FTP) is a protocol that allows file exchange between computers and servers on a network.
* Open Filezilla, enter your login details and click Quickconnect. Follow the steps in this [guide](/cpanel/using-ftp) to connect via FTP if you are not familiar with this process.
* Unzip the theme file first.
* Inside Filezilla, search for wp-content inside your WordPress directory, and open it.
* Go to the themes folder.
* Click the folder containing the template files.
* Drag and drop it into the themes folder. Your new theme will appear on the list of WordPress themes.
* Login to your WordPress dashboard,
* Locate Appearance and then click Themes
* Search for your new theme on the list of installed themes.
* Click Activate.
* Check out how you like your new site design.
A WordPress theme gives a consistent design to a WordPress site while maintaining its core features. Consider your site type, compatibility, and budget before installing a theme.
# How to Install a WordPress Plugin.
Source: https://kb.verpex.com/wordpress/how-to-install-a-wordpress-plugin
Plugins are the cornerstone of the WordPress ecosystem. They allow you to add new features to WordPress such as a contact form, layout, shopping cart, etc. They make the CMS (Content Management System) unique among its peers because of the sheer extensibility they bring to the platform. Many users are attracted to WordPress because of the plugins, but they don't know how to install them. If this is you, don't worry. We'll walk you through how to install a WordPress plugin in 3 different ways, so you'll never run out of the cool stuff your site needs.
You can install a WordPress plugin using a search, uploading the plugin and manually installing a WordPress plugin via FTP.
**Installing a Plugin using WordPress Plugin Search**
The easiest way to install a WordPress plugin is to use the plugin search. The only downside to this option is that a plugin must be in the WordPress plugin directory which is limited to free plugins only. The first thing you need to do is:
* Search for plugins that you want to install in the WordPress admin area
* Find the plugin by typing the plugin name or the feature you are looking for.
* After that, you will see lots of listings, choose the plugin that suits you best.
* You will notice that the ‘Install Now’ button will change into the ‘Activate’ button.
* A WordPress plugin can be installed on your site, but it won't work if you don't activate it. So go ahead and click on the activate button to start using this plugin on your WordPress site.
And with that, you have installed a WordPress plugin in the easiest and fastest way possible.
**Installing a Plugin using the WordPress Admin Plugin Upload**
Paid WordPress plugins cannot be installed using the first method because they are not listed in the WordPress plugin directory, as such the upload method was introduced to install such plugins. To install WordPress plugins using the upload option in the admin area, follow the steps below:\
You need to first of all download the plugin from the source which will be a zip file. Do not unzip any plugins that you download this way. WordPress reads the compressed archive, so you will always be uploading the .zip itself, not the files within).
* Next, go to the WordPress admin area and click Plugins -> Add New.
* Click on the ‘Upload Plugin’ button at the top of the page.
* Click on the ‘Choose File’ button and select the plugin file that you have previously downloaded to your computer.
* Select the plugin zip file to upload and install in WordPress
* After selecting the file, you need to click on the ‘Install Now’ button.
* WordPress will upload the plugin file from your computer and install it. You will get a success message after the installation is complete.
* Once installed, click on the Activate Plugin link to start using the plugin.
* Once complete, you will have installed a WordPress plugin via upload. The newly installed plugin will appear in the list as if you had installed it directly through the dashboard search.
**Manually installing a WordPress plugin via FTP**
Installing a plugin via SFTP is not much different from installing via download. You will need to download the plugin source file first(it will be a zip file). Then you need to extract the zip file to your computer. Extracting the plugin zip file will create a new folder with the same name. This is the folder you need to manually upload to your website using an FTP client. You would need access to connect to your host via the FTP manager. If you don't have your FTP username and password, contact your hosting provider and ask them.
* Open the FTP client on your computer and connect to your website using the login credentials provided by your host.
* Once logged in, you need to go to the /public\_html/wp-content/plugins/ folder.
* Next, upload the folder you extracted from the zip file to the /public\_html/wp-content/plugins/ folder on your web server.
* After uploading the files, you need to visit the WordPress admin area and click on the Plugins link in the admin menu.
* You will see your plugin successfully installed on the plugins page.
* Click on the Activate link under the plugin to start using it.
**Conclusion**
Without plugins, WordPress is still a fantastic platform that can do a lot. With plugins, however, it can do just about anything. By following the steps above, you can safely install plugins you download from anywhere. However, we would like to warn you that downloading plugins from untrustworthy sources and installing them can lead to compromised sites, malware and various other negative consequences, so don’t install them. The WP.org repository and developer websites are secured places to download a plugin from.
# How to Install WordPress via WP-CLI
Source: https://kb.verpex.com/wordpress/how-to-install-wordpress-via-wp-cli
Installing WordPress with WP-CLI takes just a few commands. You need to follow the steps below to install WordPress via the WP-CLI interface.
Using the WordPress command-line interface Navigate to the public\_html folder to access and manage your website:
```text theme={null}
cd /home/username/public_html
```
Download the newest WordPress core version once you are in the public\_html directory:
```text theme={null}
wp core download
```
Enter the wp-config create command to MySQL database credentials to WordPress:
```text theme={null}
wp config create --dbname=wordpress --dbuser=user --dbpass=password --dbhost=localhost --dbprefix=wp_
```
**NOTE: Replace the default values with your database details.**
To complete the WordPress installation use the wp core install command:
```text theme={null}
wp core install --url=yourdomain.com --title=Site_Title --admin_user=admin_username --admin_password=admin_password --admin_email=testing@email.com
```
**NOTE: Replace the default values with your credentials.**
After the installation is complete, you should see a successful message.
**How to Reinstall WordPress Core via WP-CLI**
Using the same WordPress installation command to reinstall the core software, use the skip-content option to download WordPress without the default themes and plugins and the force option to overwrite the existing files.
```text theme={null}
wp core download --skip-content --force
```
**Manage Content via WP-CLI**\
This method can be useful for tasks such as creating bulk posts that can’t be done on WordPress admin panel
To see the list of all posts, use this command:
```text theme={null}
wp post list
```
To delete a post use this command:
```text theme={null}
wp post delete 1
```
To create a new post, use this command:
```text theme={null}
wp post create --post_status=publish --post_title="This Post Was Created With WP-CLI" --edit
```
This command will open the Vim text editor. Input the text editor's content, exit Vim by typing:wq then press Enter.
To generate 5 posts, enter this command:
```text theme={null}
wp post generate --count=5
```
To import all images from the images\_for\_site folder use this command:
```text theme={null}
wp media import images-for-site/*
```
# How to Log in to WordPress
Source: https://kb.verpex.com/wordpress/how-to-log-in-to-wordpress
If you've just setup WordPress (CMS) with one of our WordPress Hosting plans or any of our packages provided by Verpex, or it was imported manually then the login page is accessible the same way.
If you are currently waiting on DNS propagation, you may need to wait or you can edit your hosts file temporarily in order to test or visit your site (DNS propagation can take up to 72 hours, but usually under 24 hours).
To get started, please see the steps below on how to access your WordPress admin area:
```
To log into WordPress, please open a new browser and go to your site.
Once you've visited your site for example [https://exampledomain.com] then the login would be followed by [https://exampledomain.com/wp-login.php] - (Please note: ensure to remove exampledomain.com and input your domain name).
```
Once you've accessed the page and entered the username and password credentials, you'll now be logged into your WordPress dashboard as required.
But if you want to login directly to your WordPress Admin Dashboard, you can go to your cPanel, and then open WordPress Manager by Softaculus:
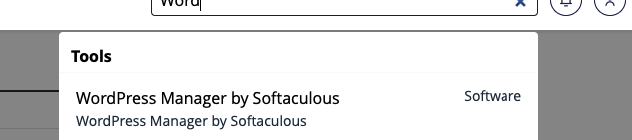
After that, you will see the list of websites that you created by using cPanel, then click login button
You are now great to get started, if you need any assistance please feel free to contact our support team today.
# How to Reset WordPress Password
Source: https://kb.verpex.com/wordpress/how-to-reset-wordpress-password
If you ever encounter an issue logging in to your WordPress dashboard due to an invalid or forgotten password, there is a neat trick to reset it from your cPanel area, specifically phpMyAdmin.
So for those who have never heard of phpMyAdmin, here’s a brief description on how it works and what it’s for:
In order to create a functional website, most developers use databases to store website information. There are various kinds of databases but one of the most popular types is MySQL. Now this is where phpMyAdmin comes in. It is created as a piece of software written in the PHP programming language that is used to handle MySQL administration. In other words, phpMyAdmin helps you to manage MySQL databases such as database creation, performing database queries, table management, and so on. This also means that it can also help you to view and manage tables that store your website data, including your WordPress users and passwords.
Follow the steps below to change your WordPress admin password from phpMyAdmin:
1. Login to your cPanel area Once logged in, type in phpMyAdmin on the top right search bar or just scroll down until you can find the phpMyAdmin option.
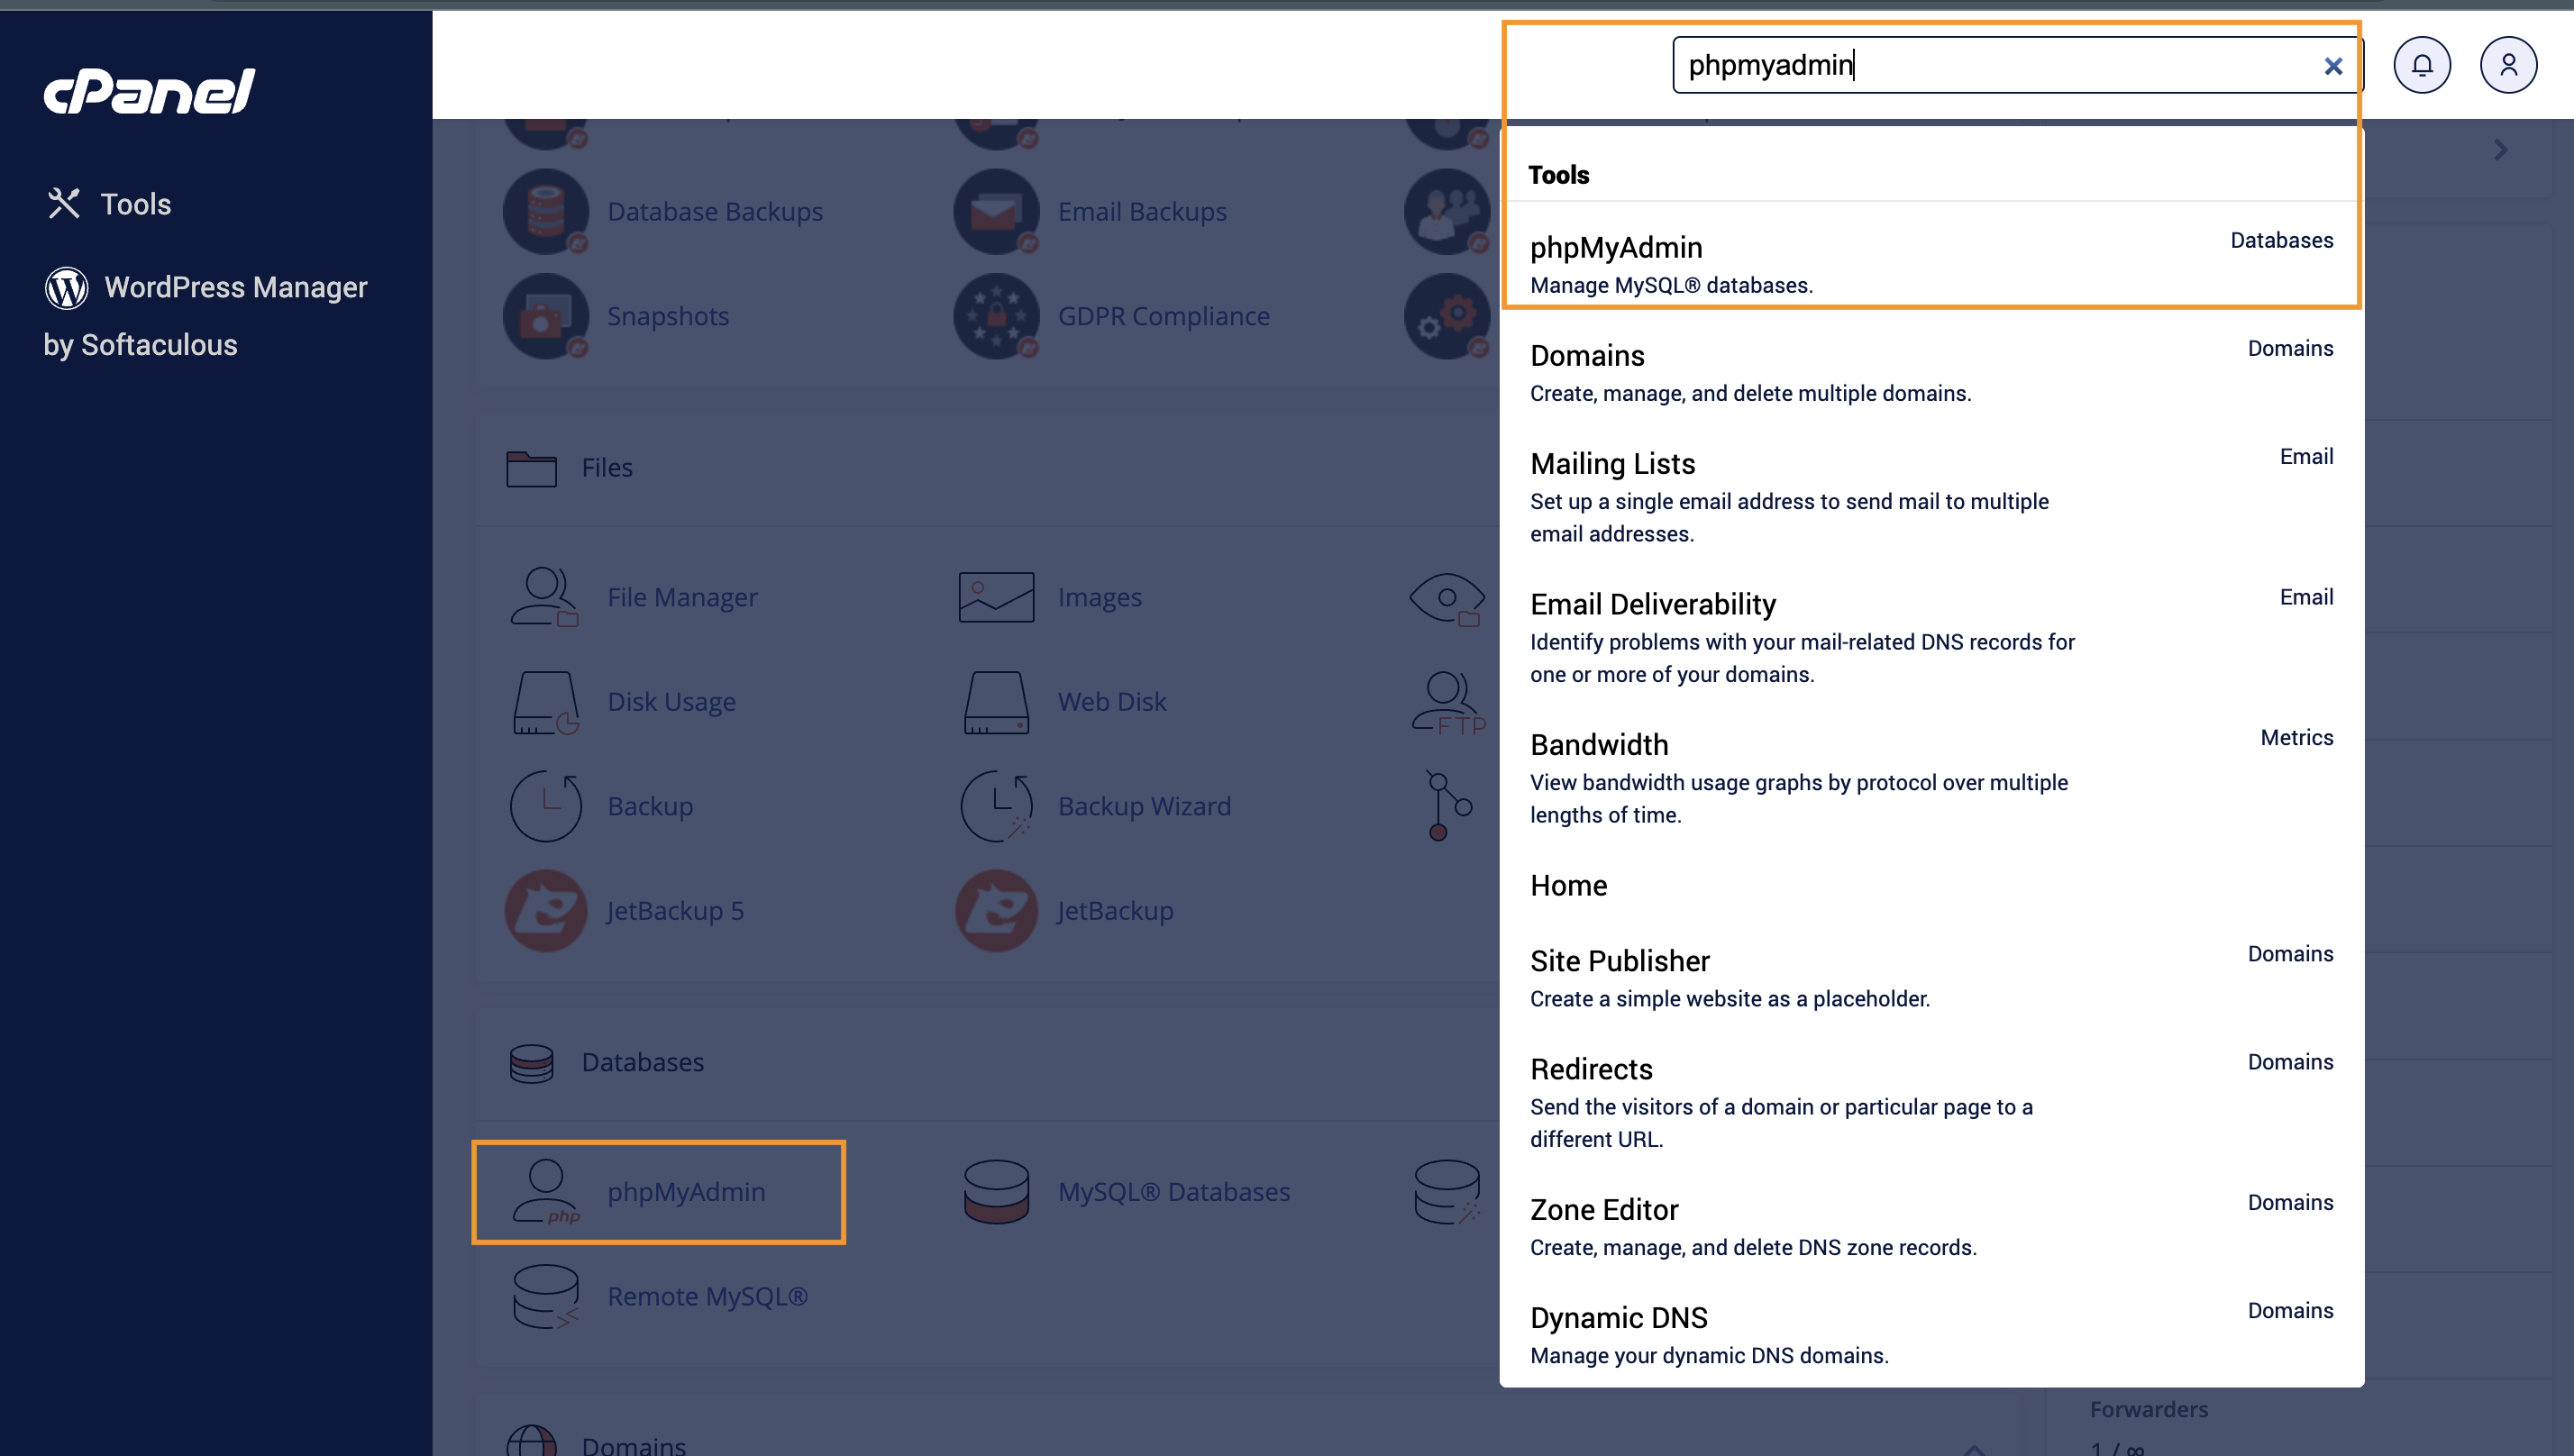
2. Choosing the correct WordPress database, select the “\_users” table, and edit the admin user row
Once the phpMyAdmin interface opens, click on your WordPress database on the left hand pane. If there are multiple databases within your cPanel account, make sure to choose the correct one. Then select the “wp\_users” table. Depending on the database prefix you are using, the name of this table could vary. In the screenshot below, for example, we are selecting the “wpro\_users”. Afterward, click the “Edit” button on the WordPress user you wish to reset the password of.
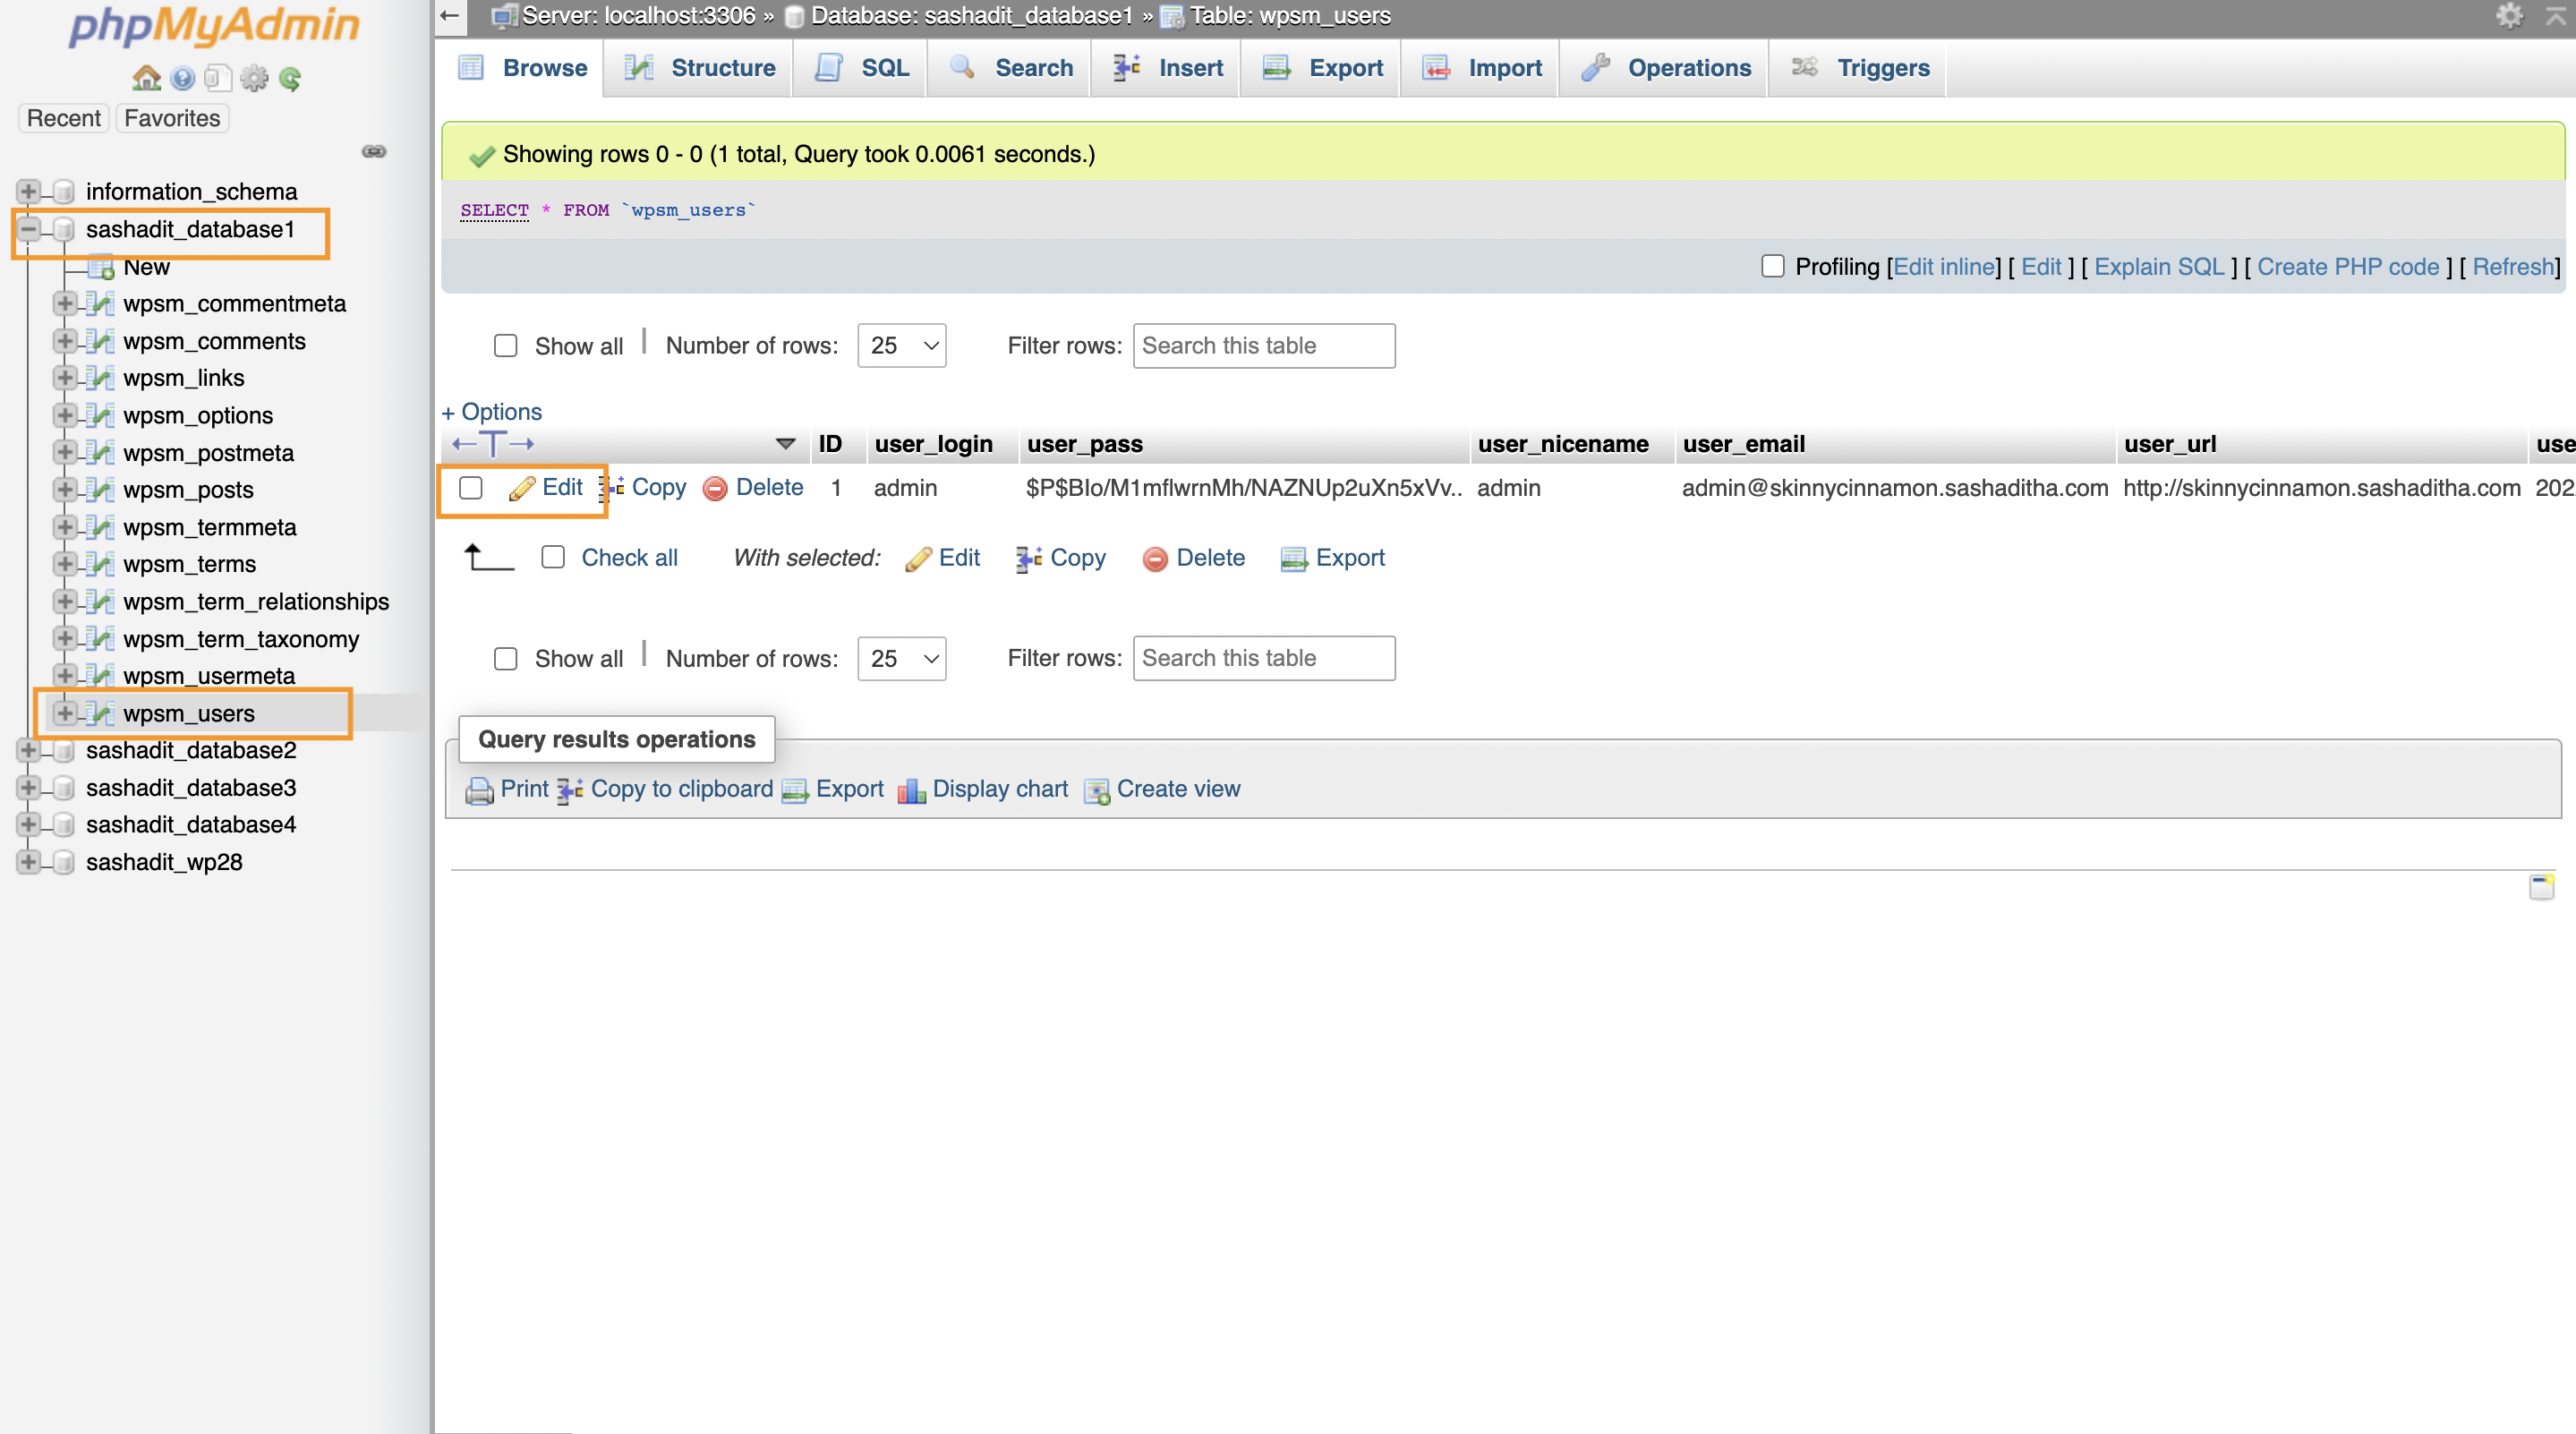
3. Inputting the new password
Now there will be several fields you can edit in this particular table row, such as the user name, email address, or password. To set a new password for this user, go to the “user\_pass” column, set the “Function” to “MD5” and input the new passphrase on the “Value” field accordingly. Then, click Go and wait for the change to be processed and saved.
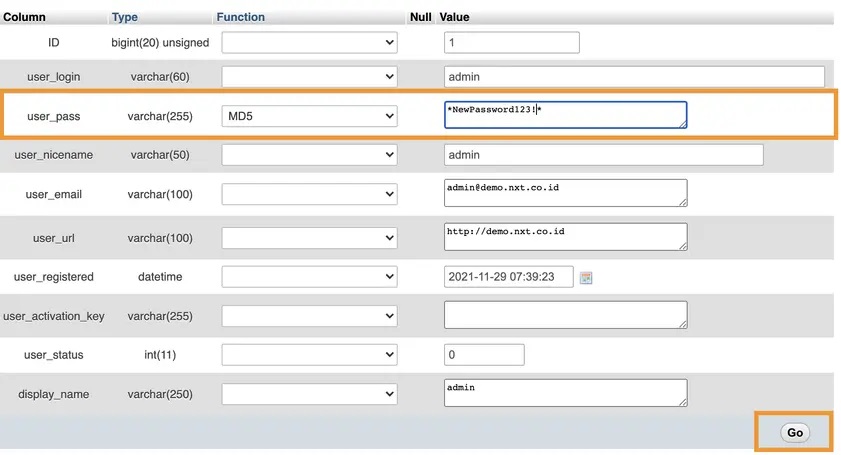
4. Login to WP admin area
To make sure that the new password has been set properly, login to your website’s WP admin area and use the passphrase you just set on the database.

If you are still having issues logging in, go over Step 2 and 3 again and double-check if you selected the correct database/WordPress user.
# How to Upgrade a WordPress Plugin
Source: https://kb.verpex.com/wordpress/how-to-upgrade-a-wordpress-plugin
Updating a WordPress Plugin
For the stability and security of your WordPress site, it is important to update plugins regularly. You additionally experience the new features the plugin developers have added. Most times users are hesitant to update their plugins because it could crash their website
No matter the number of plugins your website has, it is important to update them regularly to maintain peak performance and keep security threats at bay. You can install these updates by visiting the Plugins tab
A plugin should be updated for the following reasons:
CMS speed and compatibility management\
New feature updates\
Bugs or glitches\
Security issues
**How to Know When to Update a WordPress Plugin?**
You will get a notification in your WordPress dashboard when a plugin needs to be updated. An icon showing the plugins that require an update will appear next to the updates or plugins tab. Plugins can either be updated manually or automatically.
**How to Manually Update a Plugin**
* Log in to the WordPress Dashboard
* Check the box in front of the plugin you wish to update in the update menu
* Click on the “Updates” menu to update your plugins\
OR
* Log in to the WordPress dashboard
* Go to Plugins
* Click Update now to update the plugin.
* Update the plugin.
**How to Manually Update a Plugin Using FTP**
* Download the plugin .zip file from the WordPress Plugin directory or a third-party source.
* Extract the .zip file on your desktop
* Use a File Transfer Protocol (FTP) Client to connect to your site.
* Go to the wp-content/plugins folder in cPanel and delete or deactivate the folder of the outdated plugin you’re updating.
* Find the extracted plugin folder you just downloaded, and upload it to your wp-content/plugins folder in cPanel
* Log into your WordPress dashboard and website to ensure the plugin is active and functioning correctly.
**How to Automatically Update a Plugin**\
Manually updating many plugins could be tedious which is why you need to enable automatic updates. Enabling automatic updates saves time, you can enable auto-updates for plugins individually, enter a code snippet or use a site management tool depending on what best works for you.
**Update Individual Plugins Automatically**\
To set up automatic updates:
* Log into your WordPress dashboard
* Go to the Plugins
* Click Enable auto-updates for each plugin
* To turn off automatic updates, click Disable auto-updates.
You can also do this for bulk updates
* Bulk select the plugins you want
* Choose Enable Auto-updates or Disable Auto-updates from the Bulk actions menu
* Click Apply
**Update Plugins Automatically with a Site Management Tool**\
What a site management tool does is automatically handles tasks for you, such as backing up your website, performing security scans, or updating WordPress, WordPress themes and plugins). You can simply use plugins like WPMU Dev, Jetpack, Easy Updates Manager, ManageWP for a swift update
**Update Plugins Automatically with a Code Snippet**\
Add a code that signals to your website to update plugins as soon as they become available
Simply insert the code below to the functions.php file:
```text theme={null}
add_filter( 'auto_update_plugin', '__return_true' );
```
If this process fails, you can try to manually update the plugin. Plugin update failures are common, especially with an automatic update.
Updating a plugin is important as this will help you correct some bugs you may not notice, reinforce security and take advantage of some functionalities. It is a simple process that should take just a few clicks. Depending on the approach you wish to take to update your plugin, be diligent should in case things go awry, you can immediately fix it. Staying on top of these updates gives you and your users a smooth and secure experience with your website.
# How to Upgrade a WordPress version
Source: https://kb.verpex.com/wordpress/how-to-upgrade-a-wordpress-version
Updating Wordpress
Make sure to keep your WordPress up-to-date to ensure that your website is secure and has the latest features. It is also a good practice to test the upgrade on a non-production environment first before doing it on a live site.
**Follow these steps to upgrade a WordPress version**
* Go to the WordPress dashboard and check if there is a notification for an available update.
* If there is an update available, click on the **Update Now** button.
* Wait for the update to complete. This may take a few minutes, depending on the size of your website and the speed of your server.
* Once the update is complete, check your website to make sure everything is working properly.
If you have any issues, restore your website from the backup you made in step 1.
Alternatively, you can update the WordPress version via FTP, you can download the latest version of WordPress from WordPress.org, upload the files to your\
server, and then follow the same steps 3-6 mentioned above
It is always recommended to take a full backup before updating the WordPress version. Should in case something goes wrong, it can be easily restored from the backup.
# How to Upgrade WordPress Theme
Source: https://kb.verpex.com/wordpress/how-to-upgrade-wordpress-theme
Updating a WordPress Theme
Themes impact your website’s design, speed, performance, SEO, and user experience. Updating a WordPress theme means installing it to the latest version which could be disruptive WordPress notifies you once there is an update.
**Why Should you Update Your WordPress Theme?**\
Updating your theme improves the security, functionality, performance, and compatibility of your site and as such you want to keep your themes updated at all times.
**Security**\
To keep your WordPress site secure at all times, you need to constantly update your software, themes and plugins as soon as these updates are available. You leave your site vulnerable to security threats if you do not install these theme updates.
**Compatibility**\
When a new version of WordPress is released, theme developers test their themes' compatibility with the new version of the software and release an update. Compatibility issues can be avoided when theme updates are installed.
**Feature Upgrades**\
Installing updates allows you to enjoy new features to the full potential of your theme.
**Performance Optimization**\
Updating your theme will ensure your theme is running at its maximum performance.
**Update WordPress Themes Automatically**\
Outdated themes are a risk to the security, performance, and compatibility of a website, follow the process below to set up auto-updates for your WordPress theme.
* Log in to your WordPress dashboard.
* Click **Appearances**
* Go to **Themes.**
* Click on the active theme you wish to update
* Click **Enable auto-updates**
If there are custom codes added to your theme, you might want to avoid auto-updates.
**Updating WordPress Themes Manually**
Updating your theme is easy if you simply installed and activated your theme without making any customization on your site. You can use any of the options stated below:
* Login to your WordPress dashboard.
* You should see a notification displayed in your WordPress Admin Menu when a new version of a theme is available.
* Click **Themes.** You will see the following message if your theme is up to date: **Your themes are all up to date**. However, if any of your themes are not updated, you need to select the theme you wish to update and click the **Update Themes** button.
Another option to manually update your theme in your WordPress dashboard:
* Log in to your WordPress dashboard
* Click **Appearance**
* Go to **Themes**. You’ll see this notification **New version available. Update now.**
* Click Update now. WordPress will automatically download and unzip the theme package, and replace the old theme files with new ones.
This will overwrite the old theme files on your website and you will lose any customization made. In order to avoid this loss, you can update your theme using an FTP client installed on your computer.
**How To Update A Theme Via Ftp(FileZilla)**
You can transfer your files from your computer to your WordPress hosting account using\
FTP. Follow the steps below to update your theme via the FTP client.
**1. Create a backup of your theme.**
* Log in to your site via FileZilla.
* Locate the public\_html folder.
* Click wp-content, and go to your themes folder.
* Click the themes folder in FileZilla to begin the manual theme update process
* Rename your active theme folder
* Download the folder to your computer
**2. Download the new version of your theme.**
* Go to the theme’s website to download the latest version of your theme to your computer
* Locate the theme’s zip file and extract.
* You now have the old and new versions of the theme on your computer.
**3. Add the customization to the new theme files.**
* Copy the code from the outdated theme files and paste them into the new ones.
* Open both your old and new theme folders to spot the custom code added to the old theme folder.
* Copy the custom code from the old theme file and paste them into the same file in the new theme folder.
* You now have the updated version of your theme with your previously-made customization. Proceed to upload it to your site.
**4. Upload the new theme folder to your site.**
* Log into Filezilla, you can follow this [guide on how to use FileZilla](/cpanel/using-ftp)
* Click the public\_html folder.
* Locate the wp-content folder.
* Go to the themes folder and upload your new theme directory.
* Locate the themes folder in FileZilla, then click upload to upload an updated version of the theme.
**5. Activate the new theme on your site.**
* Log in to your WordPress dashboard.
* Click Appearance
* Go to Themes.
* Activate the new theme.
* If prompted to overwrite the theme click the Replace current with the uploaded button.
**6. Test your site.**
Go to your website to test if everything works fine. If your website is not running as it should, you need to revisit the backup of your old theme and make sure you copied everything that there is to copy to the new theme.
To provide the best experience to your users, you need to regularly update your themes
# How to Upload Files in WordPress
Source: https://kb.verpex.com/wordpress/how-to-upload-files-in-wordpress
Uploading Files in WordPress
There are different ways to upload files to WordPress, depending on the type of file and where you want to upload it. Here are the steps to upload files to WordPress. In case you prefer using an FTP client for that purpose check out our step-by-step guide.
* Log into your WordPress dashboard
* Go to Media > Add New.
* Click on the "Select Files" button to upload files from your computer. You can also drag and drop files into the upload area.
* Once the files are uploaded, you can edit the file details, such as the title, caption, and description.
* Click "Insert into post" to add the file to a post or page, or click "Save" to save the file to the media library.
These files can be used for later use.
You can also use an FTP client to upload files to your site, you need the FTP credentials to connect to your website and then you can upload files to the desired location.
* In your WordPress Dashboard
* Click **Posts** >**Add New Post**
* On the Upload menu, click The **Add media files from your computer** page will appear.
* Click the **Select Files** button.
**Uploading Files in a Post**\
There are two possible editing interfaces that you may be working on: the Classic Editor and the Gutenberg Block Editor.
**Classic Editor**
* While editing a post, click the Add Media button to add a media image
* Select the Upload Files tab
* You can drag files from your computer or click on the Select Files button to open up a file browser
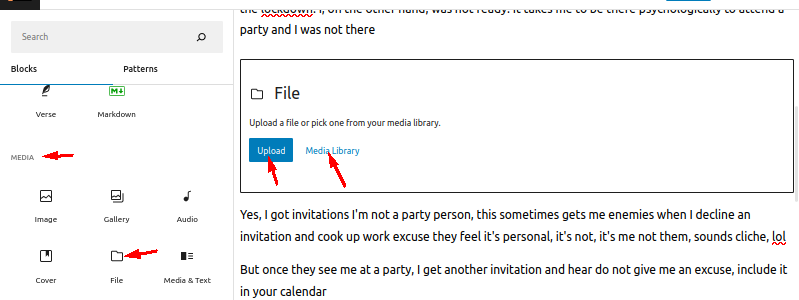
* If you're not ready to use the files now, simply make to uncheck the files. The files will still be there to be used in the future
**Gutenberg Block Editor**
* Open the post editor
* Click one of the plus buttons
* Find the File block and click it
* You'll see a file block appear in the post body. You can drag files from your computer, or click on Upload or Media Library
# How to Use the WP-CLI to Manage Your WordPress Site
Source: https://kb.verpex.com/wordpress/how-to-use-the-wp-cli-to-manage-your-wordpress-site
With the different commands available on WP-CLI, there is nothing that cannot be done via the command line. Find below a list of some actions that can be performed using commands.
**1. Install and Update WordPress**\
Downloading and installing WordPress on your site is the most fundamental task you can accomplish with WP-CLI
To download WordPress use this command:
```text theme={null}
wp core download
```
To refine the download further to the version you want use this command:
```text theme={null}
wp core download --locale=en-US
```
This command will download the English version of WordPress
Proceed to install WordPress using the install command:
```text theme={null}
wp core install --url=testing.com --title=Example --admin_user=supervisor --admin_password=strongpassword --admin_email=info@testing.com
```
**Note: Replace the default values with your credentials.**
Test the installation to confirm WordPress has been successfully installed using this command:
```text theme={null}
wp core version
```
Update to the latest version using this command:
```text theme={null}
wp core update
```
**2 . Manage Themes and Plugins**
There are different ways to manage themes and plugins using WP-CLI, let’s take a look at some of the basic options
**Managing Themes via WP-CLI**
To list installed themes use this command:
```text theme={null}
wp theme list
```
To list all inactive themes as a CSV list, use this command:
```text theme={null}
wp theme list --status=inactive --format=csv
```
To change an active theme to twenty-twenty, use this command:
```text theme={null}
wp theme activate twenty twenty
```
To search for themes with Bootstrap support:
```text theme={null}
wp theme search bootstrap
```
Using this command, proceed to install and activate:
```text theme={null}
wp theme install the-bootstrap-blog --activate
```
To enable a theme using Twenty twenty theme, use this command:
```text theme={null}
wp theme enable twenty twenty
```
To update themes use this command:
```text theme={null}
wp theme update --all
```
To list all currently installed plugins, use this command:
**Managing Plugins via WP-CLI**
To install and activate a plugin use this command:
```text theme={null}
wp plugin install litespeed-cache --activate
```
Run this command to update plugins:
***
```text theme={null}
wp plugin update --all
```
**Note that the –all parameter is used to update all installed plugins.**\
This can be changed to a specific plugin by replacing –all with the plugin name.
Using the litespeed-cache plugin, disable and uninstall a plugin:
```text theme={null}
wp plugin deactivate litespeed-cache –uninstall
```
To activate any inactive plugin, use this command:
```text theme={null}
wp plugin activate litespeed-cache
```
To find WordPress cache plugins use the following command:
```text theme={null}
wp plugin search cache
```
To delete plugins use the wp plugin delete command:
```text theme={null}
wp plugin delete litespeed-cache
```
**3. Create a Child Theme**
By using the scaffold command, you can generate a child theme that includes the functions.php and style.css files. We recommend that you do this if you want to make changes to an existing theme. When you use a child theme, any customization won’t be lost after new software updates.
To do this, you’ll simply need to specify the slug for the new child theme, and for the theme, you’re using as the ‘parent.’ In this example, we are creating a child based on the Twenty Twenty theme, and we’re giving it the slug twenty-twenty-child:
```text theme={null}
wp scaffold child-theme twenty-twenty-child --parent_theme=twentytwenty
```
You will get a successful message that the child theme has been created.\
and find the child theme in the specified template.
**4. Moderate Comments**
With WP-CLI, you can quickly create, edit and delete comments making managing comments much easier. There are many comment subcommands you can use, but let’s look at some of the most basic options.
To add a new comment, use this command. This command will add a comment to a post with the post ID of 10, and state the author and contents:
```text theme={null}
wp comment create --comment_post_ID=10 --comment_content="This is my comment" --comment_author="author-name"
```
This command will return a table containing the comment ID and author name for all approved comments on the post with an ID of 5:
```text theme={null}
wp comment list --number=5 --status=approve --fields=ID,comment_author
```
To delete comments, specify the comment IDs individually, like this:
```text theme={null}
wp comment delete 46
```
To delete multiple comments using the force parameter, which permanently deletes comments instead of adding them to the trash bin:
```text theme={null}
wp comment delete 3 25 46 54 --force
```
Using WP-CLI commands you can work through your site’s comments
**5. Update the WP-CLI**
You should always make sure that WP-CLI is updated at all times.
To update WP-CLI run the following command:
```text theme={null}
wp cli update
```
If your version is updated, you will get a successful message confirming this, however, if you are running a version that is not updated, you will be prompted to accept the installation, selecting yes will get WP-CLI updated
With a simple interface like WP-CLI you can perform functions unavailable in WordPress, complete multiple tasks using a single command and improve productivity,
# Installing WordPress
Source: https://kb.verpex.com/wordpress/installing-wordpress
We've made it really easy for anyone who uses our services to go ahead and install WordPress.
The overall procedure takes around 3-4 minutes with the installation time of 60 seconds and under once you've inputted all the required setup details.
To get WordPress installed on Verpex's services, please follow the steps below:
```
Log into your Verpex's cPanel hosting account - you can access cPanel directly from your clients.verpex.com client area > services
Once you're logged in, you'll need to scroll to the bottom of the page till you find Softaculous Apps installer. Please click on Softaculous.
```

**Please click on WordPress and then install now.**
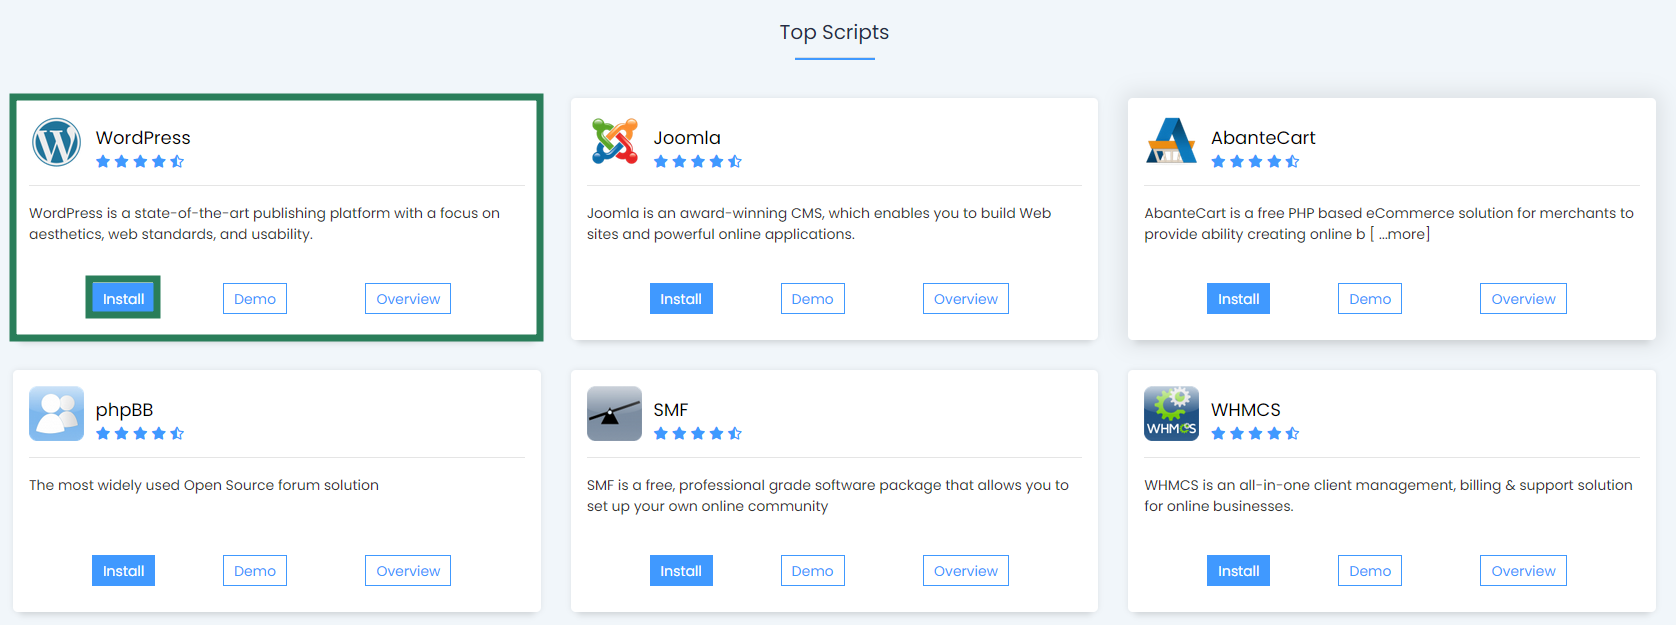
```
Please complete the fields required (The version you may wish to install and the domain you would like WordPress installed on).
Please note, if you require WordPress to be installed on the root of the domain, please kindly remove the text 'wp' from the 'In Directory' section and keep this blank.
```

```
Themes are provided by WordPress to help get you started if you require one, if you already have a theme you'd like to upload please ignore this section as the theme can be changed at any time.
Once you have everything filled, please click install to complete the installation. This process is pretty fast and will take just under 60 seconds.
```
You now successfully installed WordPress, in order to access the WordPress admin area, please enter a browser and enter /wp-admin after as the example below (Please remove the testdomain.com to you're desired domain name set).
[https://testdomain.com/wp-admin](https://testdomain.com/wp-admin)
If you face any issues during setup and need some help, please contact us and we'll be delighted to help you further along with any questions you may have.
# Manually Installing Software
Source: https://kb.verpex.com/wordpress/manually-installing-software
All website software is created to be manually installed. With software such as WordPress, Joomla, and Magento, the installation process is pretty standard.
The first thing you need to do is download the software from your software provider. The version we recommend downloading is the latest version that is stable. The server requirements should also be checked to see if the software needs a specific PHP version. If it does, you can use the cPanel to adjust this.
Then, you need to upload the files for installation to the webspace location where you want them. We suggest that you use FTP/SFTP.
Almost always, the software includes an install file. You will be asked for further information when you go to this file in your web browser. If your software doesn’t have this type of file, it will have a configuration file, and the same information will need to be entered there.
The last thing you will need to do is enter the database credentials. You should create a user and database in cPanel, and these details should be entered here. Keep in mind that localhost will almost always be the server hostname.
The software install is probably going to be complete once you save it, and you can start using it.
Manually Installing WordPress
For instance, when installing WordPress, you will need a hosting company and a domain name for your site to appear online. Next, you will need to decide which type of WordPress installation suits the needs that you have. There are several different methods that use different platforms and software, such as MySQL, cPanel, and FTP with FileZilla.
For those who want to take advantage of the popular five-minute installation that the platform offers, they need to make sure that their host offers a solution like Softaculous. You will need to use cPanel or FTP if you’re going for manual installation.
To manually install WordPress with cPanel, you need to log in to your cPanel, and in the files section, open the file manager and click public\_html to find the directory you want to use. After you’ve selected the directory you want, look at the toolbar and click Upload.
To upload the WordPress .ZIP file you downloaded, click Select File and the Go Back link when the upload is complete. Click the WordPress file and hit the Extract button in the toolbar to extract the files to the right place. Then, a window will be displayed in front of you, asking where the files should be extracted to. Click Extract File(s) to extract everything inside the zip folder.
You will see a WordPress folder in the directory when the files are extracted. To complete the installation, the contents of this folder need to move. To show its files, click on the WordPress folder, selected all to highlight the files, and click the MoveFile button to move them to the domain name’s main root. To do this, remove the section WordPress of the file path from http\://public\_html/wordpress to /public\_html/, and once you’re ready, click on Move File(s).
# Using WP-CLI on WordPress
Source: https://kb.verpex.com/wordpress/using-wp-cli-on-wordpress
Managing WordPress either as a beginner or a developer from the admin panel is straightforward. However, there is another way of managing a WordPress site which involves using the WordPress command-line interface or WP-CLI. This command-line tool lets website administrators manage websites using easy commands rather than navigating the admin panel. You can execute tasks like installing plugins, activating themes and updating WordPress.
The biggest benefit of WP-CLI is saving time when configuring WordPress websites and performing tasks not supported by the WordPress admin panel. For example, you can use a command to install multiple plugins on a WordPress multisite environment at once or generate bulk posts
**How to Install the WP-CLI on Your WordPress Website**
To install WP-CLI on your WordPress website, your environment must have the following specifications:
* A UNIX-like environment (OS X, Linux, FreeBSD, Cygwin)
* The latest version of PHP
* WordPress latest version
* A hosting account with SSH access.
Download the wp-cli.phar file to your root directory using this command :
```text theme={null}
curl -O https://raw.githubusercontent.com/wp-cli/builds/gh-pages/phar/wp-cli.phar
```
Using the command confirm that the file is working:
```text theme={null}
php wp-cli.phar --info
```
To use the wp command and move it to another directory, you need to make the file executable by using the command below
```text theme={null}
chmod +x wp-cli.phar
```
Use this command to move into the final location.
```text theme={null}
sudo mv wp-cli.phar /usr/local/bin/wp
```
The WP-CLI has now been successfully installed. This can be tested by running the command wp –info. The information about the version of the WP-CLI will be\
displayed if everything works. Using the command-line tool, you can start working with your WordPress content and files.
You are now ready to use the WP-CLI tool to manage your site more efficiently.
**Help Documentation to Access the List of WP-CLI Commands**\
Enter the following command to open the WP-CLI built-in documentation
```text theme={null}
wp help
```
To Check WP-CLI Version use the following command
```text theme={null}
wp cli version
```
To see more information about your server and WordPress configuration use this command:
```text theme={null}
wp –info
```
To update WP-CLI, use the following command:
# What’s the Difference Between Managed WordPress Hosting and Cloud Web Hosting?
Source: https://kb.verpex.com/wordpress/whats-the-difference-between-managed-wordpress-hosting-and-cloud-web-hosting
One of the most important decisions you will make when you want to build a website is the type of hosting to purchase. Cost is the major criterion when you want to opt for a type of hosting. Managed WordPress hosting and Cloud web hosting are both types of web hosting, but they differ in terms of the level of management and resources provided. Cloud Web hosting is a type of low-cost plan where you share space on a server with other sites. Managed WordPress hosting means that the server is optimized and solely created for WordPress.
At Verpex, we offer both Cloud web Hosting and Managed WordPress Hosting. Both are competitively priced and viable options, making it difficult at times to choose the right one. We will take you through your main hosting options, and explain how to find a plan that suits your needs.
**Managed WordPress Hosting**
Managed WordPress hosting is a hosting environment specifically designed to host WordPress websites and is optimized for the platform. It typically includes features such as automatic updates, daily backups, and security measures that are tailored to WordPress. Which often includes technical support that is knowledgeable about WordPress and can help troubleshoot any issues that may arise.
It is specifically fine-tuned to deliver the best performance with customized dashboards and all the features you need to manage your website.
Managed WordPress hosting is carefully designed to address the needs of your specific site, it better meets the performance and security needs of sites built using the platform.
Managed WordPress hosting generally provides free automatic backups, it also comes with easy and worry-free features that give you peace of mind and stand out from other hosting packages.
You get access to platform-specific features such as backups, pre-installed sites, automatic WordPress updates, and dedicated WordPress support.
Managed WordPress hosting provides auto-updates, ensuring better security while giving you one less thing to worry about when it comes to your business’ website
The WordPress hosting provider vets plugins to be sure they are of the highest quality and are fully secure
Managed WordPress hosting saves you a lot of time and effort and takes care of basic site optimization on your behalf
Managed WordPress hosting brings a whole new level of performance to your website. The server is optimised for server caching which enables speed on your website, this can ultimately improve SEO and boost ranking on Google
Managed WordPress hosting provides WordPress-specific services, optimized stability, performance, dedicated resources, and powerful tools for your site. it is a set of added services and performance tweaks that sits on top of regular hosting. Because of those services, and tools, it’s somewhat more expensive so you’ll need to factor that into your decision.
We recommend managed WordPress hosting if you are new to WordPress and you don’t have the time or expertise to handle performance and security concerns personally.
WordPress can be used on a cloud web hosting but you will be saddled with the responsibility of managing your environment than if you go with an optimized Managed WordPress hosting package.
**Cloud Web Hosting**
A Cloud web hosting plan is a service that enables you to rent space for your website on a server, gets your site online, and enables people to visit it. There are different types of hosting plans available, and each one differs in terms of price and potential benefits.
Unlike WordPress hosting which is restricted to the WordPress CMS, cloud web hosting allows you to use almost any CMS. Whether you use Joomla, Drupal, Magento, or a tool like DreamWeaver, cloud web hosting will support almost all content management systems and web development software.
As the most affordable hosting in the market, cloud web hosting is usually the best option for small websites as it gives you the ability to get your website live and available for visitors to view
Cloud Web hosting plans are generally less expensive than managed WordPress hosting, but they may not include the same level of support or optimization for a specific platform like WordPress.
In summary, Managed WordPress Hosting is optimized and tailored for WordPress websites, while cloud web hosting is a general solution for hosting multiple websites with shared resources and less specialized support
If you’re just starting out and prefer an easy-to-use interface Managed WordPress Hosting is perfect for you. However, if you require a wider variety of options or have advanced needs in setting up your website, we recommend cloud web hosting. Whatever hosting you choose should depend entirely on your needs and how comfortable you are with managing a website on your own.
# Fixing the White Screen of Death (WSOD)
Source: https://kb.verpex.com/wordpress/white-screen-of-deathwsod
The White Screen of Death (WSOD) is one of the most common errors that occur in WordPress. It is a common issue that can occur for a variety of reasons, including plugin conflicts, theme issues, insufficient memory limits, and server-side problems. The WSOD can also occur when there are errors in the code, such as PHP syntax errors, which prevent the website from loading correctly. When the WSOD occurs, it can be difficult to determine the cause of the issue, as there are no error messages or other information displayed on the screen. However, by following a series of troubleshooting steps, it is possible to diagnose and resolve the problem.
Here are some steps you can follow to try to fix WordPress blank page (white screen):
Note: It's always recommended to take a backup of your WordPress site before making any changes.
**Increase Memory Limit**
This error happens because a script has exhausted the memory limit. To fix this, you need to increase the PHP memory available. You can do this by adding the following line of code to your\
wp-config.php
```text theme={null}
define('WP_MEMORY_LIMIT', '256M');
```
Or follow the detailed instructions in our [knowledgebase article](/cpanel/how-to-increase-your-php-memory-limit) on how to increase PHP memory in WordPress.
**Disable Plugins**
If increasing the memory limit doesn’t solve the problem or the memory limit is already 256M or 512M, the next step is to disable all plugins. You can do this by renaming the plugins folder in your WordPress installation to plugins.bk or From your WordPress admin area
* Go to the Plugins » Installed Plugins page.
* Select all the installed plugins and then select ‘Deactivate’ under ‘Bulk Actions’ drop-down.
* This will prevent all plugins from being loaded and will allow you to determine if a plugin is causing the issue.
* If this fixes the issue, then enable one plugin at a time to know the plugin causing the issue.
* Once you find the plugin causing the issue, you can uninstall and reinstall it or report the issue to the plugin developers.
**Switch to the Default Theme**
If disabling plugins doesn’t solve the problem, you can try switching to the default WordPress theme. This will help you determine if a theme conflict is causing the WSOD. A poorly coded function in your theme’s functions.php file can also cause the white screen of death error. Consider downloading a fresh copy of your theme from its source and then installing it.
* First, connect to your website using an FTP client and go to the /wp-content/themes/ folder. It contains all installed themes on your website.
* Download the current theme as a backup by right-clicking to select, then proceed to download it to your computer.
* Proceed to delete the theme folder by selecting ‘Delete’
* Take a look at your theme’s functions.php file. If there are extra spaces at the bottom of the file, then you need to remove those, and sometimes that should fix the issue.
**Check for Error Messages**
If none of the above steps solves the problem, you should check your error logs for any error messages that might be related to the WSOD. The error logs can be found in the root folder of your website(public\_html folder) in your hosting control panel or by using a plugin such as WP Debug.
**Enable WP\_DEBUG mode**
You can also use the WordPress debug function to see what type of errors are being outputted.\
Locate the wp-config.php file in the root folder(public\_html folder) of your website\
Enable the WP\_DEBUG mode by adding/editing the code below.
```text wp-config.php theme={null}
1
2
define( 'WP_DEBUG', true);
define( 'WP_DEBUG_LOG', true );
```
Once you add this, the blank screen will now have errors, warnings, and notices. These may be able to help you determine the root cause.
If you don’t see any errors, you may still want to check the debug log. Simply visit the wp-content folder on your website using an FTP client. There you will find a new debug.log file containing a log of all errors, notices, and warnings.
**Switch PHP Versions**
The blank page can also be caused by an incorrect PHP version. You can try switching PHP versions to check it.
**Contact your hosting provider**
If you are still unable to resolve the issue, you should contact your hosting provider for assistance. They will be able to help you diagnose and resolve any server-side issues that may be causing the WSOD.
Sometimes, you may have access to the backend, but the front end of the site has the white screen of death. This can happen because of a caching plugin. Simply empty your cache.
# WP Toolkit Lite vs WP Toolkit Deluxe: A Feature Comparison
Source: https://kb.verpex.com/wordpress/wp-toolkit-lite-vs-wp-toolkit-deluxe-a-feature-comparison
**What is WordPress Toolkit?**
WordPress Toolkit is a cPanel-integrated WordPress management solution with an all-extensive yet easy-to-use interface that lets you install, configure, secure, and manage all your WordPress sites. WordPress Toolkit introduced many advanced management options which come in two versions: free WordPress Toolkit Lite and premium WordPress Toolkit Deluxe, which requires a paid license.
**WordPress Toolkit Lite**
WordPress Toolkit Lite is a free WordPress management enabled within cPanel. It offers many advanced tools(A WordPress site management dashboard and a set of tools to install, connect and configure individual sites) not found in the old WordPress Manager.
It allows the customization of new installations, a single interface for the administration of all WordPress sites, the possibility of accessing the administration dashboard of any site with a single click, the management of plugins and themes, automated security changes, automated single site updates and many other useful features.
Here are some of the most useful features that will be available for free in the WordPress Toolkit
**Easy-to-Use Dashboard**
With this dashboard, you can perform different operations on all websites at the same time. WordPress Toolkit dashboard manages all your WordPress sites through an easy-to-use interface. It also displays current updates and security status along with many other features.
**Single-Sign-On**
This allows admins and users to sign in directly to WordPress sites with a single click without having to enter a WordPress website username and password.
**Customizable Installation\
**\
This option allows cPanel users to install new WordPress sites in seconds, and each site can be customized before installation. Customization options include installation path, website title, administrator details, database name and password, and auto-update settings.
**Automatic Single Site Updates**
Automatic Single Site Updates change automatic update settings for WordPress sites and their themes and plugins from cPanel. It ensures your website is always safe from hackers when core updates on plugins and themes are automated on all WordPress websites.
**Automatic Security Hardening**
Security enhancements, limited access to sensitive files, disabling pingbacks, setting security keys and more are automatically applied on a website upon installation with the use of WordPress Toolkit Lite.
**Scan for Websites**
WordPress Toolkit Lite provides seamless integration and scanning of previously installed WordPress websites
**Debug Management**
You can enable an advanced maintenance mode, disable search engine crawling, and enable password protection in the same interface, it also enables WordPress debugging modes from the site dashboard
**Installation of Plug-in and Theme Sets**
This feature allows you to easily create blogs, WooCommerce stores, etc by installing default plugins and themes when installing a site.
WordPress Toolkit Lite offers an amazing collection of tools that make life easier for site owners and resellers who manage multiple WordPress sites.
**WordPress Toolkit Deluxe**
WordPress Toolkit Deluxe is a paid upgrade from the lite version which extends and improves the security and update features of the Lite version. In addition to automatic security enforcement, WordPress Toolkit Deluxe allows users to scan sites and selectively apply security enforcement settings to multiple sites at once. Developers and administrators who manage many sites have at their disposal powerful additional tools to many multiple sites.
Here are some of the most useful features that will be available in the WordPress Toolkit Deluxe
**Site Cloning**
You can clone (make an exact copy of) an existing WordPress installation with a click. This can be useful when developing or testing a new theme, plugin, or site design. Files and databases are automatically copied, configuration files are updated, and you can quickly access the new site on a subdomain. This is very useful for testing changes, without affecting a production website.
**Site Staging**
While the cloning feature is great for testing, changes can now be applied quickly in production. The Copy Data tool can copy parts of a staging site to a production site in minutes. What was once a complex and risky process can now be accomplished with just a few clicks in the WPToolkit interface.
**Smart Updates**
Smart Update lets you test an update without actually affecting the site. Smart Update does this by creating a full clone of the website, running a series of preliminary checks, updating the cloned website, and running the checks again to see if the update breaks anything. The results include before and after screens that you can compare to make an informed decision on whether or not to update your production site.
**Security Rollback**
WordPress Toolkit can apply several changes that significantly increase the security of your sites. However, if any of these changes break a site's functionality, it can be undone with a single click.
**Apply Changes in bulk**
The Deluxe version allows you to apply changes to multiple sites at the same time. For example, you can perform updates, change security settings or install plugins.
These are features available in WordPress Toolkit Lite and WordPress Toolkit Deluxe. Do not hesitate to contact us with any questions and our system administrators will be happy to help you.
# XML-RPC, What it is and how you can Enable/Disable it
Source: https://kb.verpex.com/wordpress/xml-rpc-what-it-is-and-how-you-can-enabledisable-it
What is XML-RPC in WordPress?
XML-RPC is a core WordPress API that allows users to connect to their WordPress website using third-party apps, tools, and services. The xmlrpc.php, which is stored in the root directory of your site, allows remote connection to WordPress and is enabled by default on WordPress since version 3.5.
It will be impossible for various tools and publishing applications to access the website remotely without XML-RPC except by logging directly into the system. However, the REST API has replaced this feature, but WordPress still has it installed due to backwards compatibility.
The biggest downside of keeping the XMLRPC file enabled is that it makes your website vulnerable to hack attacks, like DDoS and brute force attacks, and makes your website slow due to the PHP file eating up a lot of server resources. It is pointless to delete the file, as it will be recreated after a WordPress update. Deleting the xmlrpc.php file will not help, as it might disrupt the dependent functionality of some 3rd-party apps and plugins to interact with WordPress. Disabling it is the best option to keep your site secure. You can disable it by using a plugin or adding some code in your .htaccess file.
**Method 1: Disabling Xmlrpc.php With Plugins**
Installing a plugin is the easiest and fastest way to disable XML-RPC in WordPress.
* Log in to your WordPress admin dashboard using yourdomain/wp-admin
* Go to Plugins
* Search for Disable XML-RPC using the search box in the top right corner and install it
* Once the plugin is installed, click on Activate to activate the plugin on your site and the xml-rpc.php file should be disabled
* And you’re all set. This plugin will automatically insert the necessary code to turn off XML-RPC.
**Method 2: Disabling Xmlrpc.php by Adding a Code in your .htaccess File**
The code is simple and can be of great use if you do not want to worry about new plugins consuming your server resources. You can manually disable XML-RPC using this method and stop xmlrpc.php requests before it gets to WordPress.
* Find and edit the .htaccess file within file manager or use your FTP client to locate this file.
* You may have to turn on the ‘show hidden files’ to access .htaccess.
* In the top right of the File Manager, click on Settings and check the button “show hidden files.”
* Click save and you will now see your .htaccess file.
* Open up your .htaccess file.
* Paste the following code inside your .htaccess file:
```apache theme={null}
# Block WordPress xmlrpc.php requests
order deny,allow
deny from all
allow from xxx.xxx.xxx.xxx
```
Now “Save” the file. It’s that simple. The remote connection using XMLRPC.PHP has been denied.
You can remove this line 'allow from xxx.xxx.xxx.xxx' completely or change xxx.xxx.xxx.xxx to the IP address that can access xmlrpc.php
When a new plugin is installed or a file is modified, it can often break your website, which might be risky. Not to worry, we provide backups which is a safety net should you have a broken website. You can always retrieve a copy of your website [here](/cpanel/how-to-restore-your-website)
Disabling this feature eliminates the risk of external attacks from gaining access to your website.
According to the contributors, the programming of xmlrpc.php is as secure as the rest of the core files of a hosted WordPress website. If you require some of the functions needed for remote publishing on your website and the Jetpack plugin, we are going to show you how to enable xmlrpc.php. So if you use any of the following resources to disable it, simply redo your settings or erase the code to re-enable it.
Disabling XML-RPC on WordPress might not be the only solution to prevent hackers from exploiting your website; you need to install a powerful WordPress firewall to block out bots and malicious IPs.
* Click on the Save button
You have just successfully changed your domain name.
# How to Change WordPress Admin URL
Source: https://kb.verpex.com/wordpress/how-to-change-wordpress-admin-url
To keep your WordPress login page safe and prevent attackers from accessing your admin login, you need to change the login URL to a new unique URL. This could really help when it comes to fighting attacks, hacks, and brute-force attacks.
To change the WordPress Admin URL, you can use a plugin such as "WPS Hide Login" or you can manually edit the functions.php file in your WordPress theme. You can use plugins like iThemes Security, WPS Hide Login plugins, etc.
**NOTE**: Make sure that you generate a full backup of your website before proceeding with any changes,
**Change Your WordPress Login Page Using the WPS Hide Login plugin**
The easiest way to change your WordPress login URL page is by using a free plugin like WPS Hide Login, The plugin is very lightweight, and it doesn’t change any files in the core or add rewrite rules.
* Log into the WordPress dashboard
* Go to plugins
* Add new
* Search for the WPS Hide Login plugin
* click Install Now.
* Proceed to activate the plugin
* After activation, Go to Settings > WPS Hide Login
* Enter a new URL for the login page and save the changes
* The link to the WordPress Dashboard will be changed from testing.com/wp-admin to testingname.com/login.
* Your new login page will become effective and your old login URL will no longer work!
**Change Your WordPress Login Page Using The functions.php File**\
**Manual Method :**
* Access the functions.php file in your WordPress theme
* Add the following code:
```text theme={null}
function custom_admin_url() {
return '/my-secret-login';
}
add_filter('login_url', 'custom_admin_url');
Replace '/my-secret-login' with your desired login URL
Save the functions.php file
```
You may need to log out and log back in for the changes to take effect\
Please note that changing the URL of the login page does not provide full security for your website, it is just an extra layer of protection to make it harder for hackers to find the login page.
Another way to change your WordPress login page is to edit your .htaccess file by using a password-protect to protect your login page with a .htpasswd. This will restrict those without passwords to access the login page.
# How to Change WordPress Site Address (URL)
Source: https://kb.verpex.com/wordpress/how-to-change-wordpress-site-address-url
You need to know how to change your WordPress site URL whether you are updating your site to use HTTPS, changing your domain name, migrating from a local server to a live site, or transferring to a subdomain.
We will provide you with a step-by-step procedure on how to change your WordPress site. Make sure to generate a full backup of your website before making any changes.
**Steps on How to change your WordPress site URLs**
**Change the WordPress URL in your WordPress Admin Dashboard**
Adjusting your WordPress URL in the admin dashboard may be all you need to change a domain name, however, some sites may have the URL hardcoded in the wp-config.php file in these cases, you will have to use method 2 below.
* Log into your WordPress admin dashboard
* Click on Settings → General.
* Update WordPress Address (URL) line and Site Address (URL) lines with your new domain name. Both of these fields(Site Address and WordPress Address URL) should be the same.
* Save changes
* Visit your website to make sure everything is working as it should.
**Using wp-config.php File**
You need to access the wp-config.php file first, this file is located in the root folder of your\
website.\
To change this file you need to connect to your website using an FTP client.
* Locate the wp-config.php file, which can be found in the root folder for your domain.
* You need to add the code below just above the line that says ‘That’s all, stop editing! Happy publishing’.
define( 'WP\_HOME', '[https://examplesite.com'](https://examplesite.com') );\
define( 'WP\_SITEURL', '[https://examplesite.com'](https://examplesite.com') );
* You will need to replace ‘[https://examplesite.com’](https://examplesite.com’) with your new domain name.
* Save changes and upload the file back to your server.\
Visit your website to make sure that everything is working fine.
**Using functions.php File**
For some reason, you are unable to access your WordPress admin panel, then you will need to use this method.
* Using an FTP client, you can connect to your WordPress site
* Locate your WordPress theme folder. For most users, this will be something like /wp-content/themes/your-theme-folder/.
* Locate functions.php file via FTP
* using your preferred text editor like Notepad, open your functions.php file and edit it
* Add the code below to the bottom of the file.
update\_option( 'siteurl', '[https://examplesite.com'](https://examplesite.com') );\
update\_option( 'home', '[https://examplesite.com'](https://examplesite.com') );\
Replace ‘[https://examplesite.com’](https://examplesite.com’) with your own site URLs.
* Save changes and upload the file back to your server using FTP.\
Visit your website to make sure everything is working as it should.
This method updates the site URLs in the database. You need to remove the two lines of code from your WordPress functions.php file once your website is working properly.
**Using SSH**
* Enable SSH access in your cPanel using this guide.
* Log into your cPanel > Advanced > Terminal:
* Find your website directory using the command below:
cd rootdirectory
* Where the root directory is the main folder of your installation (e.g., public\_html for the main domain).
* Run the command below:
wp search-replace '[http://oldsite.com'](http://oldsite.com') '[http://newsite.com'](http://newsite.com')
The links in your database will be changed to the new domain name.
**Using phpMyAdmin**
In case you do not have access to the WordPress admin dashboard or Terminal, follow these steps to change the URLs via the database.
You can update WordPress site URLs by changing them directly in your WordPress database. This can be done from within your hosting account dashboard using phpMYAdmin. Your site could break if the changes made to your database are not done properly. So, it is recommended to take a WordPress database backup or check with a developer. This is really important and will help you undo any WordPress database changes if anything goes wrong.
* Log into your cPanel
* Locate the database associated with your website in wp-config.php file
* Click phpMyAdmin in the ‘Databases’ section.
* Click on the database in the left-side column and wp-options(by default wp\_ is the database prefix but it can be different for your installation)
* You will see rows inside the options table. You need to locate the ‘option\_name’ column where ‘siteurl’ and ‘home’ will be listed.
* Click on the pencil ‘Edit’ icon to the left of each row and change the ‘option\_value’ field to your new site URL.
* Click the ‘Go’ button in the bottom right corner to save your database changes.
Visit your website to make sure everything is working as it should.
Some references in the database may not be reassigned to the new domain, in this case, you have to update all links following the steps below.
* Locate the database associated with your website in wp-config.php file
* Right-click on wp-config.php > View or Edit option:
* Download the backup of the database. You can take a backup from within your cPanel > Files section > Backup menu
* Open .sql file with some text editor and update all URL references
* Using Ctrl + F and select Replace option.
* Fill in the corresponding fields
* Replace your old domain with your new domain and click Replace All:
* Save changes.
**Create a new database in your cPanel account**
* Upload the updated database using the phpMyAdmin menu in the Databases section
* Select the newly created database from the list on the left and use the switch to Import tab. Import the database .sql file from your local device
* Once done, you will need to update the wp-config.php file in your installation root folder:
These are the fields to be changed\
define 'DB\_NAME' line – the name of the new database you've created in MySQL Databases menu.\
define 'DB\_USER' line – the name of the new user you you've created in MySQL Databases menu.\
define 'DB\_PASSWORD' line – the new password you've set for database user in MySQL Databases menu.
* Save changes.
* Delete the old database once you confirm that everything is working fine
* Proceed to your WordPress admin page to re-generate the permalinks to make sure they have the new URL.
* Log into your WordPress dashboard in the Settings menu > Permalinks.
* If you had a Post name, switch it to Plain
* Save changes and then revert everything back
**Using WP-CLI**
This option uses the WordPress Command Line Interface (WP-CLI) to access and edit your site. The process involves using command lines to run specific tasks as such you need the help of a developer.
The commands to edit your URL are as follows:\
wp option update home '[http://examplesite.com'](http://examplesite.com')\
wp option update siteurl '[http://examplesite.com'](http://examplesite.com')\
Replace “examplesite” text with your existing domain to get this done!
You have a number of methods to choose from to change your WordPress URL
You can change the settings in the WordPress admin, hardcode them in your wp-config.php file, edit the database, use WP-CLI or use a plugin\
. Work through the methods above to find the one that suits your site, and you’ll have your new WordPress URL working in no time.
# How to create a WordPress staging site with cPanel
Source: https://kb.verpex.com/wordpress/how-to-create-a-wordpress-staging-site-with-cpanel
**What Is a WordPress Staging Site ?**
A staging site is a cloned copy of a production site that is used to test changes before making them live. In simpler terms, it is a copy of your website where you can make changes that do not alter your live website until you deploy them. Staging sites help you catch errors, so you do not damage your website. Moreover, it also helps to avoid downtime and bad user experience. It contains the same data and files, but it is not publicly accessible and usually hosted on a different subdomain. In this article, we will explain what you need to know about WordPress staging sites.
**Why do you Need a Staging Site ?**
If a business depends on its WordPress site or WooCommerce store, editing the live production installation is risky. WordPress staging sites also called development sites or testing sites, are safe alternatives. Ideally, any edit more complicated than publishing a post is thoroughly tested before it goes live.
**Cases for staging sites are:**\
Testing new landing pages to ensure each component works as expected before potential customers visit.\
Checking updates for compatibility issues\
Creating a new theme or modifying the current theme.\
Modifying the site’s code to add new features.\
Staging sites are also useful when you want to allow developers and designers to work on your site but don’t want to give them access to the production\
installation.
Now that you know the benefits of staging a website before production, let’s look at how this task can be accomplished.
WordPress is one of the most popular content management systems (CMS). However, it requires regular updates to ensure full functionality and optimal performance. When performing updates, it is always recommended to have a separate clone of the site in a staging environment to test the compatibility of patches and updates with the site and plugins.
Here are the steps for staging the cPanel site.
**Step 1: Create a Subdomain in cPanel**
* To create a subdomain in cPanel, login to Verpex cPanel.
* Click Subdomains in the Domains section.
* Give your subdomain a name (e.g. test), then click the Create button to add your subdomain, which you can use to import your live WordPress site. Note the location of the staging folder in your directory. The subdomain is where you will access your new staging environment.
Using File Manager\
Manually create a staging site using File Manager:\
Login to your cPanel, and click Advanced\
files. In the public\_html folder\
Navigate to File Manager, under the public\_html folder, download the entire root folder of the website for which you want to create a staging site.
**Step 2: Copy the Database Using phpMyAdmin**
Your WordPress site will have at least one associated database. The database name can be found in the wp-config.php file in your public\_html folder. Once you know the database name, access phpMyAdmin in the Databases section of cPanel.
* Go to phpMyAdmin
* Click on your database name(the database name copied from wp-config.php).
* Choose the Quick export and SQL format options.
* Click Go, this option downloads a copy of the site’s database on your computer.
**Step 3: Create a Database User and Assign it to a Database in cPanel**
* A new database that will act as a clone of the live one has to be created.
* To create a new database, click MySQL Databases in the Databases section of cPanel.
* Scroll down to the MySQL Users section, and click Create a database user
* Enter the username, and password.
* Once the user has been created, you need to add the User to the database
* Scroll down to the Add User To Database section, select the newly created database and click Add.
* Check the box next to All Privileges and click Make Changes.\
You now have two databases listed on the left side menu in your phpMyAdmin
* Click the new database, then click Import.
* Click Choose File to upload the .sql file which is the backup of the live website’s database into the new database.
* After completing all necessary selections, click Go to finish the database import.\
Depending on the size of the uploaded file, it might take from a few minutes to a few hours. After the import is complete, you have two databases with the same database tables.
* After cloning the database, you need to modify the cPanel staging site’s URLs.\
Do so in phpMyAdmin, click on the wp\_options table, and edit the home and site URL options. Click Edit for each individual option to update the URLs.
**Step 4: Copy Website Files in File Manager**
The next step is to copy the files now that the database and user have been set up.. You can do this through file transfer protocol (FTP) or through cPanel's File Manager.
* Log into cPanel, click File Manager
* Locate and open the public\_html folder
* Click Select All
* Click Copy.
* The interface prompts you to set a destination for the cloned files. Enter the directory where your new subdomain is hosted. If you do not know which directory it is, go to the home screen and click Subdomains in the Domains section.
Once the files have been copied, you will need to type in the new database information: database name, database user, and password.
* Go to the File Manager window.
* Right-click on the wp-config.php file, and select Edit.
* In the Database settings section, modify the wp-config.php file with the correct database credentials. .
// **Database settings - You can get this info from your web host** //\
/\* *The name of the database for WordPress*/\
define( 'DB\_NAME', 'budd\_testing' );
/\* *Database username*/\
define( 'DB\_USER', 'budd\_testing' );
/\* *Database password*/\
define( 'DB\_PASSWORD', '\' );
/\* *Database hostname*/\
define( 'DB\_HOST', 'localhost' );
/\* *Database charset to use in creating database tables.*/\
define( 'DB\_CHARSET', 'utf8mb4' );
/\* *The database collate type. Don't change this if in doubt.*/\
define( 'DB\_COLLATE', '' );
* After adding the correct credentials, click Save Changes.
**Step 5: Create A Record for the Subdomain**
An A record needs to be added to your domain name system(DNS) provider to enable you to use the cPanel staging site. The A record has to be pointed to the IP address listed in the General Information section in cPanel as a Shared IP Address. Once the DNS propagation is complete, your new cPanel staging site will be accessible using your chosen subdomain. However, to avoid potential problems with links in the database, replace them to match the subdomain of the staging website.
Instead of manually checking the directories (which can take hours), the easiest way to replace them is with a plugin, such as Better Search Replace. With the plugin installed, you can search and replace all instances of the old domain with the new one.
A WordPress staging site has its advantages and disadvantages:
**Advantages**\
**Risk-free environment:** A safer environment to tweak your site or try out major updates without risking the live website functionality.\
**Early error prevention**: Helps debug WordPress to discover critical issues and system crashes before the site goes live.\
**Flexible configuration:** It can be configured locally or online, depending on your preferences.\
**The best possible output**: It allows you to create a better site since you can test everything thoroughly before launching it.
**Disadvantages**
For beginners who have yet to learn WordPress, setting up a staging site can seem like a challenge at first. Creating a WordPress staging site online may include additional plugin or hosting costs. You will need to take some time to test the changes on the WordPress staging site and repeat the same changes on the live version of the site.
**Conclusion**
Due to frequent security threats and updates to WordPress themes, plugins and core files, staging sites are necessary. Knowing how to create a staging site in a cPanel is straightforward and easier than undoing changes that might break a production site. Additionally, our support team is available around the clock to assist you with cPanel functionality.
Expert Tip\
Go through all the possible use cases with the changes you made. Only after you find no issues with them, then push the changes to safe production.
# How to Debug WordPress® with cPanel and WordPress Toolkit?
Source: https://kb.verpex.com/wordpress/how-to-debug-wordpress-with-cpanel-and-wordpress-toolkit
This article provides a step-by-step explanation on how to quickly and easily debug your WordPress site using the WordPress Toolkit in cPanel. The WordPress Toolkit provides a convenient, easy-to-use interface in cPanel that you can use to set up and manage WordPress websites.
WordPress’s greatest asset is that it simply works, the average user has little or nothing to worry about. As with any complex software, there are bugs in WordPress’s code, plugins, themes and features that could cause unexpected errors. Although WordPress has debugging tools to troubleshoot these issues but using them can be cumbersome and time-consuming.
When facing issues on a WordPress site, enabling and configuring debug mode may be helpful. WordPress toolkit allows you to check your site’s security and fix issues from one interface. CPanel's WordPress toolkit makes debugging easier and faster by providing an intuitive interface for identifying errors.
WordPress debug mode instructs the software to log error messages and warnings generated by the underlying PHP code. Error logs help developers determine the cause of unexpected behaviour. Logs reveal information about the internal state of WordPress that should be kept private. Debug mode, by default, prints errors on WordPress HTML pages, but you can change this behaviour in the configuration settings.
**What do these options do?**
**WP DEBUG**: It enables and disables debugging. Debugging is usually disabled because it consumes server resources and poses a security threat\
**WP\_DEBUG\_LOG**: When enabled, WordPress writes error messages to a file called debug.log, located in the wp-content directory of the site\
**WP DEBUG DISPLAY**: Checks whether error messages are displayed on WordPress pages or not.\
When debugging a staging or development site, it is useful to show an error message where they are generated; however, when debugging a production site, disable this option and use the debug log instead\
**SCRIPT DEBUG**: This option instructs WordPress to use unminified CSS and JavaScript files to find bugs in front-end code.\
**SAVEQUERIES**: This option saves database queries to a PHP array, which can be viewed on a page or accessed in code. Do not forget to turn off this option after debugging because enabling it can severely degrade your site’s performance.
Follow these steps to debug WordPress with WordPress Toolkit
* Log in to cPanel. Please see[ this article](/cpanel/how-to-access-cpanel) if you do not know how to log into your cPanel
* cPanel ->> Domains - WordPress Toolkit icon
* Open WordPress Toolkit: This page opens with a list of installed WordPress sites.
* From the WordPress Toolkit page, Select a site in the WordPress Toolkit interface and click on the Debug option in the Tools section to enable debug mode.
* Under a site listing header, under Status, click Check Security.
* After choosing debugging options, click the OK button
* The scanning of your website begins, and WordPress will start logging errors. If you have WP DEBUG LOG enabled, you can view errors logged in the file manager by navigating to your WordPress site's wp-content directory and opening debug.log.The toolkit displays a list of issues and suggests improvements once the scan is complete
* Check the box next to the issue, and then click Secure.
These issues can be fixed manually and resolved automatically if you have WordPress Toolkit Deluxe. To check for the integrity of WordPress application files and confirm it has not been tampered with click Verify Checksums.
The steps below provide you with a list of debugging options using the WordPress Toolkit
**Identifying Bad WordPress Plugins**
Non-developers can have a hard time reading PHP error logs, and there are easier options if you just want to identify and disable a badly behaving plugin. Faulty plugins can be identified through a process of elimination, which involves disabling plugins one by one until the problem is resolved, deciding the plugins that are faulty and uninstalling them.
* In the WordPress Toolkit interface, select a site
* Click on the Plugins tab.
* The plugins table contains an option that activates and deactivates individual plugins.
* Deactivate the plugins one by one and check if the issue is resolved.
* Once the culprit is found, check the box next to the plugin and click the remove button to uninstall
**Enable Maintenance Mode with WordPress Toolkit**
Debugging mode is not recommended on a production website, it should only be used on staging and testing sites. If you find a bug on a live site that affects user experience, you can combine debug and maintenance modes. Maintenance mode displays a static page to notify users that a site is unavailable. When you update plugins and themes, WordPress automatically places the site in maintenance mode, but you can disable it using the WordPress Toolkit.
* Open WordPress Toolkit
* Navigate to the site you want to debug.
* Click the switch in the lower right corner of the interface to enable maintenance mode.
* Click the adjacent configuration icon to configure the maintenance mode page
* Make your changes, and then click the preview button to make sure everything is in order.
**Restoring WordPress Backups with WordPress Toolkit**
The fastest way to fix a damaged WordPress site is to restore from a backup made before the bug appeared. WordPress Toolkit's backup and restore interface makes it easy to restore your site to an earlier point.
* Launch the backup/restore tool for the site you want to repair.
* Select a recent backup from the list
* Click the restore button.
Restoring reverses changes made to the site after the backup was created, so it's best to create a new backup before making any changes. As you can see, the backup/restore tool makes backup and restore easy.
WordPress Toolkit in cPanel makes it easy to install, manage, and debug any number of WordPress sites, allowing WordPress hosts to provide a better user experience while keeping support costs under control.
# How to Delete a WordPress site
Source: https://kb.verpex.com/wordpress/how-to-delete-a-wordpress-site
Deleting a WordPress Site
Deleting a site will completely get rid of it and you will be unable to view the website. It is important to note that this step is irreversible and you will lose all the content on your site so make sure to back up your website's files and database before proceeding
* Log into your hosting account from your client area
* Go to Softaculous App Installer

* Select the WordPress website you wish to delete from your current installation
* Click the dustbin icon in front of the WordPress installation you wish to delete and delete

* You will see a pop-up window confirming that you would like to delete your WordPress site, click yes to proceed

* You just successfully deleted your WordPress
Now proceed to delete the database as well\
From within your cPanel click on MySQL Databases\
This displays a list of databases, select the database of the site that you have already deleted WordPress installation\
Delete the database and the user associated with it.

***
You can permanently and completely delete your WordPress.com site by following the steps below. WordPress.com provides support for site deletions that have been accidentally deleted or changed of mind. It's possible to revert the site deletion within 30 days of deleting it. Your site will disappear forever if you don't.
* Click **Tools** on your WordPress.com website's dashboard.
* Select to delete a site
* You will be offered the option of backing up your content.
* Enter the name of the WordPress website you wish to delete.
* Click to Delete This Site.
* Now login to your WordPress.com Dashboard
* And click **My Websites** > **Settings.**
* Scroll down and click to permanently delete your site.
Another way to delete the WordPress, can be deleted from WordPress Manager by Softaculus inside your cPanel.
* Go to WordPress Manager by Softaculus
* Click 'Scan'
* Then, click delete button on the website that you want to delete
# How to Edit My WordPress Website in cPanel Using WP Toolkit
Source: https://kb.verpex.com/wordpress/how-to-edit-my-wordpress-website-in-cpanel-using-wp-toolkit
WordPress Toolkit is the most popular option to manage WordPress websites, and it is embedded with an easy-to-use interface and various features. With these features, you can easily edit your website. So, today we plan to talk about how to edit WordPress using the WP toolkit.
Before we dive deeper, we need to clear some sub-topics. So, first, we will talk about WordPress Installation using the WP toolkit and then the features, and remember there are two different versions of the WordPress toolkit; the Lite version and the Deluxe version.
**WordPress Installation Via WP Toolkit**
This section will shed light on installing WordPress Using the WP toolkit; This is an easy process. If you follow the mentioned steps correctly, there won't be a problem.
**Step 01** - First, log in to your cPanel account.
**Step 02** – Then click on the WordPress Toolkit button near the WordPress Manager icon.
**Step 03** – Now click the Install WordPress button. A window will pop up. In that window, you can see four different tabs: General, WordPress Administrator, Database, Automatic Update Settings. Fill in the necessary data to each tab and start the installation process.
**Step 04** – Finally, install the recommended plugins and themes.
**How to Manage and Edit Your Website Using WP Toolkit?**
After the installation, you will be able to see the WP toolkit. You can see four options; Dashboard, Plugins, Themes, and Database. So, in this section, we will talk about these four options. You can manage and edit your WordPress website. So, let's get started.\
Dashboard
**Log in**: You can log in to the WP site from here.
**Setup**: Using this button, you can easily change your WordPress website's password.
**File Manager**: If you need to review the files on your WP website, you can use the File Manager button; it will show all the files associated with the WP website.
**Copy Data**: With Copy Data, you can copy data from one site to another easily.
**Clone**: This button enables you to clone the original website. You can test new features without disturbing the original site with a clone site. Also, it allows you to select the files and database tables that need to be copied into the original site.
**Backup/Restore**: This option allows you to backup and restore your website. If something goes wrong while running your site, this feature will help you greatly.
**Plugins**
In this tab, you can see all the plugins that you have to install to your WP website. Also, it will allow you to install new plugins, and you don't have to go to the WordPress Dashboard; you can complete it by using the WP toolkit.
**Themes**
Like in the WordPress Dashboard, you can access all the themes you own from here. Moreover, this is an easy and quick way to apply and test new themes, and you can delete and install themes from the WP toolkit without much effort.
**Database**
In the Database tab, you will be able to change the database's user name. But don't change that unless you have to. Also, you can open the database within PHPMyAdmin.\
How to Activate Maintenance mode in WordPress?
WordPress Maintenance mode allows its developers to display a notice to website visitors regarding the unavailability of the website. It is handy while you are developing or updating the WP website. You can easily enable and disable the Maintenance mode using the WP toolkit. So, let's check that out.
**Step 01**- Log in to your cPanel account.
**Step 02** – Then, go to the Application section. Select WordPress Toolkit.
**Step 03** – Once you have completed the process, select the correct website to turn on the Maintenance mode. So, select the correct website from the dropdown list.
**Step 04** – Finally, enable the Maintenance mode by switching the toggle button; now, your WP website will display a notice saying that the site is currently unavailable whenever someone tries to visit your site. You can change the display message picture and count downtime according to your needs.
**Tools**
On the WordPress Toolkit window, go to the dashboard; the right side column shows five different tools. These tools can be used to manage and edit your WP website. So, in this section, we will talk about them one by one.
**Search Engine Indexing**: This tool is very valuable. With this, you can turn on or off the indexing and index. So, you can hide your site from Google search results.
**Debugging**: Whenever the WP site is developed, multiple bugs can be created; So to fix these issues, you can use debugging mode. Simply turn on the debugging before your site goes live, and it will identify all the errors that need to be fixed.
**Password Protection**: This feature allows you to change or set new password access to your website. It is a good feature if your site is still in development stats. In that kind of situation, you can set a password to your site; So when password protection is on, visitors cannot view your site unless they provided the correct password.
**WP-Cron**: With the WP-Cron feature, you can schedule tasks various takes to run on your website. Using this feature will save lots of time for you, and it allows the WP toolkit to change the necessary steps.
***Hotlink Protection***: This is one of the best features in the WP toolkit. It blocks other sites from using your images. Most of the time, the user will copy your images from one site to another. This is done by gathering the image location or image URL. But when Hotlink Protection is on, an outsider cannot copy your images to their websites.
**Wrap Up**
We hope that, with this article, you were able to get a good idea about how to edit and manage your WP website using WordPress Toolkit. There is plenty of tools and features available in the WP toolkit. So, you need to learn how to use these tools properly.
# How to improve WordPress Website Security with these Tips?
Source: https://kb.verpex.com/wordpress/how-to-improve-wordpress-website-security-with-these-tips
Improving WordPress SEcurity
WordPress is one of the most popular and powerful blogging content management systems which faces a lot of security issues and makes it vulnerable to all sorts of attacks. This throws the question– is WordPress secure?
Of course, WordPress is secure regardless of its vulnerable state. Lack of security awareness is one of the major reasons for security breaches which is why it is best to apply precautionary security measures before your website gets hacked.
**Why Do You Need to secure your WordPress Website?**
You risk losing important data, assets, and credibility if your WordPress website is hacked. The cost of damages cannot be measured and you sure do not want to go through the heartache of a hacked website
**How do you Secure your WordPress website?**
There are quite a few simple WP security tips that can help you secure your WordPress site
* Keep your WordPress and all plugins and themes up to date and remove unused plugins and themes.
* Use a strong and unique username and password for your WordPress account, and avoid using "admin" as your username.
* Limit the number of users with administrative access to your website and use strong passwords for each account.
* Change WordPress Admin URL
* Use a security plugin, such as Wordfence or iThemes Security, to help protect your website from common security threats.
* Limit the number of login attempts to your website, so that hackers can’t try multiple passwords in rapid succession.
* Use a web application firewall (WAF) to help protect your website from common web attacks.
* Keep regular backups of your website so that you can restore it in case of an emergency.
* Install an SSL certificate to encrypt data transfer between the browser and the server.
* Use two-factor authentication as an additional layer of security.
* Set up a safelist and blocklist for the admin page.
* Migrate to a more secure web host.
* Disable file editing.
* Disable the XML-RPC feature.
* Hide your WordPress version.
* Regularly monitor your website for any security breaches or suspicious activity and scan for malware
By following these steps, you can greatly reduce the risk of your website being hacked or compromised, and help ensure that your website remains secure.
Applying these security measures is a continuous process that can help reduce the risks of cyberattacks.
# How to Increase WordPress Memory Limit
Source: https://kb.verpex.com/wordpress/how-to-increase-wordpress-memory-limit
Follow these steps to increase WordPress memory limit:
* Log into your cPanel from within your Verpex client account
* Locate and click the **File manager** menu in the **Files** section
* Click **Public\_html**
* Search and select **wp-config.php** file and right- click Edit
* Add the following code right before the / *That's all, stop editing! Happy blogging.*/' line:
```text memory_limit code theme={null}
define( 'WP_MEMORY_LIMIT', '512M' );
```
You can enter any value where 512M was stated. 512M is the memory limit you want to set:
You can also change the WP\_MEMORY\_LIMIT via the wp-includes folder and edit the default-constants.php file.
To confirm whether your changes have got into effect, create a PHP info.php file. To create an info.php file, follow the steps in this [guide](/cpanel/how-to-create-a-phpinfo).
# How to Install a WordPress Theme
Source: https://kb.verpex.com/wordpress/how-to-install-a-theme
Installing a WordPress Theme
To create a website that matches your brand and looks professional, you need to install and activate a WordPress theme.
You can install a WordPress theme using the WordPress directory, download it manually, or use an FTP client.
**1. Install Using the WordPress Theme Directory**
Follow these steps if you are going to use a free theme:
* Log into your WordPress dashboard,
* Locate Appearance and click Themes.
* Next, click the Add New button at the top of the page.
* Hover above your theme of choice to start the installation process
* You can get a preview of your website using the theme by clicking the Live Preview button.
* Click Activate to use the theme
* Visit the site to see how everything looks.
**2. Install Through Downloading WordPress Themes**
If you purchased a theme from a developer, you need to upload before installing. Follow the steps below to upload and install a theme.
* Download the theme’s .zip file to your local computer.
* Log into your WordPress dashboard,
* Locate Appearance and click Themes.
* Click the Upload Theme button at the top of the page to upload a theme you have previously downloaded.
* Click Choose File.
* Select your theme’s .zip file on your computer
* Click Install Now and wait for the uploading process to complete.
* Click Activate to use the theme straight away
**3. Installing a WordPress Theme via FTP**
A File Transfer Protocol (FTP) is a protocol that allows file exchange between computers and servers on a network.
* Open Filezilla, enter your login details and click Quickconnect. Follow the steps in this [guide](/cpanel/using-ftp) to connect via FTP if you are not familiar with this process.
* Unzip the theme file first.
* Inside Filezilla, search for wp-content inside your WordPress directory, and open it.
* Go to the themes folder.
* Click the folder containing the template files.
* Drag and drop it into the themes folder. Your new theme will appear on the list of WordPress themes.
* Login to your WordPress dashboard,
* Locate Appearance and then click Themes
* Search for your new theme on the list of installed themes.
* Click Activate.
* Check out how you like your new site design.
A WordPress theme gives a consistent design to a WordPress site while maintaining its core features. Consider your site type, compatibility, and budget before installing a theme.
# How to Install a WordPress Plugin.
Source: https://kb.verpex.com/wordpress/how-to-install-a-wordpress-plugin
Plugins are the cornerstone of the WordPress ecosystem. They allow you to add new features to WordPress such as a contact form, layout, shopping cart, etc. They make the CMS (Content Management System) unique among its peers because of the sheer extensibility they bring to the platform. Many users are attracted to WordPress because of the plugins, but they don't know how to install them. If this is you, don't worry. We'll walk you through how to install a WordPress plugin in 3 different ways, so you'll never run out of the cool stuff your site needs.
You can install a WordPress plugin using a search, uploading the plugin and manually installing a WordPress plugin via FTP.
**Installing a Plugin using WordPress Plugin Search**
The easiest way to install a WordPress plugin is to use the plugin search. The only downside to this option is that a plugin must be in the WordPress plugin directory which is limited to free plugins only. The first thing you need to do is:
* Search for plugins that you want to install in the WordPress admin area
* Find the plugin by typing the plugin name or the feature you are looking for.
* After that, you will see lots of listings, choose the plugin that suits you best.
* You will notice that the ‘Install Now’ button will change into the ‘Activate’ button.
* A WordPress plugin can be installed on your site, but it won't work if you don't activate it. So go ahead and click on the activate button to start using this plugin on your WordPress site.
And with that, you have installed a WordPress plugin in the easiest and fastest way possible.
**Installing a Plugin using the WordPress Admin Plugin Upload**
Paid WordPress plugins cannot be installed using the first method because they are not listed in the WordPress plugin directory, as such the upload method was introduced to install such plugins. To install WordPress plugins using the upload option in the admin area, follow the steps below:\
You need to first of all download the plugin from the source which will be a zip file. Do not unzip any plugins that you download this way. WordPress reads the compressed archive, so you will always be uploading the .zip itself, not the files within).
* Next, go to the WordPress admin area and click Plugins -> Add New.
* Click on the ‘Upload Plugin’ button at the top of the page.
* Click on the ‘Choose File’ button and select the plugin file that you have previously downloaded to your computer.
* Select the plugin zip file to upload and install in WordPress
* After selecting the file, you need to click on the ‘Install Now’ button.
* WordPress will upload the plugin file from your computer and install it. You will get a success message after the installation is complete.
* Once installed, click on the Activate Plugin link to start using the plugin.
* Once complete, you will have installed a WordPress plugin via upload. The newly installed plugin will appear in the list as if you had installed it directly through the dashboard search.
**Manually installing a WordPress plugin via FTP**
Installing a plugin via SFTP is not much different from installing via download. You will need to download the plugin source file first(it will be a zip file). Then you need to extract the zip file to your computer. Extracting the plugin zip file will create a new folder with the same name. This is the folder you need to manually upload to your website using an FTP client. You would need access to connect to your host via the FTP manager. If you don't have your FTP username and password, contact your hosting provider and ask them.
* Open the FTP client on your computer and connect to your website using the login credentials provided by your host.
* Once logged in, you need to go to the /public\_html/wp-content/plugins/ folder.
* Next, upload the folder you extracted from the zip file to the /public\_html/wp-content/plugins/ folder on your web server.
* After uploading the files, you need to visit the WordPress admin area and click on the Plugins link in the admin menu.
* You will see your plugin successfully installed on the plugins page.
* Click on the Activate link under the plugin to start using it.
**Conclusion**
Without plugins, WordPress is still a fantastic platform that can do a lot. With plugins, however, it can do just about anything. By following the steps above, you can safely install plugins you download from anywhere. However, we would like to warn you that downloading plugins from untrustworthy sources and installing them can lead to compromised sites, malware and various other negative consequences, so don’t install them. The WP.org repository and developer websites are secured places to download a plugin from.
# How to Install WordPress via WP-CLI
Source: https://kb.verpex.com/wordpress/how-to-install-wordpress-via-wp-cli
Installing WordPress with WP-CLI takes just a few commands. You need to follow the steps below to install WordPress via the WP-CLI interface.
Using the WordPress command-line interface Navigate to the public\_html folder to access and manage your website:
```text theme={null}
cd /home/username/public_html
```
Download the newest WordPress core version once you are in the public\_html directory:
```text theme={null}
wp core download
```
Enter the wp-config create command to MySQL database credentials to WordPress:
```text theme={null}
wp config create --dbname=wordpress --dbuser=user --dbpass=password --dbhost=localhost --dbprefix=wp_
```
**NOTE: Replace the default values with your database details.**
To complete the WordPress installation use the wp core install command:
```text theme={null}
wp core install --url=yourdomain.com --title=Site_Title --admin_user=admin_username --admin_password=admin_password --admin_email=testing@email.com
```
**NOTE: Replace the default values with your credentials.**
After the installation is complete, you should see a successful message.
**How to Reinstall WordPress Core via WP-CLI**
Using the same WordPress installation command to reinstall the core software, use the skip-content option to download WordPress without the default themes and plugins and the force option to overwrite the existing files.
```text theme={null}
wp core download --skip-content --force
```
**Manage Content via WP-CLI**\
This method can be useful for tasks such as creating bulk posts that can’t be done on WordPress admin panel
To see the list of all posts, use this command:
```text theme={null}
wp post list
```
To delete a post use this command:
```text theme={null}
wp post delete 1
```
To create a new post, use this command:
```text theme={null}
wp post create --post_status=publish --post_title="This Post Was Created With WP-CLI" --edit
```
This command will open the Vim text editor. Input the text editor's content, exit Vim by typing:wq then press Enter.
To generate 5 posts, enter this command:
```text theme={null}
wp post generate --count=5
```
To import all images from the images\_for\_site folder use this command:
```text theme={null}
wp media import images-for-site/*
```
# How to Log in to WordPress
Source: https://kb.verpex.com/wordpress/how-to-log-in-to-wordpress
If you've just setup WordPress (CMS) with one of our WordPress Hosting plans or any of our packages provided by Verpex, or it was imported manually then the login page is accessible the same way.
If you are currently waiting on DNS propagation, you may need to wait or you can edit your hosts file temporarily in order to test or visit your site (DNS propagation can take up to 72 hours, but usually under 24 hours).
To get started, please see the steps below on how to access your WordPress admin area:
```
To log into WordPress, please open a new browser and go to your site.
Once you've visited your site for example [https://exampledomain.com] then the login would be followed by [https://exampledomain.com/wp-login.php] - (Please note: ensure to remove exampledomain.com and input your domain name).
```
Once you've accessed the page and entered the username and password credentials, you'll now be logged into your WordPress dashboard as required.
But if you want to login directly to your WordPress Admin Dashboard, you can go to your cPanel, and then open WordPress Manager by Softaculus:

After that, you will see the list of websites that you created by using cPanel, then click login button
You are now great to get started, if you need any assistance please feel free to contact our support team today.
# How to Reset WordPress Password
Source: https://kb.verpex.com/wordpress/how-to-reset-wordpress-password
If you ever encounter an issue logging in to your WordPress dashboard due to an invalid or forgotten password, there is a neat trick to reset it from your cPanel area, specifically phpMyAdmin.
So for those who have never heard of phpMyAdmin, here’s a brief description on how it works and what it’s for:
In order to create a functional website, most developers use databases to store website information. There are various kinds of databases but one of the most popular types is MySQL. Now this is where phpMyAdmin comes in. It is created as a piece of software written in the PHP programming language that is used to handle MySQL administration. In other words, phpMyAdmin helps you to manage MySQL databases such as database creation, performing database queries, table management, and so on. This also means that it can also help you to view and manage tables that store your website data, including your WordPress users and passwords.
Follow the steps below to change your WordPress admin password from phpMyAdmin:
1. Login to your cPanel area Once logged in, type in phpMyAdmin on the top right search bar or just scroll down until you can find the phpMyAdmin option.

2. Choosing the correct WordPress database, select the “\_users” table, and edit the admin user row
Once the phpMyAdmin interface opens, click on your WordPress database on the left hand pane. If there are multiple databases within your cPanel account, make sure to choose the correct one. Then select the “wp\_users” table. Depending on the database prefix you are using, the name of this table could vary. In the screenshot below, for example, we are selecting the “wpro\_users”. Afterward, click the “Edit” button on the WordPress user you wish to reset the password of.

3. Inputting the new password
Now there will be several fields you can edit in this particular table row, such as the user name, email address, or password. To set a new password for this user, go to the “user\_pass” column, set the “Function” to “MD5” and input the new passphrase on the “Value” field accordingly. Then, click Go and wait for the change to be processed and saved.

4. Login to WP admin area
To make sure that the new password has been set properly, login to your website’s WP admin area and use the passphrase you just set on the database.

If you are still having issues logging in, go over Step 2 and 3 again and double-check if you selected the correct database/WordPress user.
# How to Upgrade a WordPress Plugin
Source: https://kb.verpex.com/wordpress/how-to-upgrade-a-wordpress-plugin
Updating a WordPress Plugin
For the stability and security of your WordPress site, it is important to update plugins regularly. You additionally experience the new features the plugin developers have added. Most times users are hesitant to update their plugins because it could crash their website
No matter the number of plugins your website has, it is important to update them regularly to maintain peak performance and keep security threats at bay. You can install these updates by visiting the Plugins tab
A plugin should be updated for the following reasons:
CMS speed and compatibility management\
New feature updates\
Bugs or glitches\
Security issues
**How to Know When to Update a WordPress Plugin?**
You will get a notification in your WordPress dashboard when a plugin needs to be updated. An icon showing the plugins that require an update will appear next to the updates or plugins tab. Plugins can either be updated manually or automatically.
**How to Manually Update a Plugin**
* Log in to the WordPress Dashboard
* Check the box in front of the plugin you wish to update in the update menu
* Click on the “Updates” menu to update your plugins\
OR
* Log in to the WordPress dashboard
* Go to Plugins
* Click Update now to update the plugin.
* Update the plugin.
**How to Manually Update a Plugin Using FTP**
* Download the plugin .zip file from the WordPress Plugin directory or a third-party source.
* Extract the .zip file on your desktop
* Use a File Transfer Protocol (FTP) Client to connect to your site.
* Go to the wp-content/plugins folder in cPanel and delete or deactivate the folder of the outdated plugin you’re updating.
* Find the extracted plugin folder you just downloaded, and upload it to your wp-content/plugins folder in cPanel
* Log into your WordPress dashboard and website to ensure the plugin is active and functioning correctly.
**How to Automatically Update a Plugin**\
Manually updating many plugins could be tedious which is why you need to enable automatic updates. Enabling automatic updates saves time, you can enable auto-updates for plugins individually, enter a code snippet or use a site management tool depending on what best works for you.
**Update Individual Plugins Automatically**\
To set up automatic updates:
* Log into your WordPress dashboard
* Go to the Plugins
* Click Enable auto-updates for each plugin
* To turn off automatic updates, click Disable auto-updates.
You can also do this for bulk updates
* Bulk select the plugins you want
* Choose Enable Auto-updates or Disable Auto-updates from the Bulk actions menu
* Click Apply
**Update Plugins Automatically with a Site Management Tool**\
What a site management tool does is automatically handles tasks for you, such as backing up your website, performing security scans, or updating WordPress, WordPress themes and plugins). You can simply use plugins like WPMU Dev, Jetpack, Easy Updates Manager, ManageWP for a swift update
**Update Plugins Automatically with a Code Snippet**\
Add a code that signals to your website to update plugins as soon as they become available
Simply insert the code below to the functions.php file:
```text theme={null}
add_filter( 'auto_update_plugin', '__return_true' );
```
If this process fails, you can try to manually update the plugin. Plugin update failures are common, especially with an automatic update.
Updating a plugin is important as this will help you correct some bugs you may not notice, reinforce security and take advantage of some functionalities. It is a simple process that should take just a few clicks. Depending on the approach you wish to take to update your plugin, be diligent should in case things go awry, you can immediately fix it. Staying on top of these updates gives you and your users a smooth and secure experience with your website.
# How to Upgrade a WordPress version
Source: https://kb.verpex.com/wordpress/how-to-upgrade-a-wordpress-version
Updating Wordpress
Make sure to keep your WordPress up-to-date to ensure that your website is secure and has the latest features. It is also a good practice to test the upgrade on a non-production environment first before doing it on a live site.
**Follow these steps to upgrade a WordPress version**
* Go to the WordPress dashboard and check if there is a notification for an available update.
* If there is an update available, click on the **Update Now** button.
* Wait for the update to complete. This may take a few minutes, depending on the size of your website and the speed of your server.
* Once the update is complete, check your website to make sure everything is working properly.
If you have any issues, restore your website from the backup you made in step 1.
Alternatively, you can update the WordPress version via FTP, you can download the latest version of WordPress from WordPress.org, upload the files to your\
server, and then follow the same steps 3-6 mentioned above
It is always recommended to take a full backup before updating the WordPress version. Should in case something goes wrong, it can be easily restored from the backup.
# How to Upgrade WordPress Theme
Source: https://kb.verpex.com/wordpress/how-to-upgrade-wordpress-theme
Updating a WordPress Theme
Themes impact your website’s design, speed, performance, SEO, and user experience. Updating a WordPress theme means installing it to the latest version which could be disruptive WordPress notifies you once there is an update.
**Why Should you Update Your WordPress Theme?**\
Updating your theme improves the security, functionality, performance, and compatibility of your site and as such you want to keep your themes updated at all times.
**Security**\
To keep your WordPress site secure at all times, you need to constantly update your software, themes and plugins as soon as these updates are available. You leave your site vulnerable to security threats if you do not install these theme updates.
**Compatibility**\
When a new version of WordPress is released, theme developers test their themes' compatibility with the new version of the software and release an update. Compatibility issues can be avoided when theme updates are installed.
**Feature Upgrades**\
Installing updates allows you to enjoy new features to the full potential of your theme.
**Performance Optimization**\
Updating your theme will ensure your theme is running at its maximum performance.
**Update WordPress Themes Automatically**\
Outdated themes are a risk to the security, performance, and compatibility of a website, follow the process below to set up auto-updates for your WordPress theme.
* Log in to your WordPress dashboard.
* Click **Appearances**
* Go to **Themes.**
* Click on the active theme you wish to update
* Click **Enable auto-updates**
If there are custom codes added to your theme, you might want to avoid auto-updates.
**Updating WordPress Themes Manually**
Updating your theme is easy if you simply installed and activated your theme without making any customization on your site. You can use any of the options stated below:
* Login to your WordPress dashboard.
* You should see a notification displayed in your WordPress Admin Menu when a new version of a theme is available.
* Click **Themes.** You will see the following message if your theme is up to date: **Your themes are all up to date**. However, if any of your themes are not updated, you need to select the theme you wish to update and click the **Update Themes** button.
Another option to manually update your theme in your WordPress dashboard:
* Log in to your WordPress dashboard
* Click **Appearance**
* Go to **Themes**. You’ll see this notification **New version available. Update now.**
* Click Update now. WordPress will automatically download and unzip the theme package, and replace the old theme files with new ones.
This will overwrite the old theme files on your website and you will lose any customization made. In order to avoid this loss, you can update your theme using an FTP client installed on your computer.
**How To Update A Theme Via Ftp(FileZilla)**
You can transfer your files from your computer to your WordPress hosting account using\
FTP. Follow the steps below to update your theme via the FTP client.
**1. Create a backup of your theme.**
* Log in to your site via FileZilla.
* Locate the public\_html folder.
* Click wp-content, and go to your themes folder.
* Click the themes folder in FileZilla to begin the manual theme update process
* Rename your active theme folder
* Download the folder to your computer
**2. Download the new version of your theme.**
* Go to the theme’s website to download the latest version of your theme to your computer
* Locate the theme’s zip file and extract.
* You now have the old and new versions of the theme on your computer.
**3. Add the customization to the new theme files.**
* Copy the code from the outdated theme files and paste them into the new ones.
* Open both your old and new theme folders to spot the custom code added to the old theme folder.
* Copy the custom code from the old theme file and paste them into the same file in the new theme folder.
* You now have the updated version of your theme with your previously-made customization. Proceed to upload it to your site.
**4. Upload the new theme folder to your site.**
* Log into Filezilla, you can follow this [guide on how to use FileZilla](/cpanel/using-ftp)
* Click the public\_html folder.
* Locate the wp-content folder.
* Go to the themes folder and upload your new theme directory.
* Locate the themes folder in FileZilla, then click upload to upload an updated version of the theme.
**5. Activate the new theme on your site.**
* Log in to your WordPress dashboard.
* Click Appearance
* Go to Themes.
* Activate the new theme.
* If prompted to overwrite the theme click the Replace current with the uploaded button.
**6. Test your site.**
Go to your website to test if everything works fine. If your website is not running as it should, you need to revisit the backup of your old theme and make sure you copied everything that there is to copy to the new theme.
To provide the best experience to your users, you need to regularly update your themes
# How to Upload Files in WordPress
Source: https://kb.verpex.com/wordpress/how-to-upload-files-in-wordpress
Uploading Files in WordPress
There are different ways to upload files to WordPress, depending on the type of file and where you want to upload it. Here are the steps to upload files to WordPress. In case you prefer using an FTP client for that purpose check out our step-by-step guide.
* Log into your WordPress dashboard
* Go to Media > Add New.
* Click on the "Select Files" button to upload files from your computer. You can also drag and drop files into the upload area.

* Once the files are uploaded, you can edit the file details, such as the title, caption, and description.
* Click "Insert into post" to add the file to a post or page, or click "Save" to save the file to the media library.
These files can be used for later use.
You can also use an FTP client to upload files to your site, you need the FTP credentials to connect to your website and then you can upload files to the desired location.
* In your WordPress Dashboard
* Click **Posts** >**Add New Post**
* On the Upload menu, click The **Add media files from your computer** page will appear.
* Click the **Select Files** button.

**Uploading Files in a Post**\
There are two possible editing interfaces that you may be working on: the Classic Editor and the Gutenberg Block Editor.
**Classic Editor**
* While editing a post, click the Add Media button to add a media image
* Select the Upload Files tab
* You can drag files from your computer or click on the Select Files button to open up a file browser

* If you're not ready to use the files now, simply make to uncheck the files. The files will still be there to be used in the future
**Gutenberg Block Editor**
* Open the post editor
* Click one of the plus buttons
* Find the File block and click it
* You'll see a file block appear in the post body. You can drag files from your computer, or click on Upload or Media Library
# How to Use the WP-CLI to Manage Your WordPress Site
Source: https://kb.verpex.com/wordpress/how-to-use-the-wp-cli-to-manage-your-wordpress-site
With the different commands available on WP-CLI, there is nothing that cannot be done via the command line. Find below a list of some actions that can be performed using commands.
**1. Install and Update WordPress**\
Downloading and installing WordPress on your site is the most fundamental task you can accomplish with WP-CLI
To download WordPress use this command:
```text theme={null}
wp core download
```
To refine the download further to the version you want use this command:
```text theme={null}
wp core download --locale=en-US
```
This command will download the English version of WordPress
Proceed to install WordPress using the install command:
```text theme={null}
wp core install --url=testing.com --title=Example --admin_user=supervisor --admin_password=strongpassword --admin_email=info@testing.com
```
**Note: Replace the default values with your credentials.**
Test the installation to confirm WordPress has been successfully installed using this command:
```text theme={null}
wp core version
```
Update to the latest version using this command:
```text theme={null}
wp core update
```
**2 . Manage Themes and Plugins**
There are different ways to manage themes and plugins using WP-CLI, let’s take a look at some of the basic options
**Managing Themes via WP-CLI**
To list installed themes use this command:
```text theme={null}
wp theme list
```
To list all inactive themes as a CSV list, use this command:
```text theme={null}
wp theme list --status=inactive --format=csv
```
To change an active theme to twenty-twenty, use this command:
```text theme={null}
wp theme activate twenty twenty
```
To search for themes with Bootstrap support:
```text theme={null}
wp theme search bootstrap
```
Using this command, proceed to install and activate:
```text theme={null}
wp theme install the-bootstrap-blog --activate
```
To enable a theme using Twenty twenty theme, use this command:
```text theme={null}
wp theme enable twenty twenty
```
To update themes use this command:
```text theme={null}
wp theme update --all
```
To list all currently installed plugins, use this command:
**Managing Plugins via WP-CLI**
To install and activate a plugin use this command:
```text theme={null}
wp plugin install litespeed-cache --activate
```
Run this command to update plugins:
***
```text theme={null}
wp plugin update --all
```
**Note that the –all parameter is used to update all installed plugins.**\
This can be changed to a specific plugin by replacing –all with the plugin name.
Using the litespeed-cache plugin, disable and uninstall a plugin:
```text theme={null}
wp plugin deactivate litespeed-cache –uninstall
```
To activate any inactive plugin, use this command:
```text theme={null}
wp plugin activate litespeed-cache
```
To find WordPress cache plugins use the following command:
```text theme={null}
wp plugin search cache
```
To delete plugins use the wp plugin delete command:
```text theme={null}
wp plugin delete litespeed-cache
```
**3. Create a Child Theme**
By using the scaffold command, you can generate a child theme that includes the functions.php and style.css files. We recommend that you do this if you want to make changes to an existing theme. When you use a child theme, any customization won’t be lost after new software updates.
To do this, you’ll simply need to specify the slug for the new child theme, and for the theme, you’re using as the ‘parent.’ In this example, we are creating a child based on the Twenty Twenty theme, and we’re giving it the slug twenty-twenty-child:
```text theme={null}
wp scaffold child-theme twenty-twenty-child --parent_theme=twentytwenty
```
You will get a successful message that the child theme has been created.\
and find the child theme in the specified template.
**4. Moderate Comments**
With WP-CLI, you can quickly create, edit and delete comments making managing comments much easier. There are many comment subcommands you can use, but let’s look at some of the most basic options.
To add a new comment, use this command. This command will add a comment to a post with the post ID of 10, and state the author and contents:
```text theme={null}
wp comment create --comment_post_ID=10 --comment_content="This is my comment" --comment_author="author-name"
```
This command will return a table containing the comment ID and author name for all approved comments on the post with an ID of 5:
```text theme={null}
wp comment list --number=5 --status=approve --fields=ID,comment_author
```
To delete comments, specify the comment IDs individually, like this:
```text theme={null}
wp comment delete 46
```
To delete multiple comments using the force parameter, which permanently deletes comments instead of adding them to the trash bin:
```text theme={null}
wp comment delete 3 25 46 54 --force
```
Using WP-CLI commands you can work through your site’s comments
**5. Update the WP-CLI**
You should always make sure that WP-CLI is updated at all times.
To update WP-CLI run the following command:
```text theme={null}
wp cli update
```
If your version is updated, you will get a successful message confirming this, however, if you are running a version that is not updated, you will be prompted to accept the installation, selecting yes will get WP-CLI updated
With a simple interface like WP-CLI you can perform functions unavailable in WordPress, complete multiple tasks using a single command and improve productivity,
# Installing WordPress
Source: https://kb.verpex.com/wordpress/installing-wordpress
We've made it really easy for anyone who uses our services to go ahead and install WordPress.
The overall procedure takes around 3-4 minutes with the installation time of 60 seconds and under once you've inputted all the required setup details.
To get WordPress installed on Verpex's services, please follow the steps below:
```
Log into your Verpex's cPanel hosting account - you can access cPanel directly from your clients.verpex.com client area > services
Once you're logged in, you'll need to scroll to the bottom of the page till you find Softaculous Apps installer. Please click on Softaculous.
```

**Please click on WordPress and then install now.**

```
Please complete the fields required (The version you may wish to install and the domain you would like WordPress installed on).
Please note, if you require WordPress to be installed on the root of the domain, please kindly remove the text 'wp' from the 'In Directory' section and keep this blank.
```

```
Themes are provided by WordPress to help get you started if you require one, if you already have a theme you'd like to upload please ignore this section as the theme can be changed at any time.
Once you have everything filled, please click install to complete the installation. This process is pretty fast and will take just under 60 seconds.
```
You now successfully installed WordPress, in order to access the WordPress admin area, please enter a browser and enter /wp-admin after as the example below (Please remove the testdomain.com to you're desired domain name set).
[https://testdomain.com/wp-admin](https://testdomain.com/wp-admin)
If you face any issues during setup and need some help, please contact us and we'll be delighted to help you further along with any questions you may have.
# Manually Installing Software
Source: https://kb.verpex.com/wordpress/manually-installing-software
All website software is created to be manually installed. With software such as WordPress, Joomla, and Magento, the installation process is pretty standard.
The first thing you need to do is download the software from your software provider. The version we recommend downloading is the latest version that is stable. The server requirements should also be checked to see if the software needs a specific PHP version. If it does, you can use the cPanel to adjust this.
Then, you need to upload the files for installation to the webspace location where you want them. We suggest that you use FTP/SFTP.
Almost always, the software includes an install file. You will be asked for further information when you go to this file in your web browser. If your software doesn’t have this type of file, it will have a configuration file, and the same information will need to be entered there.
The last thing you will need to do is enter the database credentials. You should create a user and database in cPanel, and these details should be entered here. Keep in mind that localhost will almost always be the server hostname.
The software install is probably going to be complete once you save it, and you can start using it.
Manually Installing WordPress

For instance, when installing WordPress, you will need a hosting company and a domain name for your site to appear online. Next, you will need to decide which type of WordPress installation suits the needs that you have. There are several different methods that use different platforms and software, such as MySQL, cPanel, and FTP with FileZilla.
For those who want to take advantage of the popular five-minute installation that the platform offers, they need to make sure that their host offers a solution like Softaculous. You will need to use cPanel or FTP if you’re going for manual installation.
To manually install WordPress with cPanel, you need to log in to your cPanel, and in the files section, open the file manager and click public\_html to find the directory you want to use. After you’ve selected the directory you want, look at the toolbar and click Upload.
To upload the WordPress .ZIP file you downloaded, click Select File and the Go Back link when the upload is complete. Click the WordPress file and hit the Extract button in the toolbar to extract the files to the right place. Then, a window will be displayed in front of you, asking where the files should be extracted to. Click Extract File(s) to extract everything inside the zip folder.
You will see a WordPress folder in the directory when the files are extracted. To complete the installation, the contents of this folder need to move. To show its files, click on the WordPress folder, selected all to highlight the files, and click the MoveFile button to move them to the domain name’s main root. To do this, remove the section WordPress of the file path from http\://public\_html/wordpress to /public\_html/, and once you’re ready, click on Move File(s).
# Using WP-CLI on WordPress
Source: https://kb.verpex.com/wordpress/using-wp-cli-on-wordpress
Managing WordPress either as a beginner or a developer from the admin panel is straightforward. However, there is another way of managing a WordPress site which involves using the WordPress command-line interface or WP-CLI. This command-line tool lets website administrators manage websites using easy commands rather than navigating the admin panel. You can execute tasks like installing plugins, activating themes and updating WordPress.
The biggest benefit of WP-CLI is saving time when configuring WordPress websites and performing tasks not supported by the WordPress admin panel. For example, you can use a command to install multiple plugins on a WordPress multisite environment at once or generate bulk posts
**How to Install the WP-CLI on Your WordPress Website**
To install WP-CLI on your WordPress website, your environment must have the following specifications:
* A UNIX-like environment (OS X, Linux, FreeBSD, Cygwin)
* The latest version of PHP
* WordPress latest version
* A hosting account with SSH access.
Download the wp-cli.phar file to your root directory using this command :
```text theme={null}
curl -O https://raw.githubusercontent.com/wp-cli/builds/gh-pages/phar/wp-cli.phar
```
Using the command confirm that the file is working:
```text theme={null}
php wp-cli.phar --info
```
To use the wp command and move it to another directory, you need to make the file executable by using the command below
```text theme={null}
chmod +x wp-cli.phar
```
Use this command to move into the final location.
```text theme={null}
sudo mv wp-cli.phar /usr/local/bin/wp
```
The WP-CLI has now been successfully installed. This can be tested by running the command wp –info. The information about the version of the WP-CLI will be\
displayed if everything works. Using the command-line tool, you can start working with your WordPress content and files.
You are now ready to use the WP-CLI tool to manage your site more efficiently.
**Help Documentation to Access the List of WP-CLI Commands**\
Enter the following command to open the WP-CLI built-in documentation
```text theme={null}
wp help
```
To Check WP-CLI Version use the following command
```text theme={null}
wp cli version
```
To see more information about your server and WordPress configuration use this command:
```text theme={null}
wp –info
```
To update WP-CLI, use the following command:
# What’s the Difference Between Managed WordPress Hosting and Cloud Web Hosting?
Source: https://kb.verpex.com/wordpress/whats-the-difference-between-managed-wordpress-hosting-and-cloud-web-hosting
One of the most important decisions you will make when you want to build a website is the type of hosting to purchase. Cost is the major criterion when you want to opt for a type of hosting. Managed WordPress hosting and Cloud web hosting are both types of web hosting, but they differ in terms of the level of management and resources provided. Cloud Web hosting is a type of low-cost plan where you share space on a server with other sites. Managed WordPress hosting means that the server is optimized and solely created for WordPress.
At Verpex, we offer both Cloud web Hosting and Managed WordPress Hosting. Both are competitively priced and viable options, making it difficult at times to choose the right one. We will take you through your main hosting options, and explain how to find a plan that suits your needs.
**Managed WordPress Hosting**
Managed WordPress hosting is a hosting environment specifically designed to host WordPress websites and is optimized for the platform. It typically includes features such as automatic updates, daily backups, and security measures that are tailored to WordPress. Which often includes technical support that is knowledgeable about WordPress and can help troubleshoot any issues that may arise.
It is specifically fine-tuned to deliver the best performance with customized dashboards and all the features you need to manage your website.
Managed WordPress hosting is carefully designed to address the needs of your specific site, it better meets the performance and security needs of sites built using the platform.
Managed WordPress hosting generally provides free automatic backups, it also comes with easy and worry-free features that give you peace of mind and stand out from other hosting packages.
You get access to platform-specific features such as backups, pre-installed sites, automatic WordPress updates, and dedicated WordPress support.
Managed WordPress hosting provides auto-updates, ensuring better security while giving you one less thing to worry about when it comes to your business’ website
The WordPress hosting provider vets plugins to be sure they are of the highest quality and are fully secure
Managed WordPress hosting saves you a lot of time and effort and takes care of basic site optimization on your behalf
Managed WordPress hosting brings a whole new level of performance to your website. The server is optimised for server caching which enables speed on your website, this can ultimately improve SEO and boost ranking on Google
Managed WordPress hosting provides WordPress-specific services, optimized stability, performance, dedicated resources, and powerful tools for your site. it is a set of added services and performance tweaks that sits on top of regular hosting. Because of those services, and tools, it’s somewhat more expensive so you’ll need to factor that into your decision.
We recommend managed WordPress hosting if you are new to WordPress and you don’t have the time or expertise to handle performance and security concerns personally.
WordPress can be used on a cloud web hosting but you will be saddled with the responsibility of managing your environment than if you go with an optimized Managed WordPress hosting package.
**Cloud Web Hosting**
A Cloud web hosting plan is a service that enables you to rent space for your website on a server, gets your site online, and enables people to visit it. There are different types of hosting plans available, and each one differs in terms of price and potential benefits.
Unlike WordPress hosting which is restricted to the WordPress CMS, cloud web hosting allows you to use almost any CMS. Whether you use Joomla, Drupal, Magento, or a tool like DreamWeaver, cloud web hosting will support almost all content management systems and web development software.
As the most affordable hosting in the market, cloud web hosting is usually the best option for small websites as it gives you the ability to get your website live and available for visitors to view
Cloud Web hosting plans are generally less expensive than managed WordPress hosting, but they may not include the same level of support or optimization for a specific platform like WordPress.
In summary, Managed WordPress Hosting is optimized and tailored for WordPress websites, while cloud web hosting is a general solution for hosting multiple websites with shared resources and less specialized support
If you’re just starting out and prefer an easy-to-use interface Managed WordPress Hosting is perfect for you. However, if you require a wider variety of options or have advanced needs in setting up your website, we recommend cloud web hosting. Whatever hosting you choose should depend entirely on your needs and how comfortable you are with managing a website on your own.
# Fixing the White Screen of Death (WSOD)
Source: https://kb.verpex.com/wordpress/white-screen-of-deathwsod
The White Screen of Death (WSOD) is one of the most common errors that occur in WordPress. It is a common issue that can occur for a variety of reasons, including plugin conflicts, theme issues, insufficient memory limits, and server-side problems. The WSOD can also occur when there are errors in the code, such as PHP syntax errors, which prevent the website from loading correctly. When the WSOD occurs, it can be difficult to determine the cause of the issue, as there are no error messages or other information displayed on the screen. However, by following a series of troubleshooting steps, it is possible to diagnose and resolve the problem.
Here are some steps you can follow to try to fix WordPress blank page (white screen):
Note: It's always recommended to take a backup of your WordPress site before making any changes.
**Increase Memory Limit**
This error happens because a script has exhausted the memory limit. To fix this, you need to increase the PHP memory available. You can do this by adding the following line of code to your\
wp-config.php
```text theme={null}
define('WP_MEMORY_LIMIT', '256M');
```
Or follow the detailed instructions in our [knowledgebase article](/cpanel/how-to-increase-your-php-memory-limit) on how to increase PHP memory in WordPress.
**Disable Plugins**
If increasing the memory limit doesn’t solve the problem or the memory limit is already 256M or 512M, the next step is to disable all plugins. You can do this by renaming the plugins folder in your WordPress installation to plugins.bk or From your WordPress admin area
* Go to the Plugins » Installed Plugins page.
* Select all the installed plugins and then select ‘Deactivate’ under ‘Bulk Actions’ drop-down.
* This will prevent all plugins from being loaded and will allow you to determine if a plugin is causing the issue.
* If this fixes the issue, then enable one plugin at a time to know the plugin causing the issue.
* Once you find the plugin causing the issue, you can uninstall and reinstall it or report the issue to the plugin developers.
**Switch to the Default Theme**
If disabling plugins doesn’t solve the problem, you can try switching to the default WordPress theme. This will help you determine if a theme conflict is causing the WSOD. A poorly coded function in your theme’s functions.php file can also cause the white screen of death error. Consider downloading a fresh copy of your theme from its source and then installing it.
* First, connect to your website using an FTP client and go to the /wp-content/themes/ folder. It contains all installed themes on your website.
* Download the current theme as a backup by right-clicking to select, then proceed to download it to your computer.
* Proceed to delete the theme folder by selecting ‘Delete’
* Take a look at your theme’s functions.php file. If there are extra spaces at the bottom of the file, then you need to remove those, and sometimes that should fix the issue.
**Check for Error Messages**
If none of the above steps solves the problem, you should check your error logs for any error messages that might be related to the WSOD. The error logs can be found in the root folder of your website(public\_html folder) in your hosting control panel or by using a plugin such as WP Debug.
**Enable WP\_DEBUG mode**
You can also use the WordPress debug function to see what type of errors are being outputted.\
Locate the wp-config.php file in the root folder(public\_html folder) of your website\
Enable the WP\_DEBUG mode by adding/editing the code below.
```text wp-config.php theme={null}
1
2
define( 'WP_DEBUG', true);
define( 'WP_DEBUG_LOG', true );
```
Once you add this, the blank screen will now have errors, warnings, and notices. These may be able to help you determine the root cause.
If you don’t see any errors, you may still want to check the debug log. Simply visit the wp-content folder on your website using an FTP client. There you will find a new debug.log file containing a log of all errors, notices, and warnings.
**Switch PHP Versions**
The blank page can also be caused by an incorrect PHP version. You can try switching PHP versions to check it.
**Contact your hosting provider**
If you are still unable to resolve the issue, you should contact your hosting provider for assistance. They will be able to help you diagnose and resolve any server-side issues that may be causing the WSOD.
Sometimes, you may have access to the backend, but the front end of the site has the white screen of death. This can happen because of a caching plugin. Simply empty your cache.
# WP Toolkit Lite vs WP Toolkit Deluxe: A Feature Comparison
Source: https://kb.verpex.com/wordpress/wp-toolkit-lite-vs-wp-toolkit-deluxe-a-feature-comparison
**What is WordPress Toolkit?**
WordPress Toolkit is a cPanel-integrated WordPress management solution with an all-extensive yet easy-to-use interface that lets you install, configure, secure, and manage all your WordPress sites. WordPress Toolkit introduced many advanced management options which come in two versions: free WordPress Toolkit Lite and premium WordPress Toolkit Deluxe, which requires a paid license.
**WordPress Toolkit Lite**
WordPress Toolkit Lite is a free WordPress management enabled within cPanel. It offers many advanced tools(A WordPress site management dashboard and a set of tools to install, connect and configure individual sites) not found in the old WordPress Manager.
It allows the customization of new installations, a single interface for the administration of all WordPress sites, the possibility of accessing the administration dashboard of any site with a single click, the management of plugins and themes, automated security changes, automated single site updates and many other useful features.
Here are some of the most useful features that will be available for free in the WordPress Toolkit
**Easy-to-Use Dashboard**
With this dashboard, you can perform different operations on all websites at the same time. WordPress Toolkit dashboard manages all your WordPress sites through an easy-to-use interface. It also displays current updates and security status along with many other features.
**Single-Sign-On**
This allows admins and users to sign in directly to WordPress sites with a single click without having to enter a WordPress website username and password.
**Customizable Installation\
**\
This option allows cPanel users to install new WordPress sites in seconds, and each site can be customized before installation. Customization options include installation path, website title, administrator details, database name and password, and auto-update settings.
**Automatic Single Site Updates**
Automatic Single Site Updates change automatic update settings for WordPress sites and their themes and plugins from cPanel. It ensures your website is always safe from hackers when core updates on plugins and themes are automated on all WordPress websites.
**Automatic Security Hardening**
Security enhancements, limited access to sensitive files, disabling pingbacks, setting security keys and more are automatically applied on a website upon installation with the use of WordPress Toolkit Lite.
**Scan for Websites**
WordPress Toolkit Lite provides seamless integration and scanning of previously installed WordPress websites
**Debug Management**
You can enable an advanced maintenance mode, disable search engine crawling, and enable password protection in the same interface, it also enables WordPress debugging modes from the site dashboard
**Installation of Plug-in and Theme Sets**
This feature allows you to easily create blogs, WooCommerce stores, etc by installing default plugins and themes when installing a site.
WordPress Toolkit Lite offers an amazing collection of tools that make life easier for site owners and resellers who manage multiple WordPress sites.
**WordPress Toolkit Deluxe**
WordPress Toolkit Deluxe is a paid upgrade from the lite version which extends and improves the security and update features of the Lite version. In addition to automatic security enforcement, WordPress Toolkit Deluxe allows users to scan sites and selectively apply security enforcement settings to multiple sites at once. Developers and administrators who manage many sites have at their disposal powerful additional tools to many multiple sites.
Here are some of the most useful features that will be available in the WordPress Toolkit Deluxe
**Site Cloning**
You can clone (make an exact copy of) an existing WordPress installation with a click. This can be useful when developing or testing a new theme, plugin, or site design. Files and databases are automatically copied, configuration files are updated, and you can quickly access the new site on a subdomain. This is very useful for testing changes, without affecting a production website.
**Site Staging**
While the cloning feature is great for testing, changes can now be applied quickly in production. The Copy Data tool can copy parts of a staging site to a production site in minutes. What was once a complex and risky process can now be accomplished with just a few clicks in the WPToolkit interface.
**Smart Updates**
Smart Update lets you test an update without actually affecting the site. Smart Update does this by creating a full clone of the website, running a series of preliminary checks, updating the cloned website, and running the checks again to see if the update breaks anything. The results include before and after screens that you can compare to make an informed decision on whether or not to update your production site.
**Security Rollback**
WordPress Toolkit can apply several changes that significantly increase the security of your sites. However, if any of these changes break a site's functionality, it can be undone with a single click.
**Apply Changes in bulk**
The Deluxe version allows you to apply changes to multiple sites at the same time. For example, you can perform updates, change security settings or install plugins.
These are features available in WordPress Toolkit Lite and WordPress Toolkit Deluxe. Do not hesitate to contact us with any questions and our system administrators will be happy to help you.
# XML-RPC, What it is and how you can Enable/Disable it
Source: https://kb.verpex.com/wordpress/xml-rpc-what-it-is-and-how-you-can-enabledisable-it
What is XML-RPC in WordPress?
XML-RPC is a core WordPress API that allows users to connect to their WordPress website using third-party apps, tools, and services. The xmlrpc.php, which is stored in the root directory of your site, allows remote connection to WordPress and is enabled by default on WordPress since version 3.5.
It will be impossible for various tools and publishing applications to access the website remotely without XML-RPC except by logging directly into the system. However, the REST API has replaced this feature, but WordPress still has it installed due to backwards compatibility.
The biggest downside of keeping the XMLRPC file enabled is that it makes your website vulnerable to hack attacks, like DDoS and brute force attacks, and makes your website slow due to the PHP file eating up a lot of server resources. It is pointless to delete the file, as it will be recreated after a WordPress update. Deleting the xmlrpc.php file will not help, as it might disrupt the dependent functionality of some 3rd-party apps and plugins to interact with WordPress. Disabling it is the best option to keep your site secure. You can disable it by using a plugin or adding some code in your .htaccess file.
**Method 1: Disabling Xmlrpc.php With Plugins**
Installing a plugin is the easiest and fastest way to disable XML-RPC in WordPress.
* Log in to your WordPress admin dashboard using yourdomain/wp-admin
* Go to Plugins
* Search for Disable XML-RPC using the search box in the top right corner and install it
* Once the plugin is installed, click on Activate to activate the plugin on your site and the xml-rpc.php file should be disabled
* And you’re all set. This plugin will automatically insert the necessary code to turn off XML-RPC.
**Method 2: Disabling Xmlrpc.php by Adding a Code in your .htaccess File**
The code is simple and can be of great use if you do not want to worry about new plugins consuming your server resources. You can manually disable XML-RPC using this method and stop xmlrpc.php requests before it gets to WordPress.
* Find and edit the .htaccess file within file manager or use your FTP client to locate this file.
* You may have to turn on the ‘show hidden files’ to access .htaccess.
* In the top right of the File Manager, click on Settings and check the button “show hidden files.”
* Click save and you will now see your .htaccess file.
* Open up your .htaccess file.
* Paste the following code inside your .htaccess file:
```apache theme={null}
# Block WordPress xmlrpc.php requests
order deny,allow
deny from all
allow from xxx.xxx.xxx.xxx
```
Now “Save” the file. It’s that simple. The remote connection using XMLRPC.PHP has been denied.
You can remove this line 'allow from xxx.xxx.xxx.xxx' completely or change xxx.xxx.xxx.xxx to the IP address that can access xmlrpc.php
When a new plugin is installed or a file is modified, it can often break your website, which might be risky. Not to worry, we provide backups which is a safety net should you have a broken website. You can always retrieve a copy of your website [here](/cpanel/how-to-restore-your-website)
Disabling this feature eliminates the risk of external attacks from gaining access to your website.
According to the contributors, the programming of xmlrpc.php is as secure as the rest of the core files of a hosted WordPress website. If you require some of the functions needed for remote publishing on your website and the Jetpack plugin, we are going to show you how to enable xmlrpc.php. So if you use any of the following resources to disable it, simply redo your settings or erase the code to re-enable it.
Disabling XML-RPC on WordPress might not be the only solution to prevent hackers from exploiting your website; you need to install a powerful WordPress firewall to block out bots and malicious IPs.