> ## Documentation Index
> Fetch the complete documentation index at: https://kb.verpex.com/llms.txt
> Use this file to discover all available pages before exploring further.
# How can I Manage DNS on my Domain Through cPanel?
Your domain has to point to our server to make the changes in your zone editor work. Find below our default nameservers
ns1.mysecurecloudhost.com\
ns2.mysecurecloudhost.com\
ns3.mysecurecloudhost.com\
ns4.mysecurecloudhost.com
Once your domain points to us, you can follow the steps below to add your records to your cPanel:
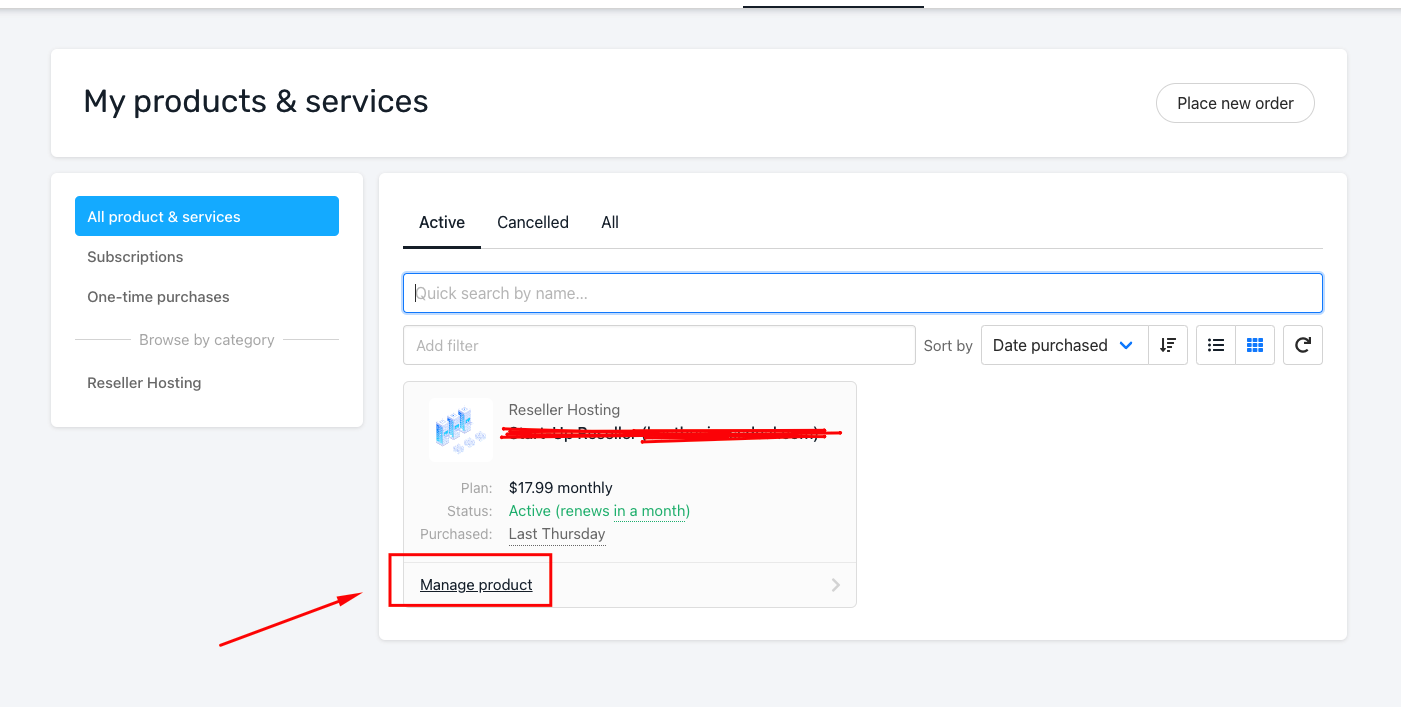
Step 1: Log into your verpex client account\
Step 2: Click products\&services

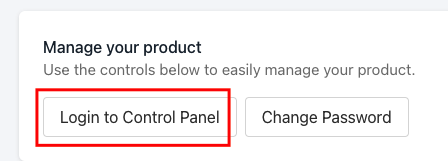
Step 3: Click manage product under the hosting account you wish to manage DNS for
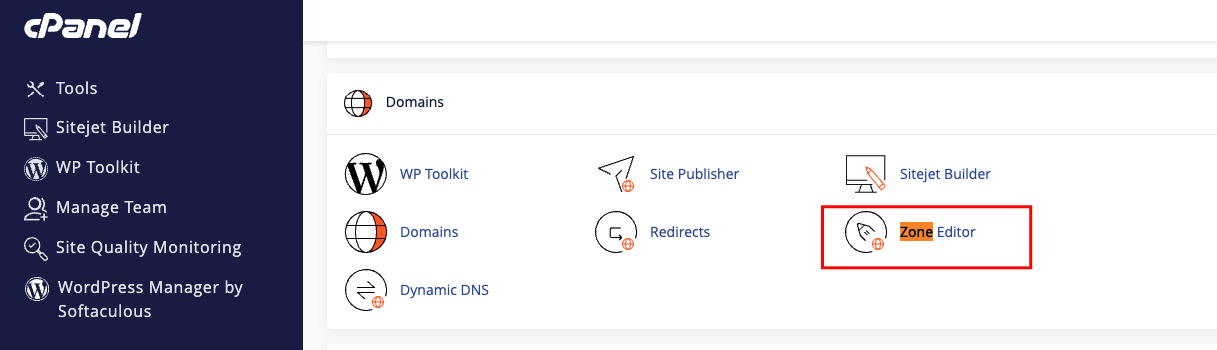
Step 4: Log into Cpanel -> Domain -> Zone editor
Step 5: Enter the records below in the appropriate fields
Name: Enter the value given or your domain name\
TTL: 7200\
Type: It could be any of these records A, AAA, CNAME, TXT, DMARC, SRV, etc.\
Record: Enter the code provided
The DNS zone allows you to create, edit, and delete records for the domains, addons and subdomains in your cPanel.
If you have more than one domain, click manage in front of the domain you wish to add a record for.
Click the drop-down arrow to choose from any record you wish to add and save\
And if you wish to edit, click the edit button in front of the record and save.\
You will get a pop-up message that the record has been added successfully.